


Gary W
-
Posts
1,060 -
Joined
-
Last visited
-
Days Won
14
Content Type
Forums
Gallery
Events
Everything posted by Gary W
-

Fitting new tires into side mount fender wells
Gary W replied to Mark Huston's topic in General Discussion
Hi Mark I've found the Firestone tires are always a little larger diameter tire. I like them and I run Firestones on all four of my cars. I had the same thing with my Model "A" Fords. I install the side mount with about 15 lbs of air, snug up the lugs and the plate, then add more air until the tire is tight in the well. I can't get the side mount spare to the recommended 35 pounds, but it settles in and tightens up around 28. I carry a foot pedal pump with me in case a roadside swap is necessary. Thankfully, I've never had a flat in any of my vintage cars yet, so I've been fortunate. Your Studebaker is beautiful! -
The simple way is to remove #1 spark plug and lay it on a head bolt next to the spark plug hole. With the key off and the gas shut off, parking brake set, rotate the engine while looking at the valves and piston. A flashlight helps. When you see both valves closed and the piston coming up towards top dead center you know that the cylinder is nearing the end of the compression stroke. Using a non – metallic tool, (like a plastic stir stick), you can feel as the piston passes top dead center and begins to move downward. The point where the piston is moving downwards is when the spark should happen with the timing lever all the way up. Once you see what is happening and understand when the spark should occur you can turn the key on and check to see when the spark plug fires on Battery. You should be hearing the coils buzz as you hand crank the motor. Firing order 1-2-4-3... sometimes the wires get crossed at 3 and 4.
-
32' Oldsmobile Deluxe Convertible Roadster
Gary W replied to chistech's topic in Our Cars & Restoration Projects
I drive my roadster 99% of the time with the top down. I love the open look and the fresh air... just a great drive. I've taken her out a couple of times with the windshield folded. A little rough on the ears. It's amazing what that windshield deflects! Really enjoy following all your work. Gary

-
32' Oldsmobile Deluxe Convertible Roadster
Gary W replied to chistech's topic in Our Cars & Restoration Projects
Looks Sharp with the top down! Does your windshield fold forward? Beautiful!! -
Seeking a great body/paint man in central NJ
Gary W replied to StylishOne's topic in General Discussion
Please allow me to clarify. I used the term "SANDBLAST" as a generic term that encompasses all types of media blasting techniques. Edinmass is correct that blasting is very difficult, very technique sensitive and involves a lot of skill. Done wrong, and the blaster will generate excess heat with excessive pressure and will absolutely cause metal warpage and ruin your restoration. I sincerely hope that my reply was not misinterpreted that I am endorsing some fly-by-night blaster to get the job done quick and use crappy coal slag (black beauty) to do the job cheaply. That was not my intention. I never cut corners or let price dictate my decisions. I like quality people that turn out quality work. So let me update my post with a little more detailed information: 1. My cars were MEDIA BLASTED in my driveway by Atlantic Sodablast and Stripping. Joe is very talented and is a car guy. When we first met in 2014, discussing my 1914 Ford Model "T", Joe told me: "First, we do not blast with sand. Sand contains silica and can be very harmful to the lungs so we use an inert CRUSHED GLASS media. CRUSHED GLASS media will not warp the panels or leave any residue." The Model "T" came out perfect, so I called him back when I did the Buick in 2017. 2. Joe worked over NINE hours in the driveway to complete the job. Not a quick job when it is done carefully and correctly. 3. The job was not cheap. You pay for the glass media, the set up and his time. I spent over $1,500.00 having the Buick blasted. That was over nine hours of work and 500 pounds of glass. Let me share a few photos: In 2014 I restored a 1914 Ford Model "T" Touring car. Please notice how far away from the body Joe is situated. Using just enough pressure the glass media slowly removes the paint without any warping. I took a first place in the Monmouth County Concourse in 2016. Nothing was destroyed during the blasting. Back at it in 2017, again you can see the angle of approach, the distance he is from the body. A very long nine-hour day to finish it. And the final result came out very nice. So, I shared the shop I used for the blasting and recommended a local paint shop that I have had personal experience with. I hope I didn't create any confusion by using the generic term "sandblast". I should have been more exact with my words. As always, I defer to the guys with much more experience than I'll ever have. And Edinmass is one of those guys. I've relied on his advice throughout my restoration.... and beyond! I've said it in my blog a million times: I would not want anyone to follow my advice and it ends up causing trouble, so do your research. Thanks for your time! Gary You can follow my blog from the point of blasting, to the trip to the body shop and the paint process here: (Just touch the arrow in the upper right corner) When I re-read my posts, I tend to call it "sandblasting" but I actually did emphasize that it was glass beaded.


-
Seeking a great body/paint man in central NJ
Gary W replied to StylishOne's topic in General Discussion
I hired a mobile sandblaster who came out to the house. I built a wood carriage to support the car so he could work and spin the body, get under / over... The body attached to the wooden frame which is on casters for easy maneuvers. Joe started at the front, nice and slow so there was no metal heating or warping. The rear after he was done. Some earlier bondo was exposed Doors, fenders and miscellaneous parts all done. Before and after of the inside Before and after of the trunk area Then off to the paint shop where the final sanding, self-etch primer, build up primer, sanding between every step before color and clear. The underside of the fenders were treated with an undercoat. Finished in "Super Jet Black" I now have 2500 miles on the car since the restoration was completed..thumb.JPG.7129bbebf5ca5ad7fa628119626253af.JPG.24d4f56ce76e2731c7f25187090b1246.JPG)


-
Seeking a great body/paint man in central NJ
Gary W replied to StylishOne's topic in General Discussion
Walt has a great point. When I restored my Buick, I hired a blaster who came to my house and did all the paint / rust removal down to the bare metal in my driveway. Definitely helps keep the paint bill down. -
Seeking a great body/paint man in central NJ
Gary W replied to StylishOne's topic in General Discussion
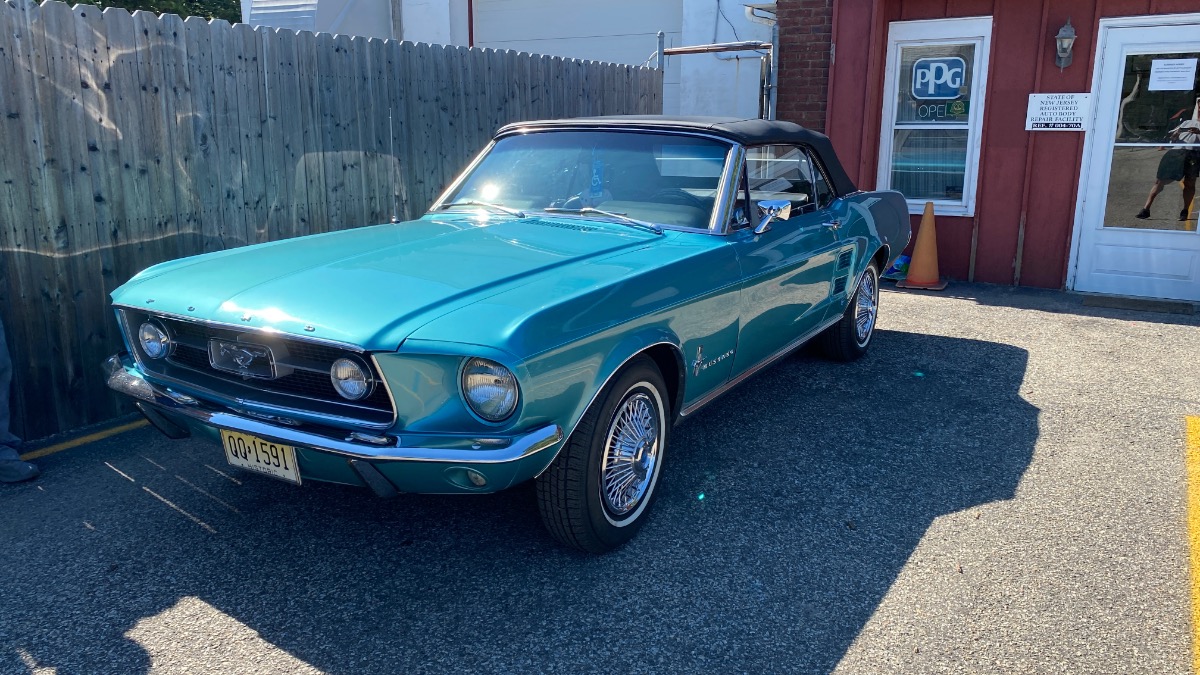
Good morning! Here's a great place to start: Tim at Surfside Collision located at 539 Mantoloking Road in Bricktown, NJ Phone: 732.477.2266 Fax: 732.920.0512 Quick story: My buddy John owns a '67 Mustang (owned it for 40 years). Perfect. A couple months ago, the front right tire "de-treaded" while he was driving and the tread just beat the hell out of the inner wheel well, actually caused the right headlight to get blown out through the front of the car, the parking light was wrecked and the top of the fender was pushed up to where the paint was cracked. Tim expertly matched the paint, did all the body repairs, and finished the job to where you wouldn't ever know anything ever happened. Beautiful job. Not only that, but he flat bedded it both ways so John didn't have to drive it over and back. Tim first came over with a few different paint panels and used a special light to get the color as close to perfect as possible. The finished fender. all the dents are gone, the paint matches beautifully Outside the shop, finished for delivery! Good Luck with your search! Gary

-
I'll add my two cents also! If you keep reading through, I do the other door as well in a step-by-step manner:
-
I've been using Penrith Steering Box Lube. It's a semi Fluid grease. You can get it from Restoration Hardware

-
My bypass is 100% closed off. All water circulates from the pump, through the block and up and into the radiator. Going over my restoration notes, I actually drilled two 1/8" holes through the thermostat flange. It's how I got the car, and it functions just fine. It seems very logical to me as a way to eliminate the old spring valve. She still warms up just fine, (maybe a little slower than normal?), but I have nothing to compare it to. Have a great day! Gary
-
When I got my '37, the bypass valve had a freeze plug installed with NO hole drilled in it. So basically the car runs as if the bypass valve is closed... (engine fully warmed up, thermostat open, water being directed through the radiator) What I did was simply drill a hole in the thermostat flange to allow water to circulate slowly, warm slowly and allow the thermostat to open at temperature for a full flow through the radiator. With the freeze plug installed in place of the spring loaded valve, the water heats the thermostat, and once the thermostat opens the water enters the radiator and begins circulation. (See "normal circulation" below) I now have 2500 miles on her, out in these oppressive 90+ degree days and she hasn't ever gone over 180. I get plenty of heat in the winter so I'm going to keep the setup as is. From the manual: 1. Recurculation: What I call "warm up". The spring loaded valve is open, thermostat is closed, water is cold, Water is circulating through the engine to warm up. 2. Normal Circulation: This is basically how my car operates full time. I have no spring loaded valve, just a freeze plug so ALL water is directed to the thermostat all the time. I drilled a hole in the thermostat flange to allow enough circulation while the engine heats up. Then the thermostat opens, and you have "normal circulation"

-
1937 Buick Model 48: RESTORATION HAS BEGUN! (Photo)
Gary W replied to Gary W's topic in Buick - Pre War
Terry! Thank you so much for the kind words! If my blog posts do nothing more than inspire someone else to tackle a project..... any project, large or small...... then I feel like I've accomplished something good for the car community. The admiration is mutual. You have persevered through all your ups and downs, shared every highlight and every heartache. Through your ceaseless efforts, you now have a classic, beautiful piece of Buick history, but more importantly, a classic, beautiful piece of Wiegand history! A timepiece to be enjoyed, displayed, driven and passed down through the family. Time to start making your own memories and create some new stories for the generations to come! Your dad is smiling today!! Many safe and happy miles, my friend! Job well done! Gary -
Run some simple diagnostics on it while it's still in the car. I submitted a reply through my blog before I noticed this: I sent my dash gauge cluster and my sender to Bobs Speedometer in Howell, MI. For a good understanding of the gauge and some diagnostics, read the following starting with "I ran out of gas".... There are a bunch of good guys on here that gave me great advice: Hope it helps! Gary

-
1937 Buick Model 48: RESTORATION HAS BEGUN! (Photo)
Gary W replied to Gary W's topic in Buick - Pre War
I sent my entire gauge cluster and my sender to Bob's Speedometer in Howell, MI. Just be sure to check your sender for a full 0 - 30 - 0 OHMS, and that it the float doesn't bottom out in your tank. Bob's website I have a full write up of how to diagnose your sender unit. Start here and read along. you'll get a lot of good information:
-
Congratulations Terry! Something to be very proud of! How quickly we forget all the setbacks, and the busted knuckles once we are sitting behind that wheel cruising along!! She sounds solid and strong.. Many many happy miles!
-
Put a dab of white paint on the pitman arm the shaft and the housing so it all goes back nice and straight. One little tooth off and the steering wheel won't be lined up nice and straight.
-
Carter WCD for ‘38 Special - rebuild and fitting
Gary W replied to rodneybeauchamp's topic in Buick - Pre War
I swapped my original Marvel for a Carter 608S and never looked back. The Carter has an integral vacuum start switch so I removed my original manifold start switch and rerouted the wires to the Carter. There are a few modifications to be made, and I documented the whole transition step-by-step. Just touch the arrow in the upper right corner: -
Matt, when you close the hood and turn the lever, the front "hook" should grab the metal "catch" under there. If the metal catch is off just a bit it will prevent the hood from closing down properly. Just make sure the wire under there is catching. Also, the front part of that hood can be bent down with a little pressure to help form the proper radius and get the Left and Right gaps looking consistent. This metal hook turns and has to grab the front catch to lock the front of the hood down. Here's that front catch. I actually removed that when I put my hood on just to be sure it wasn't interfering with the hood properly seating. Then back in to get it adjusted. Under the hood, this chrome piece is adjustable to allow the grill pin room to clear From the manual... a bunch of adjustments can be made to the front clip to help the alignment. Here's the page showing how to hand form the hood in the front. Hope it helps. Gary


-
Words of wisdom... "Top Ten Tech Tips in 20 Words or Less"
Gary W replied to rocketraider's topic in General Discussion
Buy cheap, buy twice -
I had to "recalibrate" my sender. I did have it restored, but at empty it wouldn't drop to "0" Ohms. After a little grinding and bending the float arm, I finally got it as close to zero as I could without ruining the gear mechanism. There are some diagnostics you can run with the tank out before you reinstall to get it reading more accurately. Good Luck! Here's my post(s) on my sender repair: Just hit the upper right arrow:
-
1929 Chevrolet International - 4 Door Sedan Project
Gary W replied to BearsFan315's topic in Our Cars & Restoration Projects
Could the thermostat be working a little "jumpy"? Opening quickly at temperature, she cools down? Possible? -
Dissembling of the Headlights on a 1937 Buick Special
Gary W replied to 37 Buick Special's topic in Buick - Pre War
You have it. Just push the single pin towards the middle of the reflector hole, then the other two will come right out. Just for reference. This is how the sockets look when removed from the reflectors. (I soldered the ground wire tab onto the bottom) Those pins are held by spring pressure only. push that lower, lone pin towards the center, and the socket will come out.


-
Dissembling of the Headlights on a 1937 Buick Special
Gary W replied to 37 Buick Special's topic in Buick - Pre War
Here's my post on headlight rebuild: My notes
-
Here's my step-by-step from my '37 Buick. maybe it'll help you with the steps involved:


.thumb.JPG.7129bbebf5ca5ad7fa628119626253af.JPG.24d4f56ce76e2731c7f25187090b1246.JPG)


