Taylormade
-
Posts
2,396 -
Joined
-
Last visited
-
Days Won
1
Content Type
Forums
Gallery
Events
Everything posted by Taylormade
-

selling my 26 DB Sedan. How much worth?
Taylormade replied to fsnooks's topic in Dodge & Dodge Brothers
Looks like a nice car. The color may hurt you a bit. These seem to be going in the $8000 range. If the work on the motor is documented, that will help you. The problem with these cars is the limited top speed, which relegates them to back roads and small town driving. Good luck with the sale. -
32' Oldsmobile Deluxe Convertible Roadster
Taylormade replied to chistech's topic in Our Cars & Restoration Projects
Getting ready to do the firewall pad on my 32 Dodge Brothers. May I ask where you got the jute and the fiber board? My pad is not as thick as yours and appears to have a single layer of jute. What did you find to be the best method to cut the jute to shape? How about the fiberboard. Both of your materials look to have very clean cuts. -
1948 Tucker #1057 on ebay
Taylormade replied to 1950panhead's topic in Automobiles and Parts - Buy/Sell
The Carioca, Now that’s a car I’d like to see someone build. I wonder if there are any other drawings of this proposed design. -
‘I assume you mean corn head grease. What alternative do you recommend?
-
1933 dodge steering box rebuild - any help accepted
Taylormade replied to Sactownog's topic in Dodge & Dodge Brothers
As I said in the post, they were repaired by Jeff Holzmer. He welded in new metal and reshaped the openings to the correct size. -
1933 dodge steering box rebuild - any help accepted
Taylormade replied to Sactownog's topic in Dodge & Dodge Brothers
When working on my drag link, I wasn't having much luck finding NOS parts other than threaded inserts and new internal springs. Then Curti on this site suggested I contact Jeff Holzmer in Woodbury, Minnesota. He replaced the pitman arm balls on several Auburns for Curti and came highly recommended. Since my pitman arm was very similar, if not identical to the Auburn arm, I thought I'd get in touch. He agreed to work on mine and also to repair my damaged drag link. I'm very happy with the work. Here are some before and after photos. The pitman arm before... And after. And the drag link before and after. The other end. -
You seem to be interested in originality, but changed the car to 12 volts? It looks like an older paint job in the first place, so I’m not sure why you think you’re owed a new paint job on the whole car. Maybe I’m being naive, but I can’t imagine taking a car to a shop and let them sit the car outside month after month. You said you took some pictures six month ago - did you not notice it being stored outside at that time? Did you occasionally stop by the shop to check progress and find it sitting outside? I think the shop owes you an explanation and a fix and repaint on the fender. I think you owe yourself a rethink on how you handle repairs to your car in the future.
-
The Ressurection of Daphne - a 1932 DL
Taylormade replied to Taylormade's topic in Dodge & Dodge Brothers
My engine rebuilder said it might need adjusting. Not sure why he thought so - I’m giving him a call Monday. I used a new temporary gauge, not the original, to test the oil pressure. I’ll try the original gauge and see what that reads. At least I have too much pressure rather than not enough. -
The Ressurection of Daphne - a 1932 DL
Taylormade replied to Taylormade's topic in Dodge & Dodge Brothers
Is there a gap between the cover and the block? I don’t think mine is screwed all the way in. Any pictures would help. -
The Ressurection of Daphne - a 1932 DL
Taylormade replied to Taylormade's topic in Dodge & Dodge Brothers
Starting and running the engine a few times and some minor problems have cropped up. The oil pressure is running 65 pounds, which I think is too high. Looks like I may have to adjust the pressure relief valve. I found a small oil leak at the bottom of the timing chain cover. I tightened the cover bolts and it seems to have stopped the leak. I certainly hope so, as the thought of having to replace the cover gasket is not something I want to consider. I also found a leak around the pressure relief valve cover - which is more of a screw on domed fitting in the side of the block. This will need some investigating. I’m not sure if there is a gasket involved or just the tightness of the unit being screwed tight into the block is supposed to be sufficient. If I have to adjust the pressure relief valve, I guess I’ll find out as that cover is how you access it. -
Can anyone identify this B&B carb marked with Chry Corp
Taylormade replied to Narve N's topic in Chrysler Products - General
Externally it looks like the BB on my 1932 Dodge Brothers sedan. Mine is really for a 32 DeSoto, but the two motors are almost identical and it works fine on my car. As Carbking says, without the tag, you just can't tell. -
Retapping to 1/4 inch is the obvious answer. There is plenty of meat on the plate, so it should be an easy process. I like to keep things as original as possible, but since most of it is hidden inside the wood block, I'm not going to have a coronary over it. Thanks for all the advice. And I tried all the outlets suggested above with no luck. It's the length that is the problem.
-
Those are coarse threads #12-24. I need fine thread, #12-28. Thanks for trying!
-
2.25 would work, but I figured they would be impossible to find. The two inch were just short - just. I may just retap the holes for a 1/4 inch bolt that is easy to find.
-
The rearmost wooden floorboard. The four bolts along the back are just an inch long, so that was no problem. The two front bolts pass through the floorboard and a wood block spacer before they thread into a tab on the frame. Sometimes you just have to wonder, something this minor ends up holding things up for days.
-
I’m looking for some #12-28 bolts - either hex head or slotted screw head. My local auto shop has them up to 2 inches.. Naturally, I need 2-1/2” length. I’ve tried Grainger, Amazon and other usual suspects with no luck. I guess this is an odd size. There is a plethora of #10 and 1/4” bolts in all lengths, but the meager supply of #12 resides in a small specialty box with maximum length of 2 inches. Since I only need two, I don’t think having a batch of ten thousand made up in China works for me. Any suggestions?
-
Personal Message sent.
-
1933 Dodge Steering box and shaft removal ?
Taylormade replied to Sactownog's topic in Dodge & Dodge Brothers
Comes out as a unit. -
1933 DODGE DP SIX 1953 ENGINE - T5 SWAP HELP
Taylormade replied to Sactownog's topic in Dodge & Dodge Brothers
If your shift lever comes out of the top of your transmission, with no side levers or mechanism, it is probably original. The 53 had a column shifter, an entirely different beast. -
What type of rivets do you plan to use? Getting ready to do a similar operation on my 32 Dodge Brothers.
-
The Ressurection of Daphne - a 1932 DL
Taylormade replied to Taylormade's topic in Dodge & Dodge Brothers
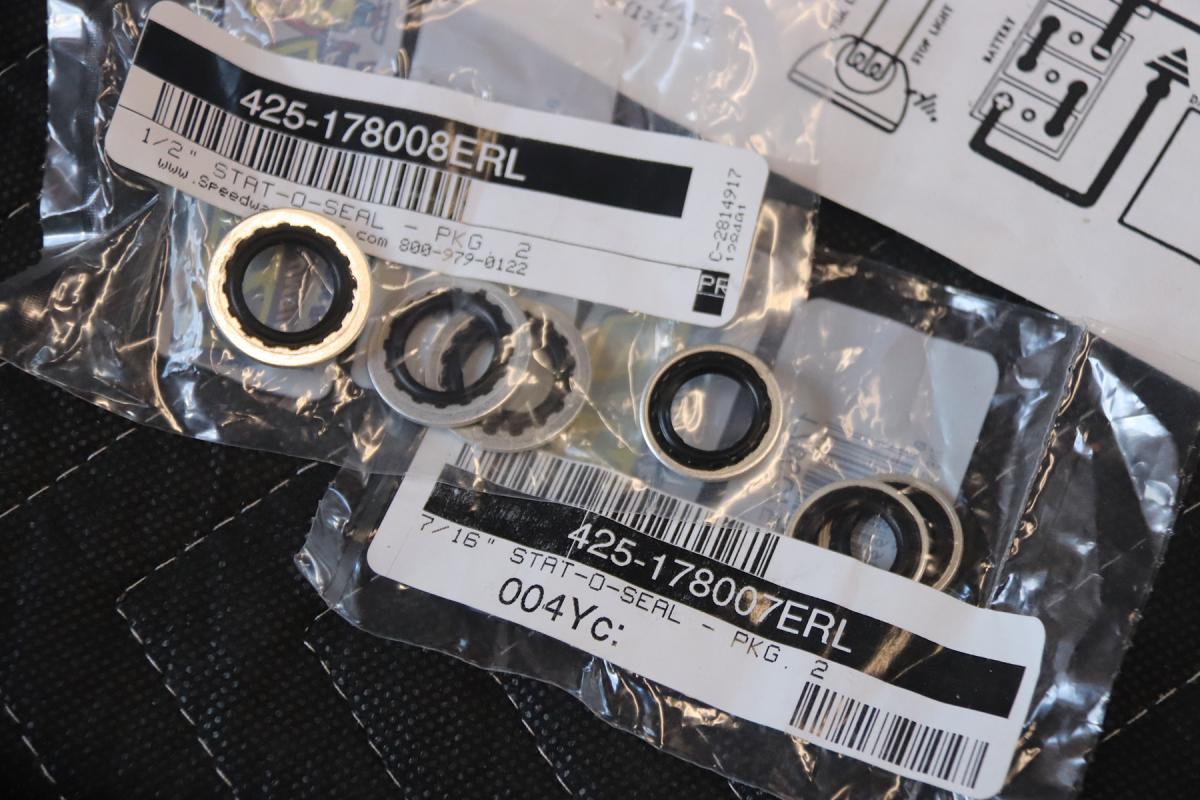
The results are in, the Stat-O-Seal washers did the job on my leaking brake connections. Once I installed them, the leaking stopped - period. Not a drop of fluid anywhere. They are a combination crush washer and rubber seal. Don't get the steel variety, get the aluminum, as they act as a crush washer and rubber seal. I got mine from Speedway Motors. I needed two sizes, one for the outer part of the banjo bolt and the other for the threaded section. I also got most of the floor spacers done for the floorboards. They rest on the frame and keep the actual floorboards at the correct level. Here you can see the old and the new. The holes in the old piece are there to clear rivets and bolts on the frame. I haven't drilled them yet on the new spacers. Sitting in place on the bottom of the floorboards. The old floorboards before I removed them from the car. And the new ones partially finished.


-
Small Disaster on the way to the Colac rally today.
Taylormade replied to Mattml430's topic in Dodge & Dodge Brothers
Bummer. Back to the workshop - glad everyone is okay. -
The Ressurection of Daphne - a 1932 DL
Taylormade replied to Taylormade's topic in Dodge & Dodge Brothers
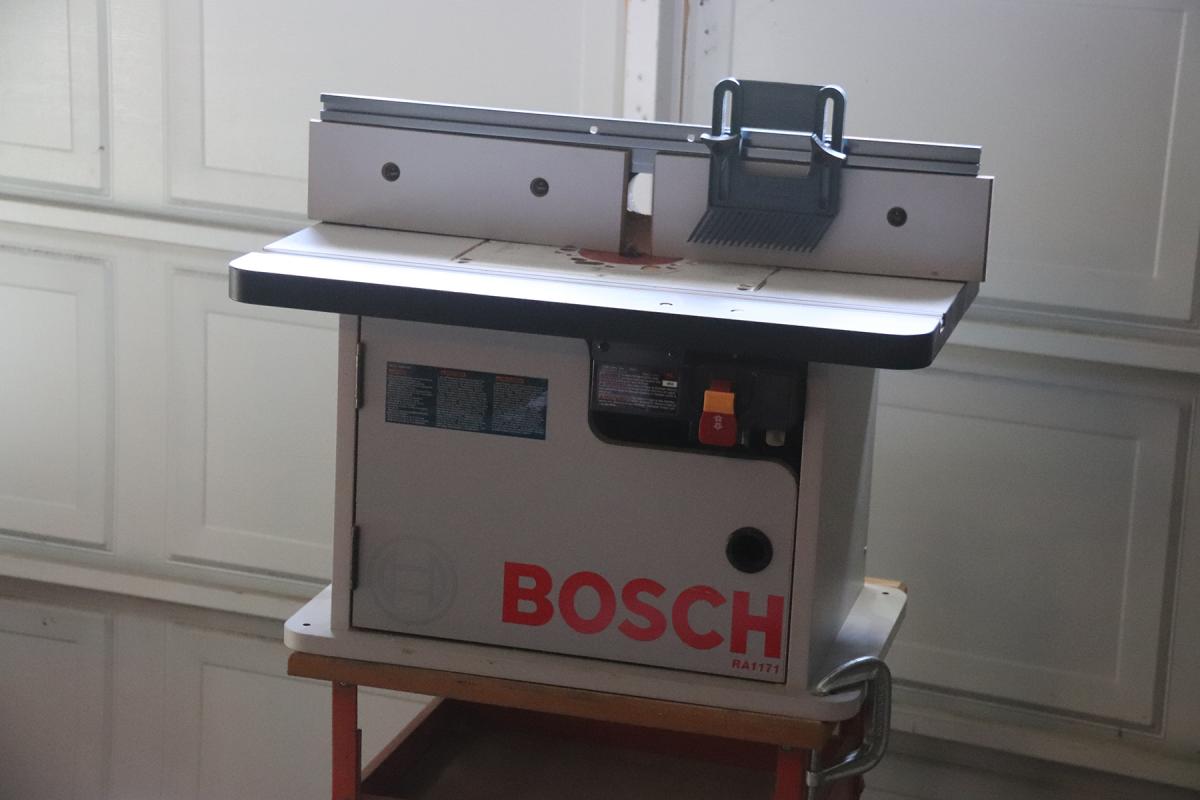
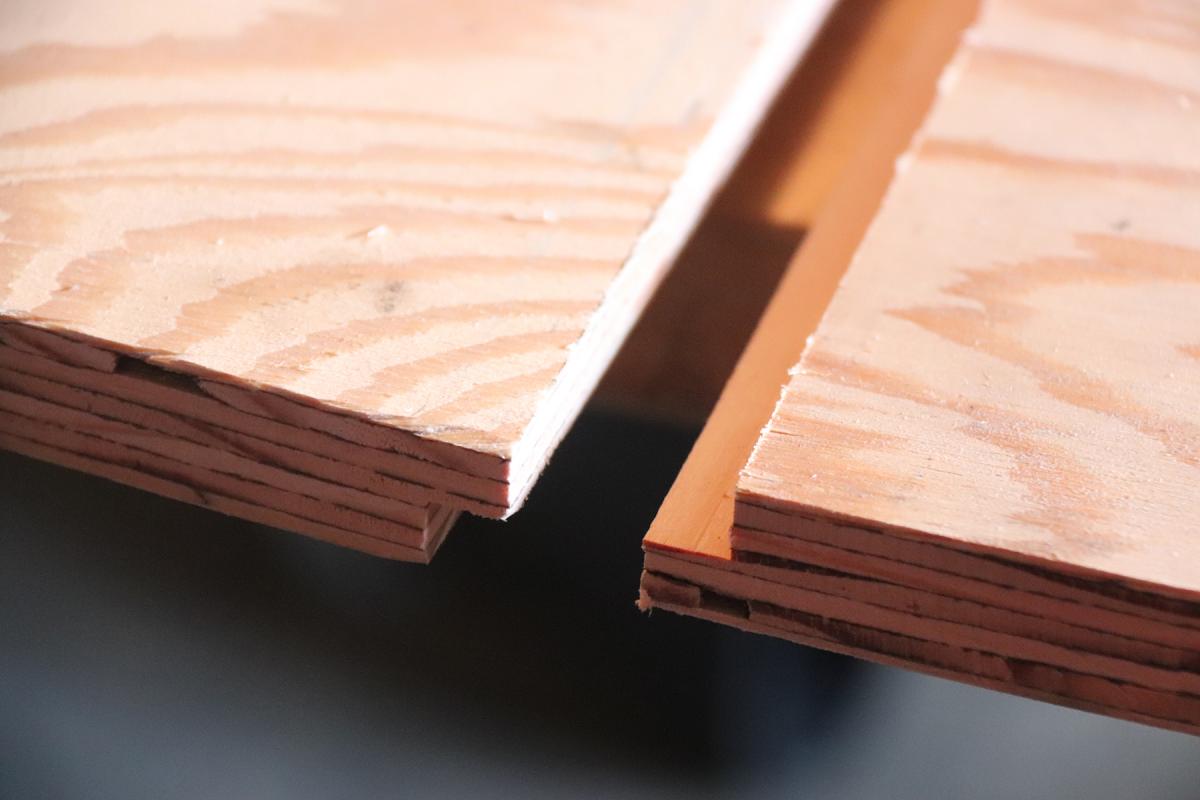
Got the three rear most floorboards cut out and routed the edges. The rear floorboard has the mounting holes drilled and the cutout for the differential plate. The attaching edges are routed for an overlapping fit. I still haven't sanded the edges, cut out the battery access, or cleaned things up. The routing was done on my Bosch router table. I was worried about tear-out on the plywood, but I got very clean cuts on all the boards. Each floorboard has a mounting pad made of wood, and attached to each short end, that rests on the top of the frame rail. The wood is 1-1/8" thick, three inches and a quarter inches wide, and the length of the floorboard. Getting lumber of that dimension proved impossible. Rather than having a sawmill plane it for me, I bought some oak from a big box store and glued two pieces together. This gives me a chunk of wood 1-1/4" thick and 3-1/2 wide. I'll use my router to knock off an eight of an inch of the thickness and a quarter inch off the width, and then I can cut the resulting stock to the correct lengths. I should have everything wrapped up by tomorrow evening.


-
Not to be a wise guy, but that’s in there for a reason. Did the car run and drive before you took it apart? I find it strange that it would be missing - unless the trans was out and disassembled before you bought it. I could be wrong, maybe someone was driving the car around for years with the part missing with no problem. Any chance it’s hiding somewhere, misplaced when you rebuilt the unit? Been there, done that.
-
New wheel cylinders or resleeve ?
Taylormade replied to FLYER15015's topic in Chrysler Products - General
Same problem with Roberts, but they were totally up front about it and didn’t claim to have the correct cylinders. Keiser31, I’m surprised the 31 and 32 are different. I never noticed until I received my cylinders and discovered the difference. It’s slight - so slight I can’t imagine why the bothered to make them different. Just a slight difference in the bolt hole spacing.