MikeC5
-
Posts
2,522 -
Joined
-
Last visited
Content Type
Forums
Gallery
Events
Everything posted by MikeC5
-
I knew ethanol was bad for natural rubber seals, etc. but for soldered joints too? Is soft solder similar to what you would use on copper pipe (as opposed to something like silver solder/braze)? I haven't seen the term soft solder before.
-
Ha ha! Exactly! When I seem them on fleabay they most often are 6 v models.
-
I found a Klaxon at a flea market for only $20 and it works. Only thing was, it was a 6 volt horn and my car is a 12 v system. With the appropriate resistor in series it works fine. I use it mostly to AOOGAA people who wave...
-
Robert, you have your work cut out for you but it looks like real progress is being made. It's hard to imagine the water level but those witness lines on the cars help tell the story.... wow...
-
Thanks again Dave. Here's a question for all of you with '24 - '26 touring cars (maybe others too); When the front bow is unfolded (opened) and the top secured to windshield, what does the hinge and linkage bar look like? On the left side, it opens and and the hinge point sort of locks in place so it's above the link bar (and is rigid). The right side doesn't quite get there (the hinge point is slightly below the link bar. On this same side I had repair the socket which had broken at the rivet/pin location. I plug welded a doubler in place and had to re-drill the hole. I'm thinking maybe the hole placement is slightly off and this may be the reason it doesn't behave like the left side. So I'm curious how yours look.


-
Thanks Dave. I wasn't certain if the straps should be firmly affixed to the 3rd bow (from back) but it sounds like yes. I have added two equal length rear body to rear bow straps since photo was taken. I'm taking my time to get this right before I start stapling/tacking. Also, I noticed on the photo above in this post there are diagonal straps between last and 2nd bow. These are to give more stability and keeping this panel rectangular?
-
Thanks Dave. LeBaron-Bonney does have the black/tan canvas-like top material but it's almost $70 per yard. Too expensive to learn on for me. I was going to just go with the 'cave' look using a less expensive vinyl but then saw what he was doing in the video. Although it does seem as though 2 separate layers is more difficult and more work, I'll need 2 layers anyway for the rear window (I did source one). Any tips on getting the bows where you want them? I just got my new bows installed and put the top on with temporary straps to get a feel for things. The 2nd bow from front is uneven in height left/right and my attempts to adjust strap tension seem to have little effect.

-
In this video, a '25 coupe is getting a new top and I see he uses 2 layers of material, the tan color inner lining and outer vinyl (I assume it's vinyl since he uses a heat gun to help remove wrinkles). What type of material is the tan stuff? Is it more difficult to do it this vs. the 2 layer (black/tan bonded together) Haartz-type material? https://www.youtube.com/watch?v=5tpehWxfh8U
-

Centering tool - perfect for brake/throttle links
MikeC5 replied to ligurian's topic in Dodge & Dodge Brothers
That does look like a handy tool to have next to the drill press. -
Nice work! And for just a few dollar's worth of common hardware too.
-
I hear you Ray. It is a slippery slope.... It's not like just slapping in a new set of bearing shells. I'm sure it will be fine as-is. Previous owners or mechanics can really leave a mess for us.
-
There are other things that can bend a crank. It is well known in the Ford Model T community that lugging the engine excessively can break a crank. Perhaps a stouter crank may bend a little under severe lugging. My experience was with a 'modern' engine that was suffering severe pre-ignition (knocking due to insufficient octane). At the time I had no appreciation of how destructive knocking could be... It finally blew a head gasket. When I tore it down I found scoring in one cylinder (corresponding to HG failure location). Further tear down revealed top piston ring on all pistons broken into several pieces and a bent crank. Lesson learned! I imagine the latter scenario is very unlikely on a low compression engine running modern fuel. If the center journal is only showing 0.003" runout with indicator, I would probably just go with it although I suspect if you can find someone who has the proper equipment and has done this before, it looks like only an hour of labor should do it. Don't give up yet Ray....
-
https://www.youtube.com/watch?v=Qtb2KWB1Ulc I suspect that's how it is done. Support the ends and then carefully push in the opposite direction of the bend though it must take a calibrated touch to not make things worse.
-
Journal... yes. I missed that. It may be possible to have the crank straightened. I had to have that done before (on a different make).
-
That does look like a real nice job!
-
Hi Ray, I thought you had new babbitt bearings poured but I can't imagine how a new line bored bearing could be out of round (except maybe a worn out line bore machine?). If not a new bearing I would suspect oil starvation or maybe improperly set shims. Did you have the crank checked for bending? I think they set it up on v-blocks on the ends and then indicate center bearing.
-
I have a pair of top irons but am not sure what car they belong with. They are structurally sound but do need a little repair in areas shown. I can provide dimensions. $300 plus shipping.


-
Looks good! You've made some real progress.
-
I don't suppose you know what the blue color name or code is?
-
Good to hear you found a solution. I also used a pressure washer to clean out my block which had a lot of the (missing) upholstery material in it. Mice had set up shop in there since the radiator hose opening on the head had been exposed for who knows how long.... It took a lot of flushing before coming clean.
-
Some stripped threads? You might try making a new copper connecting pipe (with new nuts).
-
Hi Ray, I would try to find a shop that can demonstrate they are good with magnaflux or penetrant inspection (special fluid that is applied to part, let sit for specified time, washed off and then examined in a dark place with black light; the crack will fluoresce). The idea is to map the extent of the crack to ensure it will be machined away completely. Do you know any NDT people at Rolls Royce? Hopefully the crack isn't too large to allow an insert. I am surprised the shop didn't check for this condition before going too far since, generally speaking, this is not an unusual area to find cracks.
-
That is disappointing for sure but I wouldn't think machining out the seat area and installing an insert would be too expensive. If an exhaust valve seat I would be tempted to do all 4. It shouldn't need to be a hardened seat but they will need to know the correct interference fit. Having in insert come loose can damage a block beyond repair.
-
Thank you again Dave. That does look a bit tricky to say the least. I guess I'll have to wait and see which type of window frame I can dig up.
-
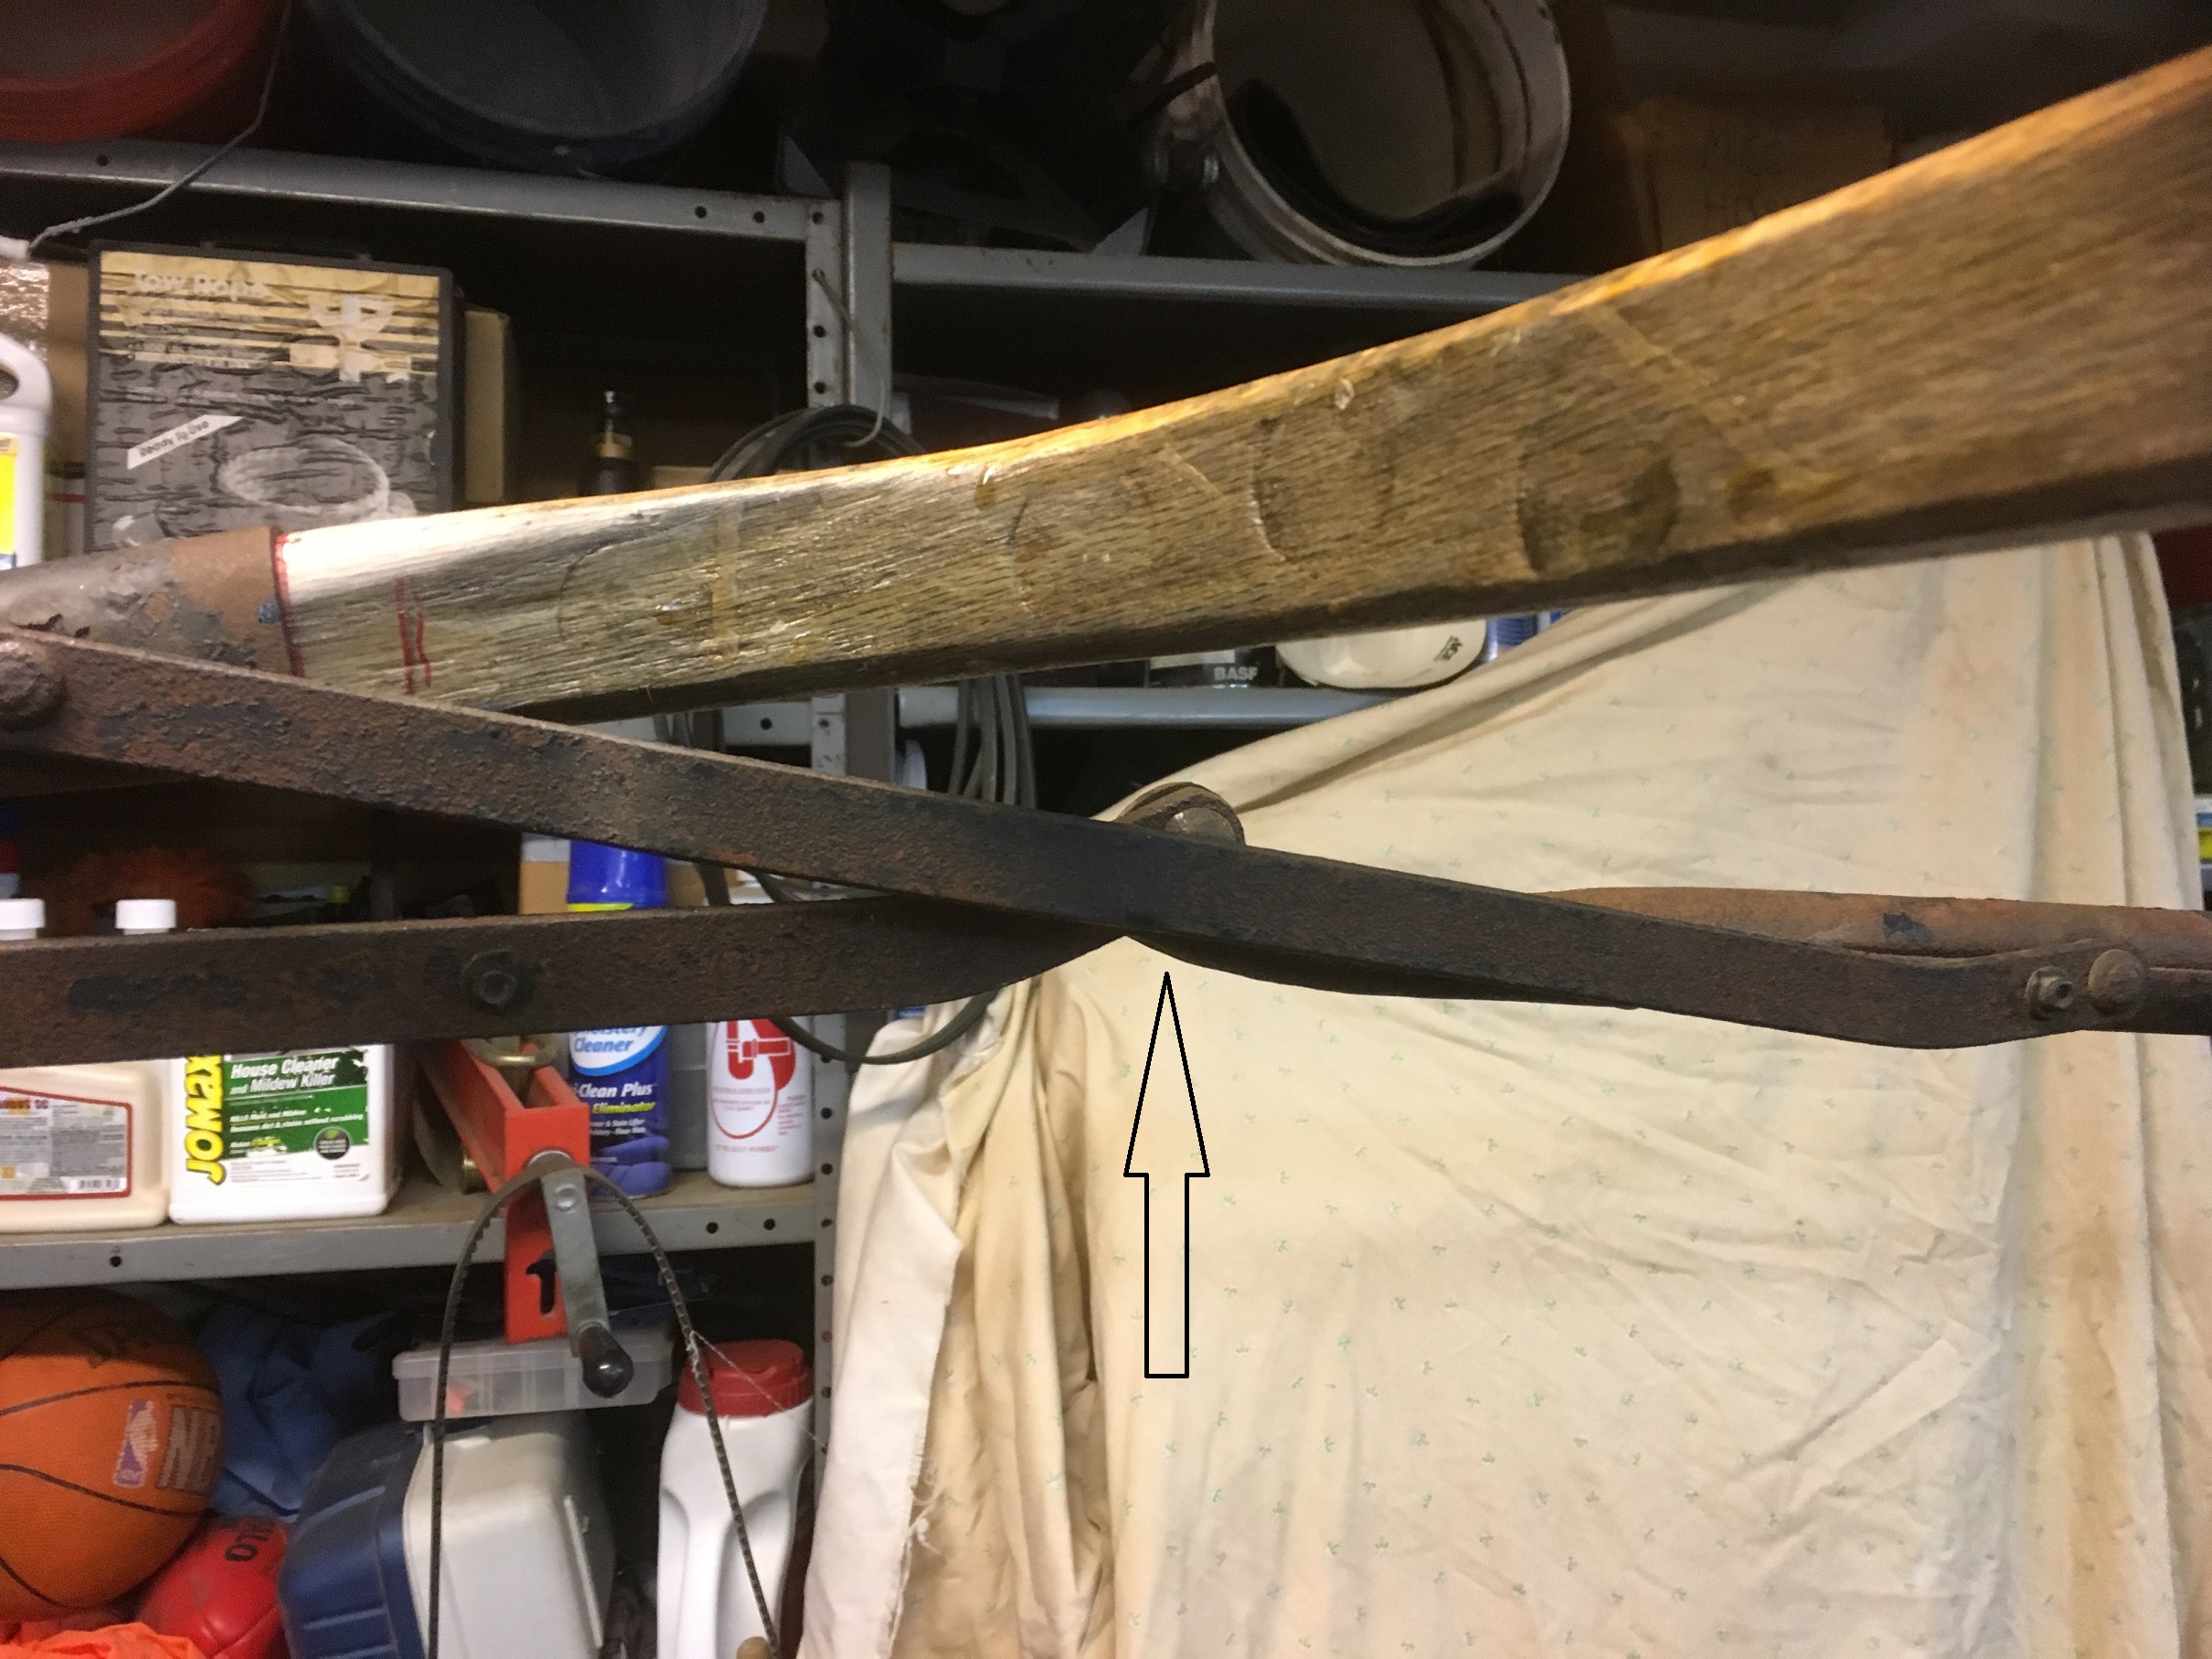
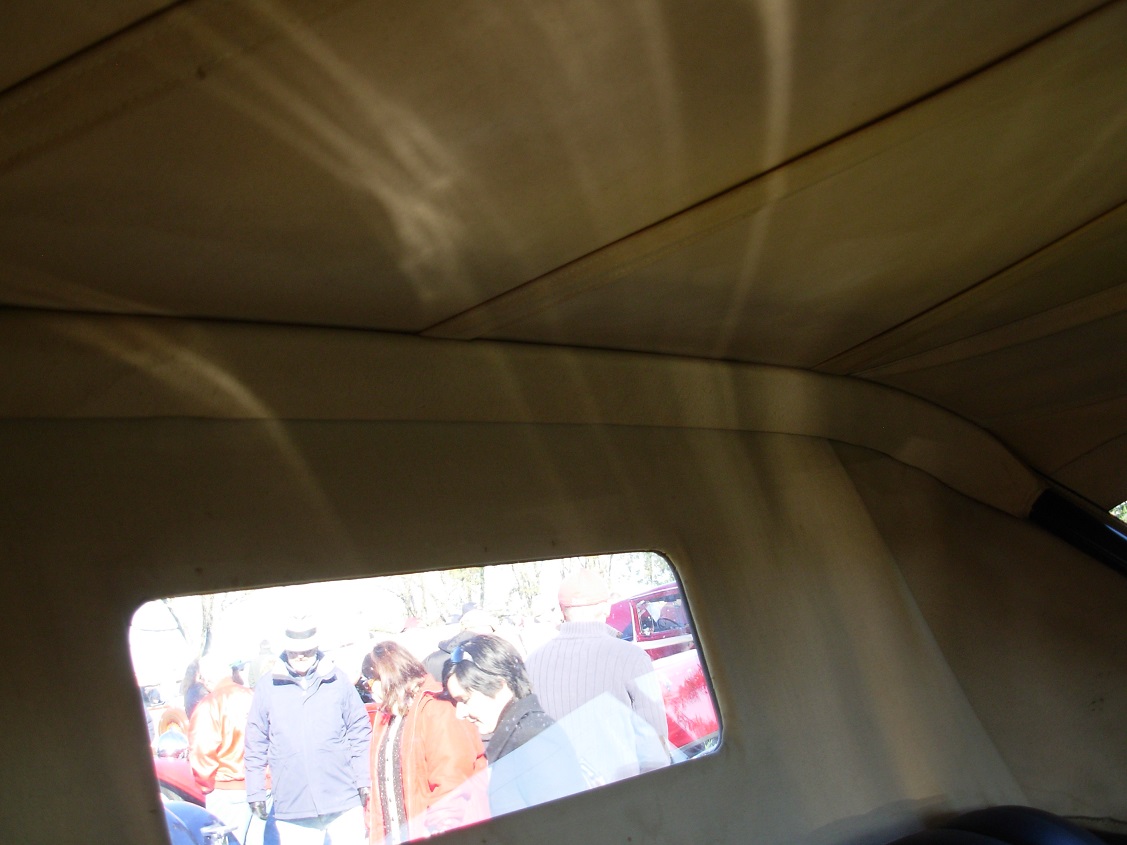
That you for the tips Dave. The detail on the pads is great since there doesn't seem to be a whole lot of information out there on how to make them. Relative to the rear glass, should it not be made of safety glass? I should then concentrate of finding the frame, although unlike many where you can see the frame and screws, this one is hidden (see attached). There must be a frame hidden under there. From the same car I had pictured above, I noticed what looks like a double layer for the rear curtain which appears to loop under the wood rail in the back. Have you seen this type of thing before?