RichBad
-
Posts
733 -
Joined
-
Last visited
-
Days Won
1
Content Type
Forums
Gallery
Events
Everything posted by RichBad
-
Head bolt torque specs for '31 Chrysler Straight 8
RichBad replied to Gunsmoke's topic in Chrysler Products - General
I had my head crack tested and pressure tested. That said, I think they may have done that before they removed the old head studs which could have stresses it? i was told the process for the Dodge engines was to gradually tighten to 45, then let sit for a while to settle, re torque then start and run engine and allow to cool and then do a final torque to 45. -
1928 Series 128/129 Fast Four engine rebuild
RichBad replied to RichBad's topic in Dodge & Dodge Brothers
Yea, cracking was the last thing on my mind - I was more worried that I was going to pull the threads, apparently that can happen quite often on these. I would have thought that the threads would give before something cracks but not the case for me:(. My engine was up and running 18 months ago and the only thing different since then is all the engine machining - I can’t help but think perhaps a crack was started when the old studs were removed. I didn’t pull them out as I was scared I may damage something (they were in very tight) the engine shop said they would machine them out to avoid any damage. when I picked up the engine, the studs were in a bag with the other engine parts and hadn’t been machined (but did have some pretty large marks from some monkey grips or mole wrench). -
Head bolt torque specs for '31 Chrysler Straight 8
RichBad replied to Gunsmoke's topic in Chrysler Products - General
I only went to 35lbs (that assumes my wrench is correct which I’m going to get checked). Also, I’d never do it hot (many a wise man has told me that and I tend to believe them). If your wall thickness and thread depth is good you may be fine - in hindsight mine weren’t great (the Dodge engine isn’t that great for this to start with). -
1928 Series 128/129 Fast Four engine rebuild
RichBad replied to RichBad's topic in Dodge & Dodge Brothers
I don’t know what’s possible, I’m guessing not in that area but I don’t have any experience with what can be done with block repairs. would be good if it could! -
1928 Series 128/129 Fast Four engine rebuild
RichBad replied to RichBad's topic in Dodge & Dodge Brothers
Spinney, just checked - 7/16 x 20 tpi. I was told 45lbs for these, my plan was to go to 35 then leave until i was ready for the first start. Matt, you may be right, it’s quite thin there and easy to overheat. i just pulled the head off and it is quite thin in that area which probably didn’t help. The stud holes are all open ended but I did notice the stud was slightly lower than the others (only 0.020 - 0.040) but perhaps the stud wound in more and the non threaded section of the stud ‘forced’ the hole open? I also noticed that one on the front had cracked too, again it’s pretty thin there too. Black day today, my wife found my bill from the engine shop for my ‘paperweight’ and I’d promised my son it would be ready for his end of school year:(. Oh well, how does that monty python song go...

-
1928 Series 128/129 Fast Four engine rebuild
RichBad replied to RichBad's topic in Dodge & Dodge Brothers
Has me baffled. Head and block were both skimmed. Studs were new and tightened first with stud lock so I don’t think they would have turned, I’m pretty sure all the stud holes are open into the water jacket. The studs are 7/16 unf and I was tightening progressively (with some wait time inbetween to let the gasket settle). Maybe it was a bad gasket, I’ll pull that and have a look. There could have been a crack initiated, the engine builder removed the old studs and said they were seriously hard to remove - perhaps that stressed it? But they did crack test and pressure test the block (but not sure if they did that before or after remiving the studs). -
1928 Series 128/129 Fast Four engine rebuild
RichBad replied to RichBad's topic in Dodge & Dodge Brothers
OHH SHT, I think I’m done - was just about finished on the engine rebuild, torquing the head bolts and it was all looking good... Was going up in gradual steps and was at 35lbs, heard a slightly strange crack when tightening one nut but it tightened ok so I thought it must have just been something settling, finished torquing all the bolts and then while looking around the engine saw this its two cracks between cylinders 1&2 on the starter side. I’m guessing I’m stuffed and its start again from scratch with a new block (if I can find one). I can’t believe it, having spent so much $ on the block work (resleeving, bearings, guides etc) and a year waiting it’s all gone:( im going to bed to cry!

-
1928 Series 128/129 Fast Four engine rebuild
RichBad replied to RichBad's topic in Dodge & Dodge Brothers
Bu&&er - spoke too soon. Flywheel bolts need to go into the crankshaft before you fit the sump! Oh well, will call that one a trial fit:) -
1928 Series 128/129 Fast Four engine rebuild
RichBad replied to RichBad's topic in Dodge & Dodge Brothers
Apparently the cork strip is for an earlier version of fast four engine and it seals at the front of the sump. Anyway, got my sump on now and it looks good with the fresh galv finish. Next step is the timing cover end.
-
Looking awesome!
-
1928 Series 128/129 Fast Four engine rebuild
RichBad replied to RichBad's topic in Dodge & Dodge Brothers
Anyone know where this cork gasket goes? My gasket set had this and a felt strip. The felt strip looks like it fits on the rear bearing cap to seal against the sump but not sure about the cork. It looks like there should be something that goes on the rear cover to seal the cover to the sump but I would have thought that would be felt not cork?
-
1928 Series 128/129 Fast Four engine rebuild
RichBad replied to RichBad's topic in Dodge & Dodge Brothers
Probably all as one but I’m not too worried about that - as soon as you remove anything for repair it breaks that anyway and can result in paint chipping/peeing at joints. I did the covers black as I prefer the look, it’s powder coat so probably a little more harder wearing (as they’ll be on and off for adjustments) and also won’t show fingerprints soo much:) -
1928 Series 128/129 Fast Four engine rebuild
RichBad replied to RichBad's topic in Dodge & Dodge Brothers
Crankshaft in, felt a little tight to start with but as I gradually increased the torque on the bolts it became very smooth to turn. Torqued to 60lb (some a tiny bit more to get the split pin holes lined up). Don’t forget to fit the oil slinger upper trough to the block before fitting the crank:) Camshaft and oil pump fitted (camshaft needs to go in first). Cam followers and valves fitted. Fitted manifold and water pump studs (used thread lock to seal as they all go into the water jacket). Tappet covers fitted to keep the dust out - still need to set the gaps. Pistons fitted and caps torqued to 45lbs, still feels nice and smooth to turn by hand.


-
1928 Series 128/129 Fast Four engine rebuild
RichBad replied to RichBad's topic in Dodge & Dodge Brothers
Block up on the stand and cleaned again. It’s been decreased, power washed, hot tanked, wire brushed, decreased again, power washed again and still getting dirt out of the oil galleries! Bob, your notes came in handy as I made up a ‘U’ shaped tube for my airline which helps get in to the cavities. Also got a great bottle brush kit from Moroso which has some long ones which do the full length of the oil tube. first step, engine bolted to rear mount and oil gallery blanking plugs fitted.
-
1928 Series 128/129 Fast Four engine rebuild
RichBad replied to RichBad's topic in Dodge & Dodge Brothers
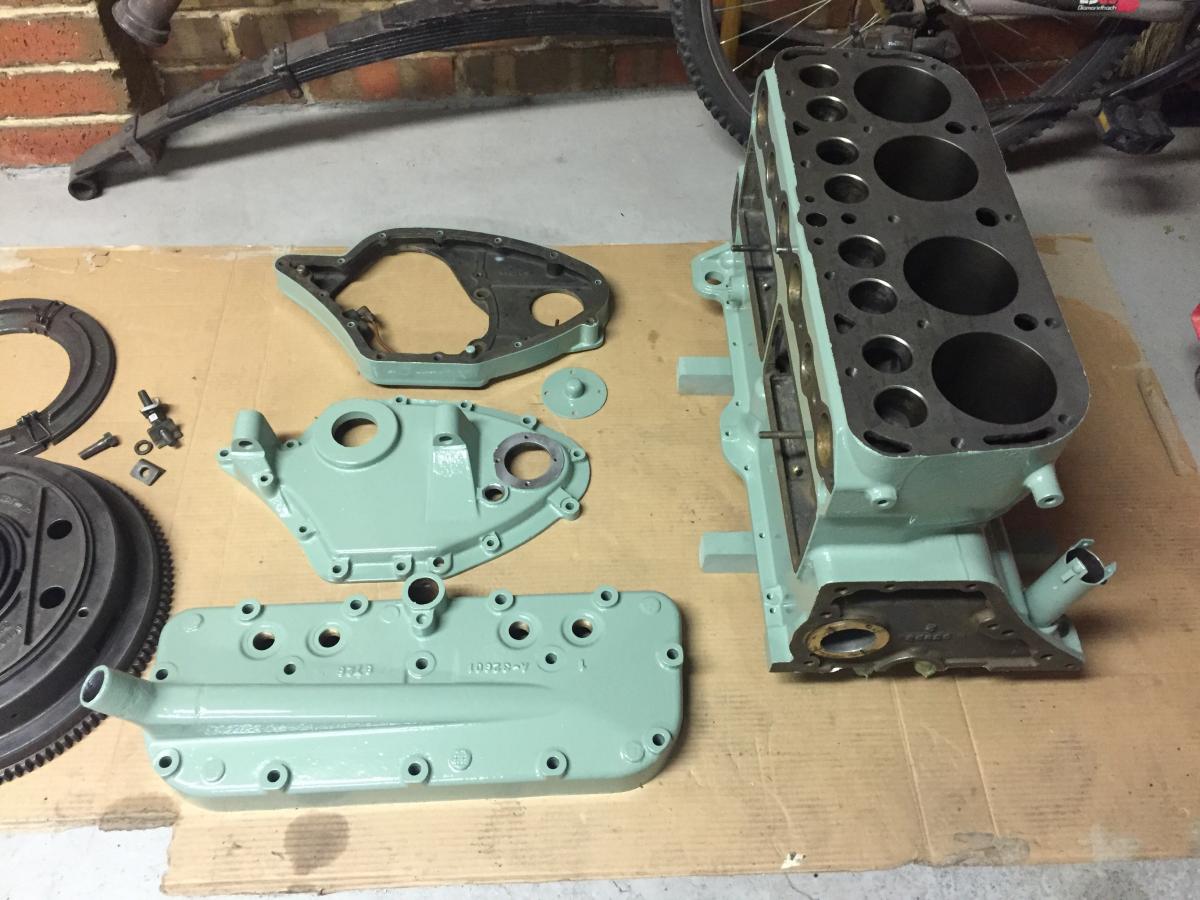
Engine parts painted and ready to go back together - thanks to Matt (mattml430) for painting it and the engine stand!!
-
1928 Series 128/129 Fast Four engine rebuild
RichBad replied to RichBad's topic in Dodge & Dodge Brothers
Bob, papers arrived today - many thanks. I’ll read them this evening and scan a copy at work tomorrow. Thanks for your help I’d be lost without it! -
1928 Series 128/129 Fast Four engine rebuild
RichBad replied to RichBad's topic in Dodge & Dodge Brothers
Next question - do the head studs need to be sealed into the block? I see that they go through to the water jacket and the old ones that were removed had Teflon thread sealer on them. I guess a stud lock is probably a good idea and that would probably seal the threads? -
1928 Series 128/129 Fast Four engine rebuild
RichBad replied to RichBad's topic in Dodge & Dodge Brothers
All the engine parts cleaned and ready to go.
-
1928 Series 128/129 Fast Four engine rebuild
RichBad replied to RichBad's topic in Dodge & Dodge Brothers
Refaced the valve spring retainers as the retaining pins had worn quite large grooves. Also got some new dowel pins as the retaining pins were so worn they were almost square.
-
1928 Series 128/129 Fast Four engine rebuild
RichBad replied to RichBad's topic in Dodge & Dodge Brothers
Cleaned and countersunk the oil holes in the rods and added the chamfer to the bearings on the split line.


-
Northeast starter generator GA 12v rebuild
RichBad replied to Mpgp1999's topic in Dodge & Dodge Brothers
Coat of paint will make a big difference. You can go as far as you want with these - tear it down and do everything or just give it a coat of paint. I disassembled most of mine - http://forums.aaca.org/topic/299339-192728-dodge-brothers-series-128129-tourer/?do=findComment&comment=1674947 and it’s quite easy. -
The Ressurection of Daphne - a 1932 DL
RichBad replied to Taylormade's topic in Dodge & Dodge Brothers
I’ve always used the dowty seals when I can - brakes, oil, fuel - and never had a problem. Ive also found with Cooper washers they are not always that soft from new and sometimes re-annealing them can make a big difference. -
1928 Series 128/129 Fast Four engine rebuild
RichBad replied to RichBad's topic in Dodge & Dodge Brothers
Thanks Bob - I’m pretty sure it’s to retain the tube and stop it rotating when you put the plugs in each end otherwise there doesn’t appear to be anything stopping tube rotation which would probably shorten the engine life (as it would cut all the feed to the bearings). Just odd that it’s so long - perhaps to cover the tolerances you get in the block? -
1928 Series 128/129 Fast Four engine rebuild
RichBad replied to RichBad's topic in Dodge & Dodge Brothers
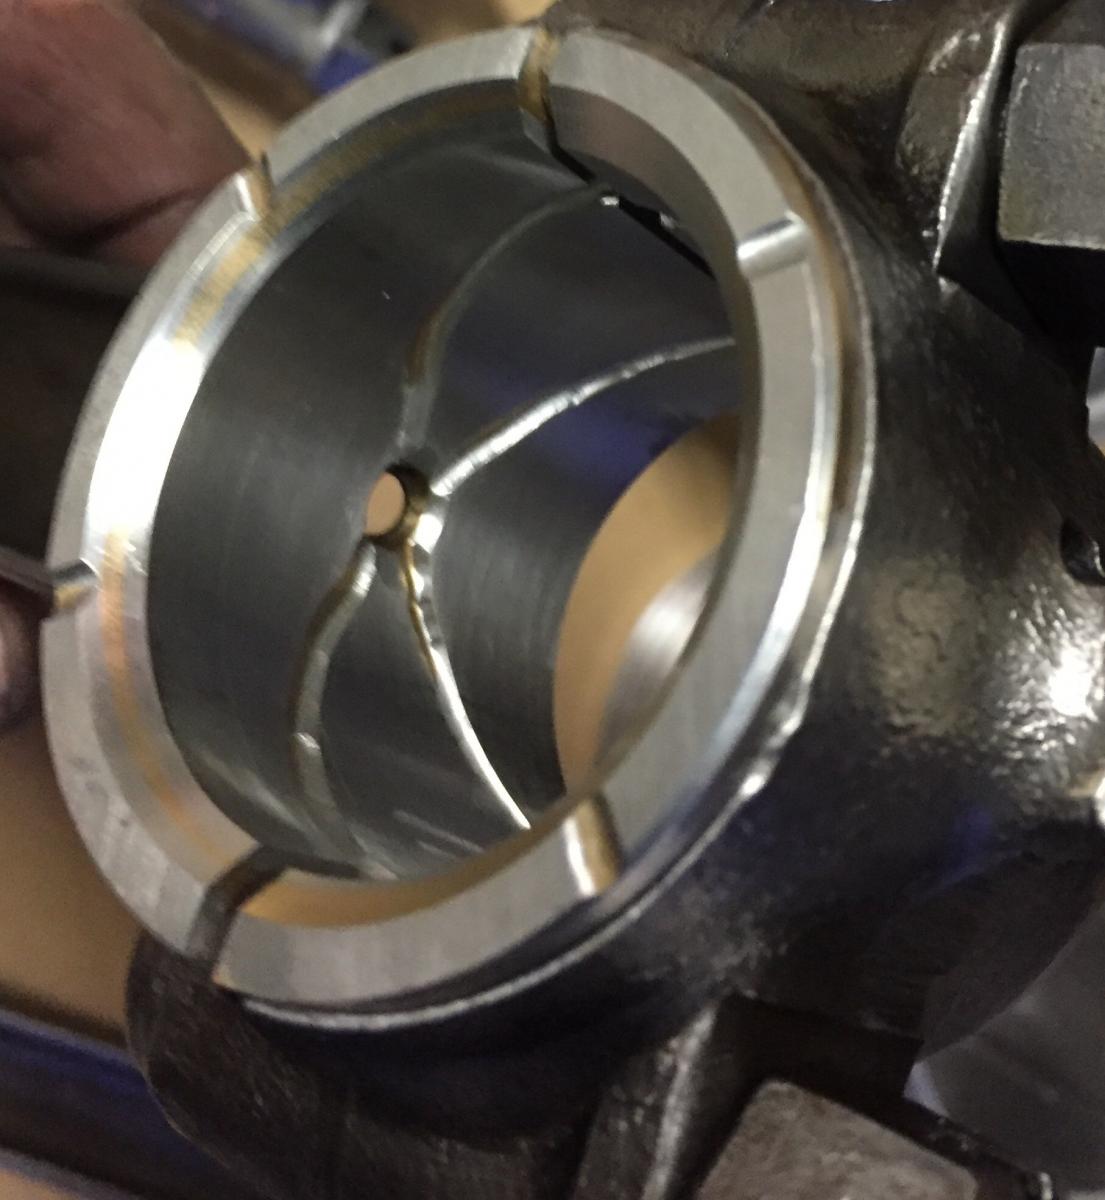
Perfect, thanks Bob - time for the dremel:) Next Q I’m putting the oil gallery plugs back in the block before painting and the rear one has a step. I’m guessing it’s just to locate the oil tube in place but it had quite a long threaded section so I thought maybe it is supposed to be a flow adjuster for the rear bearing in which case I probably don’t want to screw it all the way in?

-
Finally got my engine parts back from the machine shop - after a year! Getting everything cleaned up and ready for re-assembly and wanted to check a few things. Bob, I know you told me some of the correct clearances - I should have written them down:) Mains are 0.0022” Big ends are 0.0018” Cap-shim interference - 0.004” crank end float 0.005” Piston clearance 0.0025” Ring gap - 0.008” Main bearing torque - 60lbs? (This is what they used when the shop linebored the bearings and they stamped on the case by no.1 bearing). Big end torque?? The main bearing oil grooves look pretty good but the big ends grooves look a little dodgy. I think that should be ok as they have the correct ‘x’ pattern. Bob, you mentioned that they should have a chamfer running into the split line on both sides? Mine doesn’t have this, is it something I should add? Any photos? Big Ends Rear main Centre main