MikeC5
-
Posts
2,522 -
Joined
-
Last visited
Content Type
Forums
Gallery
Events
Everything posted by MikeC5
-
Another thing to consider might be the valve seats on this engine. They are probably not hardened and burning unleaded gas will do them no good in the long term (I had this happen on a '65 Plymouth with slant 6, over 100,000 miles the valve seats were pounded badly and compression was way down as a result). However, if you only drive the car on occasional Sundays and miles are few, I doubt you will need to worry too much. There are lead substitute products you can add to the gasoline that are supposed to remedy this. There's a bunch of info on oils for flat tappet cams (higher ZDDP) here: http://forums.corvetteforum.com/c3-tech-performance/2484100-list-of-flat-tappet-oils.html
-
Thanks guys. Maybe the belt dressing or synthetic belt are worth a try but I'm pretty sure the problem is the bolt/friction set up just isn't holding. The pulleys don't look excessively smooth. I suppose I could rough them up a bit though and maybe do the same on the fan pulley mount post.
-
One other thing I forgot to add, if you did remove the carb from the intake mixing chamber you may want to double check that the two blots are tightened evenly. I failed to do this and ended up with a vacuum leak that was hard to figure out. I unbolted it and carefully tightened each bolt again and it then fired right up.
-
I'm having the same issue with my 25. I'm using a modern belt with the ribs contacting the pulleys. I get it as tight as I dare and tighten the bejeezus out of the clamp bolt but it loosens up withing a few minutes of driving and squeals badly at elevated rpm (forcing short shifts). Would a leather belt be quieter? Has anyone come up with any improvements?
-
I did the carb shaft re-pack today and she idles smoother for sure. Thanks Pete..
-
Did you remove and/or fiddle with the carb? I suspect a fuel issue. Are you certain the fuel bowl is getting fuel (unscrew the little cap on top of fuel bowl and look at the rod sticking out). Try pulling up on the rod with your fingers. If it's already all of the way up, it means no fuel in the fuel bowl. Have you tried pouring some gas into the vacuum tank? If the car has been sitting a long while and fuel is able to seep past the shut off valve, the tank will eventually go dry and it will take longer to get it started.
-
Welcome Charlie, that looks like an excellent project that will lead to a fine finished car. Hopefully we can be of some assistance once you get going. Cheers, Mike
-
I think water pump packing would work well too (it's probably the safe stuff). I thought Mother was the necessity of invention...
-
Great tip Pete. Thanks!
-
 I'm not sure how the cart/scooter rule would be enforced but I'm sure that assuming respect for the rules isn't doing it. It does take away from the experience...
 -
I'll keep an eye out at Hershey for you too.
-
Because i was there last year and there were many people using carts that i'm sure had no infirmities. There were far too many carts and a large percentage going to fast. I miss the mud...
-
But will anyone be enforcing those rules??
-
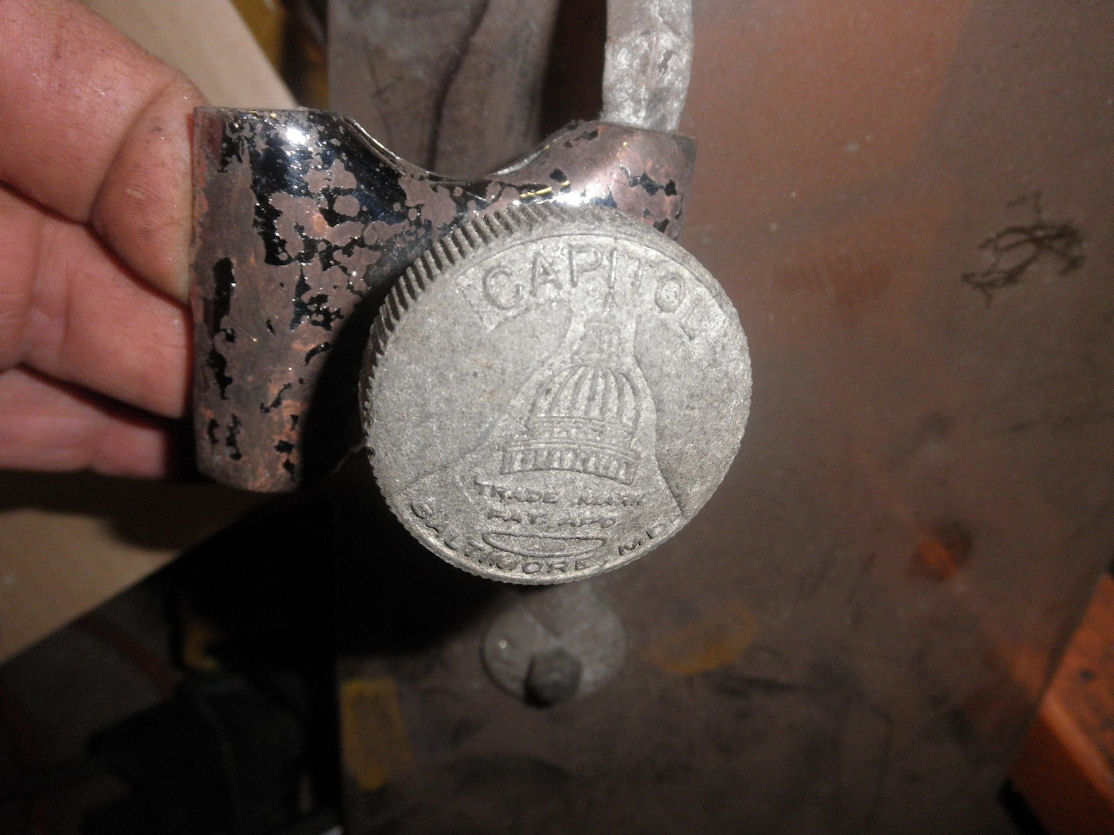
Dave, these were on my car when the previous owner bought it. I'm surprised they are held on by only the single clamp. They appear to be a more/less period accessory. Maybe someone else has a pair of Capitols... I may end up using them.


-
You're certainly not prevaricating about the bush Ray, those are frightening surcharges. But for a worthy cause in my humble opinion... Here are a few photos of the cap that was on the tank when I bought the car. I noticed the tank neck doesn't have the ears on the inside that would let me use a cap like Meyers sells.


-
Plasticene indeed Ray. I am amazed that DB had an flip over anti-drain cap back in those days. No seat belts, plate glass everywhere but... someone was thinking about safety. At least the parts you are ordering fit into a small package. I image they would really zing you on a large, bulky part.
-
I'm not sure about something as 'modern' as a '49 but since the car has a full pressure feed oil system and filter, you should be O.K. If you're in a hot climate the 10W-40 might be preferable.
-
I will get a photo of the other one now on the car Ray.
-
Forgot the photos...


-
Hi Ray, I really don't know if the cap I have is original. I know I haven't seen one with its type of mounting on fleabay. The filler neck on the tank has two pins about 180 degrees apart and the cap has indentations that are guided by the pins. I have seen electrical connectors use a similar principal and I beleive it's called bayonette mount. My car came with this extra cap that had a hole in the lid. When I later de-rusted it I found the brank name 'Neva-Lost', which apparently was a popular aftermarket cap in the day. The idea behind it was you wouldn't lose it because the end cap flips open instead of removing the cap. It is missing a wing nut and sheet metal cam-like device that you tighten to keep it from popping open. I'm going to try and find a right sized wing nut and fix it up eventually. Does your DB have a separate gas gap and gauge or are the two combined as one? On the 25, the gauge has a separate opening a few inches from the filler. I think the one Meyers sells is for this type.
-
Those repro gauges are a bit pricey though. I'll be using the calibrated stick gauge for a while...
-
No backer on the linings Jason. I had to be careful not to spotface too deep. They probably did come off a roll but the pre-bend was helpful. It's good to hear that I didn't do too badly from a pro.
-
I'm not sure if it's the same as what you need Ray but Meyers sells reproduction gas gauges.
-
Woops, here are the photos... I tried to get them to post in order but I couldn't figure it out. Start from the bottom and work your way up right to left.


-
I promised to post some photos of doing the brake linings... Photo 1 - the linings came pre-bent to almost the right radius. I kept them in there until ready for use. Photo 2 - I decided to cut using a hack saw. I was able to cut the thinner linings for the parking brake with sheet metal shears but these are tougher to do that. Photo 3 - I decided to add a bit of chamfer to the leading and trailing edge using an ordinary metal file. Photo 4 - I used plenty of clamps to hold it in place. You want to make sure the lining is tight against the band before riveting. Photo 5 - Clamped and ready to transfer drill (don't even think of pre-drilling the holes) Photo 6 - Transfer drilling the holes on the first two rivets. Rivet from the mid-point of the lining piece first, then work out toward the ends. Photo 7 - Using a spotface tool with pilot equal to hole diameter (drill diameter really). I got it from McMaster-Carr, which is also where I got the linings and brass tubular rivets. Photo 8 - Spot faced lining. I tried to get these to a depth about 2/3 of the lining thickness (0.170" for the 0.25" lining) Photo 9 - This is a 3/16" diameter semi-tubular rivet with length of 5/16". The head is 3/8". I'm not certain if this is the original rivet size used when new. The parking brake shoe used 9/64 diameter. However, whomever did the brakes the last time used the small rivets in the bigger holes on the external bands. Photo 10 - This is the rivet setting tool I got from Meyers. It worked great for the e-brake but the rivet end setter seemed too small for the larger diameter rivets. Photo 11 - This is the anvil from the Meyers tool. Luckily it was 3/8" diameter on one end and 1/4" on the other (1/4" is used for the e-brake rivets) Photo 12 - This is the rivet setting tool I used for these bands. Photo 13 - Here's the set up for bucking the rivet. I clamped a dolly into the vice and set the rivet anvil on top. Photo 14 - Ready to hammer. Photo 15 - The bucked rivet Photo 16 - The finished segment.