Laughing Coyote
-
Posts
2,359 -
Joined
-
Last visited
-
Days Won
2
Content Type
Forums
Gallery
Events
Everything posted by Laughing Coyote
-
Nice sheen finish on that black paint.
-

1961 Mercury Meteor 800 restore
Laughing Coyote replied to Laughing Coyote's topic in Our Cars & Restoration Projects
Roger, the schematic shows a small ground symbol to the tank, but when I was dis assembling the car there were no signs of a ground wire nor where there any signs of a ground to the chassis. Not sure how they grounded the fuel tank. I know the tank straps had a webbing material on them as not to rub thru the tank so that would not be a good ground. I just don't want to drill a hole thru the corner flange and bolt a wire. That wouldn't look correct. I didn't see anything on the old tank either. -
32' Oldsmobile Deluxe Convertible Roadster
Laughing Coyote replied to chistech's topic in Our Cars & Restoration Projects
I think it would look fine. Mine only concern would be any reactions the clear coat would have with the varnish. May be a question to ask your painter guy. Hate for you to do all this hard work again and make the wheels look great and then have it get all fish eyed or blistered after they get cleared. Just my $0.02. -
1961 Mercury Meteor 800 restore
Laughing Coyote replied to Laughing Coyote's topic in Our Cars & Restoration Projects
Haven't had a chance to do anything on the car. It's that holiday rush and I've been buried with orders. Of course there has to be "can I get it for Christmas" orders on top as well. After doing some of the repair work on the rocker panel and pulled the car in the garage I kept smelling gas. So after looking it over I found out that where the sending unit goes into the tank it has been leaking. I'm hoping it's just the seal for the sender and not a leaky new tank. Oh, and the new sender isn't working either. The fuel gauge hasn't been registering so I put in a NOS one and still nothing. I did some research and checked the voltage from the gauge voltage regulator and it's fine. Have power up to the sender too. So now I have to drain the tank, pull the sender and find out what's going on. Then reinstall all over again. Oh the joys of automobiles. I'm hoping after the rush I can have a few days to work on my car again. -
Roger's handcrafted 1:12 scale models
Laughing Coyote replied to Roger Zimmermann's topic in Our Cars & Restoration Projects
Love the color Roger. Not too dark and not too light. It's going to look classy when it's all together and the chrome pieces break up the blue. Great job. -
Yes, They probably would take $2800 - $3000 if there is nobody interested in buying it.
-
I'm sure this would make a good Christmas gift for someone. https://tucson.craigslist.org/cto/d/obtain-some-old-studebaker/6427703098.html
-
32' Oldsmobile Deluxe Convertible Roadster
Laughing Coyote replied to chistech's topic in Our Cars & Restoration Projects
Dei, The trains are cool, but I'd like to see the stuff with wings hanging from the rafters in the shop. I love those WWII aircraft. The car is looking good and hopefully the wheel issue has been solved for you. -
1952 Studebaker Commander Starlight Coupe
Laughing Coyote replied to Eric W's topic in Our Cars & Restoration Projects
Eric. Where did you purchase the tires and what brand are they? Just the look i'm wanting. The bias-ply look with the radial ride. Who did you use for powder coating? I do a lot of stuff with Anderson's. -
32' Oldsmobile Deluxe Convertible Roadster
Laughing Coyote replied to chistech's topic in Our Cars & Restoration Projects
Don't you hate these kind of issues? You're moving along on your project and making good headway and then, Blam! The auto Gremlins pop in and cause all kinds of issues and slow you down. I have my own issues with a new fuel sender that's not working in a new tank that is leaking fuel around the sender mounting area. So now I have to drain the fuel, drop the tank, pull the sender, check why it's leaking, clean the fuel off the outside of the tank, repaint the tank outside and start over with the whole process. Even put an NOS fuel gauge in which was a PITA. Aren't cars just wonderful. Keep at it, you will get it figured out and be back on track. -
Early Factory Aluminum Wheel Options?
Laughing Coyote replied to poci1957's topic in General Discussion
Here is a Pontiac GP ready for a restore with those exact wheels. https://tucson.craigslist.org/cto/d/1965-pontiac-grand-prix/6415501980.html -
1961 Mercury Meteor 800 restore
Laughing Coyote replied to Laughing Coyote's topic in Our Cars & Restoration Projects
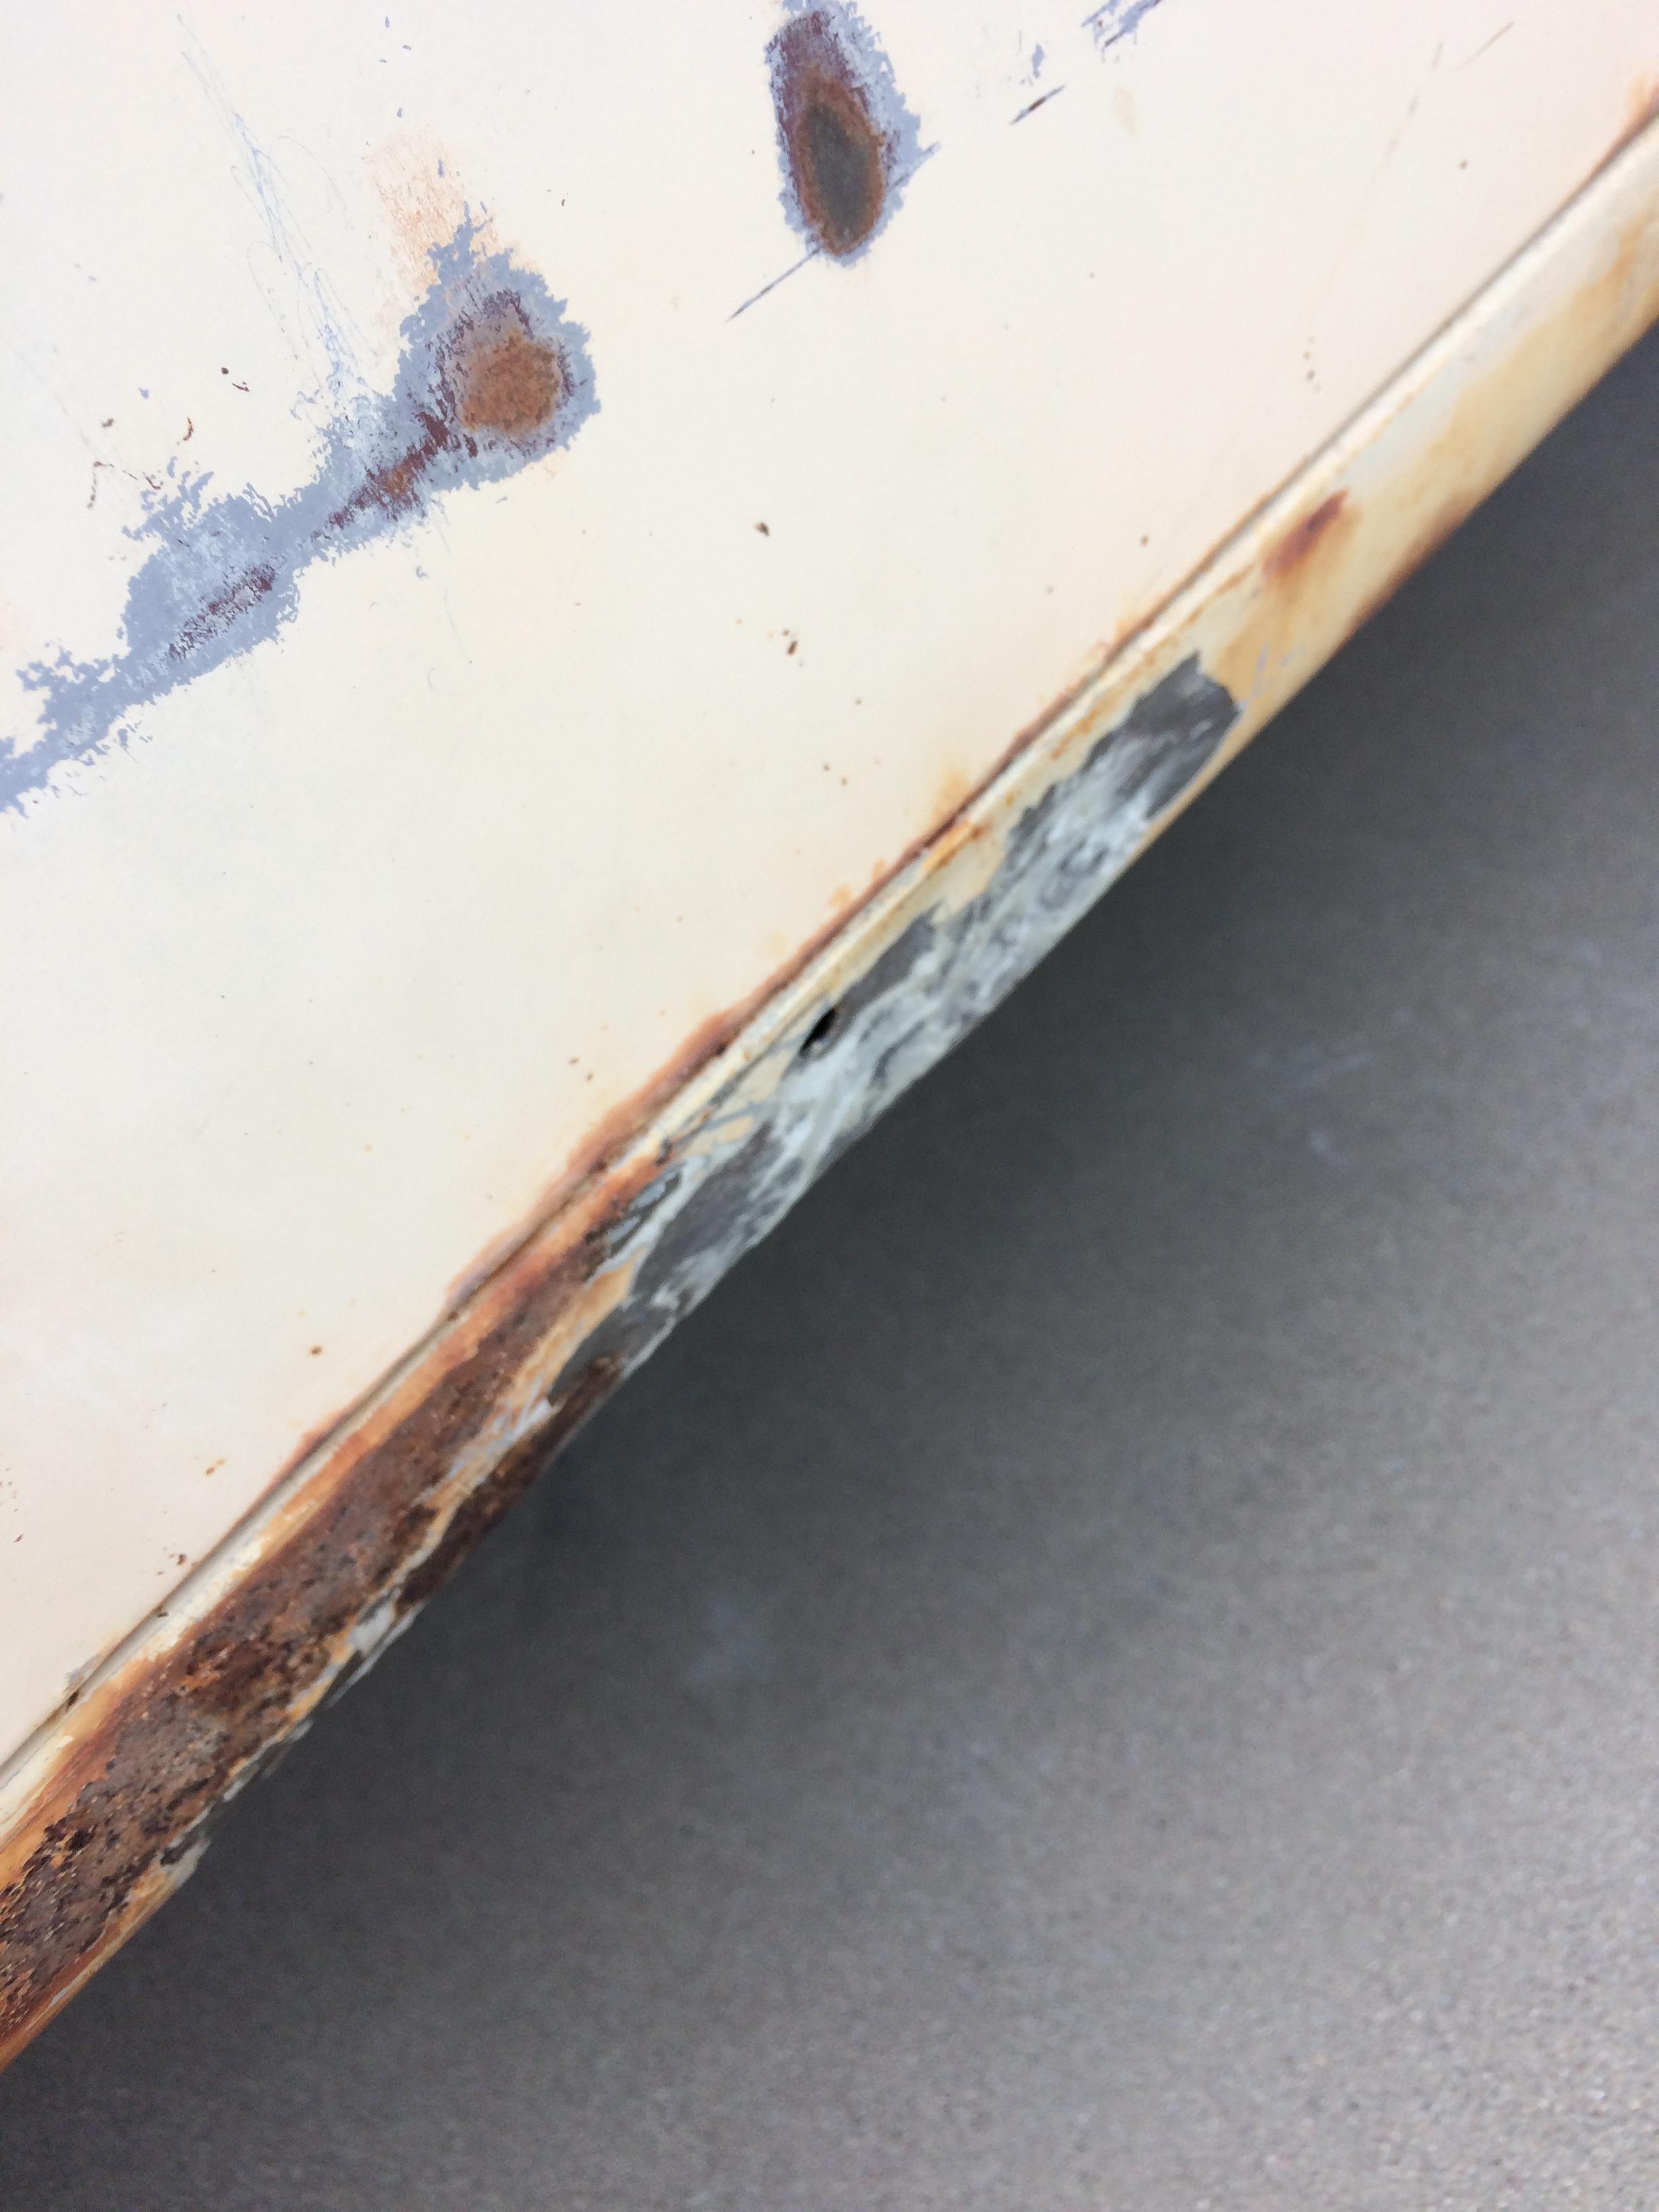
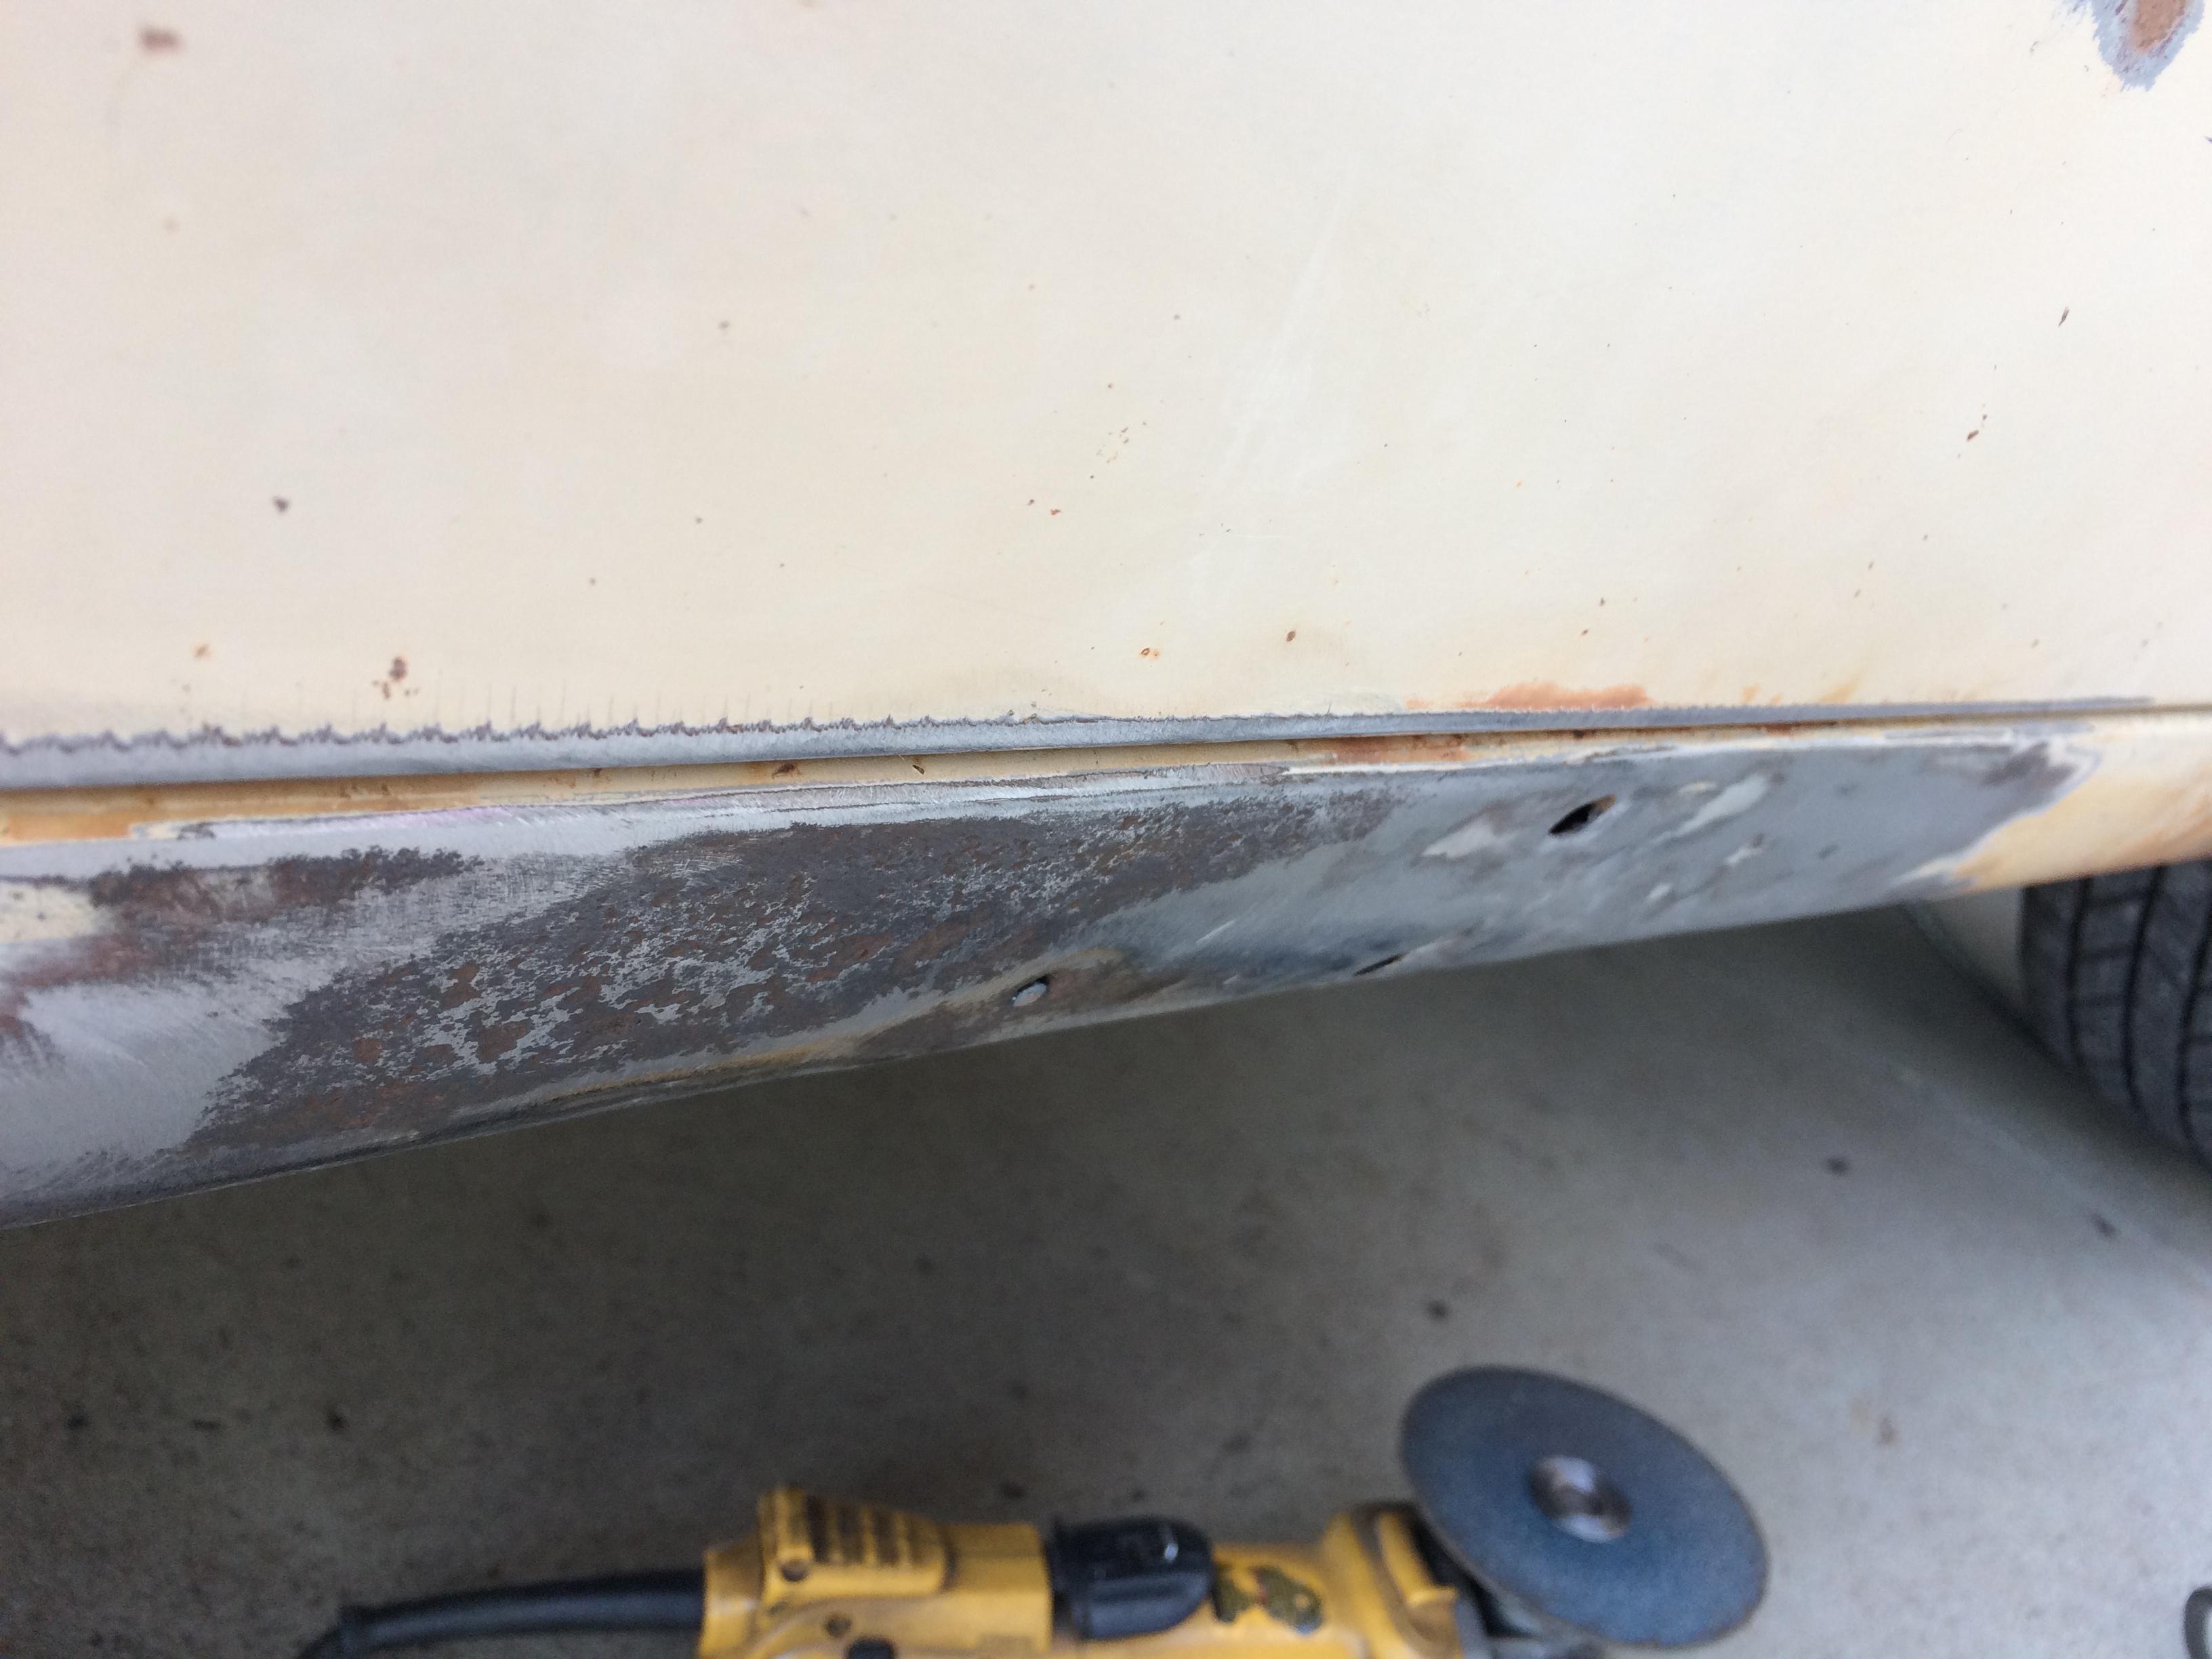
I did get some time in to work on the car. The rocker was caved in pretty good. it was covered in the old green/grey bondo. Once it was cleaned up I used a stud gun my friend let me borrow for the project. Works pretty cool. It spot welds a metal pin to the metal and then you put the slide hammer on it and bang it out. A lot of the damage came out. Not to much left to do. May have to use some filler on it, but not a 1/4" thick. The body guys that worked on it before just punched a hole thru the sheet metal under the door threshold and pounded out they could and covered it up. So I will have to patch that hole too.


-
32' Oldsmobile Deluxe Convertible Roadster
Laughing Coyote replied to chistech's topic in Our Cars & Restoration Projects
Very nice -
1961 Mercury Meteor 800 restore
Laughing Coyote replied to Laughing Coyote's topic in Our Cars & Restoration Projects
Broke off from work early today and decided to get the front panel painted. Did all the final sanding and priming yesterday. Now if the weather is decent tomorrow and I get the honey do list done quick enough I will start on some rocker dent repair.
-
1961 Mercury Meteor 800 restore
Laughing Coyote replied to Laughing Coyote's topic in Our Cars & Restoration Projects
Thanks John. Yes they are a matching left and right. One looks different because I still had the studs in the back of one when I took the picture. -
32' Oldsmobile Deluxe Convertible Roadster
Laughing Coyote replied to chistech's topic in Our Cars & Restoration Projects
Those wheels will look classy with the cap and rings on them. -
1961 Mercury Meteor 800 restore
Laughing Coyote replied to Laughing Coyote's topic in Our Cars & Restoration Projects
Picked up my outer rear trim panels from the powder coater. They look good. I will start to get them ready for primer and set them aside for later when I get to the painting step. I managed to work on the front filler panel today. I still have to do some final sanding and it will be ready for paint. I still have paint left over from the fire wall so I will shoot it when i'm done with the prep work.

-
1961 Mercury Meteor 800 restore
Laughing Coyote replied to Laughing Coyote's topic in Our Cars & Restoration Projects
I have the rear trunk trim piece almost ready for paint. I fixed all the little dings and scratches that were in it. I wet sanded and primed it several times to make sure it's nice. I just have to wet sand it with some 1500 and do the final primer sealer coat. I will be working the front piece next and then I guess start working on the rockers. The passenger side has a area that needs some work. I will post pictures on that when I start.
-
32' Oldsmobile Deluxe Convertible Roadster
Laughing Coyote replied to chistech's topic in Our Cars & Restoration Projects
Nice work. Great attention to detail. It will be one nice looking car when you get it done. -
1961 Mercury Meteor 800 restore
Laughing Coyote replied to Laughing Coyote's topic in Our Cars & Restoration Projects
Thanks for the comment Jeff. I hope everyone had a good Turkey day. As for an update, I stopped by the powdercoater and picked up the front filler panel and the trunk rear finish panel. I had them blast the filler panel with the AO media and used the plastic media on the trunk panel. I just took off the paint and left the red oxide primer. I didn't want them to blast it with the AO stuff and have it generate to much heat and warp it, it's a cast part. I also dropped off the rear corner finish panels while I was there. They too are the cast material. I wet sanded the trunk finish panel to remove the primer so I can look it over. I will be applying new primer and using glazing putty afterwards to fill any small scratches and pits before I do another coat of primer. The front filler panel will get a coat of primer and maybe some paint. The weather has been unseasonably warm so I best take advantage of it and start getting the body work going.

-
Looks good. I like how the aluminum parts and nice clean looking hardware breaks up the black on the frame. It gives it that little detail that shows you took the time and not just painted everything black once it was all together.
-
Roger's handcrafted 1:12 scale models
Laughing Coyote replied to Roger Zimmermann's topic in Our Cars & Restoration Projects
Outstanding!!!!!!!!!!! -
1961 Mercury Meteor 800 restore
Laughing Coyote replied to Laughing Coyote's topic in Our Cars & Restoration Projects
I took some time off today and worked on the car. The transmission pressures have been adjusted and the power steering is all hooked up and works nice. So much easier to steer. I'm going to drop off some sheet metal parts to the powder coaters so they can plastic media blast them. -
I can relate to the whole work thing, but any progress is better than no progress. Keep at it when you can. I'm chomping at the bit to get back on the Merc.
-
That's one sweeet ride. If I had an extra $6K just laying around I would be all over it. (NOT)