


Stude Light
-
Posts
1,808 -
Joined
-
Last visited
-
Days Won
3
Content Type
Forums
Gallery
Events
Posts posted by Stude Light
-
-
-
Part number for the port gasket is 16967 (qty 6)
These used an alignment ring too that kept the gasket in place - part number 16966 (qty 6)
-
On 10/11/2022 at 4:15 PM, rocketraider said:
I knew Ranny made cars, trucks and mowers, but not appliances. Enlighten us!🙂😎
Mr. Olds organized the Ideal Engine Company in 1906, another stationary engine business. Always the tinkerer, he began developing other uses for their engines and, in 1915, he received a patent for the gasoline powered lawn mower. It utilized an Ideal air-cooled hit & miss engine and started a new industry.

Following its rapid success, the company changed its name to the Ideal Power Lawn Mower Company in 1922 and began purchasing smaller engines from Briggs & Stratton and the Indian Motorcycle Companies to use on their lawn mowers. In 1946, the REO Motor Car Company decided to get into the lawn mower business using Clinton and Briggs & Stratton engines. The Ideal Company was liquidated and merged into the new Lawn Mower Division of REO. In 1949, REO developed their own engines which are easily recognized by the unique ‘slant head’ cylinder and drove the mower from the camshaft, not the crankshaft. By 1950 REO was the largest lawn mower manufacturer in the world.

REO also made snowblowers

They even made a kit to convert your row boat into an inboard powered boat, called the Trollabout

Either RE Olds or the REO company was thinking about getting into the refrigerator company as this prototype exists


All this is at the RE Olds Transportation Museum in Lansing, MI
-
 2
2
-
 1
1
-
-
On my 1939 LaSalle, I added 6v LEDs to my tiny tail lights. That helped but the BrakeLighter Bar (as mentioned by @chistech above, is what really aides in safety. I have no interest in the company but am only sharing to help others with their safety. https://www.brakelighter.com/
This is a video of the setup in my LaSalle.
Since this car came with no turn signals, I added a column mounted switch and repurposed the front fog lamps into directional signals.

-
3
-
1
-
-
Safety Message
My 1923 Studebaker has split rims.

I use talc in the tire and on the tubes and flaps. My tires will just slid over the rim but I do have to fish my right angle valve stem through the hole in the rim first with the appropriate mounting hardware in place which includes a bridge washer. The inner lip is part of the rim body and the outer lip is the removable locking piece. It is very important to get the removable locking portion of the rim correctly seated. They usually just snap in nicely but, as pointed out above, once in a while one may let go when filling which may be due to a foreign object, excessive corrosion, not paying enough attention, etc. It is during the initial filling process when the tire bead seats that is most likely for a removable rim to fly off. It is pretty rare but can be fatal.


This is how I fill mine. I put it all together, check it carefully, then lay the tire down with a piece of plywood on it and put my tractor bucket on top. I hook it up to my remote compressor, set it for 50 psi, close the door and walk away.

If nothing goes "KABOOM" before the compressor shuts off, I'm good to go. I've never had any issue but safety first.
Good Luck,
Scott
-
4
-
-
On 6/17/2023 at 7:09 AM, Dandy Dave said:
Chatting with my local Starter- Generator repair shop rebuilder years ago he said that a lot of times the problem is rust between the starter end plates is also a problem. Taking them apart and cleaning mating surfaces is a must with 6 volt especially to have a good ground plus what you said. Since then I take mine apart and clean them real well and a lot of times they wake up. If they need parts then off the the repair expert.
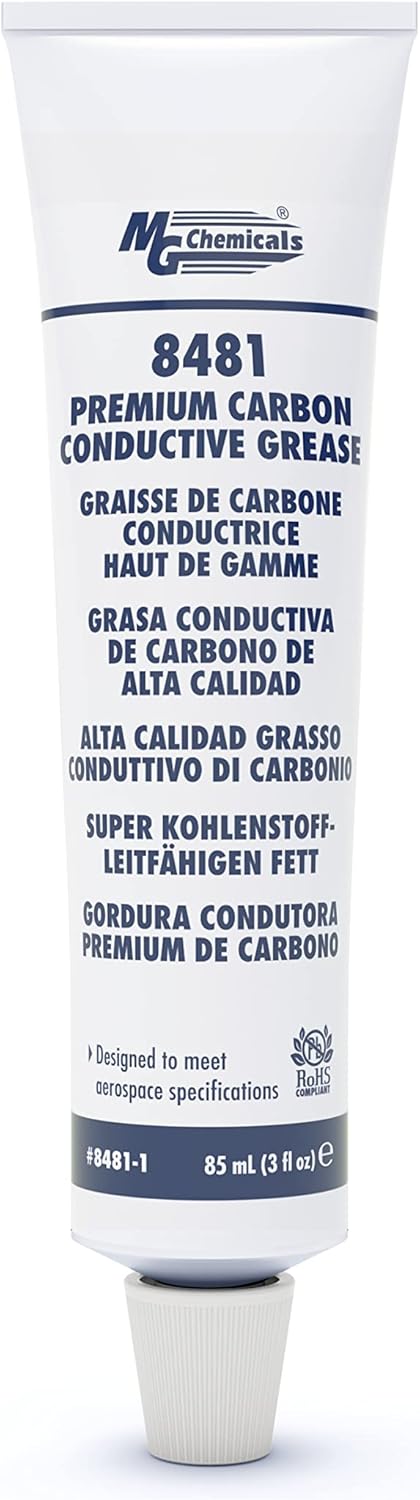
To add to Dave's comment. I apply conductive grease to these surfaces to prevent rust and improve conductivity across the mating surfaces. It is also great for other ground paths like a headlight bar. Just wear gloves as, like any carbon product, it is hard to wash it off your porous skin....similar to black paint.
-
1
-
1
-
-
Most of us just use these for starting and do not leave them on for driving.
I’m sure the lawyers at Carter want to avoid any potential liability from people that have failed mechanical fuel pumps. If you have a failed diaphragm, the electric pump will push fuel through that hole in the diaphragm which may end up in the engine or engine compartment. If you use your mechanical pump for all but starting you will know if you have a bad mechanical pump and you will not want to run your car with the electric pump which minimizes any risk.
-
1
-
-
What happened to the one that came with the car? Is it salvageable? And the one from eBay…what was the issue that made it scrap? I know I have a couple of OE-1s and they share a few parts. Maybe we make a good one from parts
-
2 hours ago, Marty Roth said:
Absolutely disagree-
@Robert G. Smits and I have used the same rotary vane 6-Volt Carter P4259 for well over 16 years without the need for a bypass. The mechanical pump on my '41 Cadillac and the '37 Buick Roadmaster (331 cu in and 320 cu in ) pull just fine through the non-running electric pump. The Carter Electric is energized only if and when the car has been stored for an extended period, or in the case of vapor lock, to which these cars are prone, especially on modern fuels. For the '30 Packard I added a Holley Pressure Regulator
My experience with the Carter pump is with two cars that had a Carter pump installed already (by others) and both had a bypass installed. That along with several on this forum that had a similar setup.
If you have personal experience with a Carter without a bypass, I stand corrected. I wonder if there are different Carter designs which would have caused others to add a bypass?
I added the Holley regulator to my setup since my pump can put out 7 psi and my carb is only good for about 3 psi.
-
I see another on eBay but they want stupid money for it. If they had a Buy it Now I might offer $75 just to level set the seller.
-
I appreciate all the input. I decided to simplify the project to just hard piping the setup I had and adding a pressure regulator so if I need to run the pump more often, it won’t over power the carburetor needle and seat. It is set to 2.8 psi.
I replaced the original fuel lines from fuel tank to engine, used the original asphalt cloth style insulation where required and I pre painted everything flat black to blend in (and it’s easier to spot a leak).

This regulator has a second outlet (pointed straight down) that can be used as a drain to pump the fuel out of the tank if ever required.I also switched to ethanol free fuel to help with the vapor lock issue. Hopefully that and my fuel pump cooling duct will solve any vapor lock issues. I won’t really know until I drive it longer distances on a hot day but I have a reliable solution if needed that doesn’t have any rubber lines and screw clamps.
Side note - I enjoy driving my prewar cars as it takes a bit more skill and planning but the downside of the LaSalle is it drives nicer than most 1960s cars.

-
4
-
-
You can always switch to SAE 50. That is all I ever used in my aircraft engines in the summer. Oil temps run a little hotter on the air cooled Lycoming engines so the higher viscosity was needed. It is definitely more viscous than 20w50 when hot. It would be another incremental improvement.
-
14 hours ago, trimacar said:
I installed a restriction in the upper radiator hose of my Pierce eight, for a different reason (radiator overflow when letting off gas from speed), but the car does run cooler. Same thing, water pump moves a lot of water.
No fancy plug, though, just a freeze plug with a 5\8 inch hole drilled in it. Yes, that small hole allows plenty of water to pass.
On the 40w oil, I have a friend who builds engines. He doesn’t like the heavier oil, as it won’t always flow well in the small nonpressure areas of an engine, such as cam bearings. Now, before anyone says that won’t happen, it will, and did to me, the reason for the discussion with him…..
Full pressure on all bearings vs all or some splash lube makes a difference.
My 39 LaSalle is all full pressure - crank, rods, cam and does like heavier oil. My 23 Stude is all splash and likes lighter oil. My 21 Olds is full pressure on everything but cam bearings so I’m sticking with 10w30 in that engine.
I assume the Lincoln is full pressure throughout.
-
Matt, I suggest you stick with water and No-Rosion until you sort out all the cooling issues. Glycol will only reduce heat transfer ability and is also messy when having to take anything apart and hot glycol does bad things to paint should you have an overheating issue. Once everything is sorted then make the change.
Also, when I rebuilt my LaSalle, I was amazed at how much the temps came down as it broke in for the first few hundred miles.
I’ve been so busy on my own projects and posts that I haven’t kept up with yours. I went through the same issue not long ago…gotta catch up on the reading now. Best of luck and thanks for sharing.
Scott
-
3
-
-
-
9 hours ago, Pont 46 said:
Hello I plan on doing this same thing with my 46 Pontiac, if you dont mind me asking asking. What is the need for the by pass line? Can i just right the fuel pump without by pass? Where does check go?
thanks for sharing your knowledge
If you use the pump setup that I have then there really isn’t a need for a bypass. That was me just being a bit retentive about things.
If you use the pump setup that Matt has then you’ll need a bypass as that unit you can’t draw through when the pump is off.
Most of us just use an easily reachable switch to run the pump just before starting to fill the float bowl or compress the vapor out of the fuel when we get vapor lock. I rely on my mechanical pump to run the car. No better way to burn your car up than with an add on electric pump that is poorly designed, installed or used incorrectly.
-
4
-
-
9 hours ago, Robert G. Smits said:
I have used a inline rotary pump at the tank without bypass on my 41 Cadillac for 16 years and thousands of touring miles. Only used for starting and occasional vapor lock. I think you are making this too complex.
You are right about too complex. I get frustrated sometimes with the car vapor locking so I was going to throw everything at it.
I picked up some new fuel line and I’m just going to hard plumb my old pump setup and start using rec fuel. That will get me 90% there.
I thought I would also try ducting a little cool air right over the fuel pump to see if that helps some. There is a small area between the radiator and sheet metal I can grab some cool air

Then blow over the pump


It can’t hurt to try.
-
15 minutes ago, Matt Harwood said:
This is the fuel pump setup on my '35 Lincoln, including bypass and check valve. Fittings are all single flare, as original.

Thanks Matt. That looks like a pretty clean setup and I see the pump is double isolated. It doesn’t look like you run a regulator on your Carter pump. What is the max psi on that? I need to stay below 3 psi so I’m thinking I need a regulator even with the pump I have. I never thought about it but I assume you can pull through a regulator.
That rotary vane is probably better than the solenoid style on my car…I have the option to change it.
My LaSalle uses double flare 3/8” fuel line. I tried flaring those original steel lines with my double flare tool with poor success so I pulled the original lines off the car today. I will be replacing those with modern lines.
Primarily, I just wanted to hard pipe the pump but then I thought about adding a bypass even though not really needed with the solenoid pump but I thought it may help reduce restriction. This simple project keeps expanding….
-
This pump is able to be drawn through and I’ve been using it that way but I wanted to eliminate all possible restrictions in the fuel supply line to reduce possibility of vapor lock. Yes, it’s overkill.
-
1 hour ago, joe_padavano said:
That's a whole lot of fittings and potential leak points. I would have selected inverted flare tee fittings and made my own hard lines, which eliminates the inverted flare-to-NPT adapters you have and also the need for a union as the inverted flare nuts perform that function.
Thank you for the input, Joe. It is a lot of joints. I considered flare joints but I would have needed adapters for the pump itself so it just eliminates the union and maybe the elbows. With pipe threads I get a more compact setup.
I decided to add a pressure regulator too so I can run the electric pump all the time if needed.
-
I’ve had an electric fuel pump on my 1939 LaSalle to help for starts and vapor lock. It was installed with rubber fuel line along the frame forward of the left rear tire. I’ve been wanting to hard pipe it and finally decided to do that.
I have tried about everything on this car to keep it from vapor locking including replacing the pump with a later model (supposed to be less prone to vapor lock), insulating the line from the pump and installing a heat shield between the carb and rear crossover.

 It will occasionally vapor lock when driving once it’s really hot under the hood - usually when demanding some fuel (accelerating).
My next thought was to install a bypass around the pump with a check valve. This style pump should flow through but another route may help reduce the pressure drop on the inlet side of the mechanical pump which may help.
Here is my proposed setup (fuel line will have double flare joints).
 I need to get all the nipples and a union still. My question is:
Should I be using a different check valve? I was planning on this Carter unit which has a light spring and seat design. It requires a small amount of pressure to open it. Maybe just a floating ball check? Does anyone have a recommendation or experience with this one?
Also, feel free to chime in on anything else that doesn’t look right. The drain was to allow a way to pump the tank out if ever needed. Thanks.
Scott
-
7 hours ago, human-potato_hybrid said:
What do you mean by bypass oil?
The engine has a full-pressure oil feed system. It has a oil pressure regulator which consists of an adjustable spring and a ball seat. In order to avoid hydraulic lock or extremely high oil pump drive torques when the pump is running, the pressure of the oil is regulated by allowing some to pass around the check ball against the spring pressure. @sfair is suggesting that on this engine the oil that is “bypassed” around the check ball regulator is sent to the timing gear interface. So, if you turn the pressure way up, less goes past the check ball and the timing gears receive less oil.
Personally, I have not seen an oil flow diagram on this engine so I would assume that the comment comes from experience with this particular Northway engine. On my V8 Northway, there is a timing gear oiler integrated with the pressure feed system and all my bypassed oil just dumps into the oil pan.
-
1
-
2
-
-
Congratulations and thank you, Jon, for all your help and advice over the years. It has helped many of us and often, indirectly, just by reading your replies to different problems.
Scott
-
The REOlds Transportation Museum has a nice 1937 Olds Touring Sedan 8 cylinder they rent out for weddings, dates, etc. I spent several hours behind the wheel and always enjoy driving that car. My 1939 LaSalle is another nice driving car. I think all of the late 30s models are just fun to drive cars and they look good.

-
1
-


 It will occasionally vapor lock when driving once it’s really hot under the hood - usually when demanding some fuel (accelerating).
 I need to get all the nipples and a union still. My question is:

Looking for Stromberg OS-1
in Studebaker, Erskine & Rockne
Posted
From what I can tell, yes, there was a thin paper gasket. That said, I did some poking around my OE-1s and found this…..
I was going to disassemble and clean it up and verify all the parts are there.