Bush Mechanic
-
Posts
340 -
Joined
-
Last visited
Content Type
Forums
Gallery
Events
Everything posted by Bush Mechanic
-
I strip mine and blast them at low pressure (45 lb) with fine glass beads. It gets into the awkward areas, and makes them look like new aluminium. I usually buff up the dash pots, to finish them off. To give you an indication of how they come up, here is a photo of the HS4's that I run on my 1275 Midget. They had just had a birthday. New shafts and bushes, and a bead blast.

-
Batwing-eight, in reply to your original query, yes, the head gasket is included in the calculations. And yes, there are commonly variations in the chamber volumes from cylinder to cylinder on factory heads. This is mainly due to variations in the sand casting surface. And I don't remember ever finding a standard head which quite achieved it's advertised compression ratio. It's called gilding the lily.
-
My 1910 Mitchell "parts car" project
Bush Mechanic replied to JV Puleo's topic in Our Cars & Restoration Projects
Yes, I must have been looking at the wrong model of RR. The threaded tail-pipe connector on the exhaust manifold above looks very similar to yours as well. I had not noticed that type before you built yours. By mandrel bends, I mean machine formed tube bends which you buy off the shelf. 30, 45 90, 180 and 360 degree (dough-nut) bends and 'Y' pieces, etc. Locally available here in stainless, black and coated (exhaust) steel, in a good choice of diameters. Endless possibilities. Cut, rotate, weld, and finish so that the joints disappear. Lots of fun. I think some-one, (Alsfarms?) mentioned them in your thread. I first found them about 25 years ago, but have no idea when they came into use. -
My 1910 Mitchell "parts car" project
Bush Mechanic replied to JV Puleo's topic in Our Cars & Restoration Projects
I looked up the RR manifolds. The three into one Wraith unit certainly would be rather difficult to construct by machining methods, but reasonably straight forward with a box of mandrel bends, a 'Y' piece and a welder. The P1 'log' manifold is probably not very efficient, but could be constructed OK. In either case they would not look particularly 'pukka', if originality was important. I like that long induction tube passing over the head on the P1. Perhaps I can see a trace of it's influence in the inlet manifold on your Mitchell? -
My 1910 Mitchell "parts car" project
Bush Mechanic replied to JV Puleo's topic in Our Cars & Restoration Projects
Core plugs have many uses. I find it interesting watching how you find solutions by machining. Having started out with welders, and no lathe or mill, my thinking usually tends toward welding fabrication. Though I have only built 3 or 4 exhaust manifolds. The mandrel bends are a great resource for building them. Much easier to get a neat finish than with the packed sand bending methods which I persevered with originally. Thanks for taking the time to document your restoration. I have picked up a few machining tricks from your posts. Mick. -
My 1910 Mitchell "parts car" project
Bush Mechanic replied to JV Puleo's topic in Our Cars & Restoration Projects
Very professional looking end caps. How did you decide to fix them into place? -
Spinney, I think that one is a special body design for the forces. It looks like a series 3, by the hinges, but the guards and bonnet line are quite different from a regular LR.
-
Wow!, Have not seen a LR with it's skirts up like that one. Mind, it's a long time since I looked, as well. I still have have a huge respect and affection for the series 2, having crossed and re-crossed Aus in them many times, sometimes towing a second one on an 'A' bar behind. Rugged, reliable, and able to handle most terrain. But they were SLOW. 50 mph cruising speed, and as noisy as all get-out. But around 1978 I bought my first Toyota Landcruiser, and haven't looked back. Cruise all day at 70mph, with 1 1/4 ton on the back. Made a lot more sense, in this country. My apologies, Luv2wrench, but we seem to have sidetracked a bit here. Still talking Pommie cars, though, you notice. Mick.
-
Sounds very similar to a series 2 Landrover box. I listened to them for many thousands of miles, echoing through the alloy panels. I make a point of not wearing my hearing aids around the cars. All those scary noises freak me out. They all sound great without the aids, though. (Industrial deafness caused by Landrovers).
-
Gearboxes can certainly be very frustrating. And the first road test tells whether you got it right, or whether some part had a little too much wear. It sounds like you are running off the workshop manual, without the exploded parts diagram. With odd-ball cars I like to work off the parts book diagrams, though they are not always easy to find. A good one will include codes for each bolt, nut, washer, etc, so that you soon recognise from the parts list the correct grade and size of fastenings stipulated by the factory. I find it satisfying to get it as near as possible to how it left the factory, (although I have no interest in entering concourse events). But I am less likely to leave washers, speedo drives etc out if I follow the parts diagrams. Especially with extended periods between tear-down and assembly. My memory is not what it once was, unfortunately. Keep it up, you're going great.
-
Luv2Wrench, it's looking good. Standard practice was to purchase a new lay-shaft and bearings, then cut down the old lay shaft, if you didn't have a shortened one handy. Getting the shim washers in place is the most difficult part, especially if you cut the shaft a few thou short. And holding your breath when sliding the third motion shaft spigot into the needle rollers. There is room for drama in that process. I'm sure you'll manage it with your usual aplomb. I remember trying to cut one of those shafts with a hack-saw. Wrong!
-
Hi, Angelo. Sorry, just noticed this, and apologies for hi-jacking the thread. But there are many 3 bearing MGB engines hiding in MGA's and Magnettes. The usual trick is to carefully grind off part of the '8' in the 1800 on the block, turning it into a '6'. On a Magnette I believe it is necessary to modify the sump to fit in with the different front cross member, but not sure if any change is needed on an 'A'. A look at your sump will tell. So, if you did want more horsepower, that is one way to go.
-
car show in the south of France
Bush Mechanic replied to sebastienbuick's topic in General Discussion
Thank you, Sebastien. Good memories for me here. So many of these cars were commonplace in Australia in my youth. Small displacement and economical to run, with interesting mechanicals. Good to see them so well cared for in France. We actually used a Citroen light 15 (Traction avant) as a paddock car! Just a cheap jalopy in the 1960's. -
Another danger with buffing dash-pots is they might catch on the 8'' buff wheel and get 'dashed' onto your scrap metal pile. Ask me how I know. Took a lot of work to get the distortion out of that one. I tend to purchase my Burlen SU parts direct from sucarb.co.uk A comprehensive website, even if a bit confusing at times. And no, I don't have a connection to the business.
-
My 1910 Mitchell "parts car" project
Bush Mechanic replied to JV Puleo's topic in Our Cars & Restoration Projects
Joe, that's a great dream to have kicking around in the background. Must admit to being a lurker on your thread, and enjoy watching how your brain works. It's solving the puzzles and making and rebuilding parts that make these old cars so appealing to many of us. Keep up the good work. Mick. -
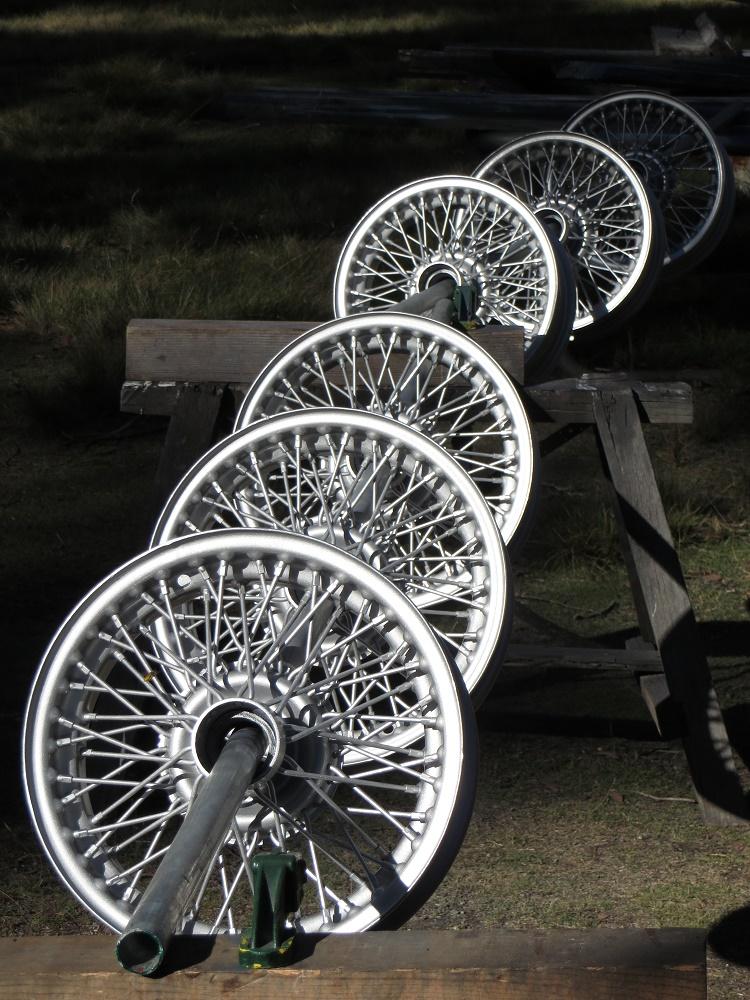
After sand blasting, I thread them on a length of pipe, about 3-4 feet from the ground. I leave plenty of space between wheels, as it is difficult to see every angle around the spokes. 2 coats of primer, and 3-4 careful light coats of acrylic enamel, rotating the wheels as I go. I leave the inner rim to last, to avoid finger marks. Patience is required to get an even gloss finish. The general opinion locally is that powder coating is fine for show cars, but inclined to chip with road use, especially on unmade roads. I have not tried powder coating myself, so cannot offer an opinion on that.

-
1930 Chrysler 70 rear axle pinion seal leaking.
Bush Mechanic replied to siddha's topic in General Discussion
Steve, it looks to me as though the nut should be tight, as the inner races are located with a distance tube. These tubes can have removable shims to take up slack in the bearings, probably at '46'. Removing shims tightens the bearing, and they could have a pre-load value. With luck, the Chrysler boys will chime in with more accurate information. The nut would need to be fairly loose to leak oil with a newly fitted modern lip-seal, assuming that the shaft is in good order. Do you have a workshop manual for the car? -
I wonder if he has any problems with bump steering?
Bush Mechanic replied to auburnseeker's topic in General Discussion
Many years ago friends visited in their Triump 2500, and we parked it in the workshop, out of the rain. When they departed, loaded with children etc, it sat mighty low. He gave it a big farewell rev and shot out across the rain gutter, and bang! It sounded like the rear had torn out of the Triumph. My concrete floor still bears the scars of the tow-bar on that thing. -
Got an old photo of you as a kid next to a car?
Bush Mechanic replied to Lebowski's topic in General Discussion
We did not own a car when I was a child, but we always had trucks. I trust it is OK to show one of them. I'm leaning on our Morris Commercial, en route to a horse show in Adelaide, a trip of 250 miles. Throughout my childhood I mainly rode on the backs of trucks. With 7 kids, there was little room in the cab. This would be around 1960.
-
In France the tyre quote does not include fitting and balancing. I went down that road 3 weeks ago. The 'extras', fit and balance were EUR 18.00 per corner. Motor-home tyres. Car tyres may be less.
-
Thinking about it, and the penny dropped. The rebound straps are likely the key to the problem. When you compress the suspension to attach the rebound straps, you will have an opportunity to start the hangers going down their correct path. At least with a bare chassis there will be no need for 6 bags of cement in the boot, in order to lower the body enough to connect the rebound straps! (Although that method is probably safer than using a large clamp).
-
Looking good. You have to love a fresh, black, rolling chassis! Those short MG spring hangers can be tricky as you gradually load the chassis with bodywork, tank etc. By then they are out of sight, and sometimes tend to hinge upward, or lock in the straight position, rather than hinging downward. I have found the need to lever them down and slip in wooden wedges until they sit correctly under load. Just something to keep an eye on, that you are most likely aware of. Have not done a TD, and quite possibly they have a lug to stop them turning up the wrong way.
-
Spinneyhill, you are right regarding the spray nozzle. It sprays in a 360 degree pattern. You slide the spray nozzle in to the end of the chassis cavity, then withdraw it slowly while spraying. The modern fish-oil based products dry to leave a waxy coating. Popular in the UK, but I cannot recall the name of their product, or the Aussie version, and I'm not at home to look on the shelf. Lanolin based would be excellent, and would emit a less offensive smell than the fish-oil products. The heavy oil that Roger applied will be better than a poke in the eye with a burnt stick.
-
That red spray grease looks like a good product. I use a fish-oil based product inside my restored chassis, AFTER all of the paint is done. Dedicated air gun with a long thin hose tipped with an adjustable spray nozzle. The part I don't enjoy is drilling fresh access holes in the bottom of the chassis cavities. Some chassis have enough holes from the factory. Heat the fish-oil to reduce it's viscosity. And we've all heard about the guy who pumped 4 gallons of used sump oil into his E- type Jag chassis. There was a hole opening into the floor behind the seats....
-
Why does my 1929 Cadillac ride so poorly?
Bush Mechanic replied to Matt Harwood's topic in Technical
Matt, I hope you had some joy with your spring problem over the weekend. Did the leaves seperate when the load was removed? I was surprised to notice the following in the owners' handbook for my '23 Metallurgique. 'After renewing the engine oil, take a coarse brush and apply the used oil liberally to all of the road springs'. So, in the era of poor and dusty roads, oil was regarded as acceptable for leaf springs. Not sure if yours have wrappers, keeping the leaves aligned, but if so, they can be bent outward, then clamped and tapped back into placed. Most likely a more sofisticated method was used to keep them straight, though.