


Riviera63
-
Posts
1,797 -
Joined
-
Last visited
Content Type
Forums
Gallery
Events
Posts posted by Riviera63
-
-
If this helps, here are some pictures of the horn relay on my 63 with wires attached. I have added 4 note horns to my car so the wiring looks a little different. The brown wire was there originally as in this picture. Because I added the 4 note horns the wiring changed slightly. Ignore the green/white stripe wire and the black/white stripe wire. What would be plugged in that spot if you have only the stock horns would be the blue wire which came from the the horns. You can see the blue wire in the first picture. The wire colors may be different for 1963 as opposed to a 65, I don't know. The positive and starter cables are the same as in Ed's picture. I just have them under a rubber cover.
Bill


-
I just got my latest issue of Hemmings Classic Car Magazine. It has a very nice 1969 Riviera on the cover with a feature article in the magazine. If you don't subscribe to this magazine this might be a nice issue to pick up. Especially, if you have a 1969.
Bill


-
 2
2
-
 1
1
-
-
29 minutes ago, Red Riviera Bob said:
Scott, there is a product you rub in the exhaust manifold to keep the color right. I’ll send the name of the stuff in a pm.
red Riviera bob
Hi Bob,
I think there might be others that would be interested in this product, including myself. Please share with us as well. Thanks.
Bill
-
11 hours ago, Seafoam65 said:
Another very interesting picture in the article shows where Buick put the tire iron from the factory on the cars with the
spare tire in the main trunk area and not the front shelf.
Here's that picture.

-
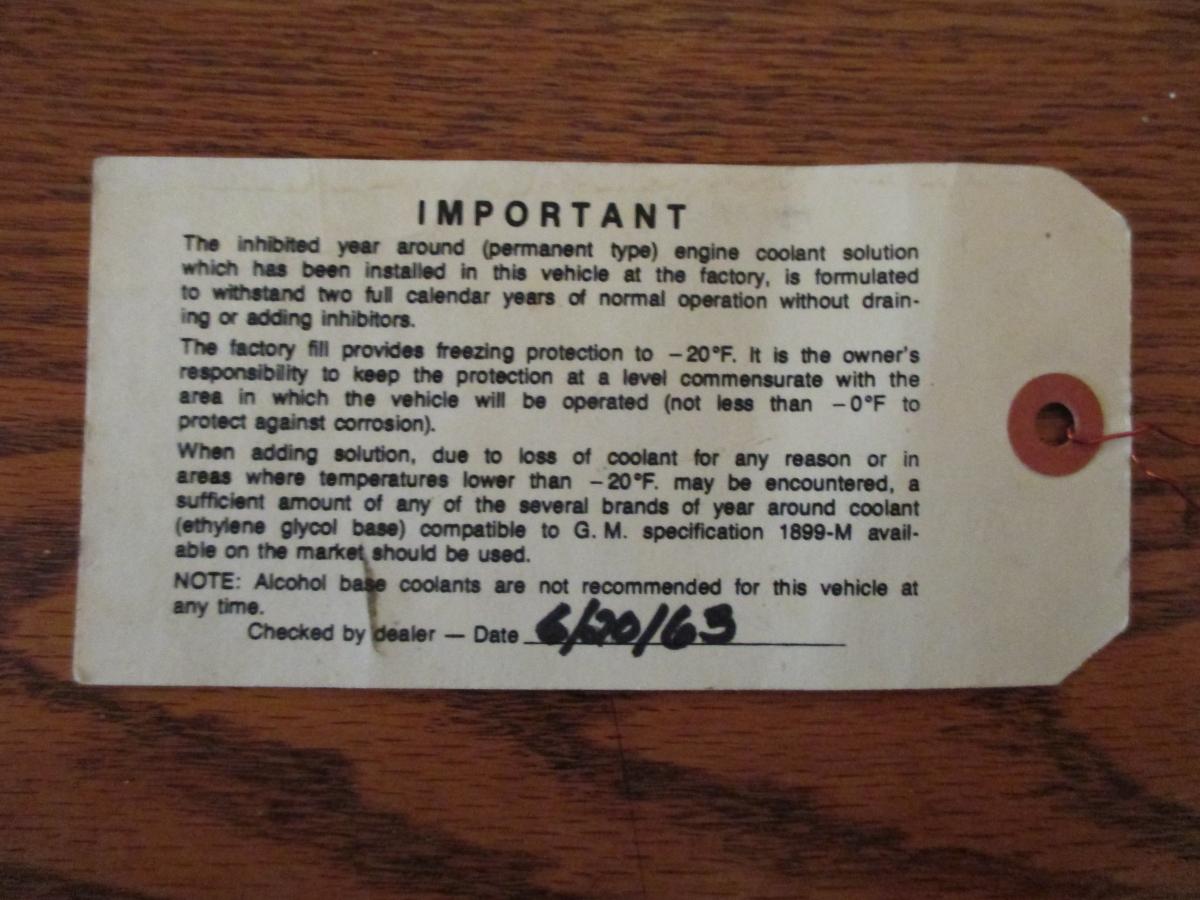
2 hours ago, Seafoam65 said:
I have been noticing tan colored tags for sale on ebay for 60's buicks that give instructions
for maintaining the coolant in the radiator. At the bottom is a blank where the date the coolant strength
was checked during make-ready at the dealer could be written down. My first inclination was I was
skeptical that these were actually put on early Rivieras. These tags were supposedly wired to the radiator neck below
the cap. Then today I was looking at an old Musclecar Review magazine from a few years ago and low and behold they
had an underhood shot of a brand new 63 Riviera being tested for a car magazine. In the picture, the hood is open and
the magazine tester is removing the air cleaner to get a shot of the carb and intake. I fell out of my chair when I immediately
spied the tan tag under the hood, identical to the one being sold on ebay.........But it was not wired to the radiator neck! Instead,
it was wired to the radiator overflow hose halfway between the radiator cap and the battery. It was perched right on top of the radiator tank
and the end of it was slightly draped over the radiator support. After seeing this pic, I'm going to put one on my car in the exact same spot....
very cool!
UPDATE.........I found the picture on the internet.......to see it google search: Buick Riviera road test 1963 Flickr. The whole article and all pics are there,
very interesting read. there were some mistakes, like the statement that you could not get a leather interior.
Winston,
Is the tag like the first one I have pictured? This is a tag I had been using for years on my 1963 Pontiac before I sold it and now on my 1963 Riviera. I had found out years ago that these were used on the 60's Pontiacs and attached as you said to the radiator overflow hose. I assumed it would have been used on the other GM makes as well. I have seen these sold through various vendors such as Jim Osborn and Ames Performance. I have also pictured another tag that I do not use that I picked up somewhere along the line. Where or when I don't recall. I would have to think that it would have been advertised as used on 63 GM's or I would not have purchased it. Maybe someone on the forum will recognize this one and what its application is.
Bill
P.S. I just happened to have that Motor Trend magazine. The tag picture attached.


-
5 hours ago, pyntre said:
I searched , but came up empty on a tutorial on how the wire caps come apart, and go back together for cleaning and polishing ... I am leaning more and more on using mine instead of spending huge money on restoring my road wheels !
I wish I had known I could have taken pictures of mine apart and as I reassembled them. Once you have done it is really quite easy. I'll try to give a quick tutorial. Flip the cover over. At the very center you will see 4 hex head screws (possibly 3 if you have early 63 wire covers). Remove those screws and that will release the spinner. The spinner will contain the plastic center medallion which is removable for cleaning or replacing if it is bad. Flip the cover back over. With the spinner gone will allow you to remove the 1st set of wire spokes. Pull up toward the top and it should release from the chrome center piece. Once the top is out you can pull the spokes out at the bottom where they fit into the wheel cover disc. You may have to do a little twisting to get them to release at the bottom. Flip the cover back over. You will see 8 (or 6 if an early 63 cover) hex head screws. Remove those. Flip the cover back over. With the screws out you can remove the chrome center disc. Once that is off you can remove the second set of spokes as you did the first set. All disassembled. You can now wash, polish and wax everything. If the flat black area is worn you can repaint. Assemble in the reverse order. After you do it a couple of times you can do this whole process quite quickly. I always save this for a cold, winter day when there is nothing to do. I will dig out my spare cover and disassemble it, taking pictures. I will post shortly.
Bill
P.S. Let me know if you need any other pictures or clarification.


-
1
-
1
-
-
13 hours ago, kegart said:
Do you have a white interior?
Yes and no. My car originally came from the factory with the 726 Silver interior. A previous owner had recovered the seats in white leaving the door panels silver. I am pretty much a stock purist and think that the seats should be recovered in the silver. That being said I have been told by someone in my household that they would kill me if I recovered the seats in silver. I am also hesitant to replace perfectly good upholstery with new. I do receive many compliments from people at shows on the white, black and silver combination. Most people don't know that it is not technically correct. Truth be told, I kind of like it too.
Bill


-
Thanks for the compliments guys. I really appreciate them. I got the wire wheel covers done and on the car. We are ready for cruising.
Every year I struggle with the question of whether or not I should go out and get a set of turbines for my car. I like many of you love the turbines and appreciate the unique look they give our Rivieras. I tip my hat to the guys that spend endless hours bringing a set of turbines back to life. I never can quite pull the trigger on buying a set. The money I would have to pay does not bother me. As I was putting the wheel covers on my car I realized why I never go out and get those turbines. I just love the look of my wire wheel covers too much. It happens every year and this year was no different. When I put those freshly cleaned and polished covers on the car for the first time in the spring, I step back and go "wow" those are some great, classy looking wheel covers. They fit the look of the Riviera so well. In my mind I don't think a set of turbines is going to be that big of an improvement, if any, over the way those wire look on my car. I think that Buick hit it out of the park with both sets of covers and you can't go wrong either way.
Bill


-
2
-
 1
1
-
-
The last of the 30+ inches of snow we got in April is finally gone and the weather has warmed up so that a young (or old) man's attention can once again turn to cars. Winter has been declared officially over in central Wisconsin as the Riviera is out of hibernation. Started right up and I took it for a drive to get everything hot so that I could replace the transmission fluid that had burped out during storage. I just have to finish cleaning, polishing and waxing the wire wheel covers and we will be ready to go. It seemed as if this day would never come.
Bill


-
3
-
-
On 10/2/2017 at 4:45 PM, Red Riviera Bob said:
I ordered three Lisle pans. When they come will we a pic.the Price was low so maybe I'll get a weak product. We will see
Bob,
I got the Riviera out of winter hibernation yesterday. Attached is a picture of the the pan I had under the car during storage. It had burped out some fluid after sitting all those months. The drip pans as you probably found out make this a quick clean up and a very minor annoyance. I took it out for a drive to get it good and hot and topped off the transmission fluid. It took 10-11 ounces and we were good to go.
Bill

-
Got the Riviera out of winter hibernation yesterday. Attached is a picture of the fluid that burped out of my transmission. Of the 4 winters I have had my car stored for an extended period without starting This has happened twice. The 2 winters previous to this it did not burp out any fluid. As several people have stated a drip pan makes this a quick clean up and a very minor annoyance. After a drive to get everything good and hot it took only 10-11 ounces to top it off and we were good to go.
Bill

-
2 hours ago, pyntre said:
Anybody in the Minneapolis / St. Paul area that REALLY knows how to put a new one in ????? Got it hanging and centered ,, seems to be more than a one man job !!!!!!
My brother-in law and I did the one on my 63. I could never have done it alone. An experienced upholstery person may be able able to do it solo but, I would opt for another set of hands. The instructions for installation are in the body manual for the 63. They were helpful.
Bill
-
2 hours ago, Chasander said:
Is there a source for the correct silver headliner for a 63? Clarks says theirs will have a slight ripple effect or they can paint a white one. Not a problem if there aren't any available.
I got my silver headliner from CARS, Inc. but it came from Clarks. Very happy with it.
Bill
-
Just a continuation of the previous post as I was only able to add 3 pictures for some reason. Funny, the PF 30 box in the first picture does not list Buick but probably does in the catalog. The second picture shows an original PF 7 with the nut and the 3rd picture is of a repro PF 7 filter.
Bill


-
1
-
-
9 hours ago, Rivman said:
Isn't the PF 30 slightly taller than the PF 24? Otherwise the same, diameter and thread and gasket size?
It has been a while since I was working with them regularly, but I think that is right.
That might give you the "slight capacity difference" you are looking for?
The PF 24 and PF 30 are identical as far as I can see. I have used the PF 24 interchangeably with the PF 30 for years on my Pontiacs and now the Riv. They are making reproductions of the PF 7 which gives you a little over another inch in length. The repros don't have the nut on the bottom like the originals.They are pricey as well, $30.00 on up. The originals can still be found but, are even more pricey. I believe the PF 7 held a full quart of oil. Here is a list of other filters I have found over the years at swap meets, Goodwill, or garage sales that also cross with the PF 24. These were/are very plentiful as people transitioned away from the cars that used them. They had these on the shelf and then finally would get rid of them. My step dad was a faithful scrounger of Goodwill and St. Vincent De Paul. He would always be on the lookout for oil filters for me. Every time I would go home he would have a bag of filters for me.
Lee LF 24, Motorvator MP 5, Purolator PER 33, Pennzoil PZ 2, Hastings 222 and Wix 51258
Bill


-
1
-
-
34 minutes ago, RivNut said:
Question for which there may not be an answer. Is there a quality filter that is a longer filter thats is the same diameter and will screw onto the filter housing? It might make a slight difference in the amount of oil the crankcase would hold but it would have that much more area of filter material.
There is at least one answer but, probably not practical as I am sure they are scarce.The AC PF 7 which was the original filter that was on some 60's GM cars when they were new. Many years ago I was having some work done on my 1963 Tempest convertible. Ed (no relation to the questioner), the mechanic that was doing the work was an older gentleman. I told him that as long as he had the car to change the oil and give it a lube job as I was pressed for time and wouldn't have time to do it. When I picked up the car I noticed it had a new PF 7 oil filter on it. I asked him where he found that. He said he had 2 or 3 cases of them upstairs in his shop. He had picked them up years before. No extra charge for that. I hung on to that filter for many years after I took it off just because I thought it was such a cool thing he had done.
Bill
-
1
-
-
9 hours ago, 68RIVGS said:
I have always used AC Delco PF-24s = fresh oil and a new filter every season, whether it needs it, or not !
If you are thinking AC Delco the PF 30 is the equivalent of the PF 24. I know that saving a few dollars should not be the only driving factor for buying oil filters. However, if you can save a few bucks, why not? I have picked up many of these through the years at swap meets very cheaply for my Pontiacs and now the Riviera. Vendors will price the PF 24 quite high because they know that they are a popular filter with the vintage car crowd. Many of them do not realize that the PF 30 is the same filter and they price them to sell because they just want to move them. I picked up several the BCA meet this last summer for very little money.
Bill
-
5 minutes ago, Adambravo said:
So, I picked up what I believe are a set of base wheel covers (see photos), for a different look than the wire wheel covers it came with. The notes in the owners manual have me a bit confused (see photo); any tips/tricks I need to know before I start anything?


What you have pictured that you are going to put on are the standard wheel covers. They go on and remove just like any wheel cover that you are used to. The 2nd listing is for the cast aluminum covers. Which are actually bolted to the wheel./rim You have to remove the center spinner to access the lug nuts and remove the wheel/rim. Then you unbolt the covers from the back of the wheel/rim. Make sure you actually have wire wheel covers before you try to remove your covers. If you have the cast aluminum you will break them if you try to pry them off like a normal wheel cover. The 3rd listing is for the wire wheel covers. These pry off like normal wheel covers. That being said be very careful when you remove them as they can be very stubborn. Applying too much force can damage them. I have found using a wider tool to remove them works better as it spreads the force to prevent damage. Avoid a tool with sharp edges. I have used a 2 inch wide pry bar with the edges/corners wrapped with duct tape. I recently purchased a wheel cover removal tool suggested by other forum members that works well. Be patient and be gentle. Also have a soft landing area under the tire as these are very heavy and can pop and drop when they do let loose if you are not ready to catch it. Hope this helps.
Bill
-
1
-
-
2 hours ago, PullmeoverRED said:
I was able to remove the shaft but how do i remove the switch from the console?
The following is from a previous post and you have already done some of it. The escutcheon is on the interior side of the console around the shaft of the light switch. It turns off just like a nut. As stated you need a screwdriver or putty knife to put in one of the grooves and lightly tap to turn it if you don't have an escutcheon tool. Once loosened it will turn by hand.
Open the ashtray/lighter door in the console.There are 3 screws holding the assembly in, remove the screws. That whole assembly will remove and the headlight switch is right there. There is a pushpin on the switch. Push in on that and you can pull the shaft out. You then remove the switch escutcheon. I did not have the switch tool so I used a putty knife to turn it. Once the switch is released from the escutcheon the switch drops down for easy access through the opening left by the ashtray assembly. I hope this helps.
Bill
-
1
-
-
1 hour ago, RivNut said:
I'm going to install a small electric pump like the one that was on my 2004 Jeep GC. It fits into a hole in the bottom of the washer bottle. I'll use the same wire that goes to the original pump to activate it. The thing I like about it is 1) it's not under the fender and 2) it shoots a stream rather than pulsing, 3) it will e out of site under the original bottle (which will require me drilling a hole in the bottom)
I have an electric washer pump on my car that was installed on the firewall by a previous owner. I love it for all of the reasons Ed said, it is not under the fender, it shoots a steady stream of fluid and it uses the same wiring. It is reliable and if it should fail it is very inexpensive to replace. I am pretty much a stock purist at heart but, in this case I will err on the side of ease of repair/installation, reliability and safety. It is small and not very noticeable. If I got ambitious I could move it to a location where it would be hidden. I have attached a picture showing mine. It is circled in red and the blue line shows the line going from the pump to the washer fluid bottle. Another line then would go from the pump, split and go to the chrome washer jets. The second picture shows this. I hope this is of help.
Bill


-
55 minutes ago, 1965rivgs said:
Rivieras go well thru the snow
Tom
Tom,
I believe you. I think I may have a problem getting it to the driveway and to the road though.
Bill


-
4 hours ago, Chasander said:
Hey Bill
Makes it a good time to do this.
Chuck

I hear you Chuck. I wish I had the space like you do to take car of things like that. Once upon a time I had a 2 stall, insulated, heated garage for the play cars. It was heaven. That really helps with cabin fever in the winter. I do feel lucky that at least I have a place on my current property to store it over the winter. It looks like you are really going to town on your Riv. Are you leaving it the original color and interior? I hope so, I thought the silver on silver was really sharp when I saw it in Flint. I can't wait to see the finished product. Back to the Bricks in 2019 is a possibility. Keep me posted on your progress.
Bill
-
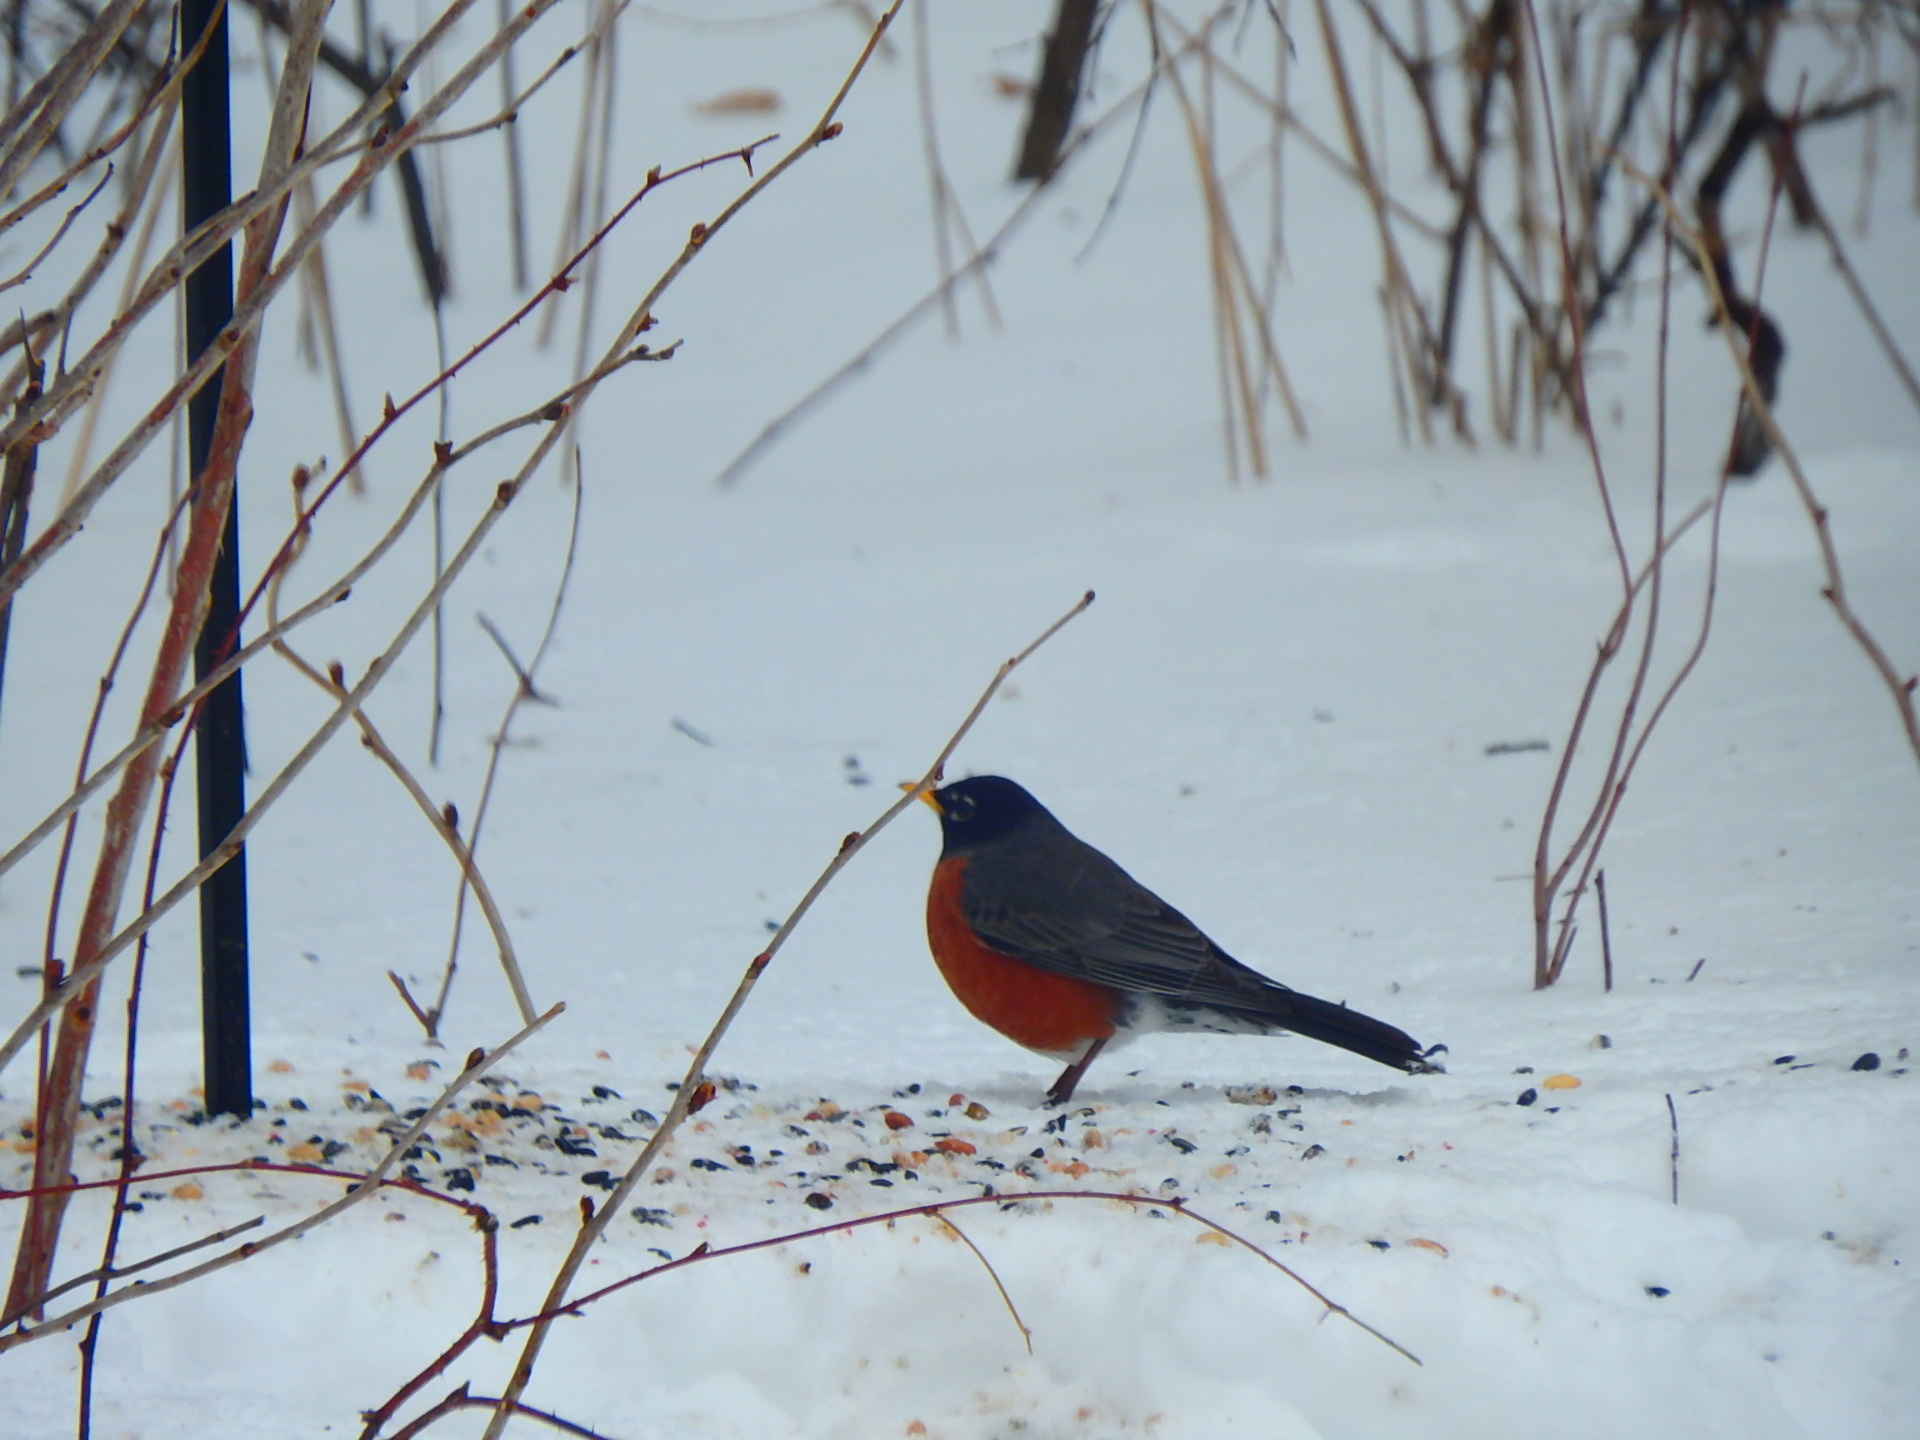
Our state bird is the Robin. They probably wished they had listened to their friends in Mexico and stayed a couple of more weeks.


-
1
-
-
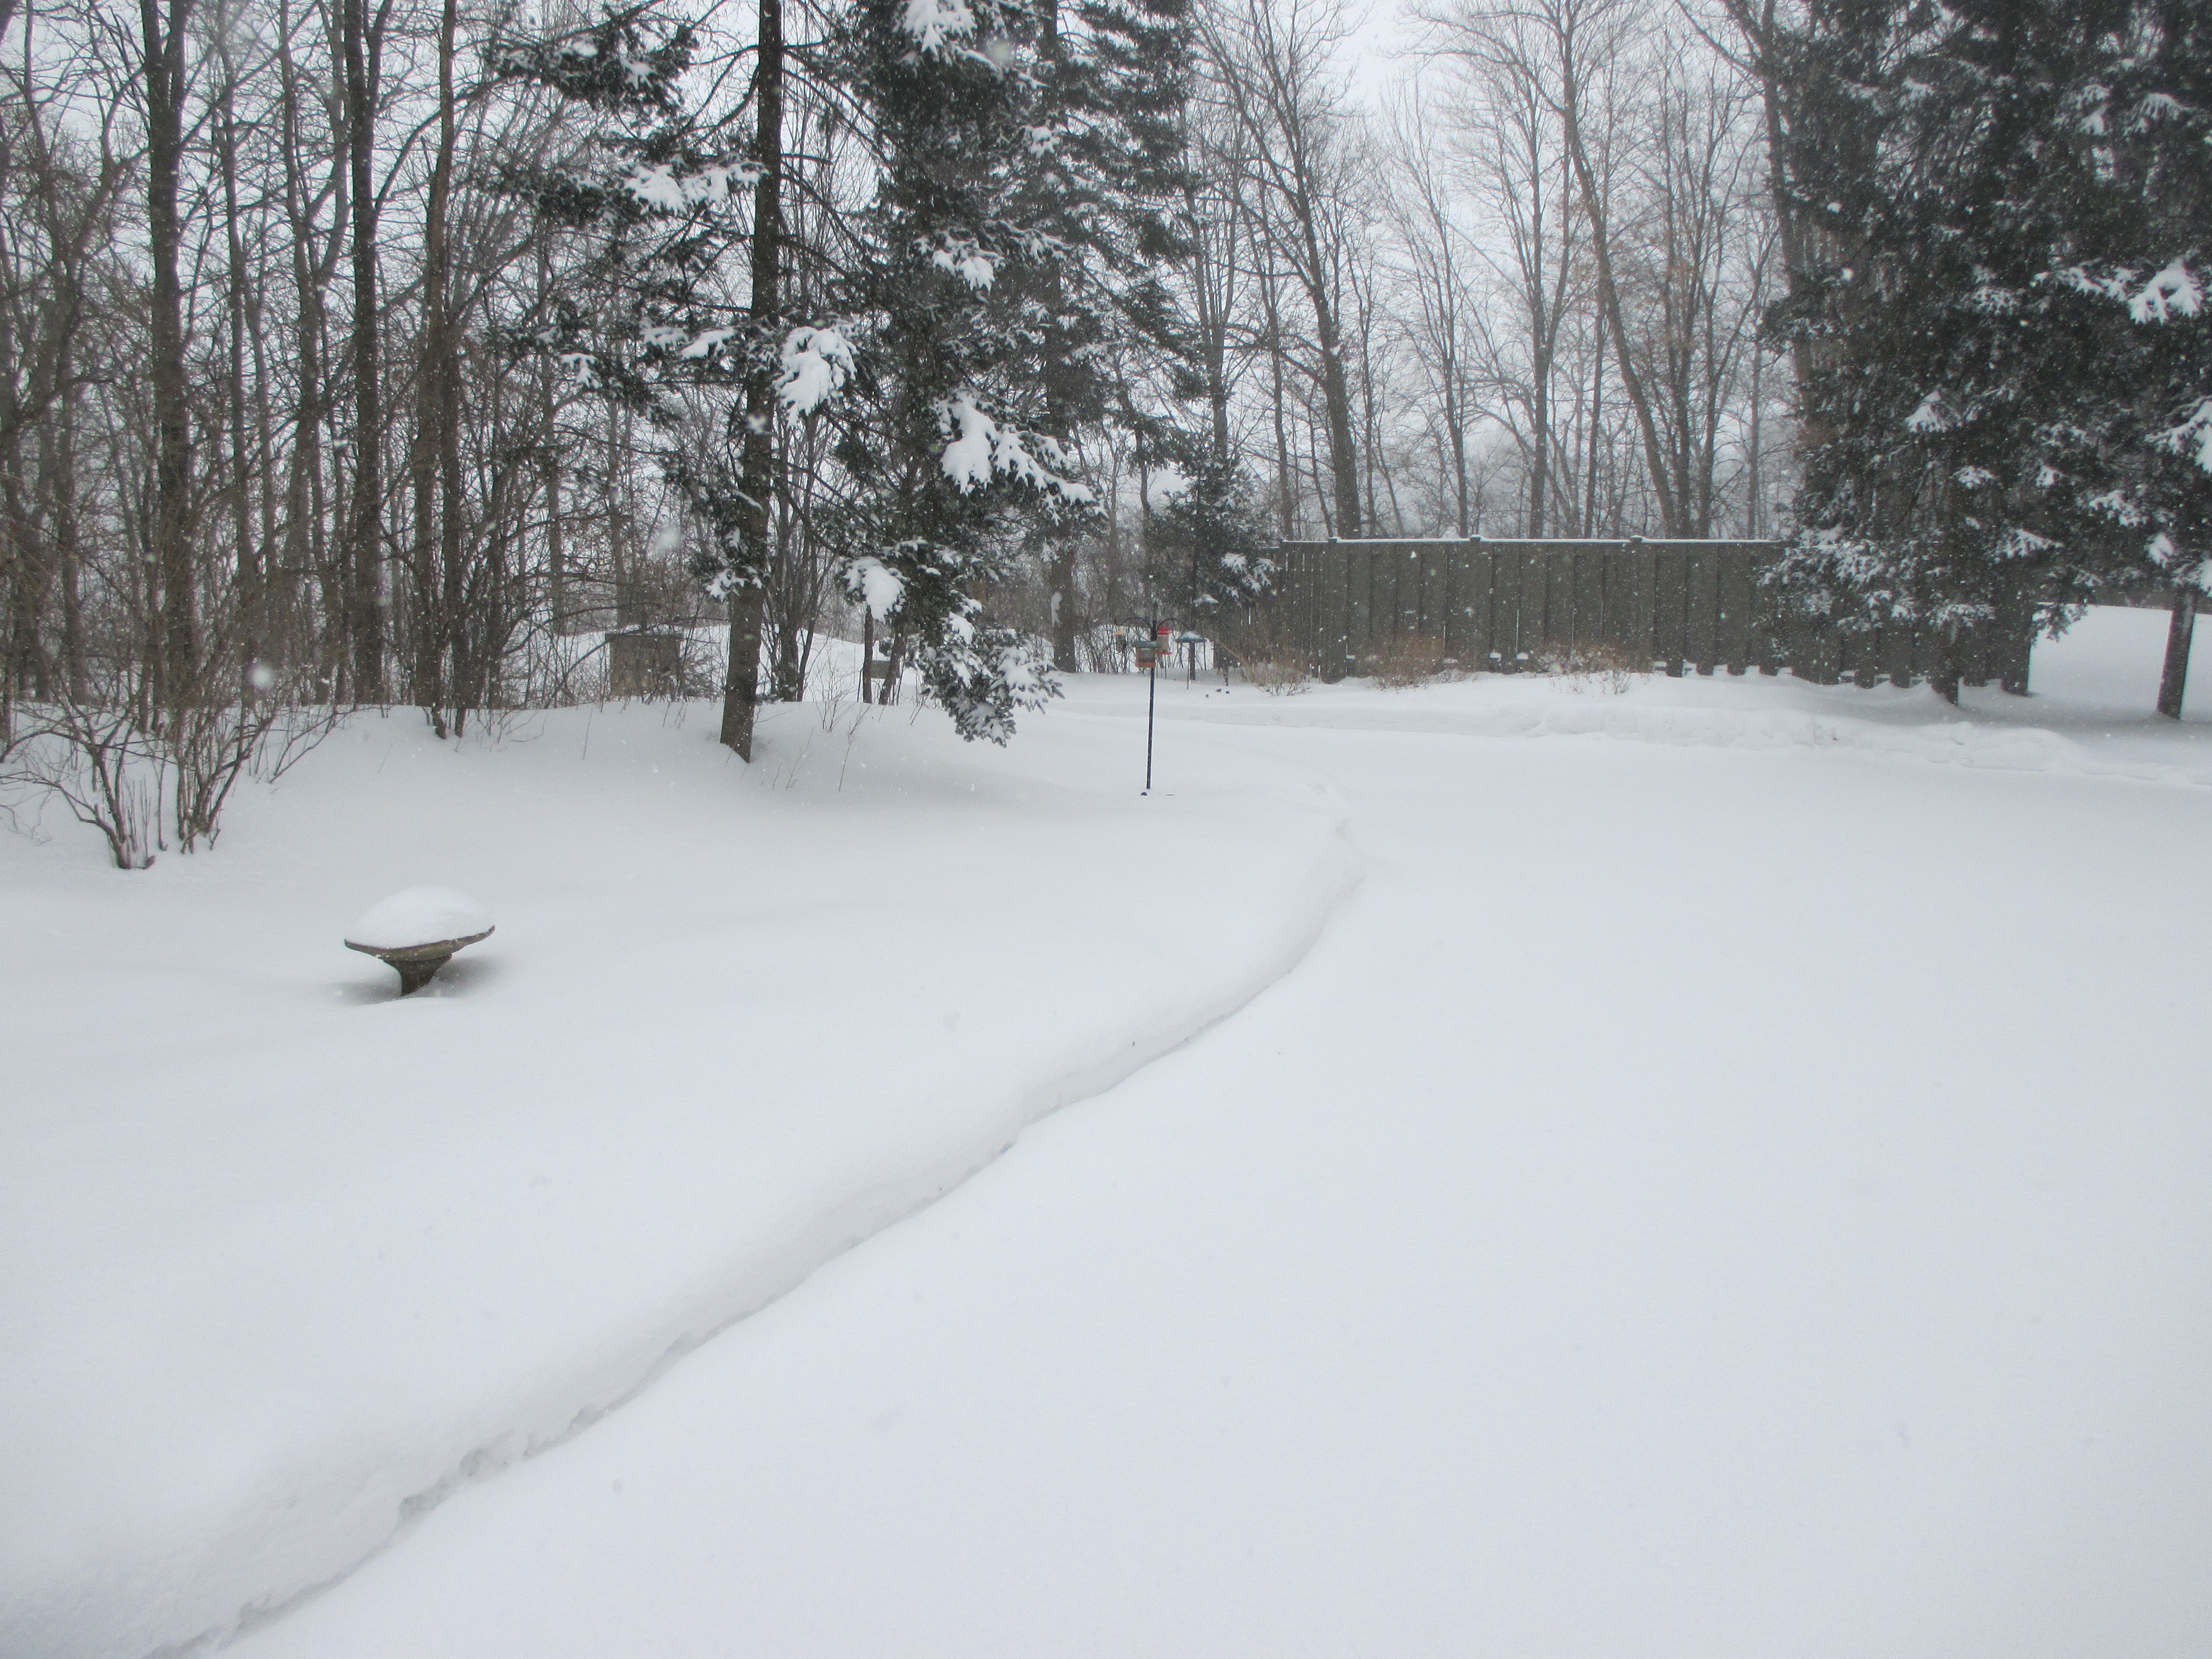
I thought I would share these photos with you. We are now approaching 20" of snow in the last 2 days. Snowfall records for April are being shattered all over the state. We are well over 30" for the month of April. My snowblower and I have become very well acquainted again. The Riv will not be coming out for awhile longer. I will have to live viCARiously through those of you in warmer climes. Take an extra drive for me. Hopefully, the snow will be gone in time for Overland Park.
Bill


Body ground
in Buick Riviera
Posted
Hi Scott,
I have been meaning to get some pictures for you and finally did it. I have a 63 but, I can't imagine they would differ too greatly. The first 2 are of the driver's side. The second 2 are of the passenger side. They both connect in the same relative spot at the rear of the engine. Where the passenger side connects on the firewall was hard to get a shot of. It goes straight back and down slightly and connects at the bottom of the flat part of the firewall just above where it begins to bend and slant back for the transmission. I hope this helps.
Bill