


hursst
-
Posts
1,599 -
Joined
-
Last visited
Content Type
Forums
Gallery
Events
Everything posted by hursst
-
Had my friends over today and was able to move the chassis to the back of the garage and reposition the body toward the front of the garage so the chassis would fit (Photo 1). From the looks of the photo, looks like zero progress over the last two years! Same exact thing, really. Now it's time to reassess the body and get it ready for final primer. There are many, many small areas on the body that need attention. The weld seam line on the inside of the body at the lower vertical rocket panel support is rough and will need more welding to make it more secure. I think I did and adequate job of welding from the outside of the body, but I need to do more welding from the inside on that same seam (the entire lower 1/3 of the inner rocker vertical support panel that I had to cut out). I actually got a lot of that work done today. There are many other areas, mostly underneath the cowl panel and around the upper trunk area, that need more attention. The places where I leaded, cut, grinded, and welded were never quite finished and there is now a lot of minor surface rust, grinding, a little welding of pinholes, filing of lead, and sanding of filler to do to get these areas acceptable. After that, there will be some rust inhibitor to add and some minor filler to make it reasonable before primer. Here's an area under the cowl panel that I cleaned up, but it will need a little more grinding to be flatter, then some rust inhibitor on the bare metal (Photo 2). This area would only be seen if you crammed your head down to the brake pedal and looked up, so just want to make it cleaner and prevent rust, not looking for perfection. The last area I have not touched yet. Probably the worst area for now, under the same cowl panel (Photo 3). Will need a good grinding and wire brush to remove the surface rust, then some good rust inhibitor to seal this area up. Again, it will not be seen, it will somewhat be covered by the upper chassis member and it will be toward the very back underneath the dash. There are about 10 more areas like this, although this one is the worst. The good news is, it is a relatively minor cleanup, since it hasn't been that long since I did the original repairs, so I should be able to blow through these cleanup areas quickly. I think I will end up doing much of the body primer piecemeal, starting on the good areas on the outside, so I can catch the good weather and keep the momentum going. I may just wet the floors and primer some of it in the garage, as moving the body is a huge hassle. I may also consider making a quick body dolly so I can easily roll it outside. I'm leaning toward the body dolly, as primering outside is preferred.


-

1923 Kissel Model 6-45 Gold Bug Speedster
hursst replied to ron hausmann's topic in Our Cars & Restoration Projects
True craftmanship there. You would make the original assembly workers proud. Great updates, keep them coming. -
Just some baby steps today. I'm a little limited on what I can do while the chassis takes up real estate below the body. First, I had historical remnants of what used to be body screws that attach the bottom portion of the front rear fender secure bracket. They had rusted so badly that I broke all the head off the screws when I first disassembled the car. I was able to back out two of them with pliers, one was just gone and replaced with new metal, and I had to drill out the last one (4 total). I will reuse 3 of the original 4 holes. I'll have to drill out a 4th hole in the new metal I welded in once I match it to the fender support bracket. I got some new screws that look correct and fit well (Photo 1) that will be ready to go when the 3rd and last round of body test fitting occurs. Next, I did some touch up welding, grinding, and rust inhibitor on the driver's rear body, which had some of the worst rust-out (Photo 2). After that, I collected up all the fender mounting hardware that secures portion of the fenders to the lower rocker panel. I will be able to reuse 95% of the original hardware. I also mixed in new hardware that fastens the lower trim pieces to cover the fasteners, spot welds, and general sloppiness of the lower rocker panel area (Photo 3). My original hardware was 95% disintegrated for the trim pieces. I will just use new hardware for all of this as the new hardware is of a slightly different design, due to lack of use of welded captive nuts on the inside of the body. (Photo 4) is a photo of the new trim pieces I bought from Moss. I will have to clean and primer them to prep them for eventual painting in body color.


-
Got the body off the chassis today by myself. Used my engine hoist and a little back and forth by hand, then some slow pumping of the jack and was able to get it clear (Photos 1 & 2). Next step will be to roll out the chassis, move the body up toward the garage door to make more room, then roll the chassis to the back of the garage. Now that I see the work I did on the body up close again, I see that I will probably need more work on some of the grinding and welding of the lower rocker support panels. There are many portions of the butt weld that aren't really welded together as seen from the inside of the body, although the welding I did on the outside, hidden by the outer rocker panels had good coverage and seemed solid at the time. I'm going to get an expert opinion from a friend. I think the welding is strong enough, but is sloppy and looks a little incomplete. I think my welding skills are better now, I think I may be able to touch it up and do a better job at it. Just have to be very careful about grinding down my bad welding and applying any new welding, not to heat things up too much as not to warp anything. There are also lots of small spots all over the lower body and trunk area that need more work, so hopefully I can get all the metalwork done by May when the nice weather and lower pollen is here and I can get busy with the final coats of primer.


-
1956 Chevrolet 1/2 Ton Panel Truck
hursst replied to Model56s's topic in Our Cars & Restoration Projects
This is how almost every part on all my cars goes, so you're shooting par. They never thought anyone would be redoing these cars and didn't design in restoration friendly engineering. It will be worth it in the end, think of the knoweldge and expertise you gain. Keep up the good work, can't wait to see this truck in its various stages. Although utilitarian, it's one of my favorite designs. -
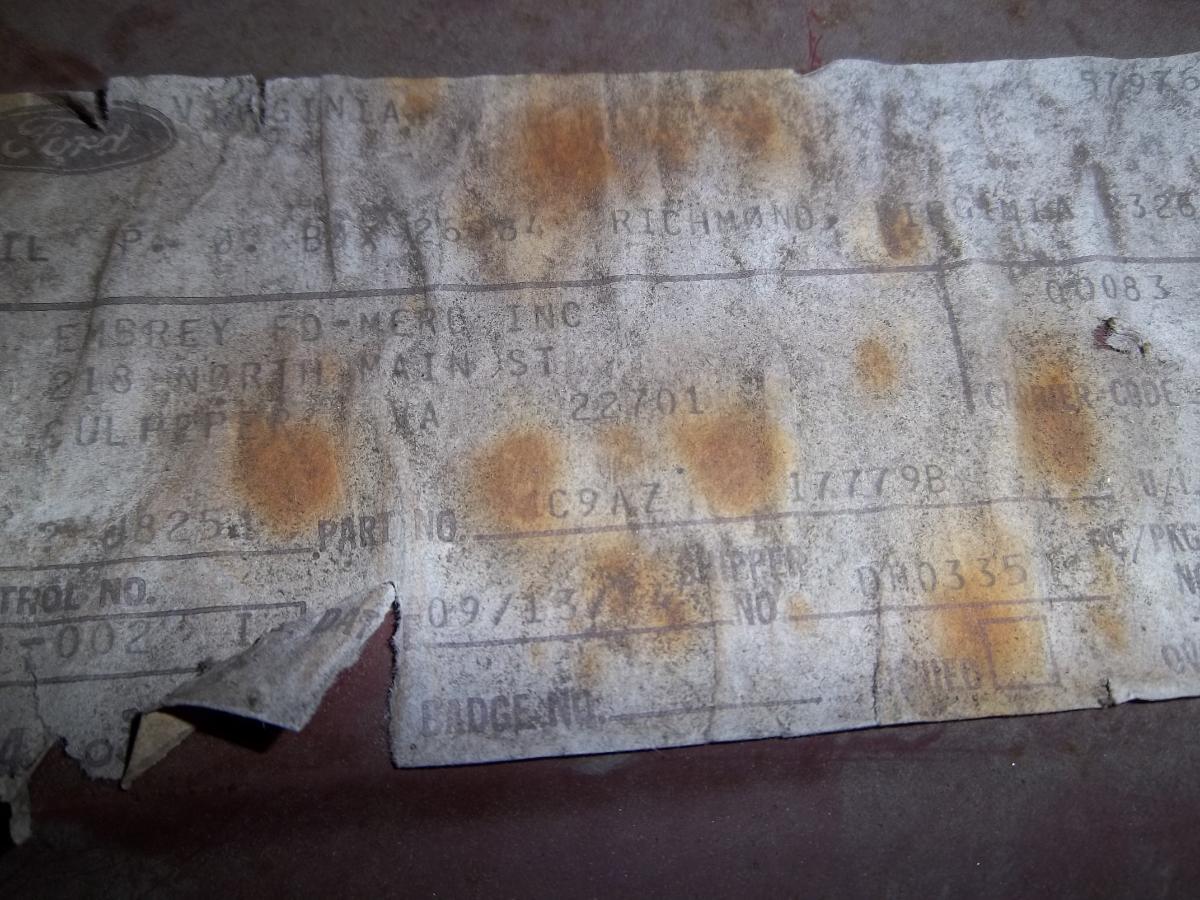
1969 Ford Galaxie, Custom, Custom 500, XL, LTD Bumper Stone Deflector. Part is NOS! Part number C9 AZ 17779B. Piece is very long, so local pickup is encouraged (Dale City, Virginia) or I may be able to deliver within 100 miles, or so, of Washington, D.C. for a reasonable cost, or for free to various Carlisle, PA events, otherwise, shipping may be very expensive. Asking $100 + shipping or make me a good offer. Looking to get rid of it; nice piece, but I don't own a Ford.


-
1951-52 Dodge Radio Delete Plate. Plate is original, in used condition. Plate is in very good condition, but does have some paint that has flaked off the rear, which shows thru the front. Could be stripped and repainted for perfection, or could probably be touched up. Comes with original mounting hardware as well. $25 + shipping or make me an offer.


-
My list of cars - How do I delete and add.
hursst replied to Dynaflash8's topic in General Discussion
Good post, I had forgotten completely about my profile and this was a good reminder. I went in and updated and added to my profile, thanks to this posting. -
Started lifting the body off myself, since I had a little time today. Got it about 6" off the chassis all told by doing a little lifting and putting wooden blocks under it a little at a time. If not anything else, it will be even easier for the 3 or 4 of us to get the whole body off. At this point, I could probably use my engine hoist to gently raise the front of the body up and clear the chassis and engine, then put my 2x4 wooden braces underneath on a pair of sawhorses, then lift the rear of the body up manually and brace that as well. The chassis will roll right out under it (easier said than done, since the front driver's side tire innertube has a blown out inflation valve). We'll see what comes first, availability of helpers, or some more time available to do it myself.
-
Today, got all the body panels off the car as well as all the body mounting bolts. Body is ready to be lifted off the frame again (Photo 1). I should be able to line up some friends to help in March. I may attempt it by myself, slowly and methodically, if I can't get the other guys to help in a reasonable time, but we'll see. I took it off by myself originally, so I know I can do it, but now the car is nicer, so there is much more risk of damaging something.

-
Jim, not yet. I'll add it to my to do list. Thanks.
-
The slightly longer days and slightly warmer temps are just enough to get me out in the garage during the week again, so got about an hour out there today after work. Fit the front valance panel. Pretty easy, not much concern about fitment, since most of it won't be seen. Ended up fitting quite well anyway, although I did have to bend it slightly to get the curve of the valance to fit the curve of the body and fenders. I look at the finished product and I think "meh," but then I do a before and after compare, and I've really come a long way from the dented, torn, rusty piece of garbage with which I started. Really glad I was able to save this panel, as I know a repro panel would be much easier, but I know it would fit like (censored!). This original panel fit just about perfectly, as one would expect.


-
Today, worked on the fitment of the driver's side rear fender. Still needed a little more bending, hammering, cutting, filler, and sanding, but I think I'm finished with this round of fitment. Gaps are okay at this point. Here's a couple photos of all the main panels on during this second go-around of fitment (Photos 1 & 2). I still need to fit the front lower valance panel, which I may do later this week. I think the next step should be to blow the car up again, take the body off the chassis and finish putting primer on the body. I'll still need to put more primer on all my recent repairs on the fenders as well. I'm sure I'll need a lot of minor bodywork all over the actual body, but much of it will be unseen, so I should be able to complete the refinement quickly. The portions of the body that will be exposed should be in reasonable condition at this point, and just need some good solid layers of primer to sand down. While I'm taking off the body, I do have some body to chassis fitment issue with the bolt holes lining up, so I will probably try to figure that out first. After I primer and sand the body, I will reassemble everything again and apply all the hardware, line up the panels again, and drill the holes I need for all the fenders and for the lower valance trim. I'll also try to rough fit the windshield, the grille, and maybe a few other parts to make sure they don't need further adjustment. I'll do the final check for everything, then it should be ready for paint.


-
Good day today overall, but three steps forward, one step back. First, I gathered up all the remaining rusty hardware that didn't disintegrate or get destroyed by me cutting it up to get it off, for the front and rear fenders and trim hardware for the rocker. I took each piece and soaked it for 3 days in Evapo-rust, then cleaned them to bare metal with a wire wheel or Dremel grinder, depending on the piece. Here they are in bare metal (Photo 1). The fenders' attachment to the rockers and the trim piece that goes on top's attachment to the rockers were originally secured with a curious mix of bolts, lock washers and captive retaining nuts, as well as regular nuts. The amount of work involved with trying to locate and weld in captive nuts and their respective retainers is just not worth it for something that can't be seen from the outside of the car, so I will just use regular nuts, bolts, and washers (both original and new). Part of my edict with this resto is to reuse any original parts, if at all possible, so I'll reuse this hardware and buy new for the rest that is missing. I guess this is also the "greenest" way to restore, by not wasting anything that can be safely used again. After cleaning these up, I sprayed them with rust inhibitor. I'll put them in rattle can etching primer tomorrow. I moved on to the driver's side front fender. First, I sanded down the filler I used to smooth the area where I welded the crack up (waste of time, as we'll see later). I then test fit the fender. Did not fit well at the bottom, as there was too much garbage welding material on the back of the fender from where I did the patch panel, and the end of the rocker panel has too severe a curve, which has the effect of jutting out a little and rubbing on my garbage welding junk, so the bottom of the fender stuck out about 1/4" from where it should be. I have the inverse problem on the other side, the curve of the lower fender is not severe enough, leaving a gap there as well. I think I can bring it in when I bolt it in, but I'll have to try a few more things with it. Back to the passenger fender, I took a grinder to the back of the fender, then did some cutting and hammering to the edge of the rocker panel. Had to go for about 5 rounds, as what I thought would be enough was not enough, so I had to keep cutting and shaping. Eventually, I got it pretty much spot on. After that, I noticed that the angle of the lower fender lip, where it bolts on to the rocker, was not severe enough, so I had to bend this lip about 5-10 degrees down, so that it would be roughly flush with the rocker so I can get a good connection when I bolt the works together. At that point, the fender fit quite nicely and the panel gaps lined up "factory good enough" after that, so I was pretty happy there (Photo 2). Unfortunately, the bending of this lip resulted in cracked filler and primer, which I expected, so I will have to grind the lip back to bare metal and refinish with some more filler to make it nice again. I will need to clean up the back of the fender and seal it to protect against rust, before I hit it with more primer as well. I will also have to do the same thing to the edge of the rocker panel to clean it up a little (it can't be seen from the outside when the fender is on it). Those repro rockers are garbage, too wide, curve not nearly severe enough, not bent properly. Needed tons of work, and I'm still having to do work on them now, and I know I'll have to do a lot of finishing work on them to make them perfectly contoured as I finish the body work on the actual body. The last step with the front fenders will be to drill holes (the very front holes remain original, as I was able to save that metal). The rears have holes already from the repro panels. I will then have to drill holes in the center lower rocker panel lips for the trim attachment hardware. I've noticed that about half of MGA owners who have restored their cars tend to leave the long trim piece that covers all this up off the car for some reason, so I was able to collect many photos from others' cars that I will use to recreate mine. I also think I have some measurements I took from my car before I cut all the cancer out 5 years ago, so I'll have to revisit my disassembly notes. Tomorrow, I'll work on the driver's rear fender again. Got it fully fillered up and rough shaped, just need to do the final sanding. Same thing with the passenger door, put some filler on the edge to make it straighter; will need to sand that as well. It only needs maybe 1/16" at most and I think it will be fine. Have a good weekend.


-
1956 Chevrolet 1/2 Ton Panel Truck
hursst replied to Model56s's topic in Our Cars & Restoration Projects
Great work and great posts. I love your truck, can't wait to see the progress on the resto, and hopefully, see the truck in person, if you take it to any shows. -
Thanks JV, your mother was very wise!
-
Made it out to the garage in the cold this weekend. Worked on the panel fitment on the passenger side some more (Photo 1). I think I got it about right, although I do notice a slightly wider area in the gap on the back of the door, which I will address. Not quite good enough. I then moved on to the driver's side rear fender. This fender is kind of a mess, since it's the one that was crushed by something at some point. I found another low area on the top of the fender, so redid this area (Photo 2). I then test fitted the panel again and found a pretty large problem with the fitment of the bottom corner of the fender, where it meets the door and the outer rocker. Since I had to replace the outer rocker with a repro piece, and I had to replace the lower fender with a repro patch panel, fitment is not going to be good. The edge of the panel did not quite come up far enough to clear the lip on the rocker panel, so I had to bend, hammer, and reconfigure this area so I could get it to fit around the upper rim of the rocker. This was a lot of work. Luckily, the area that I had to butcher at the top will be covered with a separate inner door post panel, so I am only concerned with the portion below the indentation on the fender. So, I roughly shaped it, then covered the area I had to bend (on a weld joint, nonetheless) with lead (Photo 3), since I created some small voids, filed it smooth, then covered the remainder with filler (Photo 4). I should be able to sand most of the filler off, the lead turned out fairly well. I fitted the fender, but it will need a little more work at the curve of the fender where it meets the door, as the gap is too wide there, but looks okay on the way up to the top. The more I look at it, the more picky I am getting with the door gaps, but I'm still shooting for "factory" not "concours perfect" gaps. This is all progress, but it seems like this project will never end! Pressing ahead...


-
Very cold, but was able to get into the garage with some relative heat. Finally finished the side curtains (Photo 1). I guess went as expected. Dug back into the fenders. Found a low spot while sanding the driver's side rear fender, so had to fill that in with some filler after doing a little hammering to try to raise it up a little. Will probably need just a little more sanding, but mostly complete (Photo 2). Next, moved on to the driver's side front fender and cleaned up the weld repair I did a little (Photo 3), then hit the bare metal with some rust inhibitor (Photo 4). Will need some sanding to get back down to primer in the areas where its not bare metal, then some filler to even it out. Last, I spent some time on the panel gaps on the passenger side. Was able to make a few adjustments and found the gaps thoroughly acceptable. I don't think I need to do any more work on them for now. When I finish the other panels, I'll put all the bolts in and see where I stand. Right now, I just have enough bolts in to hold it together. I'll probably have to make more adjustments once the bolts are in, as I'm not sure if the bolt holes will all line up from where I have it set up now. Gaps will not be concours perfect, I'm just shooting for factory acceptable.


-
I own a 30U as well. I'm no expert, but if you have any questions, I may be able to assist.

-
Can anyone recommend a shop that can do aluminum anodization on the East Coast? The closer to Northern Virginia, the better. Thanks!
-
1923 Kissel Model 6-45 Gold Bug Speedster
hursst replied to ron hausmann's topic in Our Cars & Restoration Projects
Glad to hear you are doing rivets. That is in the spirit of our club, it will be authentic, and you'll learn yet another new skill. -
Another weekend, another snow storm here in Northern Virginia. Finished rust inhibitor, primer, and paint for the side curtain (Photo 1). Seemed to turn out very nicely, back to the original tan color for the metal parts. Last will be to put the windows back in. Also sanded down the rear passenger fender. Had two small areas of sand-thru, again, on the edges. A friend has a small touch-up paint gun I am going to borrow so I can quickly touch up these areas inside the garage without having to make a big production of it outside (it's way too cold for primer outside). I hung this fender on the car as well (Photo 2). Panel gaps look quite good (I am going for factory quality, not perfection). Here is a before photo from May 2021 where it wasn't looking so good (Photo 3). Here is a photo now (Photo 4). Definitely an improvement in the curve without that divot in the middle of the curve of the fender. Repaired that with lead and a little filler to clean it up. I will still need to do another round of sanding the edges, wheel lips, and inner portions of all the fenders to get them smooth enough for paint, but I will not be going for perfectly smooth, just enough to knock it down to a mild orange peel, since most of it won't be seen. I'll be so happy when these fenders are complete, this has been, by far, the hardest part of the restoration.


-
Thanks for the encouragement, Jeff. I'll get there, even with this slow momentum. Doing it right is much more important than doing it fast.
-
Another good day in the garage. I got my kerosene heater out today and got things up to about 60 degrees in the garage. First, I welded up the crack on the bottom of the driver's side fender. Of course, this was a seam where I welded in the corner of the patch panel originally, so it wasn't a very good weld to start with. I ended up welding the crack 5 separate times, as each time I fixed it, an adjacent crack would appear. I owe it mostly to my bad welding, but I eventually got it right, the repair seems clean and solid now. I'll have to put some more filler on it and sand it smooth before I touch up the fender yet again with more primer. I moved on to the side curtain, didn't feel like doing more sanding today. I started by trimming the excess fabric from the new bracket I welded in, then using the 3M adhesive, glued the remainder into the slot by pushing it in with a flathead screwdriver, after heating the whole works up with a hair dryer. I then used a piece of cardboard wedged in the slot to secure it while it dried. I even surprised myself, this whole process worked very well and the piece looks pretty good (Photo 2). The only thing left with the fabric is to clean up the upper and lower portions where it was originally tucked into the outer frame fabric. I'll have to do some blending of what's left or/pieces of the original fabric to make it look right, or close to right, since it can't be perfect since I had to remove part of it to get to the welding. Next, I stripped the incorrect black paint from all metal bracketry on the piece, down to bare metal, cleaned it, taped it, and painted it with rust inhibitor to start with, as this piece was more rusty and poorly painted compared to the other side (Photo 1). Next, I'll apply some primer, then paint it the original tan color. Last will be inserting the windows, then I'll be finished with this side project. I should have time to revisit sanding of the fenders next weekend. After sanding, I'll have to figure out how to do another round of primer on the touch-ups, maybe in the garage, as it's too cold outside. The touch ups are very small now, so I should be able to figure something out.


-
Ask Ficken Wiper Service- https://rebuildingtricowipers.com/ May be able to give you a lead...I think he only works on Trico himself.


