


Riviera63
-
Posts
1,795 -
Joined
-
Last visited
Content Type
Forums
Gallery
Events
Posts posted by Riviera63
-
-
4 hours ago, telriv said:
Bill,
Dundee will need six in total, 3 for each.
Tom T.
I understand that. I only have the 3.
Bill
-
6 hours ago, XframeFX said:
Six years deep into my project and this is new to me! Was unaware of rubber spacers for those filler panels. My passenger side has an awful "creak" over bumps! TX all.
Are they reproduced? Steele Rubber?
They are not reproduced that I know of. You will have to reach out to the ROA vendors. I do have those three available.
Bill
-
14 hours ago, Dundee said:
Thanks Rivnik, great start..I guess those 2 door panels is where I need 2 of those u shaped rubber door seal thingamies where the mechanism that holds the door open goes??
13 hours ago, Dundee said:Mmm maybe not, what is the rubber for lock pillar filler all about?
For the fender fillers you will need 3 rubber pieces that slide on the outer edge for each side. The last picture is a lock pillar filler.
Bill
P.S. My fender filler panel is for a 1st generation Riviera with manual windows. That is why it looks slightly different. No opening for the rubber boot and wiring.


-
7 hours ago, Dundee said:
Thanks Bill won’t hold my breath on those fillers but who knows..
Here are pictures of them in place. As I said it bridges between the dash pad and the windshield pillar. It curves down and also bridges between the edge of the dashboard and the door windlace. Same grain as the dash pad which is different than the upholstery grain.
Bill


-
1 hour ago, Dundee said:
Thanks Bill won’t hold my breath on those fillers but who knows..
I have attached a picture of the fillers. If you should need them those are for sale.
Bill

-
1 hour ago, Dundee said:
Hi again
here are 2 latest confirmations thinking 2 chrome are front windscreen pillar mouldings but they look like they should fit around the dash pad somehow though dash part appears short?
the clunky one no idea ??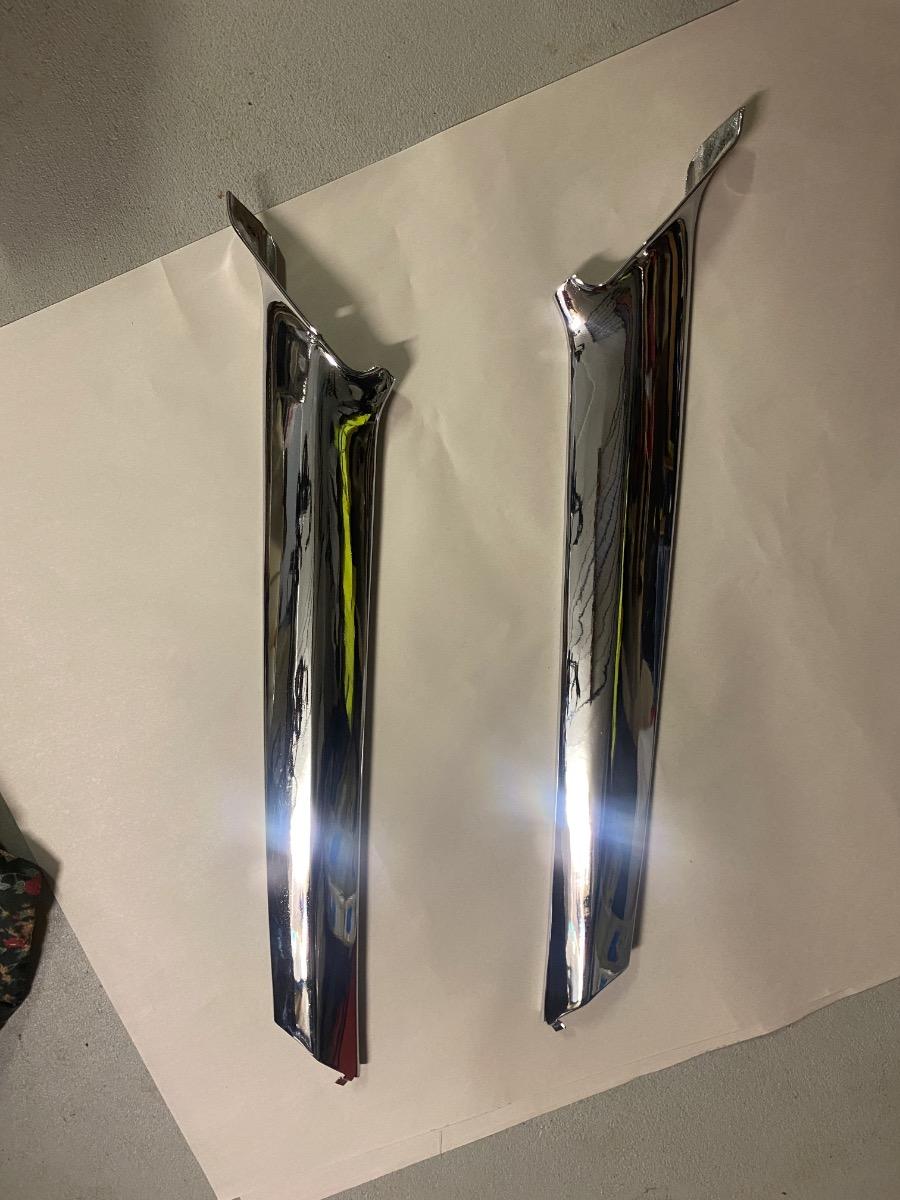
Yes, those are the inside windshield pillar moldings. They do not meet the dash pad. The dash pad ends short of the windshield pillars. The space between the dash pad and the windshield pillar is bridged by a plastic filler piece.
Bill
-
2 hours ago, Dundee said:
Any comments on lube for sun visor arms? Yes/no or what kind of?
Ron
I would say yes to the lube. I think to get a true indication of how they work you need to either mount them in the car or secure them to a board. Hard to move them when they are not anchored.
Bill
-
3 hours ago, RIVNIK said:
greetings gents! From time to time I see talk of replacing the clutch fan w a HD one from a 1 ton truck. So far I have"GM" from an old post, & I just got the last three nos."301' from Telriv. Anyone have any additional details? If I show up at my usual parts stores w such scant info (even NAPA sad to say), I'm pretty sure they're going to give me the usual blank stares. Thanks if you can help. Drew
Drew,
Here are part numbers that I have gleaned from the forum over the years for the fan clutch. It looks like they are all available from various sources.
Imperial 215049 NAPA 217301 Murray 2705
Bill
-
 1
1
-
-
The top piece is the bezel for the shift lever and the indicator lens which mounts on top of the console. The next 2 pieces are the rear heat vents which attach to the sides at the back end of the console.
Bill
-
As the guys above said. Here is a picture in place.
Bill

-
On 8/10/2022 at 4:48 PM, Jerry Ford said:
I have a 1963 Buick Riviera. The VIN plate is missing from where it should be near the door hinges on the driver's side. I know it's also on the engine block, but a potential buyer wants a picture of the VIN on the frame. Does anybody know where this is on the frame?
Here is a picture of the VIN tag on my 63. As described earlier, it should be on the driver's side cowl directly above the data plate on the firewall. If a numbers matching car you will find this same number on the engine as Ed illustrated in his post.
Bill

-
On 5/7/2008 at 7:12 PM, Jim Cannon said:
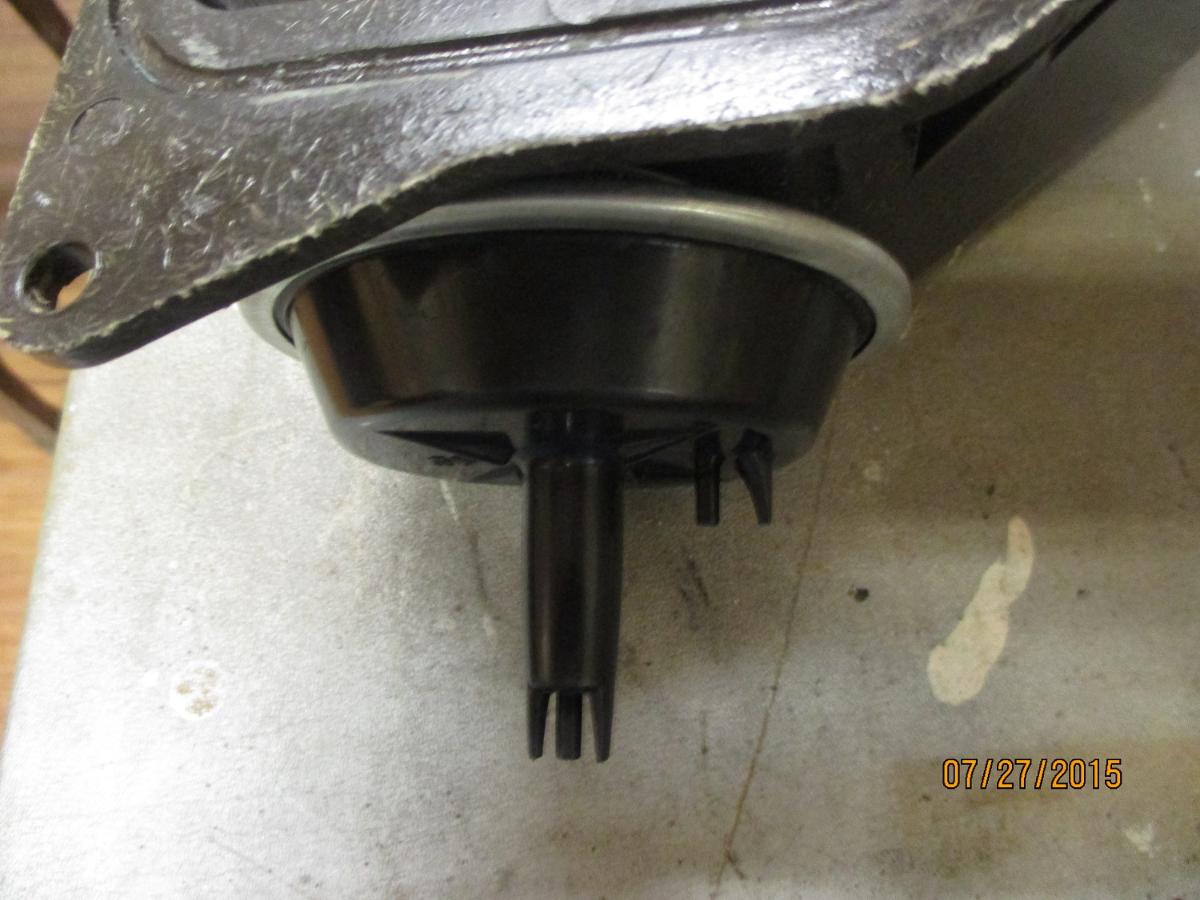
The dual diaphragm under the blower on the '63 is actually 2 diaphragm cans stacked on top of each other. It is not available new from any aftermarket supplier that I know of. Getting a good used one or looking for NOS is your only option.
You can make the 2-port diaphragm that Old Air Products sells work in this application, if you are willing to depart from original. (Because it is out of sight, under the blower, it is not very obvious that you are no longer original.)
The main problem you find with the OAP 2-port diaphragm is that you can no longer get the "part open" position of the actuator. You need to plug the vacuum hose that would normally put the diaphragm in the part open position, and T- the other vacuum hose (the full open hose) into both ports of the 2-port diaphragm.
I did this on my '63.
Then you get full open or full recirculation, never partial recirculation.
The reason you need to do this is because of the way the Old Air Product diaphragms are all inside the same can. The original stacked cans were separate and you could apply vacuum to one port or the other (or both) and not have anything leak between them. The OAP 2-port diaphragm requires vacuum on just the outer port for partial movement and vacuum on both ports for full movement. That is not what our '63 heating-A/C controllers gives us down at that position.
9 hours ago, Erick R said:ok need a little help on my 64 Riv in testing I found the dual port vacuum actuator on the vent does not work (tried direct vacuum to both ports did not move). Also checked after replacing all the vacuum lines that I do not get any vacuum from the valves. Is there a rebuild kit for the valves if so has any one done it ? If so how and where could I pick up a rebuild kit. Thanks for any help.
Erick
Read Jim Cannon's response from earlier in the thread which I have attached. He does a good job of explaining the problem and how to fix it. I did this on my 63 several years ago with Jim's guidance and all is good. Take your time and fix everything that needs fixing. This is a job that you do not want to do twice.
Bill

-
1
-
-
41 minutes ago, Steve4098 said:
Is the body in good shape and for sale?
Current car is a 1965. Yes, the body can be bought, no it is not in good shape.
-
7 hours ago, kreed said:
I have read all the threads I can find on the forum regarding the access to the wiper motor . Had mine rebuilt and it worked fine when I put in a few months ago as I was doing a frame off on my 65 GS . Naturally that was easy to do with the fenders and hood and cowl in full view . Just got everything put back together in my dash and wiring and stated the wiper and it was making a loud clanking noise in the assembly for some reason which I have yet to figure out. As I was trying to figure it out, the motor stopped suddenly and cannot be restarted - fuse is OK . Took the cowl plate off , assembly looks OK and moves like it should but obviously I can’t see the motor . How accessible is it if I take the hood and bracket to fender back off ( having spent hours getting it aligned ! ) . PLEASE tell me I don’t have to take the fender back off as my grill , bumper and headlights are exactly where I want them after literally spending days lining them up ! I am about ready to leave them non- functional if that is the case as I’m sure everyone who has done this knows . So very frustrating ! Whoever designed this wiper motor placement should be beat with a large stick and hung out to dry ! I have learned many valuable lessons over the last 20 months doing this restoration - main one being NEVER AGAIN !
Seriously would appreciate any thoughts knowing there is no easy answer .
KReedROA 14549
Hi Ken,
Here is what Buick says to do. I hope this helps. I am going on 3 years with no wipers. I have a rebuilt motor in my shop. A project I have been putting off. I clay bar my window glass at least once a year and if I wipe the glass down with Wizard's Mist N' Shine while I detail the rest of the car you don't need wipers, the rain just rolls right off.
Bill

-
1 hour ago, jframe said:
Tom, do you have a part number? I don't always trust these young counter guys. Been in the business 34 years, and most of the newer ones don't even carry a pen.
Mark,
Here are part numbers that I have gleaned from the forum over the years for the fan clutch. It looks like they are all available from various sources.
Imperial 215049 NAPA 217301 Murray 2705
Bill
-
 2
2
-
-
4 hours ago, OldGerman said:
Looking for a brake reaction rod bushing kit. Internet research provides some at least two different style's of rubber, with or without steel sleeve, but nothing seems to match the original Buick OEM design. What source or brand would you recommend / do you have positv or negativ experience ? Is there any other Buick/GM model with the same parts design (Wildcat / Impala ?) Thank you, Frank

Frank,
Contact Tom Telesco (telriv) he sells them. That is where I got them for my 1963. Very happy with them.
Bill
-
5 hours ago, telriv said:
I know that many install electric pumps to facilitate cold starting/sitting problems of restart when it comes time to start.
Myself after my car may sit for months at a time I would rather/prefer it NOT start immediately. When the engine starts immediately the bearings are running dry until oil pressure builds up. I don't pump the gas pedal to set the choke. I will crank it over it 15 second intervals, letting the starter cool somewhat in between cranks. When the oil pressure gauge moves or the oil light goes out you can now start the engine.
People tell me your wearing out the starter for no reason. It's much easier to rebuild/replace a starter than it is to drop the pan & replace engine bearings.
Just my thoughts.
Tom t.
I use Tom's method whenever my car sits for an extended period. Especially, when stored for the winter which is a 6 month hibernation. I crank until the oil light goes off (which for my car is usually 7-8 seconds), stop, pump the accelerator twice, hit the key again and it pops right off. I have been doing this for years and it has never failed me.
Bill
-
1 hour ago, atencioee said:
Actually, as Tom (1965rivgs) said, there are a handful of 64s w/the 401. I have matching #s, and my Rivi is a 64-4747.
Actually, Tom said all 64's had a 425 except for exports to certain destinations, which had the 401. He believed off the top of his head to number around 400.
-
5 hours ago, atencioee said:
Everything under the hood is OG to that car...64 Rivieras came with both the 425 and the 401...mine has the 401.
As RivNut said, 1964 is 425 only.
-
2 hours ago, Moose2 said:
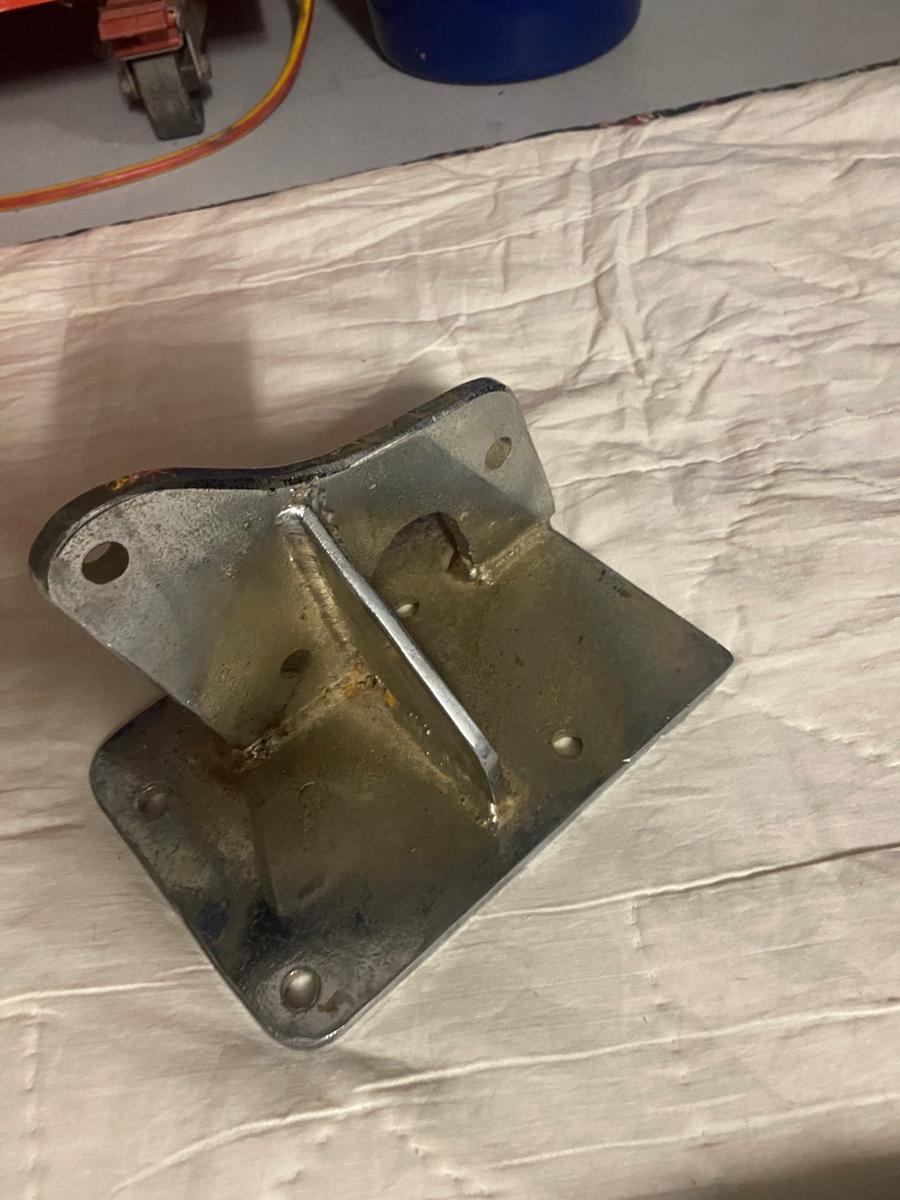
To my knowledge the seat tracks only fasten to the bottom of the seat frame in one position. Also, my experience when I was installing seats was that there was a choice of bolt hole sets on the outboard track, but no choice on the inboard track. Besides you would still have to craft a way to move the two front stirrups rearward so the front feet of the track would engage the stirrups. I hope you get additional feedback from other readers!!!!!
I reversed the front u brackets on my 1963. There was a second set of bolt holes on the inboard and outboard side. The only thing I had to do was enlarge the inboard hole slightly to accommodate the bolt. For some reason it was a bit smaller than all of the other holes.
Bill
-
1
-
-
13 hours ago, XframeFX said:
TX Bill,
I am aware of the front P/N. Wondering about the rear (my image of 55-R102 on the rear of a '64 Riviera).
The lower sticker shows RCD website. So checking just now, the same 55-R101 for the front but now a 3rd P/N for the rear - 55-R216?
http://racecardynamics.com/classics/183-1963-1965-riviera-rear-shocks-part-no-55-r216.html
I never return any purchases with my cross-border shopping and many have not been successful. So, I want to get it right.
I'm going with P/N: 55-R410 as you have indicated.
Thank-You for following-up!
Hi John,
I had to do a little digging in my notes. Just a little bit of follow-up. The 55-R102 rear shocks are shorter than the 55-R410. They are for "lowered" Rivieras. I know they have been used on stock height Rivieras. I talked to George Hussey personally on the phone about this. He did not recommend using them on stock height cars. I thought I would throw this out there to you as I don't know the height situation with your car.
I put the Bilsteins on my car a couple of years ago along with a beefier front sway bar and Tom T's rear sway bar. What a difference in ride and handling quality. The Riviera rode and drove better than any other classic car I had owned but, these improvements took it to another level.
Bill
-
1
-
1
-
-
55 minutes ago, XframeFX said:
I am perplexed on Bilstein part numbers for the rear on 1st gen. Rivs?
R55R410 from George or 55-R102? They both have the same mounts. The latter for a Toyota Pickup?

John,
The rears are 55-R410 and fronts are 55-R101.
Bill

-
1
-
-
4 hours ago, XframeFX said:
Yes, your image explains it well. So, I mounted mine incorrectly, on the other side of the mounting position. Oh well, it's not likely I'll be de-fogging my rear glass!
Now, I too have both AC and Rear De-Fogger. Rare for 1963!

John,
I have no idea what the correct mounting position is. I just chose that spot because I felt it is was easily accessible and there was room to work. Thankfully a hole was there already as drilling a hole in that area would have been problematic. Actually I may have a situation where it could come in handy. Ironically it would be during the summer. We have days where it is hot and humid. When I back out of the garage on those days the windows fog up because it is so much cooler and drier in the garage relative to the outside conditions. 😎
Bill
-
8 hours ago, XframeFX said:
Thanks for your comprehensive instructions/images Bill!
So, to add for 1963 Riviera's:
1) Easy to identify between early and "after job" instrument panel harness. Just check the Fuse Block. The later harness had the left column for live circuits. The middle and right columns were for switched circuits. The early harness had no middle column. The early harness also had the power antenna on it's own harness.
2) Rare? That template for drilling the switch hole sure is! Good thinking to PDF it for others. Seldom see both AC & Rear Defogger in '63.
3) Strange how the resistor is up against the combustible Glovebox?
4) I've found the later 1963 harness w/o Electro-Cruise & Guide-Matic has a green tab protruding from the wrap on a branch to the console (under console switches. I am curious to know what colour tab the all-inclusive harness has?
Anyone stripping a parts car, always retrieve the fuse block and firewall bulkhead connector (1963).
I re-wrapped my instrument panel harness after a few additions such as 4-way flasher. A mistake, Packard Electric did a masterful job with a quality vinyl wrap. If unhatched, leave as is!
Yes to value from Jim's Service Bulletins. They include instructions to Wiper/Washer removal instructions that the Shop Manual should've had. Learned on my own on that issue.
John,
You are welcome. Just to clear up your item # 3 question. The resistor is not mounted/up against the glove box. I found the plug for the resistor next to the left side of the glovebox. I routed the plug back into the inside cavity of the console behind the ashtray assembly. I attached it to the right side metal console brace. In my picture you can see the tail end of the wiper switch. No combustibles near the resistor.
Bill
-
1
-


1963 vacuum diaphragms
in Buick Riviera
Posted
Tom,
Here is the correct one. This is also the same one you would use on the firewall when and if needed. Follow Jim's advice on the replacement. I did this on my 63 several years ago. No problems and works great. Old Air Products also sells color coded vacuum lines. I also used these.
23-5905 - Actuator | 1963-1979 GM Applications, Dual Port (oldairproducts.com)
Bill