


Riviera63
-
Posts
1,795 -
Joined
-
Last visited
Content Type
Forums
Gallery
Events
Posts posted by Riviera63
-
-
This last week I did the installation of a rear window defogger on my 1963. I wanted to add this as I know that this is a somewhat rare accessory option for the 1963 model year. I would like to share this on the forum to hopefully help others if they should choose to tackle this. It was not a hard installation but, somewhat time consuming because of the different items you need to remove to do the actual installation. Actually, the hardest part of the installation was hauling my aging body in and out of the trunk and rear seat areas.
If you are deciding to add this to your first generation Riviera you should first determine when you car was built. Buicks built before March 1, 1963 did not have the wiring included in the wiring harness for the different options. If these early cars were to have the rear window defroster, Electro-Cruise, Guide-Matic, cornering lamps or an electric antenna a separate accessory specific wiring harness had to be added for any of these options to be installed. If your car is an early build you will need to find (or possibly make) the wiring harness for your particular accessory. I do have the necessary wiring for an early build rear window defroster if someone needs it. PM me if you are interested.
If you have a car built after March 1, 1963 like mine was, you will have one of 2 different wiring harnesses. You will either have a wiring harness with the wiring included for all of the above mentioned options or you will have a wiring harness with all of the options except Electro-Cruise and Guide-Matic. As of March 1, 1963 the Twilight Sentinel was cancelled as an option on the Riviera. See picture 1.
Having the wiring in place made things much easier. There are three plugs you will need to locate. One for the resistor, one for the power back to the blower and one for the switch. These were all located very easily. Light green tape was used to hold the plugs to a wiring bundle and the plugs are specific to its job so it is easy to match them up. See picture 2.
The power plug is easily located by the fuse box/parking brake. See picture 3. The switch plug is easily located by taking out the ashtray assembly. See picture 4. To locate the resistor plug I removed the dash. With the dash removed it is easy to locate to the left of the glovebox. This also makes it easy to route back into the console area where I mounted the resistor to the metal console brace. There was even a hole in the brace so that I could mount it with a screw. See picture 5. The defroster has two speeds. The resistor is necessary to provide the low speed.
I found the most time was spent removing items to run the power line back and the removal of items to remove the rear package tray. The holes for mounting the grill and the air holes are already pre-cut in the metal under the package tray. Before removing the package tray, I used an ice pick to poke the holes up through the package tray for the grill mounting studs, removed the insulation from the area where you will cut the holes in the tray and traced the air holes on the underside of the tray. My package tray was fiberboard covered by vinyl. I was able to cut the holes in the package tray using an exacto knife.
A template was provided to me for drilling the hole to mount the switch. I did make copies of the template if someone should need one. See pictures 6 & 7. When drilling the hole for the switch you need to drill through a thin metal skin and a plastic layer under that metal that bridges from one side of the console to the other. While drilling hold that plastic layer tight against the back of the metal layer. If you don't the drill bit could poke through and break that plastic bridge. This is not necessary on the 64 & 65 as the switch is mounted under the dash with other accessory switches. I know Steve Lorenzen had a 64/65 set up awhile back.
The blower motor ran fine but, I sent it out to Steve Lorenzen to have him rebuild it anyway. Since Steve was disassembling it to rebuild he could remove any rust on the fan blade and that underside area and then repaint so that it looked like new. He decided to leave the outer shell alone as it was in good shape and still had the original sticker from the factory. Steve also mentioned that the paint on the outside still had the original "lines" from the factory on it so he thought it best to leave it alone. There are 2 holes in the trunk tension rod brace which made it easy to ground the blower motor. The blower runs smooth and strong.
I hope this is a help to someone. If anyone has any questions I will be glad to answer them.
Bill


-
 4
4
-
 1
1
-
 1
1
-
-
4 hours ago, CMC Designs said:
Hi Tom, How can I order this rear sway bar? Thanks
Craig
Craig,
Message Tom directly from the forum. His call sign is telriv. I ordered mine from him. He designed it. He got Addco to produce it and got them to reissue his original design after they strayed. The added bonus is his customer service which is far superior to theirs. It may be a little bit more money but, it's worth it. If you don't believe me ask the Turbinator.
Bill
-
7 hours ago, XframeFX said:
Bill, your Riviera being the 3rd. I noticed the jacking instructions on the Left Side. Thought in was on the right side? Mid year production change as in the OSRV Mirror and Spare wheel placement?
Thanks for those images!
John,
You are welcome.
My car is a late May production. I believe the jacking instructions sticker to be the original. When I had the underside of my trunk lid repainted I made sure that they preserved it in place. As far as what is correct placement I have no clue.
Bill
-
1
-
-
1.) 10 very nice right hand thread lug nuts
3.) Parking brake adjustment bracket and parking brake spring pin
4.) 2-1963 & 1964(?) standard interior rear quarter panel stainless trim pieces, enough for one side, can be used on either side
11.) 1965 passenger side console plastic kick panel plate with attaching hardware. I have been told that the holes are placed differently than the 63-64. Could still be used drilling different holes as it is covered with carpet.
54.) 1965 console shifter bezel and shifter guide
57.) 1965 Front upper bumper brackets with attaching hardware
59.) 1965 lower bumper support bar
62.) SOLD-1965 gauge cluster lens
63.) SOLD-1965 speedometer lens
68.) Console heater/AC air hose clamp
70.) SOLD-Tilt wheel lever-has black end-not technically correct for any of the 3 years but, will fit and work.
76.) SOLD-Clock mounting bracket and screws
80.) SOLD-Dashboard plastic end cap trim pieces-driver's and passenger's side
83.) 1965 rear bumper
84.) 1965 upper front bumper
85.) 1965 lower front bumper
89.) Suction Throttle Valve bracket with attaching hardware
95.) 1965 front bumper filler panel/lower tie panel
96.) SOLD-Wheel opening molding-driver's front
101.) SOLD-Lower windshield stainless reveal trim molding set
102.) Complete set 1965 front seat belts with all floor bolts-female belts & buckles rough-both retractors work well-one retractor cover is perfect-the other cover cracked but I believe is repairable
103.) Miscellaneous inside headliner trim pieces-painted
105.) Blower motor-AC car-tested working
107.) SOLD-2 outside door lock assemblies with retaining clips
108.) Set of 22 control arm/inner fender splash apron clips
112.) Headlight Switch
116.) 1965 driver's side front fender
118.) Driver's door stainless beltline trim molding
119.) Upper cowl panel
122.) AC receiver/dehydrator brackets, clamps and attaching hardware
123.) 1964 1965 front speaker to speaker/defroster grill attaching bolts
124.) SOLD-Upper windshield reveal stainless trim molding
126.) SOLD-Delco Remy voltage regulator cover with gasket & attaching hardware-painted ready to install
127.) SOLD-Sail panel light wiring harness
128.) Passenger side lower dash pad
130.) 4 access panel attaching clips-2 needed per panel
132.) SOLD-Glovebox light switch plunger and wiring harness
134.) Wiper motor to firewall ground wire
136.) 1963 dash pad defroster grill with attaching hardware
137.) SOLD-Starter to horn relay junction block wiring harness
138.) 1965 speedometer cable with housing and connectors
139. 1965 heater/AC wiring harness
140.) SOLD-Wiring harness-runs from firewall along inner fender to driver's headlights over to passenger headlights.
Updated
-
1 hour ago, NC1968Riviera said:
Unless you are a member of the ROA FB group, no one can see the content you provided links to.
I un-joined this group because of my inability to keep reading the same questions being asked over and over.
That makes sense. Thanks. I downloaded the images and attached them to my first post.
Bill
-
I tried it after I posted it and it worked. I just tried it again and it came up. Try this one.
Bill
https://www.facebook.com/groups/BuickRivieraOwners/permalink/5058523104196844/
-
My first car show of the year. I met my brother back in our home town of Wisconsin Dells this last weekend for their annual car show for the first time in 20+ years. The weather was a bit chilly but, sunny skies and no rain. There were 3 Rivieras in attendance at the show. Someone was kind enough to photograph all 3 of them and post the pictures on Facebook. A nice surprise this morning. Click on either of the links below.
Bill
https://www.facebook.com/groups/BuickRivieraOwners/permalink/5058523104196844/


-
3
-
-
10 minutes ago, Brtele said:
Trying to cross of some more items.
I have the following hole in my shifter section.
Would the following R270 part from Clark's take care of this?
Thanks,


Yes
-
1
-
-
11 hours ago, PaulMuzz said:
After staring at this clock for so long i know everything about it but unfortunately after pulling back the spring it just stays open and never closes. I can move some of the gears with a screw driver without much effort but it is not moving on its own. For the quartz conversion, i did see a kit for about 100 dollars in the Original part group catalog. Are there other options out there?
thanks again!
These are the guys John was talking about. They are great. If you request they will send back the original mechanism. Mine has not skipped a beat in 5 years.
Bill


-
1
-
-
1 hour ago, moran75 said:
Yes, that actuator us shot but it’s propped open at the mo with a piece of rubber😀
but re cowl vent….do you think it’s also susceptible to being partially blocked over time thus reducing air flow into the blower?
or does it just not happen ? Can’t find any reference to such a think in forum history ….
Is it propped all the way open? Where air going into the heater box and the blower comes from is controlled by a door in the heater box which is controlled by the double vacuum canister attached to the bottom of the heater box. That door also aided by a spring that hooks on that door and to the top of the heater box through a hole in the top of the heater box. Depending on the position of the door inside the heater box you get 100% air from the cowl vents, 100% recirculating air or a combination of the two. Air flow can be restricted by an obstruction such as a mouse nest in the heater box. Remove the blower motor and you can see into the heater box for an obstruction, the condition of the spring and the position of the door. The spring will often break. If you have no obstruction you will be getting a full flow of air. Where the air is coming from depends on how your heater box door is positioned. I believe the 3rd picture shows the door in the 100% recirculate mode as it is closed and not allowing air from the cowl vents in. I believe the 2nd picture showing the spring, the door is all the way down allowing 100% air flow from the cowl vents.
Bill


-
1
-
-
2 hours ago, moran75 said:
Hi all
Re. A/C I’m guessing the blower draws outside air in through the cowl vent…does the vent ever get clogged? Is that a common phenomenon ?
only ask as my a/c blows cold, fan motor certainly goes through the gears up to high - but air doesn’t exactly shoot out …I know all is old but instinct tells me should be a bit stronger….
I know it could be ducting behind dash but I’m not going to go there 😀…sounds like a can of worms …
which made me think of where air comes in to the blower….
if it is blocked is there an easy way to get access? I’m guessing not due to the wiper….
thanks in advance
kev
It is possible that it could be clogged with a mouse nest. The problem you are describing sounds exactly like the one I had with my 1963 when I first got it. I could hear the fan blowing like crazy but, not that much air coming out of the AC vents. My problem was solved when I replaced the vacuum actuator on the firewall. See the picture attached. Mine was bad and so the door to allow the air from the blower to flow was partially closed. Once that was replaced the door opened and closed fully so air flowed freely and forcefully like it should. Old Air Products sells them and that is a quick and easy replacement.
The blower fan in the 65 is the same as my 63. It has a metal fan.
Bill

-
4
-
-
Today the temperatures were in the low 90's here in central Wisconsin. Winter to summer in one week. Who needs spring? Time to awaken the Riviera from its long winter's sleep. This is one of my favorite yearly rites of passage. I still marvel at this car every time I get it out in the spring. Crank the starter until the oil light goes out, stop, 2 pumps on the accelerator, hit the starter again and we have ignition! Running smooth as silk. Ready for a ride to get it nice and hot so that I can check and replace the transmission fluid the Dynaflow burped out this year. Following Tom T's advice brake fluid was in the mix this year. With the weather so hot and muggy the AC got a work out as well. Thankfully, no problems there. All is right with the world.
Bill


-
5
-
-
1.) 10 very nice right hand thread lug nuts
3.) Parking brake adjustment bracket and parking brake spring pin
4.) 2-1963 & 1964(?) standard interior rear quarter panel stainless trim pieces, enough for one side, can be used on either side
11.) 1965 passenger side console plastic kick panel plate with attaching hardware. I have been told that the holes are placed differently than the 63-64. Could still be used drilling different holes as it is covered with carpet.
43.) SOLD-64-65 dash pad
44.) SOLD-Complete set of dash pad mounting hardware
54.) 1965 console shifter bezel and shifter guide
56.) SOLD-Set 1964-1965 console mounting brackets
57.) 1965 Front upper bumper brackets with attaching hardware
59.) 1965 lower bumper support bar
62.) 1965 gauge cluster lens
63.) 1965 speedometer lens
68.) Console heater/AC air hose clamp
70.) Tilt wheel lever-has black end-not technically correct for any of the 3 years but, will fit and work.
72.) SOLD-1965 Headlight switch knob, bezel, lock nut and ground strap
76.) Clock mounting bracket and screws
80.) Dashboard plastic end cap trim pieces-driver's and passenger's side
83.) 1965 rear bumper
84.) 1965 upper front bumper
85.) 1965 lower front bumper
89.) Suction Throttle Valve bracket with attaching hardware
95.) 1965 front bumper filler panel/lower tie panel
96.) Wheel opening molding-driver's front
97.) SOLD-Dashboard speedometer/gauge bulb sockets-tested good
101.) Lower windshield stainless reveal trim molding set
102.) Complete set 1965 front seat belts with all floor bolts-female belts & buckles rough-both retractors work well-one retractor cover is perfect-the other cover cracked but I believe is repairable
103.) Miscellaneous inside headliner trim pieces-painted
104.) SOLD-2-speed windshield wiper motor with washer-motor tested & works smoothly in both speeds
105.) Blower motor-AC car-tested working
107.) 2 outside door lock assemblies with retaining clips
108.) Set of 22 control arm/inner fender splash apron clips
112.) Headlight Switch
113.) SOLD-1965 neutral safety switch
116.) 1965 driver's side front fender
118.) Driver's door stainless beltline trim molding
119.) Upper cowl panel
121.) SOLD-1965 dash gauges cluster face
122.) AC receiver/dehydrator brackets, clamps and attaching hardware
123.) 1964 1965 front speaker to speaker/defroster grill attaching bolts
124.) Upper windshield reveal stainless trim molding
125.) SOLD-1964 1965 front console ashtray
126.) Original Delco Remy voltage regulator cover with gasket and attaching hardware
127.) Sail panel light wiring harness
128.) Passenger side lower dash pad
129.) SOLD-1965 rear console ashtray
130.) 4 access panel attaching clips-2 needed per panel
131.) SOLD-Passenger side headlight wiring harness
132.) Glovebox light switch plunger and wiring harness
133.) SOLD-Throttle rod
134.) Wiper motor to firewall ground wire
135.) SOLD-Turn signal switch without cornering lights
Updated
-
7 hours ago, 63 RIV MOE said:
Still having trouble accessing the rear of the Sonomatic in my 63. How do I remove the face panels around the face of the radio? And do I need to go thru the glove box?
No need to go through the glovebox. As Ray said remove the ashtray assembly. If your car has AC remove the center vent and the plastic diffuser behind it. No hoses to disconnect. The chassis manual has a good diagram and describes what to do as far as releasing the radio from the dash. If you really want to have fun replace your AM with an AM/FM. That radio is larger and is loads of fun to install with less space. Don't make the mistake I did and misjudge how much time it would take and start this in the shaded driveway that turned into the sunny driveway. (yes, I could have moved the car but, who wants the interruption?)
Bill
-
1
-
-
1 hour ago, jframe said:
Accessed the bulb under the dash, and replaced it. No dice. When I turn the switch on a cold engine, neither the hot or cold light comes on. When I unplug the switch and ground the dark green wire, the hot light will come on with the ignition turned on. When I ground out the light green wire for the cold light, I still get nothing when the ignition is turned on. Thinking towards a sending unit now, but the original seems to be welded into the head, lol. Sprayed the threads with some Liquid Wrench last night, hoping for it to loosen.
If you go with a new sending unit test it before installing. This could save you some time. I took mine in because the cold light wasn't lighting. I did not even know it had a cold light until someone mentioned it on the forum. I took it to my mechanic because I was pretty sure it was the original and thought they were better equipped than me for a frozen unit. They were getting units from NAPA and went through 5 before they got a fully functional unit.
Bill
-
1
-
-
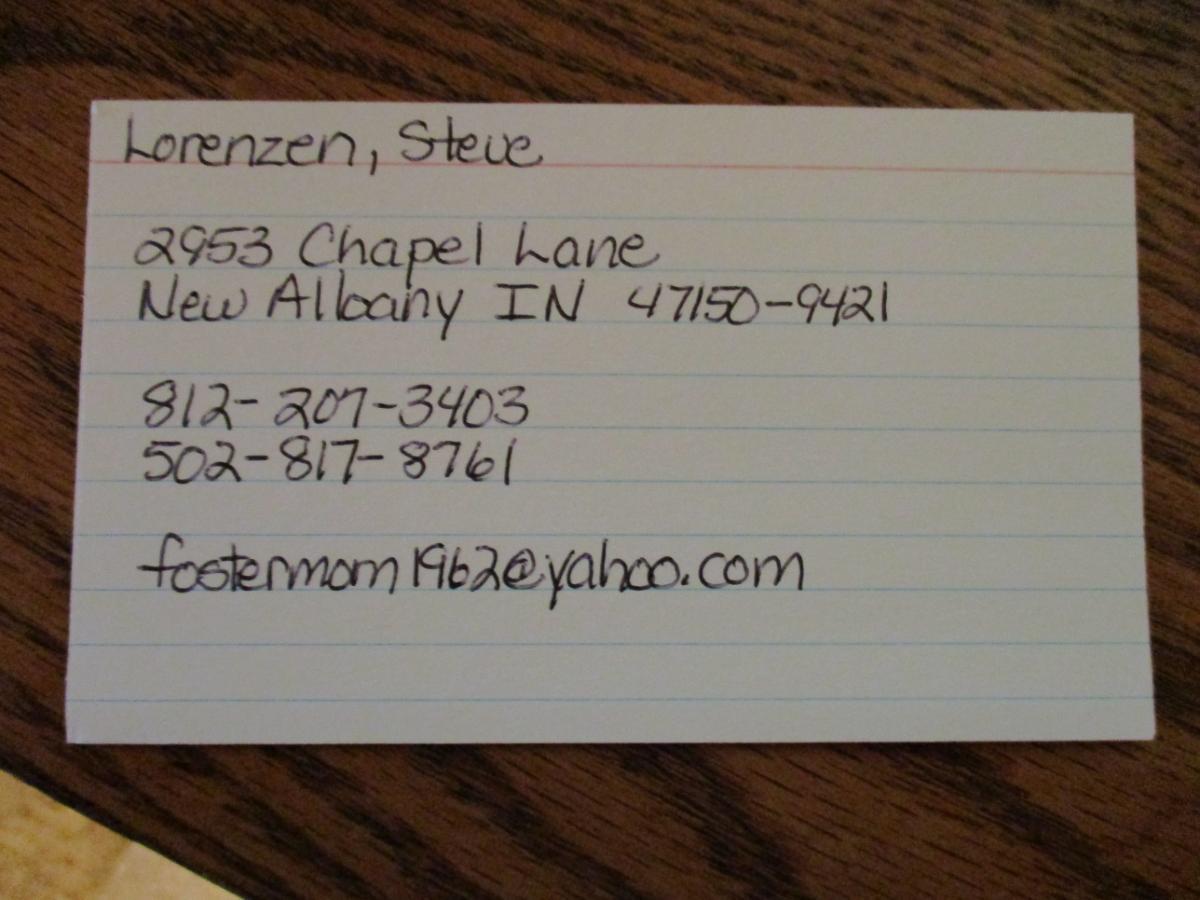
Here is Steve's contact info.
Bill
-
1 hour ago, Deanoko said:
Yeah, Tom and I talk. He's doing a 4 note horn setup for me. I have sourced the switch. Just need the resistor AND the '64 switch panel with THREE labels (or incorrectly, just the '65 "accessory" switch tab label..)
Thanks.
You might also try James Kehr, Best Offer Counts. Also in the Riview.
Bill
-
3 hours ago, Deanoko said:
Title says it. Also need the common chrome 64 knob. Thanks.
Steve Lorenzen has a complete 64-65 set up for sale on ebay. Talk to him directly and you can probably get it cheaper. He probably has the individual components in his stash as well.
Bill
-
6 hours ago, PaulMuzz said:
thank you Tom and Bill! Any suggestions for the type of paint I should use for that vinyl piece?
I used Dupli-Color Vinyl Dye on that piece and the door/rear quarter panels with great results on my car. There are different brands of vinyl dye out there. Eastwood carries them. I found Dupli-color and Rustoleum vinyl dyes at my local big box store. The trick will be to find the right color match. I have also heard mentioned many times on the Forum you can get paint custom mixed in aerosol cans. Below is a link to a thread about rub on vinyl dye sources.
Bill
-
2 hours ago, telriv said:
Cover EVERYTHING & paint it in the car. MUCH easier than removing.
Tom T.
I will agree with Tom on this one. I had to remove mine as it was cracked and needed replacement. It is a pain to remove.
Also a lesson learned then. My pad cracked when I closed my glovebox door. I did not think I had used excessive force closing it but, apparently it was too hard. I close it very carefully now as I don't want to go through that again.
Bill
-
I only put the hoses in my engine compartment and did not go all of the way through the firewall to the control head. The hoses seemed to fit tightly enough on the connectors there.
Before I started the project I did a little art work in my chassis manual. This made it a lot easier to track and route the hoses where they needed to go. All of the needed colors are there (at least for the 1963) except yellow. Substituted the orange in for the yellow.
Bill


-
2
-
-
1 hour ago, RIVNIK said:
Im stuck inside from knee surgery & can't get to my body manual. It should have instructions & possibly an illustration showing the orientation of the brackets. anybody got one handy?
This is what is in the 1963 manual.
Bill

-
1
-
-
1 hour ago, RivVrgn said:
yeah that's what i had to do, should be here on thursday. Like I said if I can find it online why not the store? Thanks
1 hour ago, NC1968Riviera said:Old Air Products in Texas used to sell a color coded vacuum hose kit that a friend of mine bought when he did his 65 Riv wiring harness re-wire job. All of the original hoses were dry rotted so we removed them.
23-0905 - Vacuum Hose | Hose Kit 8 pcs, Colored (oldairproducts.com)
Classic Muscle has a similar kit with T connectors: 1969 Vacuum Hose Kit (correct color coded) | Classic Muscle
Amazon kit: Amazon.com: Universal Rubber Vacuum Hose Kit #23-0905 : Automotive
We couldn't get the new hoses to fit through the firewall grommet with it in the firewall so we removed it then fitted them in the grommet then placed it back in the firewall.
The hose kit has all of the necessary hoses but a couple are not colored to match the original hoses.
You definitely need the 65 Chassis or Body manual (can't remember which at the moment) to correctly route the hoses and fit them to the proper control nipples and engine compartment fittings.
Be aware that there are several cross connected and T connected hoses on the back side of the AC / Heater control unit.
Take your time, read three or four times then run one hose at a time.
I have had this problem for many years trying to go to NAPA for hoses. They (at least my local stores) never seem to carry the correct hose sizes and /or style. I have had to go online to get the hoses I need more than once.
I bought the color coded hose kit from Old Air Products to redo my engine compartment vacuum hoses on my 63. Worked great. Not all of the colors are the same as OEM but, at least it enables you to get all of the hoses used for different purposes a different color to enable you to keep track of them.
Bill
-
2
-
-
2 hours ago, Ckerch said:
Replacing all my front suspension parts on my 64 and got to the Brake Reaction Rod when I ran into trouble.
I ordered the bushings from Old Buick Parts and they don't look very different to the originals. In the attached picture, new parts are on the left. Also from their website, the installation instructions show the Brake Reaction Rod bushings frame attachment bracket is flared. Mine does not have the flare and is flat.
Are there two types of bushings for Gen 1 ?


Go to Tom Telesco (telriv) for reaction rod bushings. That is where I got mine.
Bill


1963 Rear Window Defroster Install
in Buick Riviera
Posted
Jim,
You are welcome. Thanks should also go to you for taking the time and effort to make the owner's manuals and service bulletins available to us. The service bulletins were very helpful with this installation. I refer to these on fairly regular basis.
Bill