.jpg.8649e28d7606cf17c290a9eef6b2f163.jpg)

kingrudy
-
Posts
711 -
Joined
-
Last visited
Content Type
Forums
Gallery
Events
Everything posted by kingrudy
-
Finished with phase two having sealed all trunk surfaces. Painted all metal surfaces under the trunk lid and the wooden back of the rear seat. The next step will be to sand and seal the lid for the small compartment behind the seat (I left the original burlap liner). I figured that it had been part of the car for almost 80 years and it was intact. Also, I need to replace the wooden luggage tray and figure out how to make a wooden cover for the tool compartment at the front of the trunk, then carpet with appropriate material. On a separate note, I received a bumper this morning after searching for the past two years. This bumper was already plated and I didn't have to pay an arm and a leg. My mission is to complete this car while still keeping to a reasonable budget. It can be done.


-
Well I sent the ignition out and I thought that would come back quickly, but I was wrong. So I started working on the trunk. This is a pic of what I found under the mat. Floor is pretty, but I found some surface rust and general discoloration. All seems solid, so I lightly sanded, vacuumed out, steel wooled and vacuumed again. Then I took a tack cloth to all metal surfaces. I started out with a Rustoleum product that they claim is a rust converter. I always to get rid of as much rust as possible by sanding and cleaning, finally using steel wool and then using the rust converter for the last little bit. The second pic is after stage 1 with all above steps completed. Tomorrow I will start applying the Rustoleum oil based gloss black, by rolling it on the flat surfaces and brushing on the corners and cracks. More info soon


-
I have a pair of '67 back up lights for a bug. I believe that this is the only year that they were not integrated into the tail lights. I have had these for about 15 years and do not own a bug.

-

want to buy 1940 or 1941 jack handle/lug wrench
kingrudy replied to Jimmy D's topic in Buick - Buy/Sell
Hi Jimmy, I had my steering column replaced and the shop threw the plate away as it had to be cut to get the column out. I asked Doug Seybold about this and he said that he could make one, but I thought that I would give it a try myself first. Good Luck and if you come up with something please let me know and I will do the same. Mike -
want to buy 1940 or 1941 jack handle/lug wrench
kingrudy replied to Jimmy D's topic in Buick - Buy/Sell
Jimmy, I have been looking for the steering column floor plate for my car also. Steele Rubber sell one, but the plate for the '40 Super does not look right at all. They list it as a plate for the 40, 50 series (different bodies). I have given up and will try create one myself. Mike -
want to buy 1940 or 1941 jack handle/lug wrench
kingrudy replied to Jimmy D's topic in Buick - Buy/Sell
Jimmy, Is there another part that goes with the lug wrench, wheel stand and jack? Thanks, Mike -
While waiting for the ignition to come back from the shop, I looked at the rear quarter windows and I do not have a clue as to how these are sealed. Can someone provide some pics of an existing, unmolested car? Thanks, Mike
-
Yes, I took apart the drivers door latch and soaked it in Vapo-Rust overnight and rinsed it in hot water the next day. Air dried the mechanism and lubed all moving parts. Looks and works like new.
-
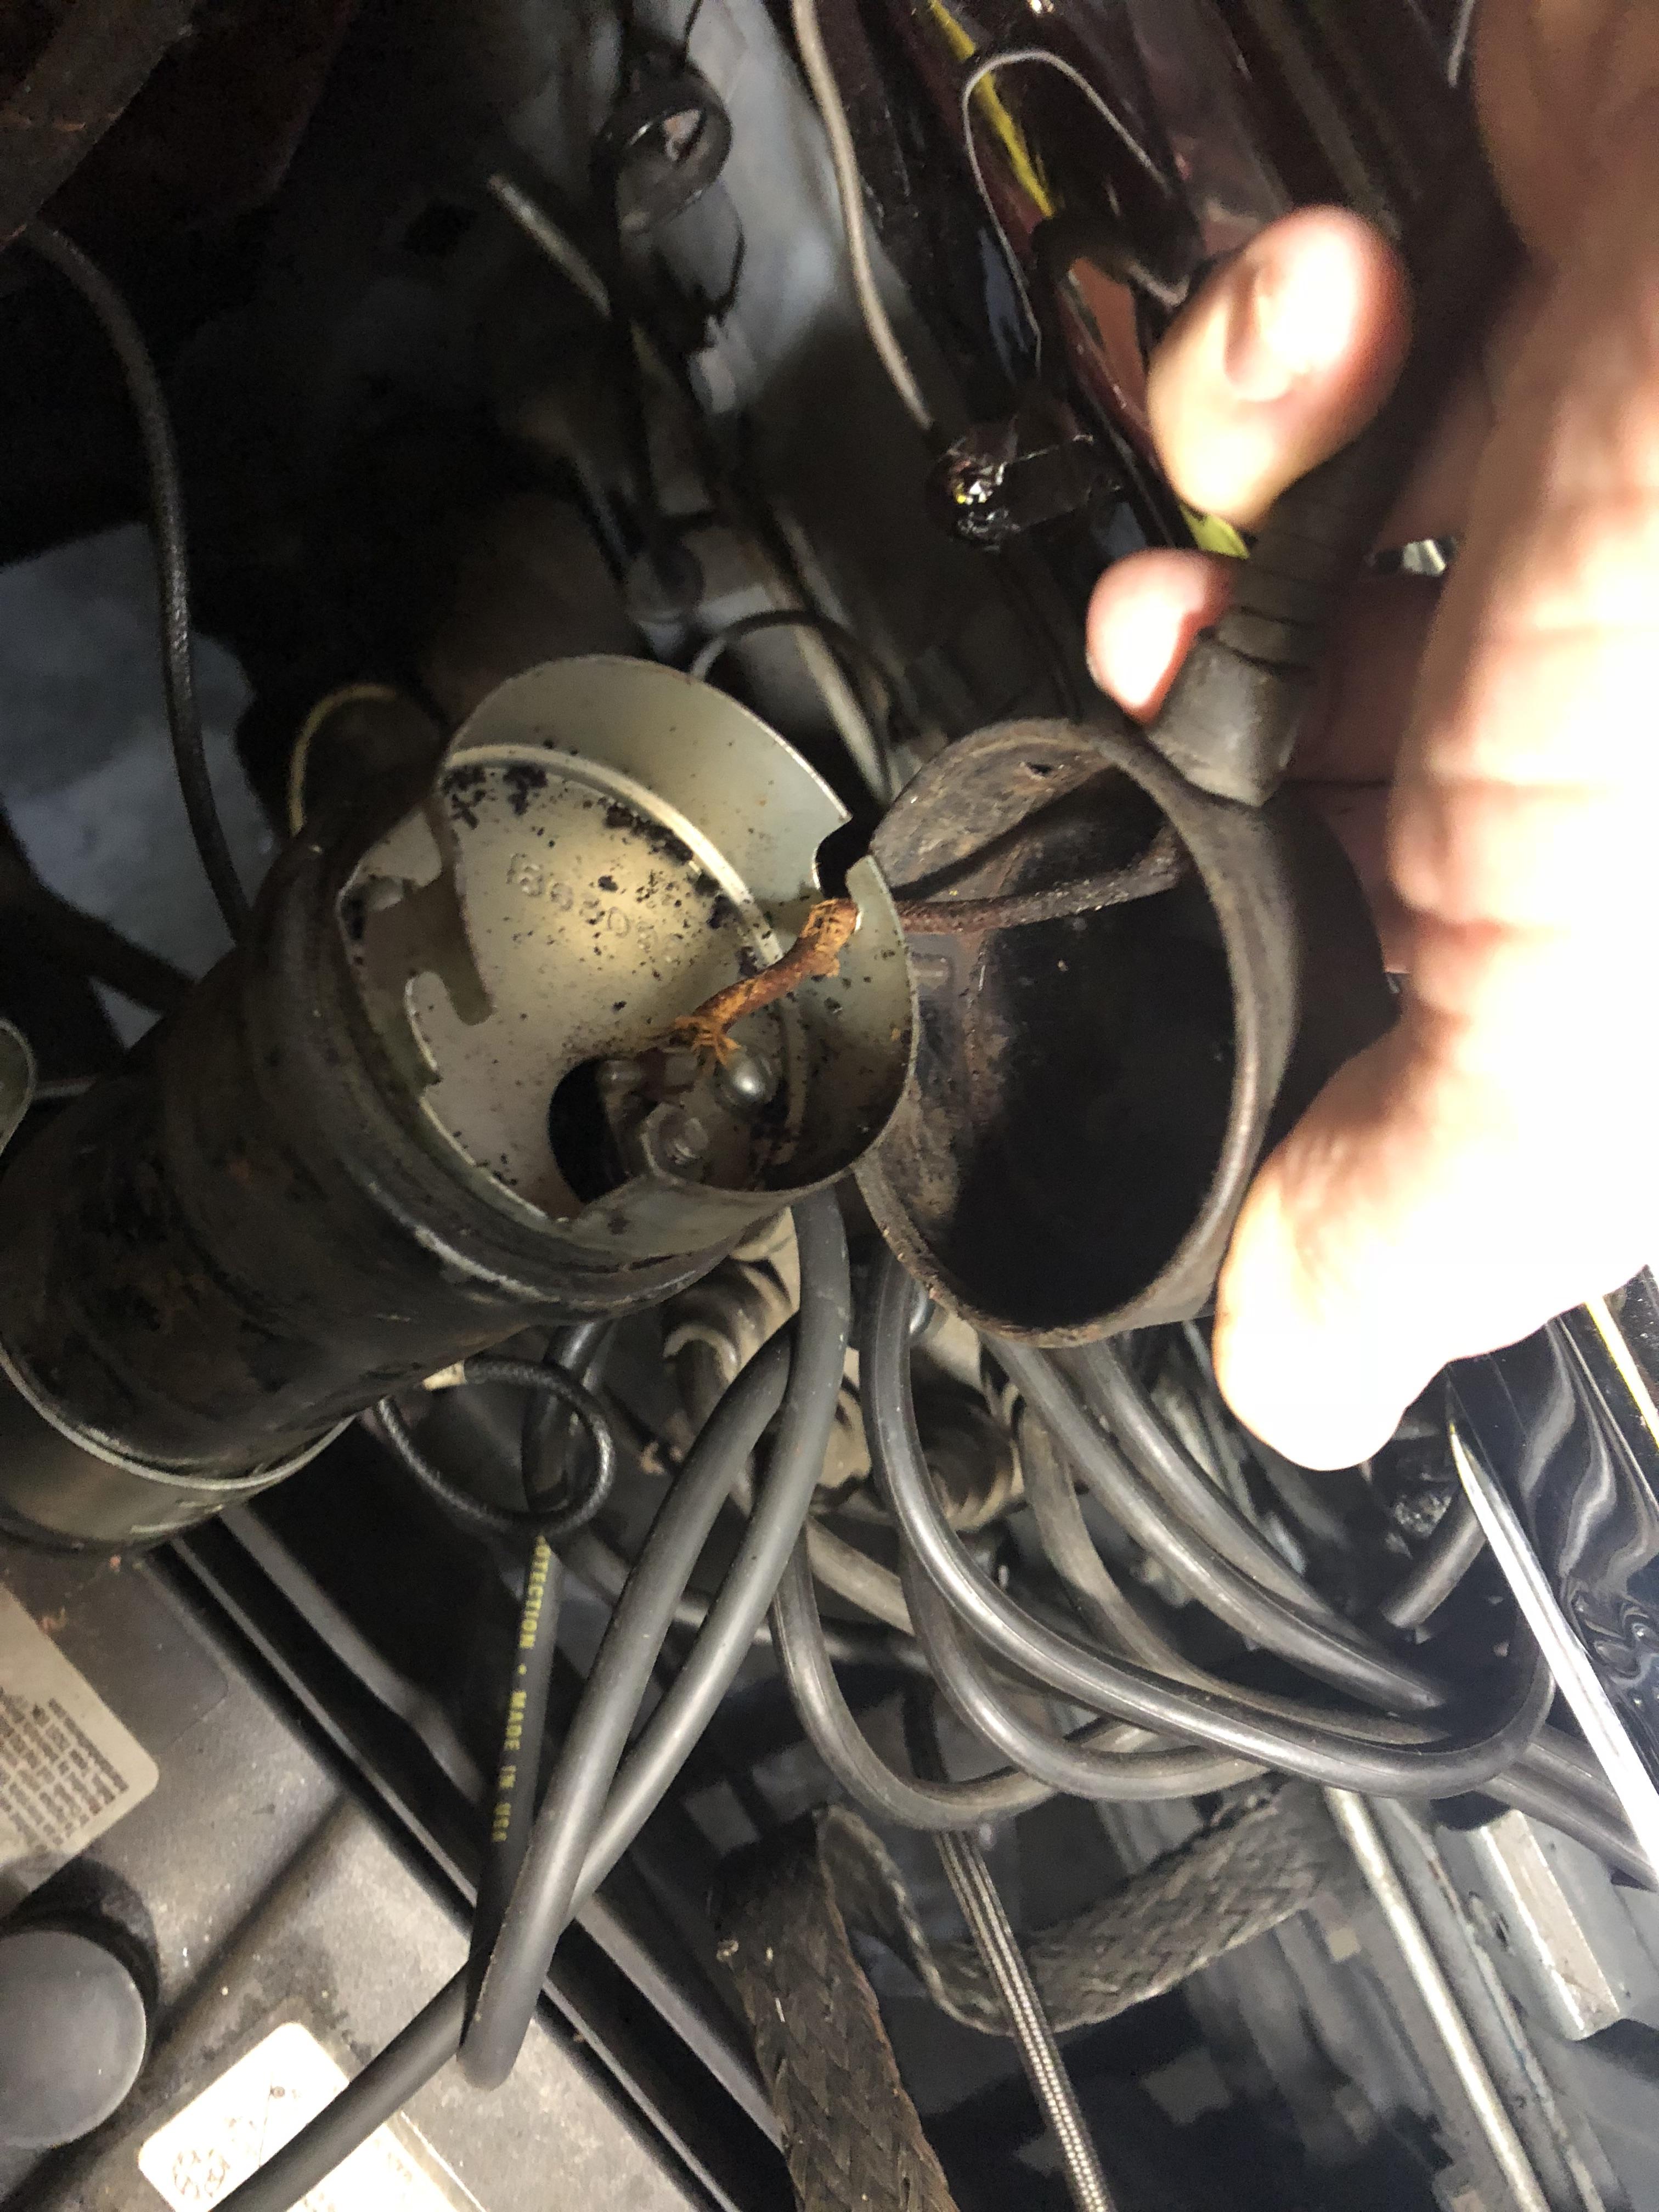
Good news and bad news...... the cowl vent is installed and works great. the small carriage screws provide some adjustment, front to back when the vent is closed and this takes a little bit of tinkering. Also the base of the handle used to open and close the vent is a bit of a challenge to secure while you are standing on your head, but all is in and adjusted properly. The bad news came when I removed the ignition key and re inserted it and turned on the ignition. I smelled smoke and the cable that attaches to the coil was very hot (this is bad). I let it cool down and removed the coil cap and the total ignition, making sure that the two wires leading to the ignition were marked. I found the coil wire (looks original) insulation had grounded out to the coil cap. On the bright side, good thing this happened in the garage. I sent the part to Doug and he will rebuild the switch and run a new wire from the ignition to the coil cap. The rest of my car has been rewired, this is the last piece. This is the original style coil hard steel cable in my hand attaches to back of coil. Wire is junk and grounded to coil case. Below is the ignition inside the car, black cable goes through the firewall.


-
The topic of your thread got me to do some thinking. I consider myself more of a caretaker, than an owner of my '40 Buick as it has been on this earth longer than I have and I hope it will be around long after I am gone. That having been said, I am worried about the future of this hobby as it doesn't seem as though many young people are entering this hobby. I had an experience the other day looking for a passenger side door latch that may have some bearing on this concern. The experience went like this: I bought a door latch from a salvage yard in another state for $75 plus shipping (I thought this was fair). The part was removed with a cutting torch and this made it unusable, so I returned it for a full refund. I spoke to a member who said he could locate one and I am still working with him. I then contacted a salvage yard in Idaho who said that they had the part and they would sell it for $200 plus shipping. Meanwhile I have spoken to two sources who may have this part. I do not begrudge anyone making a living. We all do what we can to get by in this world, but brings into question what is a fair price for a part on a car that is nearly 80 years old. I don't have the answer to this question, but it seems to me that many young people could be getting priced out of this market.
-
Thanks for replying to my question. Ternstedt was a sub contractor to Fisher Body at this time, Wikipedia has a nice article on the original owner of this company. When the "C" body came out in 1940 the outside door handle was in the belt line for the Super and Roadmaster models. All other models the outside door handle is below the belt line. I have seen photos of the "C" body Oldsmobile, Pontiac and Cadillac La Salle all have the door handle in the same place as the Buick, but I sure like to find a guide to interchangeability on this part. If anyone has any knowledge about this, I would sure appreciate it. Thanks, Mike
-
Thanks Neil, I'm celebrating every win I can get.
-
I do not know much about the Oldsmobile of 1940. I have a 1940 Buick Super that has the door handle located in the belt line. My door handle mechanism has been turned to junk and I was wondering if there is interchangeability with the "C" body Oldsmobile of this year. Any help would be greatly appreciated. Mike
-
Had a great day yesterday working on the car. First I was able to find all four of the small carriage bolts (see pic below) used to connect the cowl vent to the frame under the dash. I will post pictures after this is complete. With the pile of nuts, bolts and washers that I received when the car was returned to me finding these small parts sure picked me up. The second success was getting my brake lights working. I had the car rewired in California and when the car was delivered in January the brake lights did not work. I have some basic electrical skills, but I am by no means an electrician. I found voltage at the pressure switch and jumped this across the switch, no luck. I tried testing the continuity from the switch to the tail light. There was no continuity (getting close). I purchased an inexpensive cable tracker and connected the power to the pressure switch, after I disconnected the battery. I switched the power source to "tone" and started at the switch. I didn't have to go far. just underneath the dash I found a disconnected wire, connected the wire and toned it all the way to the brake light. I disconnected the cable tracker and jumped across the brake switch and brake lights work great. It sure seems like the little things that kick your butt. Mike


-
Thank you both Neil and Ken for the quick reply. I read the Body Manual once again and it does say to remove the screws on the body panel. I thought that it was just two screws. I will follow your lead on this one. Do you know if these regulators are used on any other years, or is this specific to 1940 and 1941? I will work on picking up these parts as soon as possible. Thank again, Mike
-
Thanks Neil for the quick reply. I read the Body Manual once again and it does say to remove the screws on the body panel. I thought that it was just two screws. I will follow your lead on this one. Do you know if these regulators are used on any other years, or is this specific to 1940 and 1941? Thank you, Mike
-
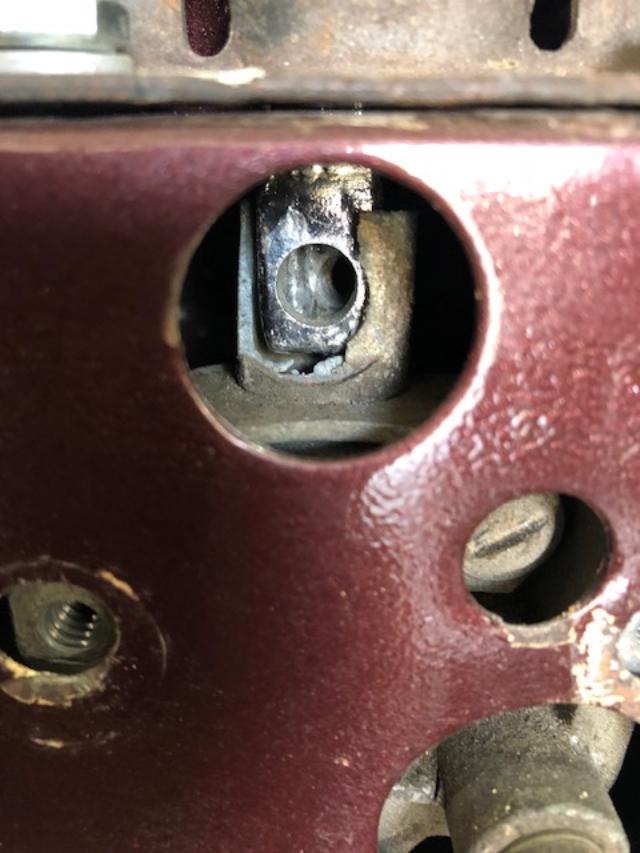
Some success and a small setback today. I worked on the drivers side window and found that the shop had put the wrong size screw (bottom) and when you rolled the window up or down the gears would interfere with the winder. Happened to have the correct length screw and all was well. Next I thought that I would check the vent window and found that you could push the vent window open without using the regulator. After using some choice words for the owner of the shop that had the car for six years I found the regulator to be broken (not that way when it went into the shop). I removed the two screws, one shown on lower left and tried to remove the regulator, but it will not budge. I looked in the Body Manual for '39 and '40 Page 25 Operation 60 and the shaft bolt (gone) and the retaining screws and all that this operation mentions. Does anyone out there have any ideas? Thanks, Mike

-
Has anyone had a chance to look at the seals on the rear quarter windows lately? If you could include a picture or two, I would sure appreciate it. I am looking at the ones that are offered by Steele Rubber, but don't know if what they have is accurate.
-
Hello Rodney, Here are the before and after photos. The filter looks larger in the after photo, but I think that is because of the angle that I used (no pro photographer here). The filter is a Fram CA8507 and it is 6.9 x 3. The math says that you could use a 7 x 1.66 but I chose the 3" tall filter to account for the air flow restrictions (probably over sized). I haven't mounted it on the carb, as I still have some details that I'm working on in the engine compartment. I do have the smaller filter, which is a Fram CA6605, 7" x 1-3/4, should work and look a little neater. Good luck. Mike


-
Thanks for all of the input, Rodney's post got me doing a little more research and I stumbled across this site: http://www.onallcylinders.com/2013/11/27/match-air-filter-size-engine/. This is a great article that talks about supplying an adequate amount of clean air to the engine. The formula begins with providing the area of the filter media (A= CID x RPM) by multiplying the Cubic inch of the engine times the RPM at maximum horse power. I have a 263 and the maximum horsepower is 3600 @ 124 HP (engine is RE). To get the height of the filter divide Area by ( Diameter x 3.14) + .75. I got the diameter using the greatest that would fit in the existing housing 7 inches multiply times pi and add .75 for the rubber gaskets on the filter. It all looks like this: A= 263 x 3600 / 25,500 = 37.129 then, H = 37.129/(6.9 x 3.14) + .75 = 1.66. I used a 3" filter height instead of the 1.66 to account for restrictions in the air flow as the calculations don't seem to account for that. Just a thought....
-
Hello Neil, I have been in touch with Doug for a number of years and he is a great guy with a wealth of information on our cars, but I have spent a lot on my cars restoration and his prices are a little bit high. So to keep my wife happy I'm trying to be a little careful on what I spend on parts. Thanks, Mike
-
Hello Jay, I had it done in Base coat/ Clear coat, but it was done six years ago and I'm in need of touch up in a few areas. I have the card and you are right, it is hard to tell what the color really looks like. I had a draw down done on a 8x11 sheet and then you can really see what you are getting. Mike
-
http://www.autocolorlibrary.com/ Jay, This site gives some good information that could help with your decision. I will also provide the shop with an accurate color formula.
-
Hello Jay, When I decided to change the color from the green, I consulted my wife (good to get her buy in). She suggested that I pick a color that was available for the 1940 Buick. I have a page from Acme Proxlin that has color samples attached. The color that we picked is called Royal Maroon No. 5530-A. Under the color it states, 737 Deep Maroon...... Fill to 55- 1/2 and 836 Luminescence .....Fill to 56. The Buick color number for that year is 544. I have received many compliments on the color, both from pics and in person. I have to credit my wife. Mike
-
Thanks for the tip, I will give him a call on Monday. Mike