


Taylormade
-
Posts
2,396 -
Joined
-
Last visited
-
Days Won
1
Content Type
Forums
Gallery
Events
Posts posted by Taylormade
-
-
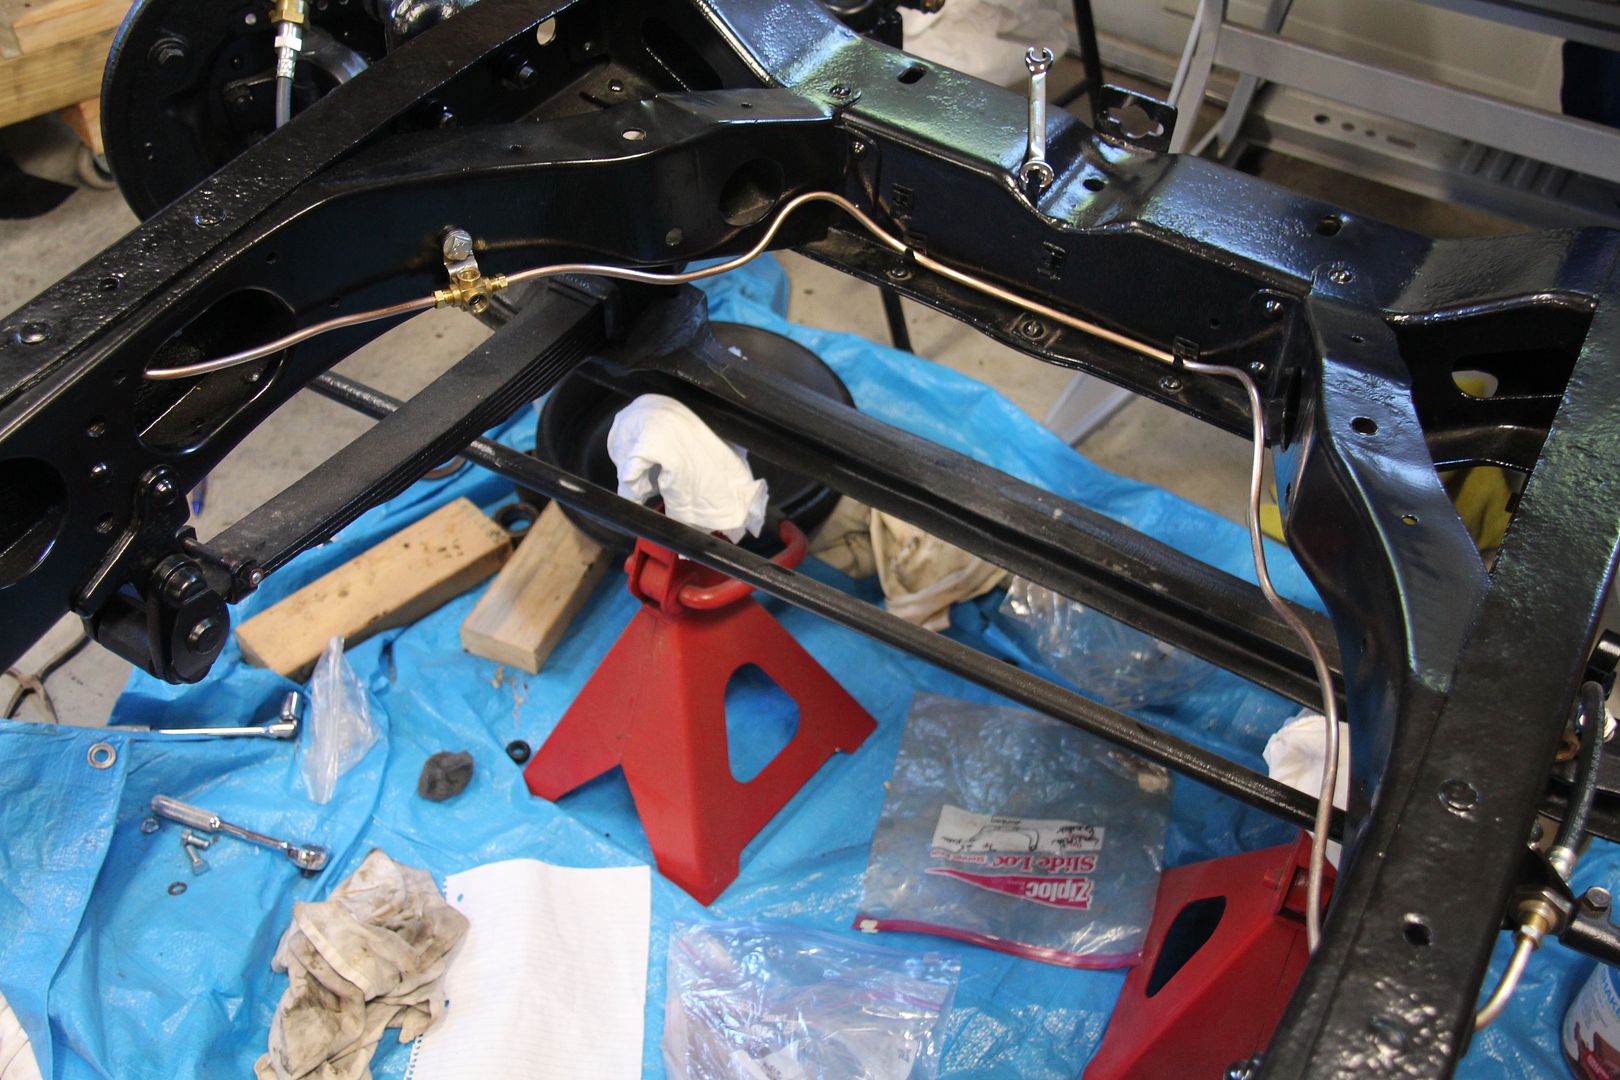
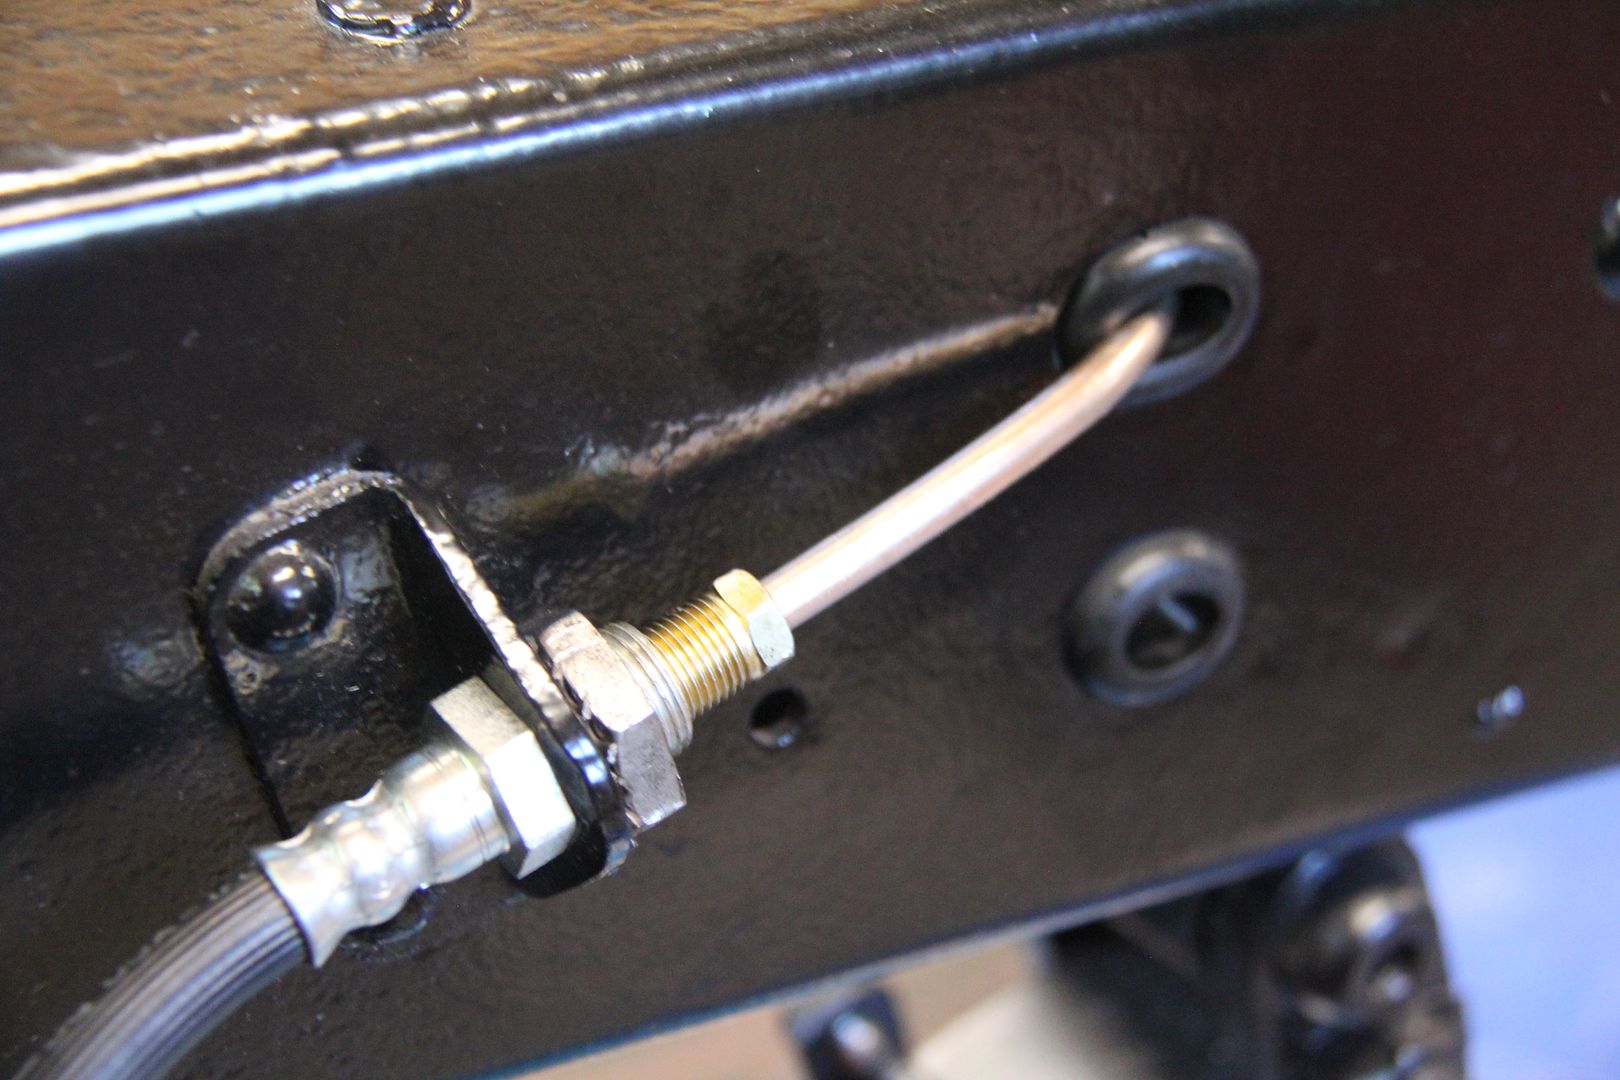
I second replacing the lines. Copper can become brittle after years of flexing and vibration. I did keep the copper lines on a 29 Plymouth I had years ago, but I was young and foolish back then. My 32 Dodge had what appeared to be copper lines, but when I got all the crud off them they turned out to be steel with a copper coating on the outside. I replaced them with Cunifer lines, and, as stated above, this material is very easy to work with. You can bend it with your hands and it forms easily. It also has a coppery shade that resembles the original copper lines. It's used on many European cars and meets all standards for strength and durability.
-
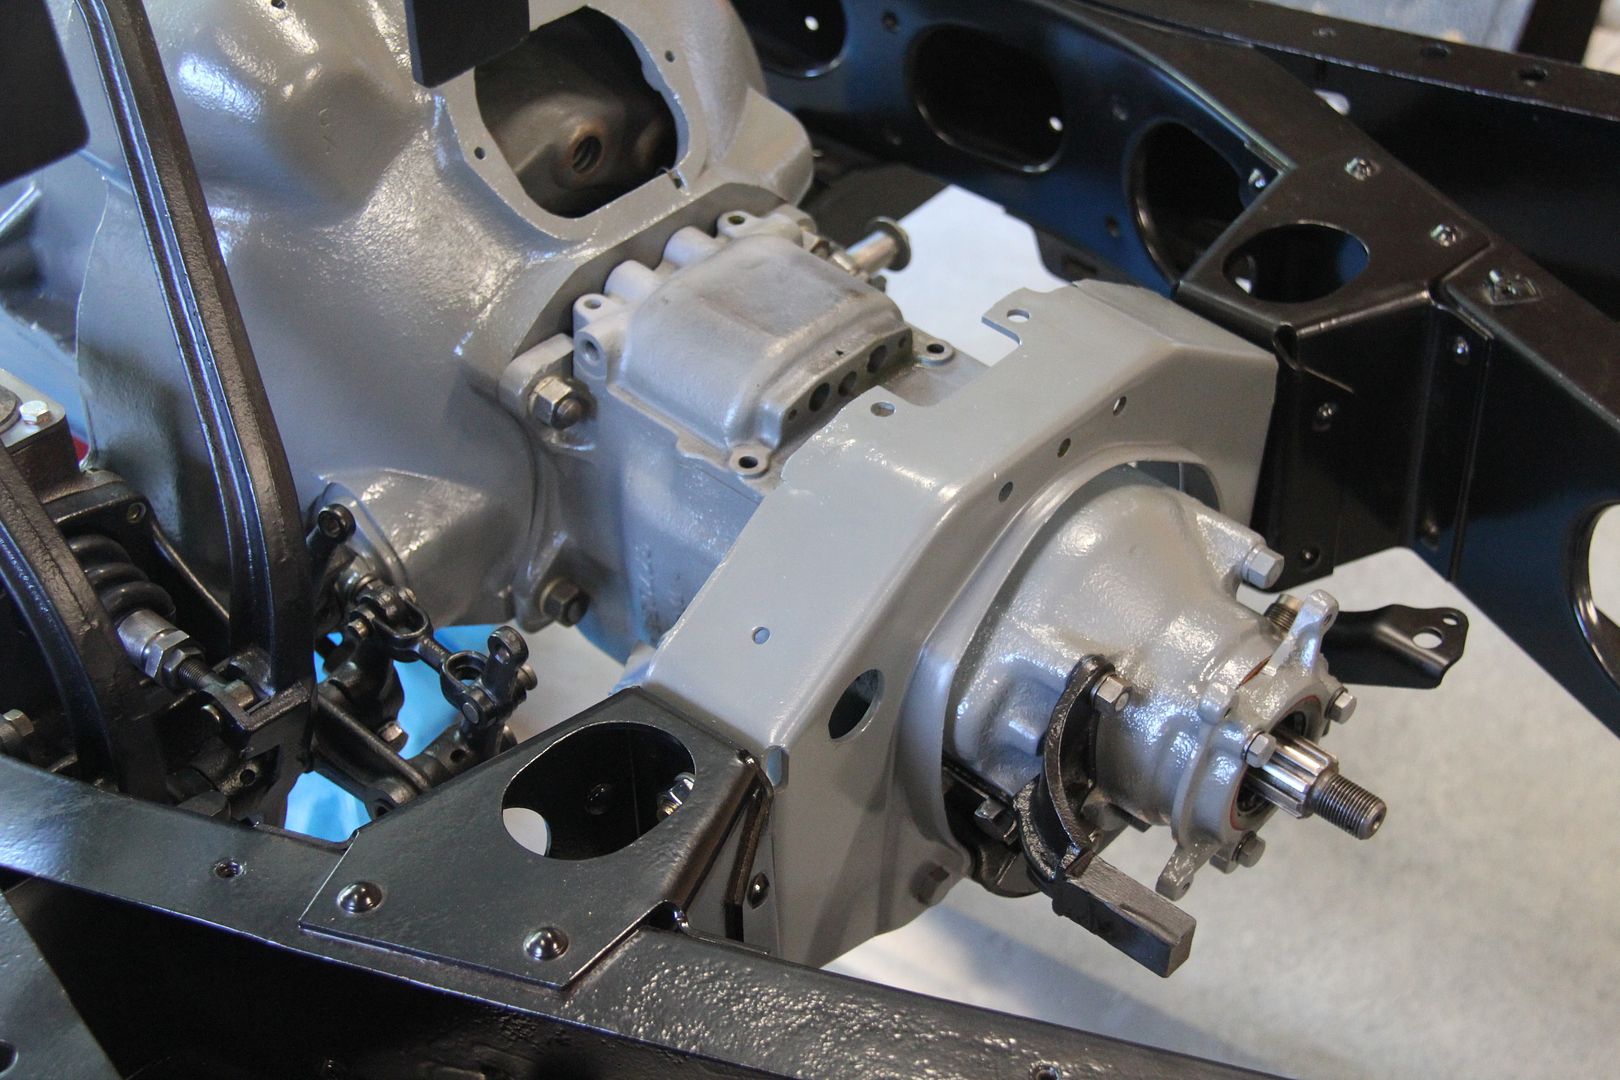
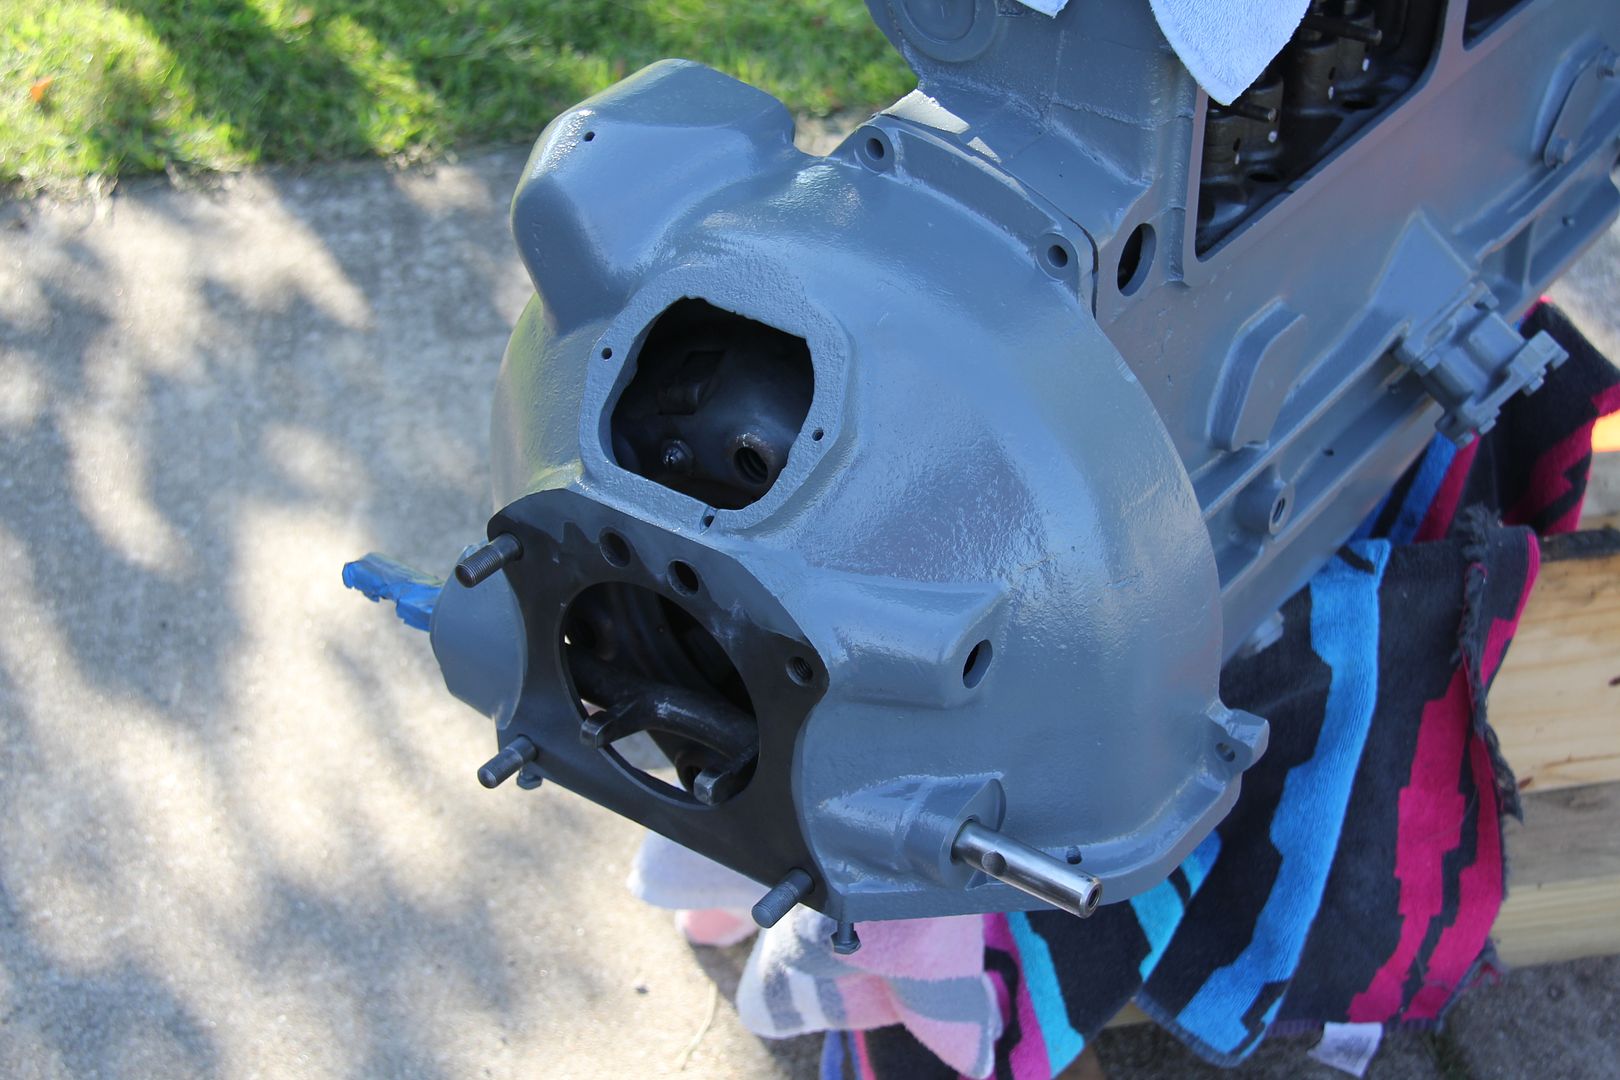
Yes, four bolts, just like yours. They did look symmetrical, but they weren't! It only goes on one way and I'm sure this is to align the timing marks correctly. Although your frame looks similar, the transmission mounting set up for the floating power is very different. Notice the way mine is mounted. It's a real pain to get the transmission out with this design. The front motor mount looks close.


-
At least on a 1932 Dodge six, the flywheel bolt spacing is asymmetrical and it will only fit on one way. I just dealt with this recently and it was a real pain figuring out the correct position, especially working in the tight spacing inside the bellhousing. I agree with ply33, you can remove and install the flywheel with the bellhousing on, in fact, as I remember, you have to. If you install the flywheel first, the bellhousing won't go on as the locating studs stick out too far to allow it to slip into place. It looks like your method of slipping the two together also worked.
I installed mine off the frame.
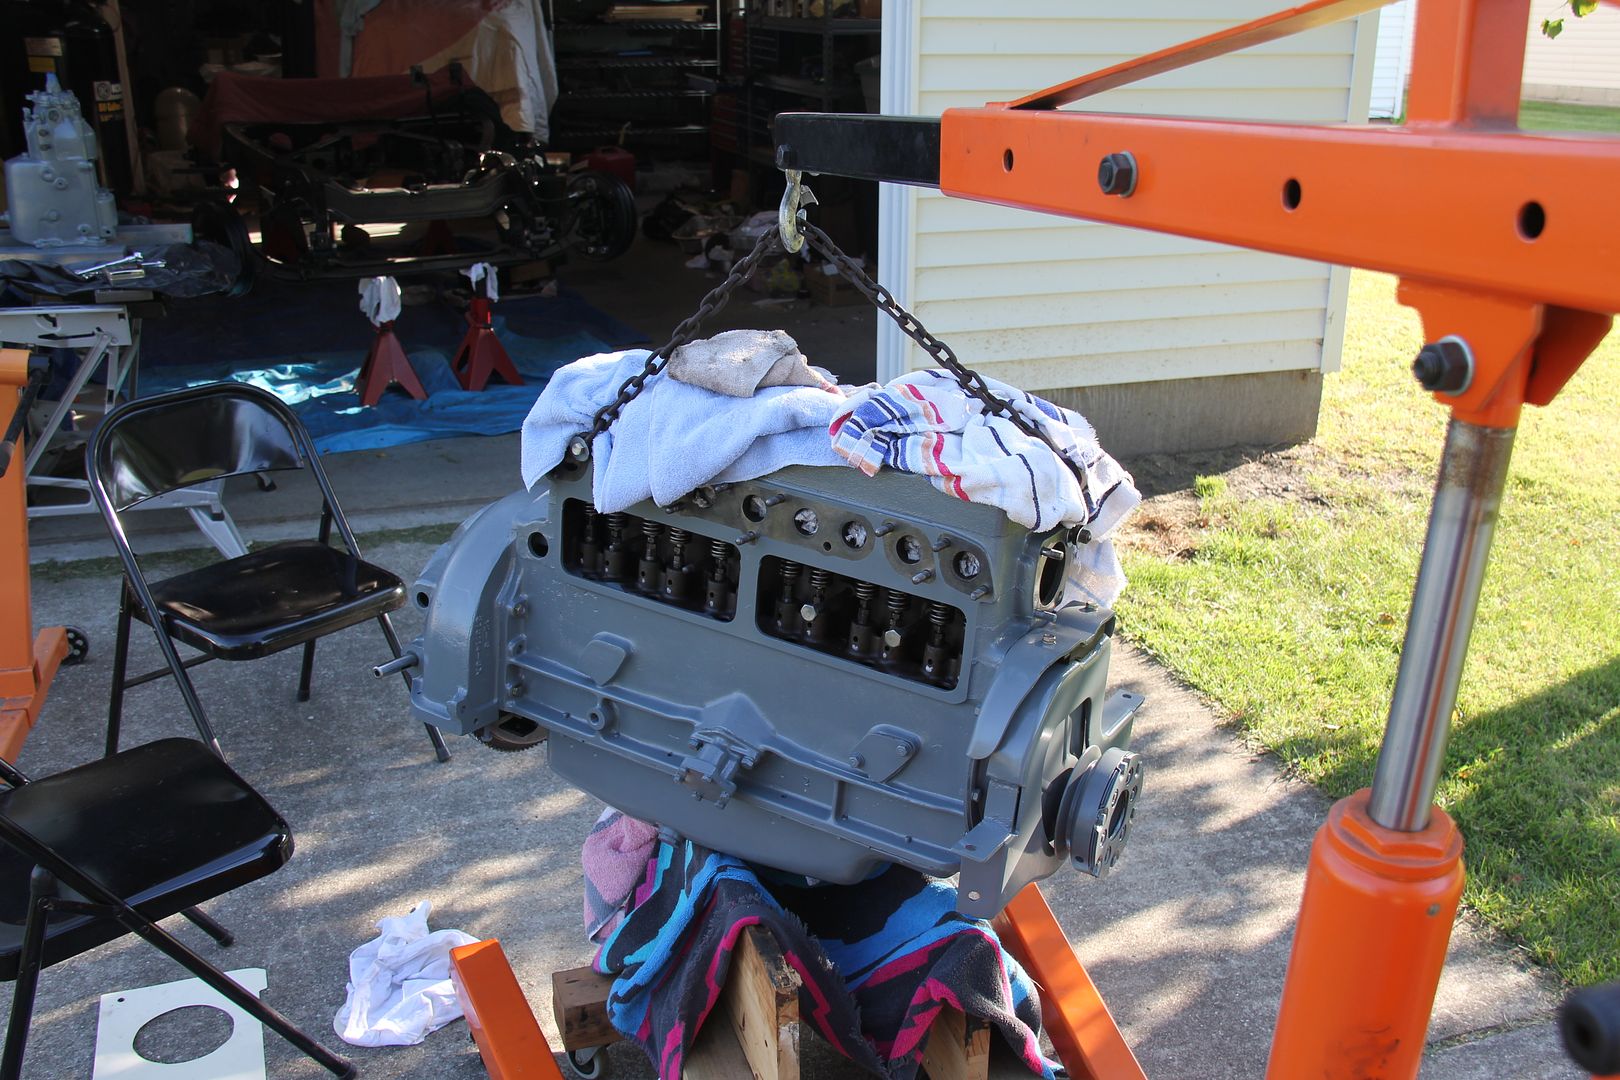
I didn't take any pictures as it took both me and my wife to get it all together. From your diagrams, it looks like our cars are mechanically similar. I have the same cover to expose the flywheel marks.
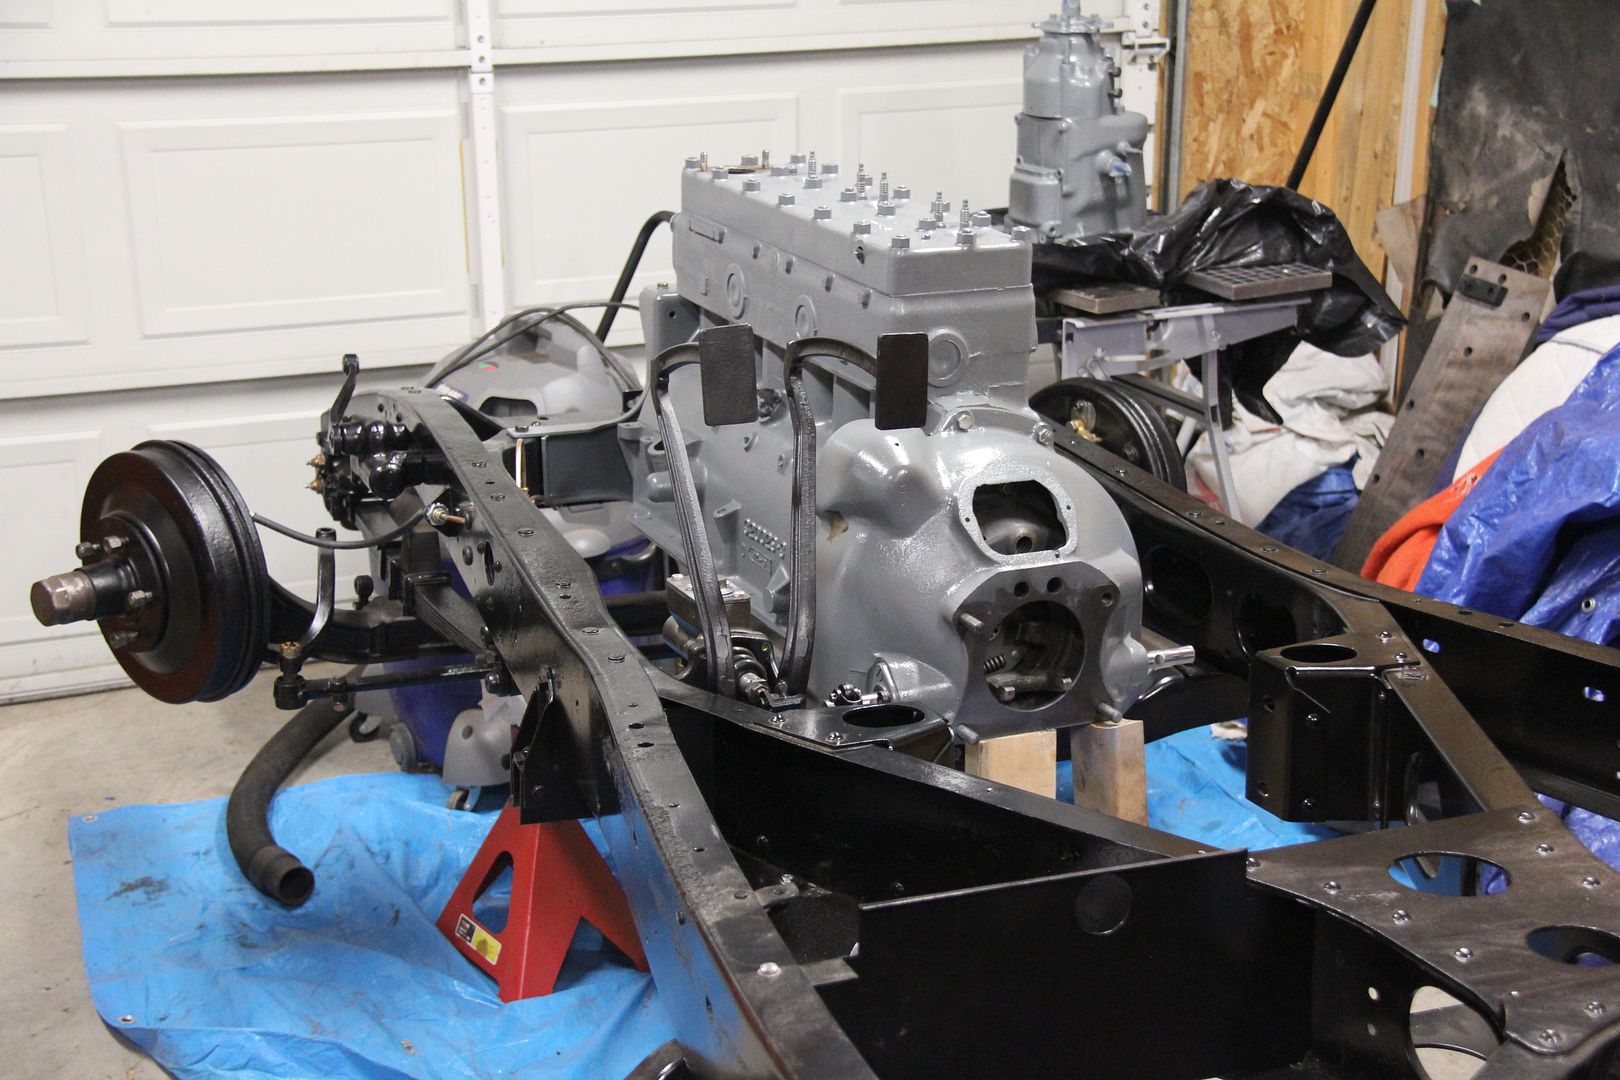
It's always a relief to get everything in place.
-
The horn button and the levers are probably held on at the bottom of the column. Mine were attached to a Clum switch for the headlights. You'll need to take off whatever is attached to the levers and then the two levers with their shafts will slide out of the steering column along with the horn button and its wire. At least that's how mine was built.
-
It looks like you could carefully enlarge the holes in the body of the goddess and take a bit off the mounting studs with a Dremel. I would tape the chrome areas just in case of a slip, although all the work needed appears to be in no visible areas. Once the head fits, I'd epoxy the two parts together.
-
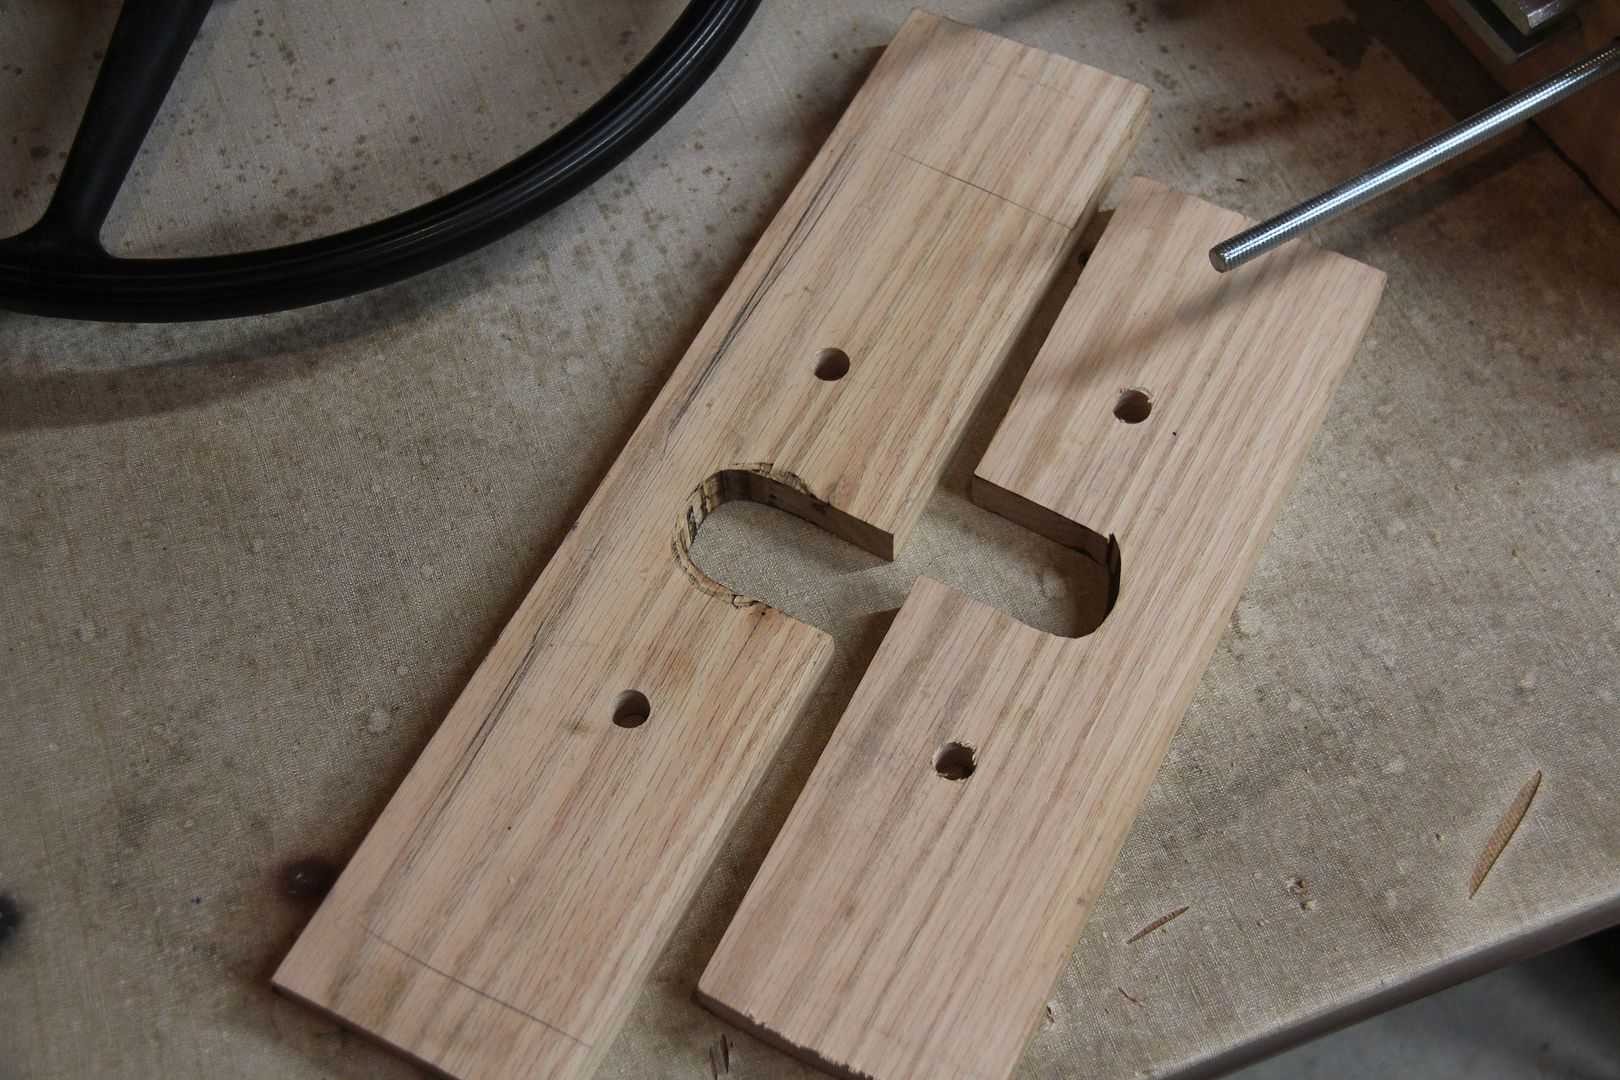
I had to pull the steering wheel on my 1932 Dodge Brothers and didn't have the correct puller to handle the job. The only puller I had was purchased to use on my 48 Plymouth and 50 Dodge - you can find one like it in most any auto parts store. It had threaded bolts that screwed into threads on the wheel. My car has no such threaded holes so I had to improvise. I made this puller out of my old puller plus some leftover oak scrap I had from my seat construction project and two long threaded bolts. I used two boards on each side for strength, with the two notched boards able to fit over the steering shaft from each side. The wood holds the steering wheel solidly in place, front and back.
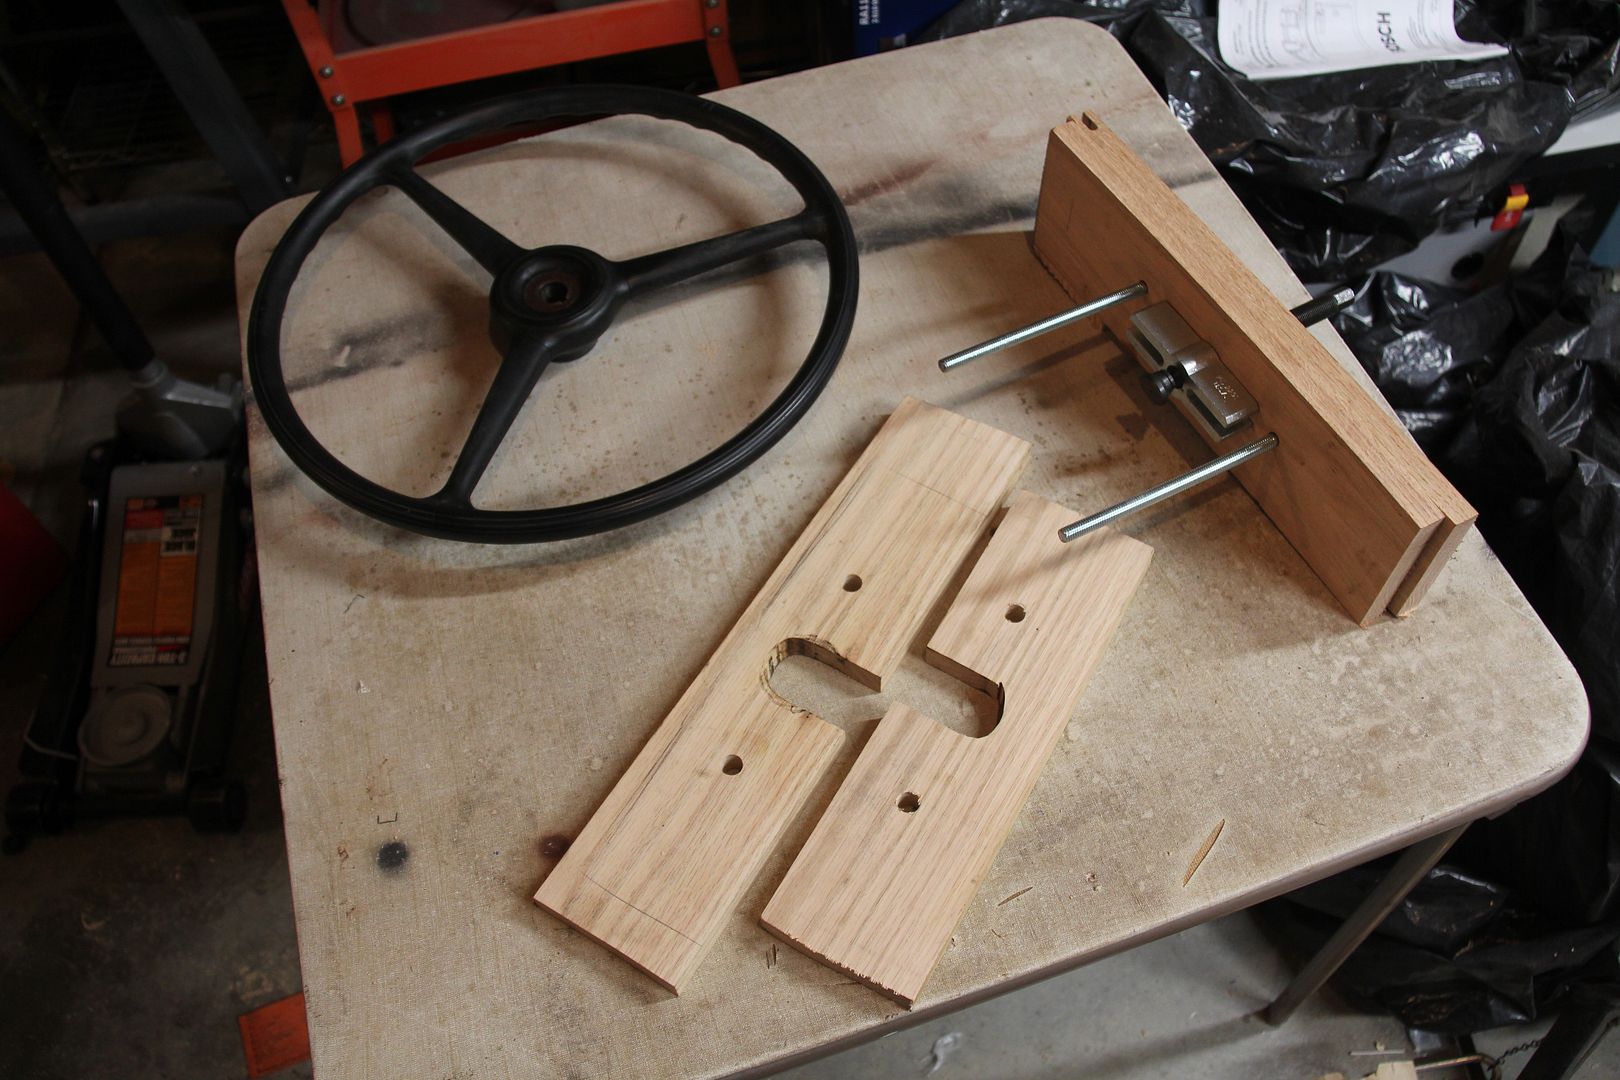
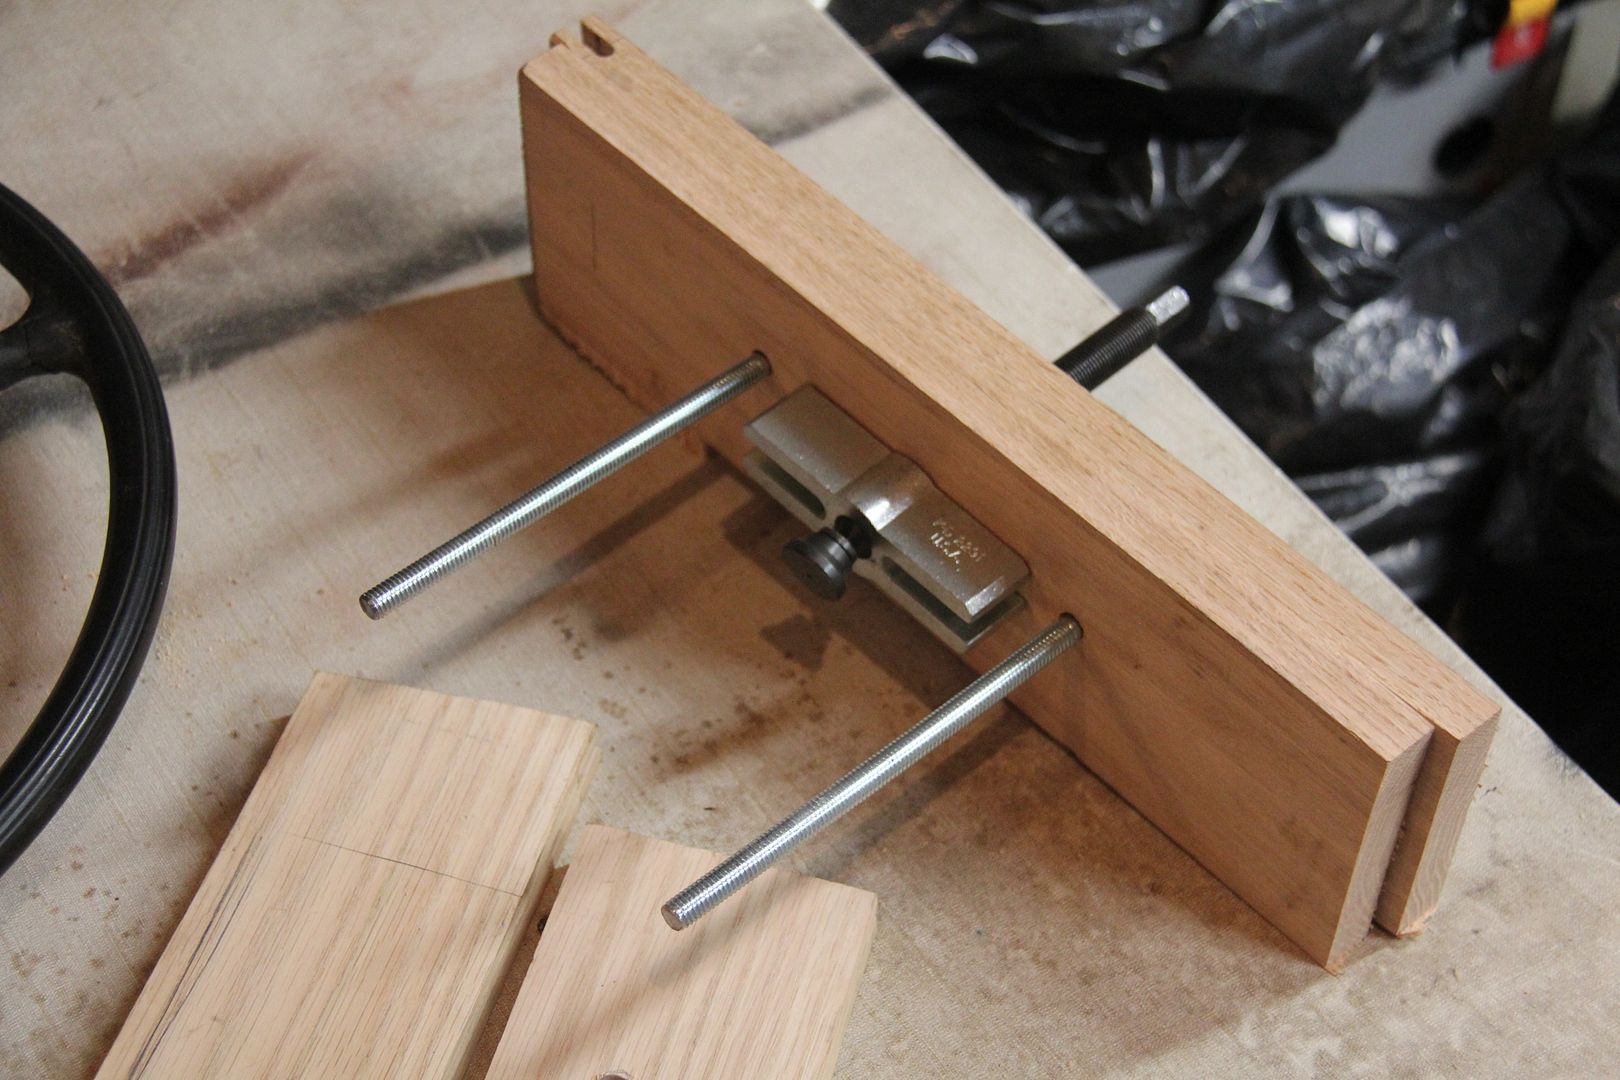
Once I had everything bolted together, I wound down the threaded shaft against the top of the inner steering shaft, hoping the wood wouldn't break. After a few turns, there was a loud bang. I thought the wood had gone, but it was the sound of the steering wheel popping loose after 84 years. No damage to the wheel. Occasionally my hair-brained ideas actually work!
Obviously, you need to take the nut off the steering shaft before you remove the wheel.
-
Got it! Very innovative.
-
I would really like to know how you used a bottle jack to push the axle out. I just can't get my head around the mechanics of that. I think your axle is very similar to the one in my 1932 Dodge Brothers. I found all new bearings and seals at my local bearing shop at reasonable prices.
-
While having no direct experience with a Packard Goddess, I can warn you that a rechrome often leaves parts with a thicker layer of plating than was originally found on the piece. Extra copper, used to fill imperfections, can build the plating up much thicker than the original. My beautifully plated cowl lights would not accept their equally beautifully plated rims due to this problem. Be very careful. I would contact the plater and discuss it with him.
-
I think you will discover that altering a sedan body is no easy task. It will take an expert metal fabricator to do the job correctly. Not that it can't be done, but if you are figuring on chopping off the top of a sedan and being ready to go, please think again. You will also need to find an original body that you can photograph and take exacting measurements off. I know what we went through just replacing some of the lower body sheet metal on my original sedan body. The time and amount of work to transform a sedan is going to be substantial and very expensive - unless you are equipped to do the work yourself. This doesn't take into account the wood replacement that will have to be done. I'm still at a loss to believe any semi-knowledgeable shop would not have seen the rarity of your body and done something to preserve it. If it is really gone, it's an irreplaceable loss.
-
I was lucky to have the wire wheel option which made pulling the drums a lot easier since they aren't attached to the wheel. There is a guy that makes pullers of the type you need, and maybe someone will chime in with his name and contact information.
-
 1
1
-
-
I've had good luck with a slide hammer. It's a bit rough on the bearings, but I was replacing them anyway, so it didn't matter. I also used the brake drum method as described by Ply33, and it worked just fine.
-
I learn something every day on this forum. Thanks, Gunsmoke.
-
One of the all time great looking radiator shells. And this from a 32 DL owner!
-
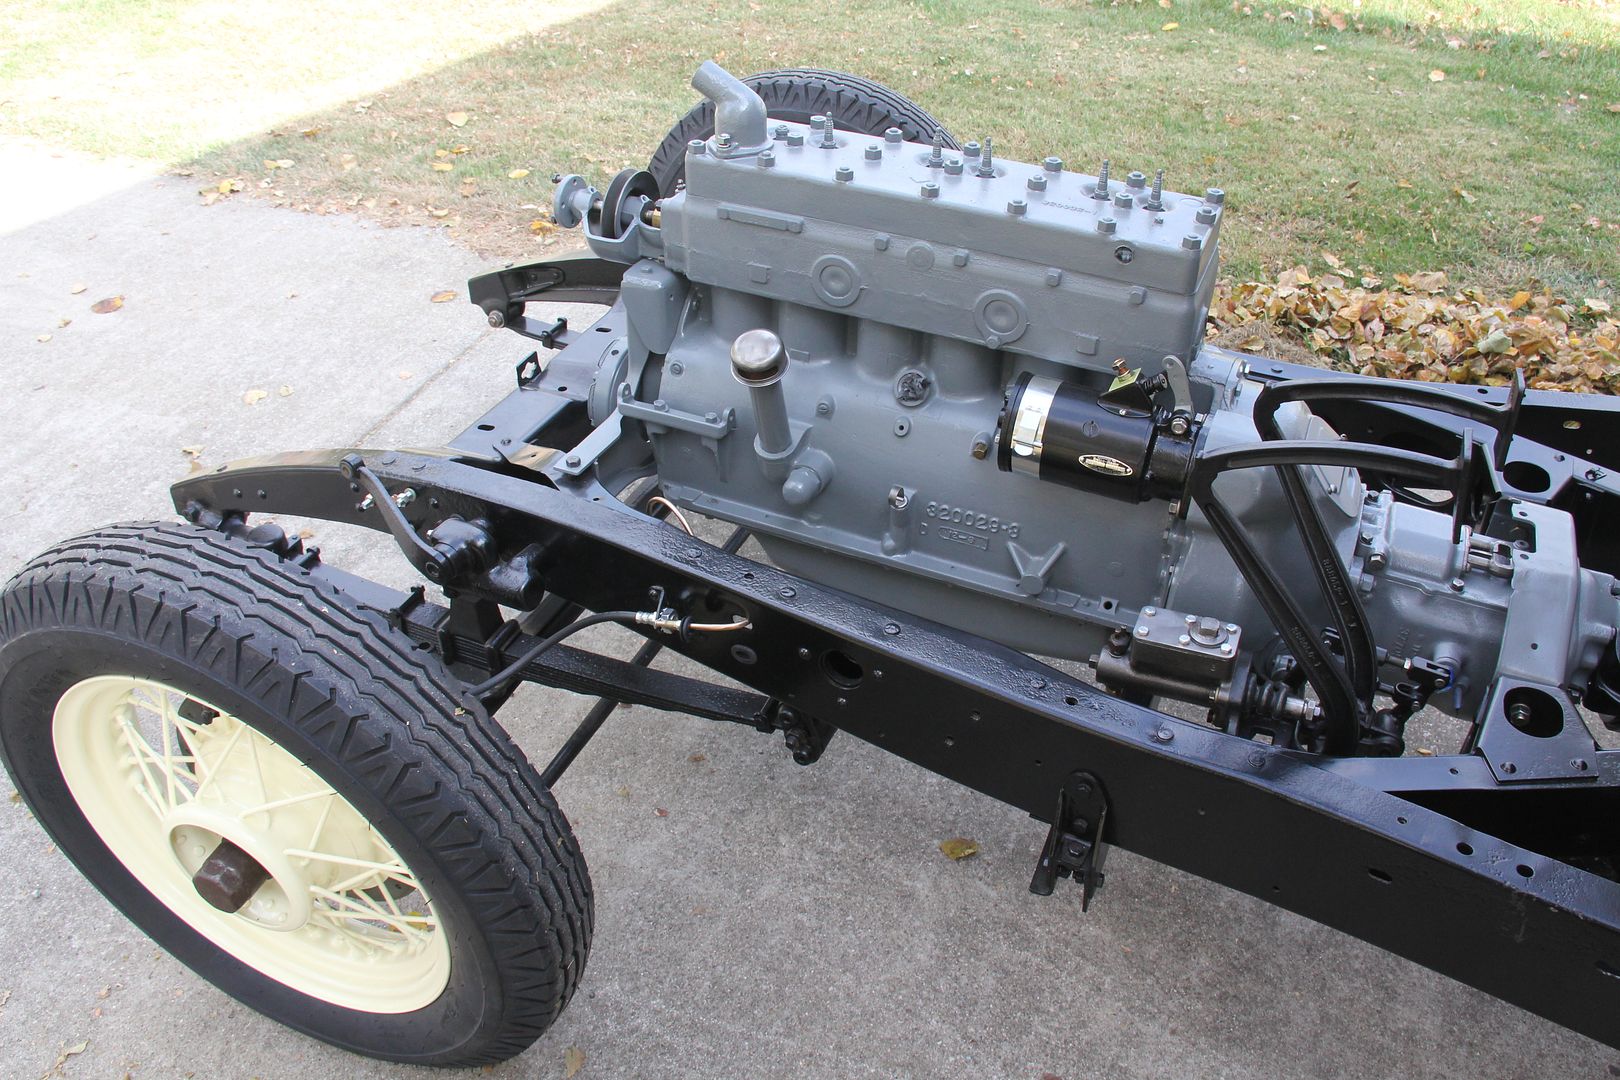
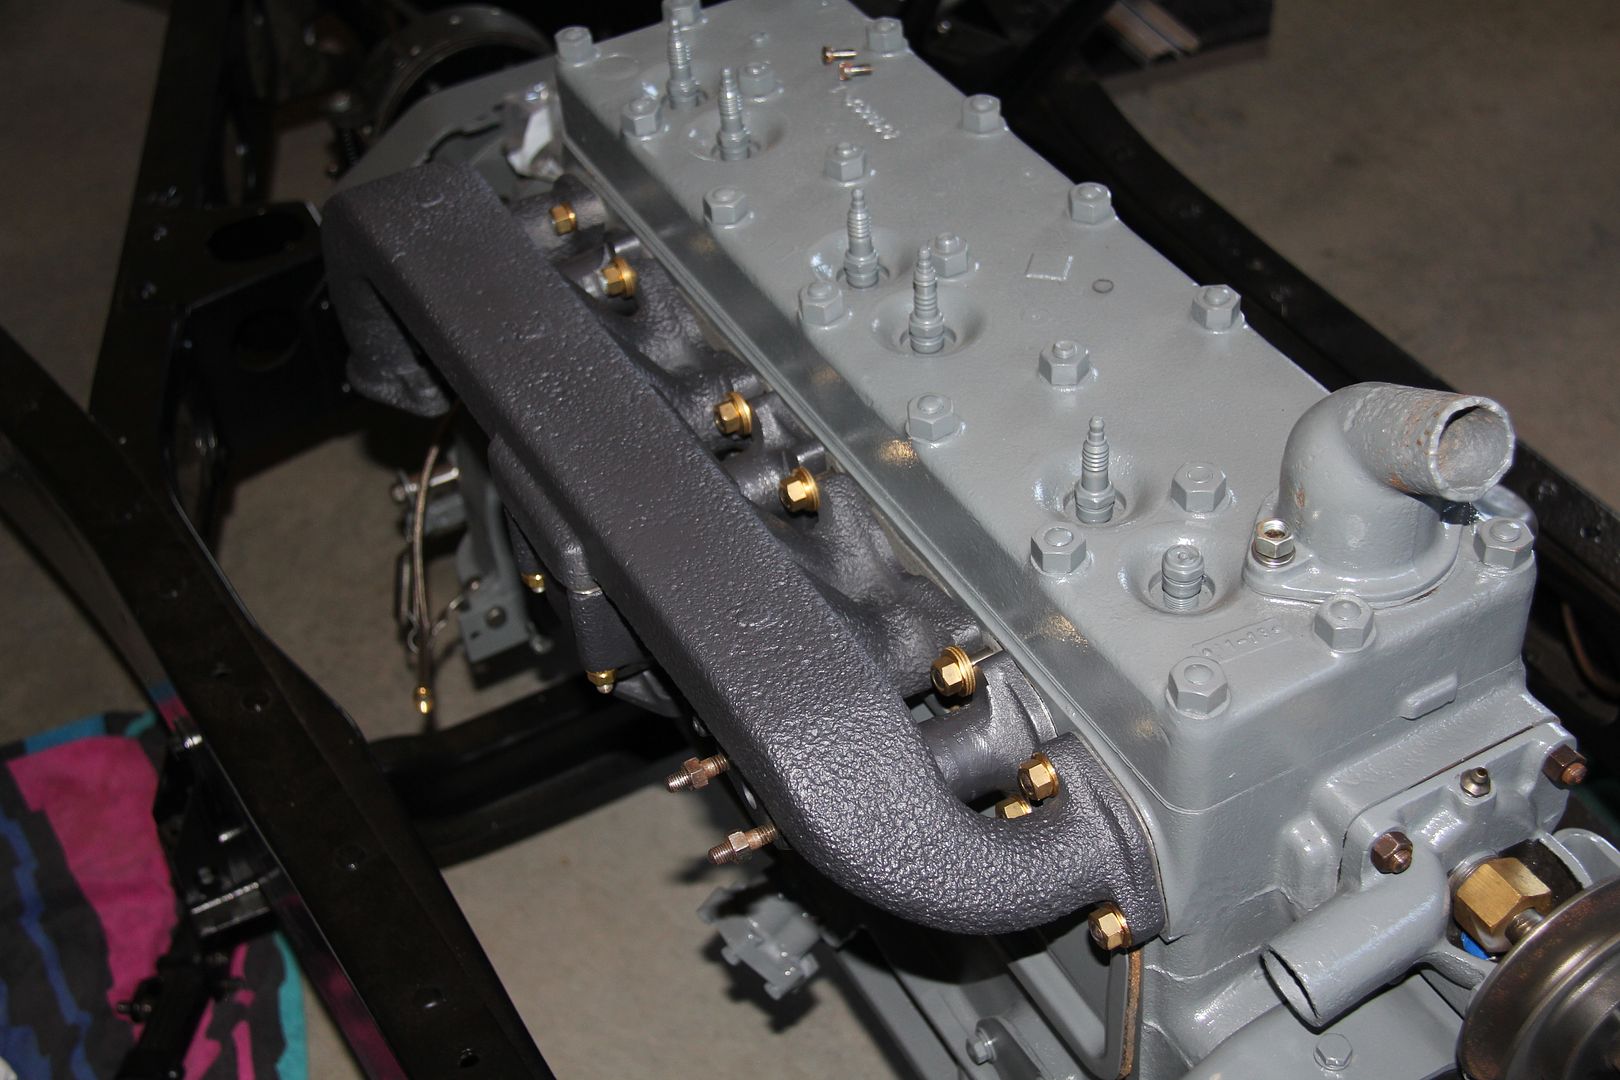
Just a question for my own edification. Is that the original manifold on the engine or one from a later model? I thought that engine had an updraft carb originally and was trying to figure out the current configuration.. Just curious. Glad to see your project is progressing.
-
Wow, that trip reads like a sequence from a horror movie. At least you found car parts, not body parts. A shame your missing pieces couldn't be recovered.
-
Thanks everyone. That's what i figured, but the new lacing I got from Restoration Specialties seems pretty stiff. I hope I can move it sufficiently to get the job done.
-
I also posted this on my restoration thread, but since we're on the subject...
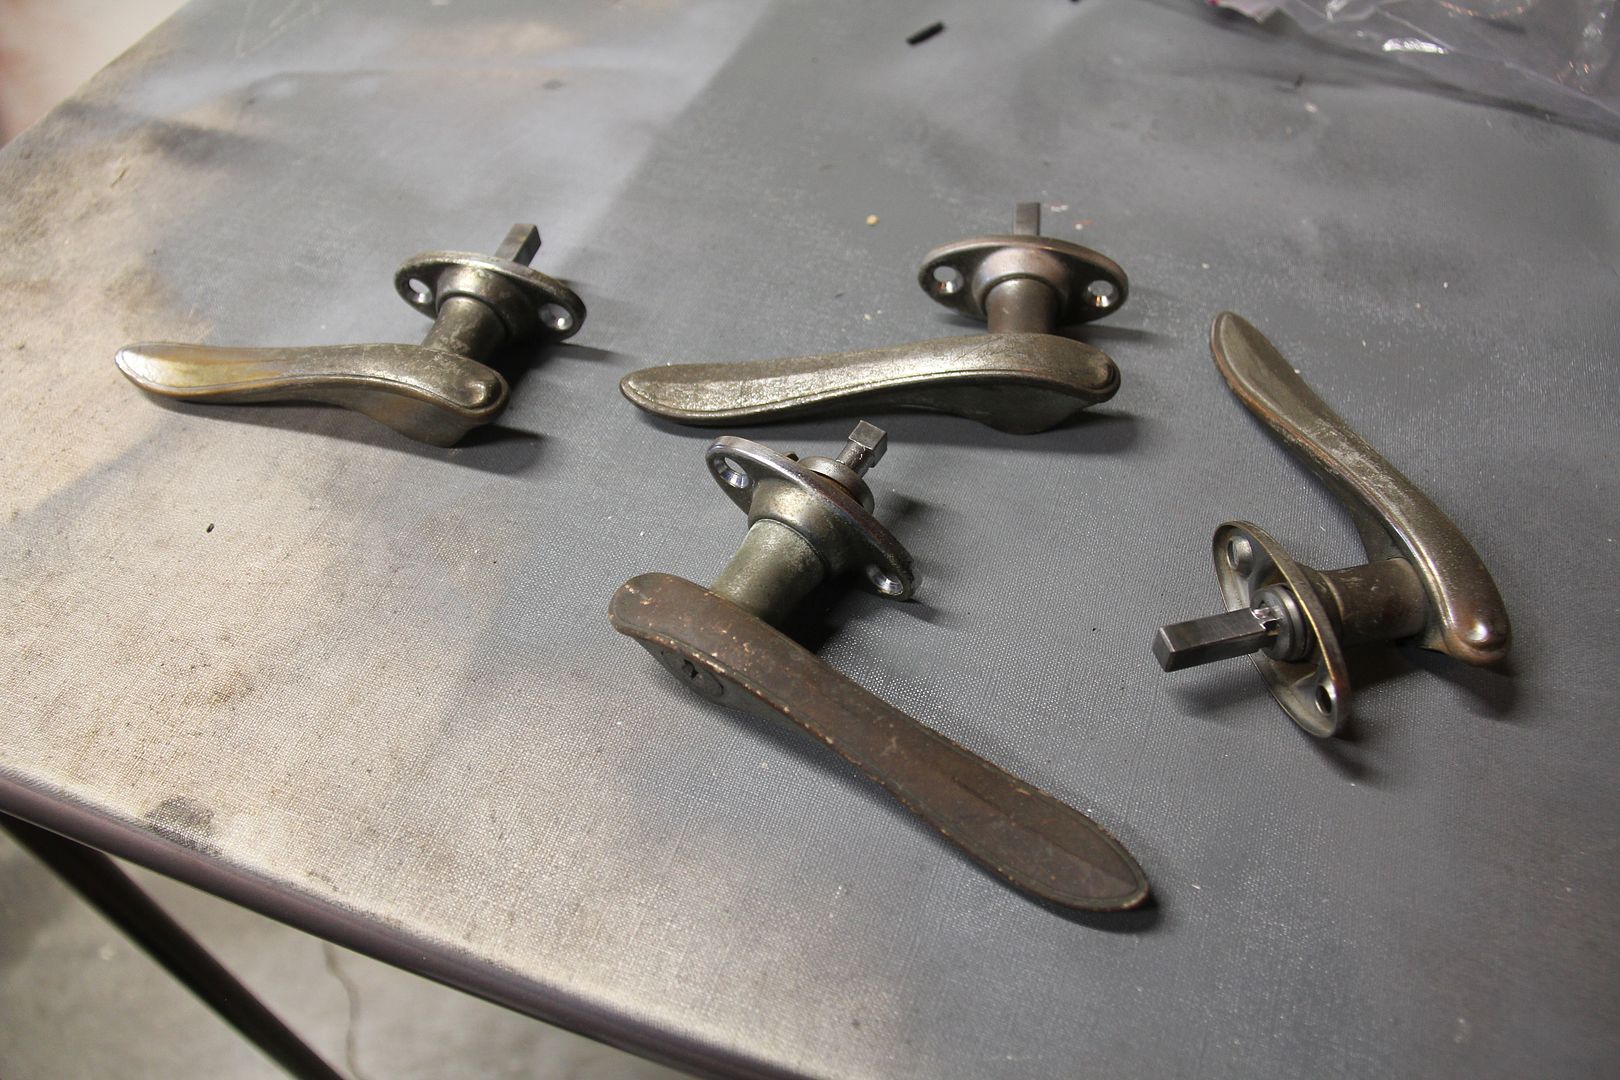
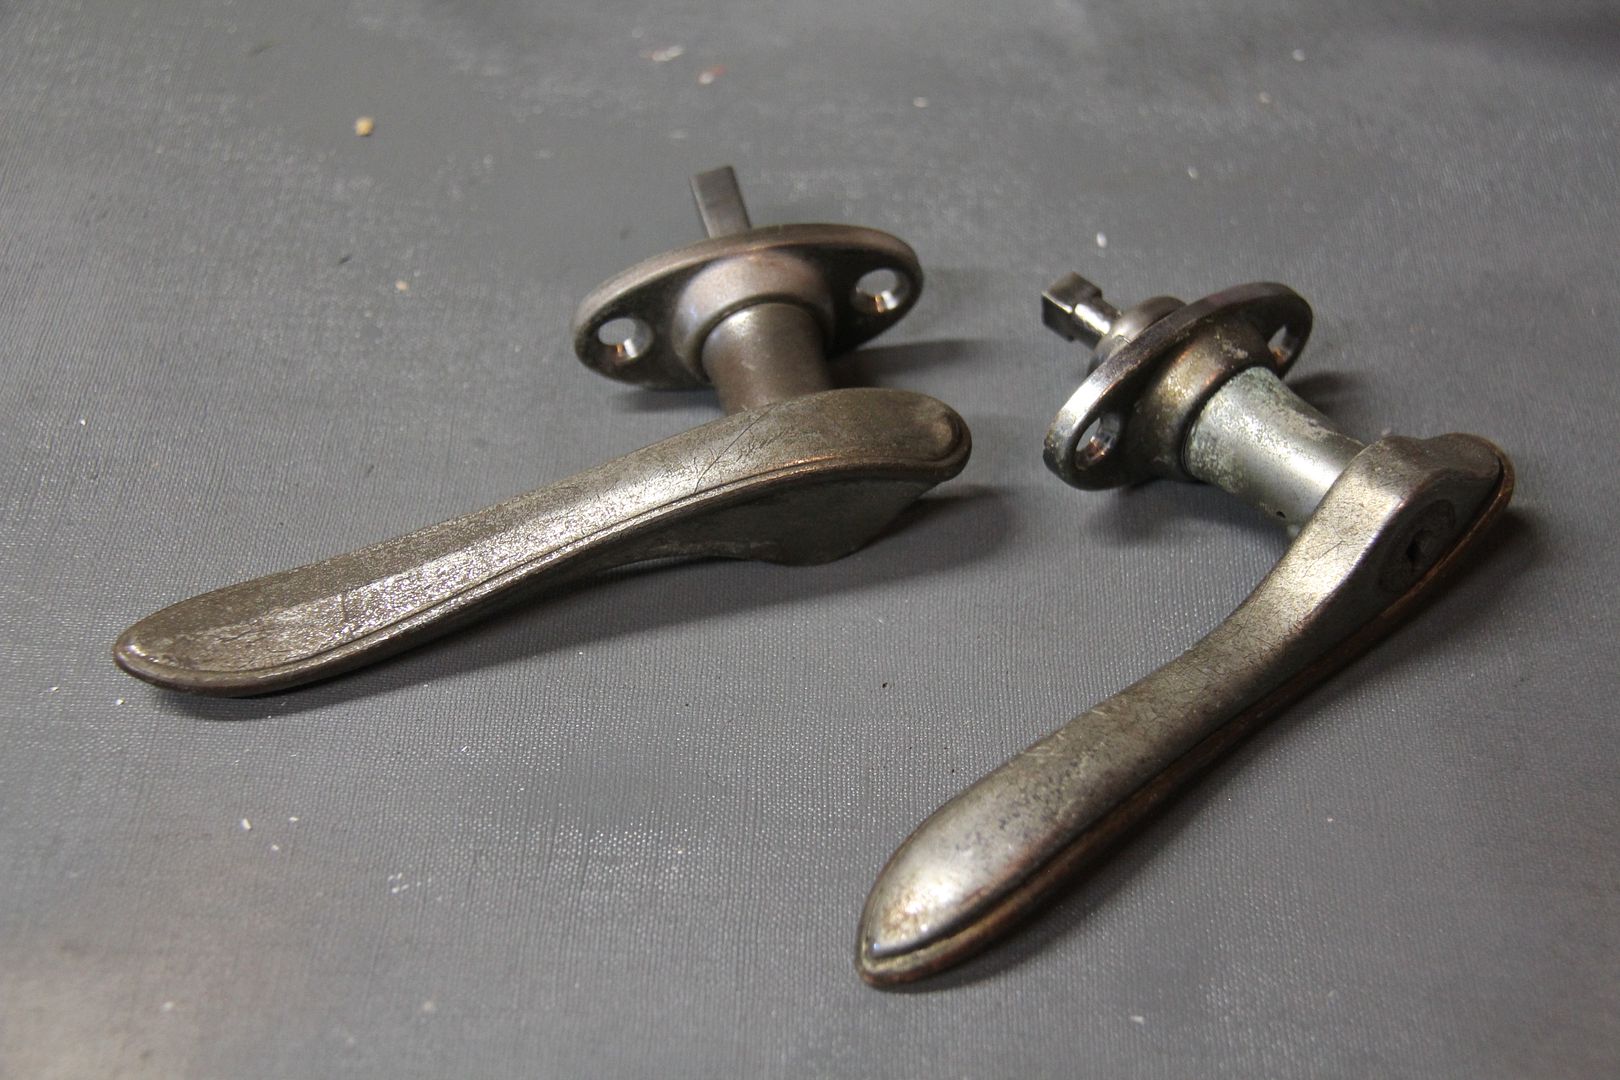
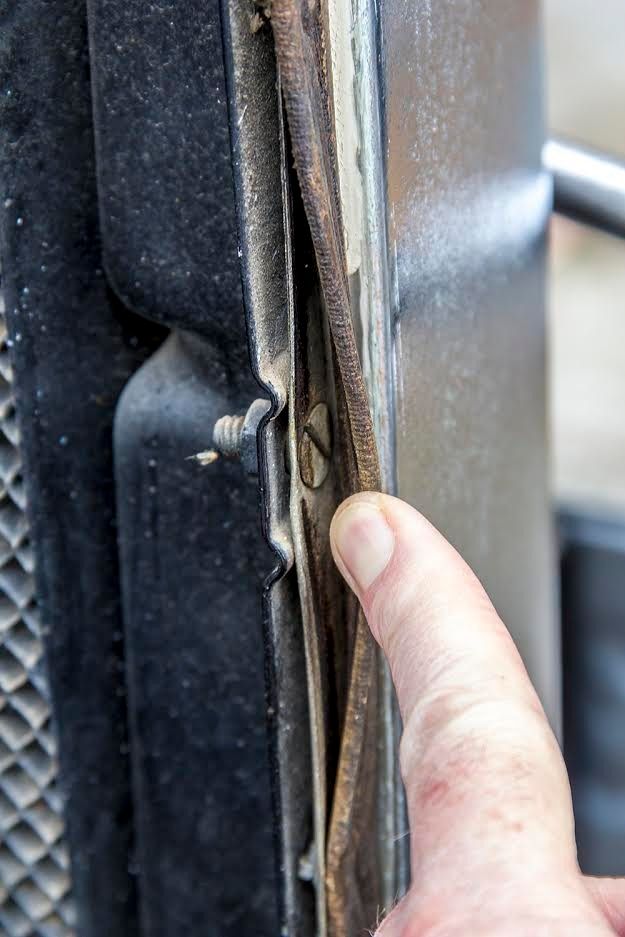
My chrome plater informs me that my outside door handles are made up of two different materials and he can't chrome plate them with out taking them apart. The top decorative part seems to be formed over the bottom piece. I can see no possible way to take this assembly apart without destroying the handle. Apparently there is a hollow space inside that traps some of the liquid chemicals used in the chrome process and they can't drain off. When the part goes into the next tank, the residual chemicals cause a bad reaction. I was lucky and the disaster happened on someone else's handles. I have seen these handles rechromed on restored cars, so there must be a way. Anyone dealt with this?
-
Second technical problem of the day. My chrome plater informs me that my outside door handles are made up of two different materials and he can't chrome plate them with out taking them apart. The top decorative part seems to be formed over the bottom piece. I can see no possible way to take this assembly apart without destroying the handle. Apparently there is a hollow space inside that traps some of the liquid chemicals used in the chrome process and they can't drain off. When the part goes into the next tank, the residual chemicals cause a bad reaction. I was lucky and the disaster happened on someone else's handles. I have seen these handles rechromed on restored cars, so there must be a way. Anyone dealt with this?
-
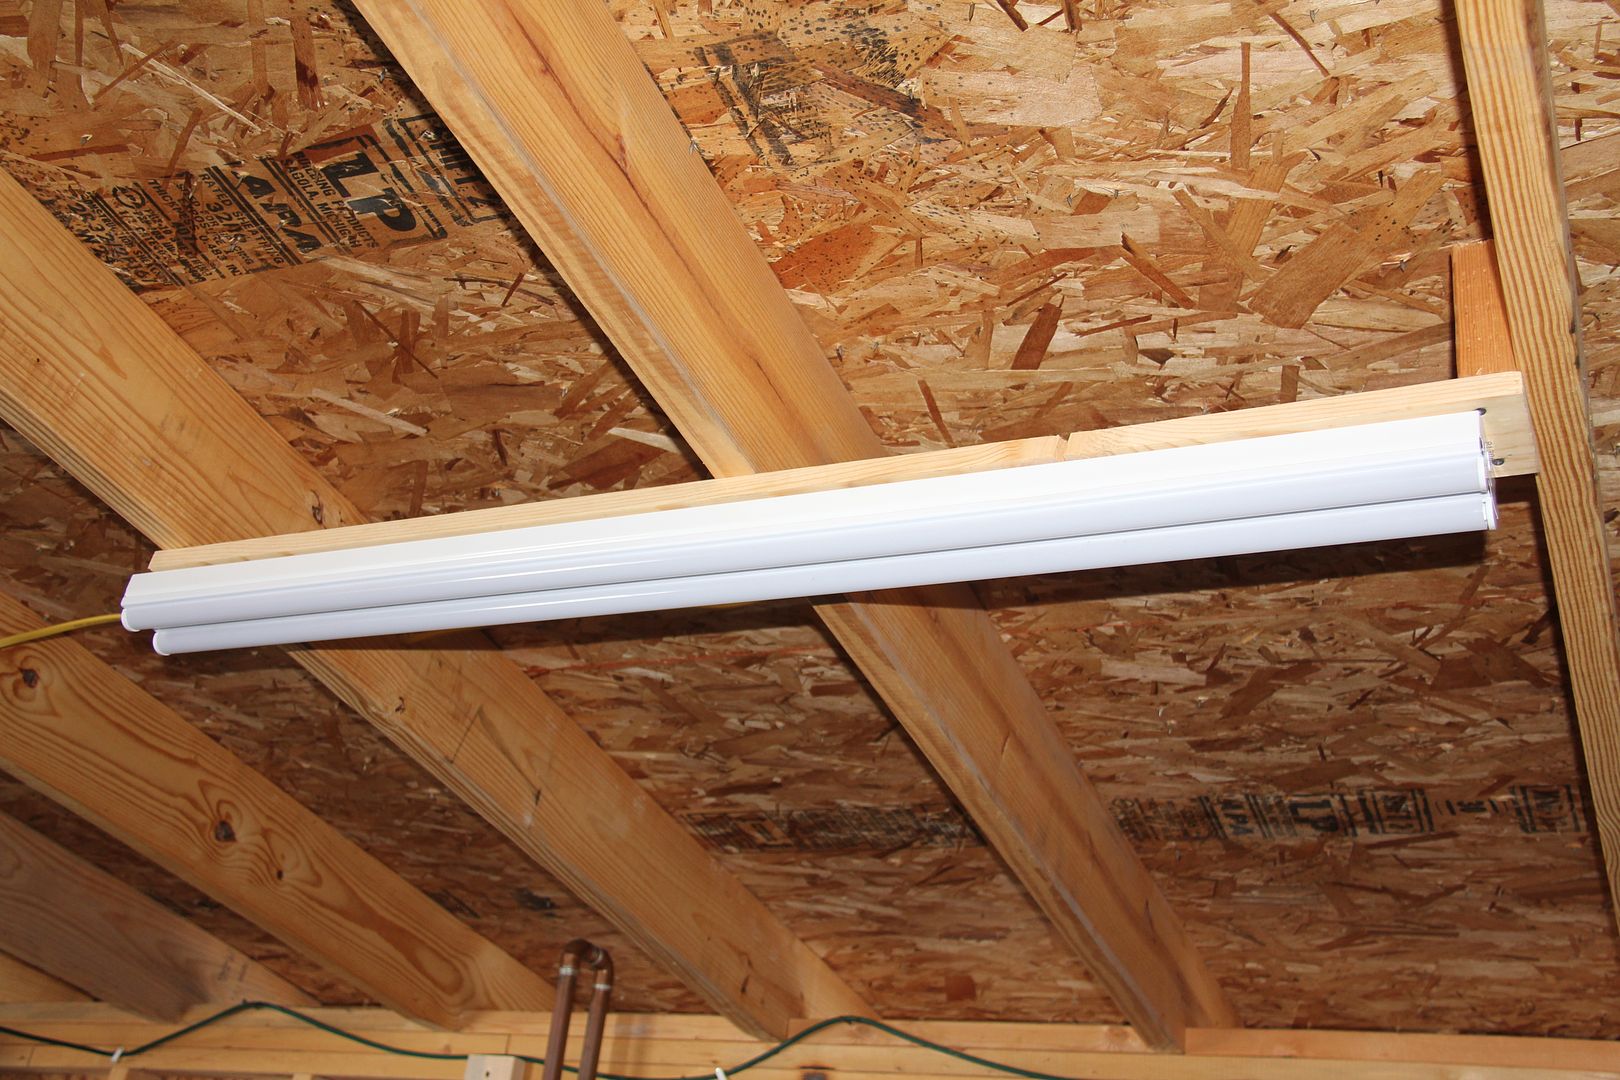
I finally got the dead LED light situation sorted out. Lowes gave me a complete replacement on the lights and since they were now cheaper, a 50 buck refund to boot. Still a pain as they were hard wired into my garage ceiling, but the good new is they are now much better made, with the plastic ballast now being a metal box that is riveted to the main body of the light rather than the former plastic clips. The new lights work great, but I don't plan on turning them on when the temperature is below five degrees.
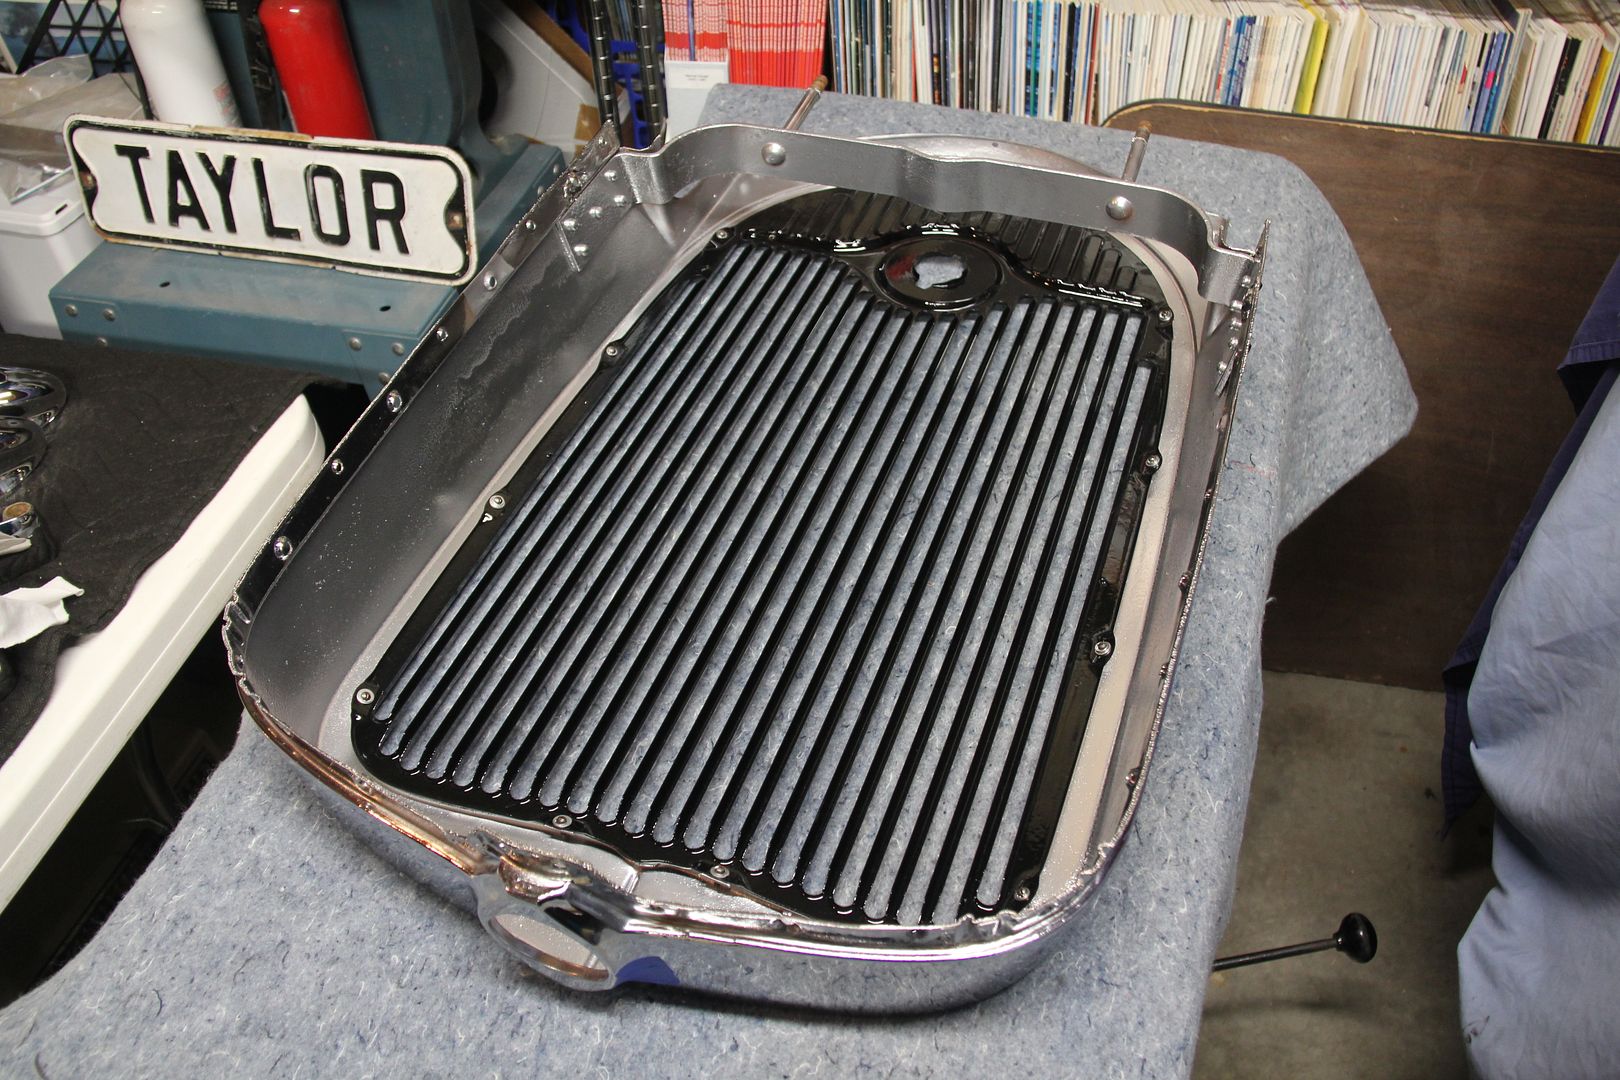
I got my grill center back from the powdercoaters and it looks great. In 32, Dodge Brothers used this to hide the actual radiator and give the radiator shell a bit of bling. Some cars had thermostatically controlled shutters instead of this trim piece, but my car didn't have that option. It was first purchased in Maryland, and maybe they thought they weren't necessary or too costly at the height of the Depression, but I sure could have used them up in Syracuse during those long winters.
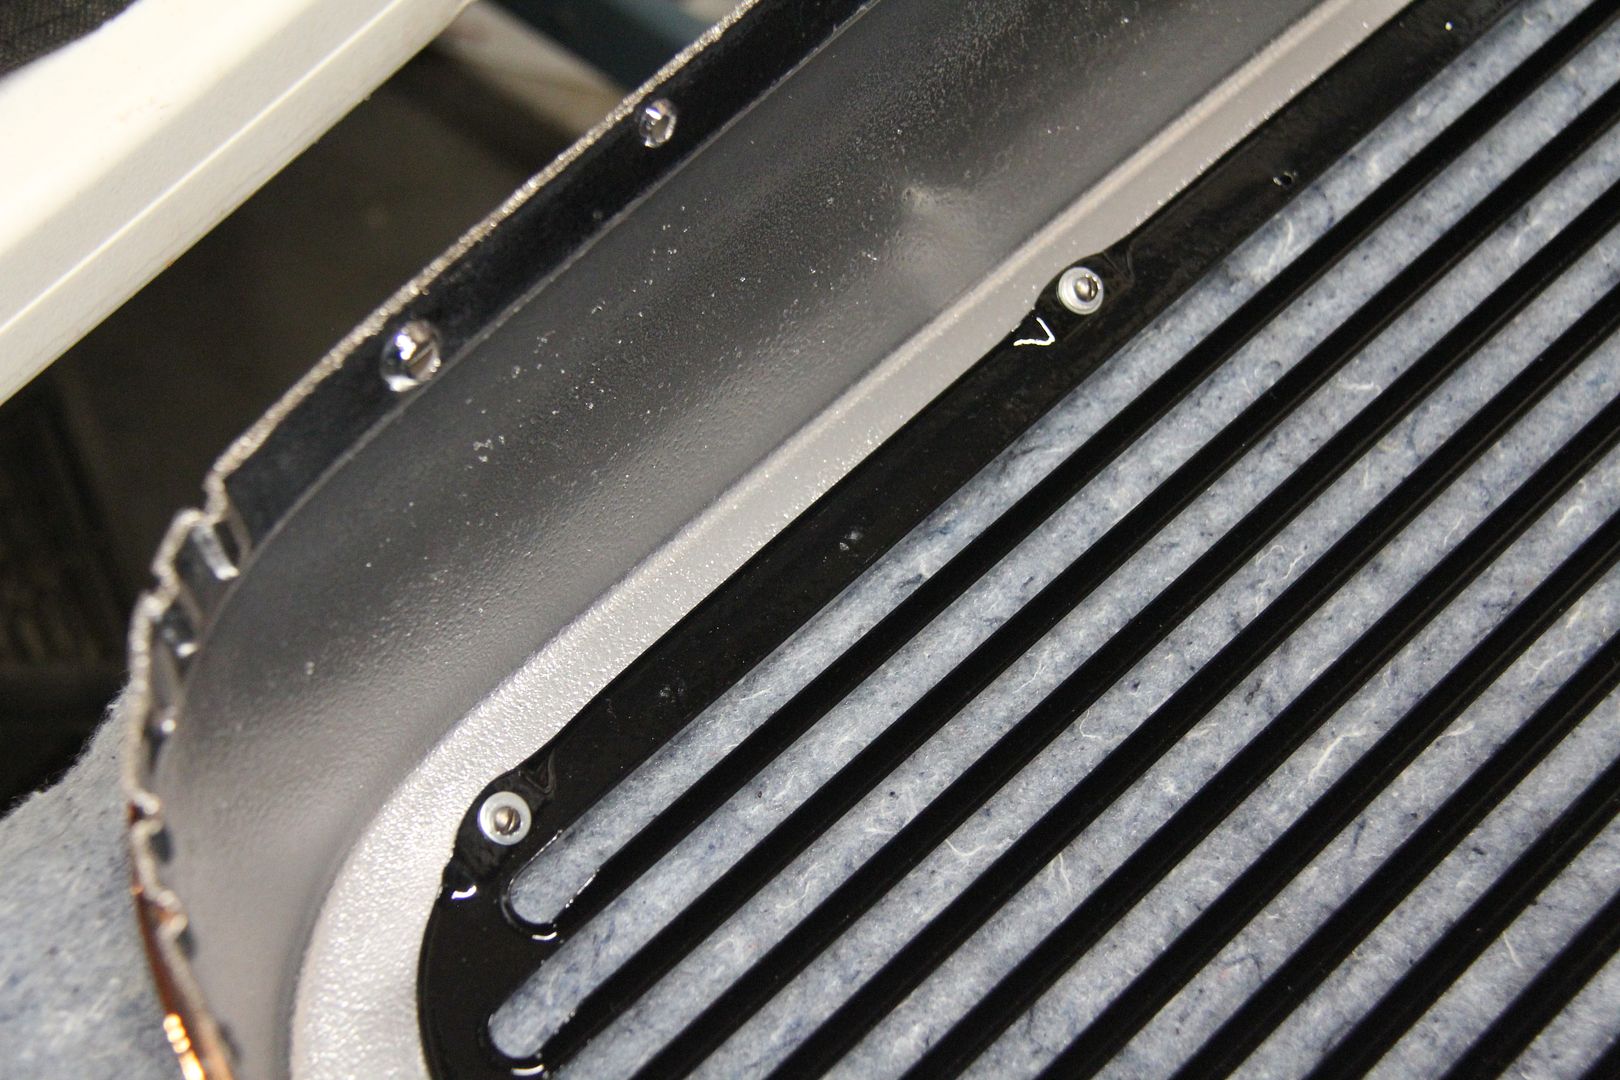
With the insert and the new chrome, the radiator shroud is looking good. I painted the inside of the shell silver, even though most of it received a good coating of chrome, just to protect against any future rust. I'm amazed that the trim piece is held in place by twelve screws, washers and lock washers. What a labor intensive job and a far cry from today's plastic clips and industrial adhesives. For some reason I have a very distinct memory of taking this piece out of the formerly rusted and dented radiator shroud over two years ago at Ed's place. It was a very satisfying feeling to put it back together with everything looking brand new.
The inside of the shell.
Attaching screws. Tiny little guys that must have been a real pain for the guy at the factory. At least he had a job in those hard times.
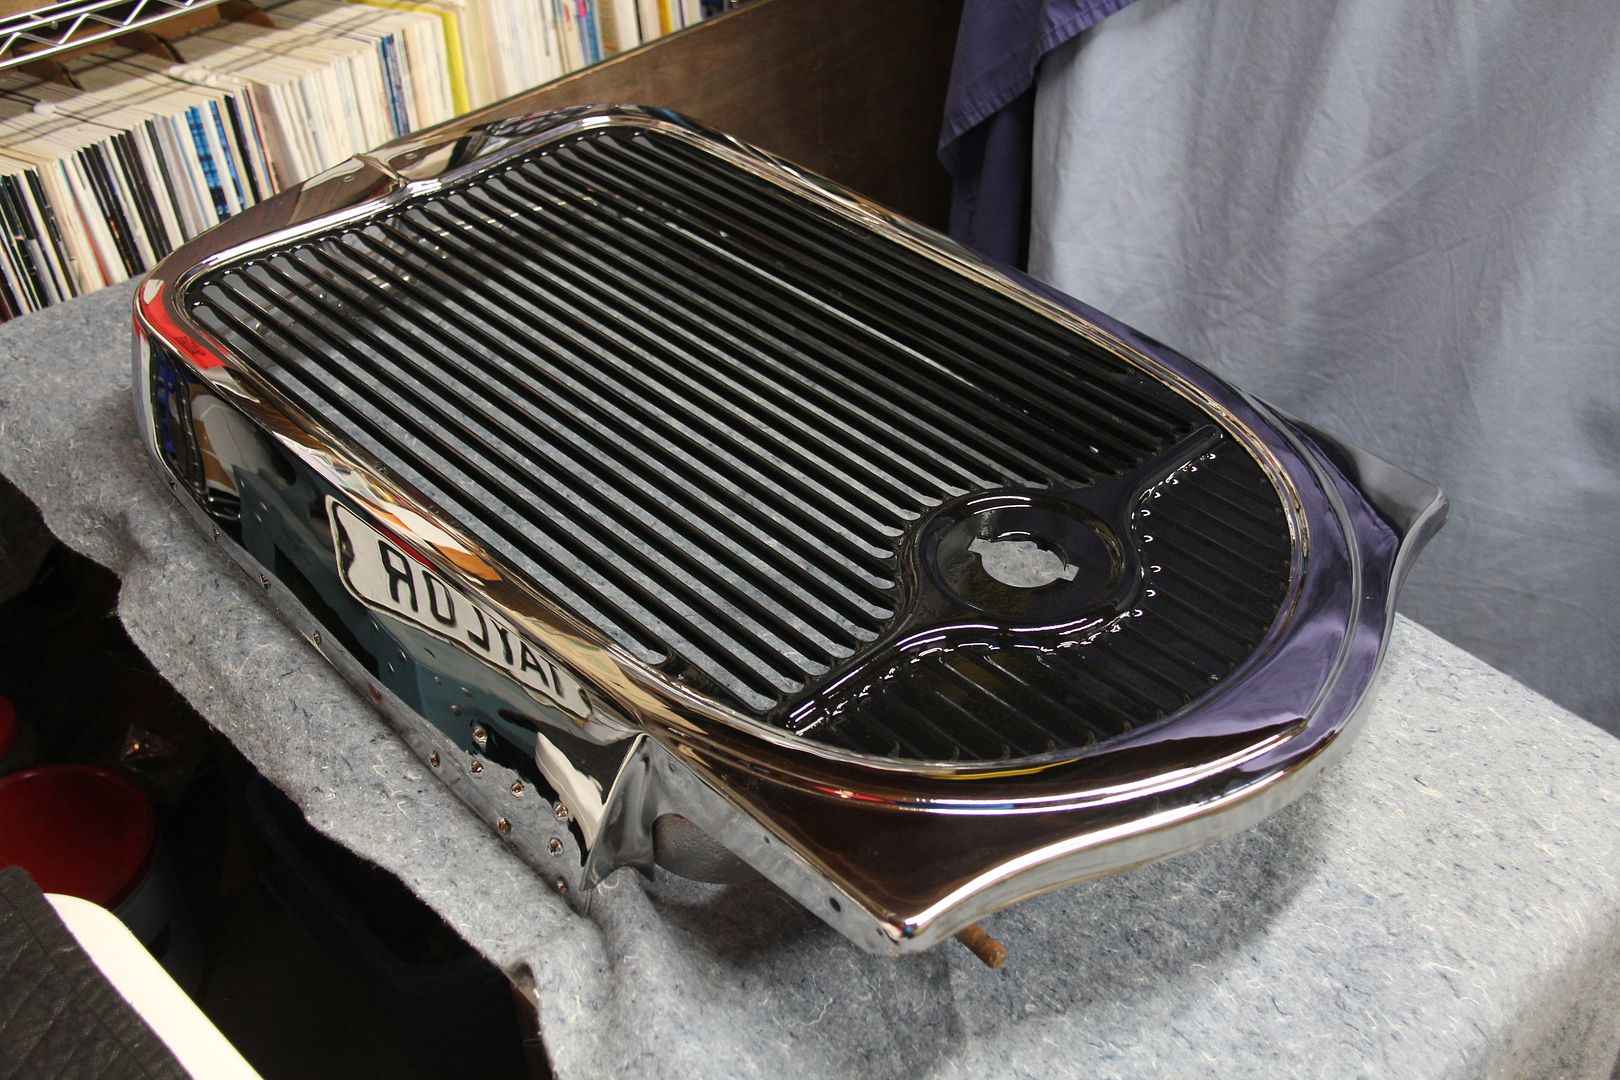
The assembled radiator shell.
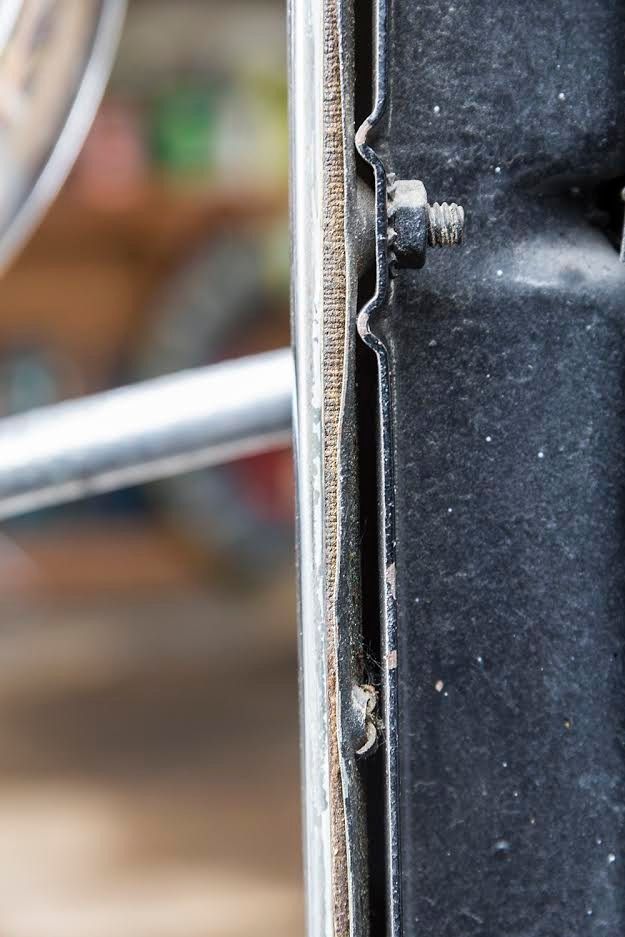
And this brings me to a technical question. Now I have to put in my freshly cleaned and painted radiator. It attaches to the shell with flat head, countersunk screws. But the screw holes in the shell are under the hood lace. So, it's a chicken or the egg scenario If i put on the hood lace, how do I put the screws in? If I put the screws in first, there is no room to install the split headed rivets that hold the lace on. PO owner Phil Kennedy sent me some shots of his 32 so you can see my dilemma. Anyone dealt with this problem?
-
Looks like the handles on my 1932 DL.
-
Check in with the folks at the Dodge Trucks forum on this site listed under Chrysler Products. You'll find a wealth of information there.
-
Taylormade.....I did not know that you needed that piece. Do you need for me to see if I can pick up this 1932 DB cowl center trim piece for you???
So sorry for the crappy photo.
Yes, yes and yes. I didn't think I needed either it until this just happened. Thanks. Anything else left of that 32? I'm sure the roof is long gone, but I'm still looking for a set of sun-visor hinges and one can always hope.
-
It's been awhile since my last post. Between the holidays and the cold weather, work on Daphne came to a screeching halt. I'm gearing up again and plan to spend some time over at the local high school shop working on the floorboards and other wood pieces. Another hold up was a problem with my garage lights. I went out and bought a bunch of LED strip lights, as they are supposed to be good for 25,000 hours and to perform in cold weather. WRONG! I went out into the garage last week in ten degree weather, flipped the switch and...they strobed once, then went dead. Since they are hard wired in place, it's going to be a real pain taking them all down and replacing them. The big box store I got them from says they'll give me a refund even though I got them last June, but we'll see when push comes to shove. At fifty bucks a pop, they'd better make it right. By the way, until this debacle, I was very pleased with the brightness and quality of light these things gave off. Much better than fluorescents, but if you live in cold weather climes, I'd stay away from them.
I have the manifold installed and it looks good. I wish it wasn't quite so pitted, but I am going to drive this car, not show it, so I'll live with it. The ceramic coating helps.
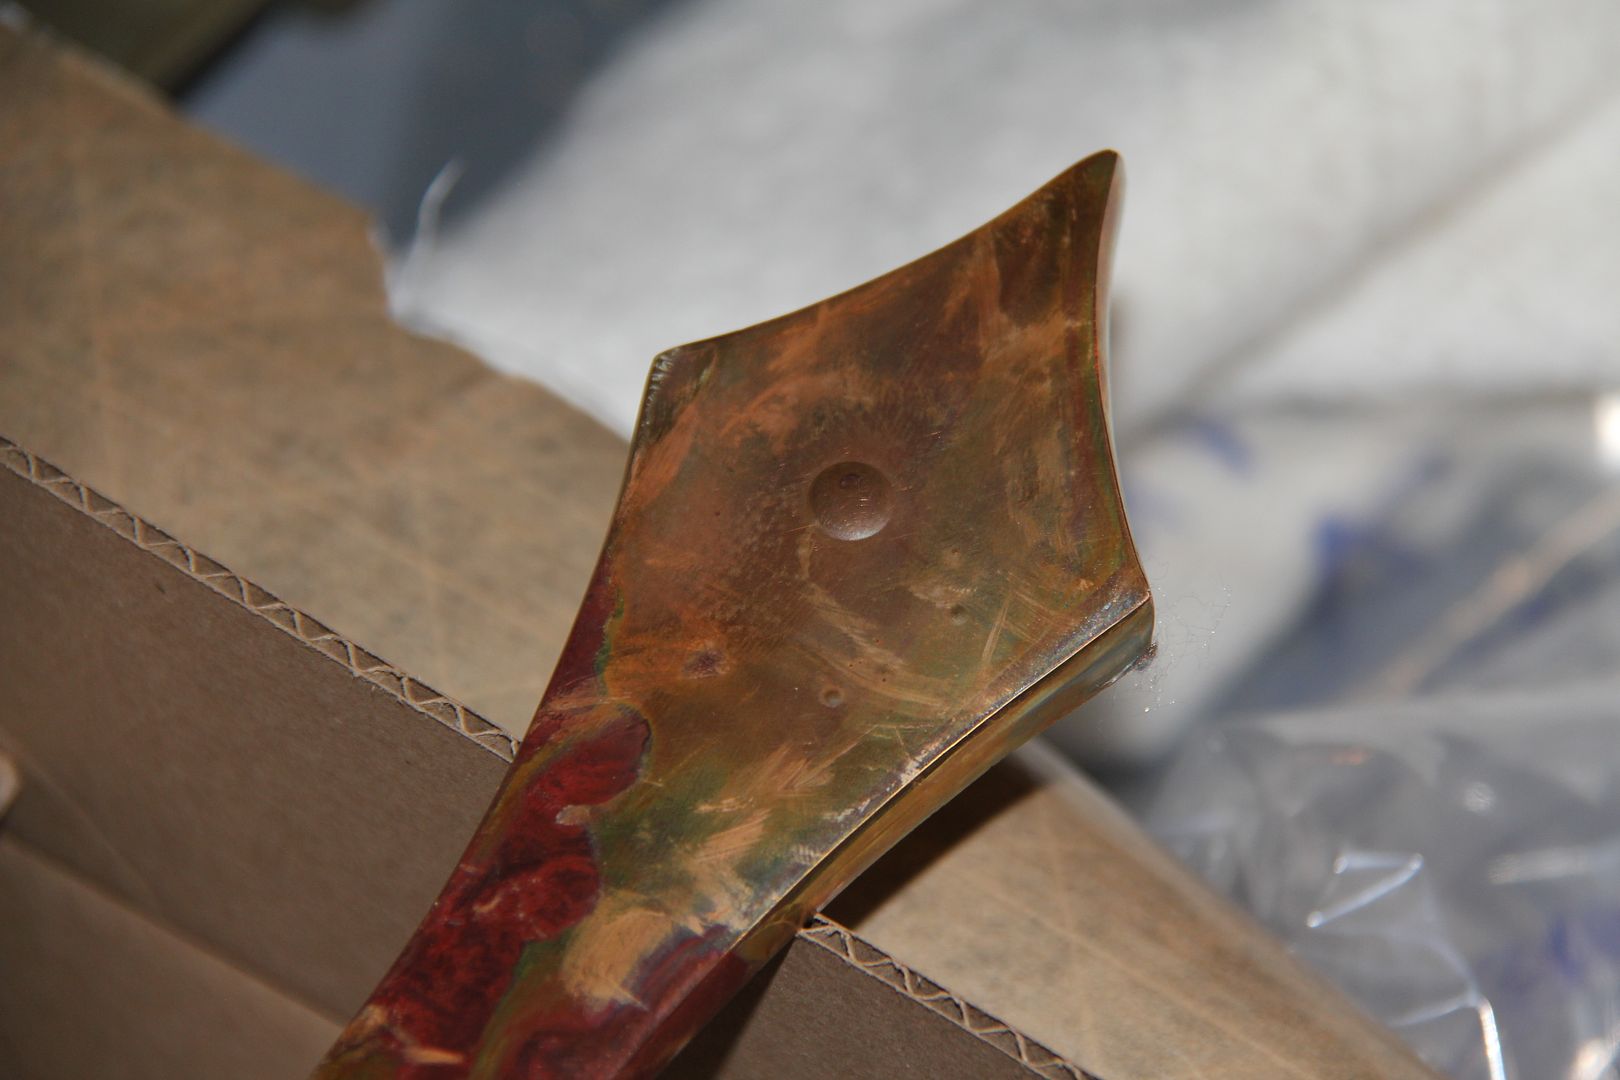
The chrome shop is having problems with my cowl spear. After finally finding one to replace my broken original, it seems the pot metal has started to deteriorate from the inside. Every time they clean it up and hit it with the copper coat, these bubbles appear. I may have to make a "new" one out of steel. A real pain at this point in the restoration, but these things always seem to happen. Typical, as I never thought I'd be able to find another, then did for an incredible 30 bucks, and then this happens.
Off to the hardware store to buy a sheet of 3/4 inch marine plywood and start on the floorboards.


Steering Wheel Puller?
in General Discussion
Posted
I'll save you the trouble of looking it up.
I had to pull the steering wheel on my 1932 Dodge Brothers and didn't have the correct puller to handle the job. The only puller I had was purchased to use on my 48 Plymouth and 50 Dodge - you can find one like it in most any auto parts store. It had threaded bolts that screwed into threads on the wheel. My car has no such threaded holes so I had to improvise. I made this puller out of my old puller plus some leftover oak scrap I had from my seat construction project and two long threaded bolts. I used two boards on each side for strength, with the two notched boards on the rear of the wheel able to fit over the steering shaft from each side. The wood holds the steering wheel solidly in place, front and back.
Once I had everything bolted together, I wound down the threaded shaft against the top of the inner steering shaft, hoping the wood wouldn't break. After a few turns, there was a loud bang. I thought the wood had gone, but it was the sound of the steering wheel popping loose after 84 years. No damage to the wheel. Occasionally my hair-brained ideas actually work!
Obviously, you need to take the nut off the steering shaft before you remove the wheel.