


Taylormade
-
Posts
2,396 -
Joined
-
Last visited
-
Days Won
1
Content Type
Forums
Gallery
Events
Posts posted by Taylormade
-
-
When I first got my car, a 1932 dodge Brothers DL, it had those God awful flexible radiator hoses on it. I want to go back to an original look and can get the correct 1-1/2 inside diameter hose from Restoration Supply. I'd love to use the red hose, but I'm sure that would be incorrect for my car, so I'm going with black. Anyway, there is no problem with the top hose, it's a straight shot with no bends. The lower hose, however, has a 90 degree bend from the water pump to the lower radiator fitting. Checking photos I took of my friend Phil Kennedy's more original car, he has a metal tube bent to 90 degrees, with short, straight radiator hose sections at each end. My 48 Plymouth had a similar set up. Obviously, this was done this way in the days before molded radiator hoses came into vogue.
So, where do I get a metal 90 bend pipe with a 1-1/2 inch outside diameter? Is this something an exhaust shop could make up for me, or is exhaust pipe material too thin for this application? Also, does anyone know the correct style hose clamps Dodge used in 32?
Thanks in advance for any help.
-
What a great looking truck. Congratulations on your find.
-
That's the end of your steering arm link. I bought a rebuilding set from Then and Now Automotive for a 1932 Dodge, but your set-up looks different. You might give them a call. Your tie rod ends will probably need replacing, too.
-
I feel your pain. Hopefully some earlier Dodge owners will reply.
-
I wish I could help. The universals on my 32 Dodge Brothers are completely different.
-
Those are pictures of my 1932 Dodge during the ongoing restoration. Ed Thomas of Thomas Resorations in Columbus, Missouri helped me with the kingpins. He had done all the bodywork on my car - extensive and way beyond my skill level - and offered to install and ream the bushings for me. This illustrates one of the problems with restoring any car. Certain jobs require special tools and often those tools turn out to be expensive - especially if you only are going to use them once. I have done maybe 80 percent of the work on the car myself, but some jobs require outside help and this was one of them. Ed had the tools and expertise, and I took him up on his offer to help. What he charged was far less than the cost of buying the correct tools and learning the correct method of installation. I posted the photos, not to be a know-it-all (which I'm certainly not) but to illustrate that correctly installing kingpins is an exacting job that needs to be done right.
-
I'm getting ready to do the running boards on my 32 Dodge. What did you use to glue the rubber mat down? I'm assuming industrial grade contact cement.
-
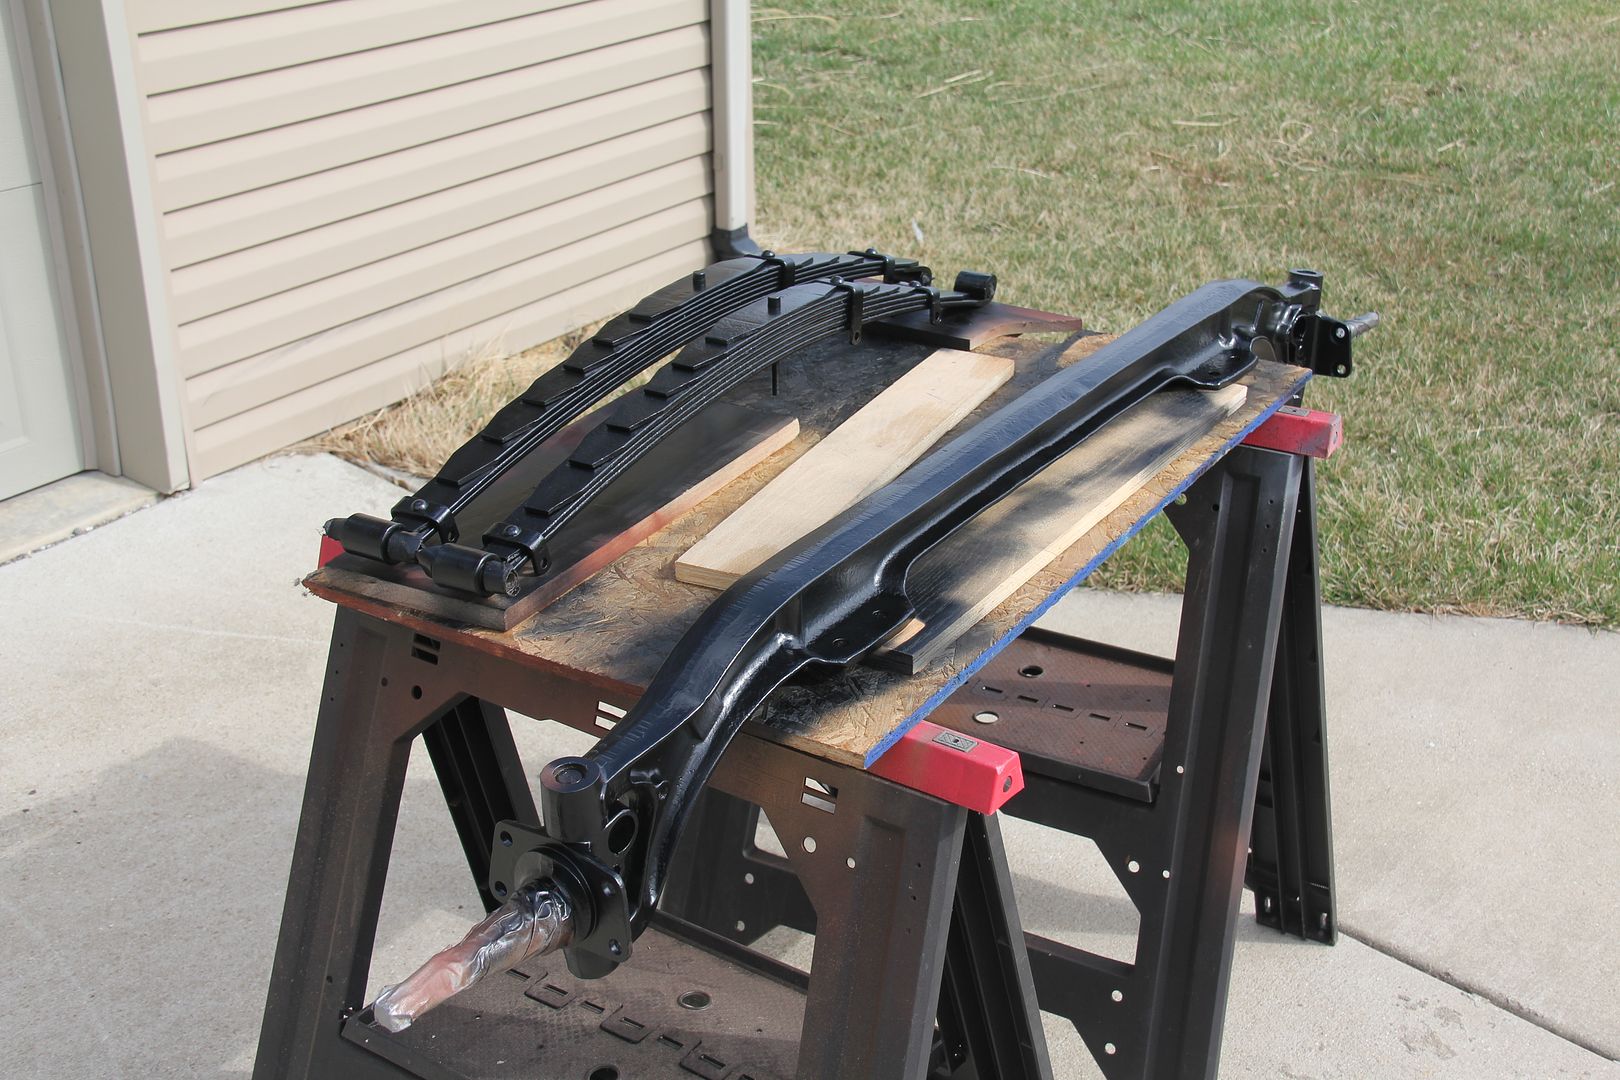
And is that part of the shock that has that strap coming down to the axle? Can you get a better picture of that please?
The strap connects the moving arm of the shock to the axle. Apparently, the strap material is hard to find these days. I was lucky - my car uses a metal yoke so I didn't have to deal with that problem.
-
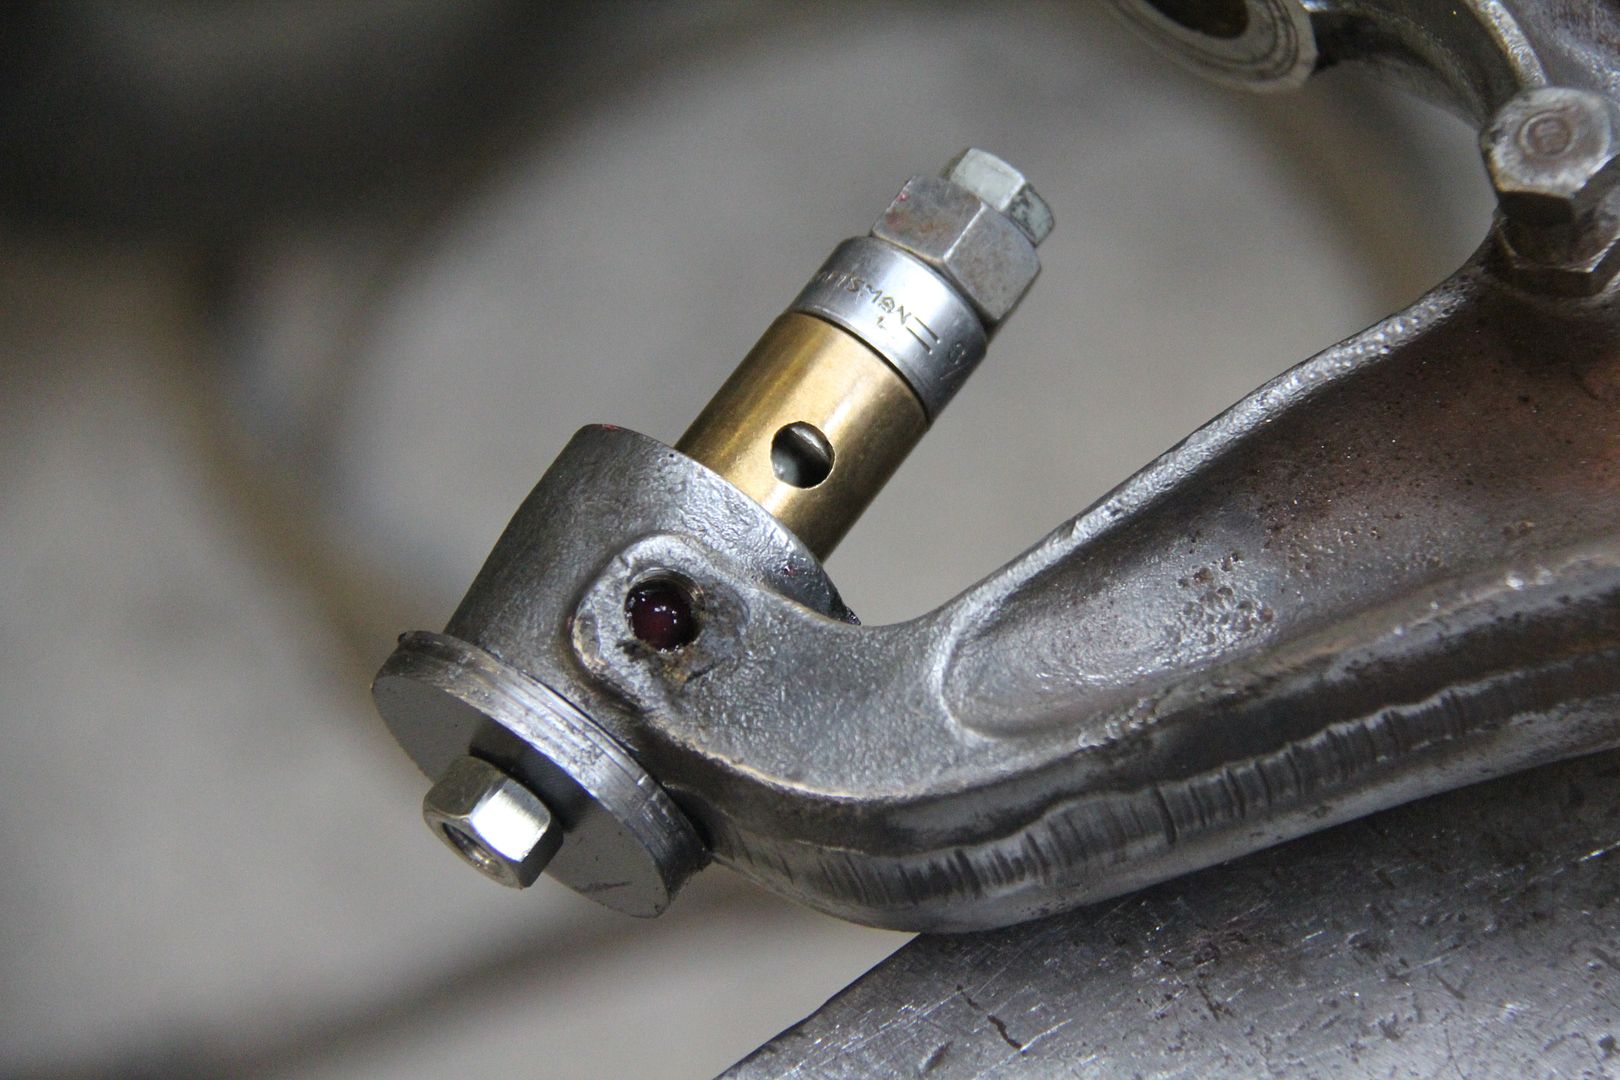
That's a bearing. Installing new kingpins (to assemble the spindle to the axle) is not an easy job. First, you obviously have to drive the old bushings out of the axle and then install the new ones. The have to be installed with the correct tool or you will damage them.. Then comes the important part. The bushings will be oversized. You need to ream them with an adjustable reamer to the correct size and clearance for the kingpin, and the reamer has to be employed so that both the upper and lower bushings are reamed to ensure perfect alignment for the kingpin. Certainly possible for the home mechanic, but you need the correct tools and some knowledge of what you're doing, or you'll ruin the kingpin set and have to start over.
Here is the bushing being installed on the axle.
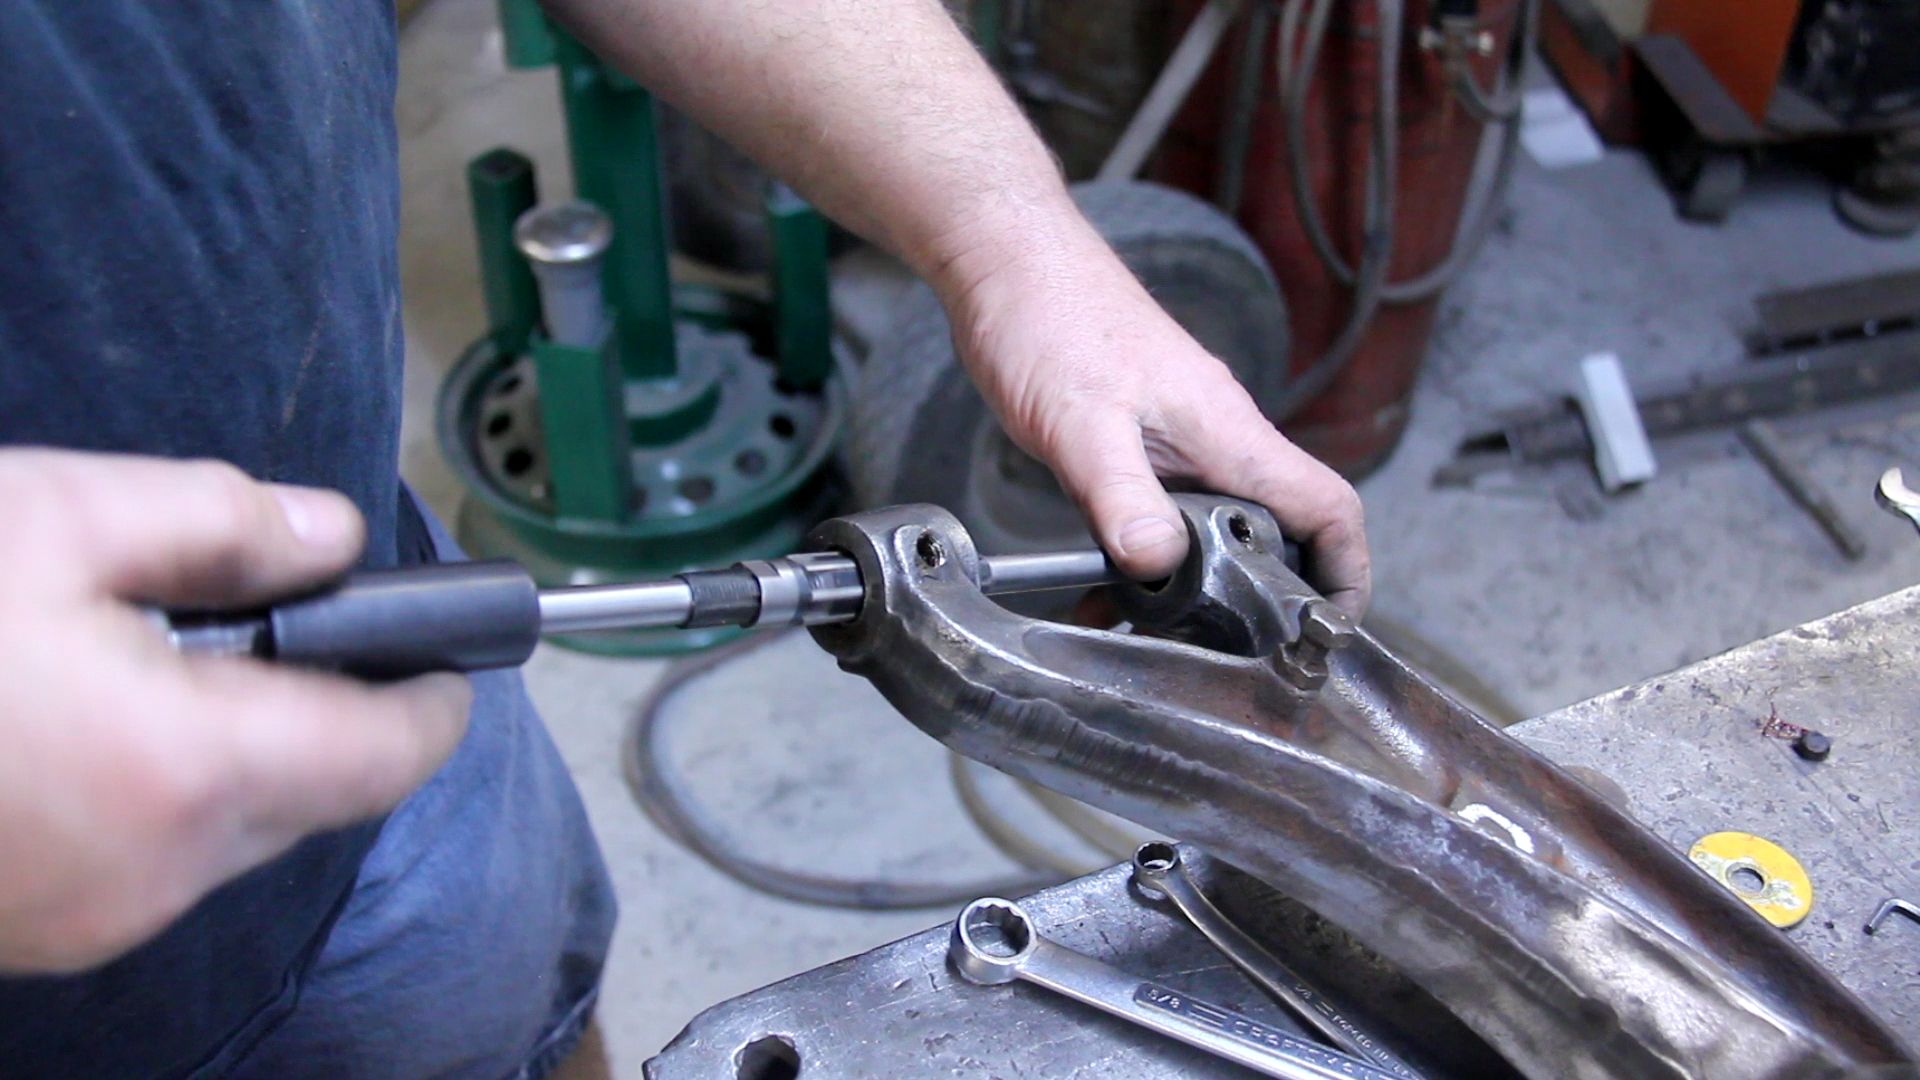
The reaming tool.
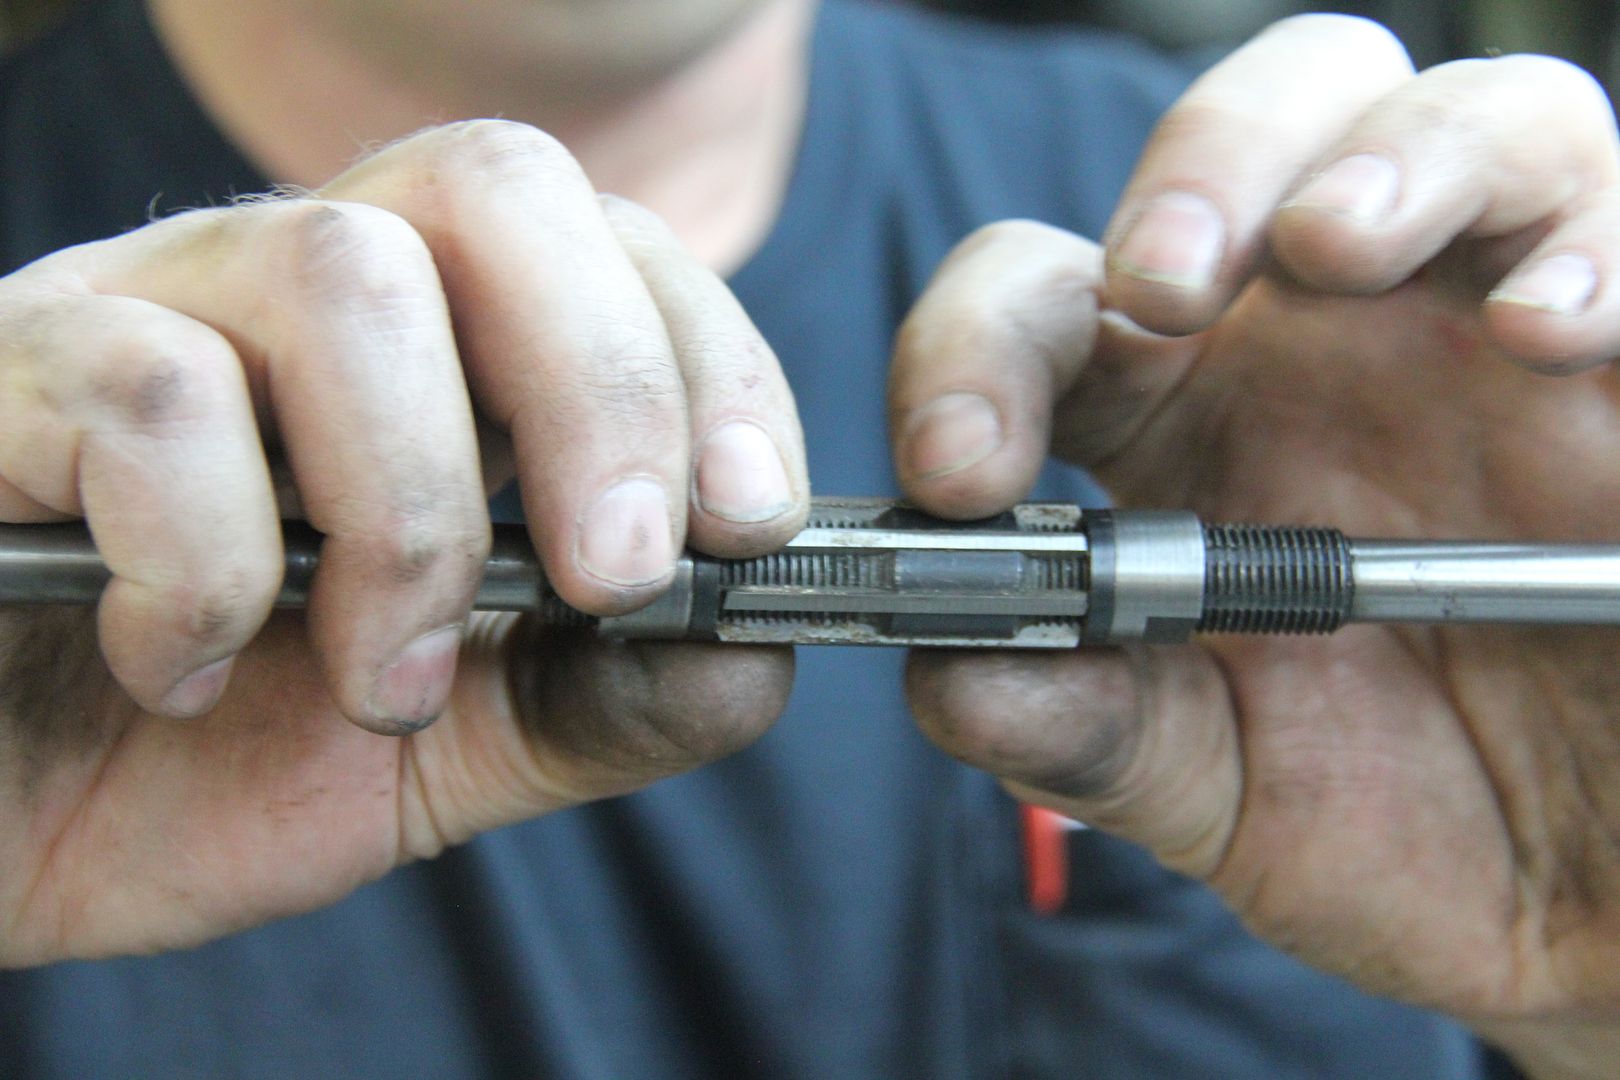
Reaming the bushings.
Pushing the kingpin in. Note the bearing on top between the axle and the spindle. A tapered pin goes in the small hole in the spindle and through a groove in the kingpin to lock everything in place. Then caps go on the top and bottom of the exposed kingpin.
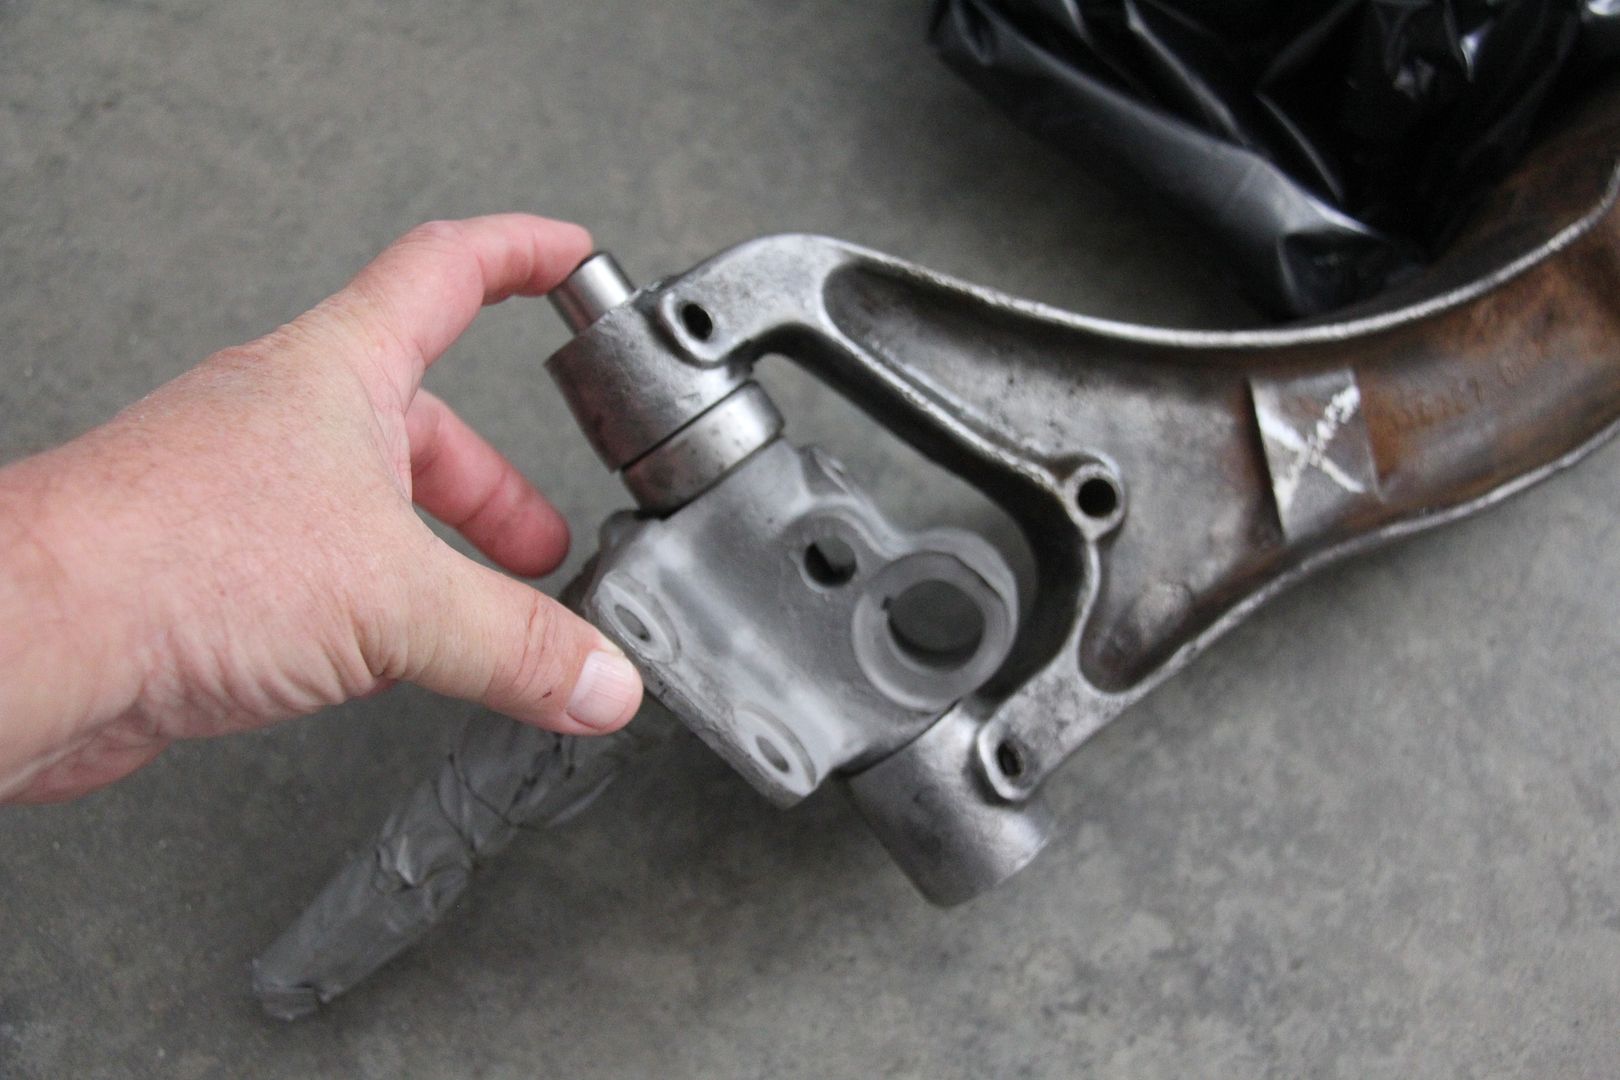
Assembled.
I hope this helps.
-
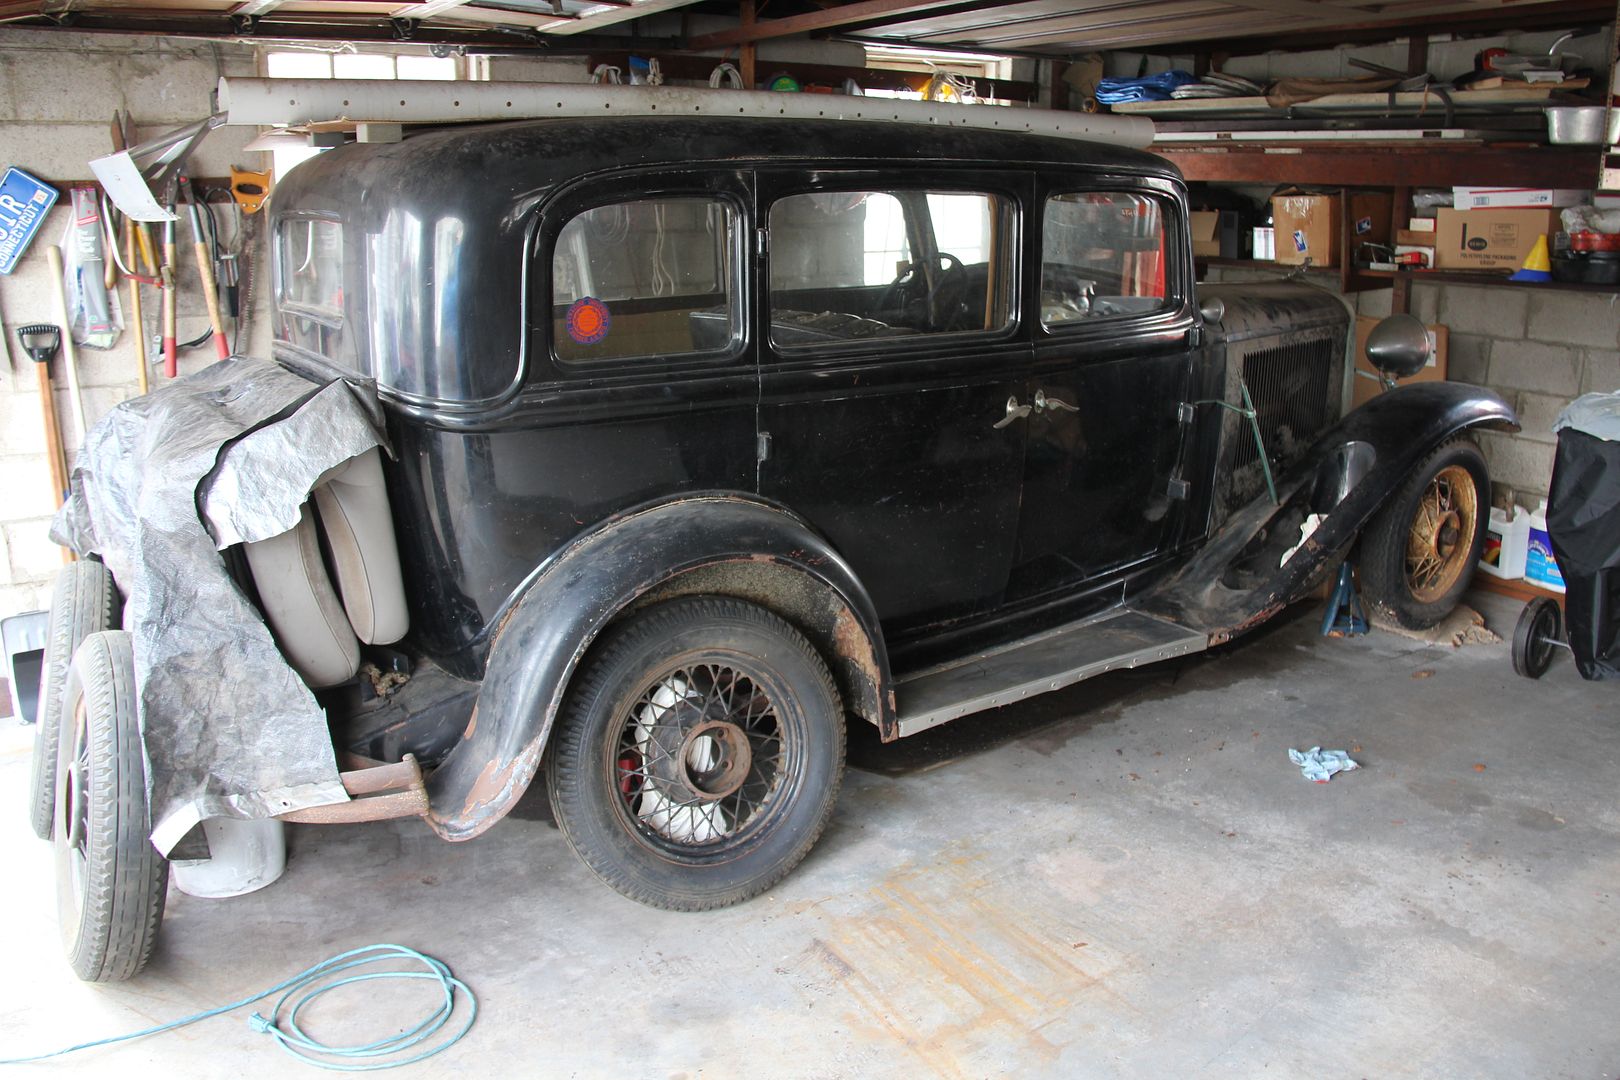
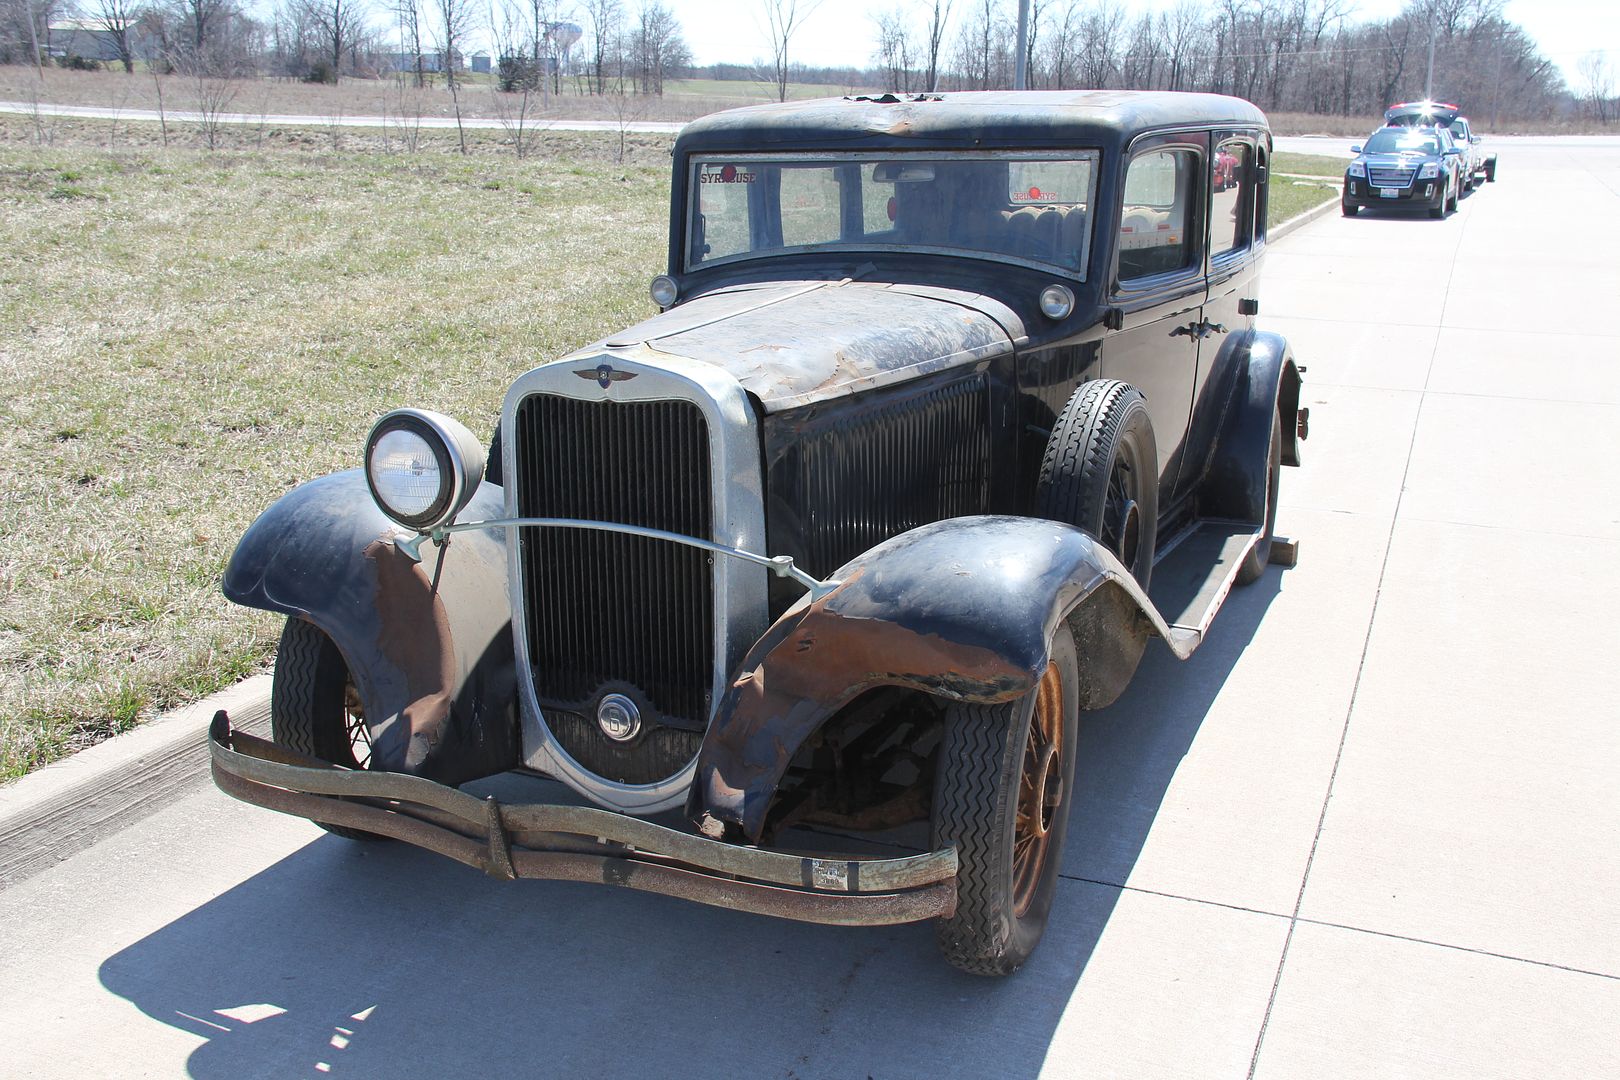
The first car I ever owned, a 1932 Dodge Brothers DL sedan. I bought it in 1965 and sold it to a fraternity brother in 1967 to my everlasting regret. We found each other after 45 years and when I asked him, "Do you still have my Dodge," he told me it had been sitting in his grandmother's garage since 1970. The photo is how I viewed it after 45 years, resting comfortably in Phil Kennedy's (formerly his grandmother's) garage. I bought it back two years ago and am restoring it.
-
 2
2
-
-
This thread should vividly illustrate the difficulties of getting this type of show on the air and then keeping an audience happy. I think many of the negative comments were seen as an opportunity by the poster to complain to someone who actually had input to the show and who might listen to their complaints. Yes, some of the complaints are repetitive, but I'd hardly call this thread a "typical" rant and rave. Check out any post on using silicon brake fluid if you really want to see ranting and raving and vitriol spewing. I understand it's frustrating to have your "baby," something you've dreamed about that you felt the hobby would embrace with open arms, criticized, but with an open forum like this, you have to expect some grumpy guys are going to chime in.
Uh-oh, now I'm going to hear from all the grumpy old guys on the forum.
-
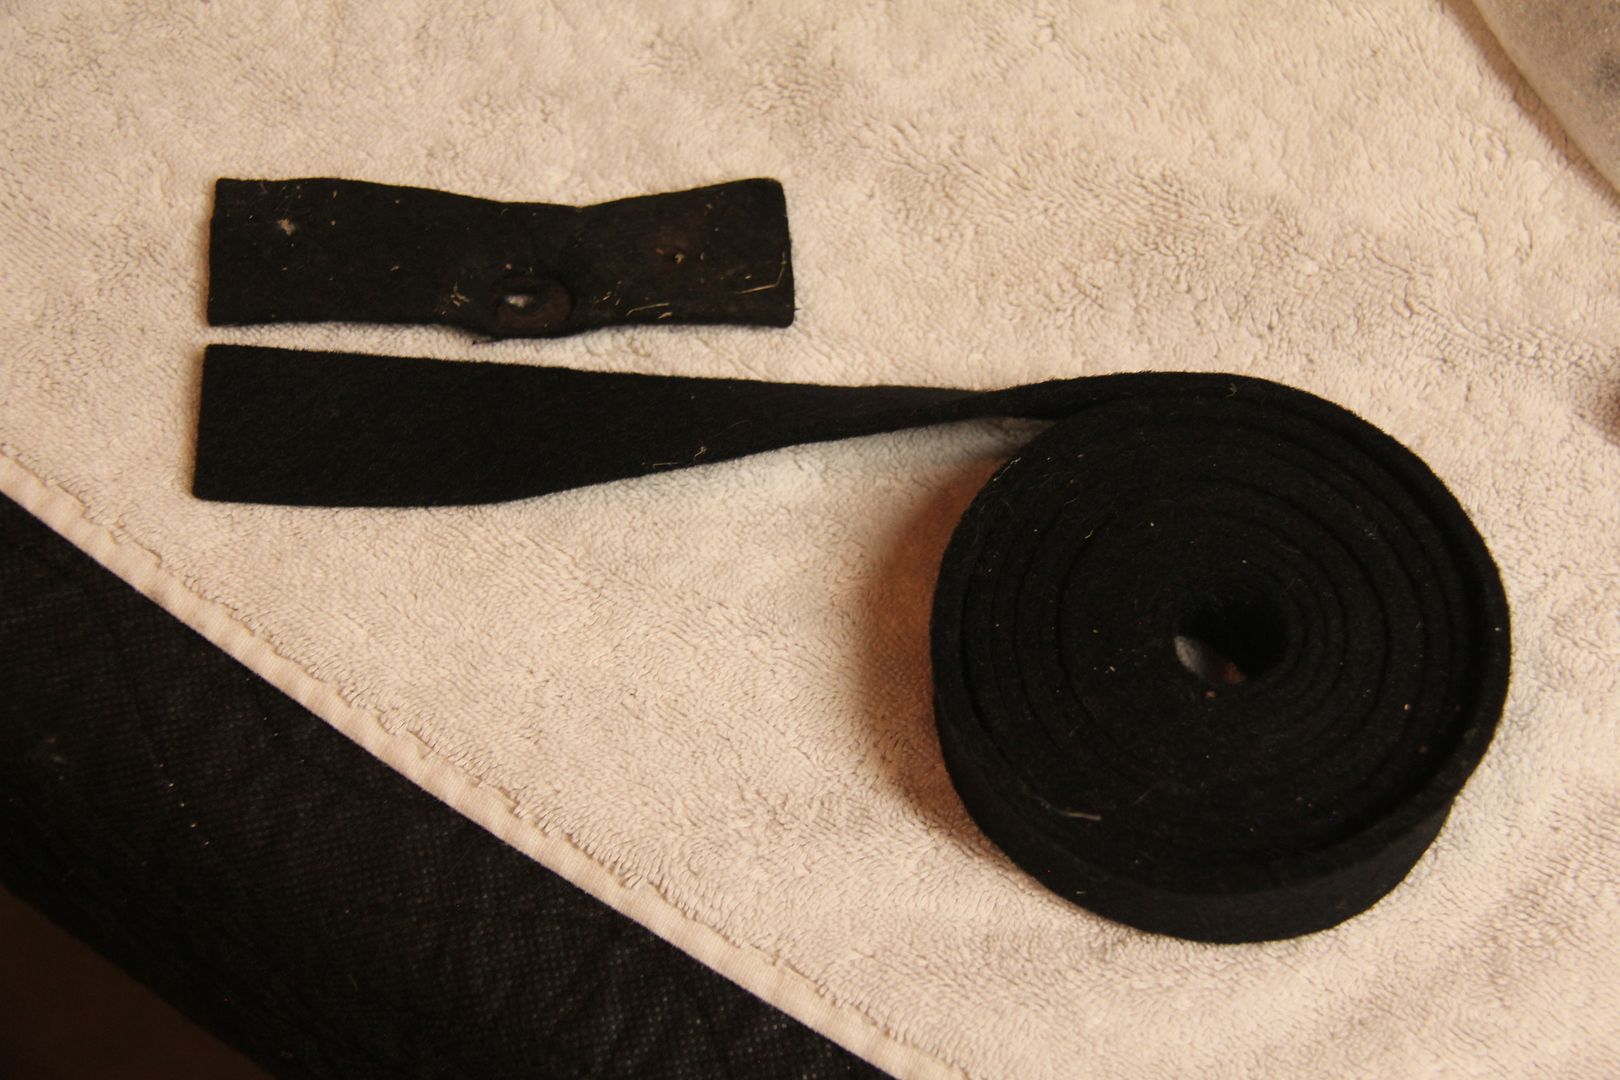
The felt is sandwiched between the wood and the frame and it's a pretty tight fit. But it could absorb water if it was really exposed to a heavy drenching. All the original felt was In very good shape considering it's 84 years old next week. It won't see much if any rain while I own it, so I'm not too concerned.
-
Yes, the floors come right out even with the body in place. No ledge on the 32 - the floorboards have square wooden supports screwed on the bottom of each edge. Long slotted head bolts then go through the floorboards and supports into threaded holes in the frame.
-
The only metal in the floor is the front angled floorboard and the area under the back seat. None of the wood floorboards are attached to the body in any way, they bolt to the frame. You can attach them and then drop the body onto the frame. I was very surprised to find all that wood myself.
-
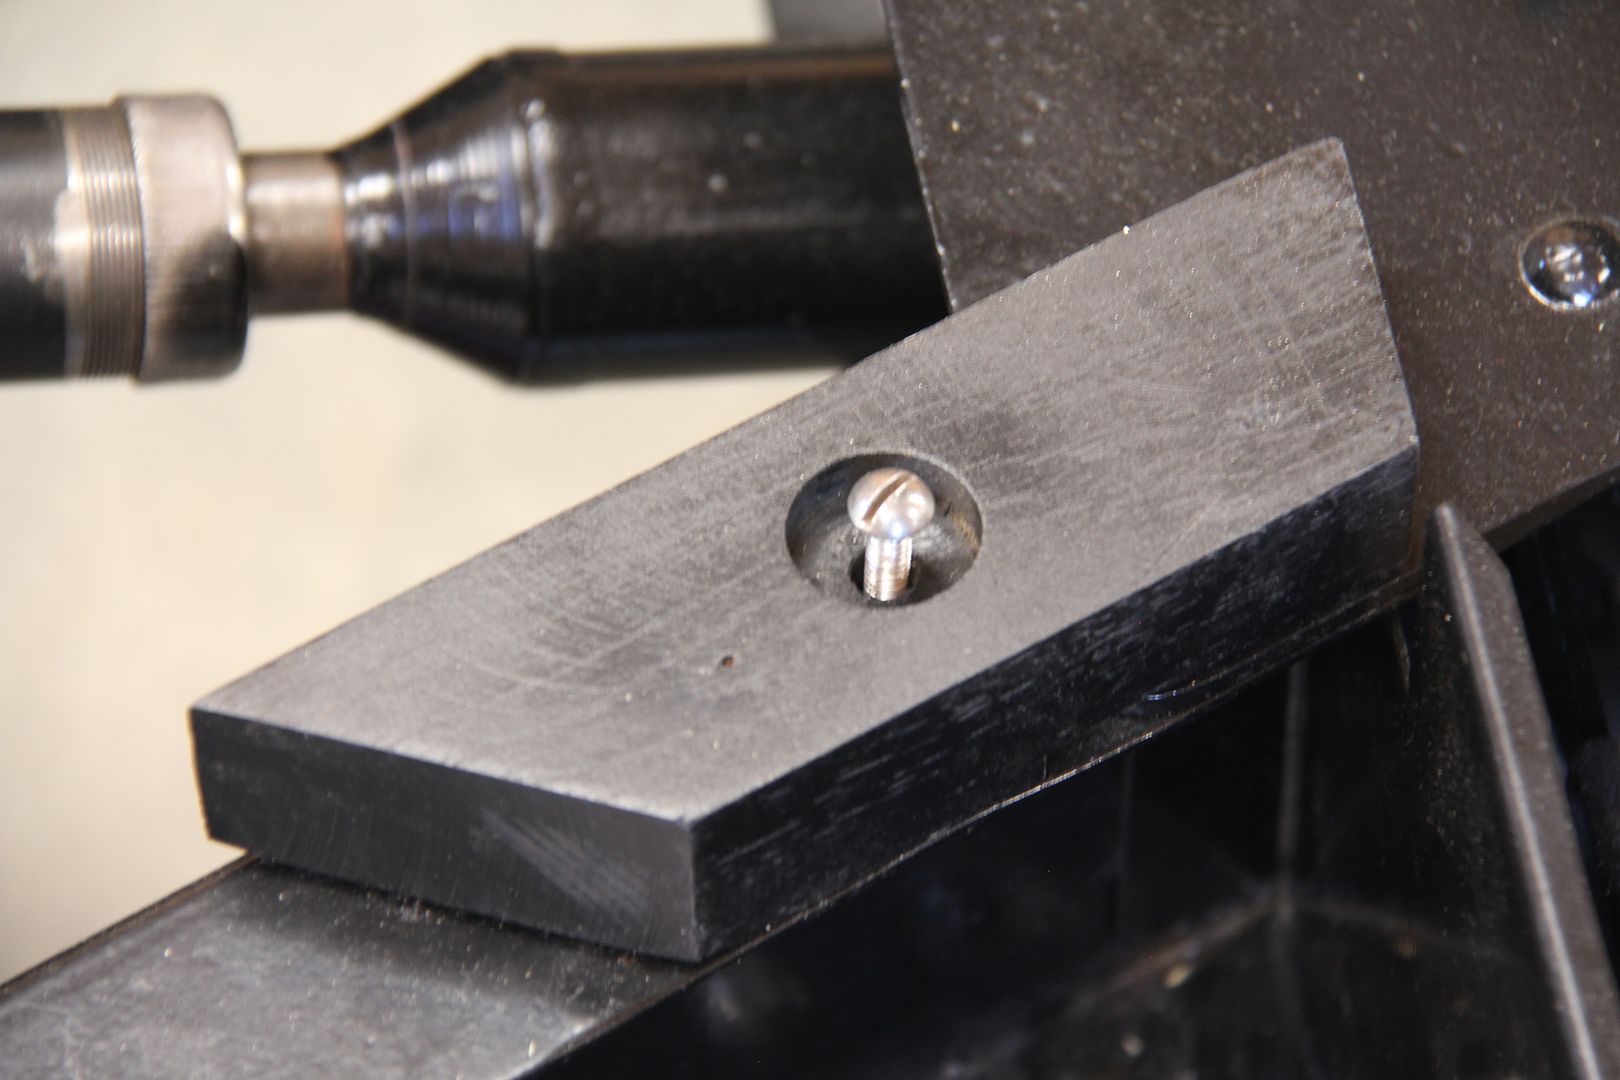
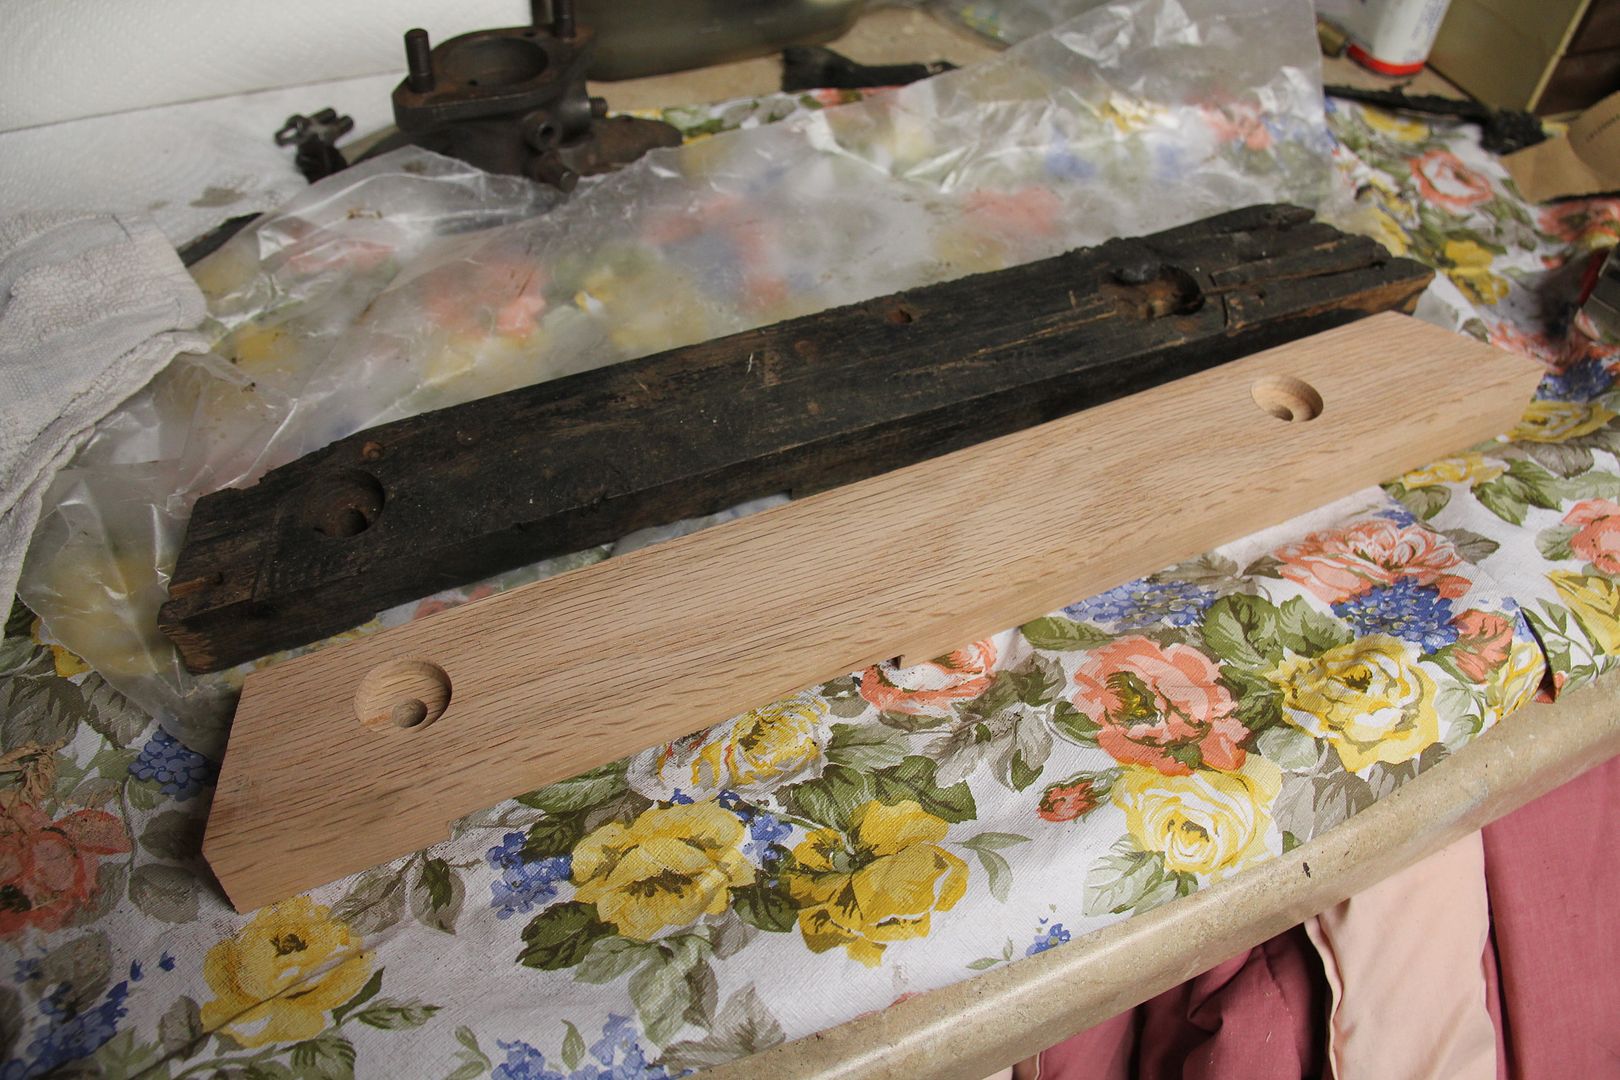
I'm working through some of the wood parts in the body. Luckily, most of the important parts (the top bows and top structure) are in good shape and will need no replacement. The floorboards are a different matter - they are plywood and all of them have delaminated over the years. I will replace them with marine plywood. One of the problems I've run into concerns the wood supports that fit under the edges of the floorboards and also surround the tool box in the floor. These wood pieces are 1-15/16 of an inch tall so I've had to laminate several pieces of oak together and then plane the assembly down to the correct thickness.
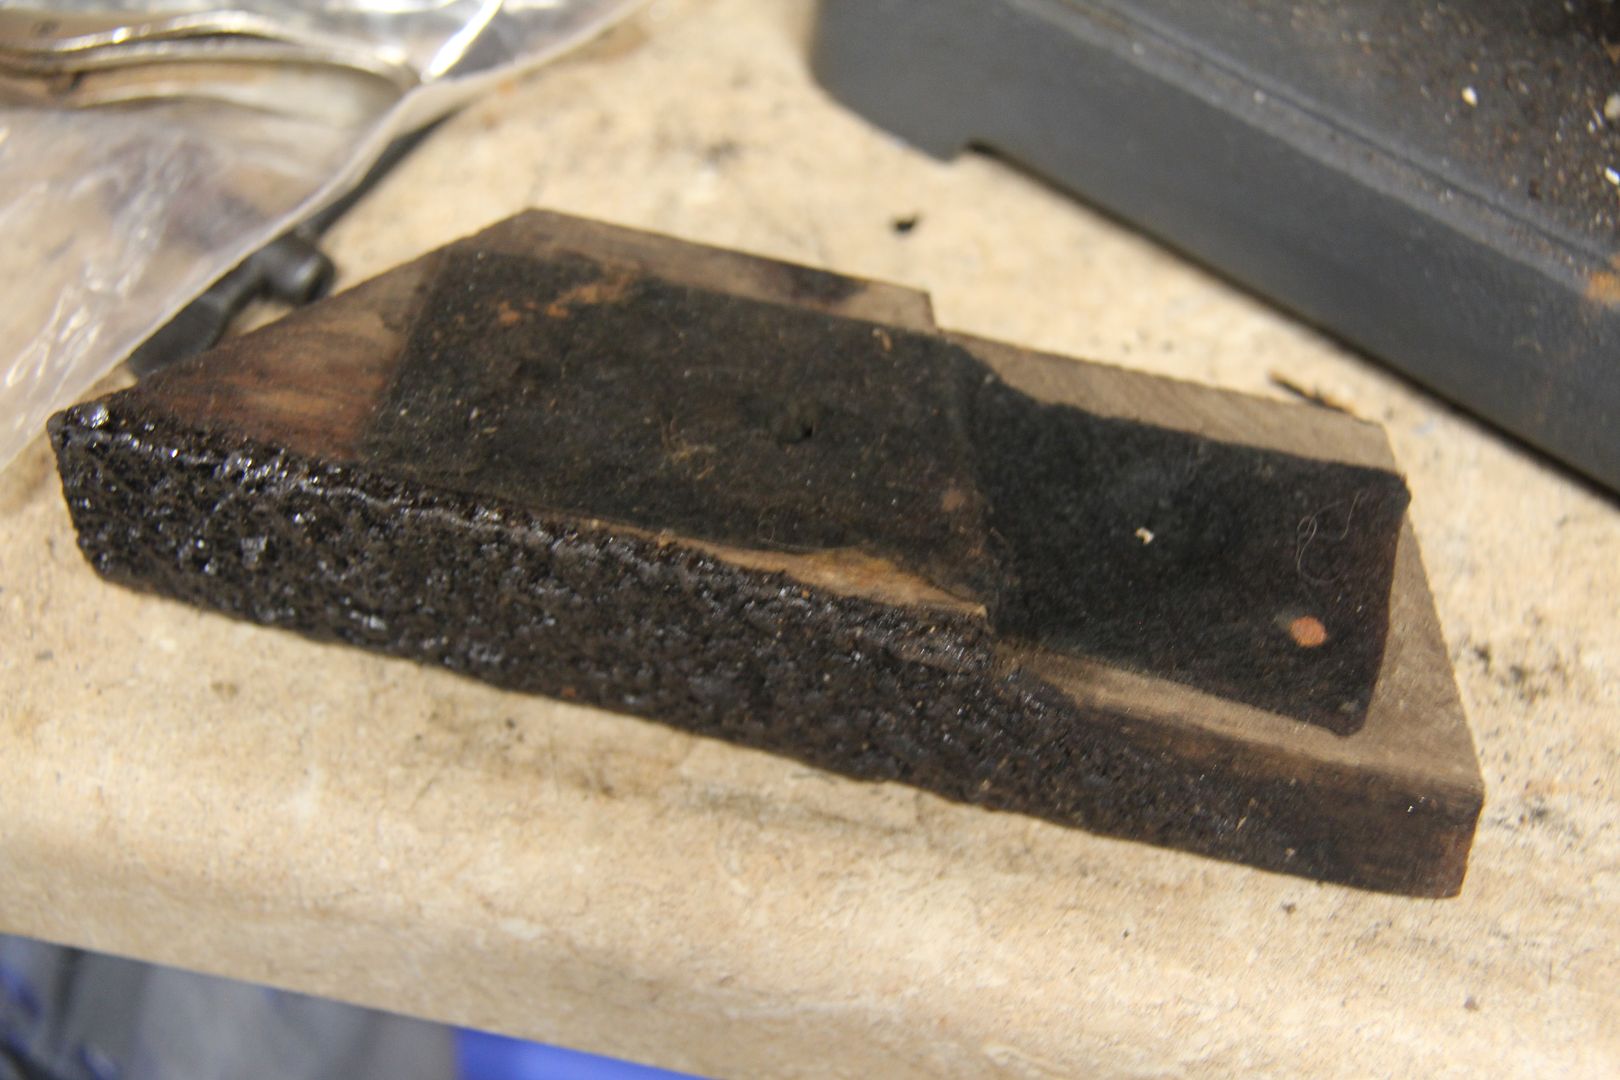
This small piece by the tool box was in good shape once I sanded off all the gooey undercoating that had been sprayed all over the underside of the car. I gave it a coat of sealer and then black paint as original and it looked brand new.
These pieces are isolated from the frame and the floorboards by strips of black felt material tacked to the wood. I happened to have a roll left over from my 48 Plymouth restoration that is an exact match to the original material. Sometimes you get lucky.
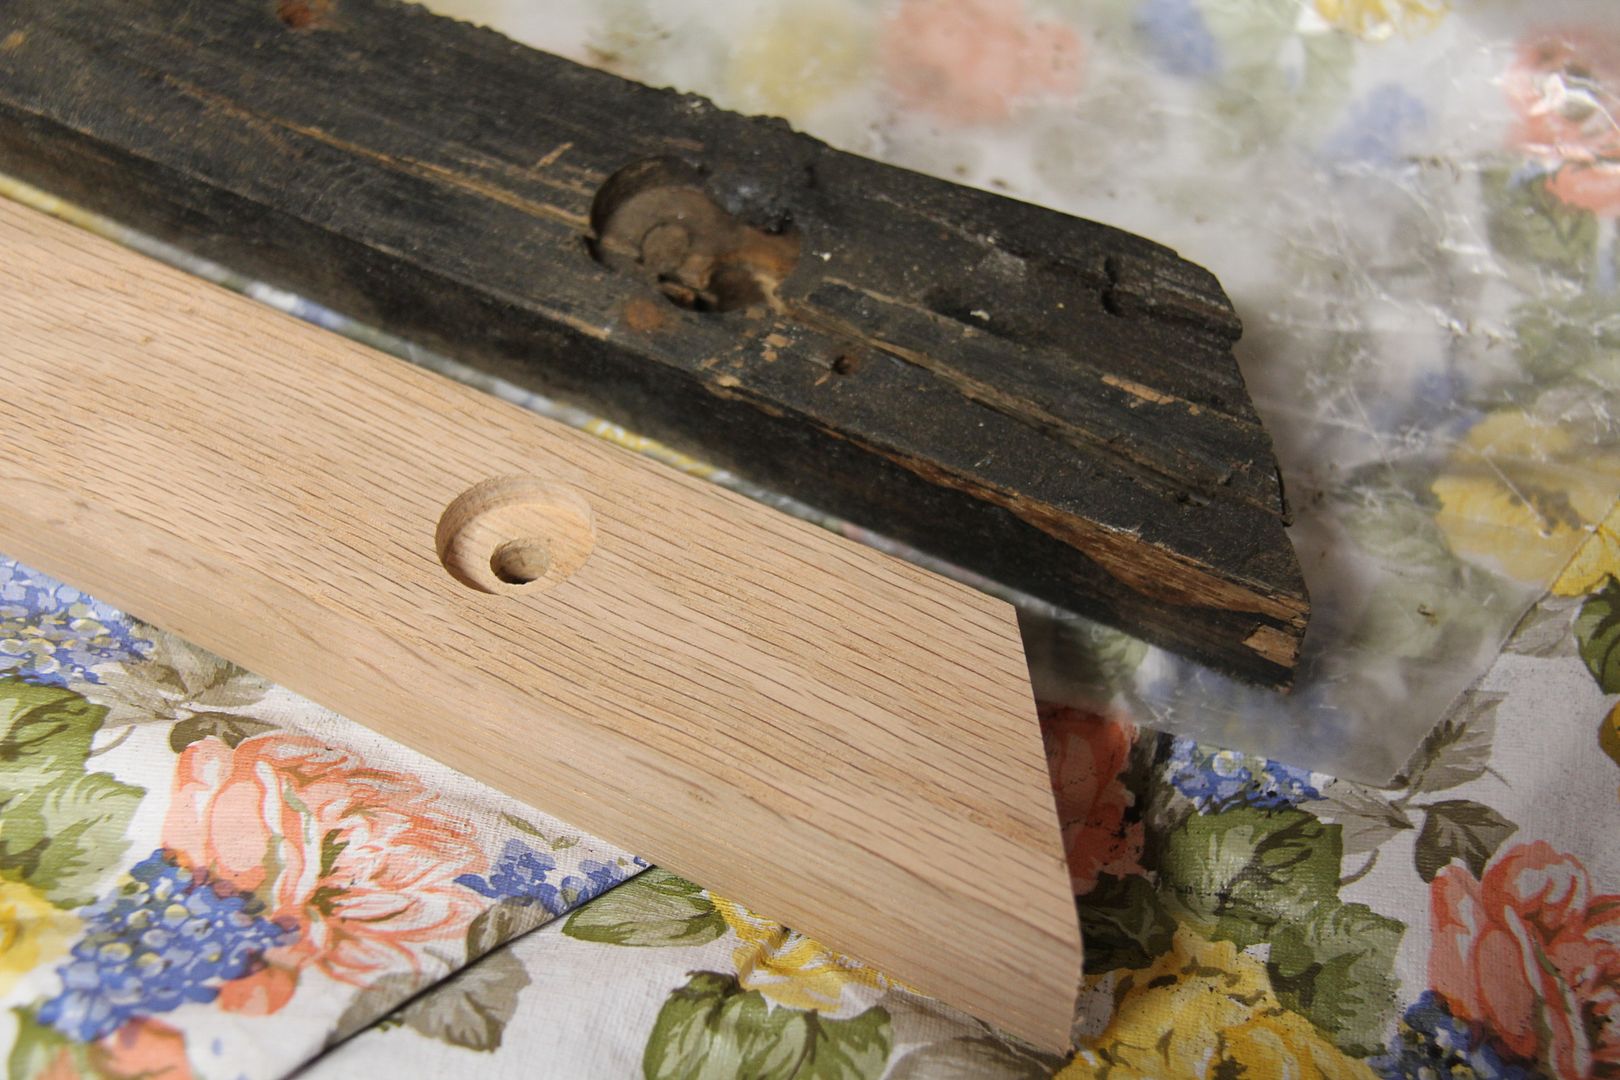
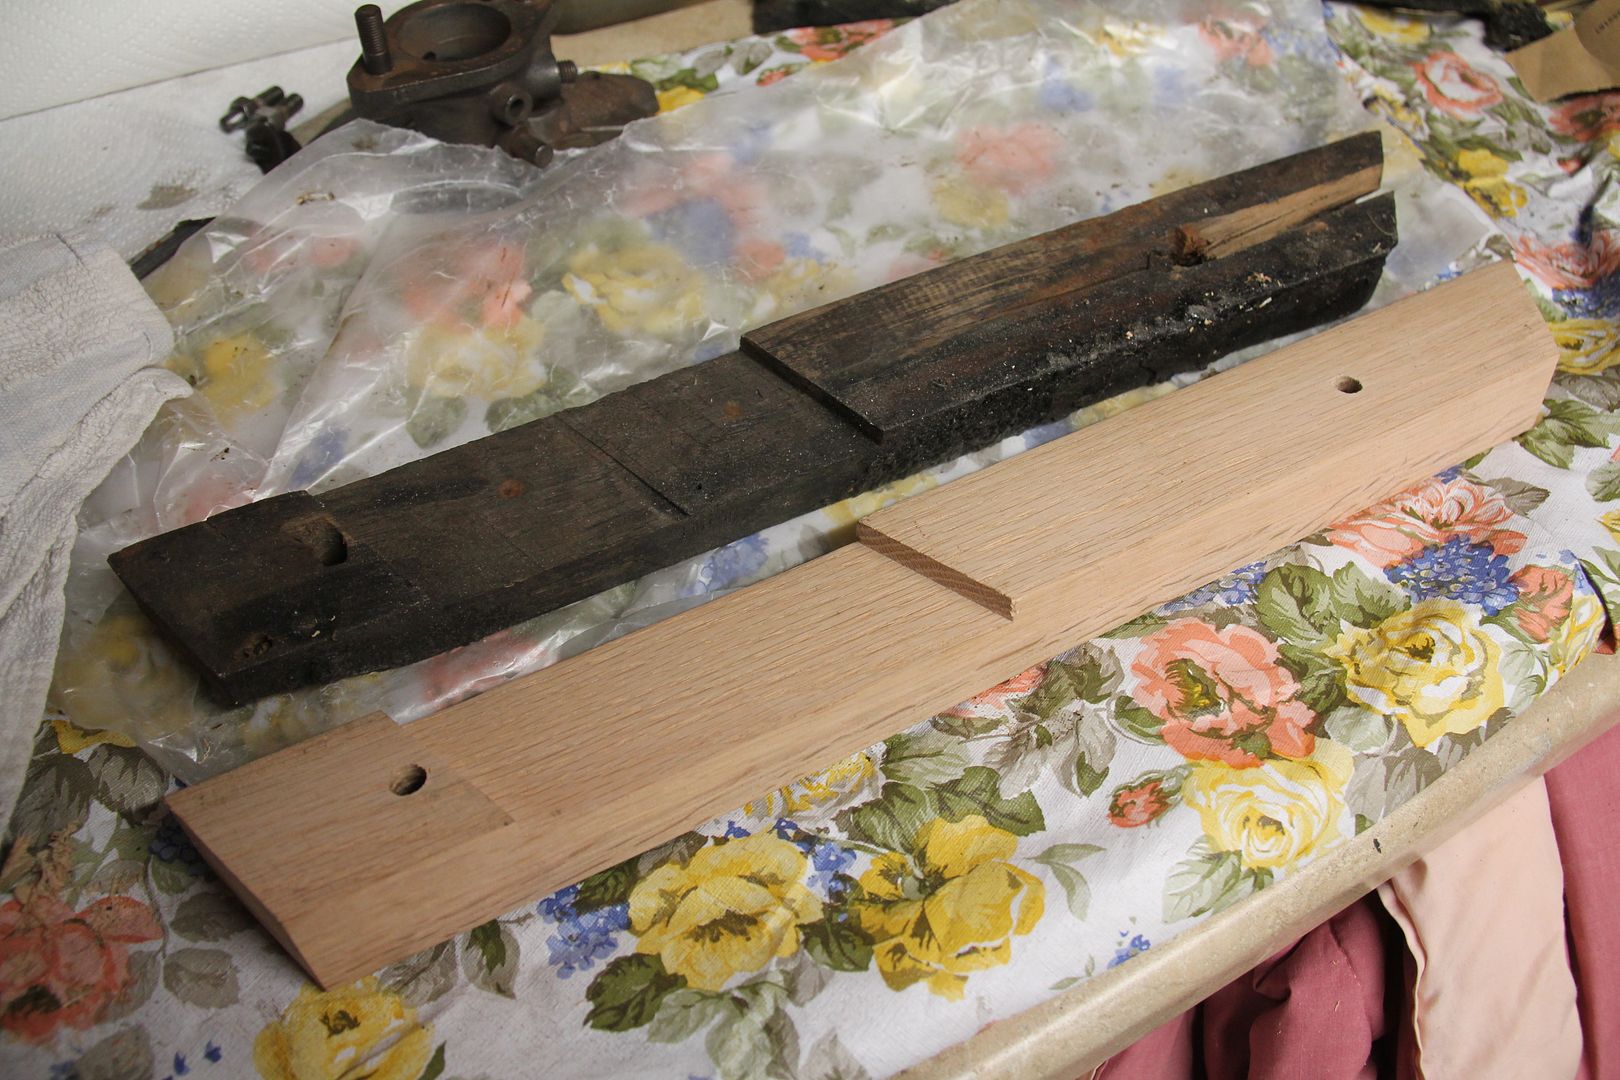
The longer piece was too far gone to save. One end had split badly and I had to make a new piece.
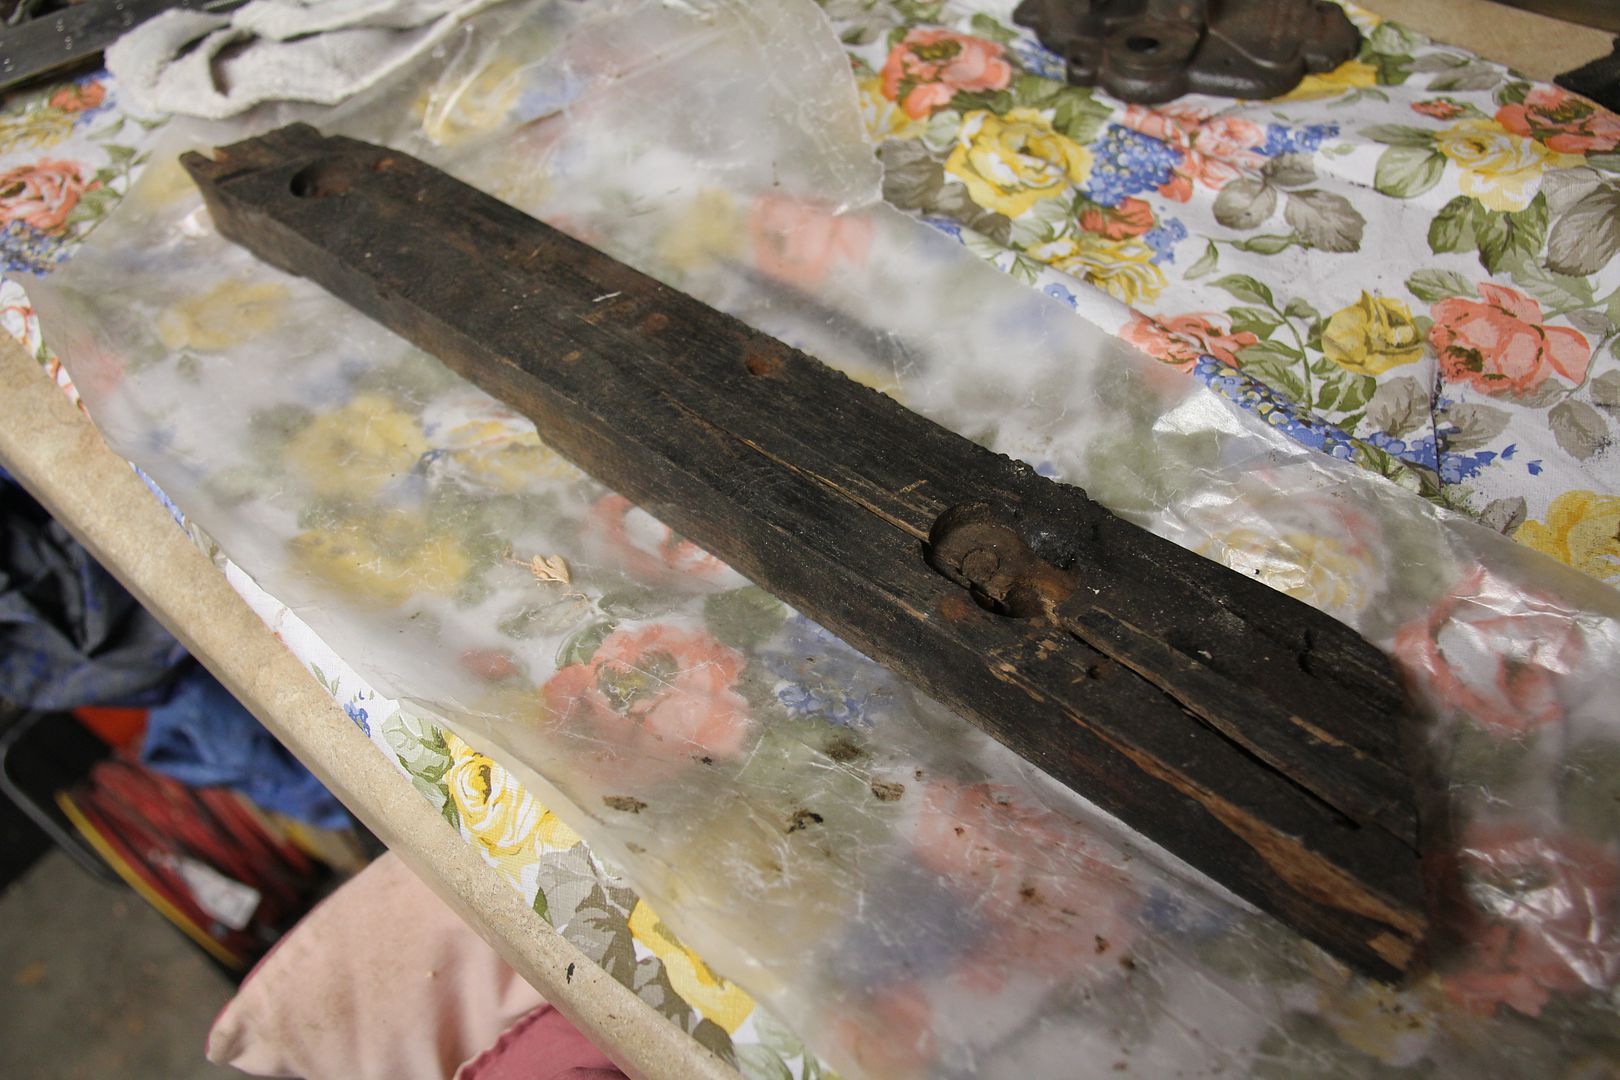
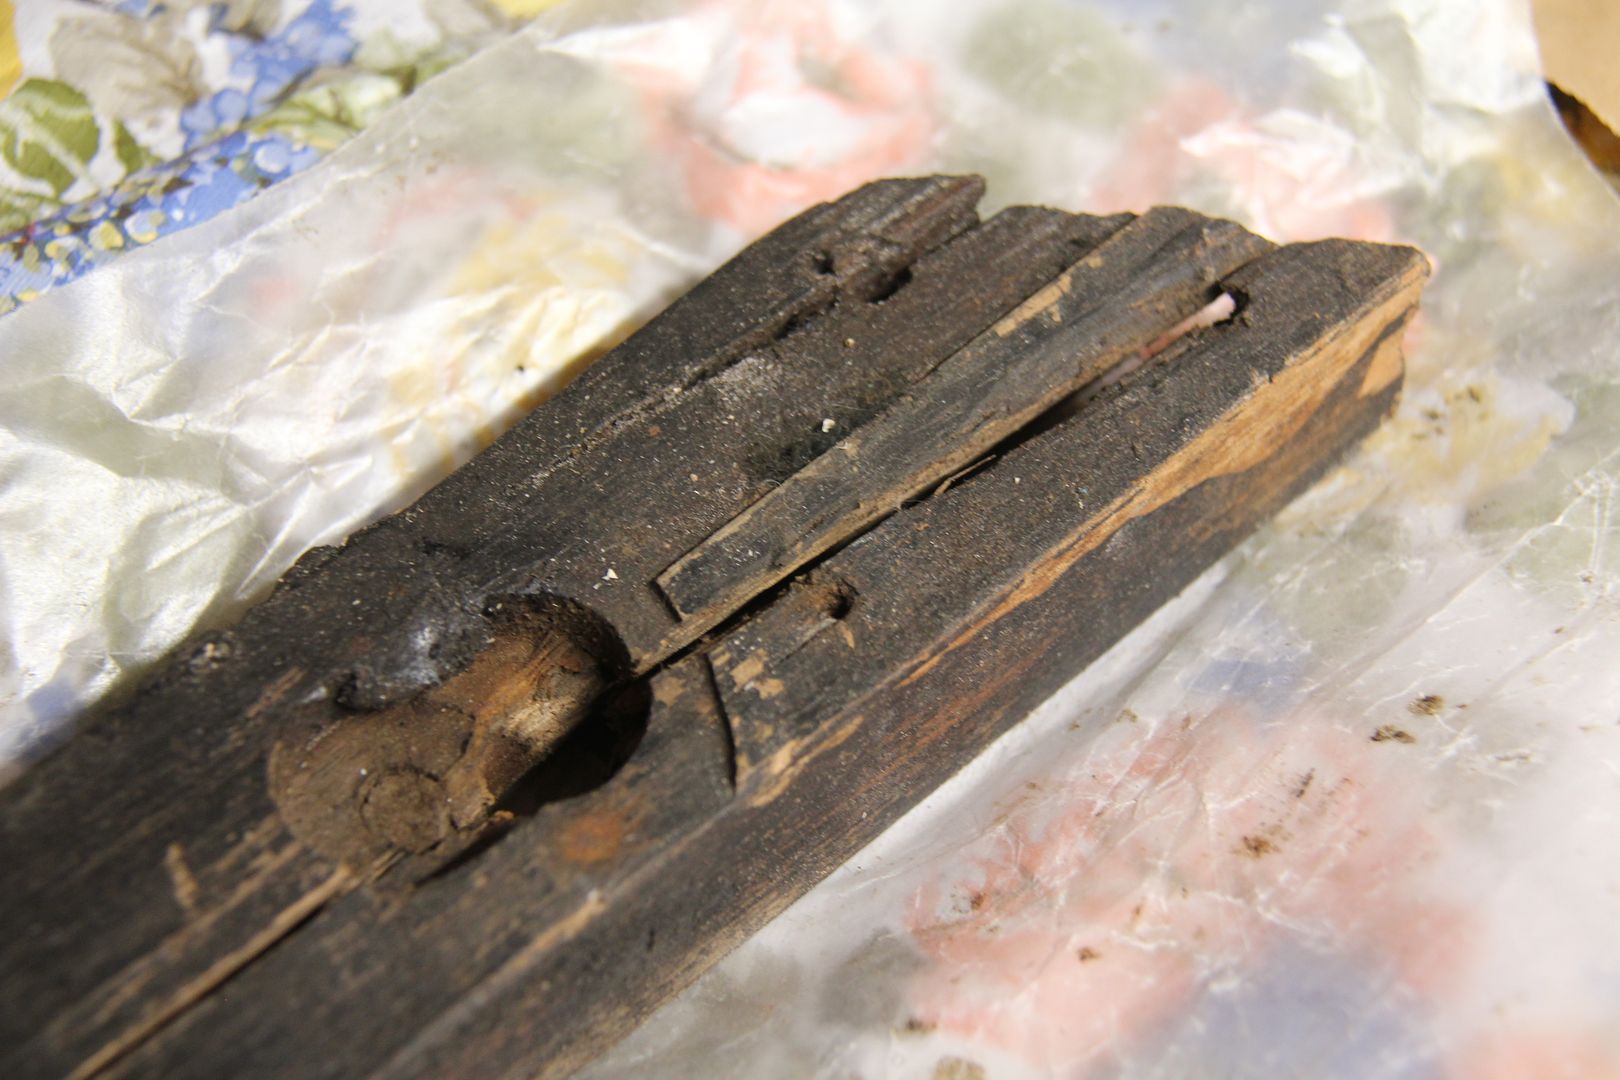
The replacement is made from oak, laminated and then planed down to the correct width and thickness. The recesses (to clear frame supports) were routed out.
Sealed, painted and ready for the felt and final installation.
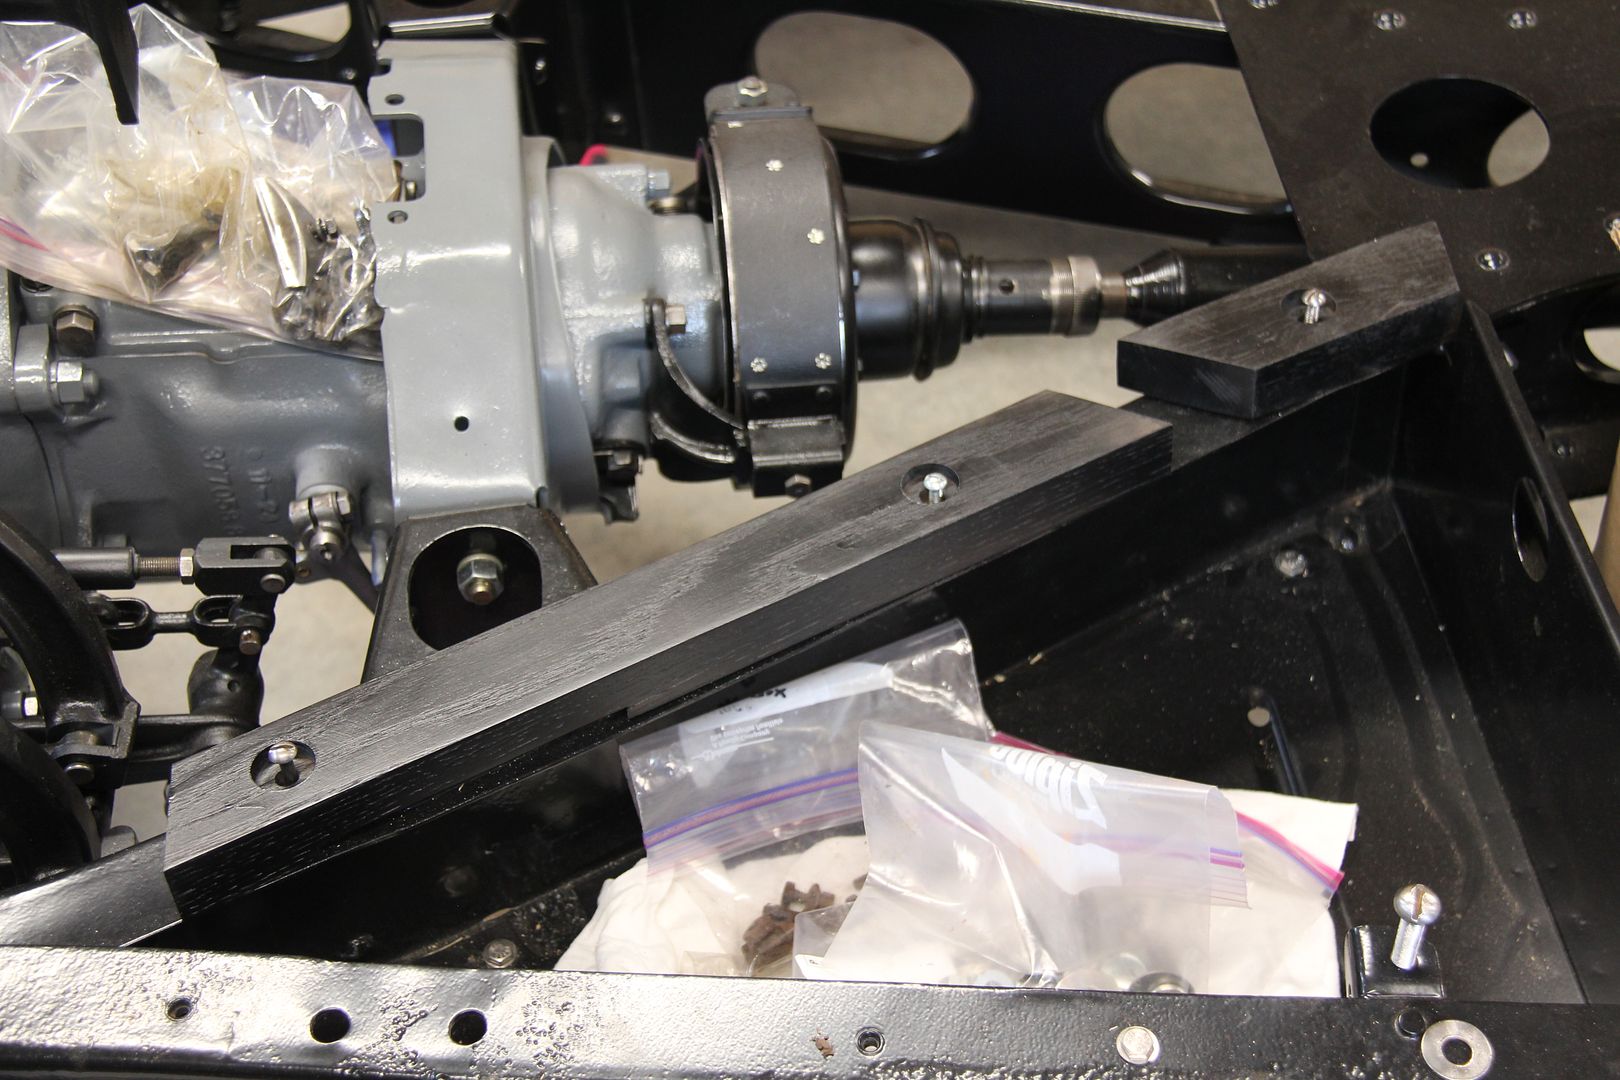
The slot these two pieces forms is for the battery cable to pass through the opening and then through the hole in the back of the tool box where it connects to the battery. It's one long battery cable!
-
Unfortunately, the wheel and steering column are set up for use with the levers. The horn assembly pretty much has to have the levers in place to work. Perhaps something from a later Chrysler would work as they dropped the levers in the mid-thirties cars like this one from 1935.
-
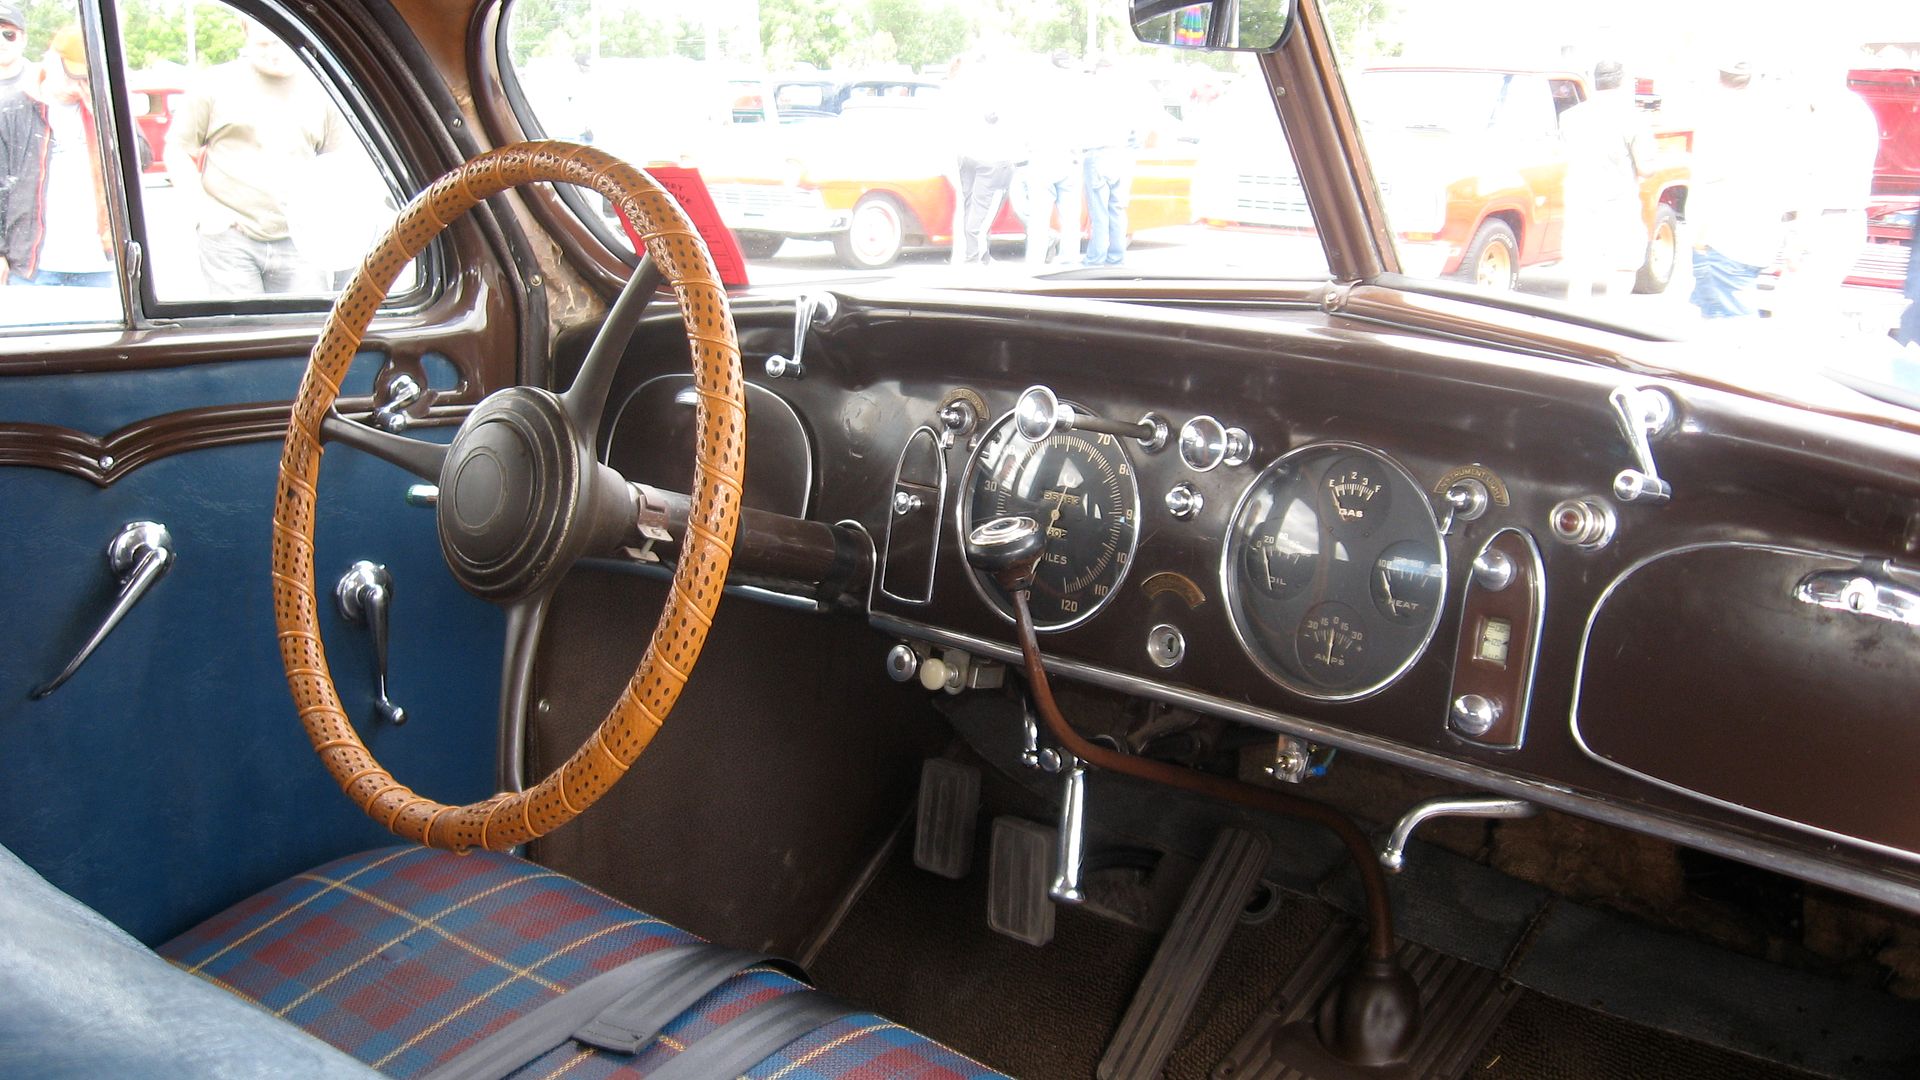
It appears similar to the steering wheel on my 32 Dodge DL, except mine is a three spoker. There is a hollow tube through the steering column with threads at the top where the large flat nut goes to hold the wheel on. A second smaller tube fits inside the first tube and has a lever attached - you can see the lever/levers in the small pic of the right hand drive car. Mine has a single switch lever for the headlights. Some earlier cars have two levers (and two tubes) for retarding the ignition or other operations. The lever tube/tubes are hollow and the horn wire runs down the inside of the smallest tube. On my car the tube is held on by the Clum switch at the bottom of the tube. As the switch/tube rotates, it turns the innards of the Clum switch. Mine has a Bakelite disk that bolts with two small bolts on to the flat portion of theswitch lever and covers the circular depressed area in the center of the steering wheel and turns with the switch. This disk holds the horn button in place. The horn button has a spring under it and a flat contact that is attached to the horn wire. I'll post some pictures tomorrow after I get out in the garage and document this. Hope my description wasn't too confusing.
Basically, the cover you are looking for bolts on to the switch lever mechanism and holds the flanged horn button in place.
-
Looks terrific! Looks like a good chrome job on the bumper and bolts.
-
Watched the show. It was okay, seemed like a cheaper version of "What's My Car Worth." I know it's the first show, but the guys seemed very forced, the interviews were short and not very interesting and I really hated the waste of time showing the list of "Purchase Price, Restoration Cost..." since everything came up "Not Revealed" other than the 20 grand for the Merc. We didn't see anyone driving the cars - the Merc disappeared down the road at the end of the segment, but that was about it. No good look at the interiors of the Merc or the Vette and lackluster photography of the cars in general. It would be far more interesting if they did the segments and then waited to see what the cars sold for so we could get some idea of the accuracy of the appraisals. The auction sale of the Vette was the only indication and it proved to be well under the appraisal. They could have lost the phony looking bet on the auction price - it didn't increase the "drama" one bit. Terrible music, terrible narrator. At least they didn't come back from a commercial and repeat the last four minutes of the previous segment. The show, as so many seem to be, is fixated on the value of the car rather than the emotional appeal for the owner or the fun of owning and driving these cars.
Finally, if the show is about how much the cars mean to their owners and their stories are what it's all about, how come we didn't hear any interesting stories, and why did all three owners want to sell their cars? The Vette owner says it belonged to his dad and it meant the world to him, then he auctions it off? Why not find some true hobbyists and let them talk about their car, how they restored/preserved it, what it took, how they found it, where and when they drive it, why they bought it in the first place? A lame four minute interview with the car sitting there on the grass or in a warehouse with a seemingly disinterested owner standing next to it doesn't mean much to me. I'll watch a few more shows, but it didn't impress me very much, I'm sorry to say.
-
This is the one I was talking about - sorry I forgot to include it.
http://www.autometer.com/antique-beige-5-pc-kit-box-w-elec-speedo.html
This has a mechanical odometer.
http://www.autometer.com/antique-beige-5-pc-kit-box-w-mech-speedo.html
-
This might be an interesting solution. These are electronic and work off GPS (speedo) and provided sensors, but have the look and size you are after. The advantage is not having to use a speedo cable and capillary temp gauge tube. I don't care for the electronic odometer, but everything else seems to fit. Another option is to find a Mopar dash of the right era with the gauges intact and hope they all work. Best of luck. My dash was all good and working except for the temp gauge which was replaced with one with the wrong face before I bought the car. I did manage to find a used one that will have to have a new printed face applied. I also found a NOS Amp gauge that i bought just in case. They are very hard to find.
-
Did you coat or paint your exhaust manifold? Your engine looks great in your photos.
-
Gunsmoke,
Even in it's current condition I love the looks of your roadster. That body with curving top of the doors and that long hood are just terrific. I'm curious about your Dodge seat. My 32 DL sedan has an all steal front seat with the exception of the seat bottom which is wood. It appears the coupe may have been different.
-
Okay, this is what happens when you get old. I got to thinking about the manifold gasket I'm looking for and then it struck me - I bought a complete gasket set when I rebuilt the engine. All the block to manifold gaskets are in there as I used them to determine patterns for masking the block when I painted it. I go out in the garage and check my gasket set box. Right there in front of me are two manifold gaskets of slightly different sizes, one of which fits my manifolds perfectly. Another Duh! moment, but one with a pleasing result for a change. An entire page in this thread on this and it's all for nothing. Thanks for all the kind replies and I'm sorry to have wasted your time.


Radiator Hose
in Dodge & Dodge Brothers
Posted
Thanks for all the advice. I found this site and it looks like they have just what I need in both steel and stainless. Now I just have to figure out the correct tube radius and I'll be all set.
http://www.sharpeproducts.com/store/bent-90-pipe-tube-elbows-with-two-tangents