


Rock10
-
Posts
497 -
Joined
-
Last visited
Content Type
Forums
Gallery
Events
Everything posted by Rock10
-
You came to the right place. Lots of help here.
-
I installed the gauge resistor and the response looks better. It shows about 1/16th of a tank at empty ( the lowest reading I can get out of the sending unit) and I adjusted it to read about 1/16th over full at the top. We can live with that. Very smooth action up and down. Now have to get the new tank installed. Thanks for the help.
-
Got everything put together and bled the brakes. Firm pedal and everything is dry! Thanks for all of the help.
-
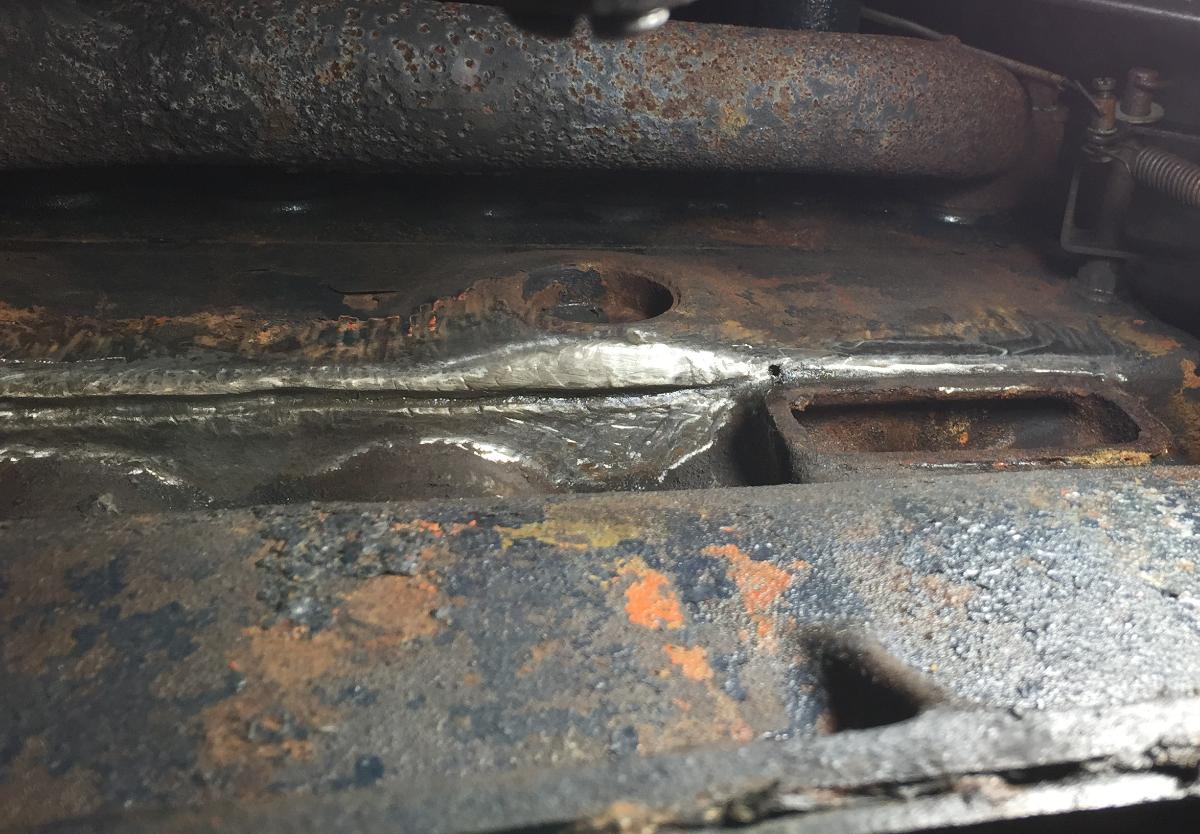
Final cleanup tonight. Ground out past crack. Drilled several new holes to anchor the JB. Sanded with 60 grit, heated it up with the torch,blew it out with the compressor and wiped it down with acetone. Used an old syringe to try to inject the epoxy into the holes and smoothed it out with an acid brush. Will sand tomorrow and apply a second coat. Pics are before the cleanup. I followed the crack with a carbide grinding tip.


-
I suspected that but not sure how they are connected.
-
We have the tube on the other side by the distributor. This one is on he manifold side and had a vent like piece bolted on it. I'll see if I have a pic. Good idea on the syringe. I think I have some left over from doggy medicine.
-
OK, back to the big hole. I'll check again tomorrow for the length of the crack. No stitching! I did research it. I just thought the screws would provide a good anchor at each end. Since I'm working upside down and JB Weld is a little saggy. I was afraid it wouldn't stay in the holes that well. Was planning on several coats with sanding in between. BTW, what is the purpose of the "vent" that goes into that rectangular space toward the rear of the block?
-
There were signs of some previous repair but not a weld. Those are the holes I drilled today. I am thinking of tapping them and using epoxy on either stainless steel or brass screws. Yes, still have work to do on the cleaning but the front hole hit water still in the block and kinda washed me out for the day. So the freeze plug goes into the smaller hole? OK. New search.
-
Also got the shaft cut out of the housing. Looking for a freeze plug. 1 1/2" is too small.

-
Worked on it today. Got some grinding done and the 2 holes drilled.


-
THe car has sat for a while. We are going to try JB Weld. I'll try to post pics this evening.
-
Thank you all. I was able to cut off the remaining shaft and will install the drilled freeze plug tomorrow. Another setback this evening. We discovered a crack in the block on the drivers side just under the freeze plug area. Looks like someone had tried to epoxy it before.
-
We need to reinstall the temp gauge. (it wasn't there when we got the car). Do you have to remove the panel to install the gauge? That would give me a chance to closely look at the gas gauge.
-
Thanks. Does that shaft screw in or is it a press fit?
-
Is the gauge adjustable? Can it be serviced or repaired? Do you have to take the instrument panel out to remove it?
-
So we need that part to operate correctly?
-
To clarify, that is not from our 36. Ours doesn't have the spring or valve, just the shaft. I wondered what it was for. Apparently someone has removed the mechanism from ours. What was the bypass function? Isn't that what the thermostat is for? Is it related to the heater? I'll try to post a pic later. Thanks.
-
What is the thermostat in this picture for? All we have left on ours is the shaft.

-

Running Light/Signal Light Dilemma ‘37 Special
Rock10 replied to Bobby Rodd's topic in Buick - Pre War
A couple more thoughts. What happens when you click the dimmer switch? Does your car have the special cross aimed brights and the 3rd position light switch? Is the wire to the switch heavy enough? Not sure what gauge wire was used originally. Again, sorry if you already answered. -
Running Light/Signal Light Dilemma ‘37 Special
Rock10 replied to Bobby Rodd's topic in Buick - Pre War
So as I understand it, everything is OK until you turn the headlights on? That's with the switch in the second position. Are you sure the headlight bulbs a 6 volt? Sorry if you already answered that. I would disconnect the headlights from the light switch and see what happens. -
Running Light/Signal Light Dilemma ‘37 Special
Rock10 replied to Bobby Rodd's topic in Buick - Pre War
How are the lights on without the switch being pulled out? -
Does anybody know the thread size on the water temp sender hole? We finally got the last of the old probe out today and the threads have taken a beating.
-
Our 36 was converted to 12 volts when we got it. Several things weren't hooked up so I don't know how complete the conversion was. Does the 6 volt gas gauge need attention or will it work fine with 12 volts? We have purchased a new tank and sending unit. Thanks
-
Could check cables for resistance with an ohmmeter.
-
Thanks


