


Gary W
-
Posts
1,060 -
Joined
-
Last visited
-
Days Won
14
Content Type
Forums
Gallery
Events
Posts posted by Gary W
-
-
Here are a few photos of the finished running boards on my '37 Special. There is just about a 3/4" clearance everywhere, and that's with the rubber vulcanized on the board. I basically loosened up all the mounting nuts and bolts, positioned the board so the gaps were consistent following all the fender contours and tightened it up. I hope these help!


Keep up the great job!
-
 1
1
-
-
Those rubber parts are available from Steele and they cushion the return of the pedals under the pedal plate.
But don't cut them like the one above. Believe it or not, they will stretch and slide over the pedal and stay as one piece.


-
1
-
-
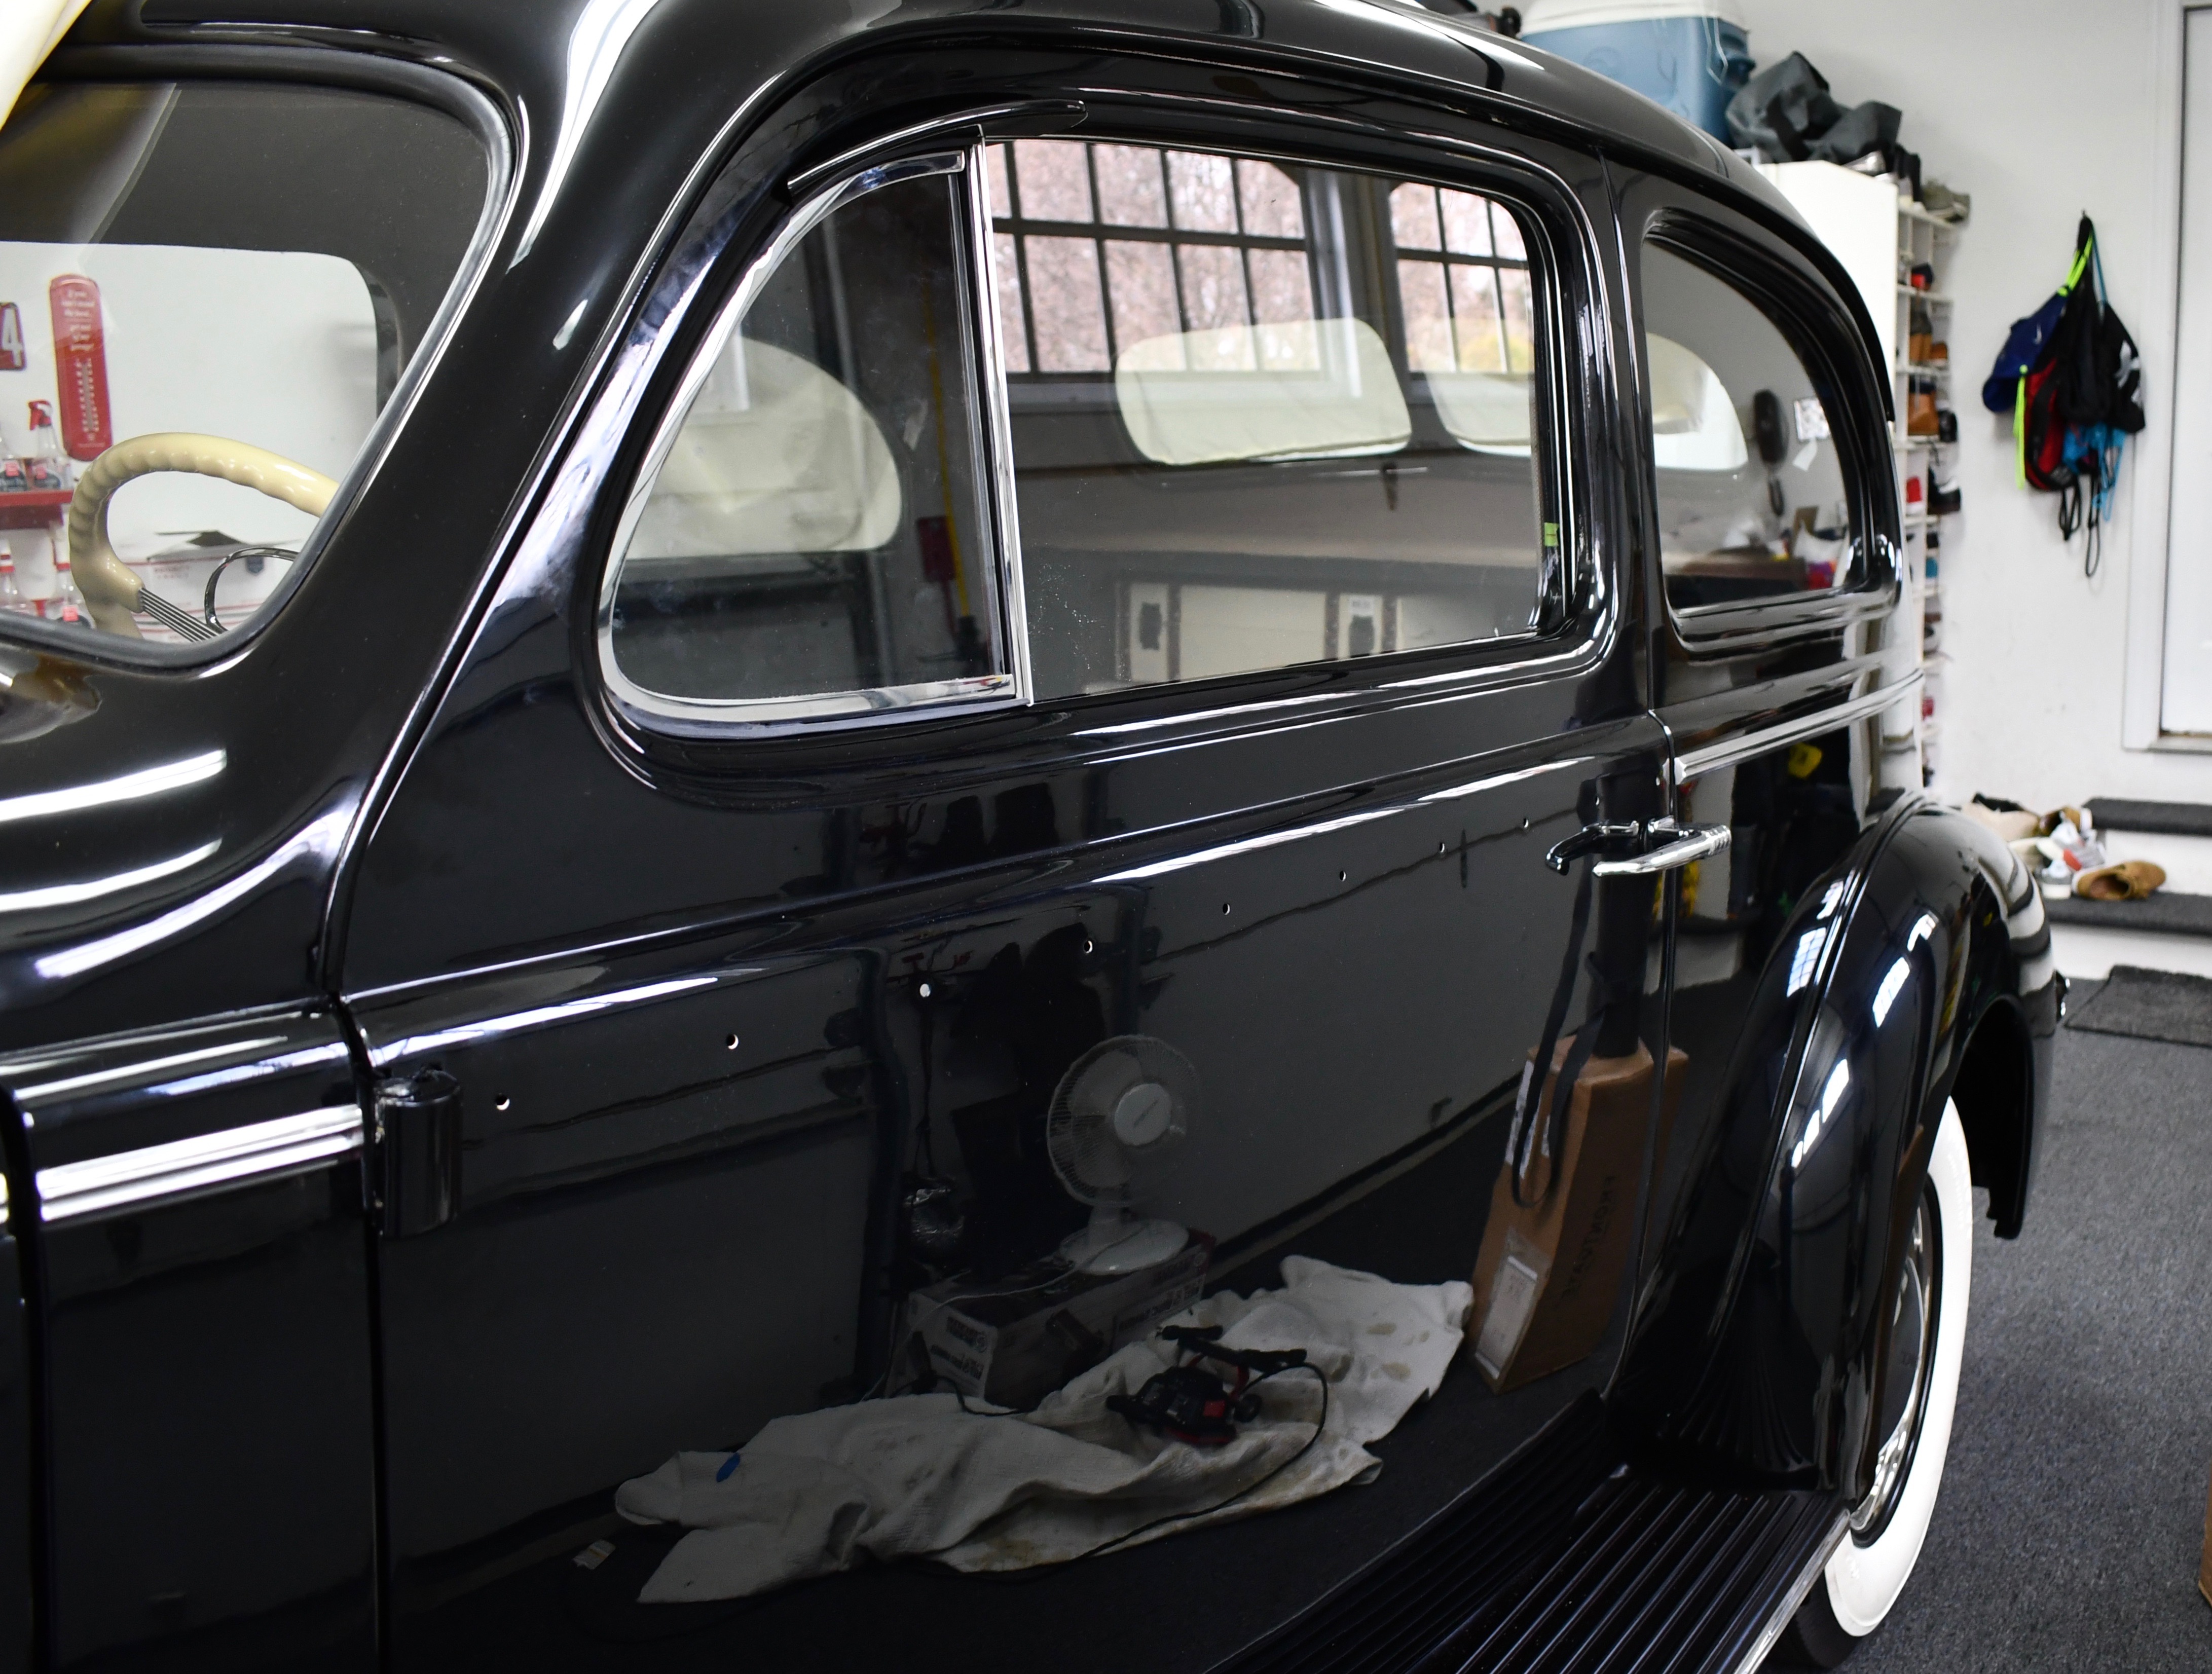
Sunday March 4, 2018: UPDATE: Doors, glass, trim installed
-
Sunday March 4, 2018: Update.. Doors, windows, trim installed
-
Saturday March 3 and Sunday March 4, 2018: Installation of the Driver's Door...... from A to Z!

Saturday Morning, 9:00 am. I went to the shop and Bob was finishing up the Drivers door. Getting it's final hand rub.

The finish is absolutely beautiful. I spent an hour with him, and the two of us turned the door over.....

And while I installed the lower door weatherstrip.....

Bob installed the large one that wraps around the entire perimeter of the door.
We worked as a team, I laid out the 3M weatherstrip adhesive ahead of him laying it out.
Two guys working, it gets done in no time.

While still sitting "shiny side down", Bob sprayed the trim black over the center section that was still in yellow self-etch.

And then the two of us loaded the door into the Sequoia, and home we go!

The last "paint shop" item coming into the garage ready for installation. We attempted to go straight onto the car, but this side was a lot tougher to get the hinges into position.

I ended up taking a fine flat file to the inner hinge surfaces to remove any trace of paint and primer that was in there.
then a light smear of oil...

2nd attempt, still no go, but getting closer. So it was a little more sanding, cleaning, oiling...

And calling in the experts! Once the upper hinge found its way into position, Matthew dropped a screwdriver in there to hold it while we got the lower hinge seated.
A little stressful, but ultimately we did get the door hung.

I started by installing the door wedge that I polished up last week.

Then the door check with a new rubber stopper installed. Again, I set it so it stops the door before the hinges bottom out.

Then the lock mechanism that I finished last week.

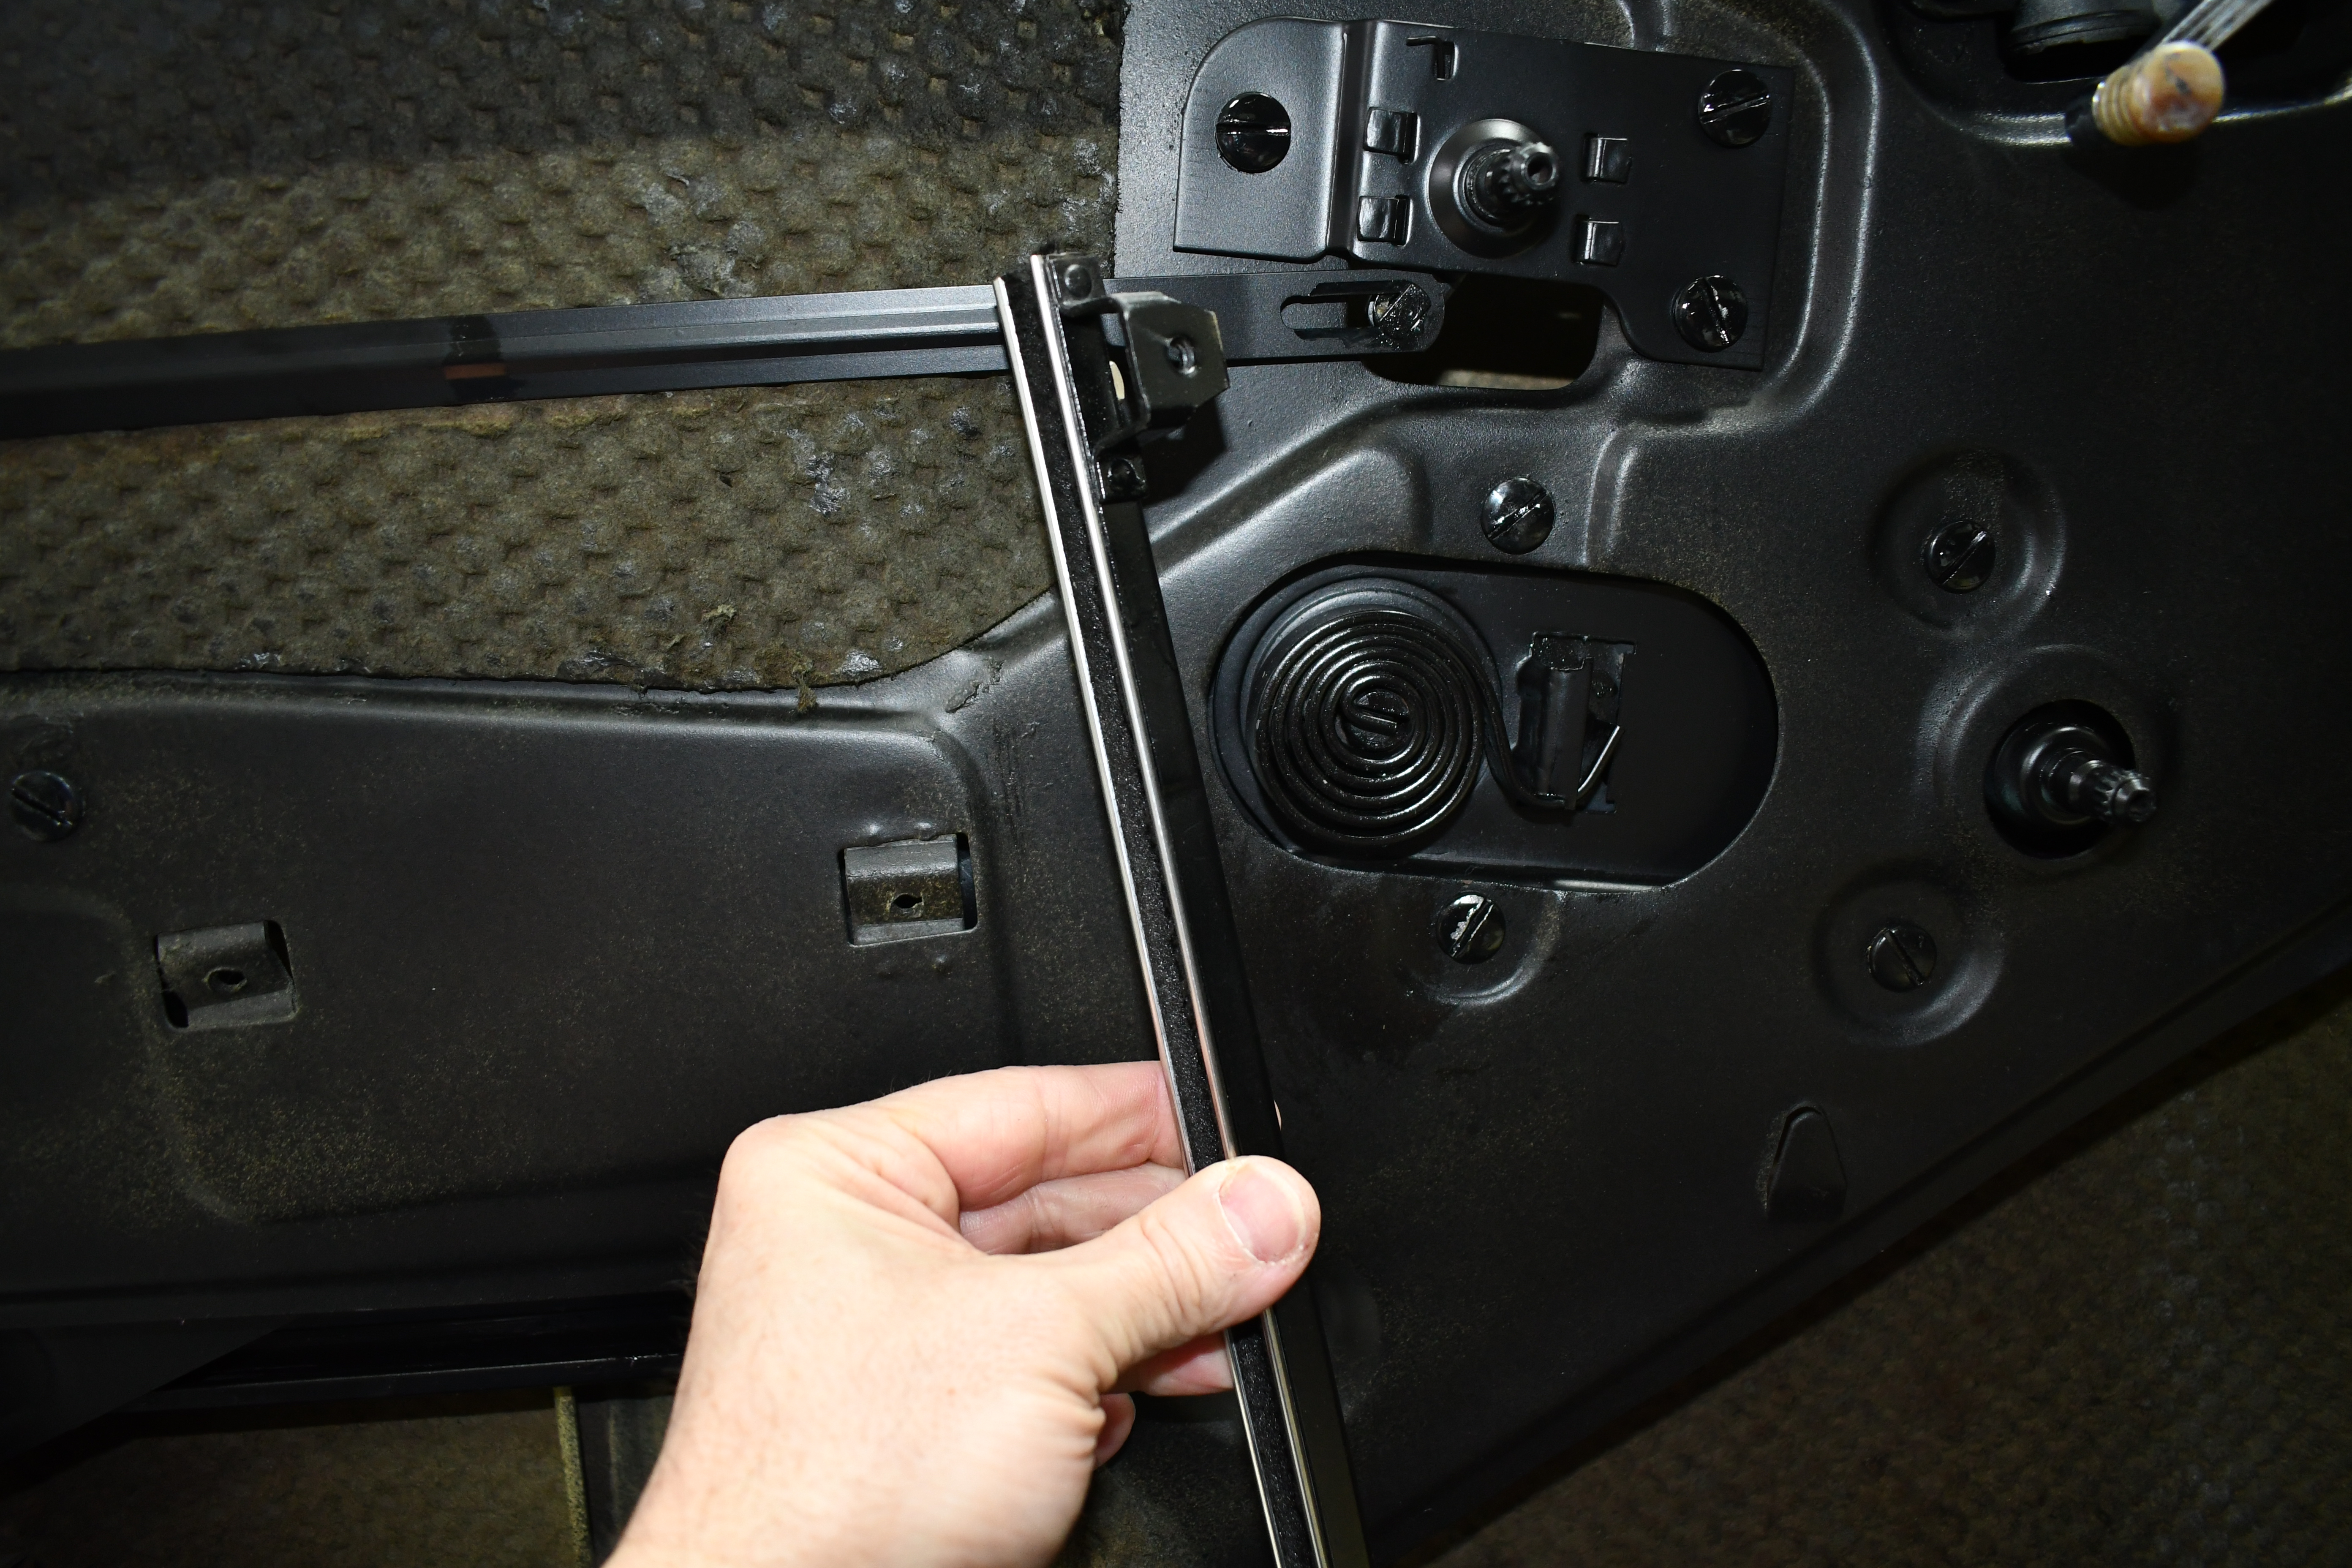
I smeared a light coat of red grease on the leather ends and inside the channels of the window regulator mechanism.
I pre-built it, collapsed it into a straight line and......

Slid it up into position in the door. Fastened all six large machine screws and it was done.

Coming together nicely and a couple well placed drops of oil and everything functions nice and smooth.

Next item was the drip shield that sits above the vent window. Only two screws and it's in.

Using the ferrule seating tool, I installed the chrome door handle ferrule with it's rubber gasket.
Following the directions, I made four "punches" with it. It does "pull" the ferrule nice and tight into the door.
(And now I'm done with the tool so if anyone needs to borrow it.......)

It makes a nice, neat job.

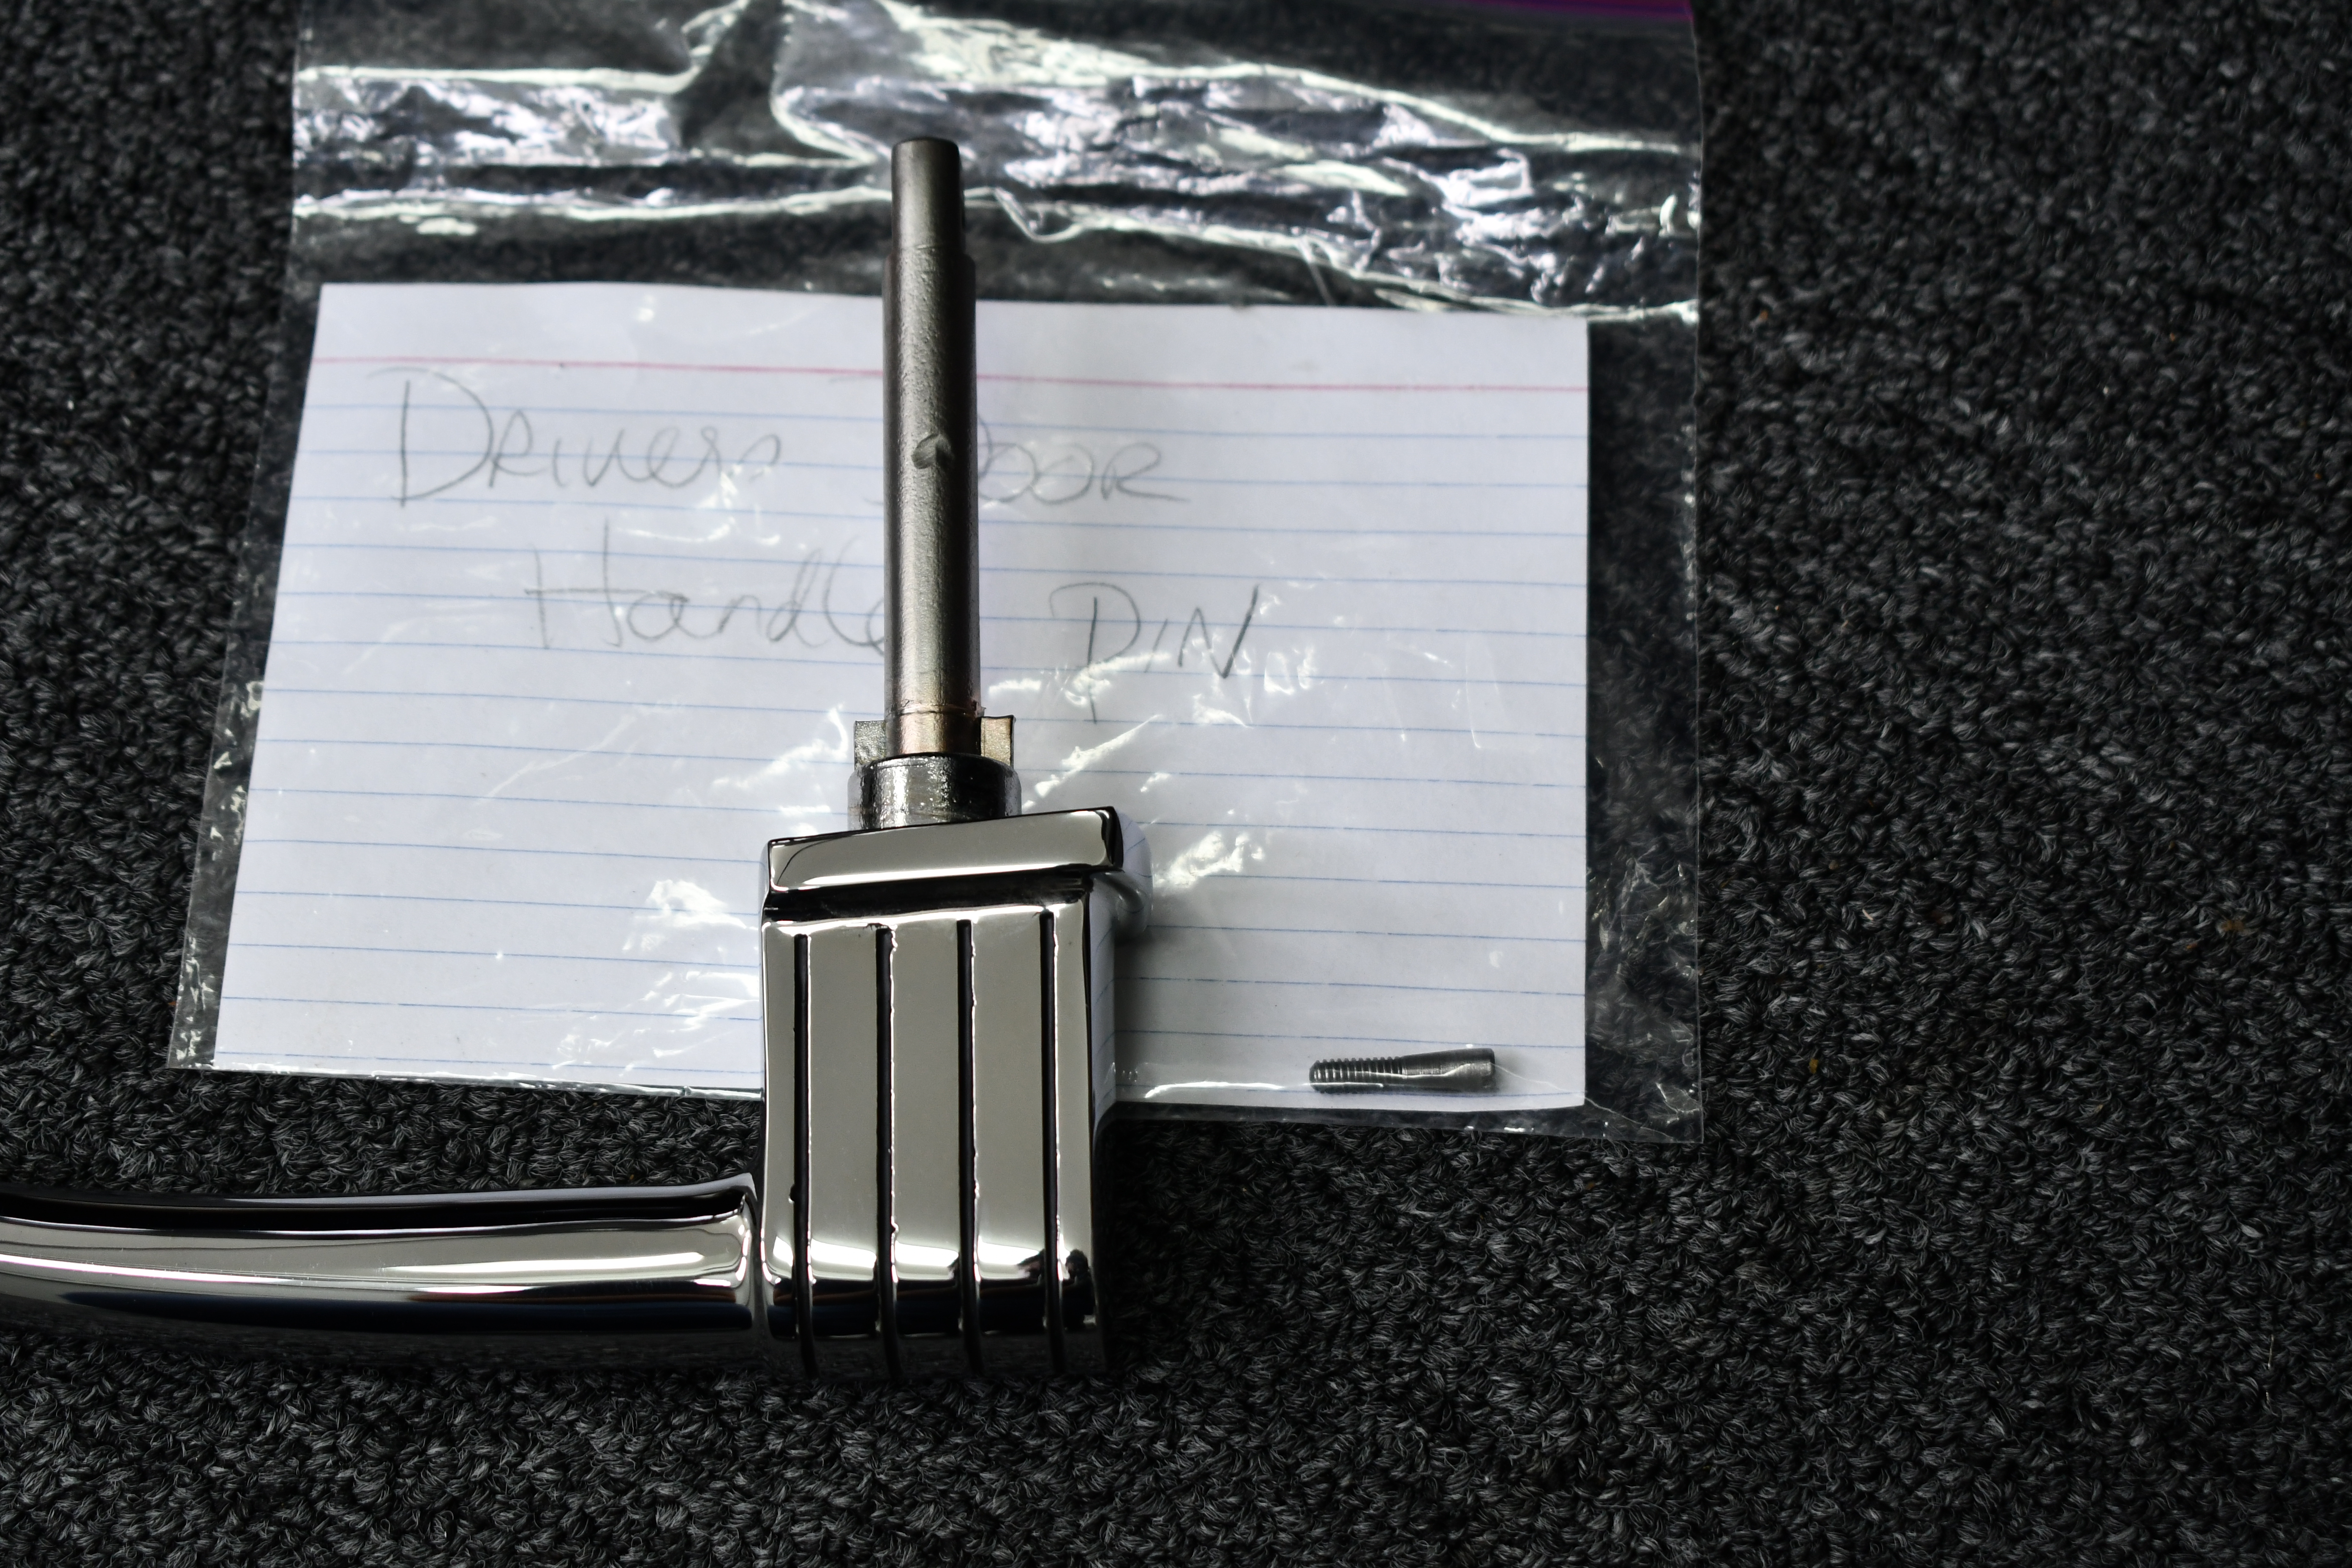
Then on to the handle and the handle retaining screw. It's so cool opening these bags from a year ago and now I hardly have any bags left to open.

From the Buick manual.

Turn the handle slightly down to line up the internal holes and give you room to install the handle pin.

Screw it in and the outside door handle is secured tight.

And the handle sits nice and level on this side.
So now it's time to get all the upper window / glass / channels installed, adjusted, checked, double checked.....
Just like the passenger side, I basically install everything first JUST TO GET THE WINDOW properly seated in its carrier.
All this work just to double check the glass is in the correct position fore and aft and moves easily through the door felts and seals properly.
So here goes with the window installation stuff:

Install the vent window. Four upper screws secure the vent window frame into the door, four lower large machine screws hold the mechanism to the door.
I put one screw in the bottom just to hold it. Then, while flexible, I install the upper screws to be sure the frame is nice and straight.
Then finish the lower screws to complete the installation.

Next, install the vent window separator. I was getting a lot of pushback from the new rubber vent seals, so I s-l-o-w-l-y used a new blade and trimmed back the rubber until it all fit nicely.

Next, the lower window channel that goes in the belly of the door.

I install this part very loose for now, as I have to loosen it to fit it to the glass so there is no binding as the glass moves.

Now on to the window felt. Like before, I simply use the glass as my template and very slowly and very carefully start making the bend.
You have to go out to the end and get it "moving" so it doesn't bind or tear. Take your time, it'll go.

Here's the basic shape. The corner looks like it has a "flat" spot, but I got that radius smoothed out.

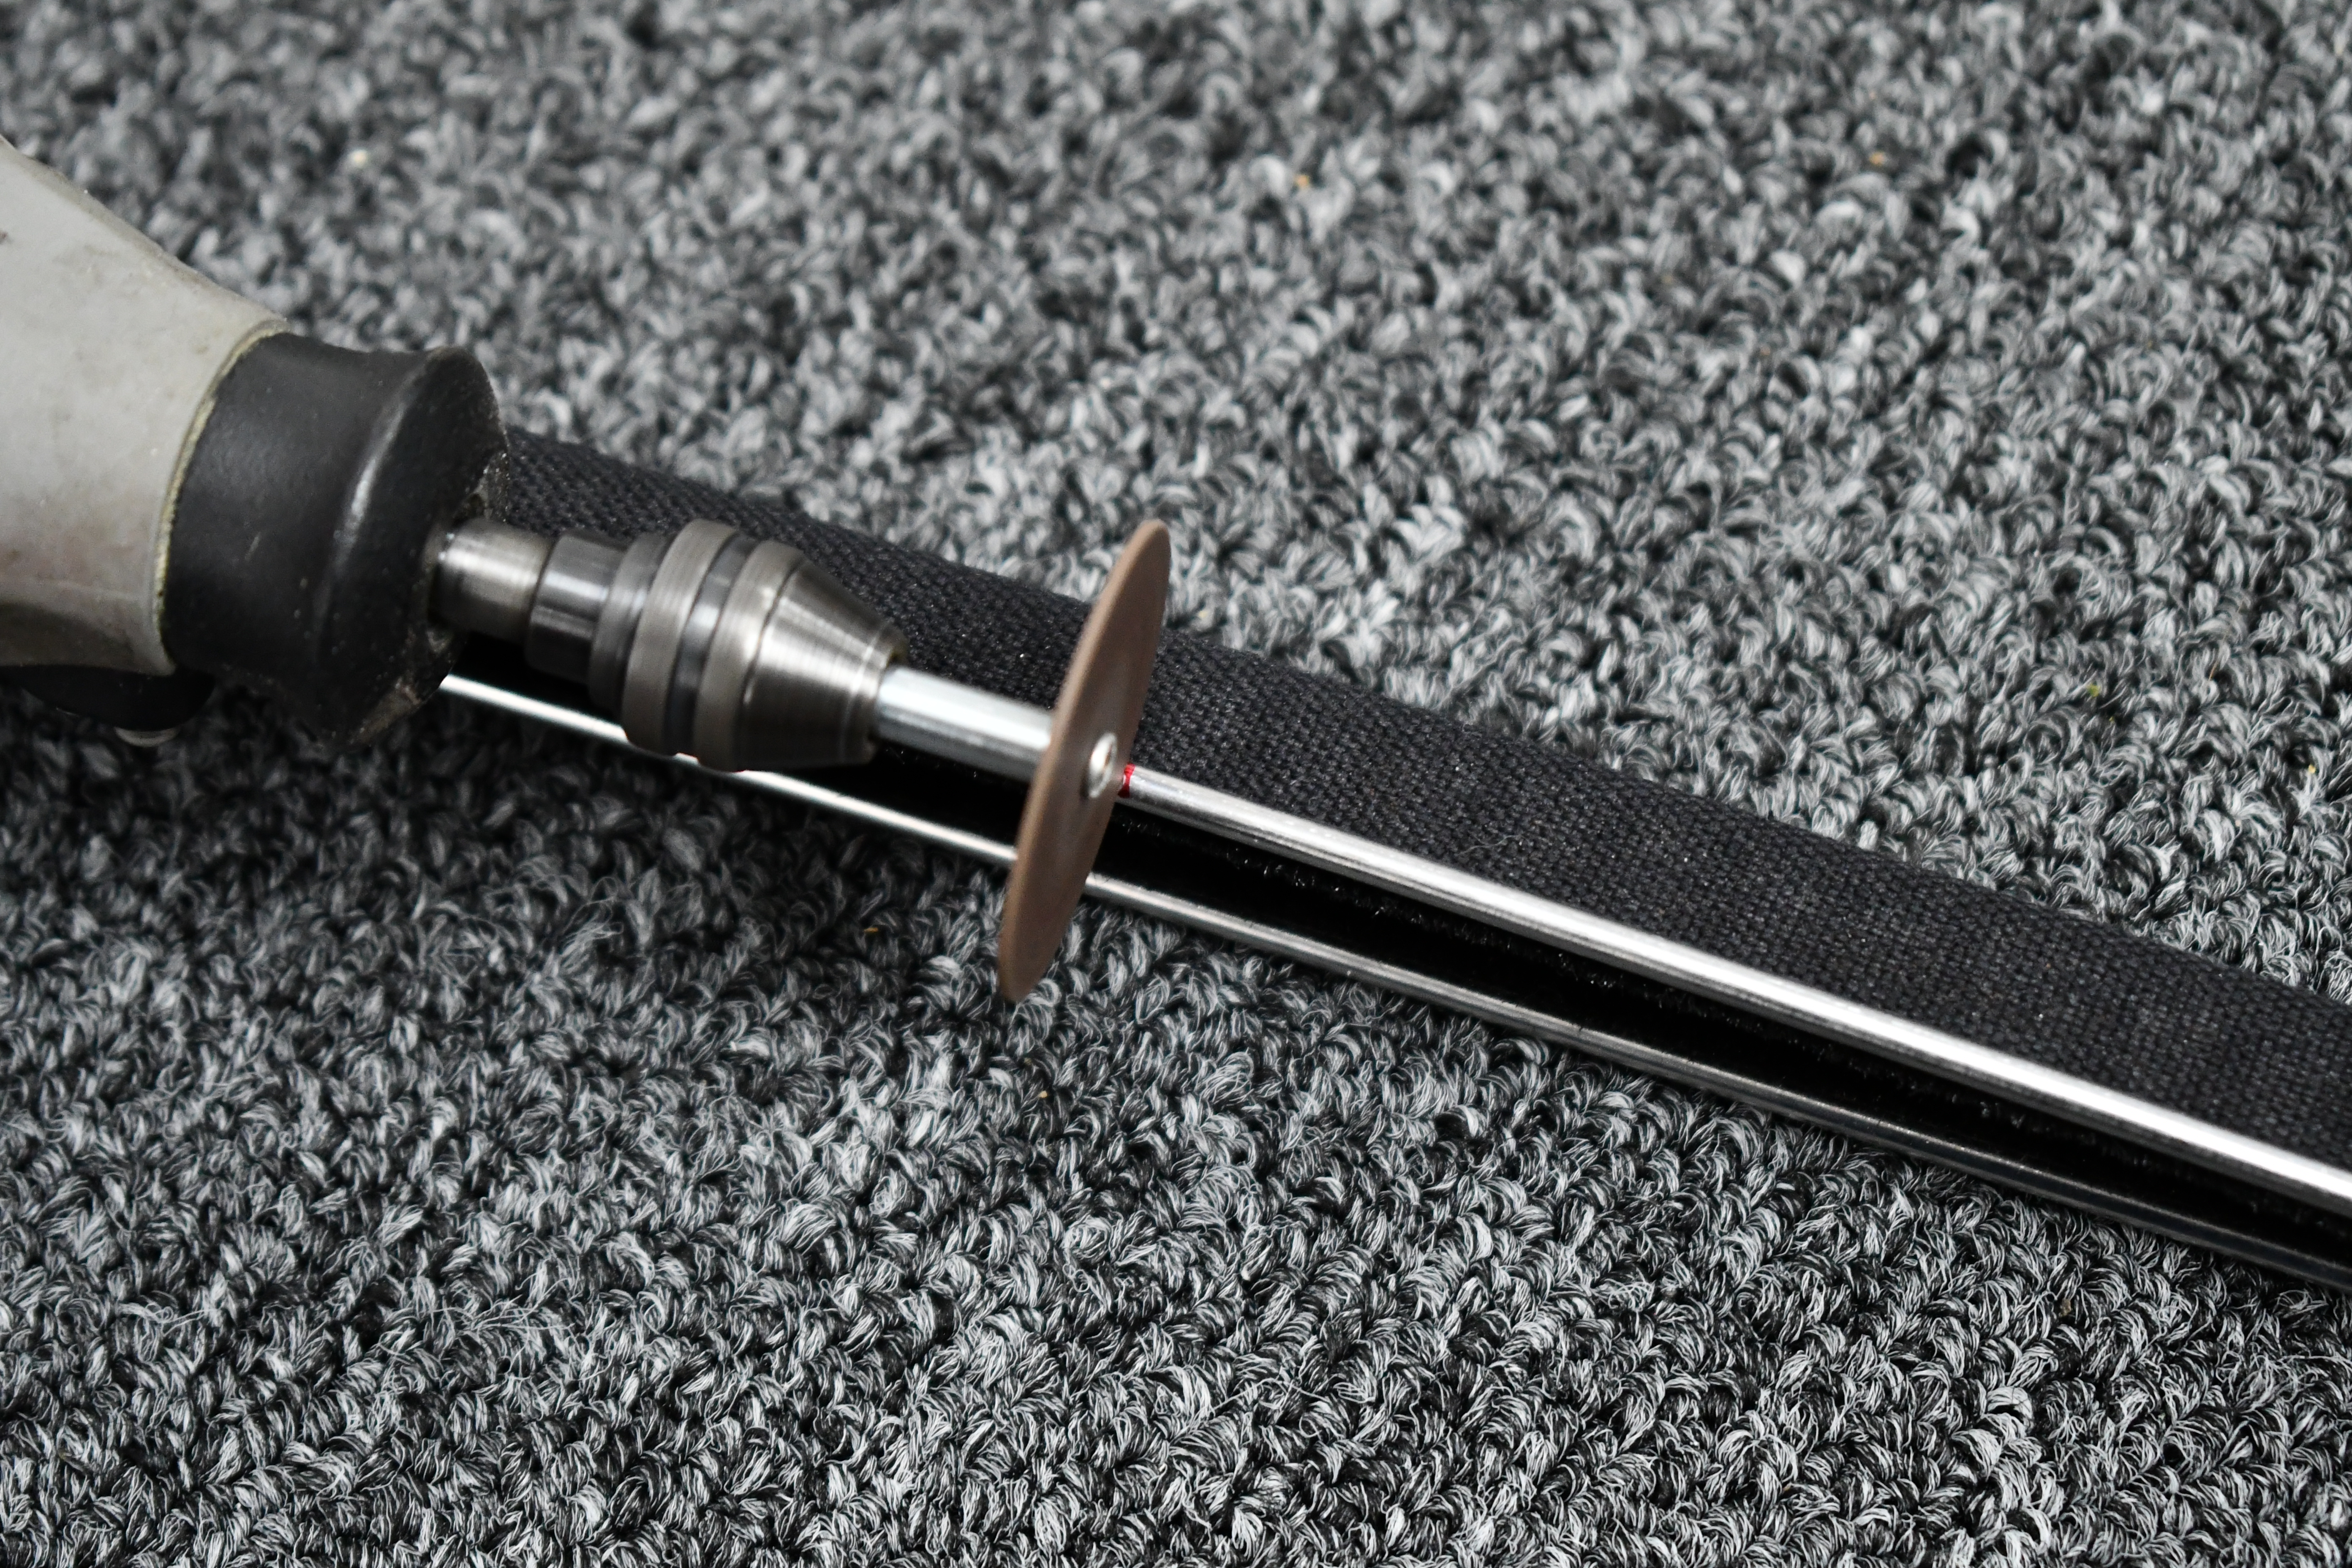
So, I measured 14 inches beyond the glass surface, marked it and cut it with a dremel cut-off wheel.

Now over to the door frame. I like this way of doing things. I first place tape over all four holes. Stick the punch through and mark the spot with marker.

When I bring the felt channel over to the door, I use a gold marker to transfer the line onto the channel.
Be sure to push that channel nice and tight into the door frame before making your marks.
I also make a mark so I can custom cut the front edge to mate with the vent window.

Over to the vice. There is a 1/4" piece of wood bracing the channel while I drill.
If you look close, you can see the gold dot on the side, which guides where I make the mounting holes.

Before installing the channel, I tapped all the holes with the new screws.

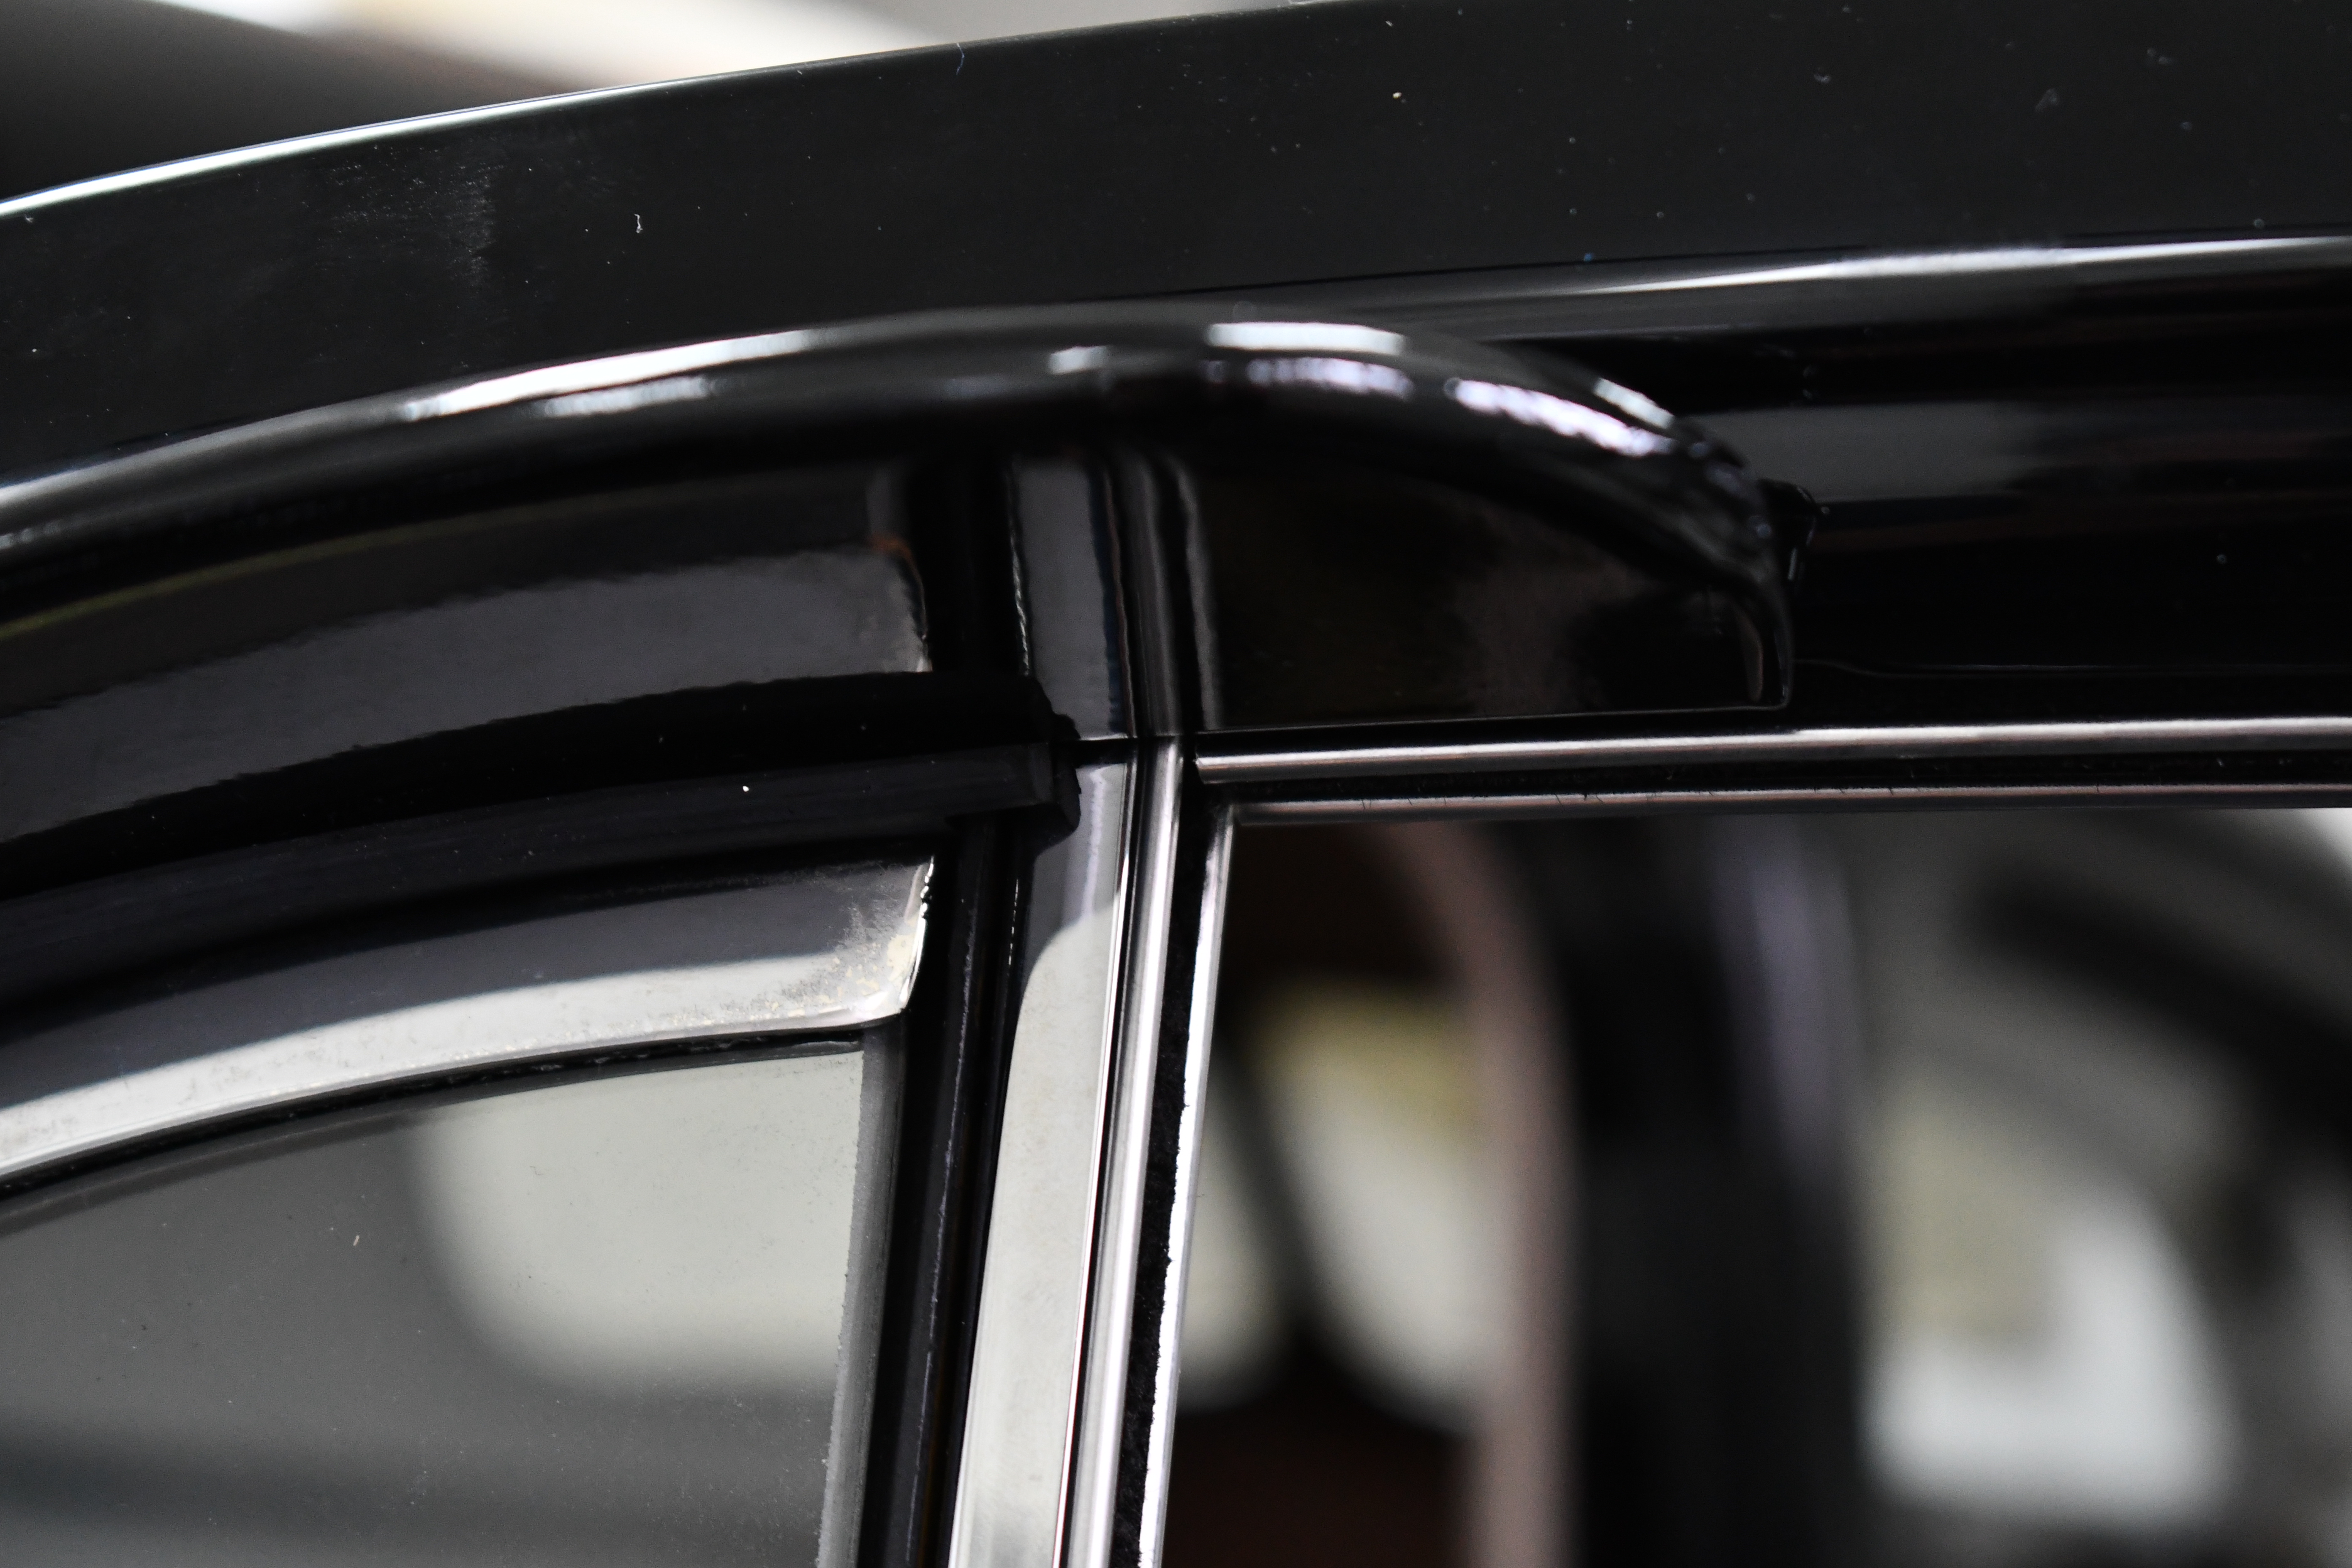
Here's the finish up top where the felt channel meets the vent window separator channel.
Also, the vent glass meets the division separator rubber nicely and all this looks good.
Now, to install the glass, this has to come out!
So I removed the three top screws from the felt channel, dropped the channel to gain access to the vent window separator mounting screws.
Then remove the vent window separator, and crank open the vent window.
Now, I'm ready to drop in the glass and get the glass aligned properly in the carrier.

But first, the new glass goes inside for a cleaning to remove all the dried on tape and whatever.

Drop the glass in and insert screws to hold the carrier to the regulator. Then line up the lower glass felt channel, re-install the vent window separator and the window glass channel.
I raised and lowered the glass several times and when I was finally happy that the glass was operating smoothly, I marked it's position and took everything back out.

I know it's a lot of extra steps, but I really want the glass to set in position without binding or stressing the glass.
So here is my mark with the final position the glass will be set.

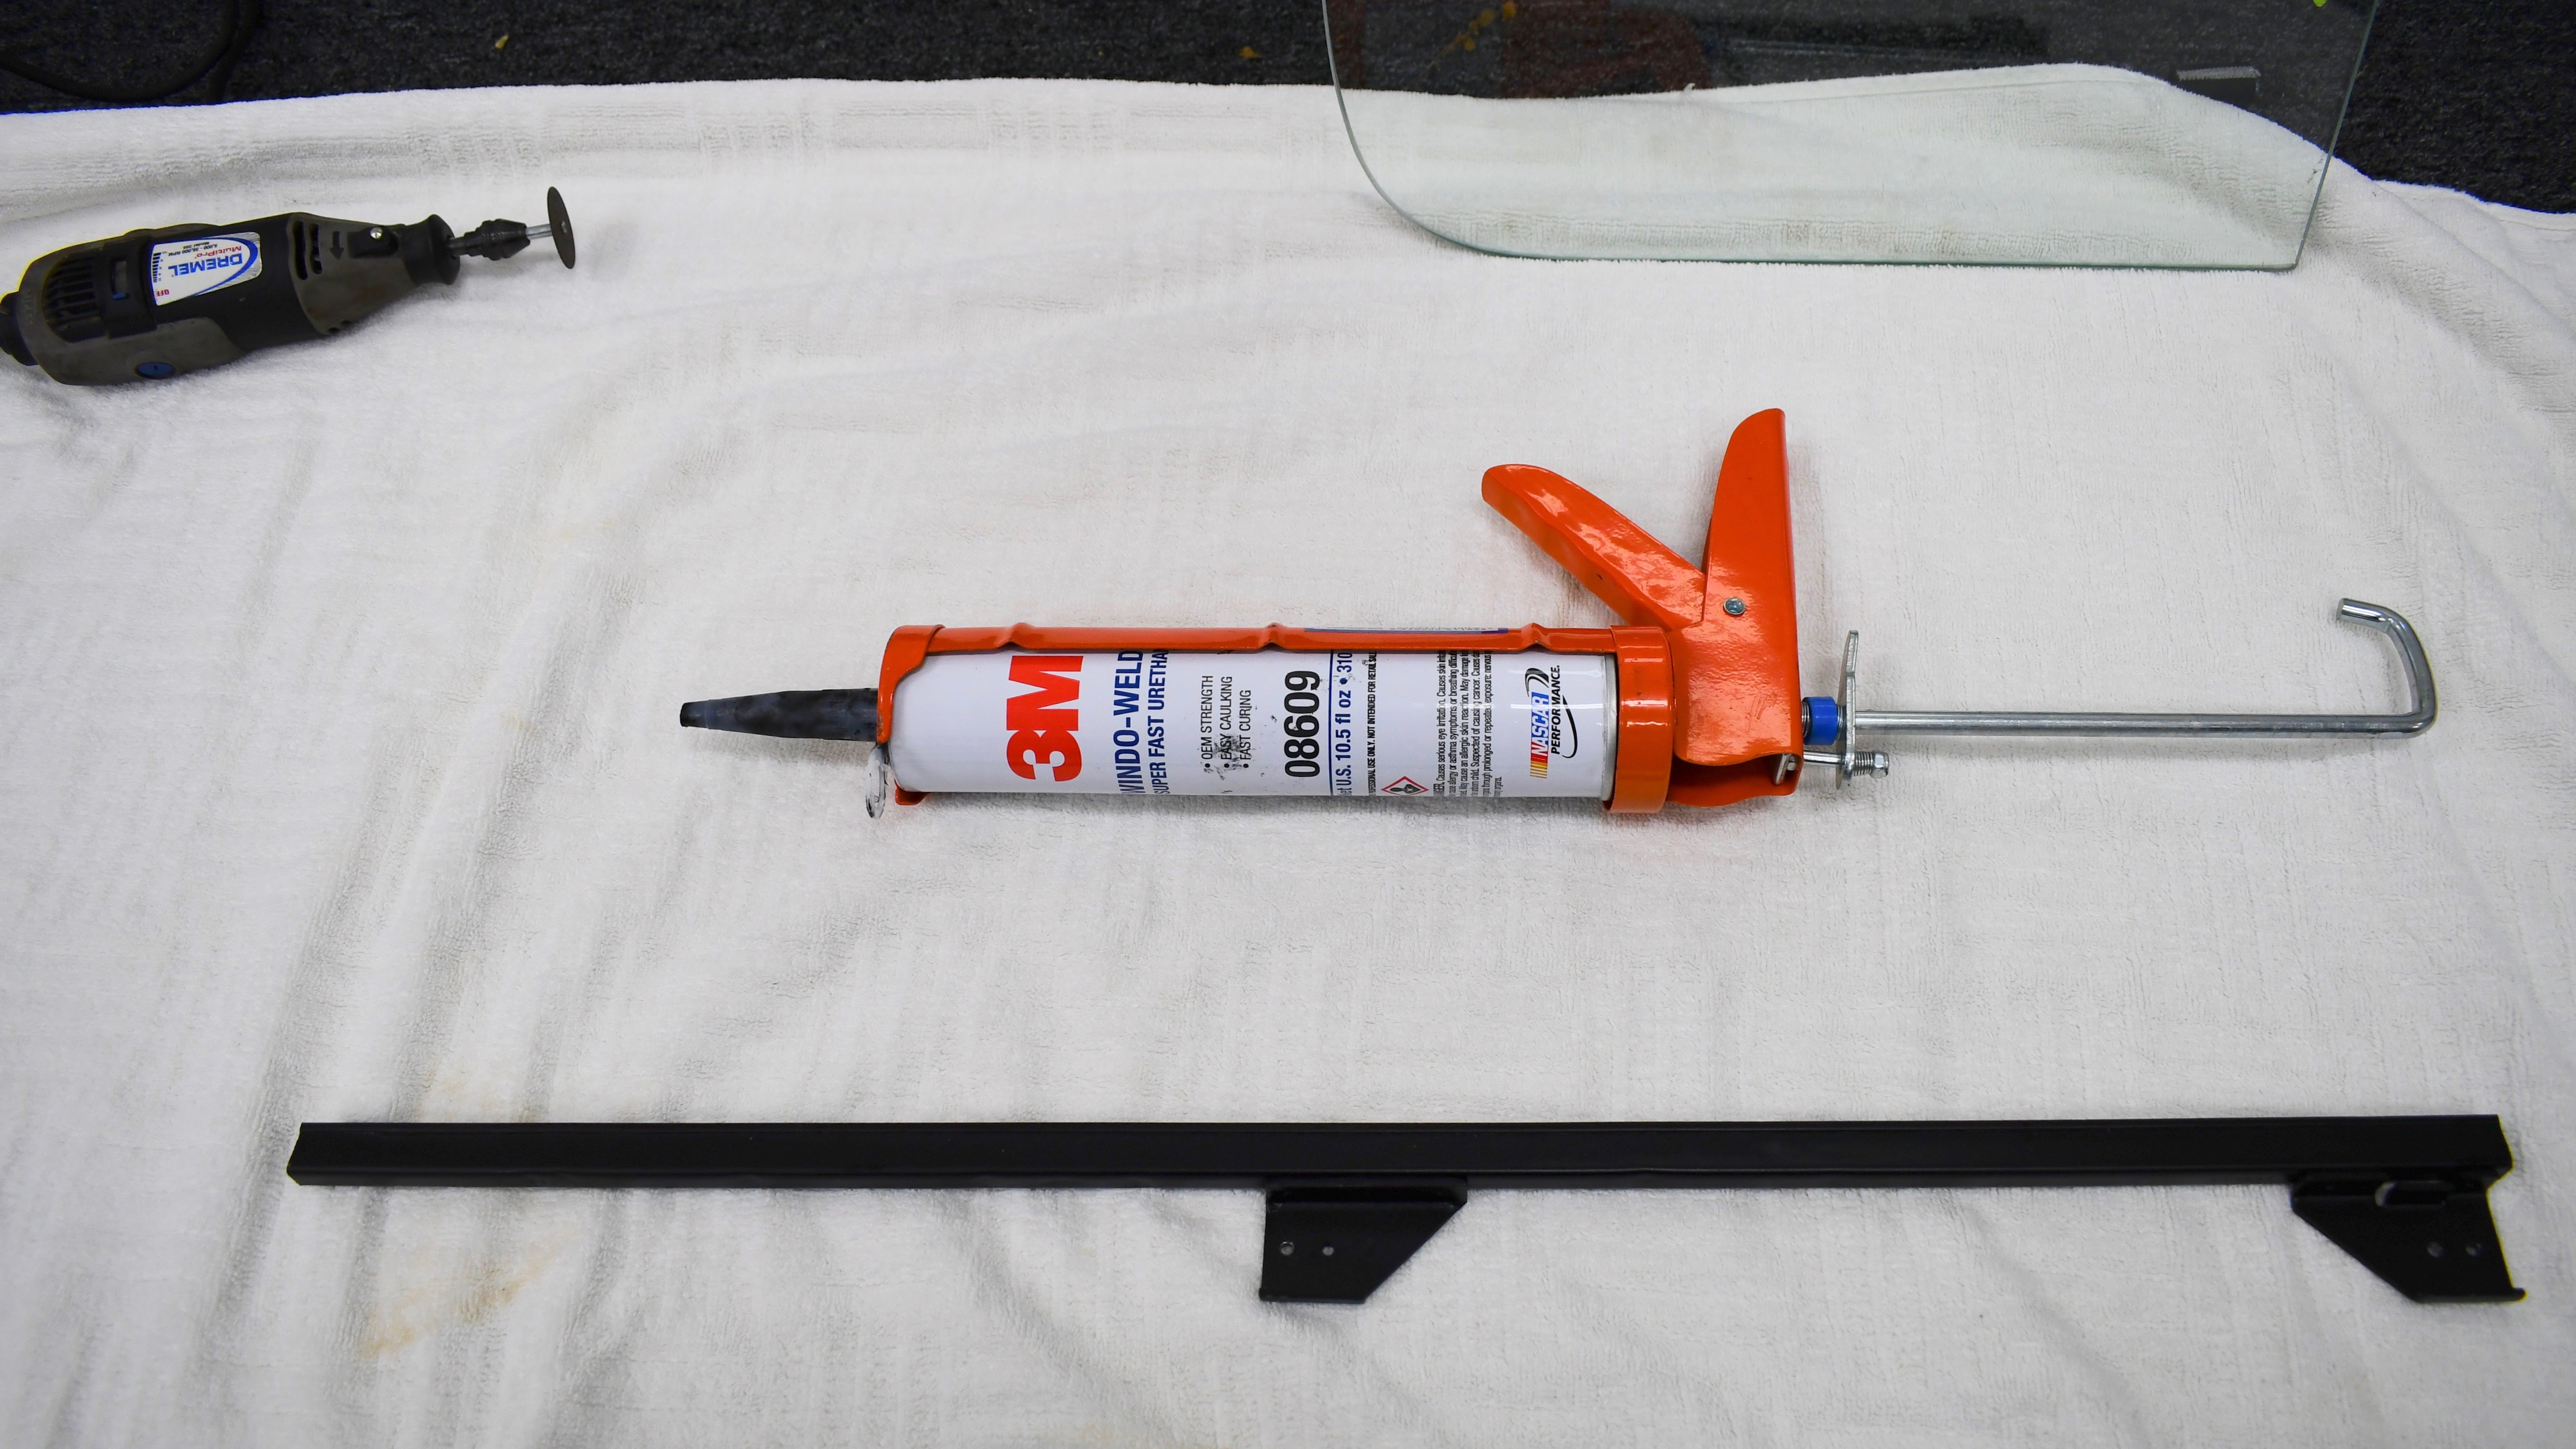
Again, a bead of 3M "Window-Weld" along the bottom of the carrier and drop the glass in.
Let it set up overnight, cut any excess with a sharp blade and its ready to be installed "for good"
Sunday March 4: Final installation of all the glass related stuff.

Now sure everything is aligned, today I started by dropping the glass into the door and securing it to the window regulator with four screws and shake proof washers.

Then the vent window separator, the felt channel and finish lining up the lower felt channel.

Roll it up, and down, and up..... nice! It's a lot of work, but I need to double check each little step along the way.
So now, only one thing left, and it's the fun thing!

Grab 10 mounting clips, snap them in to the side molding...

Line them up one at a time, and start snapping the trim strip into the door.

And the door is DONE!!

View from the back.

Driver's side.

Passenger's side.

She's looking sharp! The lines of these cars are pure perfection! Every elevation, every angle........ beautiful.
Tomorrow I'll start covering my rear arm rests, and then on to interior installation.
Have a great night out there!
Gary
-
13
-
-
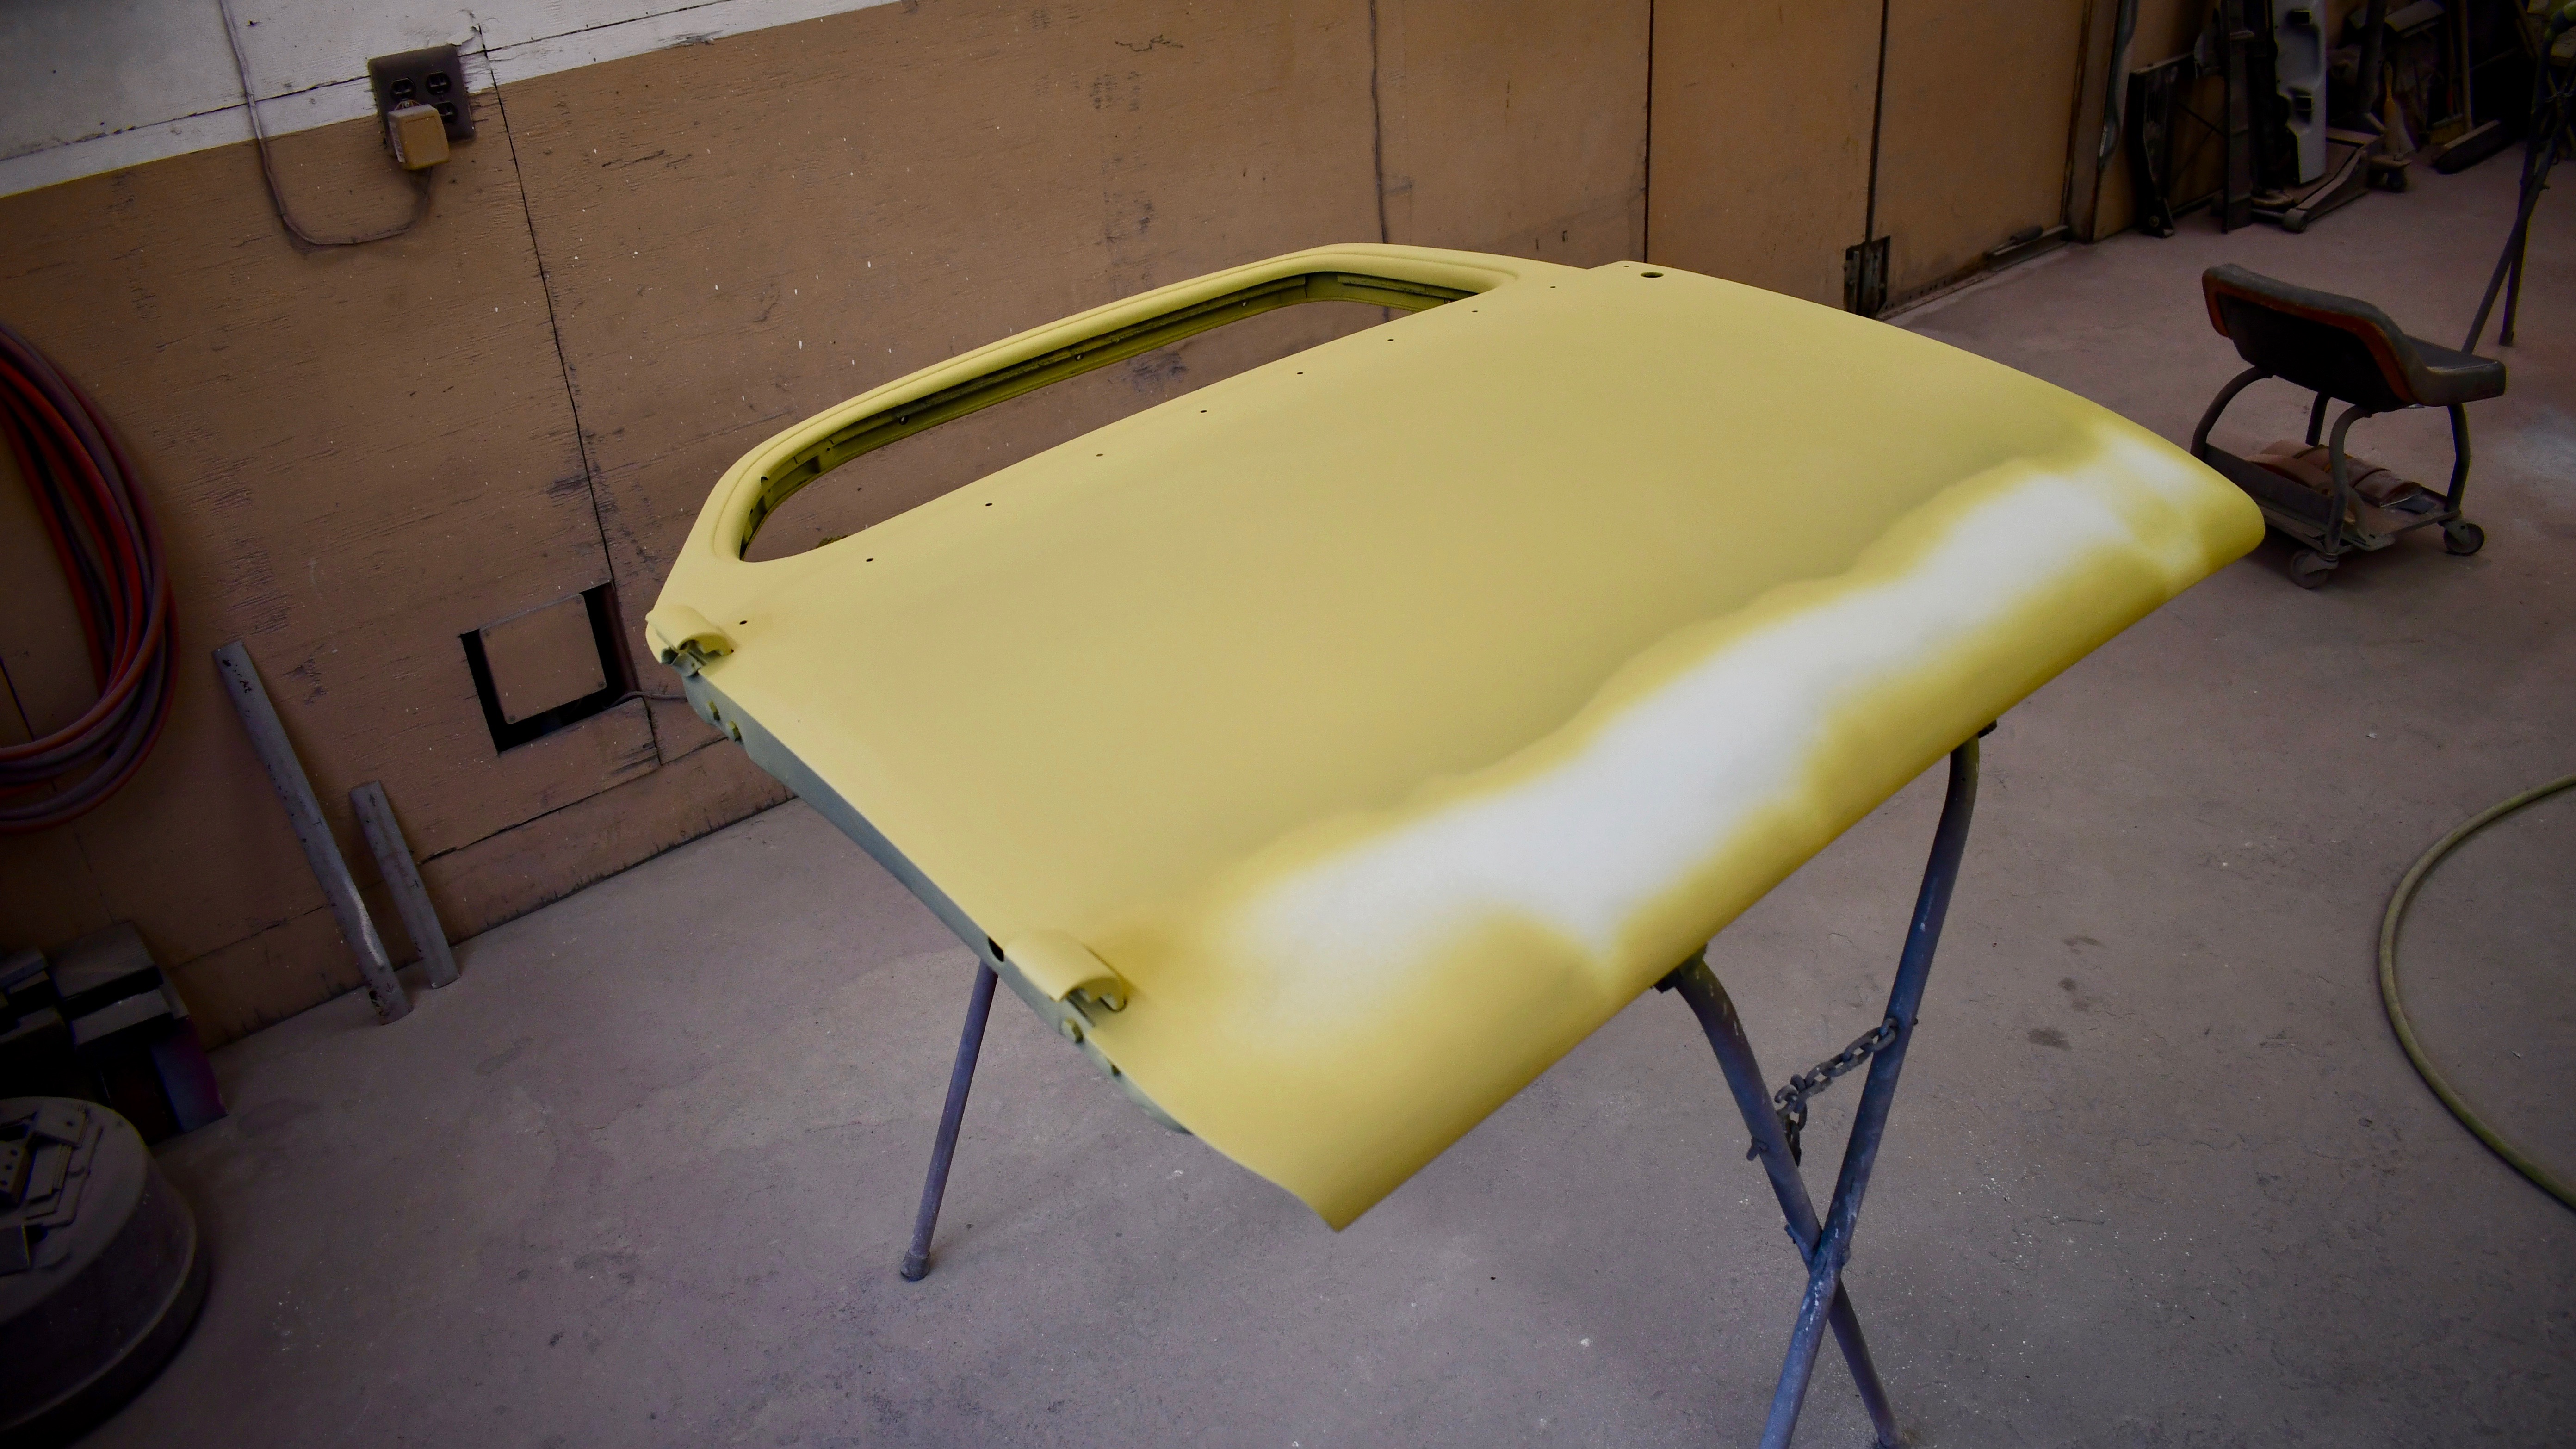
Wednesday February 28, 2018: Update at the paint shop

Last Thursday the driver's door was sanded smooth and the yellow self-etch prime applied.
Bob had a couple small jobs finish for other customers so he got them out so he could finish my door.

Monday afternoon with the grey build up primer applied and the "guide coat"

Tuesday morning the final sanding. Progressively working up to a 320 grit, the guide coat starts to disappear.

He stopped to let me get this photo of the area not sanded yet.

As he moves up to the final 320, he sands in an up and down direction to follow the contour of the door.
The black will show if you go left and right and make even the slightest depression in the finish.

It's amazing to me how much sanding dust is created.

This morning the door was at the final prep stage, wiped down and ready for the paint.
The primer has a nice sheen to it.

Finishing up the Super Jet Black for my job. Bob was waiting for a delivery of "base maker" to be sure he had enough mixed for the door.

I couldn't stay for the spraying, but here's the door at 12:30 today. Base and clear applied..

Now it needs time to cure, then wet sand, machine compound and by Saturday/Sunday I should be installing it on the car!

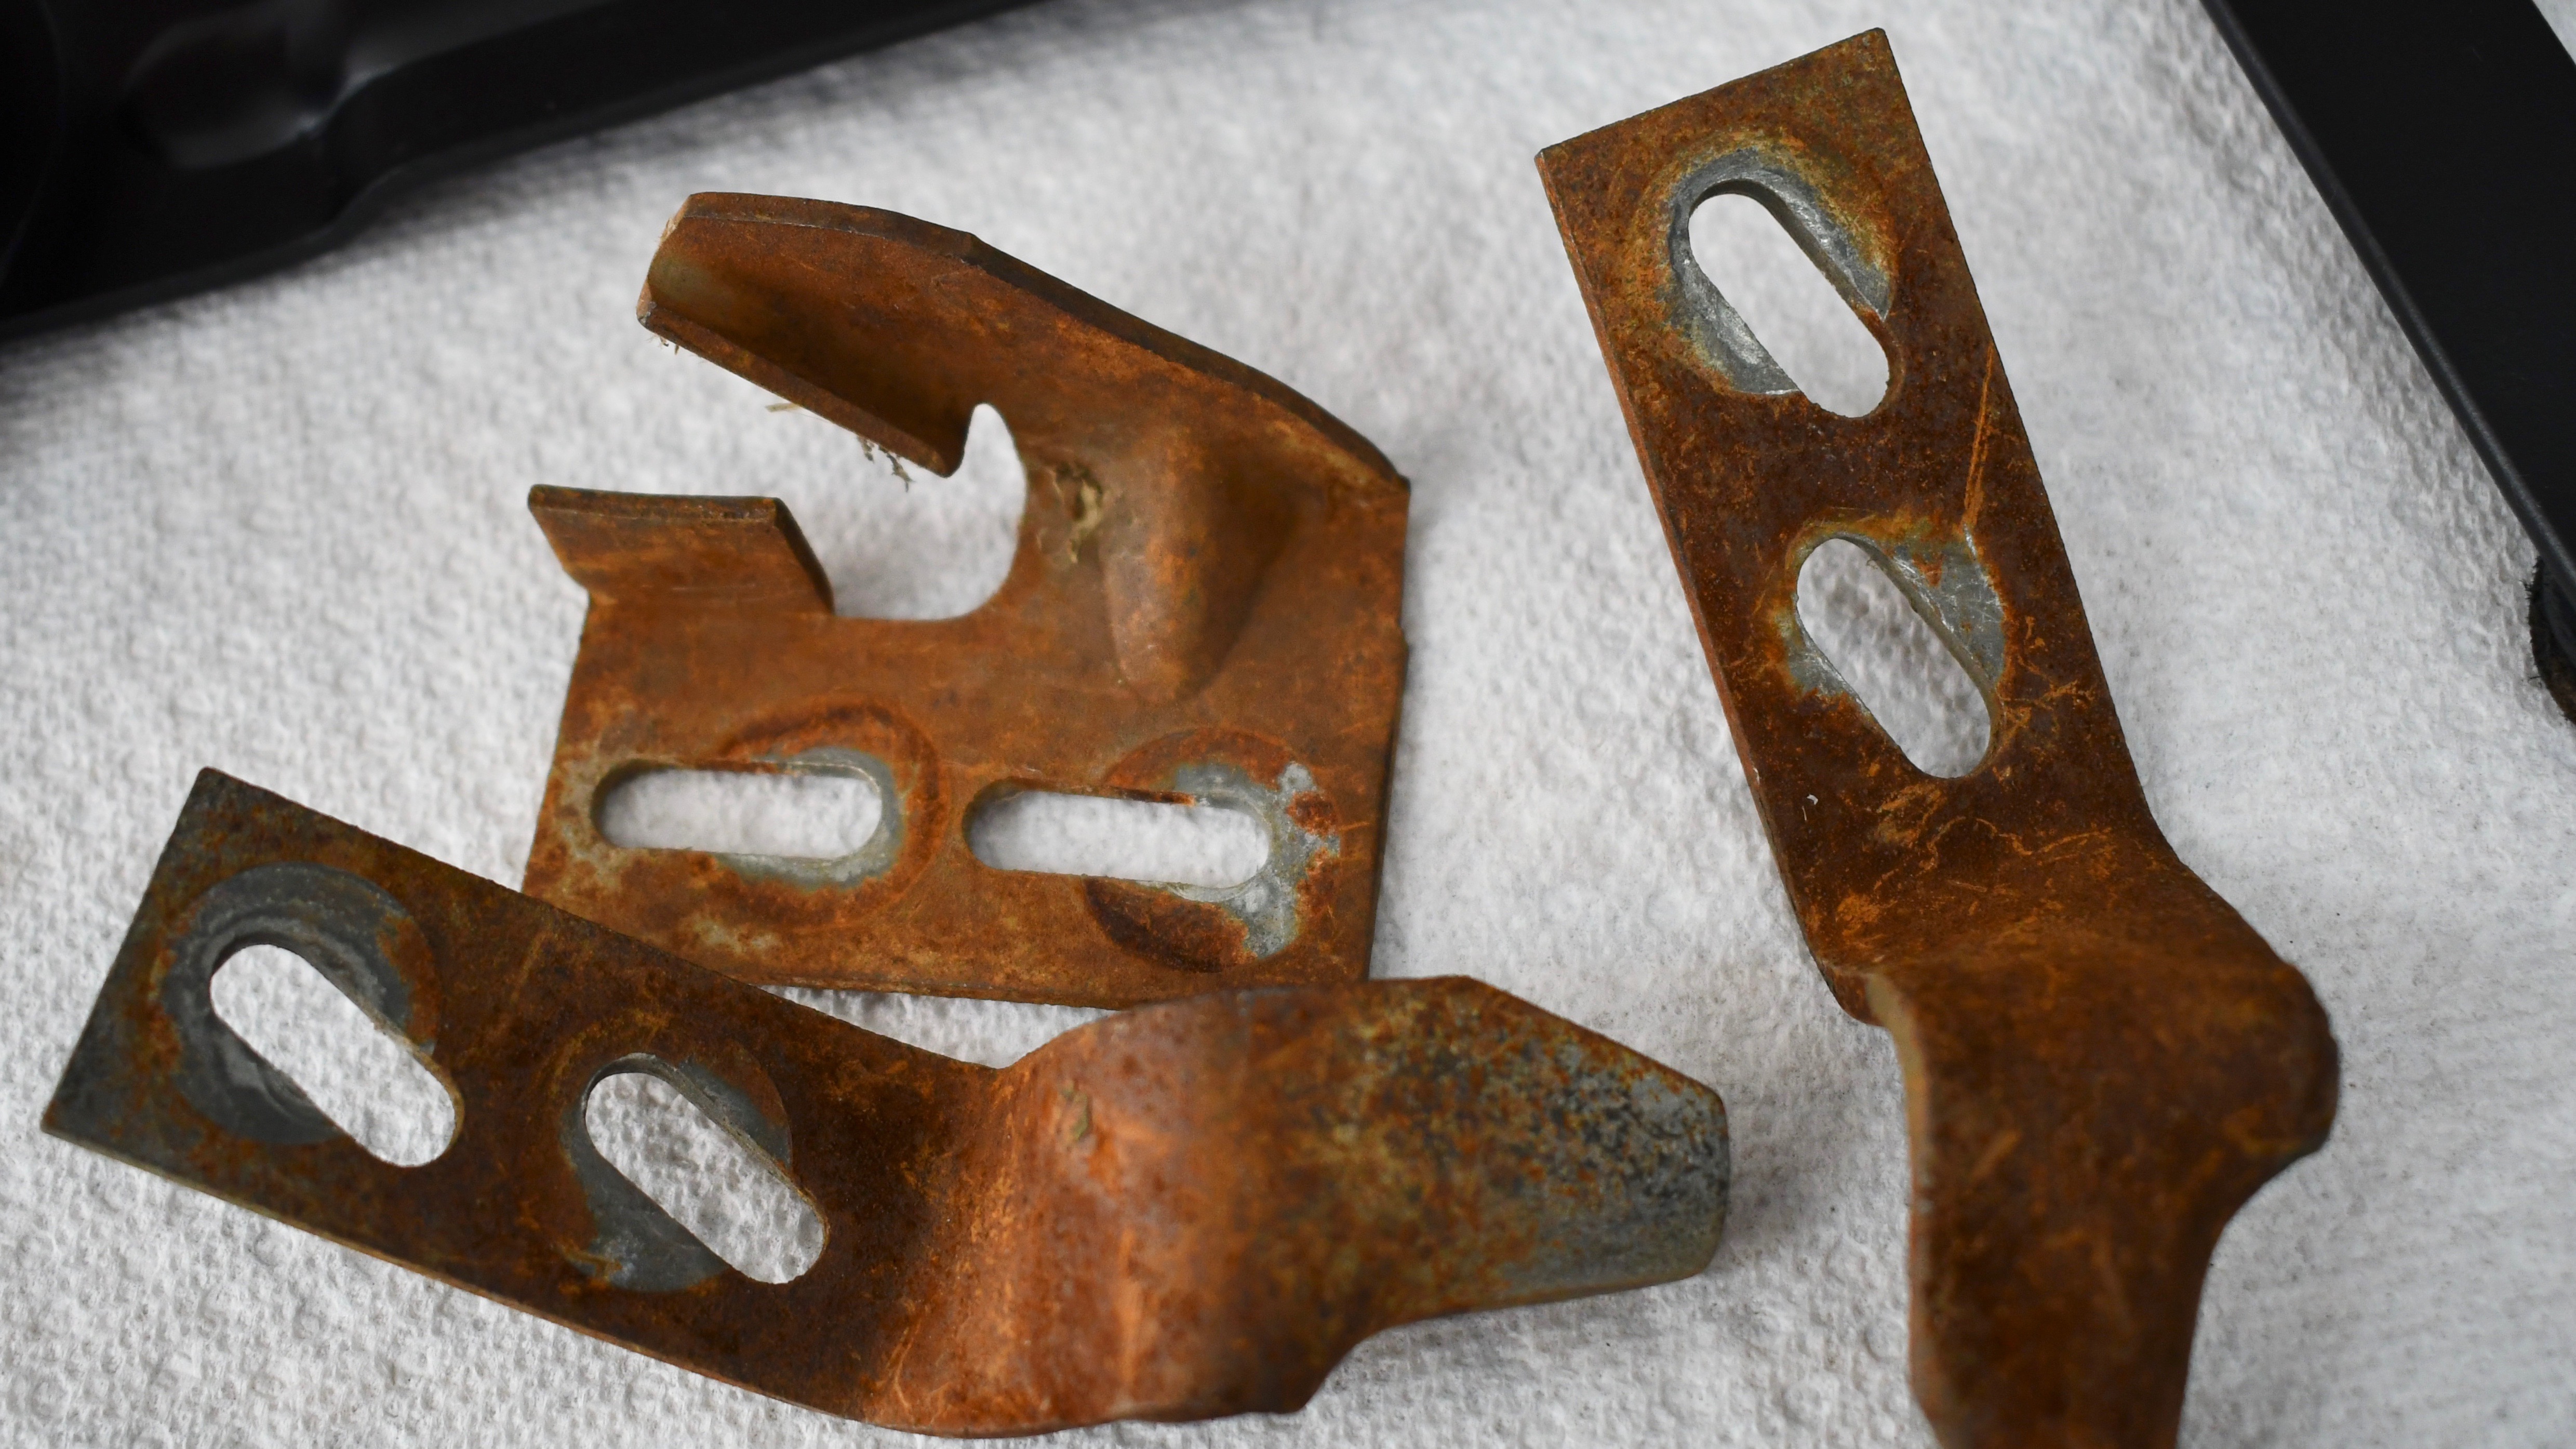
I learned that the car should have forward hood latches as well as the rear (cowl mounted) ones.
My car did not have the forward latches, so once again, a call to Dave Tachney and three days later I had them.
It is so great having people like him to help us out. It's great dealing with him. He knows everything.
I mounted them first and check the operation before restoring them. Once they checked out, it was........

Out to the wire wheel to clean all the rust off.

Then an acetone scrubbing, self-etch prime and

Rustoleum Automotive Gloss Black to finish. I'll give them a few hours to dry and install them later on tonight.
So, hopefully by Sunday Night the drivers door will be fully assembled and installed and then the interior kit can be installed.
Have a great night!
Gary
-
8
-
-
Wednesday February 21, 2018: Driver's Door Update.... Paint shop and my prep work at home getting ready for the install.
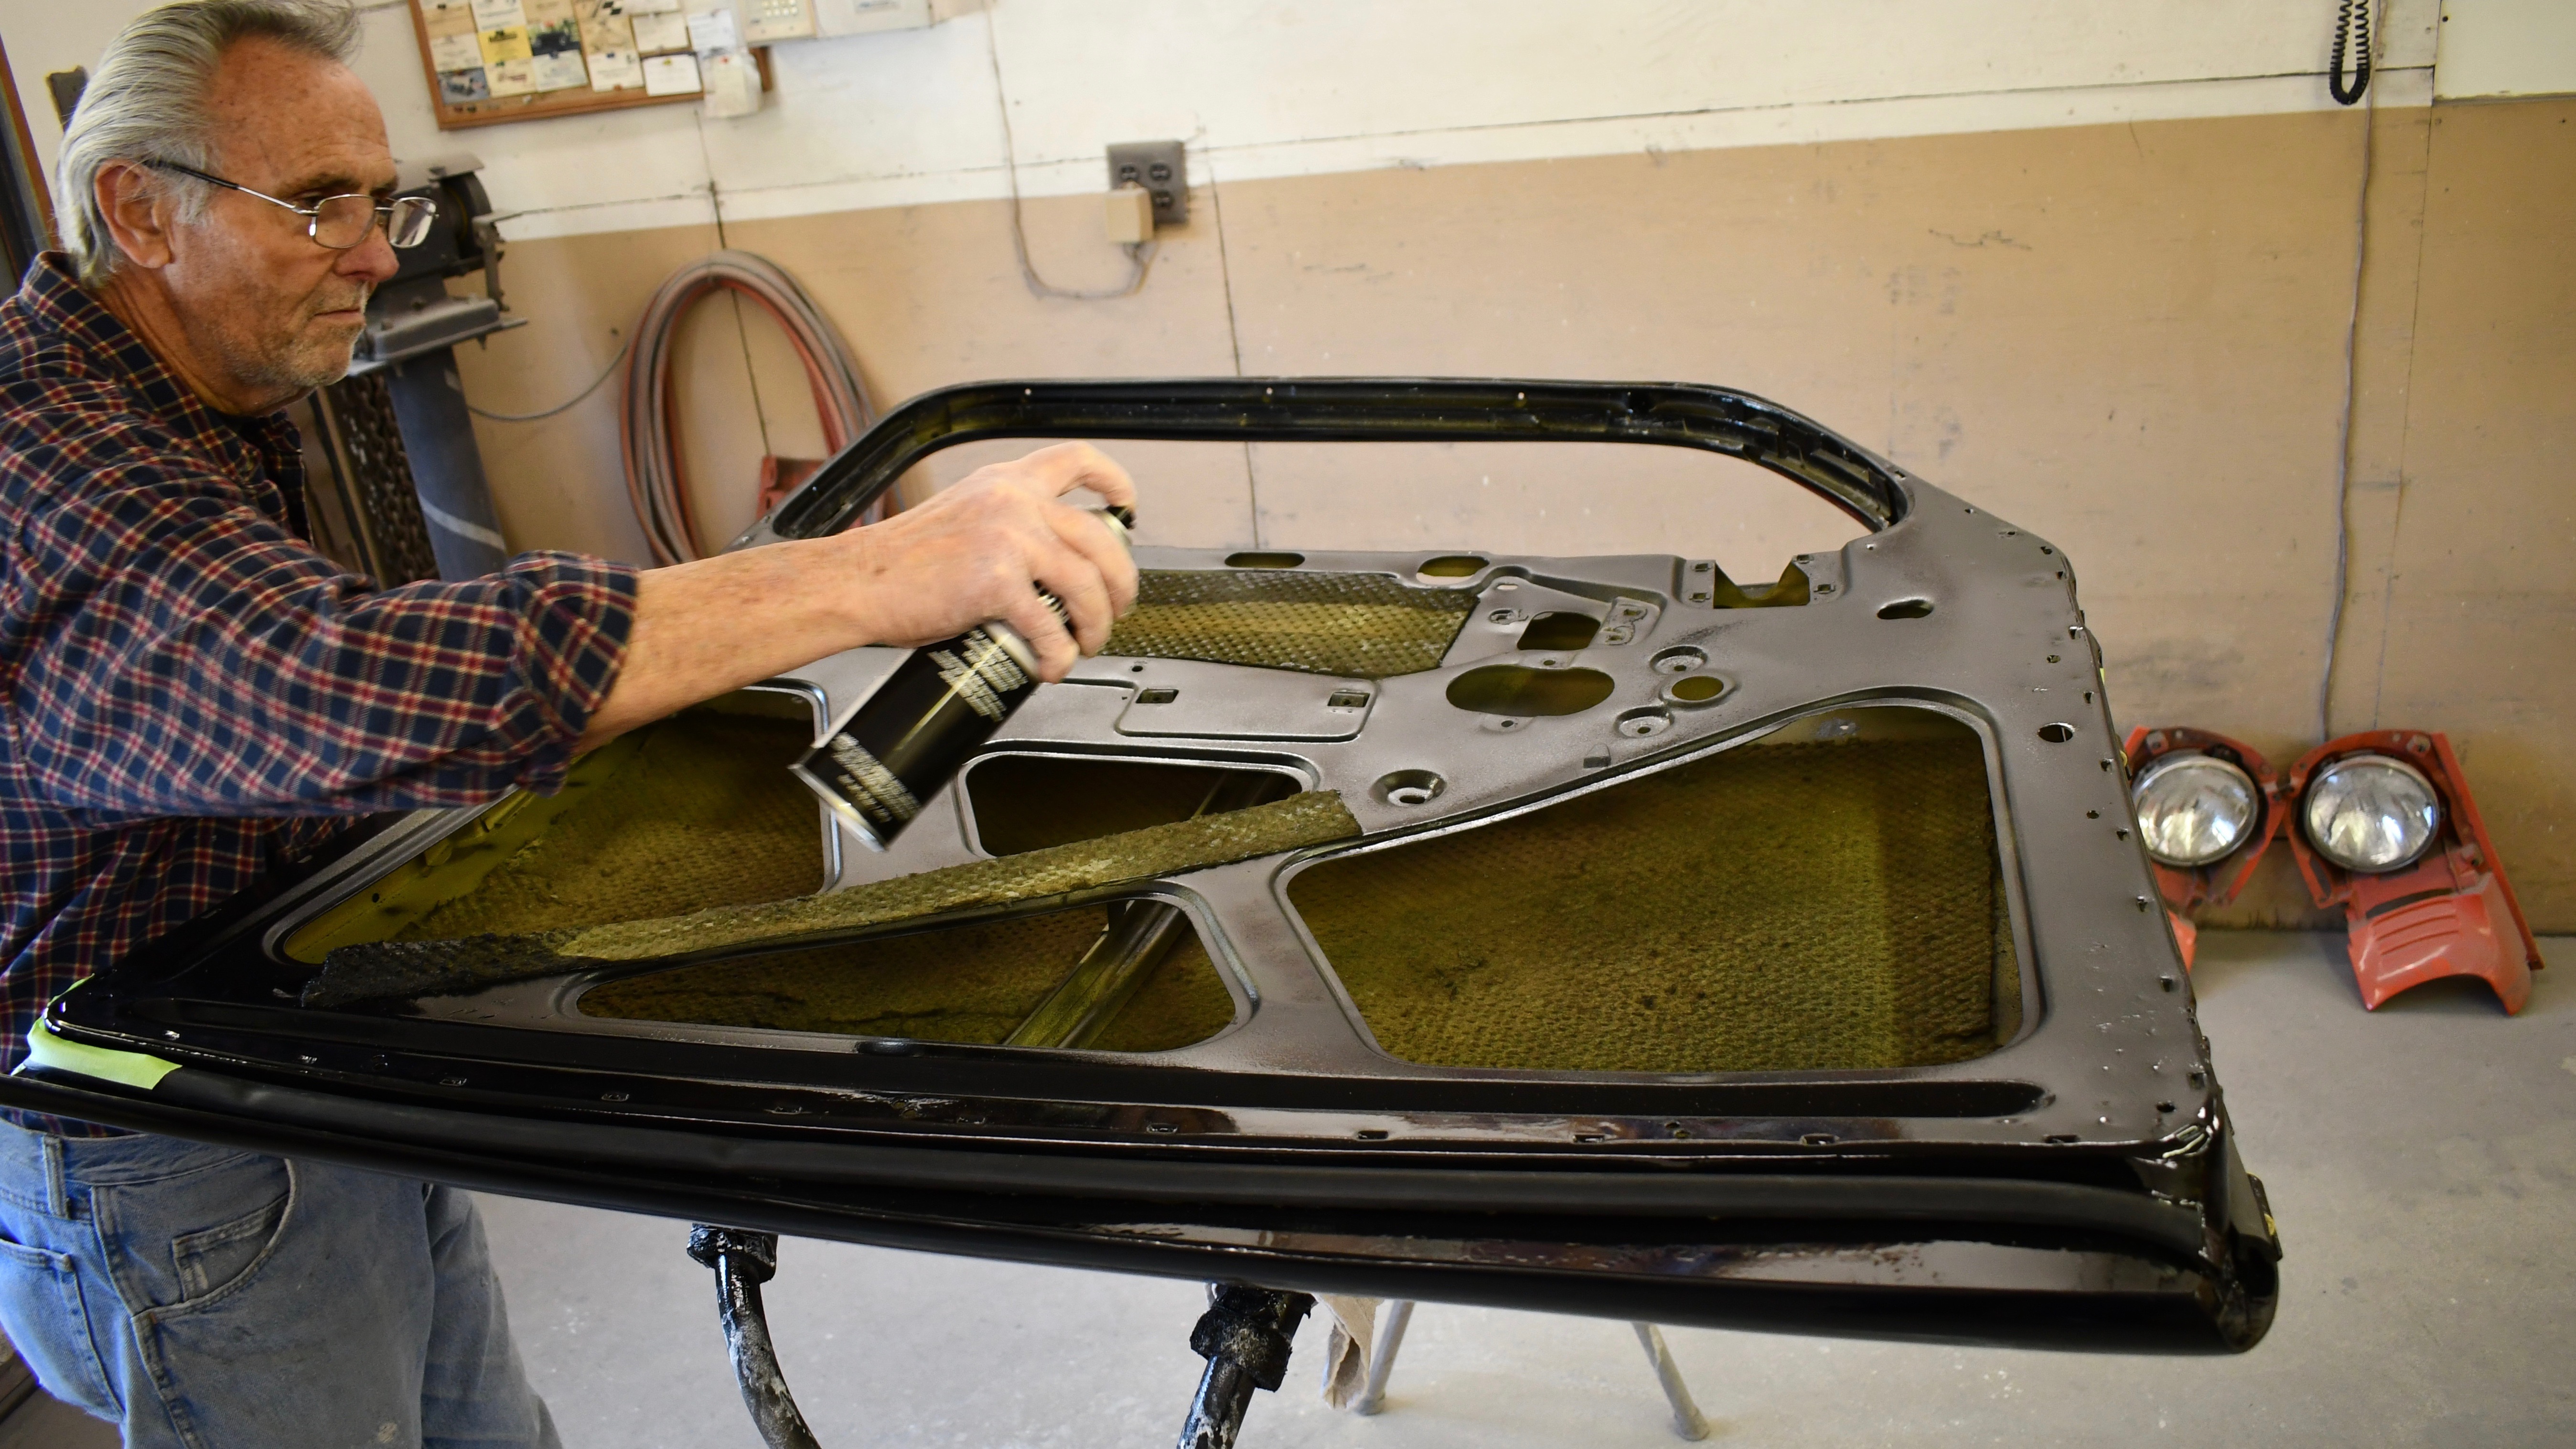
I stopped by Bob's shop this morning to get some updated photos. While I was there, Bob and I turned the door over so he can start painting the innards.
I took the opportunity to remove the lock handle mechanism, the window riser mechanism and the door wedge so I can start getting myself prepped and ready for the install once its released from paint.
This series of photos covers the last few days, so you'll see photos with a little snow still on the ground from Sunday, but the story doesn't change!
Here we go...

The driver's door with the fiberglass cured and roughed out.

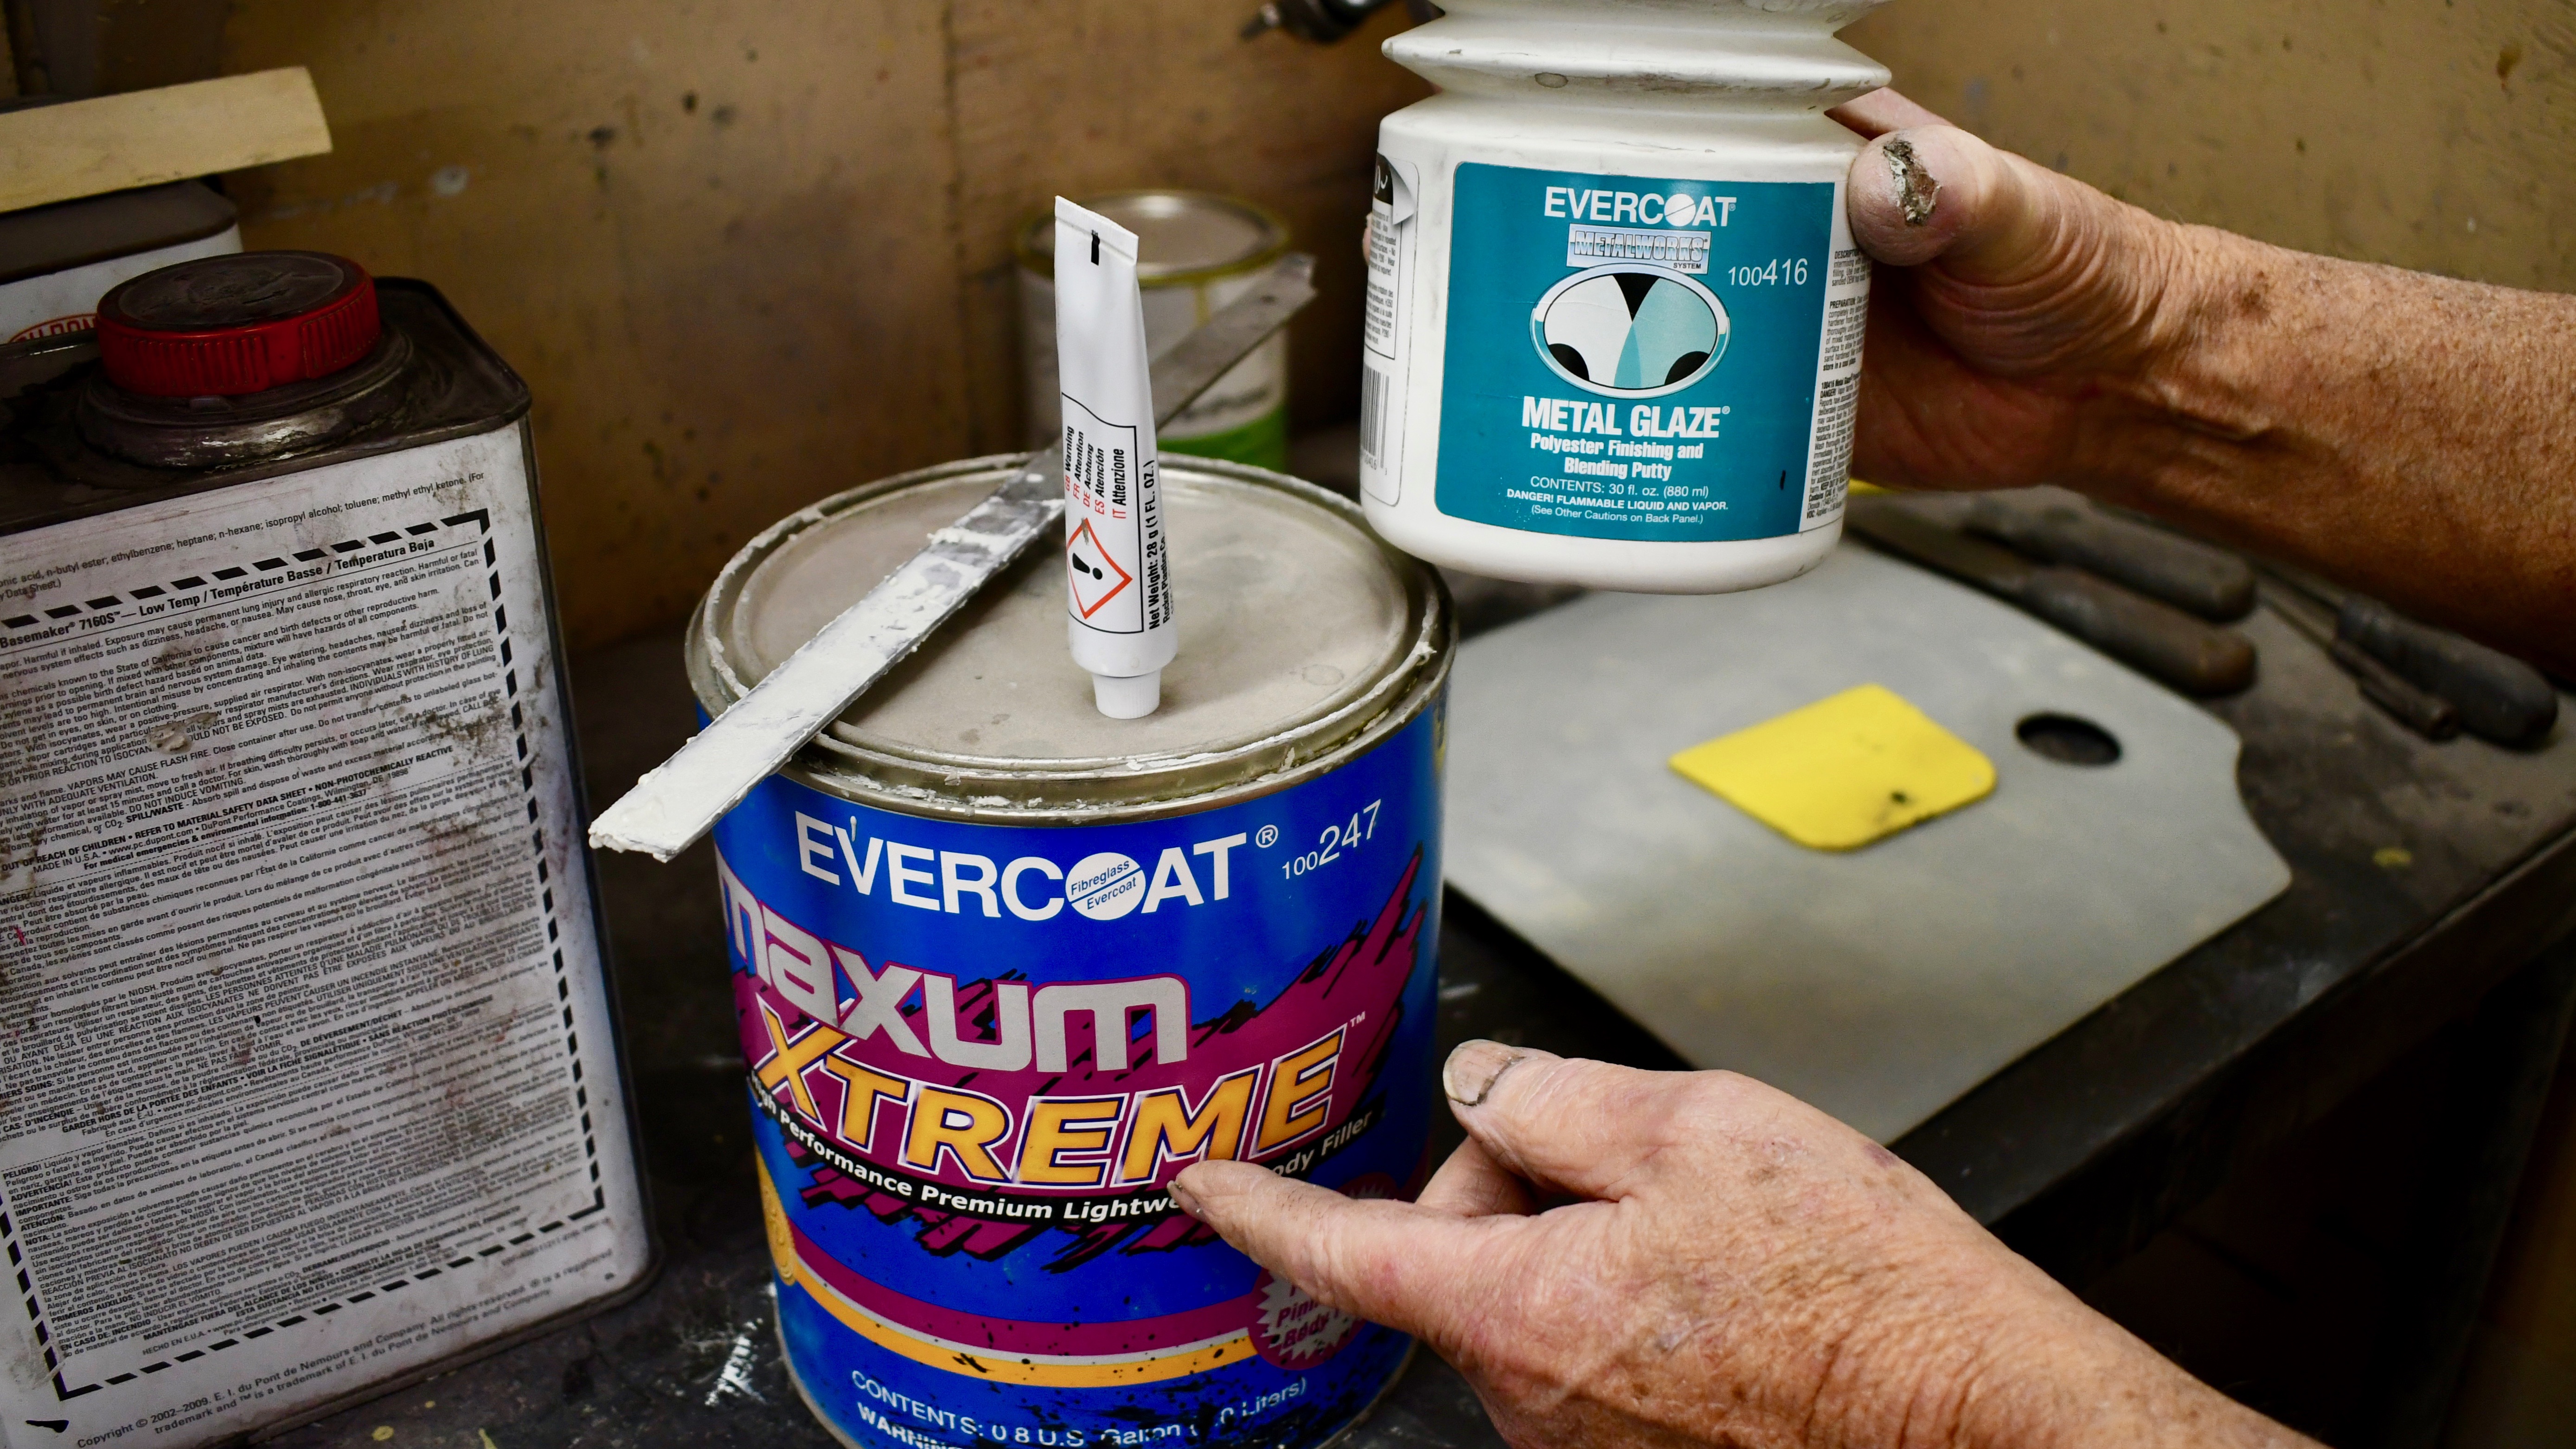
As rough as it looks, it actually feels pretty smooth to the touch. He then sanded out the entire door, removing all the old bondo.
The metal is in really nice shape, kind of the same story we've encountered throughout the build.

By mixing these three in the correct proportions, the filler is ready to be applied.

Here you can see the filler applied. It cures pretty fast.

Bob starts sanding out the ridges in every direction to get a smooth finish. He starts with a 36 grit, then progresses up to a 180(?)

It's been such a great experience to watch him work. Here he is rolling the pad around the bottom to correctly restore the original contours.
This is how I left the shop Tuesday morning.

This morning, the sanding was all done up the entire door skin and the self-etching primer was applied.
Bob and I flipped the door over so he can start working on the inside.

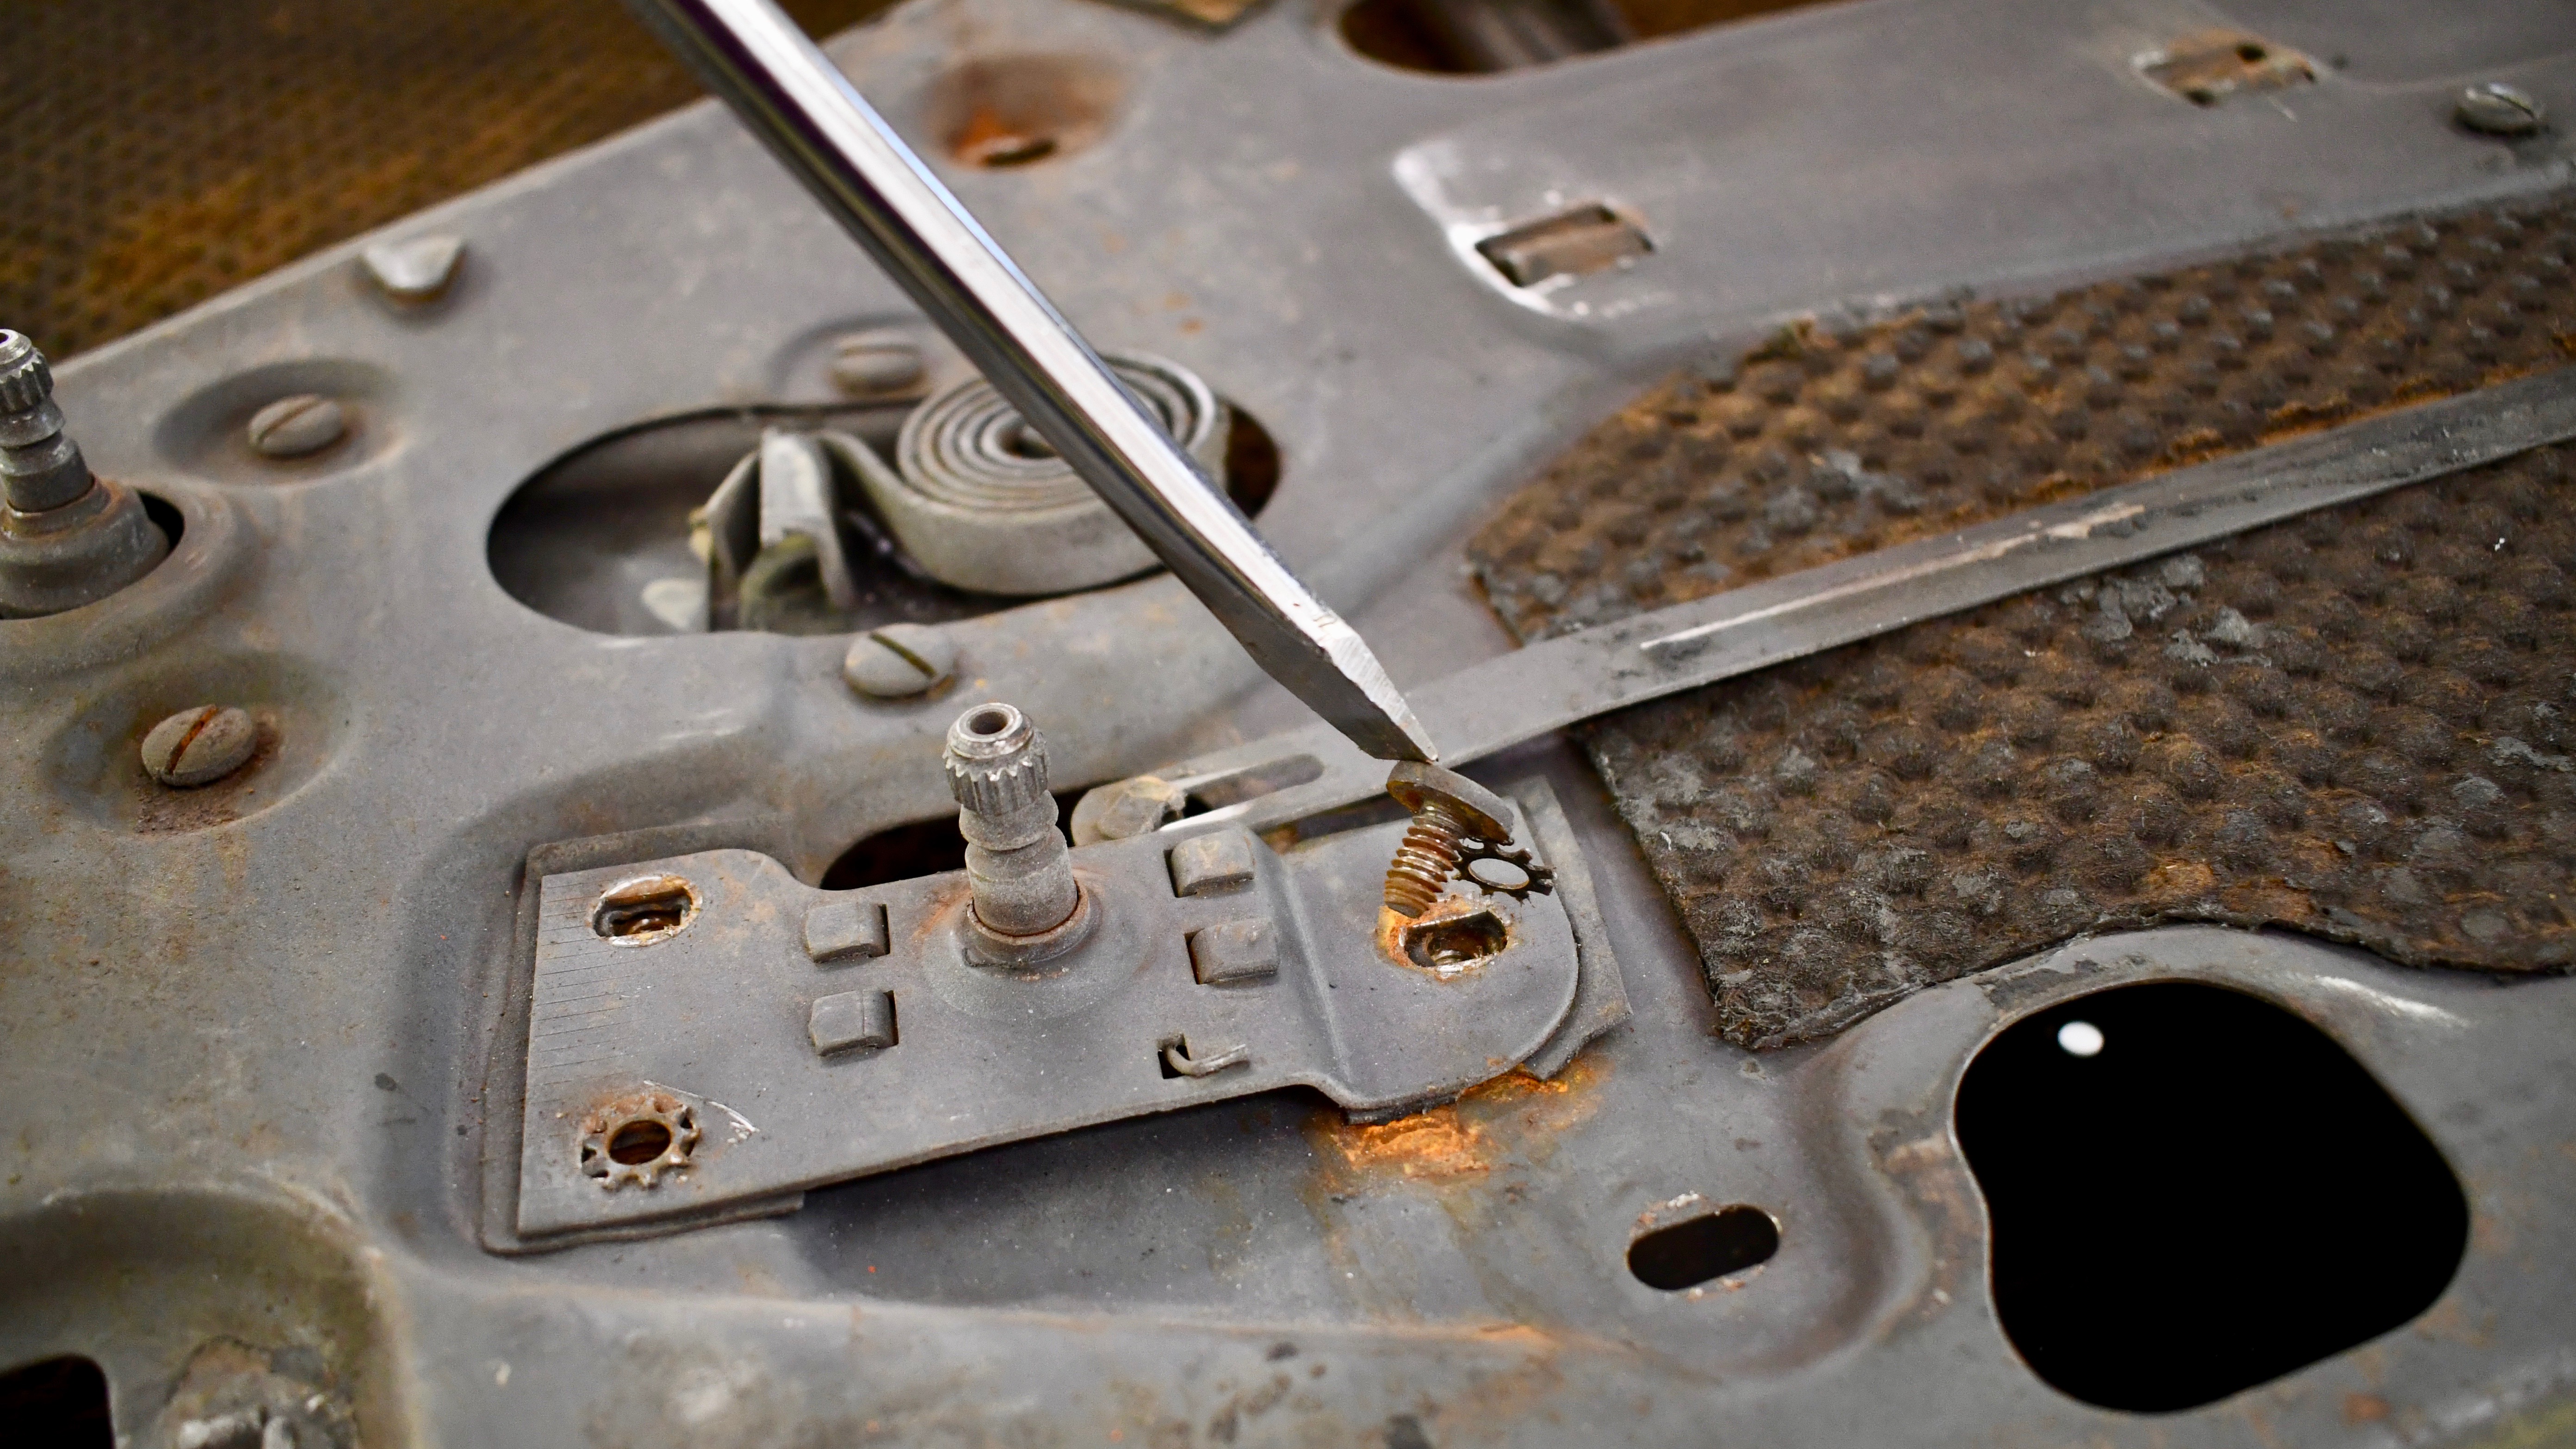
While it was turned over, I removed the door opening handle mechanism....

The window regulator screws

The two other screws that retain the channel above the arm rest and dropped the entire window riser mechanism out.

And finally, removed the door wedge.

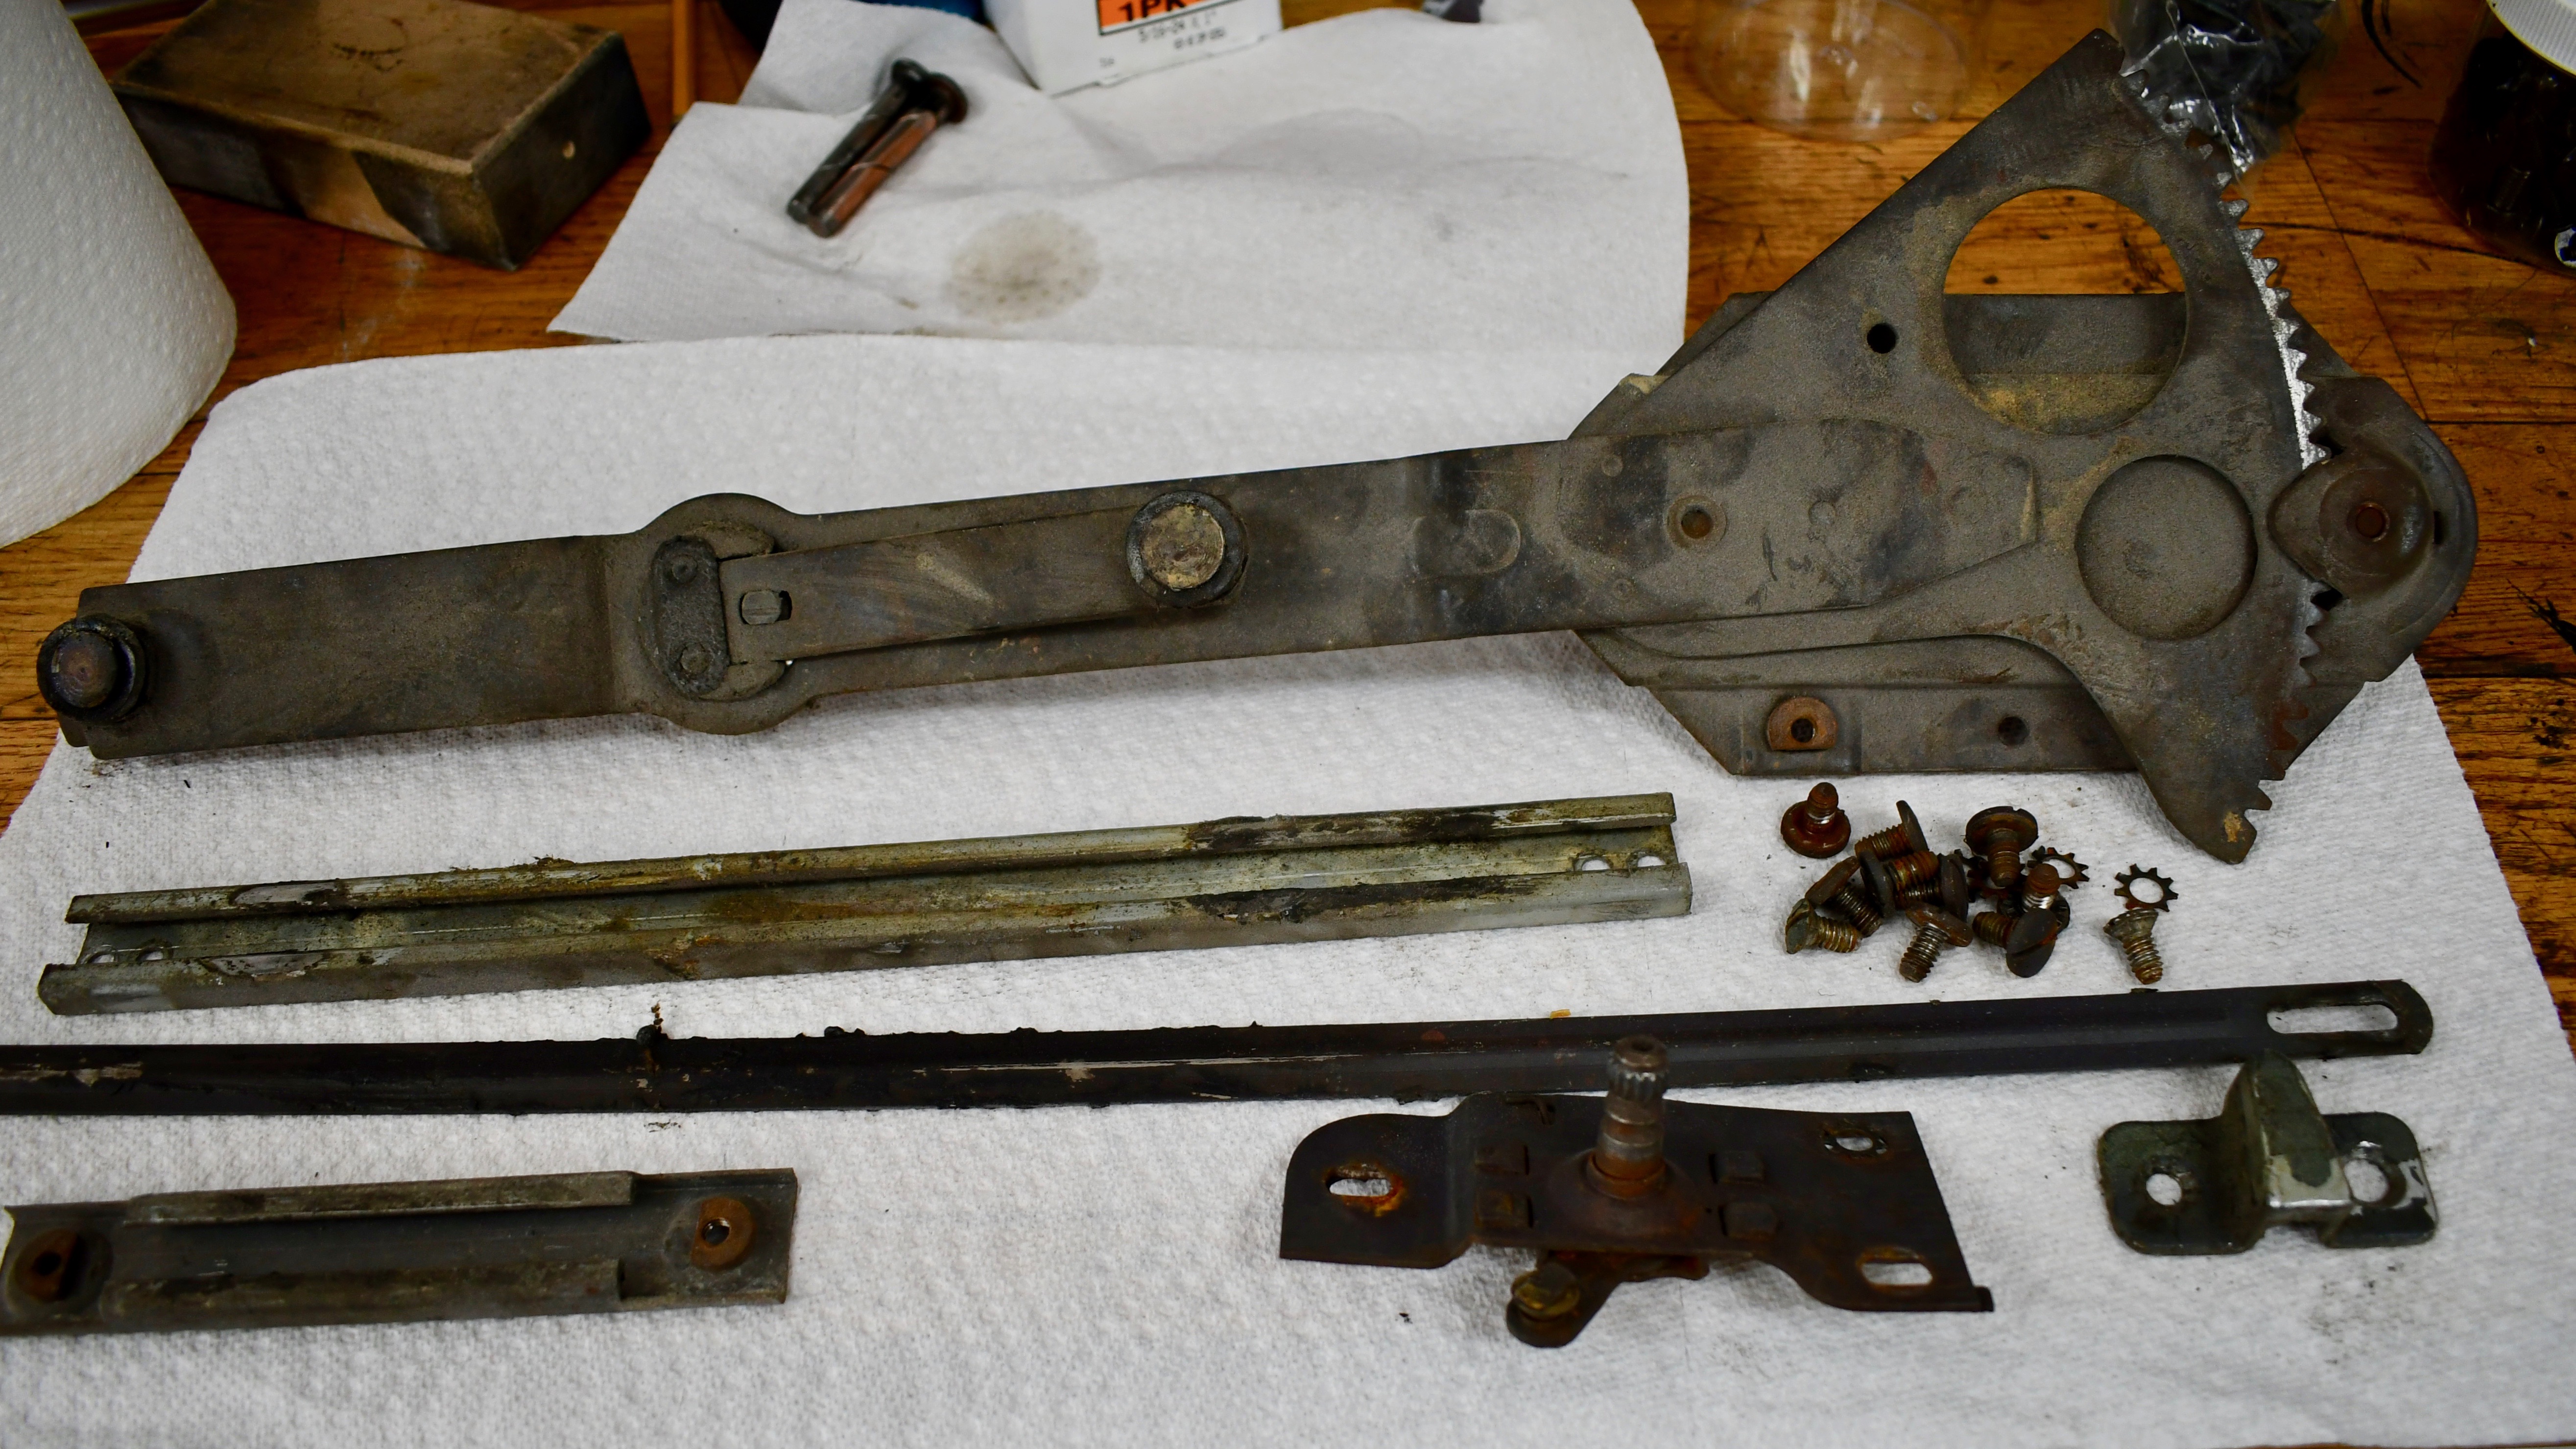
Back home, here was today's haul!

Again, the rust is all over everything.

I dealt with the door wedge first. I started by soaking it in lacquer thinner to release the paint.

Then out to the buffing wheel, using tripoli and then jewelers rouge to give it a nice shine.

And just like that, the door wedge and it's mounting screws were done.

For the rest of the stuff, Mother nature gifted us with a 79 degree day today so I took my trusty wire wheel out of the shed and got to work.

It took a while to get all the rust and crud off these parts.
Then a thorough scrubbing in a pan of acetone to remove the residual film from the wheel and to be certain all the sand from the blasting was completely removed from the moving parts.

My paint booth is back in operation. First a self-etch primer, then SEM "Trim Black" as the final coat.
I let everything hang out in the sunshine, heat and wind and it dried very quickly today.

If you've never tried the SEM products, and especially this "Trim Black", try it. It really is great stuff and the finish is beautiful.

Going back a couple of days, but relevant. Here's the driver's door window. I marked the channel position with tape so I can transfer the position to the new glass.
But after installing the passenger side, I'm going to follow the exact same protocol. Keep it loose and let it "find itself" before making a permanent seal.

Once marked, knock the channel off the bottom of the glass.

I guess this is the glass setting material that was used originally?

With the channel chucked in the vise, I used a screwdriver to release the material from the sides. It was stuck on there pretty good.

A little scraping along the bottom and it peeled out in one piece.

It looks and feels like some sort of canvas material.

The channel was quite rusty throughout the inside.

I wrapped a paint stirring stick with sandpaper and sanded it all out nice and clean.

Then I used a 1/4" thick ruler (same thickness as my glass) and by using the vise, I was able to "pinch" the top in so the glass will set nice and secure.

So now when I use the Window Weld, It won't be such a runny mess.

Once cleaned and scrubbed, it also got the self-etch prime coat and the trim black final coat.

Now the parts are laid out on the workbench, all ready for the door to start the install.
Just another view of the finish.

I have all my stuff organized and ready to go!
Have a great night out there!
Gary
-
7
-
-
Great work on the running boards! Are you going to have the rubber vulcanized onto your sheet metal, or simply bond the rubber mat that Steele sells?
Keep it up.... Beautiful
-
Hi Randy!
I'm a Nikon guy. Brand loyal for over 30 years. Used to shoot 35mm with my old Nikon and the photos looked like professional postcards. So when I made the transition to digital in 2005 (reluctantly, by the way) I bought a Nikon. My first digital was the D40x. I still have it, and it still functions fine except the flash stopped working. So in 2013 I upgraded to the Nikon D500 and used it right up to this past October, when, working on the Buick, I knocked it off the bench and it landed hard.... bent the lens ring and something inside was rattling around....... it was totally inoperable. Bummer because I think that was my favorite. So, in October I bit the bullet, went to Costco and purchased a new D7500, full kit with all the lenses...... So far I'm happy with it. A few little quirks that I think they have "over engineered" into the software, but were starting to get comfortable with one another!
So all the photos from the headliner install to current are the new D7500.
Thanks for following along!
Gary
-
3
-
-
Hi Tom! Yes.. P-51 Mustang. My boys fly them.
As far as the use of the car. I'm mostly a "Sunday Driver". We have a lot of backroads throughout Monmouth County that are 35 mph roads and being I'm usually the first one up, John and I will go for a nice 25-mile run early in the morning throughout the back roads and finish up at the beach. I try to attend a few car shows every year, but with a busy family it's not always practical for me to tie up an entire day. The bagel and coffee runs on the weekends always spark great conversations in the parking lots. I use my cars mostly just for enjoyment. I don't usually enter shows for judging, but I think I would like to explore the steps necessary to take the car to Hershey. I don't know how that all works to get a Junior / Senior. I've never attended a multi-day tour. Sounds like fun though. My buddy John has been all over the country in his Model "A" participating in over 25 Glidden Tours. I guess for me, it's the drive. I love the sound of the old engines, the transmissions winding up, the smell of the exhaust, the all-around experience of the machine. Truly sets your mind straight and makes me happy.
I can't wait to get her on the road.
Gary
-
5
-
 1
1
-
-
Friday February 16, 2018: Update at the Paint Shop - Driver's Door Progress
A quick recap of the last few days...

This is how we left off. The rotted metal parts were removed.

Using a small wire wheel on the pneumatic motor, Bob was able to remove most of the rust inside the patch area.
He treated it with a heavy coat of yellow self-etching primer.

At the bench, the donor metal is measured and cut. Then it is given its contours.

The patch panels are welded into position.

A bead of weld is placed over the entire perimeter of the patch panel.

Then the welds will be ground down smooth.

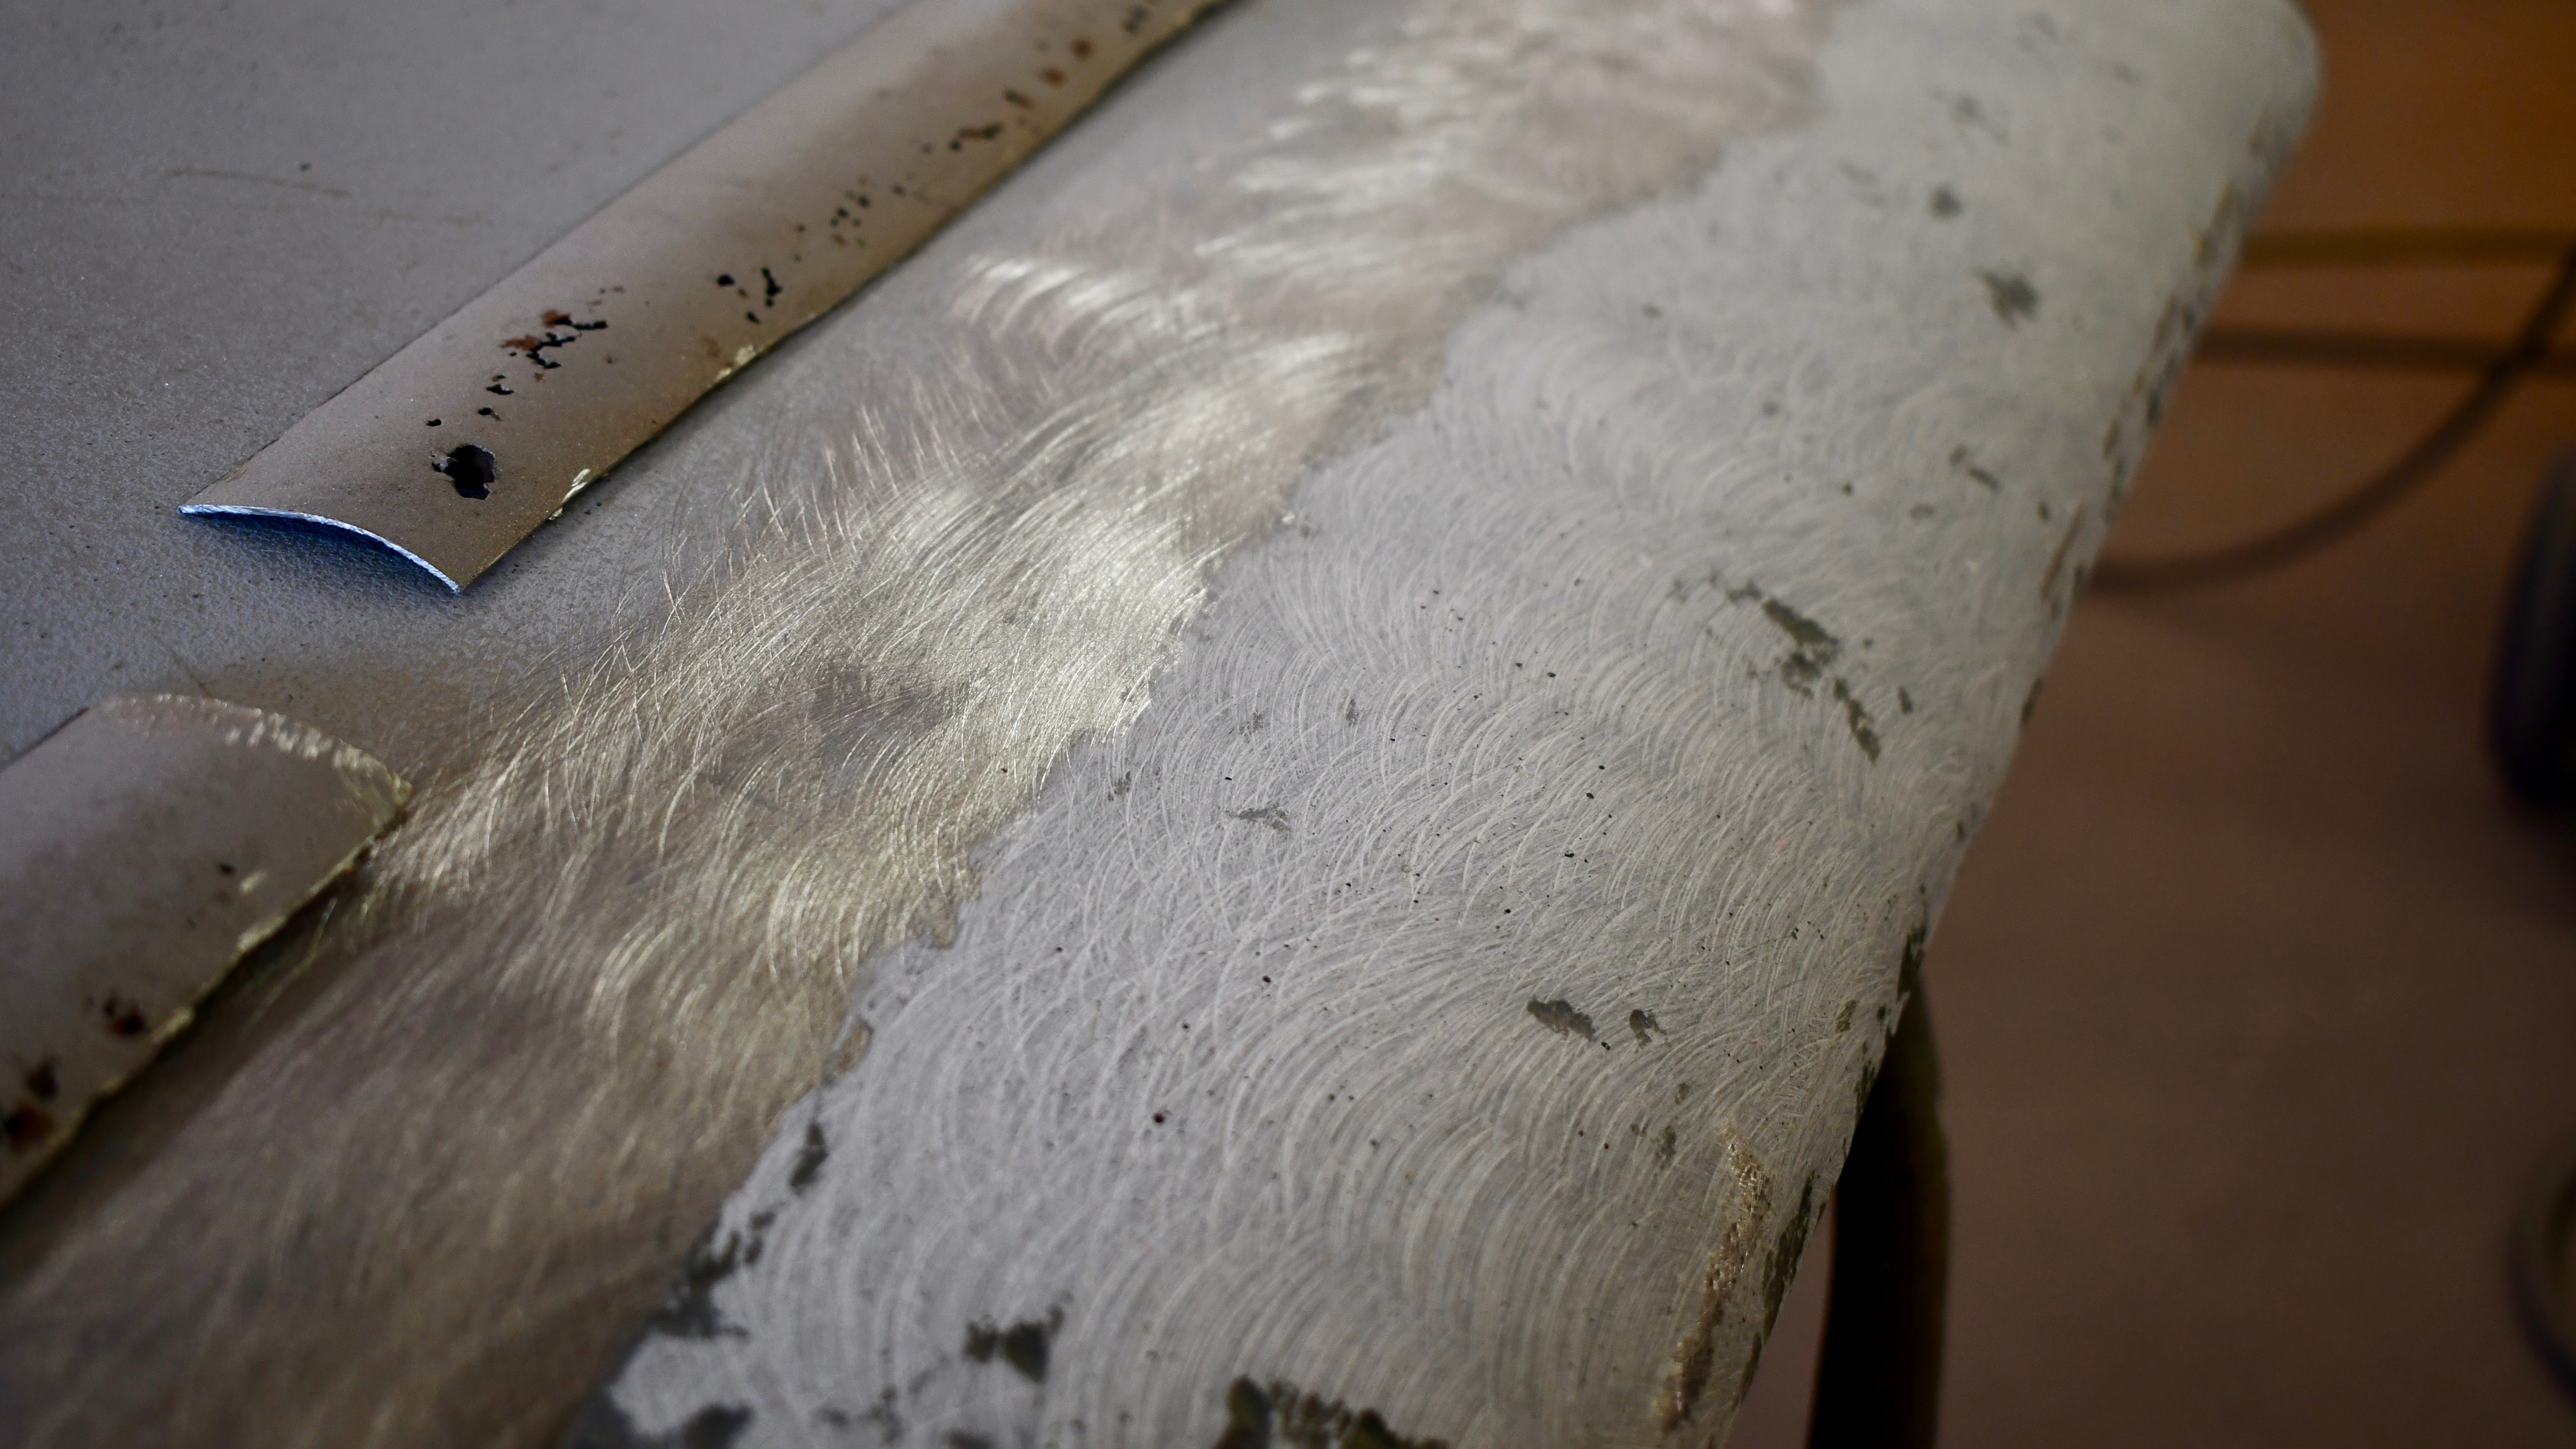
To address any small pinholes left from the welding, Bob mixes up this Tiger Hair Fiberglass with the blue cream activator.

This stuff is pretty sticky and the fibers run in all directions.

This close-up shows the fibers.

The entire lower door panel was coated with the fiberglass. It needs to fully cure all weekend so grinding can begin Monday morning.
Once it is ground to proper contour, then the skim coat filler will be applied and the body work can progress as usual.

With the fiberglass needing time to cure, the upper door panels started getting sanded out.

This is how I left the shop today at 2:00.

One more door to go!!!! (..and an upholstery kit)

I can see the finish line now! I'm so very excited to get behind that big beautiful wheel and stretch her legs.
Hope you all have a great weekend!
Gary
-
5
-
-
Hi Neil;
While the chrome frames were getting re-chromed, I sanded the "door frame" of the vent window, just cleaned the gears, then primed and painted it. My regulators work nice and smooth so I didn't open up the guts of them.

Sanded the frames smooth and used Brake Kleen, compressed air and acetone I was able to clean the regulator pretty good.

Ready for paint

Self-Etching primer coat

Then two coats of Rusteoleum gloss black.

Hang to dry and ready for all the goodies to complete the restoration.
Gary
-
1
-
-
Thursday February 15, 2018: Vent Window Restoration and Finalize Installation of Passenger Door Glass / Related
In this post, I finished installing "for keeps" the vent window, the side window, the division channel, the lower door run channel and finally the window felt seal.
I am very happy that I pre-installed everything and did a "dry run" to be sure all the rubber gaskets lined up, the channels were properly aligned... Made tonight go a lot easier.

January 2017: This is the drivers door, but the vent window restoration process was the same on both sides.

Here I am removing the four upper screws that hold the vent window frame to the door frame.

There are three upper screws.

Then remove the four machine screws and the unit comes right out.

Over on the bench, a 1/2" ratchet gets the bolt out to free the window from the frame.

Once that is removed, the glass, chrome frame and the rubber will come out. I had to flex the frame a little to help it come out.

Here's all the stuff coming out.

And these went out to Paul's Chrome Plating to get rechromed. The hash marks are my identifying marks for reinstallation.

I sanded out the "door frame" of the vent window. Then cleaned the regulator with Brake Kleen, compressed air and acetone.

Cleaned up and ready for paint

Applied SEM brand self etching primer

Then two coats of Rusteoleum Gloss Black

Hang them up to dry.

New glass getting cleaned up before installation

The chrome came out beautiful.

I used this 3M product called "Window-Weld" to secure the glass in the frame. (same on the other windows)

Test fit the glass to be sure it all fits nicely in the frame before pumping the window weld in the frame.

Use a caulk gun, express the material into the frame and seat the window fully. I allowed it to rest on the glass edge overnight to align the glass with the ends of the chrome.

Once set, simply run a new blade around the perimeter.

The excess peels right out and leaves a real nice finished edge.

Ready for its rubber gasket and installation.

Wrap the rubber over the frame, insert the stem into the mechanism, install the 1/2" bolt and the entire vent window is ready to be installed.

This is where I left off last night with the passenger window. The Window Weld dried overnight and was ready to go when I got home from work tonight.

Same routine. Cut with a new blade along the carrier and peel off the excess.

It leaves a nice clean line.

I lightly installed the four lower machine screws to hold the unit in place. Then I installed the upper screws along the top frame to be sure the frame was straight to the window opening.
You have to watch up top where the screws are that hold the rain deflector. My needed a little "persuasion" to get that just right.

Then finish tightening up the four lower machine screws to secure the unit. Vent window in.

Here I cranked out the vent window out, moved the crank handle from the vent window to the side window and lowered the window mechanism to the bottom of the door.

Dropped the window in and sat it over the mechanism. Lined up the screw holes and installed it.

Next the vent window separator, being sure not to squash the rubber to the vent window and raising and lowering the glass to be sure the channels lined up.

So the passenger's door is done. Looks nice with all the glass back in!
Have a great night
Gary
-
7
-
-
Hi Stooge;
I'm getting close to finishing up restoring my '37 Special. It's been about 14 months, and I have documented almost every step. Maybe some of my photos can help you as you sort out all the bags of parts.
Good luck with it! Beautiful car.
Gary Wheeler
-
1
-
-
6 hours ago, pplaut said:
What I want to do is fit a 12-volt modern bulb in the 36 socket.
Pplaut: Check out this post. It may help answer your question.
I had my reflectors restored using the UVIRA process and then everything is stock 6V bulbs.
-
1 hour ago, pont35cpe said:
Gary, how`s your rollers on the regulator? I replaced mine with an updated nylon roller and the widow sure rolls up/down easy.
Thanks Tom.
I have leather rings that fit into the channels so I just cleaned up the channels, greased them and installed everything. The windows roll up and down smooth, although not "easy". With all the new felts and channels there is some resistance, but no clunking or tilting of the glass. I didn't know about nylon replacements. Also, when I close the door, there is a real nice solid "thud". Nothing rattles inside now that all the felts channels are replaced and lined up.
-
Wednesday February 14, 2018: Begin installing door glass
I've titled it "Begin installing" because I wanted to check and double check all the felt channels, the riser mechanism, the fit to the vent window separator..... Before finalizing the glass installation.
Tonight I went through preliminary steps to be sure I have done all the math correctly. As it turned out, I was very glad I took the extra time to double check everything...

From the other day. I knocked the lower carrier off the old glass, marking the position of the metal with tape prior to removing the metal.

Tonight: Here you can see the new glass with the positioning tape and generally getting an idea of how things will fall in place.
Before setting the glass in permanently into the carrier, I wanted to be sure the old measurements would translate to the new channel felts, new rubber...
I was thinking that with all the new stuff, something must have changed. Plus, the original glass was broken just above the carrier so I wanted to be sure there was no stress on it.
What I did was use that friction tape you see on the ground to create a "semi-permanent" hold so the glass would stay in the channel and I can test my measurements.

So, in order to set the glass into the door, you have to remove the vent separator.
But, to remove the vent separator I had to remove the screws holding the felt glass channel to the top of the door, so I could get at the screws that hold the vent separator in place.

Looking very serious.. careful not to hit the paint anywhere, I opened the vent window and began lowering the glass down.
Remember, the lower carrier is held onto the glass with the friction tape for now.

Now the channel engages the horizontal regulator bar inside the door. You can see the upper felt swinging around over my head.

With the holes lined up, I placed one screw in the back, one in the front to secure the channel to the regulator.

Then re-install the vent window separator and the felt channel up top.

First thing was to set the lower window run channel in the door. I allowed the glass to move up and down basically "setting" the channel in the correct position.
This photo, looking down the top of the glass, the lower run channel is not centered, leaning towards the outside of the door.
But when I tightened the screws, it pulled right into position and it is nicely lined up now.
FYI: You can shim the channel with washers... to get the optimal alignment so your glass slides through easily.

With the lower run channel secured inside the door and the felt channels tight, I ran the window up and down quite a few times to allow the glass to center itself.

When I looked inside, I immediately noticed that the original (blue) marks were off. The carrier was 1/4" to the rear.
So while it was all in the car and working easy, I marked the NEW carrier position with green tape.
And then removed the felt channel, the vent window separator, the screws, and finally the glass.

Here is the new measurement that I'm going to use to mount the metal carrier.
I'm glad I took the extra time to double check.

I used a 3M product called "Window Weld" inside the carrier.

Seat the window glass fully and let it ooze out and cure overnight. A single swipe with a blade tomorrow removes the excess and leaves a nice finish.
So tomorrow I'll rebuild all the door components for the passenger's side.
Happy Valentine's Day!
Gary
-
3
-
-
It's Beautiful!! Good Luck with the restoration! I was where you are about 13 months ago. Stick to it and you will be amazed at the progress. She's gonna be a beauty!
Can't wait to follow your progress.
Gary
-
Tuesday February 13, 2018: Installing outer door "bling" and Body Work Beginning on Driver's Door

I got my delivery of the molding clips and the door handle ferrule / grommet. But these clips are for a 5/16" hole and the Buick door is drilled at 3/16" so these would not work.

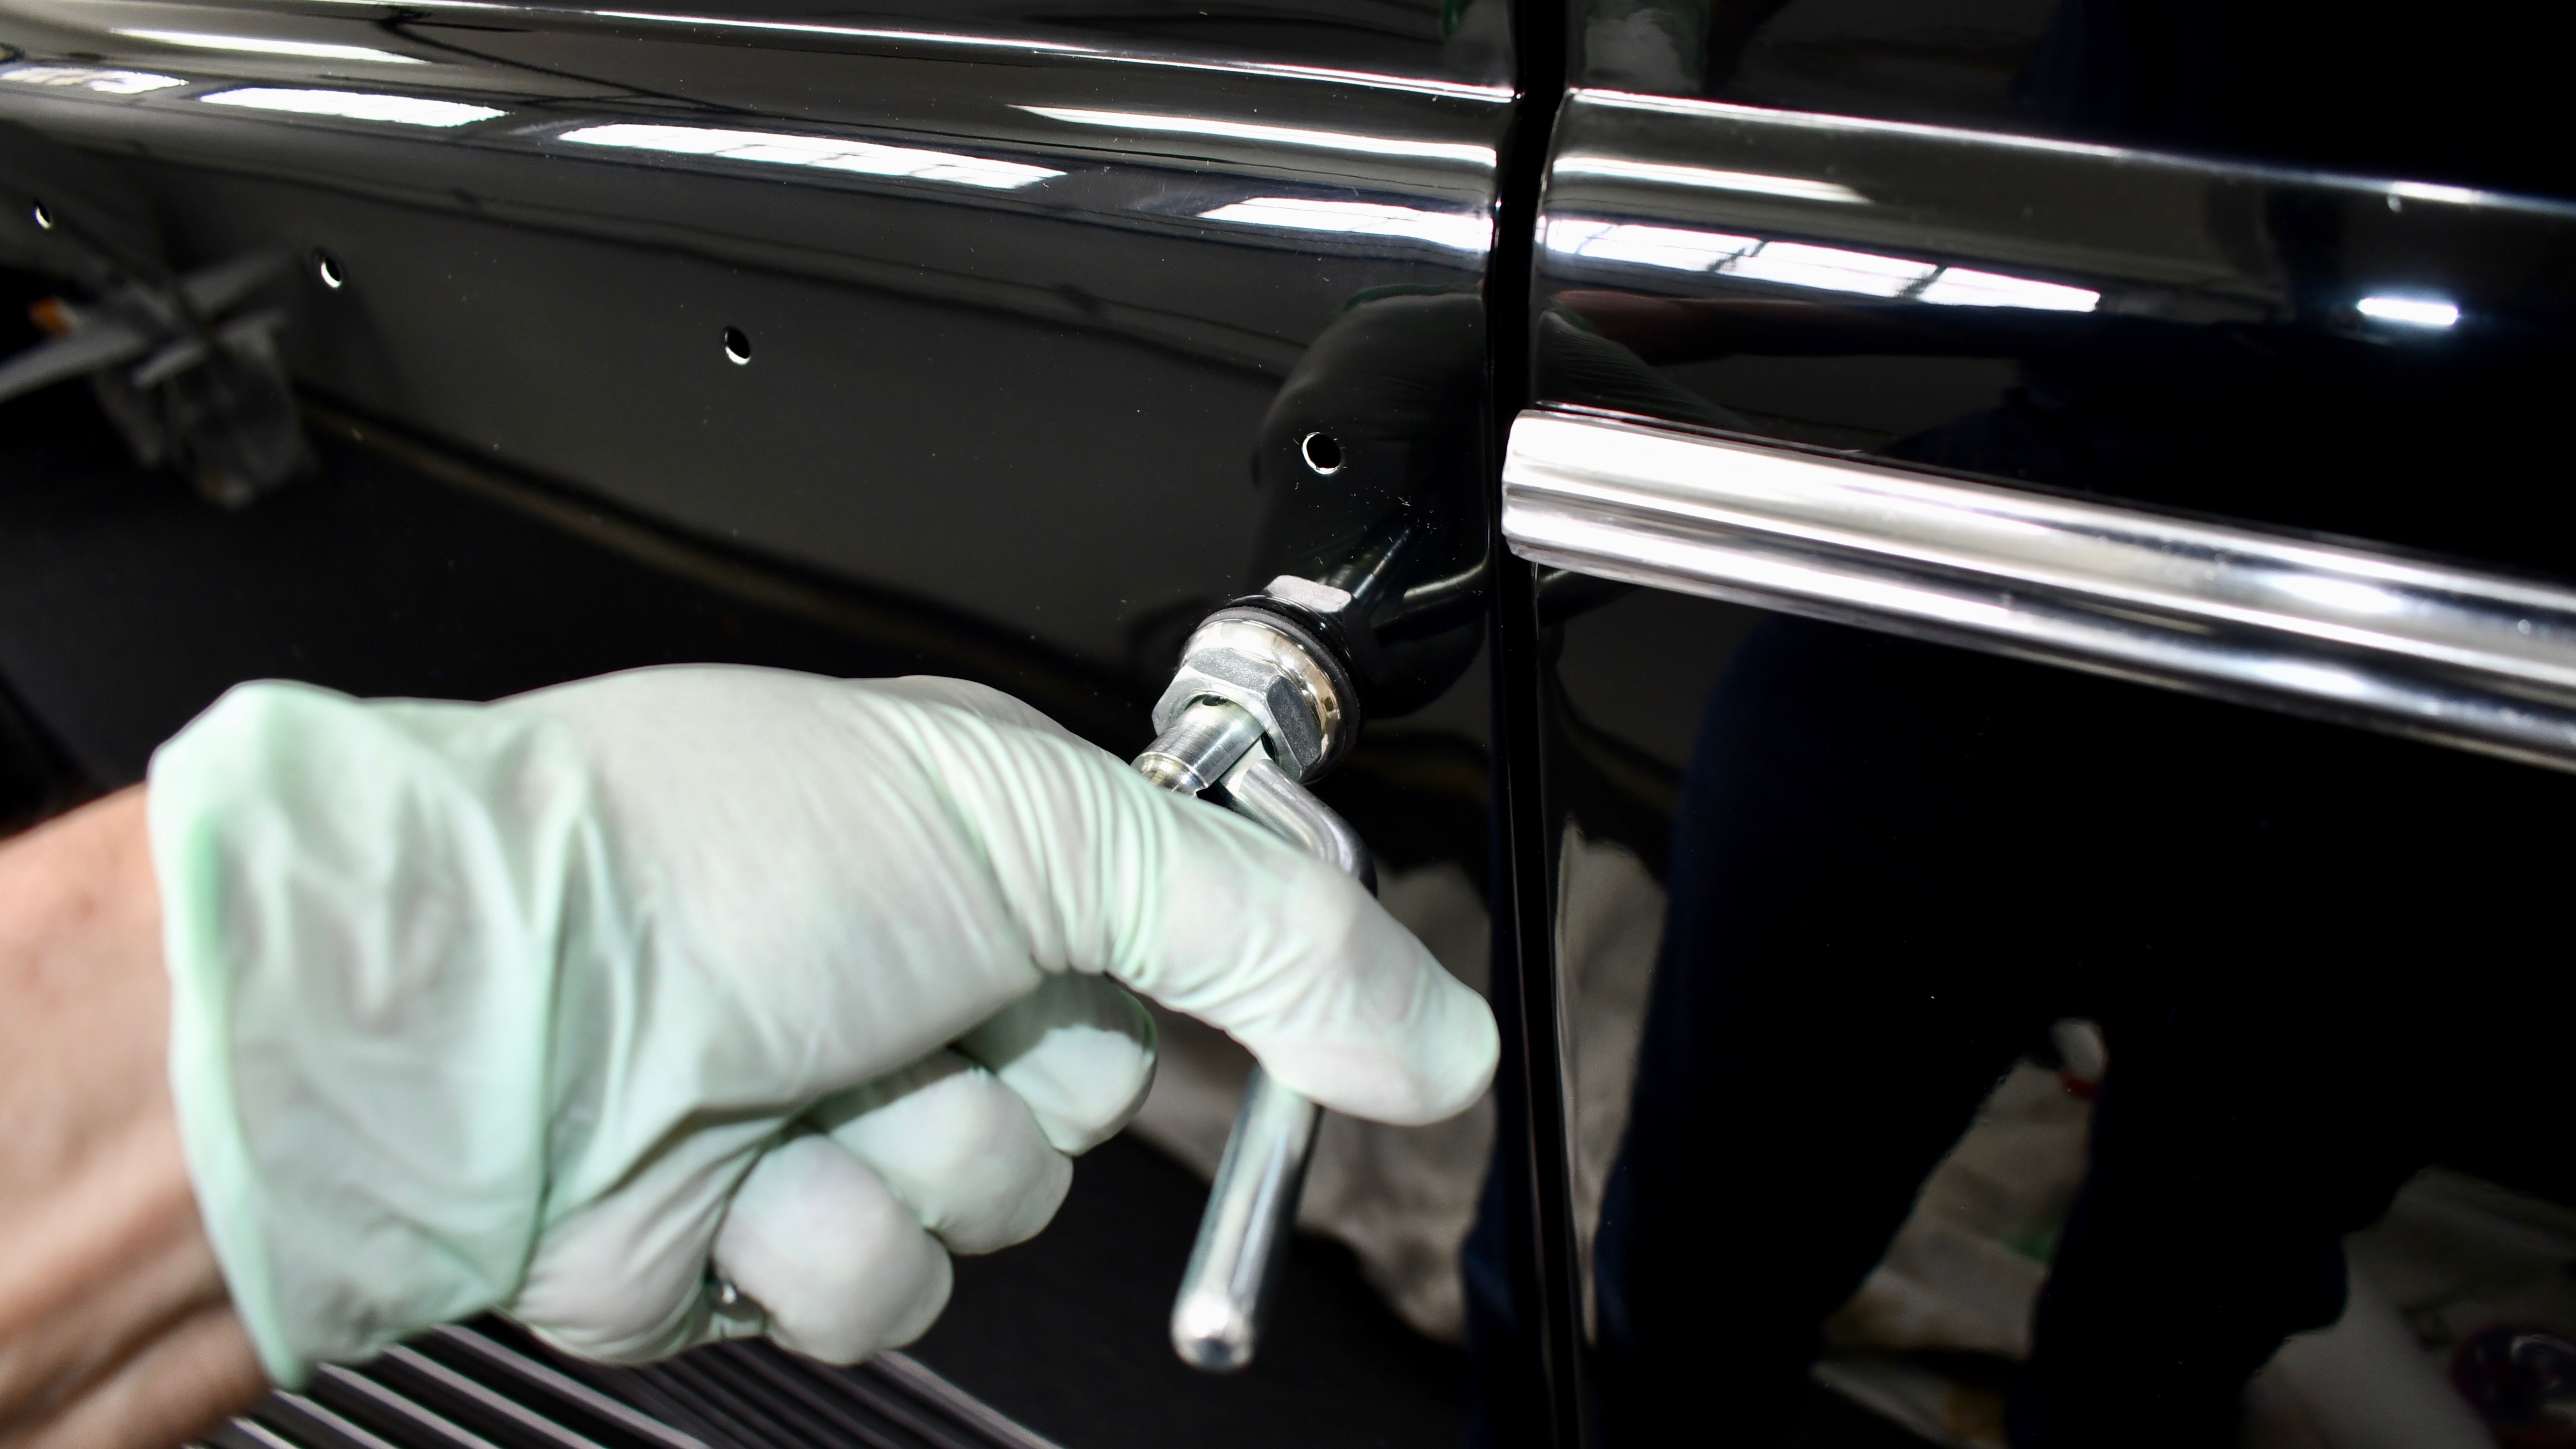
So I started with the door handle by setting the grommet onto the chrome ferrule.

I bought the tool so I can seat the ferrules properly. You first set the gauge nut for 1/16" inside the edge.

Insert the grommet/ferrule combo into the door hole, insert the tool and push

While pushing in, close the handle and it will create an internal crimp to lock it in and pulls it in tight.
Then, turn the tool 90 degrees and close it again. Repeat four times and its in.

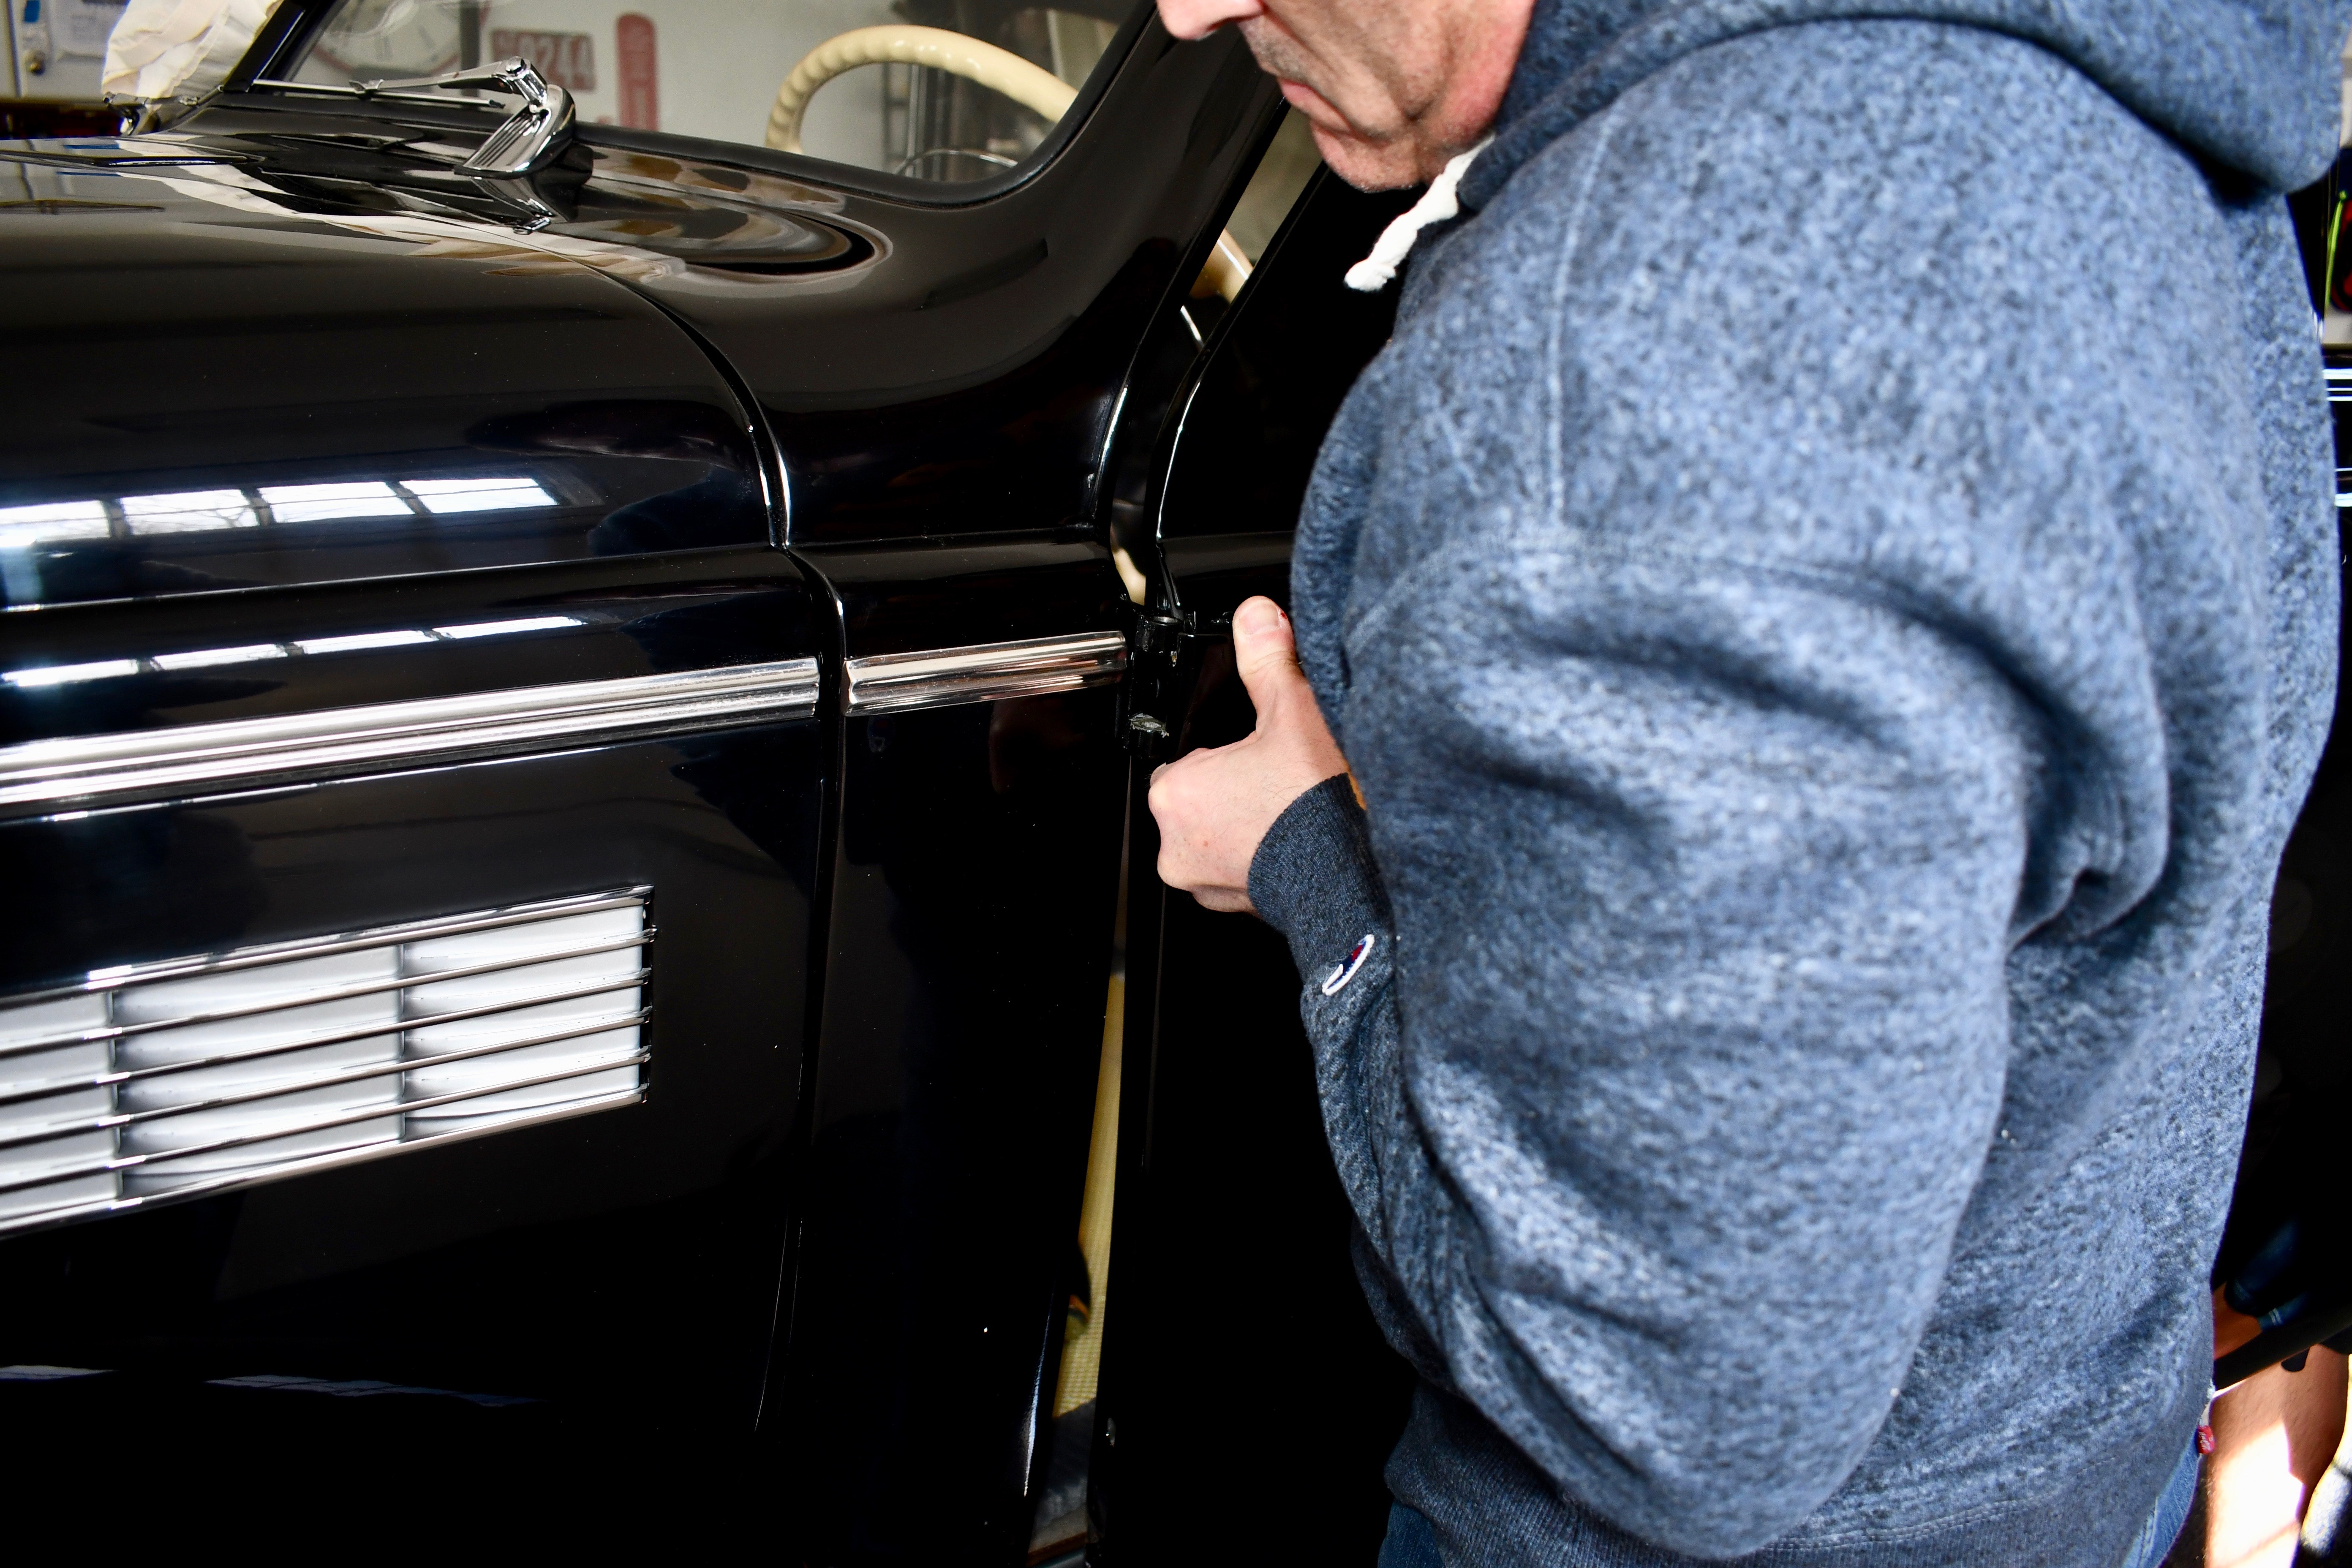
Next, slide in the door handle and watch the hole line up to insert the door handle locking pin.

Slightly turn the handle so the hole is clearly lined up and easy to get a screwdriver in there. Insert and tighten the locking pin.

Then a stroke of good luck. I stopped by the paint shop and the driver's door is underway. I asked Bob where I could find trim clips for 3/16" holes.
He casually walked me to the back of the shop, pulled out a box filled with tons of fasteners from his 50 years of working.
It took me only 5 minutes to find 20 of these! Made my day!!

So I went home immediately, inserted the clips and snapped the side molding in place.

Here's how the day started

And now with the bling assembled!

The moldings line up real nice. I seem to have a "lazy" door handle. The handle tends to drop forward and i like it to stay parallel to the molding.
I think the internal square is worn a bit.

So tonight I'll set the glass in position and update tomorrow.
BODY SHOP UPDATE: Drivers Side Door:

The Driver's Door is pretty rusted out along the bottom edge

Bob was getting his plan of attack ready.

But this will be a challenge.

Bob removed the rotted sections and put them aside to create patch panels with the proper curves.
These parts curve front to back AND top to bottom.
 .
.
The rotted sections are removed. The rust inside will be treated while it's all opened up.

Tomorrow the patch panels get welded into position.
Have a great night out there!
Gary
-
2
-
-
I've been trying to get as much information as I can regarding the window seals. I do not believe the car came with window sweeps originally. There are no holes anywhere to attach them. I removed the "lip seal" version from the window carrier (all dry rotted, of course) and I think there are supposed to be rubber window anti-rattlers that fit into the holes in the door and garnish moldings. I actually did bend the window sweeps, but I have no idea (except 3M trim adhesive) how I can attach them as access is quite limited to get in there with a drill and small screws..... Jury is still out, but I'll be trying the lip seal tonight and see if I like it. I don't know about the '38's (I don't even know about the '37's!!) but Bob at the paint shop told me that the window sweeps came into production much later than 1937. (Like in the 50's) I'll try a couple ways and update as I learn!!
-
Did you call / search LeBaron Bonney? That's where I got my interior kit for my '37.
-
Sunday February 11, 2018: Begin installing "Door Goodies" on the passenger's side
(13 months today!)
The last few days I've been busy getting the internal guts of the passenger's door installed.

First was the drip shield

I used all the original screws, doing my wire wheel job on all the door fasteners.

Then I installed the door check rod with the new rubber stopper from Steele. I adjusted it so it stops the door just before the door hinges hit to stop the door.

Window run channel coming out a year ago.

Everything restored and going back in tonight! I kept the screws loose until I actually drop the glass in there and allow the glass to align everything.
**** NOTE: Post # 517 on PAGE 21 (9/8/2017) Details the restoration of the Window Run Channel in the door and the Vertical Division Channel (Vent Window Separator) ****
Back to business...

Next, the vent window assembly. Here it is coming out last year.

Fully assembled and going right back into position.

Then the vent division post.
I quickly realized that these screws had to be cut down, and then the rubber vent window rubber had to be trimmed back to allow it to seat correctly.
So this part and the vent assembly were in and out and in and out quite a few times before it was right. I wanted to be sure this section was just right before starting the window felt channel.

Here it is installed and nice and snug to the vent window.

The view from outside.
Then I started on the window:

First I removed the lower carrier from the original glass. It popped right off. Notice I marked the position before I knocked it off.

I transferred the markings to the new glass. Then out to the shed to wire wheel these parts before installation.
I'm waiting for the rubber seat where the glass sits in, then goes in this carrier.

So the next job was the window felt channel. This is how it gets delivered, so I first used my dremel to make a nice clean cut.

Like the rear window, I used the actual glass to carefully form the felt channel.
Pushing against the cabinets to keep the top secure, I slowly started making the bend. Go easy. It needs time for the stainless to slide out.

Just taking it little by little, it will nicely form around the glass.

I left a 1/4" at the forward top so I could custom trim it to the vent division upright.

Over to the door for the first trial. A dry run to measure the overlap at the vent division and make that cut.

After measuring and making the cut, it fits pretty nice up against the vent divider post.

Satisfied with the fit up there, I began marking for the holes to screw the felt channel in place.

I used my same technique as the rear roll up windows. First, I lay the blue tape near the holes and mark the hole position up around to the door opening.

Fit the felt channel in the window opening (again) and I use a silver sharpie to make a mark on the side of the felt corresponding to the lines on the tape.

I use a 1/4" piece of wood in the vice and up into the felt and drill my holes according to the silver marks.

When its black on black on black and you are looking up into the lights, believed me these marks come in very handy.
The screws find their way easily into the holes and the felt channel falls right into place.

So the felt channel is in and I'm satisfied with the fit.
I'm waiting for the rubber lower window channel (the one the glass fits into inside the window riser) before I can drop the glass in place.

I decided to buff up the side trim moldings. My passenger side was held on the car by "hot glue" or some kind of silicone pumped in through the cowl side.

My door moldings had at least half the clips broken. These also had paint down the sides and rust inside.

Here's the pile of rusty clips I removed from the door stainless molding strips.

I first used a non-scratch Scotch-Brite pad with this Quick-Glo to remove the rust, paint and begin prepping the surface.

Next onto the cotton wheel for a buffing with jeweler's rouge.

So much better!

I did restore the clips that were usable. I ended up ordering 24 new clips for the door moldings, so I only used four of these on the cowl section.

And Paul's Chrome shop returned the visor support for the passenger side. So I installed that as well.
Hopefully I'll have the door completely ready for interior panels by Wednesday if all the parts come in this week.
Have a great night!
Gary
-
3
-
-
My camera has a feature called "Interval Timer Shooting" So when I am doing things that require "all hands on deck", I can set up the camera and every 30 seconds it snaps a shot.
When I set the hood, I actually had my iPhone taking video, then I take screenshots of the important parts.
.thumb.JPG.c50993cf27e0e3cbc2fa0cd4cab68cb7.JPG)
-
1
-
-
I tapped the pins out from the bottom. One really got messed up. The top is knurled and it really holds tight.
I used a rubber mallet to install
I did remove paint from the mating surfaces of the hinge. The fit is so tight that even a little paint prevented the door from seating fully.
-
1
-


.JPG.c04b5628097864f2e7dfb1870f64b220.JPG)
1937 Buick Model 48: RESTORATION HAS BEGUN! (Photo)
in Buick - Pre War
Posted
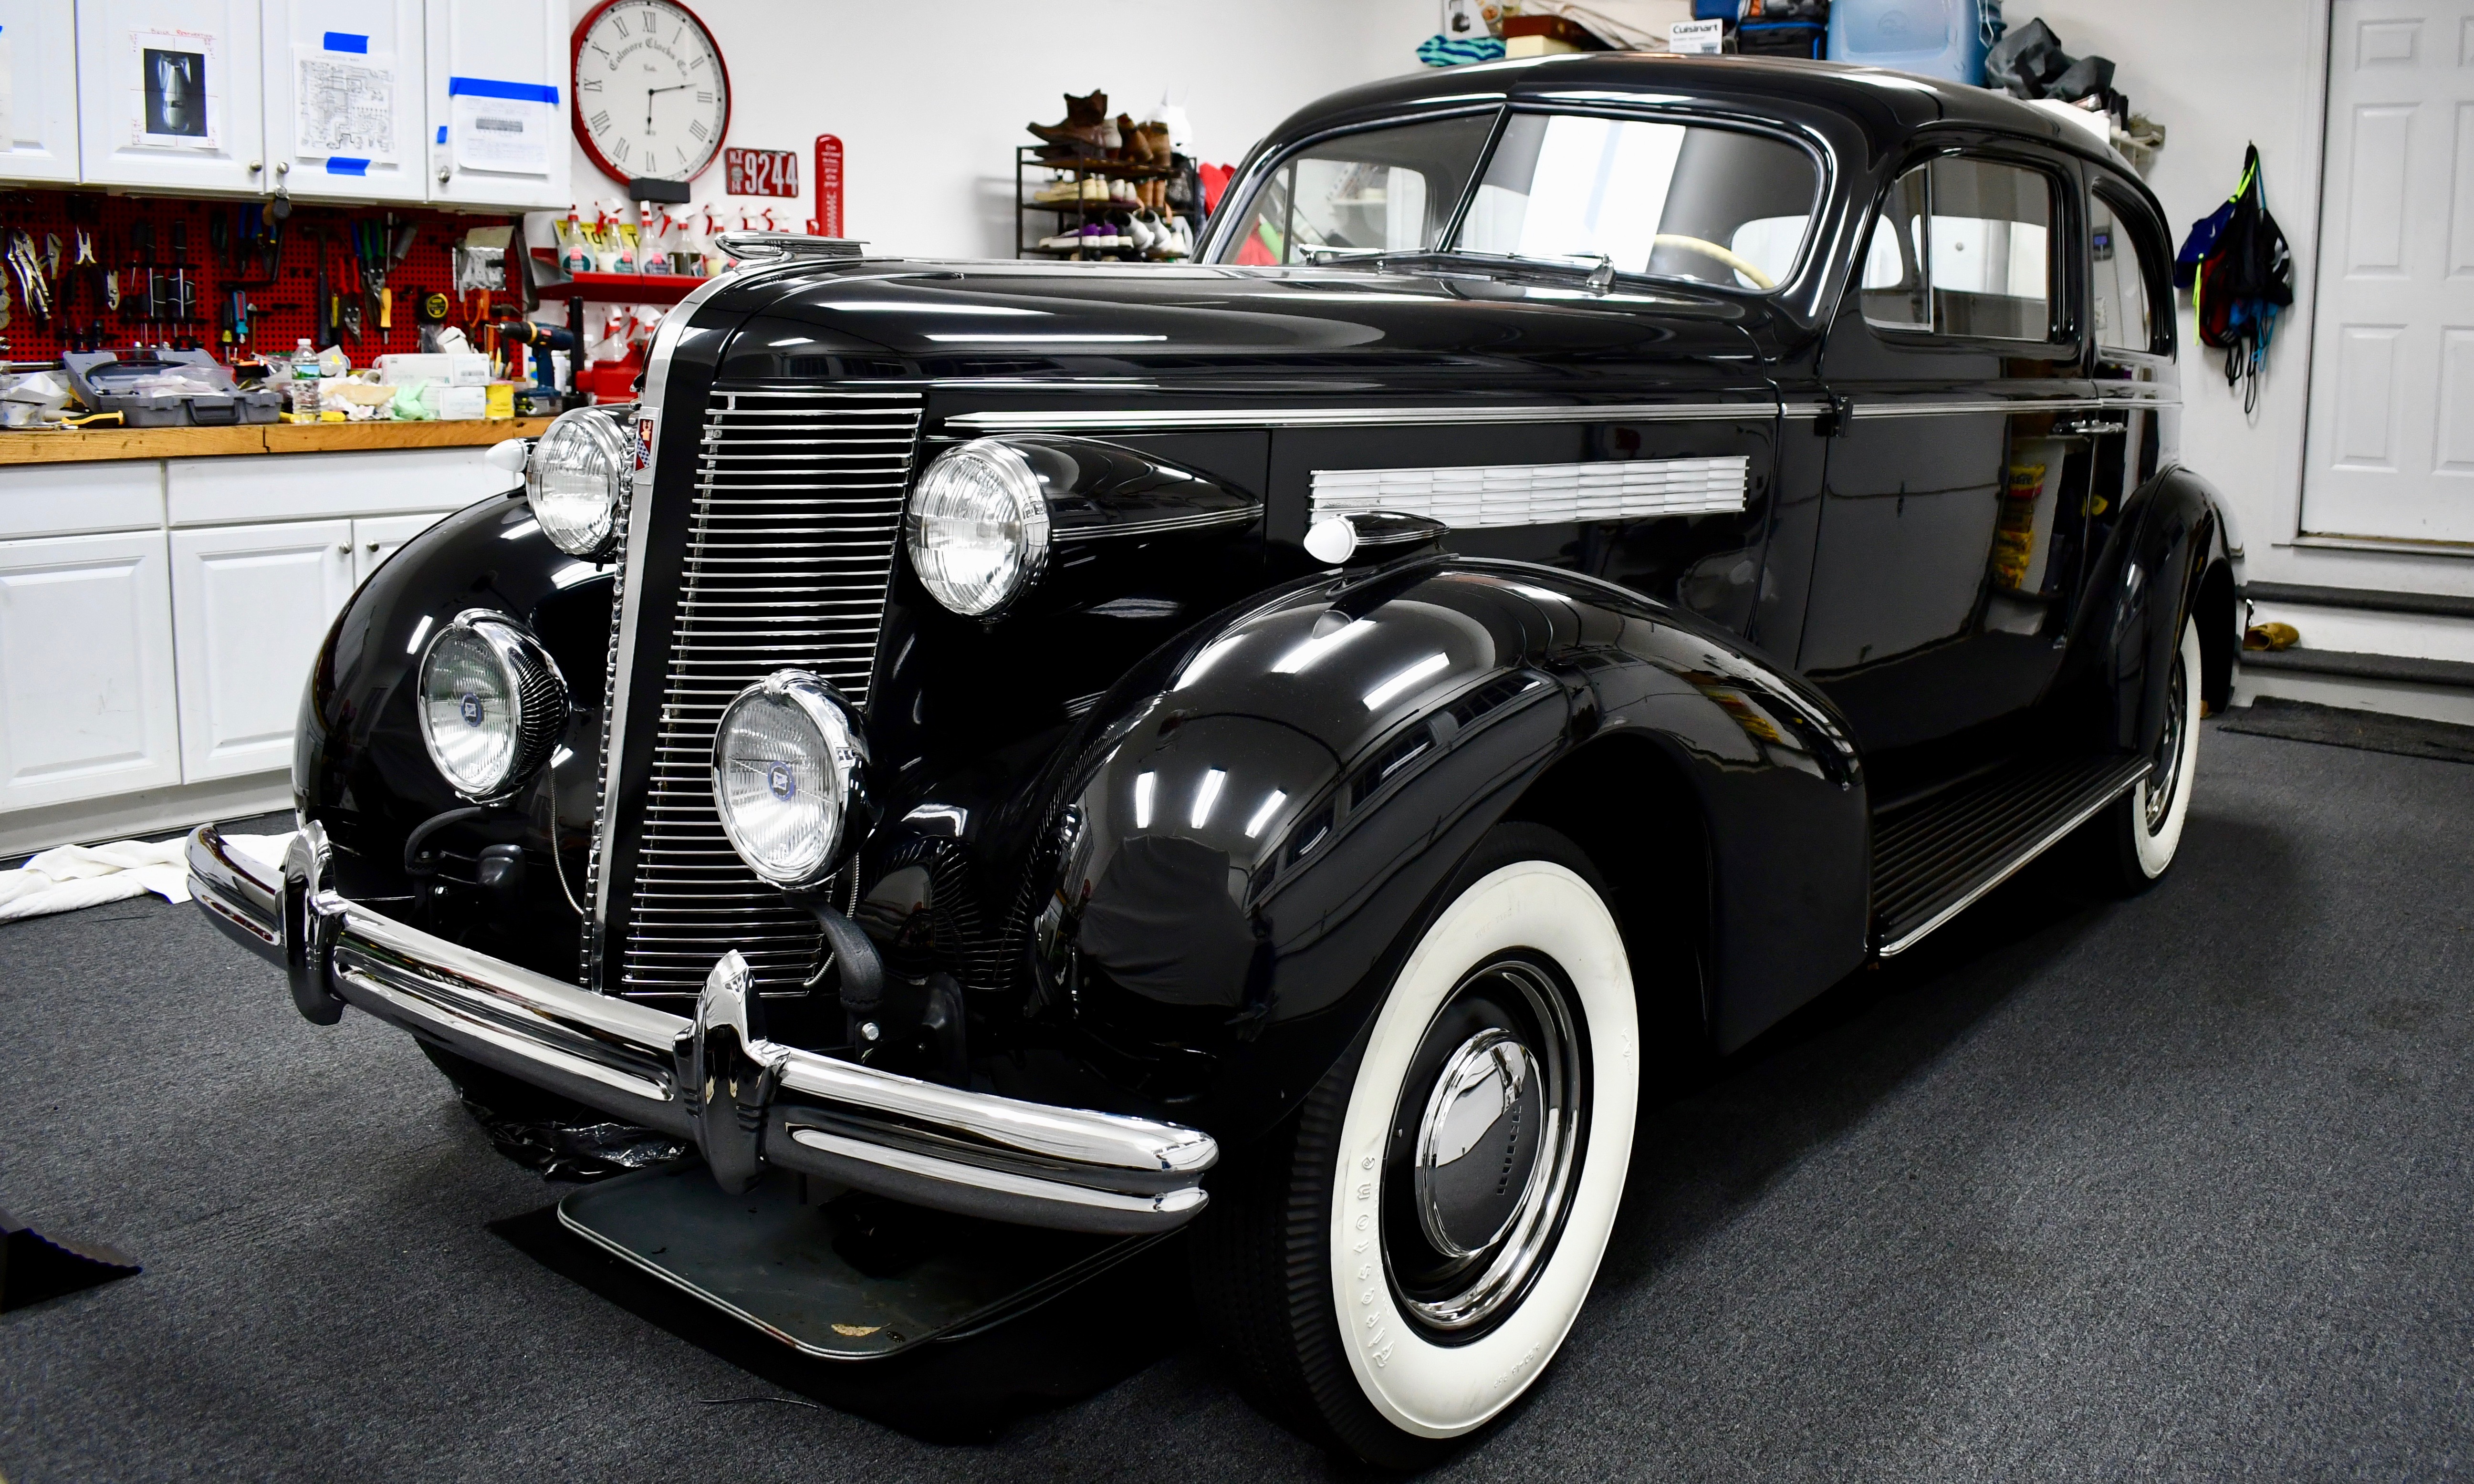
Sunday March 11, 2018: Sometimes the little things.........
Today marks 14 months since taking the first bolt out and starting this restoration.
Update regarding the interior: LeBaron Bonney got a bad dye lot, and the interior won't be shipped until they test the new fabrics, so I'm kinda in neutral waiting.
In the meantime, my lease is up at the storage facility, and I had to bring the Model "A"'s home.
Little bummed, as I really like working in the open space, and thought I'd be totally finished by now, but some things you just have no control over.
So I installed the front license plate, started getting rid of some restoration "residual things" and had to clean up to make room for two more cars!
The license plate was the very first thing I removed. The fasteners were completely rusted and unusable. During the restoration, I bought these bolts for the rear hood hold down.
They come in a pack of 10, so there were plenty left over.
I first ran a 5/16 bit through the hole to clean up the powder coat. Then, squared off the opening with a file so the shoulder fit snug.
Being the license bracket has an "offset" or a "drop" where the bolt inserts, I used a hacksaw to remove one side of the bole head.
Dressed it with a flat file
And now the bolt sits in the license plate support nice and flush.
Sometimes these little things take quite a while to get just right!
So now the front is looking good.....except getting that hood lined up at the top. Still needs some tweaking there, but Bob said he'll help me get it just right.
Now it's time to move the beast. She's had the entire garage to herself for over a year and I had to get my other cars from storage.
So, I spent some time cleaning up the garage to make space. (I have to get four cars in a three car garage)
Out in the daylight she goes!
Then it's almost magical what happens when the sunlight hits that paint!
Really looks beautiful outside.
Let me share a couple of photos.
Just so cool.
Then I sat on my plastic crate, started her up, and parked it in the single bay.
John came over and we drove to the storage place and got the Model "A"'s back home and the garage is totally filled up!
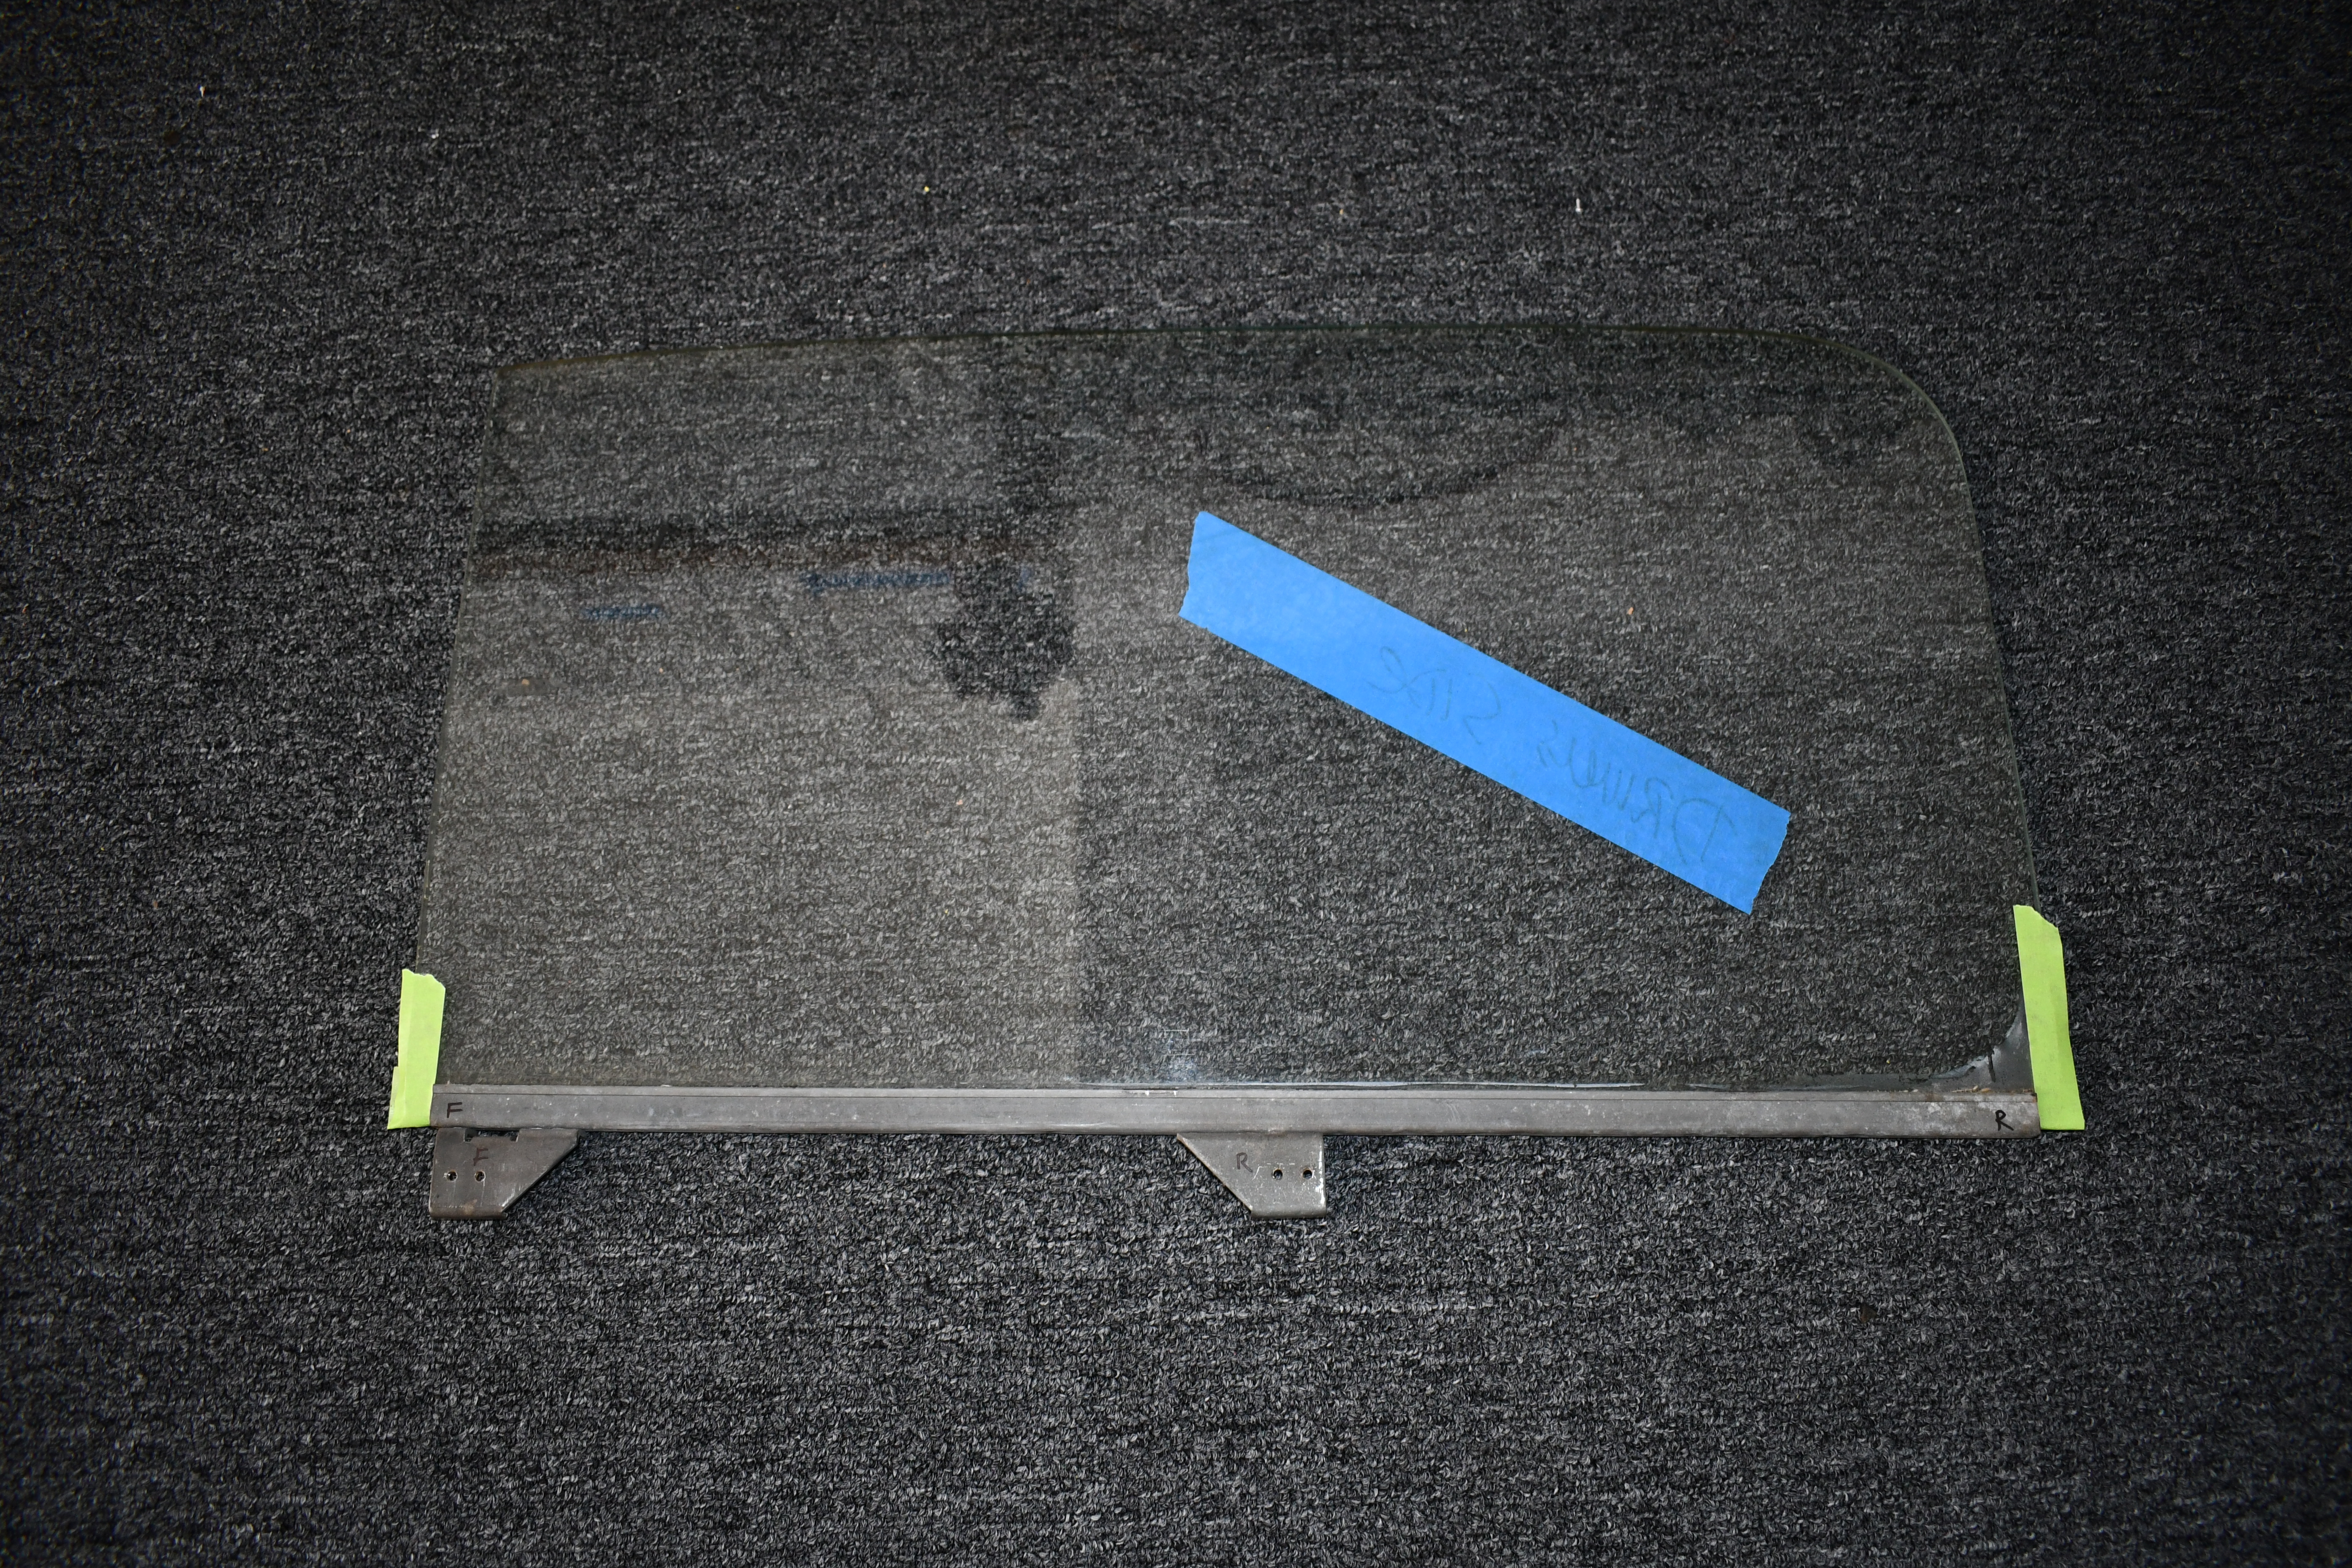
As I'm going through the parts I removed and won't be reusing, I got these photos of the glass markings.
I was just wondering if any were original or if both were replaced being they have different marks on them.
Does anyone etch these markings into new glass? Or is there a kit or a clear plastic stick on?
Curious.
So, I'll keep you updated as the interior saga unfolds.
Enjoy your Sunday!
Gary