


47 Super C
-
Posts
92 -
Joined
-
Last visited
Content Type
Forums
Gallery
Events
Everything posted by 47 Super C
-
selling my project - 47 Super convertible (Maine)
47 Super C replied to 47 Super C's topic in Buick - Buy/Sell
Jerry, I am really looking to sell the whole package. Thanks, Kevin -
I have these as well. 2 sets of them I believe. Kevin
-
WTB 1947 Buick Super Passenger Side Gravel Fender Panel
47 Super C replied to Miguelg510's topic in Buick - Buy/Sell
Miquel, I have originals and ones that I have made. Kevin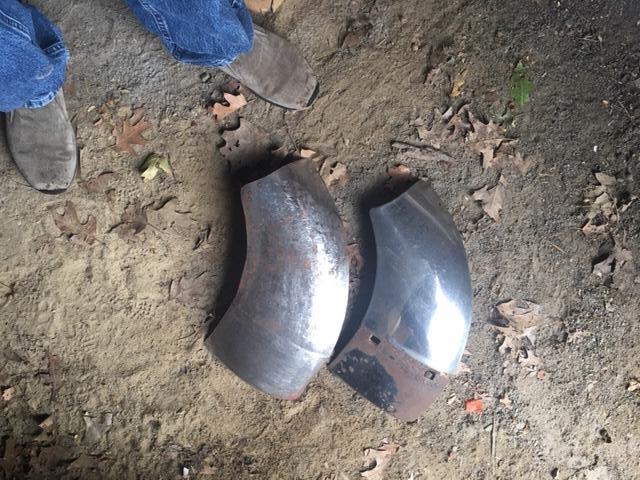
-
selling my project - 47 Super convertible (Maine)
47 Super C replied to 47 Super C's topic in Buick - Buy/Sell
I do have some pre-sandblast pictures. PM sent -
selling my project - 47 Super convertible (Maine)
47 Super C replied to 47 Super C's topic in Buick - Buy/Sell
I do still have it and can measure that for you tomorrow. Looks like you need to weld in a floor pan from your picture. Are you planning on getting that from a sedan ? -
selling my project - 47 Super convertible (Maine)
47 Super C replied to 47 Super C's topic in Buick - Buy/Sell
I sent you a PM. -
Due to a move, I'm losing my shop space and need to sell my project. Its a '47 Super C which is complete and includes NOS Front fenders and outer rocker panels. I worked on it for a while and cut up a 4 dr for floor panels, so I have duplicates of all of the common parts - grille dashboard with gauges etc. The body tub was sandblasted all the rust has been repaired and floor panels replaced starting at the back towards the front. The front floor panel taken from the 4dr still needs to be welded in. The convertible frame is solid with no patching needed, but it has no engine, which I was going to use from the sedan. Note the chassis with engine is from the sedan. There are also many boxes of small parts not shown in the pictures that go with it. Review the pictures (sorry for the quality of some of them) and contact me. I'm unloading it at a loss for $3500. Car and parts are located in southern Maine. Thanks, Kevin


-
1942 through 1947 Buck Roadmaster rolling chassis or parts car
47 Super C replied to Jack Welch's topic in Buick - Buy/Sell
Meant to type "don't know if it'll help" -
1942 through 1947 Buck Roadmaster rolling chassis or parts car
47 Super C replied to Jack Welch's topic in Buick - Buy/Sell
Jack, Don't if it'll help, but I have a good '47 chassis with complete drivetrain from a Super that I am looking to get rid of. It's stored inside in Portland ME. Thanks, Kevin Reilley -
Hi, Just following up on parts for a '47 convertible - rear fenders, rear ashtrays rear quarter windows. Thanks, Kevin
-
Hi, I'm working on a 47 Super convertible and I'm looking for rear fenders for it and possibly some other parts for the same. let me know what you have if anything. Thanks, Kevin
-
Will this unit work to add power steering to a 47 Super 56c ?
-
A little more work. Made patch panels and removed/replaced rusted out trunk floor pan. Also hammerred out and welded up the damage a PO had done to the floor with an air hammer trying, I assume to get to the fuel tank sender unit. Also made one of the replacement pieces for the front floor braces that fit inside of the inner rocker panel at the very front where it mounts to the frame.


-
1947 56C Project "Can't finish unless you start"
47 Super C replied to jackofalltrades70's topic in Me and My Buick
Matt, Sounds great - any new pictures to post ? Where did you source the rubber matting for the running boards ? Is it similar to the original in pattern ? Kevin -
Finished up the drivers side welding - not the best quality welds, but solid and the heat shrink hammered out. All the welds end up underneath faring panels or gravel guards. Fitted the fender, skirt and gravel guard less the stainless. I was a little nervous here since I had replaced so much metal in this area, but it all fit together well. Need to do the same on the passenger side.


-
2nd to last weekend to be able to work on the car. My goal is to get at least the back end of the sheet metal all done and primed. I have almost completed the driver's side as the attached pictures show. I have also finished the all of the metal replacement of the interior in the back. I made all of the parts by using the old pieces as patterns. Most of these parts (except the floor pan) I had made earlier and can be seen in previous posts. Essentially the bottom 6" of all the sheet metal except the floor braces. I also made the components where the top retracts into and the back seat attaches to.


-
Thanks for the compliments ! I have done old houses before so know what I'm getting into, but I will be able to hire out for some of the work, but will do the fussy stuff myself. They are a lot of work but the results are rewarding like these old Buicks !
-
A few more hours on the project... I welded in the cross braces for the back seat. I made up the floor brace as the original was so thin. One pictures shows my door alignment on the Drivers side. After all of the manipulating I've been doing, I re-hung the doors to ensure a good fit. I'm trying to get everything done that I can in the next few weeks before I have to set the Buick aside for a year so I can work on the new "old house project" that my wife and I are buying. It was built in 1820 and has about the same issues as the Buick - the bottom 6 inches are pretty rotten and the systems all need to be replaced/reworked, but it has the style and original features that you can't get in a new house.


-
1947 56C Project "Can't finish unless you start"
47 Super C replied to jackofalltrades70's topic in Me and My Buick
Matt, Looks great, you're so close it must be motivating the heck out of you. Have you found a source for the convertible top tack strip above the truck lid ? Kevin -
A little more work. Pictures of the rear fenders laying on the floor with the front ends all welded up. Another picture shows the drivers side convertible and sedan rear fenders. I plan on slicing off the bottom 4 inches or so from the back end of the sedan fender and welding it on to the convertible fender which is rather thin in that area. The other pictures show the passenger side floor and rear quarter repairs. My next step is to weld the brace piece back in and that side will be comlete except for the exterior sheetmetal patch. it would be done right now if I hadn't run out of welding wire ! Looks like a run to Home depot later.


-
Thanks for the comments, I do enjoy working on it - just wish I had more time to do it !
-
Done a bit of work lately. Finished up two sets of gravel guards one for my convertible and a set for another member's Sedanette. That led to me making the new front ends of both rear fenders. Pretty much just used the stump, English wheel and dollies and hammers to do all of the work. The pictures which are not in chronological order (not sure how to easily do that) show various steps of fabrication and test fitting them on the car.


-
Yes, I made them with a stump and english wheel. Kind of fun to make actually, but a little time consuming. You can see more pics in my restoration thread
-
A little busy lately with Mothers day, graduations and some house projects on the side. I have also been doing some work on the Buick. I am making two sets of replacement gravel guards - the steel part that attaches the stainless to the fender. Its been a great learning experience in metal shaping starting with the stump and wooden hammer, English Wheel and some homemade shaping jigs and punches.


-
I have been fabricating some replacement gravel guards for my 47 convertible and have been trying to figure out all of the mounting points. It appears that there were 5 points of attachment - the metal tab in the upper corner, the two though-bolts that also attache the stainless spear, the exposed screw at the bottom corner and I think one of the dimple points. The fender has lots of slots and I think most of them are there to allow the fender to flex and permit the gravel guard to sit flat. Based on some of the minor deformation around these slots on my original, never repainted fender, it looks like the factory would bang on the stainless guards to get them in alignment. Thoughts ? Better yet any pictures of original examples that show the original attachment points that would be helpful. Thanks, Kevin


