

Randiego
-
Posts
309 -
Joined
-
Last visited
Content Type
Forums
Gallery
Events
Everything posted by Randiego
-

Roger's handcrafted 1:12 scale models
Randiego replied to Roger Zimmermann's topic in Our Cars & Restoration Projects
Roger, The hood ornament looks very good. Only your eyes will see a flaw. Once you get the part filed and final sanding and plated, the emblem will look like a million on the hood. The headliner really looks authentic Like you say, will anybody really be looking up at the headliner once the roof is attached? I cannot wait to see the car with the exterior painted and peering into the engine bay, looking at all the detailing. Very heady stuff Roger. Excellent ! ! -
Roger's handcrafted 1:12 scale models
Randiego replied to Roger Zimmermann's topic in Our Cars & Restoration Projects
Roger, The problem(s) with the 3M aerosol product is that you have to have the fabric positioned EXACTLY before you press it into the headliner. Once it touches the glue, it is nigh on impossible to move it and the glue is almost instant. plus you have overspray that has to be cleaned up. I may have a solution to your adhesive. The product is called Aleene's Original Tacky Glue. It is all purpose and when applied in a thin coat it shouldn't come through the satin or fabric. It is used by crafts people gluing fabric and most everything. Since the California Air Resources Board has banned most products that have lacquers or spirits the industries have had to come up with water based products. Aleene's is a water based product and clean up is easy. Also it is not aerosol. It comes in a bottle or a tube and you can experiment with the fabric to see how it will work. If you local craft shops there do not have it, let me know. I will pick up a bottle and ship it to you. I use this product for a lot of my needs. It is used here extensively in the crafts hobbies. It is made by Duncan Enterprises here in Fresno California. I was first turned onto this product in my scale model railroad hobby. The guys used it to attach the track to the road bed without using nails (on N scale). The good thing about the glue is that if you want to remove the item or cloth, it will release without tearing up what you are gluing it to. It is water based and it should not damage your poly roof liner. With this glue, it dries clear and you have the ability to move or "position" the fabric before the glue dries. Doing a small area at a time will allow you to get good results. Email me and let me know. I will swing by the crafts store tomorrow (The 11th) and pick up a bottle or tube. Hopefully, this will solve your problem. Randy -
Roger's handcrafted 1:12 scale models
Randiego replied to Roger Zimmermann's topic in Our Cars & Restoration Projects
Roger, Under the magnifying glass (the forum watchers) of the public, you are producing magic. Like at a magic show, we, the audience, are always awaiting the next trick that you pull out of your hat. Those are TINY parts. Finishing the emblems for the plating company will be fun ! They are so minute, if there are any flaws, they will not be noticeable, only to you. One day, there will not be any more parts to make or parts to prep and paint. This story is an excellent diversion from our daily lives. We check in here and get our "dose" of Roger's Magic. You wow us all. Randy -
Roger's handcrafted 1:12 scale models
Randiego replied to Roger Zimmermann's topic in Our Cars & Restoration Projects
Roger, Cutting the lettering for the Continental is spot on. IF you were to enlarge them, they would match the 1:1 car. I do not envy you finishing them (final filing, sanding and polishing) for the plating company. I was working on a very minute turnbuckle (1:50 scale for a Military Flat Car with a WW II Sherman Tank as the payload. When I get it done, I will send you a pic). I spent 1 hour working on the tiny hooks to secure the load and spent an additional hour and a half on my hands and knees looking for the parts that I dropped (several times) :-( I am going to put down a white sheet next time I do something like this. Irritating. We are all awaiting to see how the headliner will come out. Nice to know that the weather is starting to change back to Spring time. Not there yet but coming. We here in San Diego almost washed away. More rain in Southern California that has been here since the early 90's. We broke rainfall records and we are not done with the rainy season yet. So much for living in a "desert". Always in Awe and respect for your craft, Randy -
Roger's handcrafted 1:12 scale models
Randiego replied to Roger Zimmermann's topic in Our Cars & Restoration Projects
This is for JPage, Going with 1:6 Scale allows you to get into more detail as the engine is larger. There is a guy, Louis Chenot who absolutely blew us all away with his 1:6 scale Duesenberg Phaeton. His engine RAN and I have attached the clip on U Tube showing it running. I live in Carlsbad but when he was here demonstrating the engine at the Joe Martin's "Craftsmanship Museum", I had the flu and was not able to attend. First Run of Lou Chenot's 1/6 scale Duesenberg engine - YouTube You can also see his car on You tube too. He completed the Duesenberg and won the "Craftsmanship of the Decade" award from the Joe Martin foundation. Joe Martin has passed but his company, Sherline tools, is still in business. With no heirs, he left a good part of it in Trust for perpetuity. The Museum houses a beautiful array of hand made model engines, airplanes, trains, boats, steam engines, etc., etc. If you are ever in So Cal, don't miss this museum. It is a living museum with craftsmen working in the back showing visitors the operation of their tooling (Lathes, milling machines, etc. etc. and they are actively working on different projects and models. Worth a visit. Louis has "lent" his Duesenberg to the museum and it is on display. He is now working on a 1:6 scale Garwood with a Liberty engine. Don't know if the engine will be running but knowing him, it probably will. So, J Page, (didn't get your name) is this engine going into a 1:6 scale automobile or truck? Or are you just doing the engine/transmission? The quality of your replication is spot on. Kudos to you. For Roger, we just got the pictures back on the Forum. They were upgrading or ? and all of the pictures were not attached and we could not see the progress for over a week. But they are back now and now we can see what you have been up to and what JPage was talking about as we could not see what he had attached. Looking forward to the next post. Randy -
Roger's handcrafted 1:12 scale models
Randiego replied to Roger Zimmermann's topic in Our Cars & Restoration Projects
Roger, I noticed the drive belt on one of the engine pulleys. I was going to ask what material you are using to make the "V" belts on the engine? Is that a very small "O Ring" that you are using? Not that any one would know as they will be only visible from atop. But knowing you, you probably have thought this through and have come up with a solution that is applicable for the engine drive belts. I hope that you are having a "mild" winter and that Spring will be coming soon. As soon as the weather is nice, we are looking forward to seeing the polyester work on the roof. It is just amazing how you are attending to ALL the details as some are not even seen, being hidden by fender liners, bulkheads, kick panels, etc., etc. But YOU know that the details are there, and so do we (Who have been following this build for the last 7 years). The postings are a highlight when I go to your site. Always looking for what you have done next. The bumpers and the grill look amazing. It will be nice to see them assembled and installed on the car at the appropriate time. This may be a silly question but do you keep track of the hours spent working on the Continental? Do you have a log that you keep? After building the Toronado and the Avanti, I was just wondering if you logged the actual time spent at the bench. Phenomenal work as always. Randy -
Roger's handcrafted 1:12 scale models
Randiego replied to Roger Zimmermann's topic in Our Cars & Restoration Projects
Oh the complexity of 12 scale ! The best laid plans of mice and men............ But we have confidence in your abilities. When you get the windshield wiper assemblies figured out, that will be a major accomplishment. Looking back, the window switches and motors were a "snap" in comparison. It seems that every time that you attack a problem, two more rise to get in the way of your progress. And people wonder why it takes years to get such a model/masterpiece completed. Lots of "trial and error" before you can get on to the next item. When a 1:1 car is engineered at the factory, there is a team of designers, draftsmen, mock up groups, just to get the parts to come together. And here you are doing this by yourself. For any who wonder why this is monumental, just get any simple model kit of a car and assemble it. Even though the parts are all there, for fit and finish, it still takes a trained eye and skill to put those kits together to make them look like the picture on the box. Now step back and try to do that same model from scratch...............................you will quickly get the picture what Roger is up against. And his model is in COMPLETE detail of the real car. Unlike any kit in a box. Even the Pocher kits don't come close. We are in awe. Randy -
Roger's handcrafted 1:12 scale models
Randiego replied to Roger Zimmermann's topic in Our Cars & Restoration Projects
Roger, only a trained eye would know the difference in the size of the rear screen. in the Mark (full size), was the screen for "exit air" or for air coming into the cabin? This car was ahead of it's time ! Almost a Raymond Lowey imprint on automotive design. Very advanced for the 50's. Are you using French glove leather for the interior? I understand that they have the thinnest leather for this kind of work. Looking forward to your next post. I will be in St. Louis over Christmas and Geoff and I will be looking at your posts to see what other gem we can view of the progress. Merry Christmas to you. Randy -
Roger's handcrafted 1:12 scale models
Randiego replied to Roger Zimmermann's topic in Our Cars & Restoration Projects
Roger, I am looking at the bumpers that you have polished, getting ready for the plating company. They look perfect ! I am sure that you see any and all little "flaws" (as you explained) and the painstaking work to get the brass finish perfect takes a lot of time and effort. In one word; Beautiful ! ! So they do the copper (conductivity) then the chrome. I am sure that it has been satisfactory for you for all these years. After all, with the mileage that these cars have endured, they will look good for an eternity to come. ! ! ! As long as they are not subjected to "salt air" that we have here at the coast, the finish on the model will be like "new" with only a "dusting" off of the model on occasion. How do you keep the models? Are they on a shelf for display or do you keep them wrapped up away from the dust and sunlight? The Toronado and the Avanti are beautiful examples of your work. I can't imagine that they would not be on display for all to see when they come to visit you. Do you have a glass case that they sit under? That helps with the dust. I have my Rolls Royce Phantom II "under glass" I will send you pics of that 1/8 model. It took a long time to build, even from the Pocher Kit. None of the Pocher parts fit well and it takes a lot of alteration and "fitment" to get the parts to be correct. Can't imagine building this car from scratch. THAT WOULD TAKE ME A LIFE TIME ! I would rather get my 1:1 cars done vs. building an intricate model. That I will leave to you, the master. Randy -
I am trying to upload more pictures and complete the story however, the Forum does not allow more than 19.53 megabytes per entry. How do I get more pics attached to this to complete the rebuild procedure?
-
Hey all, I am in the process of a ground up restoration on my 36 Business Coupe. I am in process with finishing another car before I can get to the Pontiac in earnest. However, knowing how costs escalate with time, I am doing the drive train and the rest of the car can wait till I can get to it. I have my engine at the machine shop. It has been fun finding some items, i.e. over sized crank and rod bearings. Pistons were not a problem. Egge in LA made me new ones. But finding over sized bearings before we machined the crank (20 over on the mains and 10 under on the rod journals) was a big hunt, but we got them and so on to the next item. The oil pump. No new oil pumps for 36 are available from the sources that we contacted. Maybe there are some parts houses or individuals who may have one, but for the month that I looked, I was not successful in my hunt. Every body has the "rebuild kit" but for my year, but it is wrong and I will tell you why. In the kit, you get two new gears, the shaft and three gaskets. First of all, the shaft is too short and there is no key way machined in it for the wood ruff key. And there is no hole drilled into the shaft to accept the pin for the drive gear. Have you ever tried to drill hardened steel? Not for the meek. SO after spending $70+ on the rebuild kit, I was not about to go down to the machinist and have a new shaft made, drilled and a key way cut. That would have cost more than a new pump (if you could find one). So improvisation was in order. For those of us who do not work for a rebuild or restoration shop, and we like to get our hands dirty, this is a pretty straight forward job (if your oil pump is not too far gone). I have attached pictures to show the steps that I took to get my oil pump back to "like new" stats. The pictures are large files and I am limited to how many I can attach so there will be several postings showing the progress of the rebuild. This first picture shows the components (with out the oil pump body) laid out. Two pump gears, drive shaft with the drive gear on one end and the gear cover plate. Notice the cover plate is nice and shiny. When I first took the pump apart, there were groves approximately 10 to 12 thousandths deep. Not too bad but definitely needing servicing. How I serviced the cover plate was to take 250 carborundum (or oxide or you choice of good abrasive paper), and lay it on a flat surface. My work bench has an area that has a steel surface just for this purpose. I laid the paper flat on the bench and took the cover plate and proceeded to "lap" the plate in circular motion constantly checking to see the progress. When it was totally smooth and the telltale grooves disappeared, I was done with that step. Be sure to wash the cover and clean it of any and all grit. Grit will make short order of an newly rebuilt engine let alone the pump. The second picture shows the pump body with the wear groves in one of the recesses. This side of the pump houses the drive shaft with the keyed gear on the pump end. Notice the second stub in the pump. This shaft sticks up, not allowing me to lap the surface of the pump. why that is of note here is that if you are to lap the 1 1/2" recess where the gear sits at the bottom, you have to lap the surface to ensure that there is no clearance or you will not have good oil pressure as oil will escape at the end of the gear. I am sure that if you wanted to get it completely smooth, you can take a torch, heat the body and extract the pin. Then you can use a 1 1/2" washer with applicable sand paper and shaft attached to "spin" the washer to remove the grooves. In my case, the wear was minute on the inside of the pump and since I have the cover plate smooth, the loss of pressure will be negligible. The third picture shows the shaft in the housing with the key way visible. This is the tricky part. When you do the re assembly, you have to be sure to have the key way in the gear and the key way in the shaft (with the wood ruff key in place) perfectly aligned. I did not heat the gear but used copious amounts of assembly lube when I was pressing the gear back on the shaft, going slowly and checking the alignment. I was fortunate that it was perfectly aligned and the gear pressed on without a hitch. The fourth picture shows the wood ruff key in place. The fifth picture shows me pressing the gear onto the shaft in my hydraulic press. When the gear becomes flush with the shaft, you need a drift to continue the pressing. In my case (next picture), my trusty 1/2" drive Craftsman socket came to the rescue. It did not take a lot of pressure and no harm was done to the socket. If you have a piece of suitable pipe in the right dimensions, you can use that. (My socket is squared and true, hence me using the socket). Be sure to oil the shaft to enhance the press. This is all that the forum has digital size for so I will sign off for now. I will continue in the next post. Randy


- 1 reply
-
- 1
-

-
Roger's handcrafted 1:12 scale models
Randiego replied to Roger Zimmermann's topic in Our Cars & Restoration Projects
Roger, The process for plating is the same for large parts as well as small parts. The liquid vats that the parts go into may be the difference. Are your parts "triple plated" (copper nickel chrome). or do you skip the copper step? Having brass polished I do not know what plating you have been doing all these years but I am sure that they are well suited for what you are doing. As far as the torch goes. We have a saying over here; "If it isn't broken, don't fix it". SO for all those years that you have been using your torch, it is a comfort level that you are used to. I am quite sure that you are "deft" (skilled) with the system that you are using. The "proof is in the pudding" as they say. It is sad that this will be your last model. But the amount of work that you do in one of these masterpieces is monumental. It is understandable why you would not want to tackle another one. Maybe a "small" little project may be on the horizon? You will let us know if you do so? The amount of polishing on these small parts is daunting in it's self. What the layman out here may not know about metal finishing; it is 90% preparation that gives the beautiful finish. I know. When I first started restoring my first Fiat, I used a company in San Diego. A year later, the chrome started peeling off the bumper. When I went back to them the owner just shrugged his shoulders. A few months later, they were out of business. Thank goodness, I found a good plating company right here in Oceanside. He does fantastic work. When I went into his shop, he was preparing a set of bumpers for a classic Ferrari. They just came out of the copper tank and were a work of art. It is sad that copper finishes don't hold up because it would be something to see a car with copper accents vs. the chrome. Any way, I had my Triumph Bonneville Motorcycle parts to do. Many small parts. He explained that it would take extra time to build a "tree" for all the small items, (screws, nuts, etc. etc) so that they would not get lost. He, not his workers, did this for me. And I got all of them back! (No small feat). That cemented our business relationship. As you well know, you get what you pay for. I pay a little extra but he delivers the most beautiful work. I had my Triumph Motorcycle, my Fiat parts, then my 36 Pontiac bumpers and other parts done (unfortunately, it will no be on the schedule to finish till I get the Fiat completed. It is in the body shop now waiting on me to pick the color that will look the best on it). Being in the watch capital of the world, your plating companies are use to working with small parts. I can imagine the quizzical looks on the tech's faces looking at the parts wondering what your "watch" looks like with all these unique parts. :-) We are awaiting the day to see how these parts will look when they go onto the car, er Model, er MASTERPIECE. As everyone else responds to your postings, " A MASTER AT WORK". It is so nice to be able to follow the Continental as it progresses. What else is so enlightening is that you EXPLAIN the problems and issues and how you overcome the challenges. For us out here who have attempted to build models (from scratch or kits) we can somewhat grasp the magnitude of what you do. I am looking forward to the next posting. It is what we have to look forward to in the cold weather months knowing that you are at your work station hammering, sawing, machining, trimming and fitting the parts to the Continental. We have our Thanksgiving season upon us. We all here (stateside) take time to have a break from our work and give thanks to our families and friends, past and present, God and all who came before us to create our great country. We are thankful during this season. So Roger, this Thanksgiving, I am including you in my list. I am thankful that you are out there with your Continental giving me the pleasure of watching this beautiful "model" come together. I wish you good health and happiness to you and yours. HAPPY THANKSGIVING TO YOU ! ! ! Randy -
Roger's handcrafted 1:12 scale models
Randiego replied to Roger Zimmermann's topic in Our Cars & Restoration Projects
Roger, I was noticing on your previous posting answering Marco's issue with the solder and his difficulty with the brazing that he was doing. I am amazed that you are using a large torch for your soldering. Have you ever used a micro torch? I have the Smith "The Little Torch" and use it extensively when I am soldering brass or even use it to heat difficult fasteners that need a little "help" to be broken loose. It is a very precise torch that is used in the Jewelry industry here state side. If you have not heard of it, I have attached three photos showing the torch head, the acetylene/oxygen tank set up and the box showing the torch. Had you ever used this type of torch? They are very reasonable but beware of the knock off's. One seller on Ebay was selling a Chinese (very inferior) torch that claimed to be a Smith torch. It wasn't. All of us that bought that torch found out what cheap junk results in. My torch leaked at the knobs and caused fires in the stem. I was lucky that I was not burnt and escaped injury. Smith came to the rescue and sent me their torch at a no cost replacement to me. I called them and asked the rep why they were replacing the torch without any cost to me as I did not purchase the torch from them. They said that they were going after the company representing them as "Smith" and they were replacing all the torches for those of us who unknowingly purchase the fake torches. I just love my torch. It beats dragging my large oxy/acetylene rig to do small jobs, plus all my modeling that requires brass, bronze, copper and steel soldering. I even weld mild steel with it. Brass and Silver soldering is a snap. The torch is pretty reasonable. I bought my torch for around $95.00 (US) several years ago. Plus the acetylene and oxygen tank set up. Two months later, after experiencing leaking and flames coming out of the handle, I contacted Smith. The rep told me to send it back for replacement. I sent the knock off back to Smith and they sent me a brand new "Little Torch" with the 5 Sapphire tips. What is great about this torch is that you can direct a micro flame into very small spots and areas. You can control the heat and amount of flame that you need. Perfect for modeling in brass or most any metal. Except for aluminium. Also, you being the expert, it is important to use a good quality solder, flux paste and KNOW what you are doing. All your experience can't be bought. Years of trial and error to find what works the best. In Awe............ Randy


-
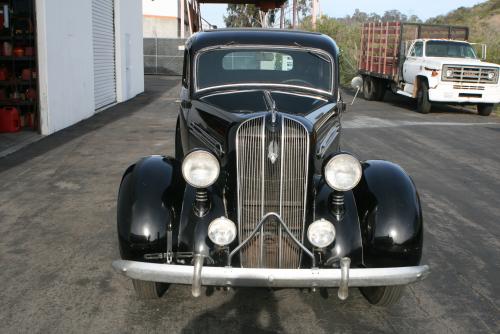
Gentlemen (and Ladies) In May of this year, I purchased a P2 Touring Sedan. Getting it out here from Michigan, I discovered that it was a Southwest (United States) area car. Not a single spot of rust any where on the car or under frame, sheet metal, etc., etc. Very rare for an 80 year old car and certainly not from the Michigan area. It was garaged most of it's later life. The roof was replaced and the individual did a great job on that. The interior is all original and I am just cleaning up the car. I plan on driving my Tudor Sedan a lot. The car from 20 feet away is very presentable. Getting up close you see the issues with the paint and some small body work that needs attention. Hence a "driver" and not a show "queen". I tried the windshield wiper motors. They work but are very slow. I imagine that they are all gunked up or the vacuum lines are old and cracked (somewhat). The headliner panel that comes off to expose the workings and the motors looks straight forward enough, but after removing all the screws and the wiper motor knobs, the panel did not budge. Is there anything else besides old age that is holding it in place? I do not want to damage it in the removal. Also, if the hoses need to be replaced, is that an ordeal to get them installed? I got new hose from Gary Roberts (very nice and honest man), just in case the old ones are compromised. A good friend of mine, Andy Lee, gave me a very good idea. He has 3 36 Pontiac coupes. The downfall of the vacuum system operating the wiper motors is; If the engine is under load, the amount of vacuum available to the motors is diminished. He has a very unique answer for that. He took a length of 4" pvc pipe, capped off both ends and drilled and tapped each end cap to take a nipple. The vacuum line coming from the engine is routed to one end of the "tank" and the other end runs up to the motors. Depending on the room that you have under the dash will determine how long a tank that you can fit under the dash. BUT........ now you have a vacuum storage tank that will allow the wiper motors to run at a good, constant speed without the horrors of not being able to see where you are going. We do not have very much rain here in So Cal, but when we do, it will be nice to know that I won't be subjected to limited visibility. I got new wiper inserts for the wiper arms and am ready to go as soon as I can access the motors and service (or replace) them. Any help with this will be appreciated. Thanks, Randy
-
Roger's handcrafted 1:12 scale models
Randiego replied to Roger Zimmermann's topic in Our Cars & Restoration Projects
Roger, Are you close to attaching the roof to the model? Once the doors are finished and the wiring is routed, will you hang the doors before the roof goes on? I am assuming that once the roof is attached, It will not be removed again. But there is so much more for the interior to be done. Upholstery, carpet, finish paint, headliner, etc., etc. I assume that the items I just mentioned will be done before the roof is attached. And once it is attached, can it come off again? Is it attached with screws and nuts or is it soldered on? Is the roof one of the last steps before the final finish? So many questions. To Amphicar Buyer: I have a very fast daycruiser (23' with a 454 Mercruiser powerplant). Maybe I could get you to share the costs and we could tow a fuel barge across the Atlantic and get to Europe in a much quicker time frame than his nice little Amphicar could get there. AND it would have to be in a calm, storm free time that the Atlantic would offer. I motor from Oceanside or Dana Point harbors to Santa Catalina Island off the coast of Southern California. It is 55 miles from Oceanside Harbor. I get there in a little over an hour. I have to leave at 6 AM when the ocean is "flat". Nice little jaunt. Crossing the Atlantic would be some adventure ! Suffice it to say, Swiss Air would be the modus for traveling to Switzerland. Back to the Continental. Even though the ashtrays wont open or the inside door handle will be in op, the fact that they are there and at one time were functional is all that counts. Who is going to reach into this beautiful masterpiece and try the door handle? Or for that matter, the ashtray? The visible feast for the eyes will be consuming most of the admirers time LOOKING at this beautiful model. When you are finished with the model, there may be a time to make a video presentation and "walk around" with you, Roger, showing the model and demonstrating the features of the car that are operable, I.E. opening the hood, trunk, doors, moving the windows up and down, honking the horn (just kidding), turning on the lights, etc., etc. We would all love to see you doing just such a video. I am sure that there are one of us out here that could set up and stage a "set" for just such a project. It certainly would be a LOT less labor intensive compared to what you have been doing for the last 6 years. And this model and your story must be shared with the world outside of the Forum. Food for thought. As always in awe of your prowess and magnificent craftsmanship, Randy -
Folks, I do not know what happened ??? I thought that I better re assemble the heater motor before I lost the small parts. I oiled the shaft at both ends and slipped the end cover on one end and the brush cover on the other. I carefully slipped the cover with the brushes opened up to allow the commutator to slip between the brushes. I put in the two long bolts and secured them. I took it to the battery and connected the wires and let it run to run in the brushes. It ran so smooth and as it was sitting there running, it gained RPM. Finally, it got up to it's running RPM and I disconnected it. I thought that I would put a loan on it, so I slipped on the fan and secured it with the set screw. I set it in a cradle and hooked the leads back up to the battery. It ran smooth. AND IT WAS BLOWING ! What the H****? ? ? How the heck did it decide to run in the right direction? I swear, I did nothing different this time than I have done in the past. There is a Poltergeist or unhappy spirit connected to this car. There is no logical explanation as to why it was running in reverse before and now it is not. I am not going to complain. I will reassemble the heater put it back in the car and hope that that is the end of this. EERIE ! ! ! Makes me wonder what else I will be experiencing with this car. Some spirit is inhabiting this beast. (October brings them out?). I would still like to know what the flap does in the rear air intake. There is a round inlet and a "square" inlet. Both feed the squirrel cage. There is a gate controlled by a lever that allows you to select the round intake or a "square" intake right next to it. Were there applications with the upper end cars that had an intake tube coming from another area of the car that you can select or leave set one way to collect the air right below heater box? If you know, please enlighten me. Thanks Randy
-
Since my cell phone creates very large pics (it is a Samsung with a 16.5 Mega pixel camera), I have to post the pictures of the switch separately.


-
Folks, I purchase the 36 P2 Touring Sedan in March. I got through the transmission issues but now I am in a quandary. I am cleaning the cooling system. New water pump and hoses, I serviced the radiatior which was in excellent shape, just full of crud and one small leak. The heater core is in great shape and we just boiled it out. I took apart the heater. It was not running and was very dirty. I got it on the bench and the issue was the switch , I took the wires from the motor and touched them to the battery. The motor worked but it was noisy. I will tell about the switch later. I disassembled the unit completely. It is a Chrysler Corp. model 17. Is that what they put in the Plymouths? This unit was in the car and is square, not round. I cleaned off 80 years of crud and polished the outer housing, including the "Art Deco" bars that are attached. I took apart the motor and cleaned the commutator and brushes, taking 600 grit sand paper to clean off the glaze. One end of the shaft had a burr and I filed that off. It now slips through the bushings with no issue. I put it back together and set it on the bench, attached the leads to a battery and Voila, it ran smooth and no noise. I lubed the bushings with lite oil and cleaned the heater housing removing dirt, cobwebs, and the oil that was deposited by the motor. I replaced the four pieces of 1/2 vacuum line that were very hard and not pliant. The 1 1/4" length pieces are used to cushion the core from the housing. I re assembled the heater assembly. On the bench I attached the leads to the battery. Runs so smooth and quiet. ONE PROBLEM. It is running reverse from what it should be running. Instead of blowing out through the heater core and out through the doors, it is "drawing air in. ? ? ? I switched the leads on the battery. Didn't matter. Still runs the same way . I thought that if you switched the wires it would reverse the direction of the motor. It is 6V DC. How does it NOT change direction? Well, I thought that the resistor switch would have something to do with that. I sprayed penetrating oil on the shaft, and got that to turn freely. This switch has the bulb under the knob and when the light switch is energized, it lights up through 5 small pin holes in the metal shield inside the knob. AND IT WORKS ! In this model (17) there is a squirrel cage blower inside the housing that shunts air on either side of the central fan blade. This blower has a round intake in the back where the air is admitted. There is a second port with a lever that operates a butterfly to select which port is open. You can see the port in the third picture. Not having a defroster system in 36, I am in question as to why there is a fan and an enclosed squirrel cage blower in this unit? Maybe this was the unit used in all of the products that Chrysler Corp made in the thirties? Any way, I am stumped as to why I cannot get the motor to run in the right direction. One of my local guys thought that it may have to do with a diode in the voltage regulator. BUT the motor doesn't attach to the generator. It goes to a power side of the resistor switch and a ground. If any one knows the answer to this riddle, I will be so ever grateful. I am assuming that this heater is the correct for this car, but who knows? It had two bolts that came through the firewall and secured the heater assembly in place and those bolts and the holes had not been removed before. Hope it is a simple solution as I am stumped not being an electrical engineer. :-( Randy


- 1 reply
-
- 1
-
-
Roger's handcrafted 1:12 scale models
Randiego replied to Roger Zimmermann's topic in Our Cars & Restoration Projects
Hellooo Roger, Glad to have you back. Wow, the door really became several issues. I am confident that you will handle them as you always do, with logic and engineering. Bet you are glad that there are only TWO doors to fiddle with. Can you imagine a 9 passenger wagon with operating tail gate and glass? Only you could handle that task. -
I have another question. My trunk lid has two large carriage (mounted in the lower center of the trunk lid) bolts that were painted over by the painter. You can see them in the picture of the rear of the car. Was there anything mounted on the trunk from the factory or is that something an owner added at one time? I will be repainting the fenders and headlight nacelles. They are scratched and the fenders have dings and bumps in them. I will be removing them this winter and attending to them. While I am at it, if the bolts in the trunk are not factory original, those will be removed and filled in. I wonder if there was some sort of "carrier" or luggage rack that was available back in the 30's that the car owner could have mounted on the trunk? Any help will be appreciated. Randy
-
Ply 33, Eureka ! In the box of extra parts that I got with the Plymouth was a Service manual that is from Australia. It is the same as the American version except that it is crisp and clean with photos and illustrations. You were right. The other manual that I have is a reprint, albeit "official looking" right down to the red, white and blue cover. However, the illustrations and photos are very poor, barely discernible. The Aussie manual is the answer. Thanks again. Randy
-
ply 33, It looks like the original, however, the photos are not as clear as yours, so it must be a reprint. I have another Service manual from Australia. It is exactly as the original service manual except is says Chrysler Australia Limited on the front. It is printed on glossy, heavy stock (cover) and the printing, illustrations and photos are very crisp and clear. Had I had this manual when I was trying to re assemble the e brake, it would have been easier. Thank you for your help. Randy
-
Roger's handcrafted 1:12 scale models
Randiego replied to Roger Zimmermann's topic in Our Cars & Restoration Projects
Roger, Have you thought about the color that you want the Continental to be finished in? Are you picking an original color that was used back in the 50's? It looks like you are "rounding the bend" so to speak and are coming up on the time for the interior finish work (upholstery, headliner, door panels, parcel shelf, interior paint and carpet), disassembly, painting and re assembly. It is getting to be an exciting time in the life of the Continental. 6 year gestation period. Lots of stretch marks, eh? :-)


