


Ron Lawson
-
Posts
1,391 -
Joined
-
Last visited
Content Type
Forums
Gallery
Events
Posts posted by Ron Lawson
-
-
9 hours ago, nearchoclatetown said:
Ron, I would never tell. Only thing I do is lay something down when the phone rings. And then I forget what I am searching for after the call.
That's an easy fix Don't answer the phone
-
1 hour ago, nearchoclatetown said:
OUCH! No laughing Ron. Matt, you do realize you didn't have to tell us that? Or you could have just said you were practicing. Or that you intend to buy another Victory. You secret is safe with me. Did you see that, Ted??
I would never laugh at Matt ,Doug as I do the same silly things I sewed up 2 left door pockets the other day at upholstery classes I hope my secret is safe with you too
-
 1
1
-
-
3 hours ago, RichBad said:
Wry similar to the series 128/129 but that mounting bracket on the front end is different. The 128/129s bolt straight through the guard to the running board.
That has most probably been added to attach it to a replacement wooden running board The ones on my car had been "converted"
-
 1
1
-
-
Its a bit of a funny one I looked up the Senior parts book and they list 4 different fenders If the fenders were in primer that was one # and if they were black another # and so on I think that the coups and roadster fenders differ from the sedans and touring cars
-
No I never mentioned the fast 4 but yes there is a possibility as well
-
1
-
-
3 hours ago, nearchoclatetown said:
Hope you are feeling better!
Yes thank you I am on the mend Spent some time in the shed today doing wood work on a 29 Buick Roadster and also some Dodgey work too
-
2
-
-
14 hours ago, Mattml430 said:
Here’s a few pics, I hope it helps.
Get the welder spotting on a piece of scrap like this first.
line up your material with your clamps or magnets.

Tack every 3/4 or so. From middle out.

Tack in between each weld again and again until they all join. Doing it this way prevents to much heat getting into the metal.
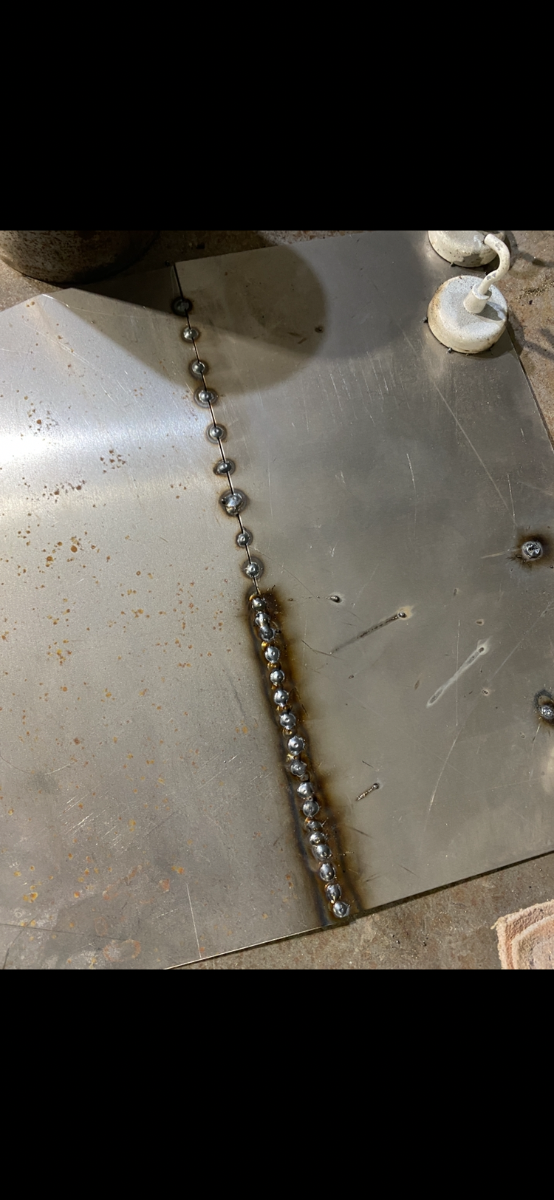
Clean up with sanding disc and finish off with a soft pad sander.
Matt you make it look so easy
-
2
-
1
-
-
Oh yes they do With slotted screws as well hahaha
-
1
-
1
-
-
the 28 senior has the same style of fender
-
1
-
-
Rich I have some old bits in the shed I will check tomorrow and let you know
-
1
-
-
Looking good and it's great to see that you are well enough to get back onto finishing Daphne
-
1
-
-
Well there is not going to be any progress on the Senior for maybe a week or two We came home from a fantastic 4000 kilometer trip up through the Pilbara Seen some beautiful gorges and Pilbara sunsets and now all of this is a distant memory as I battle a severe chest infection I only have 52% lung capacity thanks to Legonella virus that wrecked my lungs in 2005 so something like this leaves me as weak as a new born babe I will keep you posted on my progress
-
Its off a 1915 DB Roadster
-
1
-
-
2 hours ago, Mattml430 said:
Bloody screw police Rich they don’t miss a trick. 😂🤣
Its looking great the doors look to be fitting very nicely.
I was thinking once we’ve got the doors all prepped and sanded we might spray the gold on and then fit them back on the body to get the pinstripe spot on.Just keeping you on your toes Matt haha
-
1 hour ago, RichBad said:
Don’t worry Ron, only temporary - no Philips heads on this car;). I think I have enough with what you gave me already - thanks!
Okay mate no worries
-
31 minutes ago, RichBad said:
Got two front doors nailed to the frame. Definitely works well doing this after putting the body on the chassis as it’s allowed the gaps to be tweaked to get them nice and even.
Also fitted one catch and the rubber stops so I can properly close one door (and it stays closed). They work really well!
blue tack worked well to get the catches positioned before drilling the holes.
Catch and stop rubbers in place


Alignment and gaps have come up pretty good.
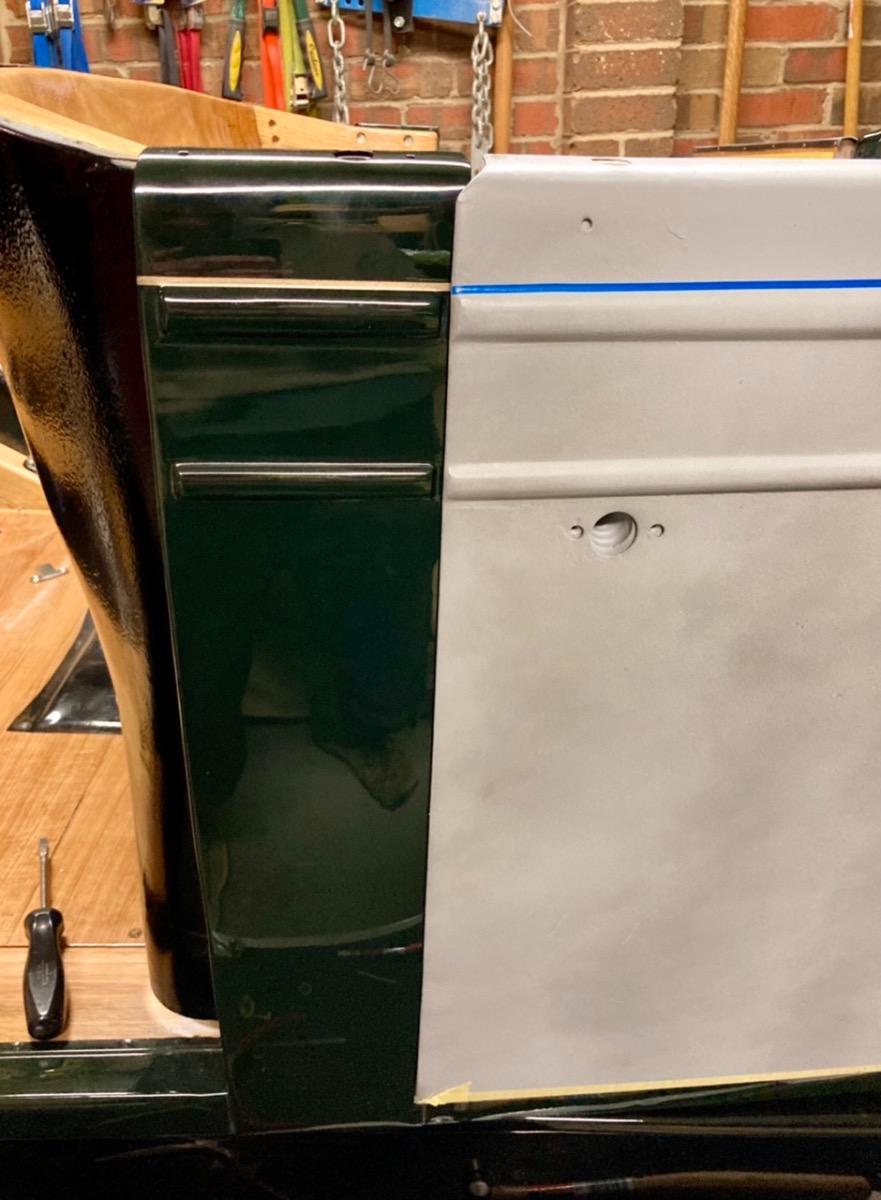
Set the gaps when closed with some guidance from Bob (about a matchstick) don’t want to damage the lovely paint!

Hope the Philip head screws are not staying in the door catches Rich if you need any more slotted screws please let me know and I will send them over
-
2
-
-
1 hour ago, RichBad said:
I use my arms, can’t forget to turn them off when turning:)
although occasionally I find my kids work well, although not always reliable;)
Good one Rich and no worries about the battery being flat either
-
2
-
-
Thanks for posting Matt I will be able to make up one good switch out of these two Both are in good condition except that the dark one needs a new rubber wheel in it The wheel runs on the underside of the steering wheel and is part of the self canceling mechanism This old yobbo forgets to turn them off that's why I have opted for this type of switch
-
2
-
-
The head light switch on my 28 2249 Senior is as yours is in the photo and it is lifted up in a clockwise direction Positions are tail and park lights, Dull or dim headlights and brighter (but still dull ) headlights
-
1 hour ago, Mattml430 said:
Hahahaha Will always have a go at anything Ron. I do have a big scrap bin that is always full. 😉
Now this is coming from a man that carved out a Senior radiator badge from a block of brass and it looked like an original.Yeah mate ya do things for your cobbers especially when he seen it ,it was "I want that" so I made it so he wouldn't pinch mine Not that he would haha
-
1
-
-
6 hours ago, Mattml430 said:
Nice to have you safely back Doug. Hope you had a great holiday away.
Progressing along with my luggage trunk this afternoon. Had 2 attempts at making the top it can be tricky getting all the measurements correct on the rolls and then have them line up square on the edges. My first fail at the lid here.

Second attempt went a little better.

Just one end to weld up now and the fit the piano hinge. Thank god cold rolled sheet it reasonably cheap.
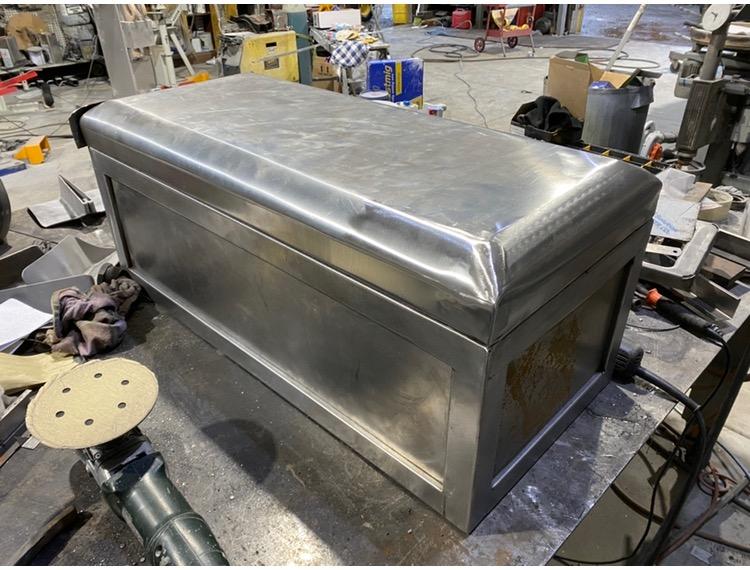

Is there anything that you can't make? !!!
-
1
-
-
1 hour ago, Mattml430 said:
Looks really nice with the rubber to mate. Rich gave me some for my screen and it fitted and looks great.
You do know by cleaning up the shed Ron you’ll loose 2 days not just one. It takes another day to find everything once you’ve cleaned up.Nah mate I have to service the D Max on Saturday and fit a tranny cooler to it as well so I have to re organise the cave to free up my hoist and move the Buuhick down into the back corner My mate Ray is coming over to lend a hand
-
11 hours ago, Mattml430 said:
The windscreen frame is all but completed I still have to drill the holes for the handles and fot the rear view mirror I can't find the mirror bracket that I put away in a safe place. I think we have all done this before

Took the frame into the windscreen people today for the glass to be cut and fitted The guy was insisting that they would have to use a Rubber sealing compound to set the screen I insisted that they use the rubber that I supplied because the frame has to come apart to fit the glass After he retrieved his brain from under the pillow and with me showing him how it came apart all was well There won't be anything happening tomorrow as a shed clean up is on the agenda
-
3
-
-
Chrysler changed things on their cars like we change our under ware and do yo keep record of what colour you wore on a certain day Same goes for Chrysler Cars
-
1
-
1
-


Restoration of Victory Six sports roadster.
in Dodge & Dodge Brothers
Posted
Your a bloody genius Matt