


hursst
-
Posts
1,570 -
Joined
-
Last visited
Content Type
Forums
Gallery
Events
Posts posted by hursst
-
-
This is one of my favorite cars. Great work so far!
-
 1
1
-
-
Yes, painted the carb bodies and main parts with Eastwood's Carb Renew II. Polishing was not practical due to the amount of work involved and the condition of the parts with all the nooks and crannies.
-
Sort of reached a milestone today...sort of finished one of the carbs. I have the throttle shaft and idle stop lever out for machining, and it's taking much longer than I thought, plus I have to finish the overflow drain tubes, but I'm ready to start on the second carb. It turned out really well, at least in the way it looks. We'll see if it actually works, since this is the first time I've rebuilt a carb. I'll leave the final tuning to the pros once everything is all together.
Here's the "completed" carb (Photo 1). Here it is next to the one I still have to restore (Photo 2). Very pleased with the results thus far.
In other news, the transmission restoration will be delayed for 1-2 months, as the shop owner had a death in the family and is completely backed up. No harm, no foul, as my goal is to have the engine and trans in by the end of the year, so plenty of time.
Whilst I keep working on the carbs, I will probably choose an engine shop in about 2 weeks and hopefully have the engine off to that shop in about 3 weeks. Really looking forward to working on the body. I'm ready to move on towards getting the car completed, but still have a long way to go.


-
3
-
-
Yet another restoration I'm looking forward to seeing. Now if I only had the time to read about all the cars and posts here. Good luck on another great car.
-
Great work, but I know the feeling of taking 3 hours to do 20 minute jobs. That's every time I work on it. Looking really good and still making fast progress.
-
1
-
-
DrData, I've kept all the old parts from the car in case they can be saved/used/restored or for reference in the future. Some items are not worth trying or restoring right now, like the 45+ year old condenser or the 50-yr old brake rotors, but I'm holding on to them for reference. I'll get the car running, then try to swap condensers once I get it baselined. I have a few other items, like the original and correct spark plug wire ends that I may try to re-install after the car is running well.
Jeff, I've never rebuilt a carb, so I shouldn't be rebuilding anyone's carbs!
Greg, good tip. I will hold on to the original bits and maybe try that in a few years. I'd have to learn how to silver solder, so for now, it's easier to go with the new stuff.
-Chris
-
Pretty deep into the carburetors at this point, but making painfully slow progress as I learn and/or find problems as I go. Here's one of the problems, the holes in this lever for the first carb are elliptical and/or worn too large. The main throttle rod and throttle plate are worn down and have elliptical holes as well (Photo 1). Repro lever on the left, old one on the right. Notice the larger or warped holes. The repro throttle rod is to the right of that. Annoyingly, it is way too long and does not have the hole for the idle lever pin drilled, so I'll have to make a trip to the machine shop and spend more $. It was be nice if Moss had mentioned the extra time and expense I have to put in if I buy this part. So, I'm waiting on buying the throttle plates and other parts before I continue on this portion, should have them next week.
Here's the first carb restored so far (photo 2). Compare to the pile of junk it was before, seen in previous photos, it's turning out quite well so far. I'm doing it piecemeal, like many other parts of the car, as I wait for new parts to come in or paint to dry, or whatever other problem comes up. I used Eastwood Carb paint for the body, the Eastwood "Zinc" paint for the add-ons. As with everything else on the car, I'm trying to reuse any original parts if they are serviceable. Most of the steel parts on the carb were quite corroded, but cleaned up nicely after 2-3 days in some Evapo-rust. Getting these very small parts zinc plated is a bridge too far for me due to the corrosion, nooks and crannies, small size, and the great expense of having it done right. I can always do that in the future if it's not good enough.
Started messing with the float chamber and it has half of Brighton Beach in it (Photo 3). These pot metal pieces, or whatever they are, seem to clean up with lots of degreaser, a few light runs with a Dremel tool, some steel wool, and some acetone, before the carb paint. Being carefull not to heat them up too much. The second carb should be much easier to restore/rebuild, as I should know much better about what I'm doing, since I've never done this before. Got some great tips at the Gettysburg show from a fellow MGA owner, too. Great all the AACA'ers are so willing to help, hope I can return the favor many times over.


-
The trans is in the shop. I should have it back around August, which is about when I should be able to ship the engine out for assessment and hopefully rebuild. In the meantime, I've still been working hard on all the small ancillary pieces to the engine, especially the carbs. I keep finding worn out parts on the carbs, so I keep ordering them from Moss. I've found that some of the carb parts from Moss require some "finishing," either major or minor, and are not ready to just go right in. Better than nothing, I guess, but frustrating. I'm down to the last few bits on the engine, other than the carbs. I'm now scrounging for small engine related parts in the pile to pull out and restore, so almost there.
I finished one of the air filter assemblies (Photo 1). The paint job on the other one is not satisfactory, so I need to do some more work on it. Was able to reuse most of the original parts, with the exception of the filters themselves.
I bought a repro coil from Moss (Photo 2). It's quite different than the original (original on the right), but it will do for now. I bought a repro sticker and put it on the repro coil (on the left). For the life of me, I don't understand why so many reproduction parts are either crap or inaccurate or both. The sticker design has the overall theme correct, but the fonts, size, and overall fidelity are way off. I don't understand this cutting corners thing with repro parts. I would gladly pay much more if they could make the part the same as the original, rather than some cheap knockoff that costs less. If you're taking the time to repro a sticker, can't you just scan an original, clean it up digitally and make a clean basis from which to print repros? I would think doing it correctly would take the same time as doing incorrectly, when you're starting from scratch.
Also finished the carb heat shield (photo 3). Turned out really well, I think. For comparison, here's the original mess I started with (photo 4).
Once I run out of small engine-related parts, I'm going to start pulling out ancillary body panels, such as the dash, fender supports, and interior panels, blast them, and get a primer coat on them in order to try out my new paint gun and see if I can get it working right with primer. Never used one before, so I'll have a learning curve. I'll slowly move into the fenders, aluminum parts (doors, hood, trunk lid), then work on the main body. Goal is to have the whole body completed and on the car by 2020, and try to do most if not all the work myself.
Happy July 4th!


-
Carbs are SU4. I should be okay with getting some new carb parts from Moss, but I'll keep your in mind in case mine are somehow beyond repair.
-
I wasn't happy with my progress. I meet a lot of guys and I ask "How long did this restoration take you?" A lot of them say "Oh, a while, about 18 months or so." This is incredibly fast, my last resto took 9 years and I'm already 2 years into this one. I guess these folks are either retired or a pro shop is doing the whole thing. I don't want this one to be another 9 years, so if I can do at least an hour each day during the week, I think I can speed up progress a little.
Thanks, I still love seeing the results of your resto; beyond professional.
-
Took a day off work and spent some more time with the MGA. Finished the preliminary cleaning of he transmission, finished painting the main floorboards (2 days ago), and started work on my carburetors. I got a copy of the SU carb manual from the MGA club in the UK a few years ago, and now putting it to good use. I exploded one of the carbs and it wasn't too bad with help from the manual (Photos 1 & 2, before and after). I'll need to do a lot of inspection of the various parts as they've been sitting for such a long time. Already discovered that the idle setting lever has worn into the main throttle shaft, creating excessive play. I'll have to replace the main throttle shaft and lever pin. I may be able to keep the lever, but an screw has broken off in it, so I'll have to drill that out.


-
1
-
-
Still able to stick to my edict of doing at least an hour each day (when I'm home).
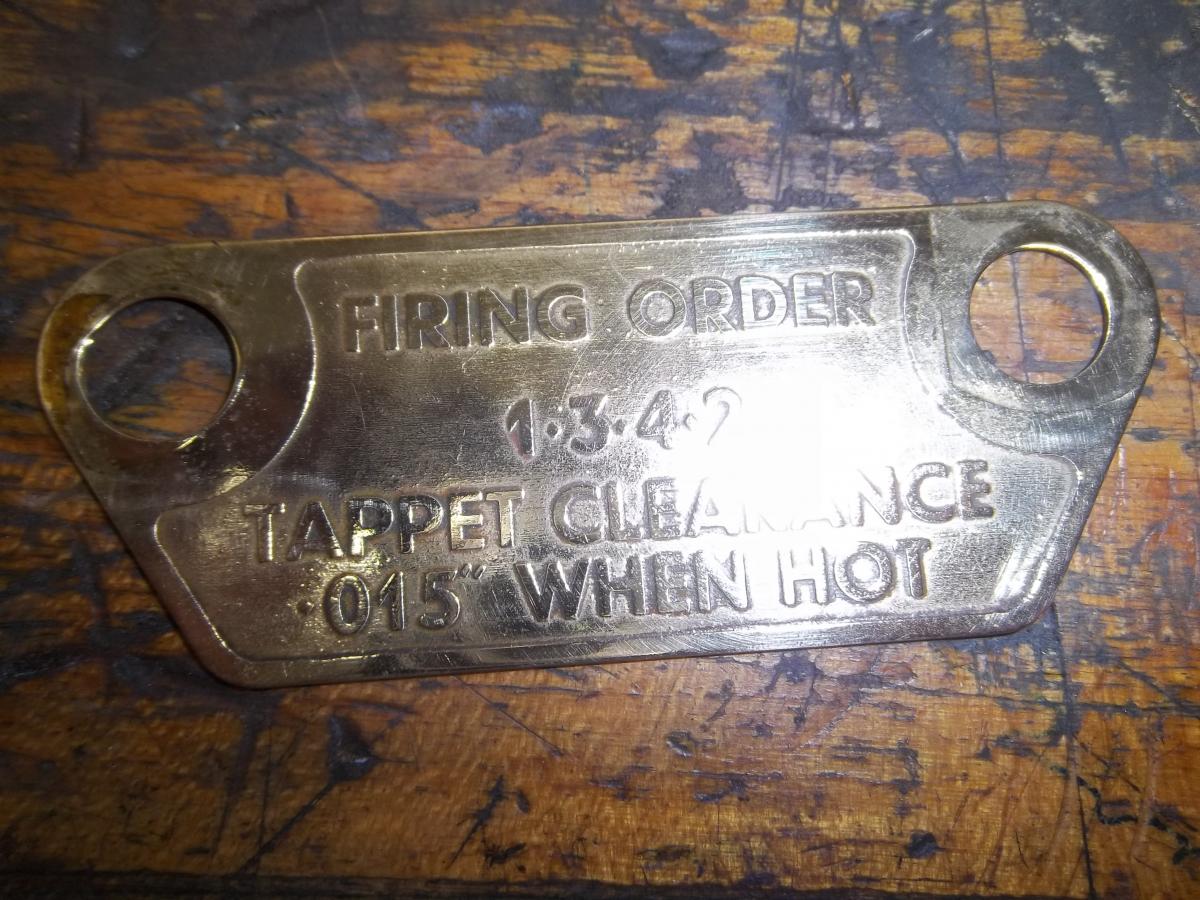
I finished the intake manifold yesterday (Photo 1). Also includes a bracket and brass firing order guide tag. Just need the gaskets on each side.
Finished painting the air cleaner assembly tops (Photo 2). Tough to get these painted well, as there is always dust and dirt around. May have to touch these up a little if there are any irregularities in them after they dry. Should be starting the lower assemblies soon, before I start on the carbs.
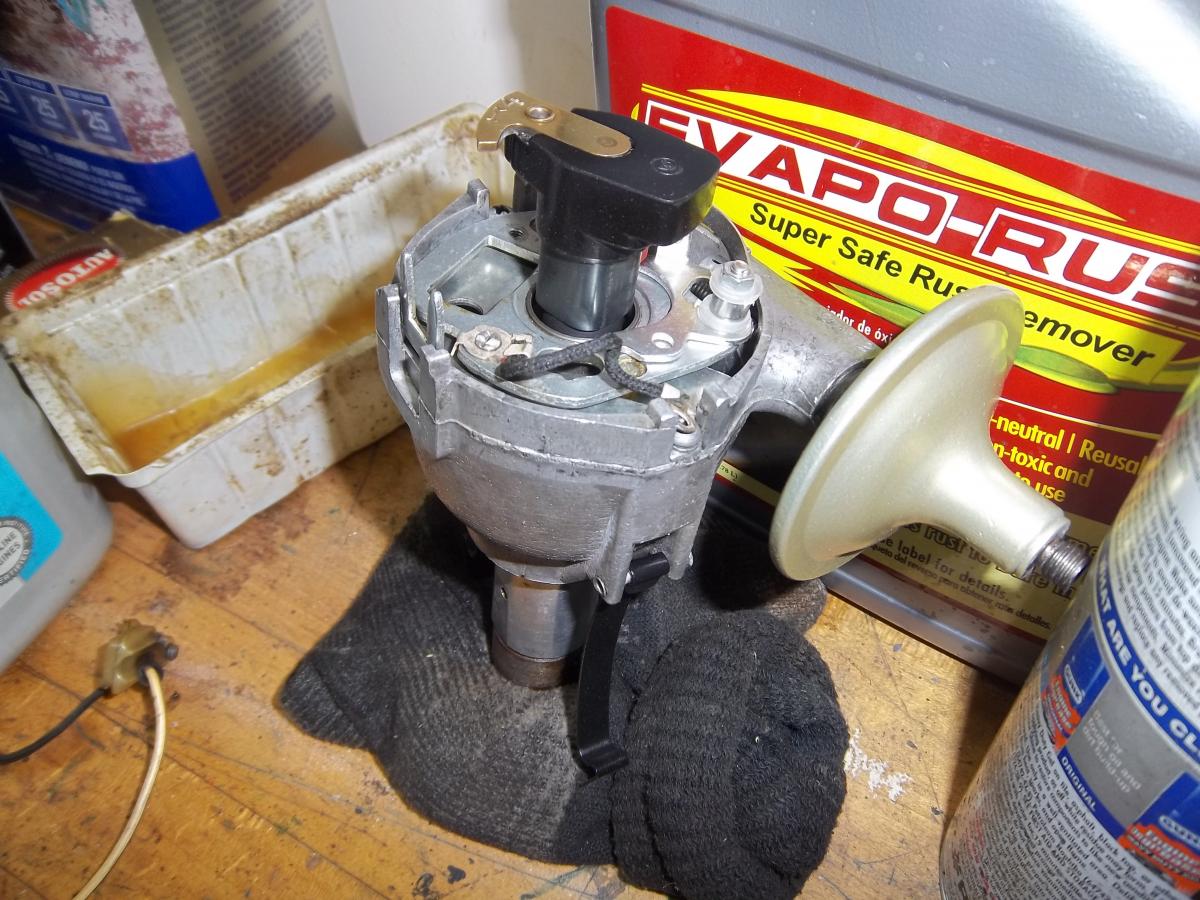
Also got my condenser in from Moss, so finished up the distributor (Photo 3). Tried to reuse as much as possible, but replaced the points, condenser, plug wires, and coil wires. Was able to clean and reuse all the other parts (with help from a junker distributor I bought on ebay to replace the main shaft. Very happy with the results on all these pieces, was able to restore most of the engine parts rather than replace. Should make for a much more authentic restoration.
-Chris


-
3
-
-
Angelo, I'm a stickler for originality, so I'm going with the original color, which of course, is Old English White, just like yours. Black interior with white piping, gray top. I must say, I've always thought the Dove gray is one of the best colors.
-
Looking great! Nice that you got the reamer and did your own shocks. I shipped mine out due to lack of machine tools and the knowledge to do it right even with machine tools. Makes the resto even better when you can do so much of it yourself.
-
1
-
-
Glad to see more posts and the great progress you're making. Still perfect work.
-
Got a good 1/2 day straight working today. Trying to do 1 hour a day on weekdays, then as much as possible on weekends, if I'm in town.
Finished restoring the tools that came with the car and the few tools I bought since then (Photo 1). Will be slowly finding the rest of the tools over time. Good side project while working on the main parts of the car.
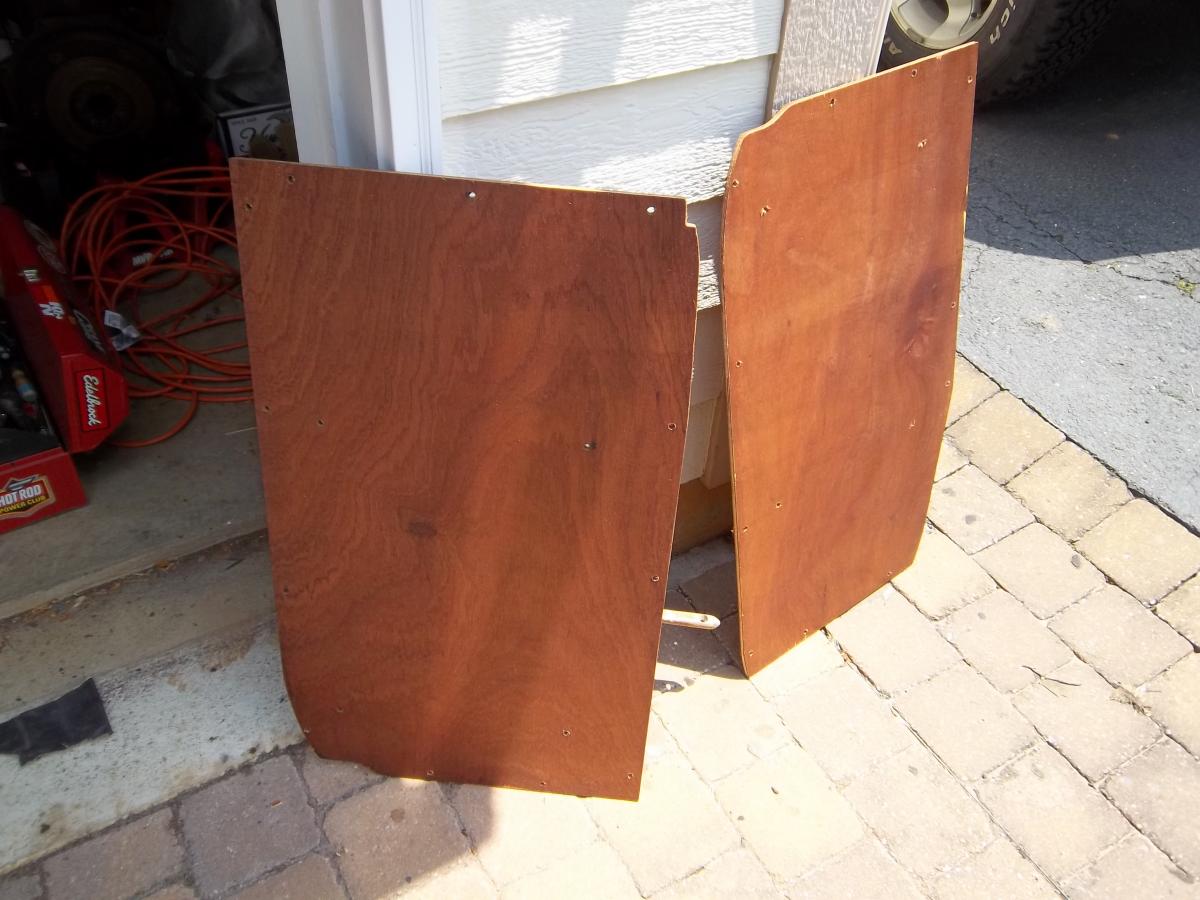
Bought some high-tech wood sealer from a specialist in California. Works as a wood sealer and primer and was recommended on the MGA blogs I read. Looks great and should perform as I would expect. Will need at least 2 days to dry and cure, then I can paint it the correct black and install the seat mounting hardware (Photo 2).
Started and completely the intake manifold. It's really simple, just some aluminum piping, really. Stripped it of the few drops of original paint that were left, cleaned all the grime off it, primed it and painted it as original. Also zinc plated the nuts and bolts to the same. Just need some new gaskets.
Also broke out the carburetor assembly. Started at the top with the air cleaner lids. Here's one stripped to bare metal and the other as it came with the car (Photo 3). Should have these primed and painted tomorrow.
Otherwise, I'm currently shopping for a transmission shop and engine rebuilder. A buddy of mine has some good local contacts, so should be visiting those guys as early as next week. Hope to have the engine and trans complete and in the car by Christmas or earlier, so I can start on the body for 2019. I think I'm on a 5-year track; 2 years in so far. Taking a long time because it's hard to find time to work on it, and I want to get it as accurate as possible, with great attention to detail, which takes lots of extra time.


-
2
-
-
Nice project, looks great! I ended up with a broken exhaust manifold and rusty gas tank as well. I bought used replacements, but holding on to the broken pieces in case there's any chance they can be repaired in the future. Hate to waste any part that may be of use somehow. I should be where you are in about 6 months, with any luck. Thanks for the post!
-
Thanks, I'm on the right track, now. Have all the parts and most of it reassembled, just need the condenser before I shore it up. On to the carburetors next.
-
Try Ficken Wiper Service; Google them, they may have it, or if you can find one that doesn't work, they can fix it.
-
I have very little time at the moment, but I've been working on the distributor and took it apart quite easily, but couldn't get off the cam assembly from the top of the main shaft. Tried heating, prying, Liquid Wrench, but nothing worked and I ended up damaging the shaft in the process, so I purchased another partial distributor on ebay to use for parts. Like anything, I found out what I did wrong after I ruined it, so lesson learned. I've been piecing it back together and so far so good (Photo 1). Just got new points and waiting on a condenser.
Polished up the firing order tag. Nice brass piece, cleaned up well (Photos 2 & 3). Looks better than photo 3 after a quick polish with the dremel tool.
Still working on the tools that came with the car, so only have to paint the engine crank, then restore the tire pump. The jack handle assemblies have been restored. Found a set of Dunlop tire irons in the UK, so I'm slowly piecing together the missing tools.
I picked up some special wood sealant/primer from a specialist, so if I can find the time, I'll be sealing the floorboards with this stuff, then painting them, then putting in the seat mounting fasteners that attach to the bottom of the floorboards.
Next is doing a final cleanup of the transmission, which means undoing all the bolts one at a time and cleaning around the holes. Right now, all the gunk is congregated around the bolt areas, so they will need some additional cleaning help. I dropped off the shifter at Paul's Chrome in Evans City, PA for replating. Shouldn't be too much longer before I can take it to the transmission shop. After that, I'll start the carbs and intake, then I should have most of the ancillary engine parts finished and it will be ready to send to the engine rebuilder. The goal is to have the engine and trans restored and in the car by the end of the year. Not sure if I will make it with having almost no time and running in to many small, difficult challenges, since I've never messed with a distributor or carb before.

-
1
-
-
Greg, thanks for the concern. I did not blast it. It was on the car when I bought it. Not grease fittings, though, not sure if it is original.
I inspected it and it seemed tight, but had good freedom of movement, so I wire-wheeled it, then dremelled the interior portions to clean it all up. I gave it multiple cleanings, then I primed and painted it steel silver. Put on new snap rings, too. Not quite factory perfect, but wanted to keep it as original as possible and protect the metal. Turned out pretty good cosmetically. I figure since it's a steering joint and I won't be driving the wheels off of it, it should be okay.
-Chris
-
Now that the chassis is complete, it's time to move on to the engine and transmission. I started by dragging out the transmission (photo 1). It was covered in about 1" of oil mixed with sand. After cleaning up the top of the trans, I found "MI6" written on it (photo 2). Must have been James Bond's MGA. As per my last posting, I'm limited to 9.77mb of photos for some reason, so I can only post 2. I must have hit some type of limit, as I know before I could post more, and other folks have been able to post more.
I'm not sure if I'll try to mess with the trans internals myself or not, but I'll probably farm it out and have a pro look it over, as I've only done minimal trans work. I was able to clean off most of the gunk and it looks pretty good now, but will require another round of cleaning to be acceptable.
I then moved on to the distributor. Took it all apart, but at the end, I discovered that the weights and springs, although free and loose, would not move at all. It completely defied the laws of physics as there appeared to be nothing keeping them from being able to move in their full range of motion. I also discovered that the top cam portion of the main shaft has seized to the shaft and will not come off. I tried penetrating fluid, then lots of heat, but nothing worked. I ended up bending the base plate trying to get the thing off, so it's ruined. I don't feel too bad, as it was ruined anyway. No way to get the weights off or get them moving. I bought a used '61 distributor from ebay and I will try to put the guts of that one into my original case to try to keep it as original as possible. I have a strange feeling that the one I bought will end up doing the same thing. I also feel that I'm missing something about how these things work. You don't know what you don't know.
I ordered some wood sealant fore the floorboards. This is the Steve Smith stuff as recommended on Barney's MGA Guru site. Actually talked to THE Steve Smith, so I think I'll be getting some great wood sealant that should protect from moisture and rot for quite a long time. I also finished restoring the seat mounting fasteners, so those will be ready to go in when the time comes.
I still have the jack handles and engine crank handle to restore, so I've been doing that one the side. I continue to try to find original tools online when I can, as to try to rebuild a complete tool set. Unfortunately, all these tools seem to be in the UK, which means the shipping costs are making this cost-prohibitive. Trying to build my own set, not pay $300-$500 to buy a set from someone that's already put a set together, but that may be the smarter financial choice after considering foreign shipping costs.
-Chris


-
1
-
-
Fantastic work, way more efficient than me. You may not have too many more posts at this rate, as you'll have completed the car.
-
1
-
-
Thanks. I got both thru Moss. Not sure what type of wood the plywood is, but it seems nice and in the spirit of the originals.


Air Conditioning Compressor Shop?
in General Discussion
Posted
Hello,
I have a 1974 Camaro with A/C. I've had it converted to R134A using as many original components as possible during its restoration (the original system was trashed). The rebuilt system worked great, but the compressor seals keep leaking oil out of the front. I just blew out my 5th seal. 5TH!!!! At first I had a pro shop do the work, but these all leaked. I decided to do it myself with a modern seal that fits, after reading about it online, since it is such a hassle to suck the system dry, take it apart, and ship a 30-ton compressor to FL each time, warranty or not. The seal I installed worked great for about 3 months, then today, seal broke and all the compressor oil leaked out of the front of the compressor.
I would think that someone, somewhere would be able to repair the seal on a generic mid 70's GM A/C compressor, but I've had no luck at all.
Could anyone recommend an A/C shop where I could take my car to have professional make this right in the mid-Atlantic states, preferably in the northern VA area? Since this is very unlikely, is there an A/C shop anywhere in the country that could do this job correctly? (I've had issues with Classic Auto Air, the only other place I know of). Any leads would be appreciated.
-Chris