


1930 Kram66
-
Posts
194 -
Joined
-
Last visited
Content Type
Forums
Gallery
Events
Posts posted by 1930 Kram66
-
-
More pictures.....
Cheers Mark.


-
 7
7
-
-
Been busy over the last 4 weeks, had some good weather that coincided with my spare time to get some paint sprayed on at last.
For starters, I masked up the body so I could spray some GMH black on the inside panels and floor.
A few days later, I sprayed the bonnet and doors for my first attempt at clear over base. I thought that would be easier than jumping straight in on the body. About 5 hours total time spent. I learnt that two tone paint jobs are hard work.
Next, I decided to paint the body in separate sections starting with the rear tub. As I wasn't confident I could get it all done in one go, based on my experience on the doors and bonnet. As It turns out that was a good move as I spent about 6 hours just on the rear.
A few days later was masking up the rear section and repeating the spraying on the front and middle parts. This actually took me 8 hours to do. Yes, I'm slow 😀.
For my first attempt at a full re-spray using clear over base, learning on the job as it were, I am fairly pleased with how it turned out- yes, I got some runs, orange peel and even a bug that managed to find its way on to the bonnet just as I was making the last pass of clear 😐.
Next is wet sanding with 1000/2000/3000 grit then compounding and polishing. I will leave the paint to harden up for a few weeks before starting this phase of the job.
Cheers Mark.


-
2
-
-
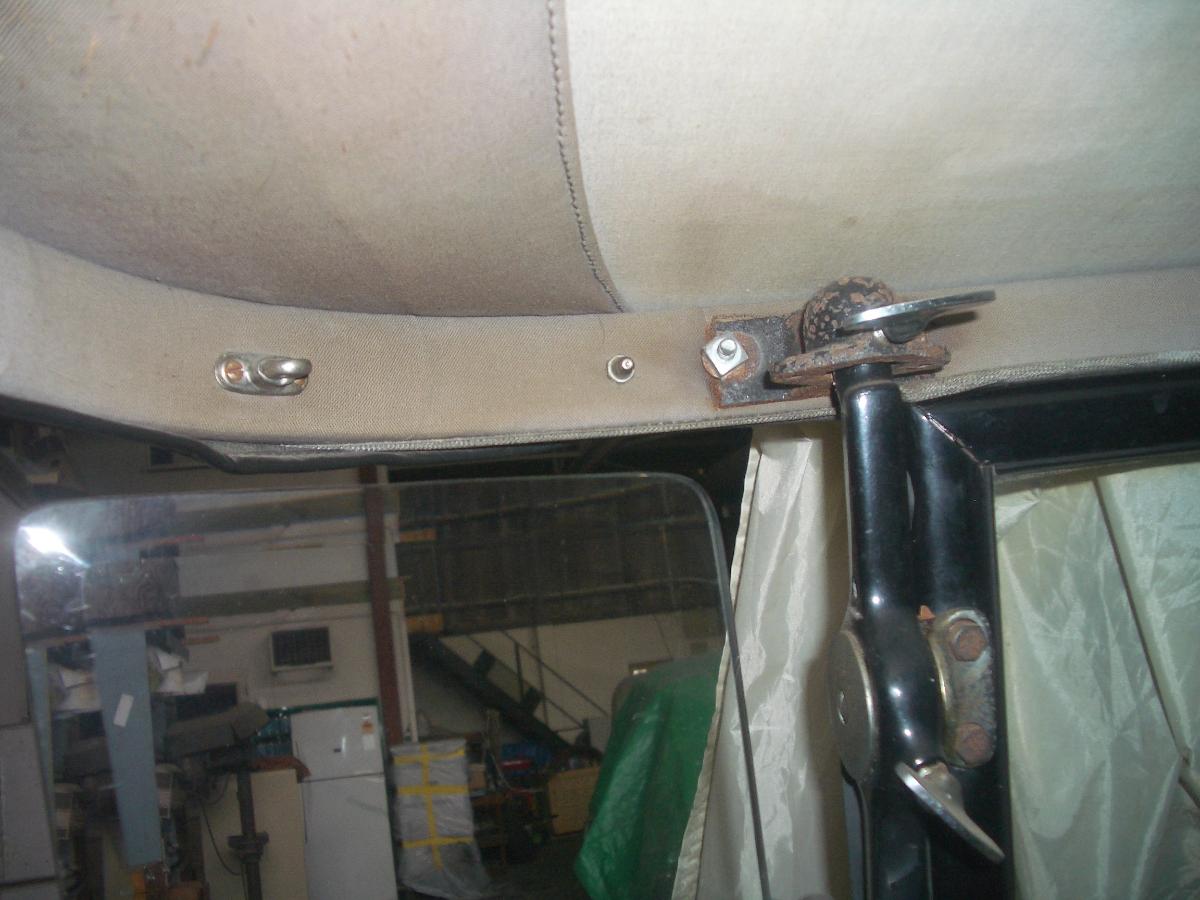
Here are some photos of my Holden bodied 1930 Chrysler, they may give you an idea on how to set your irons and bows in position. In the first picture notice how the front iron is not attached to the windscreen at this point. The whole roof assembly is self supporting, the ratchet straps are providing the tension.
I notice in your photos a clamp above the front door holding the centre up.
Until you get tension in the irons and bows it is difficult to see how the roof will eventually sit.
So what I suggest is firstly establish the position of the rear most bow using a couple of sticks to hold it up where you think it looks best, you will also need to pull this bow down with a ratchet strap to hold its position.
Then using another ratchet strap pull the second to last bow carefully towards the rear one ( this is the most important bow to position correctly) this will cause it to lift upward and at the same time it should pull the third bow from the rear up and stop it sagging above the front door, you may need a another strap from this bow to the rear bow.
The roof irons and bows must be able to support themselves and not sag above the back of the front door. Now place your sheet on the roof to see what the roof line looks like .☺️ good luck


-
3
-
 2
2
-
-
Lots of good information contained here. Not just for Buicks 😀https://forums.aaca.org/topic/343452-antique-car-convertible-top-replacement/?tab=comments#comment-2078427
-
2
-
-
Got to spray some colour paint at last ! ☺️
I sprayed the firewall of the body and the undersides of the valances and fuel tank cover with satin 2K black.
Next day I sprayed the door jambs, wheel arches, undersides of the bonnet panels and lastly the inside perimeter of the doors with the actual colour paint .... Yippee !
I used satin clear for these parts.
Finishing up with some GMH black on the insides of the doors.
Cheers Mark.


-
6
-
-
Quick update .......
After many hours sanding on the body and doors over the past 3 weeks after work, I sprayed 2 coats of 2k primer on the body and doors yesterday.
Also, I added a crude odour filter to my exhaust fan out let.... next door appreciates it 😀 I used Range hood charcoal filter material for this ...... no complaints about overspray and smell now☺️
Lastly I made some clearance holes in the body wood for the fuel tank cover sheet metal - like a dummy I did not allow for it when fabricating the body wood.😐 In a previous post I mentioned that I had to add extra shims to provide clearance for this.
I am hoping to remove some of the body shims as a result of doing this - time will tell.
Cheers Mark.


-
7
-
-
Oops.... I made a mistake.
Thank you Gunsmoke for your informative reply and questioning my number of shims used.
I clearly wasn't thinking when I made that post..... to much adult beverage ☺️.
To clarify I actually need 4 at all body mount positions except the rear most which have 5 not 8 as I said. I will edit the post to reflect this.
Once again thank you for following my posts and my apologies to all for posting incorrect information.
Cheers Mark.
-
2
-
-
Back into sanding....
I decided to start with the bonnet top pieces, after lightly sanding the last coat of epoxy I sprayed 2 coats of 2k grey primer. I did this when the boss was out over the holidays.😀


So yesterday I got started on blocking out the tops of the bonnet pieces. After applying a guide coat I wet sanded using 180grit.


This morning, another guide coat and sand with 240grit this time.


Got a bit carried away and rubbed through around the front edge on the right hand top piece and along part of the hinge line. 😐
It was a very humid day and in the afternoon I noticed some flash rust forming on the sanded through areas. You can just see it in the photo below. I spread a little vinegar water on the effected area and let it do it's work , then cleaned it off with Isopropyl alcohol, next a quick spray of etch primer to seal it up.


Got both left and right sides sanded today.
With a little luck I will spray another 2 coats of 2k primer tomorrow, then some more blocking starting at 320grit and hopefully finishing at 400 grit.
Cheers Mark.
-
2
-
-
To ease back into working on the car after the holiday's and avoid sanding primer 😐 I decided to tidy up the body to chassis mounting packing pieces while the body is back off the chassis again.
I had previously attached a piece of seat-belt webbing to the top of the chassis rail, its purpose is to protect the underside metal of the valence (splash aprons) thus avoiding metal to metal contact.
Next are the packing pieces that the body actually sits on, these sit atop of the valence - I remade a complete set plus a few spares for each mounting bolt position, I needed between 4 and 6 shims at each body bolt mounting point except for the rear most mount which has 5 shims.
I used green 2"wide x 1/8" thick webbing to make the shims and cut the pieces 5"to 6" long and punched a 1/2 " hole in each.
Next I soaked them in some boiled linseed oil to water proof them.
Cheers Mark


-
2
-
-
Since last time I have completed the final round of block sanding on the body, doors and all the bonnet parts - yippee ☺️.
I had to do a small repair to the left side bonnet- A small high spot I missed- nothing a little work with a shrinking disc and a little filler would not fix.
With everything sanded I removed the body from the chassis again to allow me to spray a couple of coats of epoxy sealer to the body, doors and bonnet parts. Happy that everything is sealed up at last.
Also since my last post I have been busy converting my garage into a spray booth of sorts. I removed as much stuff as I could and set up a extractor fan/air filter and some lighting, all very Heath Robinson. But it works well enough removing the overspray and fumes from the garage. - my next door neighbour appreciates it as well 😐
This is my last post for the year- Merry Christmas and enjoy the holiday's, I know I will.
Cheers Mark.


-
6
-
-
Ok, where are we up too... That's right, I've sprayed the third coat of All-U-Need primer on. ☺️ yippee.
Before I commence to rubbing on the body again, I thought it would be a lot of fun to refit the body to the chassis again- why! I hear you asking, well for two reasons -
Firstly I wanted to have a practice run of getting the body back on the chassis without causing any damage to the body or for that matter me 😐.
I was not happy with my previous set up for lifting the body so I came up with a different idea. This time I lifted the body from it's balance point- after fitting some internal bracing to the body to make it rigid.
Using a come along secured to the windscreen post mounting brackets I could easily raise the front of the body up to allow the gear stick and hand brake to clear the lower edge of the front cowl, however I still had to unbolt the steering box from the chassis and lay it between the clutch and brake pedal.
Secondly I also wanted to re-bolt the body down as if for the final time, just to make sure the door and bonnet alignments were still good -read acceptable. As it turns out I had to re-shim the body ( at the rear) to allow clearance for the fuel tank cover. ( Not enough space for the cover to fit under the back of the body).
As a result of that change I ended up adding a extra shims at all the other mounting points, to keep the door's and bonnet fitting correctly.
Cheers Mark.


-
3
-
-
Since last time I have sprayed the second coat of high build primer and block sanded to 180grit.
This round of sanding showed up a few area's that needed a little more filler work. Most of the high area's shown in the last post have gone away.
I am using Clausens All-U-need Primer, it sprays on well using a 2.0mm fluid tip and sands out very easily.
Waiting for a break in the weather for the third and final coat of high build.
Cheers Mark.


-
4
-
-
Since last time I have applied the first coat of high build primer to the body ☺️. Then spent many hours sanding most of it off 😐 ... not really, it just seems like that.


Round one block sanding has shown a few high and low spots.... they should go away with the second coat of primer and more block sanding.
Almost ready for round two.
Cheers Mark
-
3
-
-
Hi 31LaSalle.
I am pretty sure I have a spare mesh strainer as shown if you can't locate one in the UK.
PM me if interested.
Cheer's Mark.
-
8 hours ago, Gunsmoke said:
Those 4 door touring bodies are a big challenge to keep everything in line, nice work. What do you have under it to keep everything straight, rigid and avoid twists?
In fact it is like a giant wet noodle if not properly supported 😀.
Before I removed the body from the chassis I added some internal bracing in the body to help keep it rigid while on the dolly. Also the timber frame that sits on top of the dolly is made in the form of an "I" section, so it is quite stable. I will be placing the body back on the chassis before I put any colour on it - just to make sure all is good.


-
5
-
-
The never ending story continues .....
As the day's are starting to get longer now, I got a bit more body work done on the driver's side of the body after work during the past week. (yippee 😀)
90% of the driver's side is now filled out and sanded to 80grit.
Cheer's Mark


-
4
-
-
On mine the brass insert was nickel plated.
-
Coincidently I am getting my windscreen made this week from a template I made from 6mm MDF. So very interested in this topic.
My 66 also has a brass insert for the glass the same as your car. Also on mine the glass sit's on what looks like string inside the brass insert. I did not notice remnants any form of cloth tape.
Though that would make sense thinking about it - maybe to help keep water out. Something I will look at, thanks.
Something to consider is modern laminated glass is thicker than the original glass hence the 6mm thick template. I found that I had to spread the brass insert apart considerably to allow the template to fit in it.
I'll know soon if it all fits back together.
Your car is coming along nicely.☺️


-
2
-
-
Did not have to go to work today☺️, so I spent the morning tiding up the door gaps on the driver's side of the body. Still have have to address the top of the door's yet.


I lost interest in doing more body work after lunch so I turned my attention to fixing my Fedco I.D plate- somebody in the past thought it would be good to drill a couple of holes in it 😐.
Anyway, I cleaned it up and mounted it on a block of timber, next I ground the heads down on a couple of small bolts and made a simple jig to hold them at the correct spacing to match the factory mounting holes in the dash. With them in the right spot I soldered them to the plate. Then spent some time cleaning up the face and finally Nickle plating it.
Cheer's Mark


-
5
-
-
Since last time I have been busy working on the rear tub section of the body.
I started with filling and sanding the belt line moulding - a very tedious task, from one side around to the other starting and stopping at the back door's.
Once that was decent I masked the bead body line, then filled and sanded the complete rear tub section continuing around the corners on to the rear quarter panel on both sides.
Then put a guide coat on for the next round of sanding.
Next will be filling and sanding the doors and finally the front cowl.
Cheer's Mark.


-
5
-
-
Here are some photos I took of a couple of 28/29 Chrysler's.
One has a single wing type bolt and the other's have a double type wing bolt.
Note these are both Australian cars.


-
Please keep it original 😊
I totally agree with 24Chry48,viv w, 31 LaSalle and E-116-YH.
To modify your guards/fender's in that way will still require a high level of skill and effort to deal with reforming the wire edge bead to look half decent.
Granted we can not see how bad your original guard's are but I would be surprised if they couldn't be repaired.
-
Quick update on progress since last time.....
Finally got to spray a couple of coats of epoxy primer on the floor and the internal wood frame on the body, as well as the inside of the doors.😊


I also got some epoxy on the back of the dash, windscreen frame, door jamb parts and the tray that lives under the front seat.

Cheer's Mark.
-
4
-
-
As many of you know the Eastern seaboard of our fine country has been well and truly drenched with rain for most of this year. So this last few weeks I found myself looking for indoor activities to focus on, so I turned my attention to finalising the fit of the windscreen frame and posts to keep things moving forward.
Some time back I got new rubber gaskets for the windscreen posts from a local rubber supplier, however I wasn't happy with the way they fitted or didn't fit in this case. I just could not get them to sit properly on the curve of the cowl so I decided to make my own. I got some 1inch thick rubber and went to town on my belt/disc sander and knocked up a new pair. I got them near to final shape but they still need a bit of finish work before I call them done.
Cheer's Mark


-
5
-


Aussie 1930 Chrysler 66 Tourer Restoration.
in Chrysler Products - General
Posted · Edited by 1930 Kram66 (see edit history)
Since my last post, I started preparing the front and rear guard/fender/wings for priming along with various small items that need to be painted. Got 2 good coats on these items.
Then I managed to come down with Covid 😐, which had me down and out for a couple of weeks.
I have just started back at work and also back on the Chrysler about a week ago.
We have had some good weather here today and I had a day off, so I took the opportunity to get some black paint sprayed on the windscreen frame, headlight buckets and spare wheel carrier.
Cheers Mark.