Gary W
-
Posts
1,060 -
Joined
-
Last visited
-
Days Won
14
Content Type
Forums
Gallery
Events
Everything posted by Gary W
-

1937 Buick Model 48: RESTORATION HAS BEGUN! (Photo)
Gary W replied to Gary W's topic in Buick - Pre War
January 31, 2017: Steering Box and Flywheel Ring Gear: Today I got a few hours in the garage and made a little more headway! First I prepped the steering box for shipment to LARES for a rebuild. So I drained the fluid into a can, used a puller to get the pitman arm off, and wrapped and shipped it in a bicycle box out to MN. Then, using a heavy brass drift, I was able to knock the old, stripped ring gear off the flywheel. I set the flywheel outside for a couple hours in the 35 degree air. Next, I fired up the grill and set the new ring gear on a piece of foil for 20 minutes on high. And don't you know it, it slipped right on! It sat beautifully against the flange and looks great! Then I had to spend a couple of hours cleaning up the garage and getting ready for the engine work. Using a puller to remove the pitman arm from the steering box. The steering box is draining into the can it is sitting on. Using a brass drift, I slowly tapped the ring gear on all sides around the flywheel. Here you can see it beginning to break loose. Here you can see the flywheel ring gear dropping off the flywheel a little more. One more hit and it dropped free from the flywheel. With the flywheel sitting outside in the cold, and the grill on high, the ring gear expanded enough to be easily slipped into position. No hammer, just fell into position. Back in the kitchen to cool off! Came out very nice. My first try at this and it worked perfectly! Her you can see how nicely the ring gear is seated so evenly around the flywheel and the "ADV" and "UDC" timing marks can be seen. It took over three hours to clean up the mess from pulling the engine, and then organizing all the parts for the engine overhaul.


-
1937 Buick Model 48: RESTORATION HAS BEGUN! (Photo)
Gary W replied to Gary W's topic in Buick - Pre War
January 29, 2017: Condition of the Flywheel Ring Gear Here's what my flywheel ring gear looks like. Obviously the vacuum start switch on the intake manifold failed and the starter solenoid was trying to "start" the car everytime the accelerator pedal was depressed. I found a 1937 ring gear at Bob's Automobilia so I'll tackle that project soon. Going to put the new ring gear on the grill out back to expand it. Thanks for the advice on the clutch. I wasn't sure how thick the inserts are supposed to be. Here's the ring gear as it presented when the inspection cover was removed. Close-up of the gear teeth on the bench. There's no "fix" for this!.thumb.JPG.fb4ca7b0f5aa7013ebc256162af08a5c.JPG)
.thumb.JPG.6d6c22cd80e88ee81d6de51952391705.JPG)
-
1937 Buick Model 48: RESTORATION HAS BEGUN! (Photo)
Gary W replied to Gary W's topic in Buick - Pre War
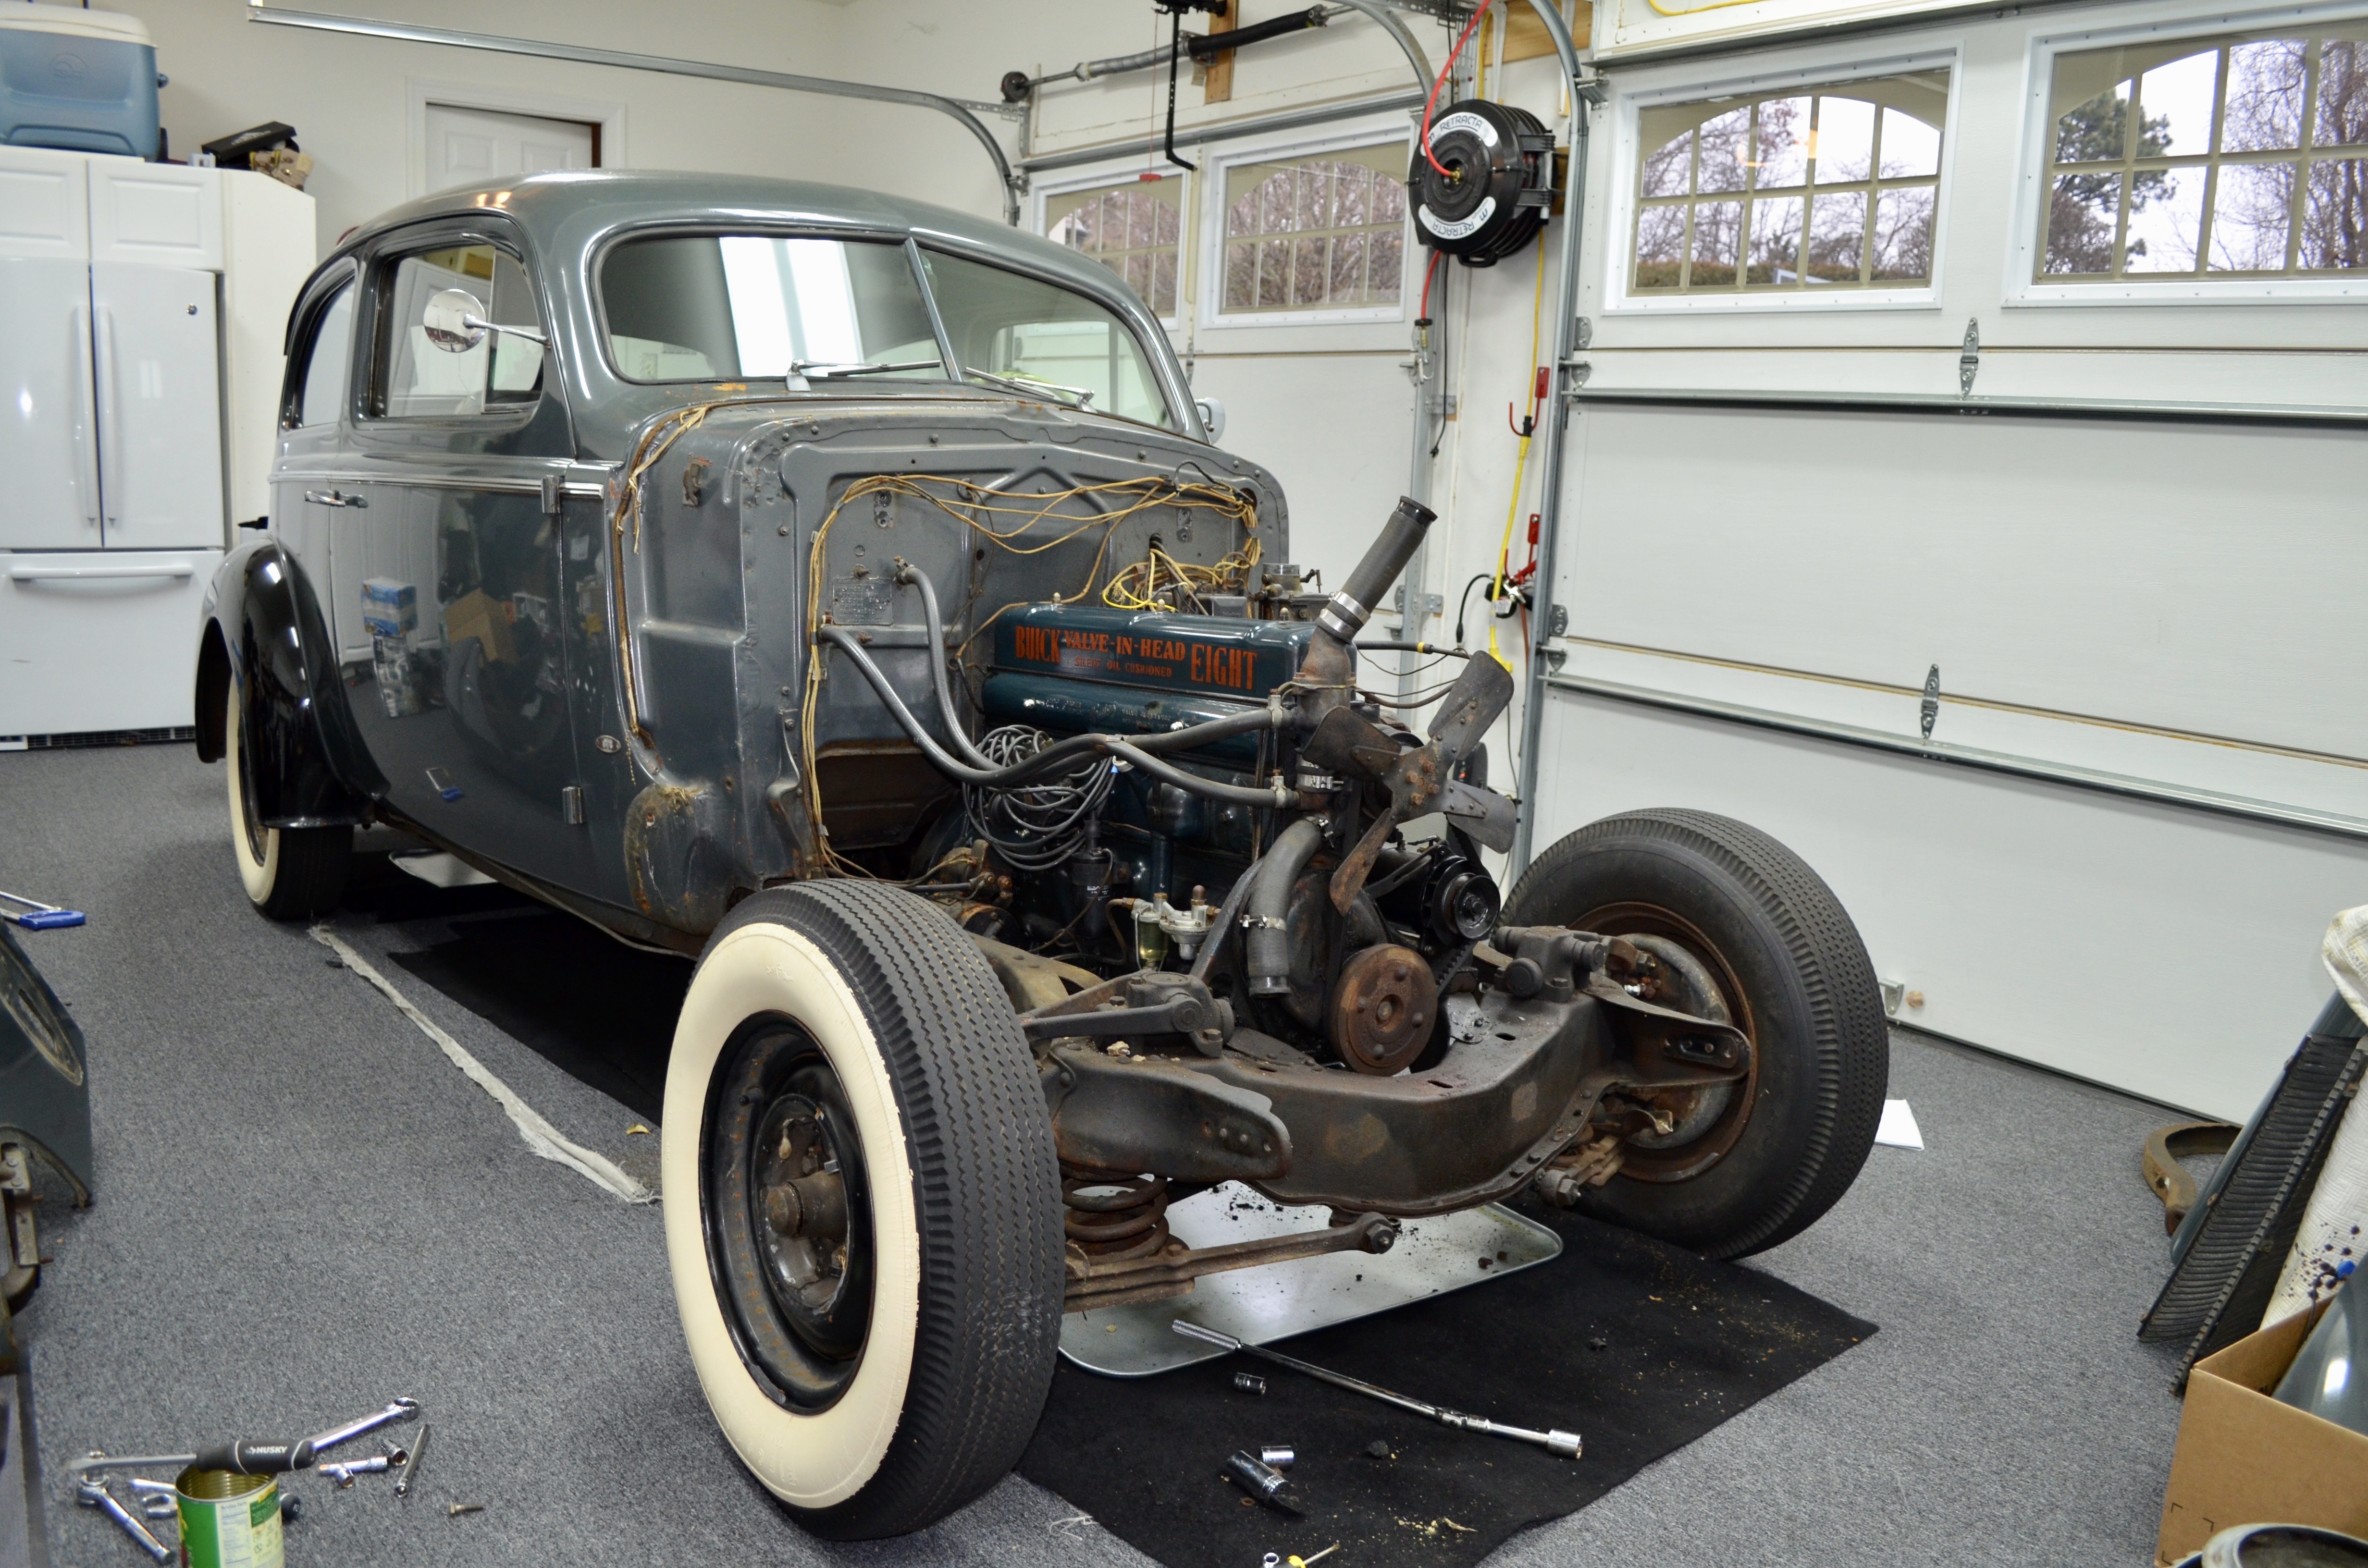
Saturday January 28, 2017: Pulling the Engine: UPDATE: This weekend I got the steering box, engine and transmission out of the car. The steering box had a noticeable "clunking" inside, so I think I'll give the folks at LARES a shot at a rebuild. The transmission seems perfectly fine, except the dry-rotted rubber mount. I knew the flywheel ring gear was destroyed and the pilot bearing was noisy, so I figured a good going through the motor while it was out was a good idea. Tore it down today to find a broken oil ring on #2 piston, but the motor really looks good inside. Crankshaft is really nice, all inserts look good. Going to take it to the machine shop this week to have the crankshaft measured and the bores measured to find out if it is standard. Any hints on installing the new flywheel ring gear would be appreciated. Also, how does this clutch disc look? Should I replace while I have the engine apart? Thanks Guys! My son Matthew loosening the rocker assembly. John Torchia. 86 years old and still pulling engines. My mentor, my teacher, my friend. Clutch disc removed. How do the inserts look? Pistons and rods all out. Engine out. Disassembly coming along quickly!


-
REAR HOLD DOWN:

-
Hi Bob: FRONT RETAINING NUT

-
1937 Buick Model 48: RESTORATION HAS BEGUN! (Photo)
Gary W replied to Gary W's topic in Buick - Pre War
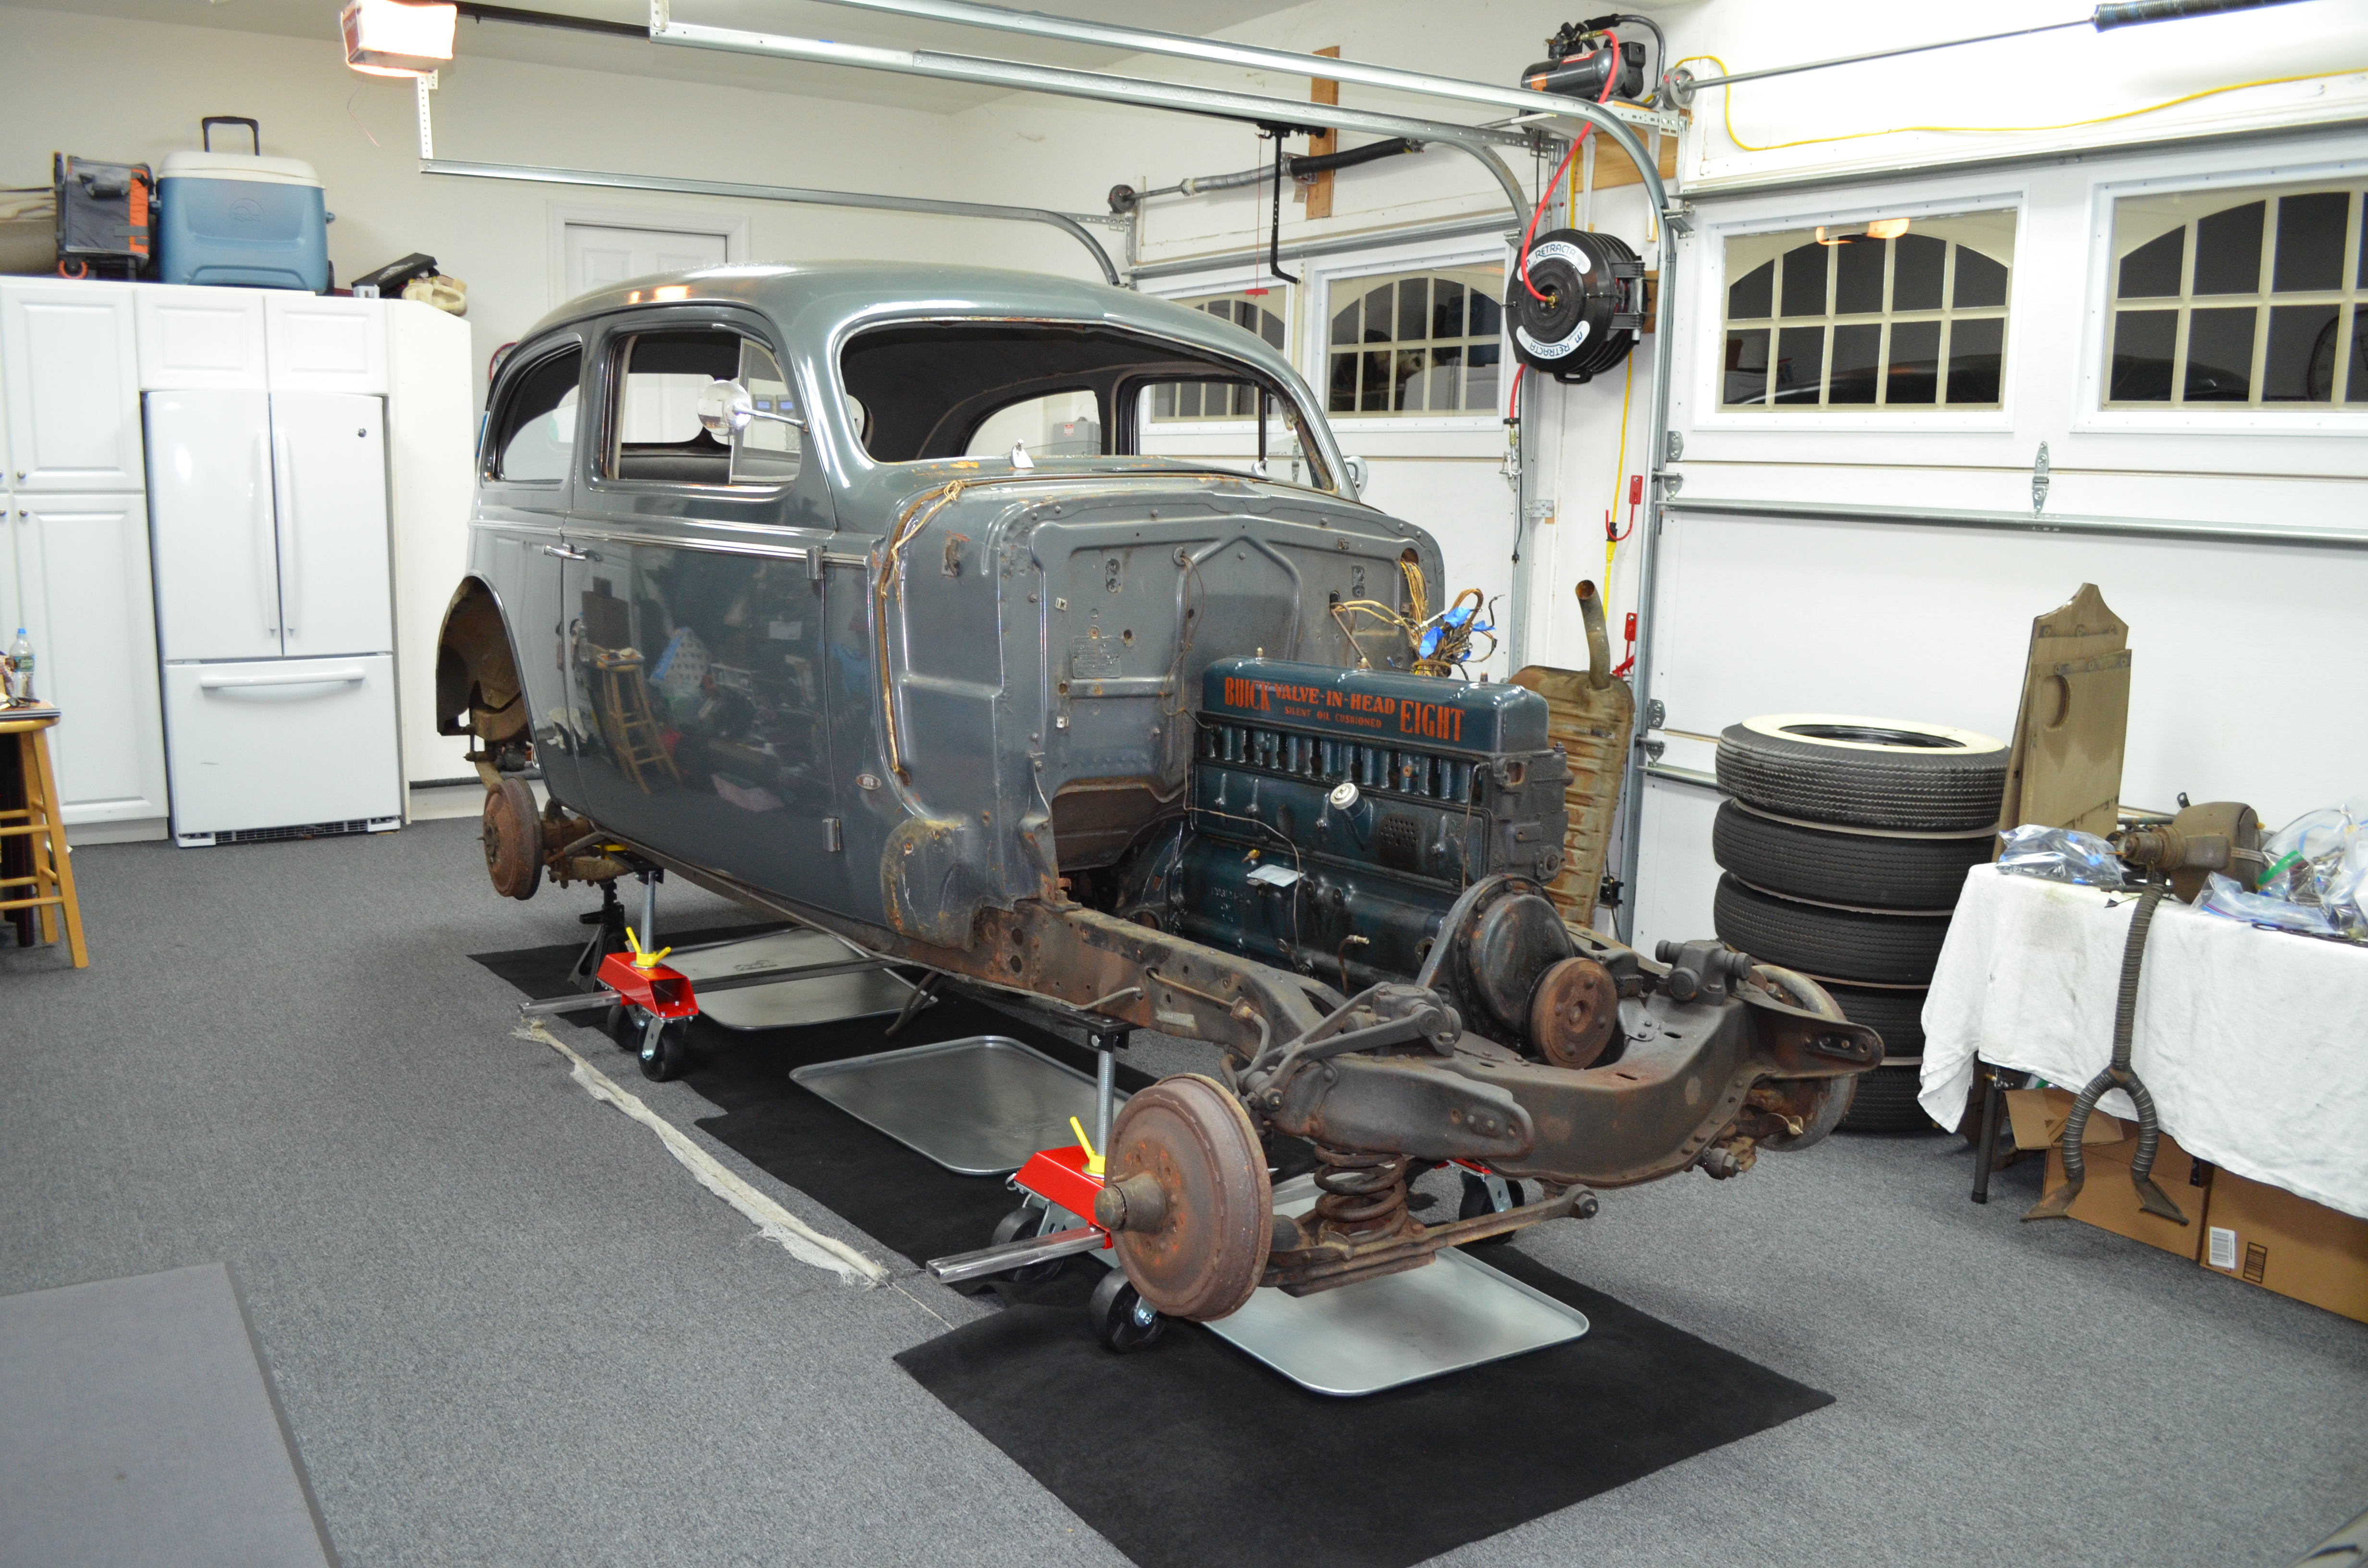
Hello Joel: It's always a struggle to find the level of restoration that you are comfortable with. It seems one thing always leads to another and the the old "....while I'm here I may as well go ahead and..........(fill in the blank!)" I am pulling the body off for two reasons: 1. All the rubber mounts are hopelessly dry rotted and need to be replaced and 2. I want to have the underside of the body blasted free of rust so I can paint a good coat of POR-15 under before mounting it back to the frame. While the body is out getting blasted, I'll treat the chassis to a degreasing, power wash and paint with the same POR-15. I Brush this on all the interior surfaces of the body as well, before any interior panels get installed to help preserve the car. Being the motor runs, the plan is to drop the pan, clean the oil pump and sludge. Remove the head to give the block a through cleaning, as the water channels are muddy. Then, a new set of rings and valves hoping the pistons, rods, babbit...are good. A basic go-through just to check specs on the mains, rods, wrist pins. I have to change the clutch throw-out bearing and the flywheel ring gear, and I may as well change the clutch plate while I'm in it, so the decision to pull the motor was kinda made for me. I constantly keep in mind the cost of the restoration, which is why I like to use local blasters, powdercoaters... But the woodgraining I will send out. The bumpers look fine, and I polished them up nice. The front grille is going out to be re-chromed, as that is a centerpiece of the car, but the door handles...will be chromed locally. Much, much cheaper. I've chosen Le Barron Bonney for the interior kit, but I'll do the install myself. Money, money, money....but I'm having a BLAST!! This is a great experience, and to work with my two boys (12 & 16), just busting' knuckles and getting greasy makes it all worth it. You want to have a car that you are proud of, but not bankrupt over. I understand your dilemma and I really try to keep the cost in mind with every decision. I'll keep posting as the restoration continues. Great bunch of guys here. PS.......HOW DO YOU GET THE INTERIOR DOOR HANDLES OFF?? I want to strip the remainder of the interior today, cannot figure it out! -
Ill get you a photo of the clip this afternoon.
-
1937 Buick Model 48: RESTORATION HAS BEGUN! (Photo)
Gary W replied to Gary W's topic in Buick - Pre War
UPDATE: Motor is ready to be pulled, dash is out, trunk is stripped, rear fenders off, Front and rear glass and all garnish moldings out. Getting close to media blasting!


-
Heres how the front hold down goes in:

-
Hi Bob. Here are some photos of my hood clamps. Hope it helps! First one is the all the rods attached. The second shows where the REAR hold down screw is under the dash. The next shows the three washers that were under the hold down bolt (in the photo) to line up the hood.


-
1937 Buick Model 48: RESTORATION HAS BEGUN! (Photo)
Gary W replied to Gary W's topic in Buick - Pre War
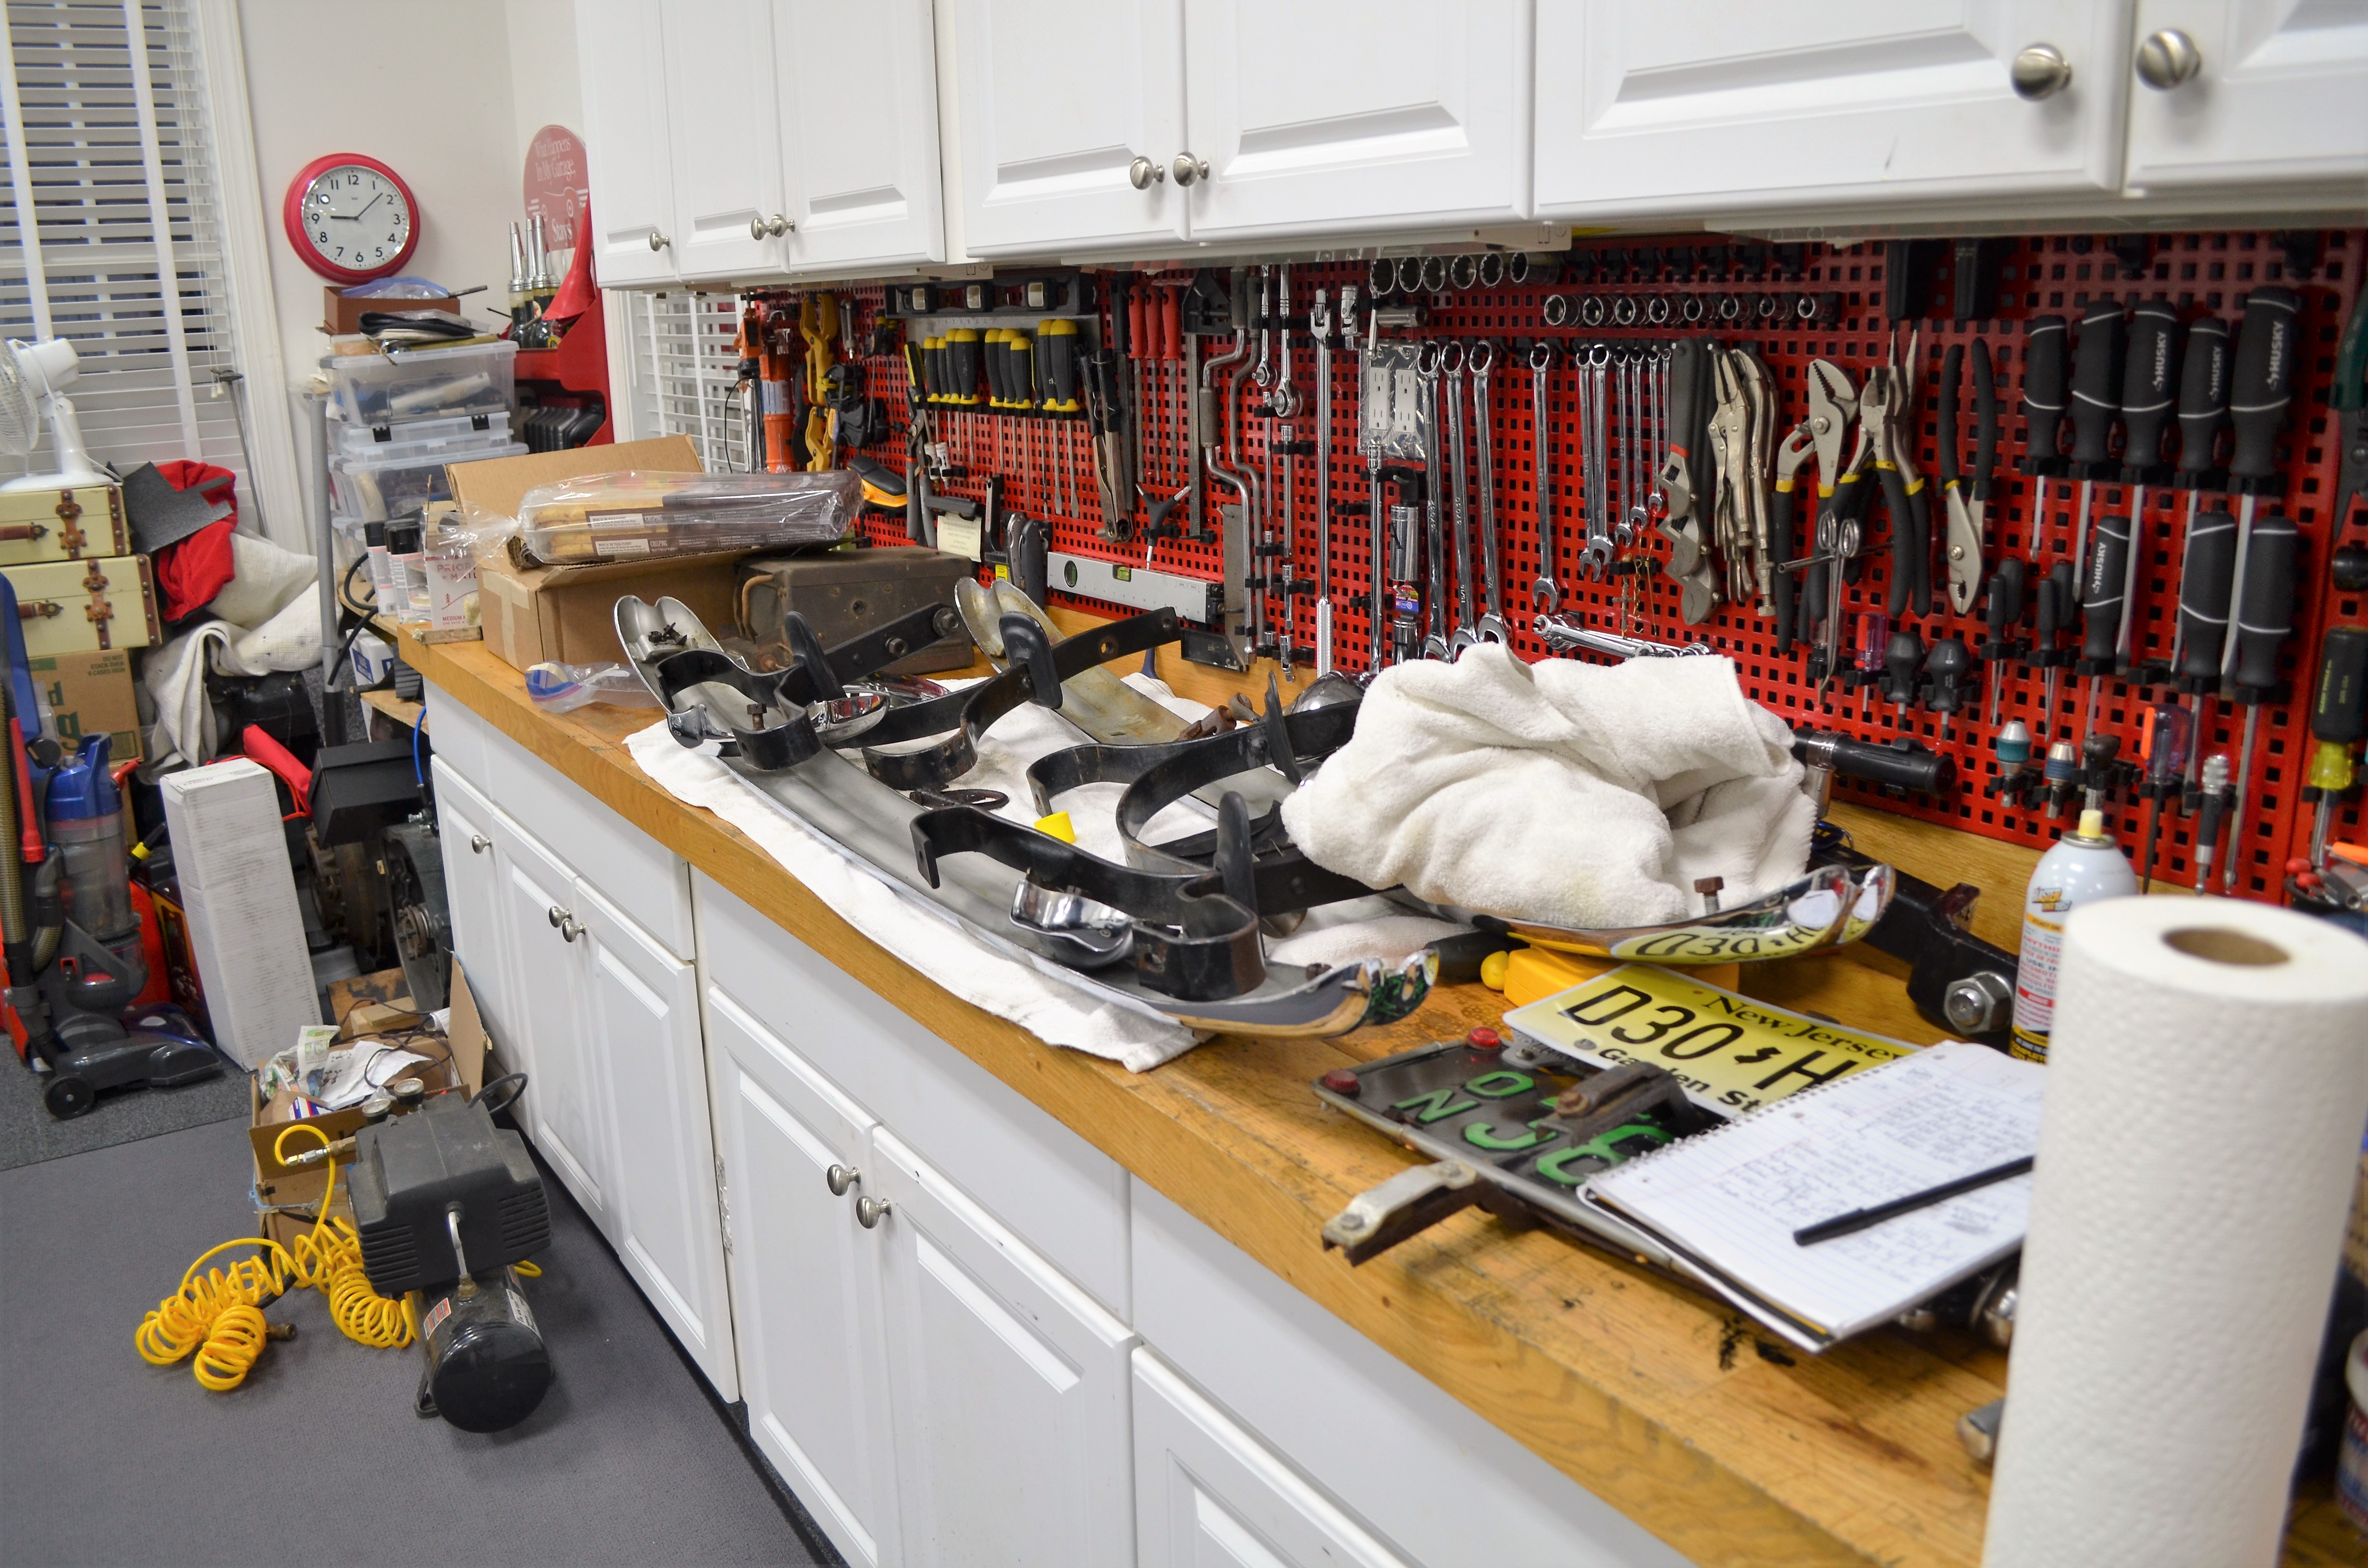
Friday January 20, 2017: Last night I prepped the running boards for re-vulcanization by removing all the brackets, hardware and trim. Here's the dry-rotted running board. I am going to send these out for re-vulcanization instead of just recovering them. The underside is very rusty and needed a good soaking of PB Blaster to loosen up those mounting bolts and related parts. Everything soaking in PB Blaster. Once all the chassis support irons and the smaller support parts were removed, I removed the mud shields under there. Then off came the running board trim. The trim is rusty on the underside so what I'm going to do is use a small wire wheel with a dremel tool, try to remove as much rust as possible, and then paint the underside with a rust-proofing paint like POR-15. I think that will prevent further rust under there. I measured the vulcanized lip that rises above the edge of the running board. This actually fits under the doors when installed. The vulcanized rubber should replicate this when they return complete. Once the running boards were completely disassembled, I had the underside of the boards sand blasted clean before shipping them out to the re-vulcanizer. All other parts under there, all the supporting irons, the metal risers, mud flaps are all getting blasted and powder coated "mirror black". I have to replace all the carriage bolts under there, as there is not one that is re-usable. All are rusted beyond repair. Then I removed all the trim from the front clip, and continued removing "stuff" from the engine (Water pump, fuel pump, distributor.....) All coming along nicely! Here is the latest photo. Coming along!.thumb.jpg.c48eb2d0350dec44663c3b825d12f52e.jpg)


-
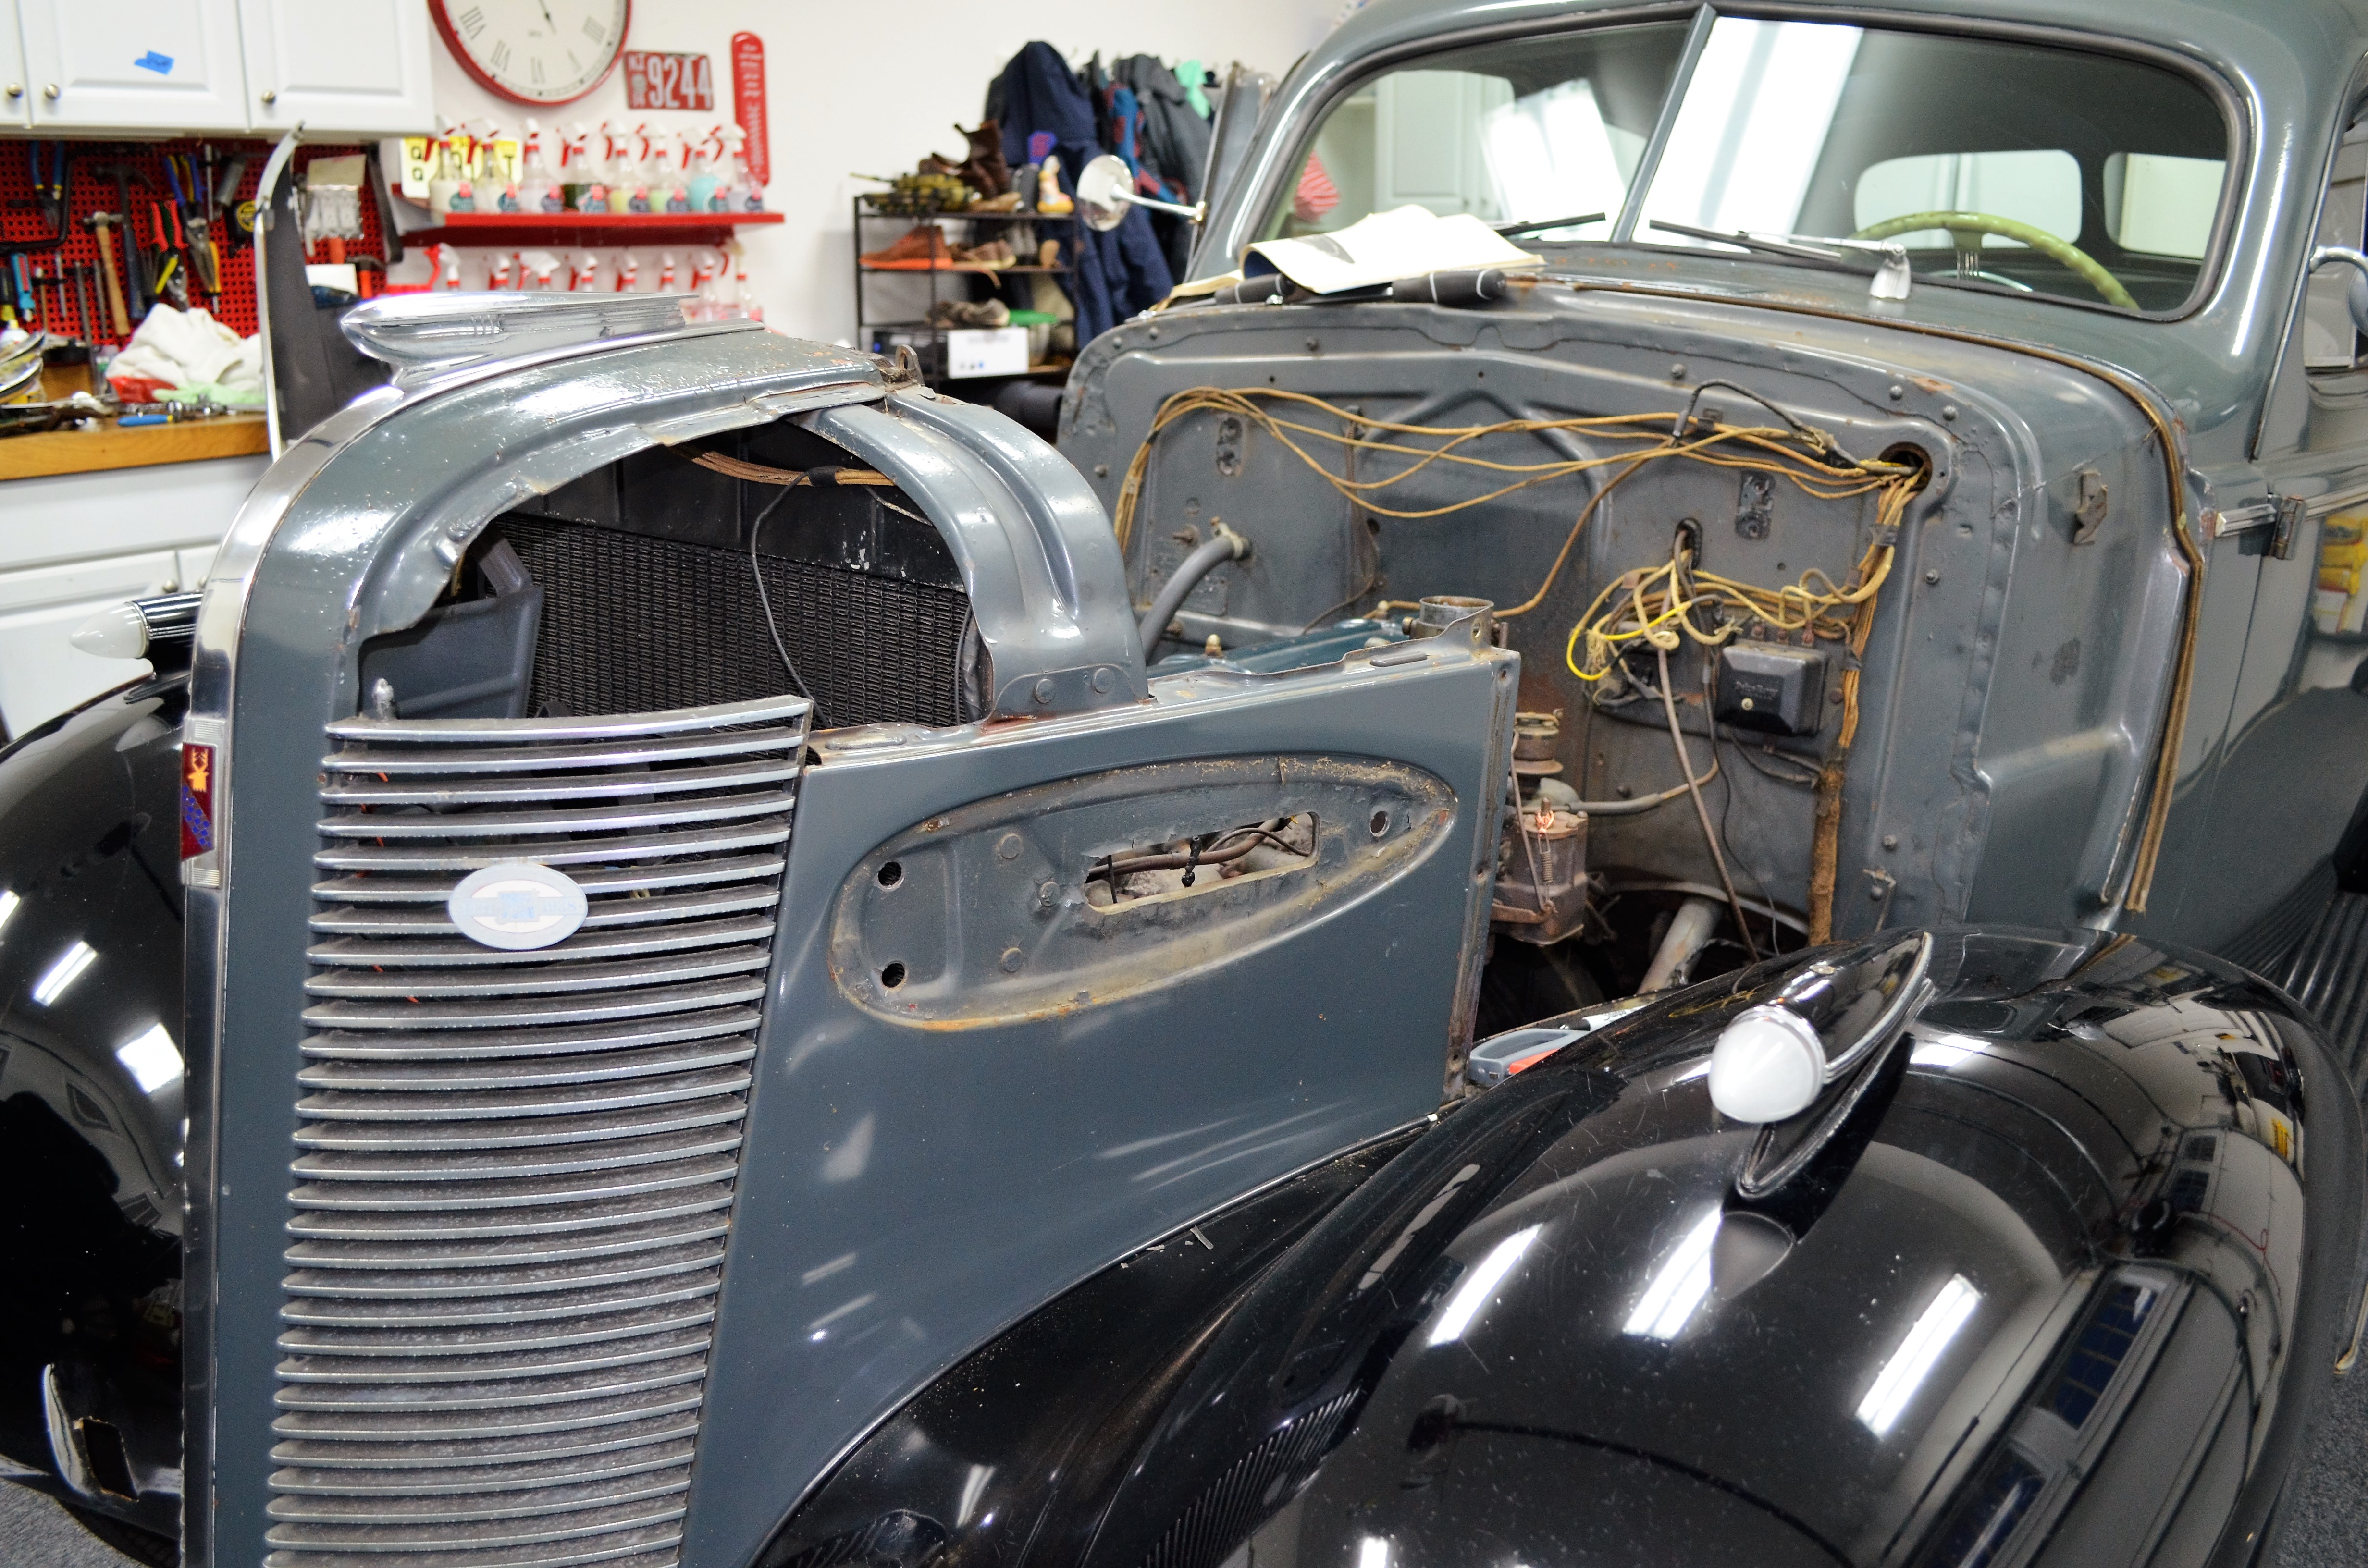
1937 Buick Model "48" (Two-Door "trunkback" Sedan) A Step - By - Step "Frame - Off" Restoration Thread Wednesday January 11, 2017: Today is the day the restoration starts. The Holidays are over, the tree cleaned up and my buddy Mike has graciously offered his vacant garage to store my Model "A" Fords for three months. This allows the Buick to take most of the garage, and puts me on an aggressive timeline so I'm not paying for monthly storage. So, with the Fords out of the garage, I parked the Buick perpendicular and began the assessment and started work. The Assessment: Here she sits all ready for restoration. Although the photo looks like the car is in great shape, I will post some photos of the issues I face: 1. PAINT All four fenders have chipping, cracking and "alligator" paint. Cowl paint is down to metal Trunk lid and rear deck is also worn down to the bare metal and flaking off. The roof paint is badly worn, and there is rust under the window rubber trim. 2. Mechanical Issues: All the body mounts, transmission mount and all four motor mounts are hopelessly dry-rotted and petrified. Every inch of wiring from the headlamps right on through the dash to the tail lamps is brittle, crumbling and exposed. Left rear leaf spring is cracked and the main leaf is protruding through the tin spring covers. 3. Interior / Upholstery Issues: Steering wheel rim is cracked all around, the plating is worn off. There is a distinct "clunk" and a heavy spot in the steering gearbox that needs to be addressed. The rug is worn out and rotted from water leaking in through the cowl gutter. The wood grain is sprouting rust blossoms. The upholstery is torn, stained and completely inhabited by mice. The smell is overwhelming. The headliner is also stained from mice living inside it. So today, Wednesday January 11, 2017 the restoration begins: After the car was situated, I started the restoration by removing the license plates and the Trippe Lamps. (They were strictly ornamental...never wired) Then the bumpers were removed by removing the medallions and the outer bumper bolts I had to use tons of PB Blaster to loosen all the rust and a breaker bar to get the nut to give up! Front bumpers off, then under the fenders to remove the bumper support irons from the chassis. Once the irons are removed, you can see some more of the chassis. I photograph everything as I go to make the build go easier. End of the day. Front and rear bumpers removed. I keep a notebook running with every part removed, bag and tag all fasteners and mark parts for location for easier reassembly. January 13, 2017: It took four of us to lift the hood off the car after removing the nut under the dash and the forward nut above the radiator. Then removed all the radiator and hood support irons Then off came the headlamps Next I removed the running boards entirely by removing the bolts that affix the support irons to the frame and the boards dropped right off into my head. Saturday January 14, 2017: I got a few hours in the garage today and got the front disassembled. I removed the fender lamps, the Front fenders, the lower radiator shield (or wind deflector), the grille halves, the front clip and the horns. I'm taking stock of parts that need rebuilding or replacing. I carefully labelled and photographed every step of the way. All nuts, bolts, washers are tagged and bagged in ziplock bags. I think I may have to replace some of the 80-year old bolts, as they are quite rusty and brittle. Here's the end result of today's work:


-
1937 Model 48 Front Fender and Front Clip removal
Gary W replied to Gary W's topic in Buick - Pre War
How do I remove these trim clips prior to sandblasting / painting?

-
1937 Model 48 Front Fender and Front Clip removal
Gary W replied to Gary W's topic in Buick - Pre War
The running boards are dry rotted, as are the motor mounts and body mounts. So....I have my work cut out for me! Hopefully with help from this forum, the job will go fairly smooth. I am open to any ideas, suggestions, helpful hints and "If I did it again, I would be sure to......." Thanks Fellas! Gary Wheeler, NJ


-
1937 Model 48 Front Fender and Front Clip removal
Gary W replied to Gary W's topic in Buick - Pre War


-
1937 Model 48 Front Fender and Front Clip removal
Gary W replied to Gary W's topic in Buick - Pre War
Then the "cosmetic" stuff: The paint is completely shot.


-
1937 Model 48 Front Fender and Front Clip removal
Gary W replied to Gary W's topic in Buick - Pre War
I'd like to add a few photos of the car so you can see why I want to restore it. There are some safety issues, as the car is very original: The wiring is all completely dry-rotted and I disconnect the battery every day for fear it may start a fire. The brakes are leaking fluid and the whole system needs a thorough and proper restoration The spring leaves are cracked and need replacing. The Steering box (or somewhere in the system) has a "clunking" high spot that needs addressing. She runs warm The fuel gauge does not operate (either the sending unit or the gauge....) So, the first thing is safety, and I am addressing those issues one by one.


-
1937 Model 48 Front Fender and Front Clip removal
Gary W replied to Gary W's topic in Buick - Pre War
I got it this far in two days. It seems I have to remove the front of the fender from the forward fender support iron, and remove the rear fender support from the frame, then a few more bolts? But is this the correct order? Remove the fenders first, then the clip, or is there a way to remove the clip without removing the fenders? It seems the radiator has to come out regardless. Thanks for any input.

-
The Buick now has the garage to herself in preparation for restoration. I started last night, removing the bumpers, hood, head and fender lamps, radiator support rods, horns,grilles.... So, what is the proper sequence to remove the front fenders and front "clip"? What order are the parts properly removed. Thanks guys!
-
Fellas; Good morning! Please give me some advice on the 1937 Series 40 Automatic Choke and Vacuum Starter Switch: 1. Automatic Choke. Mine is inoperable and the choke is wired "OPEN" so the car will run. Of course, this makes starting a challenge since there is no way of choking the carburetor (MARVEL BD). Is there someone out there that can repair/rebuild or has a functioning replacement I can purchase and install on the car. Is this unit rebuildable? Are there kits/parts/instructions? 2. Vacuum Start Switch: My switch functions ELECTRICALLY (confirmed with OHM Meter), but the vacuum disconnect does not function. (This is why I ordered a new ring gear.....obviously it was engaging for a while. Every tooth on my ring gear is "dished out" like it was cut on a lathe) I had a very pleasant conversation with Bob of Bob's Automobile yesterday, and he told me they no longer reproduce these switches, and advised that I contact the forum/BCA/'37-'39/Torque Tube......... So Again, if anyone can please steer me in the right direction I would truly appreciate any help. THANK YOU ALL for all your help and input. I've already met some truly great people and wish you all a very happy, healthy Holiday and New Year! Sincerely, Gary Wheeler, NJ
-
Here's the photo of the broken spring. Tell me please, what else do I need to do a proper repair? I was going to order new springs from Eaton Spring. They sell an "install kit"........Do I need it? I'll replace the rubber bumpers under there while I have the rear end out.


-
Thanks for all the support. Question: Where would you go to replace the rear leaf springs? I just noticed that the two upper (long) leaves are broken, so I want to just get two new springs. But I want to be sure they are the correct width, strength and correct for there car. Thank you.
-
Please help a "newbie" with some basic beginner questions
Gary W replied to Gary W's topic in Buick - Pre War
Guys.....THANK YOU for all the great information! I'll call Dave tonight. Really appreciate all your knowledge. -
Hello everyone! Being very very new to the Buick world, and now only 2 weeks into ownership of the '37 Model 48, I am getting ready for the winter restoration. I've read the Shop manual through and it is a wealth of information. I have a few basic questions if you all don't mind sharing your experiences. In these couple weeks, I've done a lot of small things and have it running pretty good for a car that was literally sitting in a dirt-floored barn for the last 7 years. The choke is wired open as the "automatic choke" mechanism is rusted, and the engine hesitates first before going, but I'm getting there. So here goes: 1. The car has a MARVEL carburetor. Do I restore it or (as I was advised) "look for another manifold with a better carburetor" so the car is a dependable runner? 2. How do you get the radiator out? Does the entire front clip have to be disassembled? 3. Can this rusty automatic choke be restored? 4. Same for the rusty heat riser and the rusted out vacuum starter switch that sits atop the intake manifold 5. The car doesn't have a radio. Can one be installed if that blanking plate is removed? Or is that a completely different dash? 6. Can I get a new gas tank / sending unit? This one leaks, and it's rusty and the fuel gauge is inoperable. 7. Where would you go to find a new flywheel ring gear? All the teeth on mine look "scooped" out on one side. OK for now. I'm SURE more questions will pop up once the restoration is underway. I truly appreciate all your help and advice. Have a great day and a blessed Thanksgiving! Gary Wheeler NJ
-


.JPG.7f9ec25a31bf8fb9da49d942ff662bdb.JPG)
.JPG.79e9b40cff19afce0f5452f50f955392.JPG)


.jpg.d9098d4d363c0d7f21d87c99a7fc1e62.jpg)