


Joe Cocuzza
-
Posts
1,684 -
Joined
-
Last visited
-
Days Won
3
Content Type
Forums
Gallery
Events
Posts posted by Joe Cocuzza
-
-
4 hours ago, Brooklyn Beer said:
Thanks. Looks like I will give it a shot. Been 30 years since the last time I did a transmission. Will get it up on 4 jack stands and go from there. Have a fluid drive manual on the way and a shop manual. Any hints on dropping this compared to say a super T 10, 4 speed?
Dropping the trans is fairly easy. It should take around an hour.
1- Disconnect the driveshaft from the transmission
2- Disconnect the shift linkages and emergency brake cable bracket - (I leave the cable connected to the bracket)
3- If there are any electrical connections to solenoids, etc remove and LABEL them so as not to miswire later
4- Remove speedo cable from tranny
5- There should be 4 bolts that hold the tranny to the bellhousing. Put a floor jack under the tranny and remove the bolts
keeping a little upward pressure on the tranny with the jack. Then slide the floor jack and tranny toward the rear of the car. It should slide out easily.
If it doesn't then either lift or lower the floor jack accordingly to relieve the pressure on the input shaft of the tranny.
6- Remove the bellhousing from the engine - then everything is accessible.
Oh yeah. All Chrysler products of that era (I'm pretty sure) have a removable floor pan that just bolts in. I suggest you pull the carpet back (or remove it) and remove the bolt-in floor pan as this will make it so much easier to work from the top instead of from the bottom of the car.
I would suggest that while the floor pan is out you check the brake master cylinder for leaking and if you wanted to remove/rebuild it NOW would be the time.
Joe
-
 1
1
-
-
It is no more difficult than changing the parts in a standard shift car.
I did my 47 Chrysler - clutch disc, throw-out bearing , etc - in my garage with no special tools, etc
In my car's case there was a Fluid coupling (looks like a torque converter) which rides on the transmission input shaft. But once it was removed
then everything else is just like a standard shift car. Removing the coupling just involved removing the transmission and the coupling.
So I would try to keep it original as it looks like a nice original car and modifying it, in my opinion, will hurt it - aesthetically and value-wise.
Also, if I am incorrect on the Dodge Fluid Drive system being similar to the Chrysler one someone will correct me - hopefully without taking me to task.
Joe
This is from the P15-D24.com website: I would recommend you take a look there, too
"Fluid Drive
Fluid Drive was a $25.00 option available on the Doges, DeSotos and Chryslerss. Besides the cool looking Fluid Drive script on your rear deck, what did you get? Fluid Drive is a torque converter, that is, it converts engine torque and transfers it to the transmission via a fluid medium. The idea is simple. Imagine two electric fans facing each other. If you turn on one fan the air pressure created will cause the blades of the facing fan to spin. In this example, the fluid medium is air. The Dodge Fluid Drive works in a similar manner. The torque converter coupling is bolted to the flywheel. Inside the torque converter coupling are two "fans" facing each one another. The entire torque converter is filled with a special fluid. As the engine turns one set of fan blades (called vanes) is driven, forcing the fluid against the vanes of the facing unit. This causes that unit to turn which drives a standard clutch and pressure plate assembly. The power is then transmitted down the drivetrain to the rear wheels just like the standard drivetrain. The advantage of Fluid Drive is there is no direct mechanical connection between the engine and drive train. This translates into a very smooth power transfer and resulting smooth ride. It also provides some unique and interesting features. For example, to shift into gear you would put the clutch in just like a regular three speed. However if you are idling at a traffic light you can let the clutch out and the car won’t stall! That’s because at idle not enough energy is being transferred from the front vanes to the rear vanes. As you step on the gas the pressure increases and the rear vanes start to spin, transferring energy to the drive train. You would then shift gears like a normal three speed. You can also start in any gear. For example, you could start in third, even though the acceleration would be slow. In some ways, Fluid Drive is like a very simple automatic transmission. The units are essentially maintenance free. The only service requirement is to maintain the correct level of fluid in the torque converter coupling. A special access port is located on the passenger side floorboard on the side of the transmission hump. Remove the access door and bell housing cap. Turn the engine over until the filler bolt lines up. It is a good idea to stuff a rag around the opening so you can drop the filler bolt in the flywheel housing. The service manual recommends using a magnetic socket for the same reason. Be very careful as you fill the unit. Any spillage will always find its way to your clutch disk! After filling, make sure the filler bolt is secure with no leakage. The factory fluid was a Mopar #10 Fluid Drive fluid. Unfortunately this is no longer available. The original fluid was an ISO 32 (10W) with an anti-wear additive and an anti-foam additive which was needed to break up the foam which develops as the vanes turn in the torque converter (Fluid Drive Coupling). The non-foaming characteristics are critical because if air bubbles form the fluid will compress and power can not be transferred. Today, two replacement fluids are readily available. Automatic transmission fluid (ATF) is an ISO 32 fluid. However DEXRON ATF contains a seal swell additive which may swell old seals in Fluid Drives and cause a failure An alternative ATF fluid is Ford Type F fluid. It does not contain the seal swell additive. The best replacement is Universal Tractor Fluid #134. This is an ISO 32 fluid with all the properties of an automatic transmission fluid for wear, heat dissipation, and anti foam. Available at most NAPA stores in 1 and 5 gallon quantities. Obviously if you have a farm/tractor supply outlet nearby they will have it. Universal Tractor Fluid #134 has other positive characteristics including added shear strength for moving bevel cut gears under high loads similar to what is found in the old Fluid Drive transmissions. Many of today’s modern manual transmissions use the #134 fluid, not a gear lube, as the factory fill. The biggest repair problem with Fluid Drive is seal leakage where the transmission input shaft mates into the housing. Any leakage will quickly ruin the clutch disk. Repair kits are available but difficult to find. So are experienced repair personnel. Using the correct replacement fluid can go a long way in extending the service life of your unit. Otherwise the units are factory sealed. Carburetors used on Fluid Drive cars are different than the non-Fluid Drive models. The Fluid Drive adds some drag on the engine and a dashpot is used to slow throttle closing, thus preventing engine stalling. The adjustment of the dashpot and replacement of Fluid Drive seals are addressed in detail in the factory service manual. Lastly the same manual three speed transmission (Type C) is used on both Fluid and non-Fluid Drive applications with one part change. The Fluid Drive transmission has a slightly longer input shaft to accommodate the greater depth of the coupling. The shafts can easily be replaced making a standard 3 speed into a fluid drive version and vice versa.-
1
-
-
Just now, Xander Wildeisen said:
The V8 was put in a press, and straightened out. Very common back in the late 40's.
OOOOOOOOOHHHHHHHHHHH........NOW I GET IT - I SHOULDA KNOWN
-
 1
1
-
-
2 minutes ago, Xander Wildeisen said:
If that's a V8 then I'm a monkeys uncle.....and I'm not
-
Looked it up - it said 31 X 5 wheels
-
35 minutes ago, SBRMD said:
Wow. Really?
Yeah, but did you notice that there is no title for the car?
-
I am sure there will be more educated advice given that can help. I can only offer a simple approach to the problem.
First, make sure all your grounds are tight and clean/metal-to-metal. Even check inside the bulb sockets to see if there is any oxidation and clean up the contacts.
Also, is the generator working? Is it charging the battery?
Normally with a generator if you rev the engine the lights will get brighter. Is that happening?
-
2
-
-
22 minutes ago, Dan Griffin said:
++++++++Do you still have the front brakes?
What exactly do you need for the front brakes?
I believe I still have the entire setup.
Joe
-
It is doable but it is a lot easier with the radiator out. It is not that difficult to remove the radiator - only 6 bolts.
But if you want to leave the radiator in...First thing to do, as suggested by a good friend of mine, is to tape a piece of cardboard over the radiator to avoid damaging it.
Next, remove the bolts that hold the fan to the pulley and then remove the fan and the pulley.
You should now have enough room to remove the waterpump.
-
1
-
-
Getting back to the original question.......
Dave's Interiors
525 Chestnut St, Emmaus, PA 18049
(610) 965-2172
He has been in business for 41 years. I know him for 30+ years.
I have had work done and I have seen his work - excellent.
-
On 8/22/2018 at 1:17 AM, Marcus Stephenson said:
No Worries Joe, really appreciate the effort.
Send me your email address.
I have a couple of pics of the grille(s)
Joe
-
From your pictures it is obvious that you certainly need a new shift linkage bushing. They are available - probably from Steeles Rubber.
I do not have my parts book in front of me and I am not at home until tomorrow to look at it or my car but it doesn't look like a nut fell off
but rather the bushing was so worn out that the end of the shaft that is tapered popped out. I believe from the pictures the tapered end gets pressed into the bushing and the bushing is what holds it in place. I may be wrong but someone will correct me if I am.
I probably have a linkage in my pile of parts if you need it or any parts.
Joe
-
1
-
-
4 hours ago, pmhowe said:
Wel, I'm impressed: What a lovely car! I'm envious. I'll bet you will love it.
P
Thanks.
I just hope that it runs/drives as good as it looks - when I get it running.
Joe
-
On 8/16/2018 at 10:50 AM, Marcus Stephenson said:
Thank you
My friend has been very busy so he has not looked for the grille halves as of yet. (he is moving)
When he gets to them I will contact you.
Sorry for the delay
Joe
-
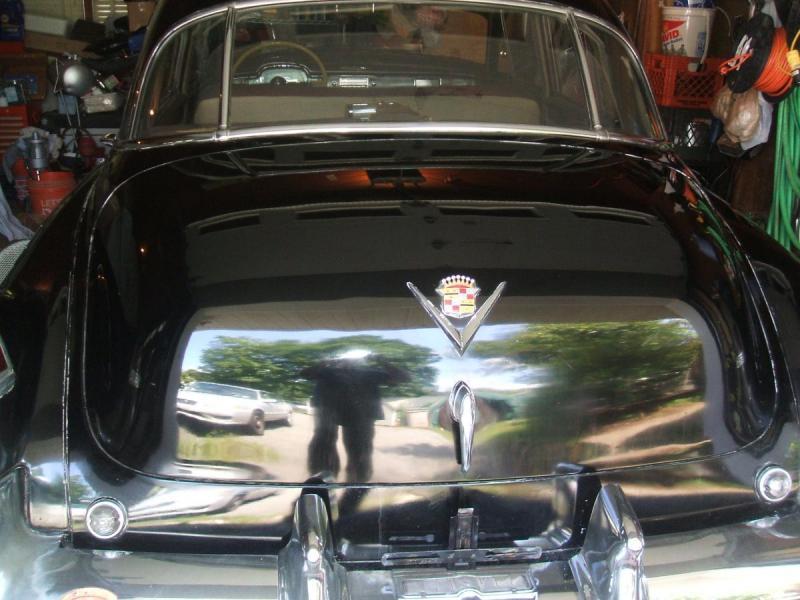
5 hours ago, GARY F said:
Gotta bring it out in the sun so we can see it really shine. Look great
Now that the outside is all cleaned and waxed I intend to move on to the mechanics and getting it running again.
That may take a little time but as soon as I can move the car in and out of the garage I will snap some shots of it outside.
BTW, thanks for the compliments from everyone here. It keeps me motivated.
Joe
-
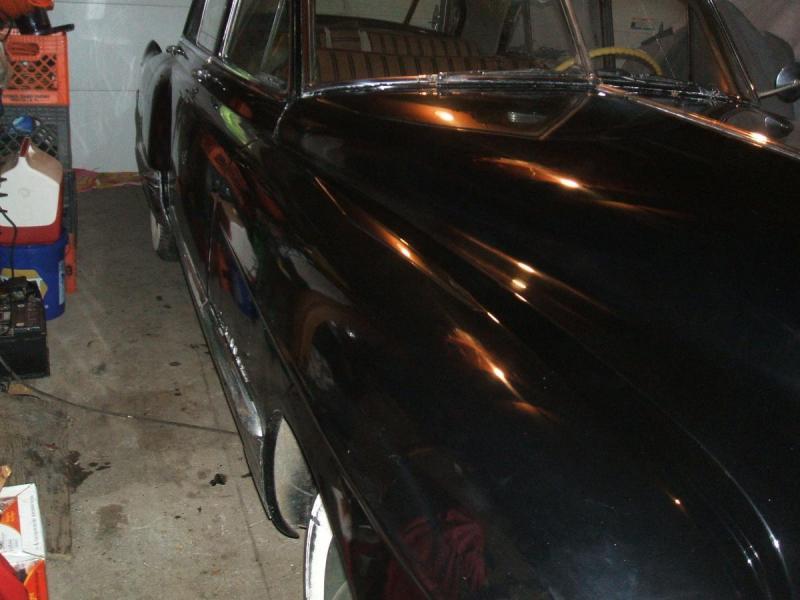
Hood & front fenders now waxed....


-
1
-
-
There was even a game called, "slug-a-bug" where if you spotted one first and said, "slug-a-bug", you got to slug the other person on the shoulder. (What can I say? I grew up in Detroit.)
Where I grew up (New Jersey, what can I say?) we called the game "PUNCH-A-BUGGY"
-
1
-
-
I am looking for the rear license plate lense (glass) for my 1949 Cadillac.
I may be looking for a couple of other things later, too.
Thanks, Joe
-
Thanks
I am slowly cleaning it up. If all goes smoothly I should be done with the polishing/waxing in a couple of weeks and then, as the weather cools off, I plan on attacking the mechanics - brakes, engine, gas tank, etc.
-
3 hours ago, Marcus Stephenson said:
Thank you
He is going to look for them and send me some pictures. It may take a day or two
-
2 hours ago, Marcus Stephenson said:
Hello Joe,
In search of the two grille half's for my 47 Coupe, the chrome shop destroyed mine unfortunately.
Looking forward to your reply.
The grille halves I have are rough.
I have a friend that may have a pair. I will ask him.
Joe
-
1
-
-
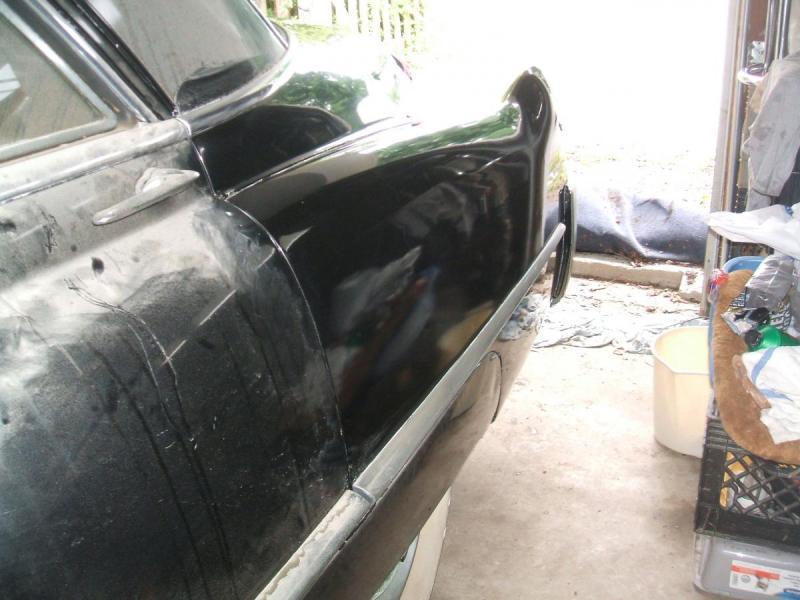
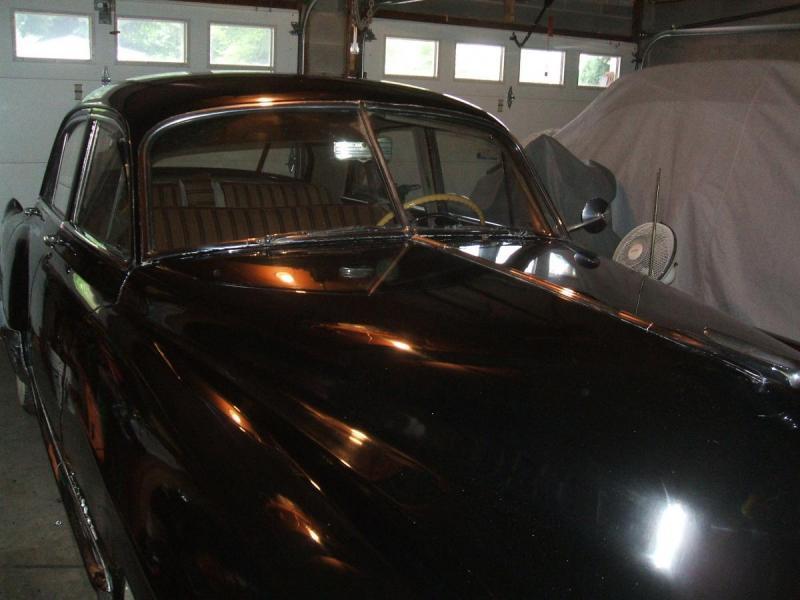
Got it home.
Just a few updated pics as I go along cleaning the 49 Caddy.
It is looking even better since the last pics


-
1
-
-
On 8/13/2018 at 7:22 PM, auburnseeker said:
Mother's Mag and Aluminum polish in the little white can works spectacular on chrome if you get around to really polishing up the chrome. I have used it on everything from perfect NOS chrome to Freshly replated parts, to old tired stuff. I don't care what any one else pitches I will put a 5.99 can up against anything they drag up for 20.00 or more a tube. Been using it for 30 years since I was in my early teens polishing my dad's 18 wheeler. Yes it says not for chrome on the can, but that's meant that eventually you will wear through the chrome. With any polishing job, the only way to truly polish is by removing the dead top layer and contaminents held in it.
That's what I used on that Caddy, except I used it for everything on the whole car including paint.
I'm wet sanding my 40 Ford coupe Acrylic enamel paint job out right now with 600 grit on a long block, because it's so messed up and after a follow up with 1000 and 1500, I'm hand polishing it out with mothers. In fact I just bought a new can to be sure I don't run out. Friends can't believe the finish it leaves. For follow up I then use the # 7 Show car glaze.
I do use the Mag & Alum polish. I have not tried it on paint but maybe I will
Thanks, Joe
-
Some updated pics of the cleaning process.
Next step is the waxing.


-
1
-


1946 dodge coupe Fluid Drive clutch needs replaced
in Dodge & Dodge Brothers
Posted
No the fork should NOT be on its side. It looks as if the fork has been seperated from the throwout bearing.
When the clutch fork and return spring are attached there should be about 1/4" play where the fork rod goes into the fork. You can adjust the play by turning the threaded end of the fork rod.
As far as where the fork should be you will know when you reattach it to the throwout bearing and assemble everything- it can only be in one position.
One other thing - there should be a rubber or leather seal that attaches to the bellhousing and then the fork goes through it. That is there to keep "stuff" out.
It attaches to a rectangular metal frame - looks like yours is missing - and then that attaches to the bellhousing in the opening where the fork goes into it. Look at the pic and look at the clutck fork and you will see the seal.
Try Andy Bernbaum for those parts or maybe they can tell you where to get them