


Smartin
-
Posts
5,631 -
Joined
-
Last visited
-
Days Won
9
Content Type
Forums
Gallery
Events
Posts posted by Smartin
-
-
I asked this question for another car on v8buick a while back...here is the thread:
http://www.v8buick.com/showthread.php?t=65800
708802 I believe is the number you're looking for, with the date code. That is on the far right side.
Schedule: 708
Date: 8-02-1968 (assuming this is from your 69)
Or it could be 1969 build date, going from the last 6 digits in the VIN. Seems like it should be a late build. I didn't think they went that late into the year with the 69 models.
-
I got my January Bugle after the February issue was supposed to be delivered. Funny thing is, I had been receiving it on a very timely basis before January...and then all of the sudden, nothing.
-
Got it today - 3/23/2006
Tattered as usual...
 My original February Bugle never got here. I did receive a replacement though.
 -
wow - where were you 4 months ago?

I would love to see some more pictures! What is the VIN? You can email me direct at adamm@buickpartsdirectory.com
-
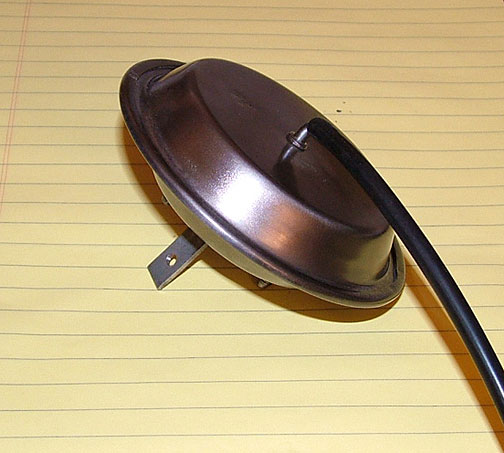
I had this apart to replace the shaft seal at the top there on the picture in October. The car now makes a very apparent vibration when it is steered as if something wasn't quite tight enough in there, and it had just enough play to make some noise.
Now, my big question - the green arrow is pointing to the suspected part that may or may not be tight enough. When I reinstalled it back in the housing in October, I snugged it up to where it felt tight. I then put the lock washer over it, and went along with my business.
I pulled it back apart tonight, and it unscrewed fairly easily. I acutally used a tool to tighten it this time. Wow, new concept!!

Could this have been my problem?? How tight does it need to be?

-
How much??
-
I used a combo of cleaners and solvents to get the various parts ready for paint. Most of the stuff in the engine compartment went all the way down to bare metal, and cleaned with a VERY heavy duty degreaser. It is actually a silk screen cleaner used for cleaning in print shops. The closest thing that I can find that does a good job, is Acetone.
Everything in the engine compartment was done with spray cans, either from CARS, or the local shop. There's no need for specialty mix paint here. The firewall was done with a one-stage paint I had mixed special. I imagine you could probably get away with cleaning the firewall up well and getting the current paint to look good....although I have no idea what yours looks like. The only reason I painted this firewall, was because it was starting to rust at the heater core, and near the brake booster.
I hope to be doing this whole treatment to my 71 LeSabre as soon as I can boot this car out of the garage
 I would like to have it ready by July.
 -
-
Rich Gibbs pointed me to Old Air Products in Ft. Worth that carries the acutator I have pictured above. It seems that the same part is used for many models and years. I looked up 1971 Buick, and they have a few listed that look exactly the same as this one. They're nearly $40 - I am wondering if it is worth the risk to buy it and hope it works!
-
Does anyone know the part number for this?
EDIT: nevermind - found it - 3146159
-
The lines are brand new. I will keep a sharp lookout on ebay. Thanks Dave
-
I posted this on Buick-59.com as well...attempting to get as many opinions as possible.
Another problem on the 60 - The door that opens for air flow from the blower will not open. I checked the vacuum line coming to it, and the vac signal is very weak. It is coming from the brass tee assembly on top of the intake manifold, and the vacuum is very weak there, also. BUT the motor is pulling very healthy vacuum. I disconnected the brake booster line from the brass tee, and it is really pulling some air. Sooo...I've got a problem here. How do I get more vacuum to the area I need it most? Do I need to replace the brass tee? Or is it clogged?
The door moves freely by hand, but I believe the vac can may also have a small leak as well. Where can I find one of these?
-
Aw crap, not this thread again!!
Getting the 60 back this weekend to finish up some loose ends that popped up after the car went back home. The steering still has a vibration, and I am pretty sure I know what it is. The choke is acting up again
. The blower door is not opening to blow air through the ducts...should be an interesting deal to figure out. And the drivers side door does not want to shut....at all. After it left the top shop, it's been goobered up since then.Last weekend, I spent my Sunday dropping the oil pan due to an oil starvation up top. There was a 1/2" of sludge in the bottom of the pan!!! YUCK! I'm glad we caught that before Rochester. The project was actually fairly easy. The frame has holes in the crossmember for access to the oil pan bolts, and I had to remove the idler arm from the frame to drop the center link enough to get the pan to come out....that, and jack up the engine 2 inches. Total project time: 5 hours
Not a great way to spend a Sunday, but it made me feel better about driving it now.
-
Excellent advice, John. I did the exact same thing when I disassembled the entire engine compartment on the 60 I worked on recently. I took MANY MANY digital pictures and used a ziploc bag for each group of bolts and parts. It made things much more organized and easy to find once I was ready for them again. It also allowed me not to miss any parts when I reassembled it. Since I was totally unfamiliar with this model car, I made sure I documented everything I did. Now, if it was one of my 71's, then I could have gotten away with some sloppiness...since I know every nook and cranny of the cars.
-
Ahhhh, progress! Looks good

I've never seen a Buick jack look like that. I don't think that's an original.
-
I gave up and changed my address to see if it actually comes next month. I don't want to miss that one. It's weird how all of the sudden I stop receiving this one magazine. I haven't made any changes in a year or so. I think one of the postal workers is a closet Buick nut.

-
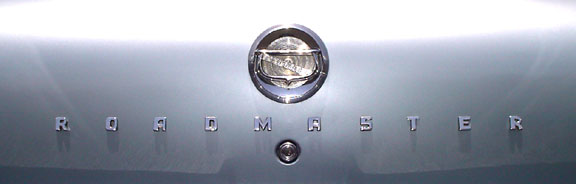
The "sediment" bulb is correct for your car. They all had it. It houses the fuel filter.
Take note!

-
I was thinking 63
-
I gotta change my mailing address.
-
I got it taken care-of tonight....it wasn't as bad as I thought. I was even able to replace the vertical piece against the window rail. I didn't realize the new rubber just slipped into the channel like that until I started looking closely at the new pieces. I was able to just pry out the old stuff and push in the new with a small flat screwdriver. I FINALLY have all the rubber replaced on that car....wow!
This stuff is supposed to just "bolt on," but there is so much custom work you have to do to make all the rubber fit just right. Otherwise, you end up with gaps and overlap everywhere. Of course, you have to know where to run a bead of sealant, too. Water finds some interesting ways to get into a car.
-
-
Mike,
Thanks for the reply. I was mainly concerned about making sure everything was ok on our side as far as me being current with my dues. I'd really hate to be bitching about this, and find out that my membership has lapsed
This is an odd situation. I had received a January Bugle at the beginning of February, and it was tattered pretty badly. But I had also received a hand-written addressed Bugle 2 weeks before that, and it was stuffed in a large white envelope. I can only imagine that was one you had sent? If it was, Thank you! And now it's time for me to get the March Bugle, and I still don't have my Feb mag yet. Someone must have an affection for Buick in my local post office....I guess they forgot to return this one to the outgoing mail bin.
This is really frustrating - but I'm glad everything is good on this side. Thanks again for the response, Mike!
-
Picture - don't mind the rust
That will disappear soon.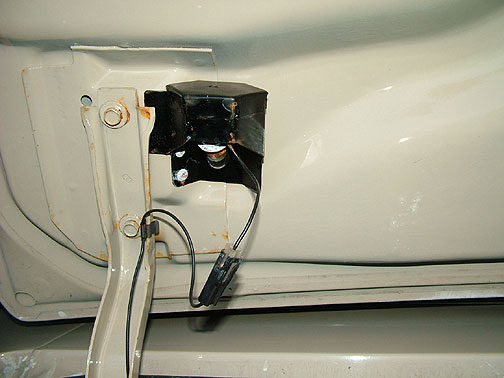
-
I will get you a picture asap.
Steering Box Help Needed
in Buick - Post War
Posted
It wasn't the problem. ......back to the drawing board!