


Mark Kikta
-
Posts
1,026 -
Joined
-
Last visited
Content Type
Forums
Gallery
Events
Everything posted by Mark Kikta
-
I used the same hide that I cut the seat back piece of leather from. I couldn’t find a way to get the entire seat cushion laid out in one piece so I was able to get 10 of the 13 pleats in once piece and then I got the other 3 pleats cut individually from the same hide once piece at a time. Then I just sewed them all together and my seat cushion is sewn and complete. On to stuffing it next.


-
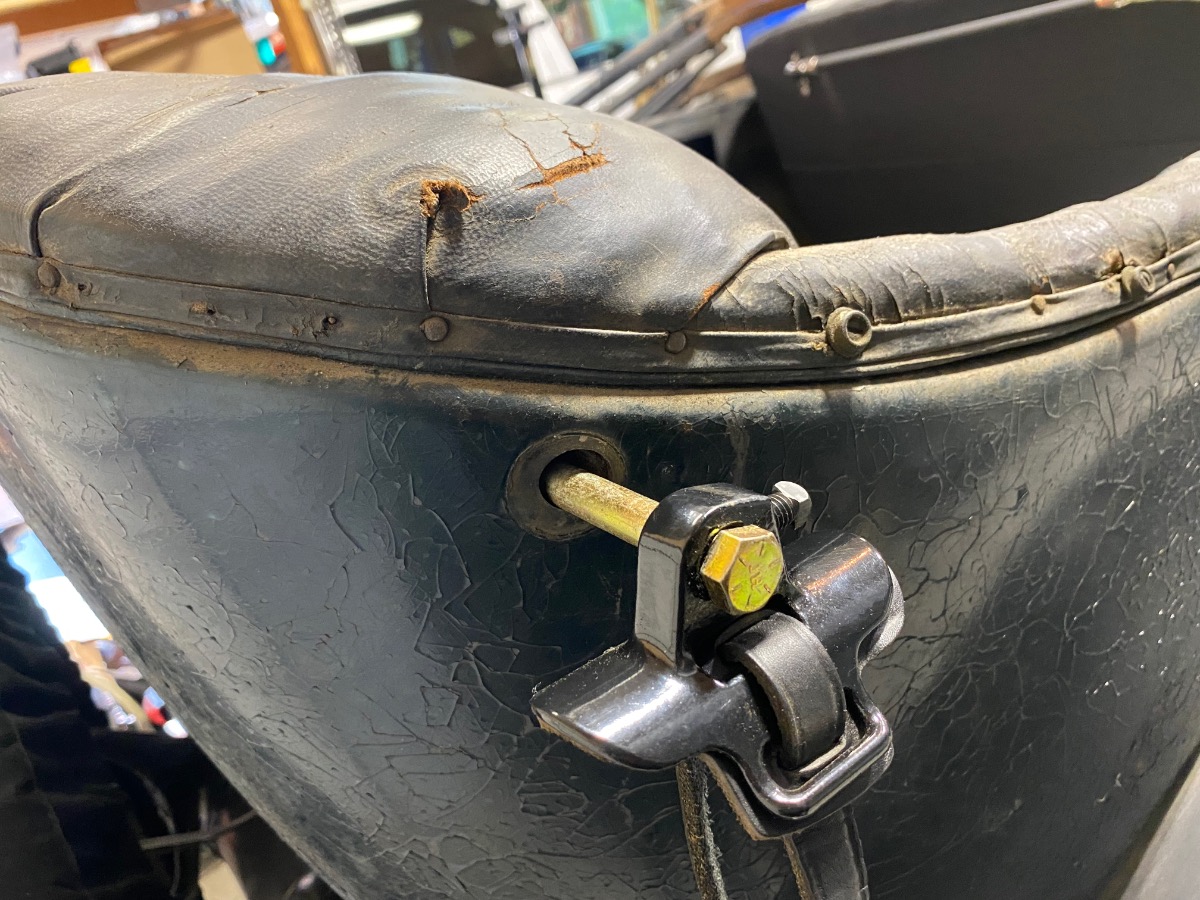
I took the back cushion off and then dismantled it so I could get good measurements and note them for making the seat cover . I was curious about the stamp inside of the leather seat cover “ST B”. Wonder what that stood for in the original factory manufacturing process?


-
Hugh, Yes that back stay you show for 1923 and earlier is exactly what I have and it just bolts to the back of the seat frame like everything else. That is how my back straps were attached also to the bow. Thanks, Mark
-
I am now working on the seat cushion for the rear. I have already finished the front seat. Once I finish the entire rear seat, I’ll only have the doors to do to finish the entire job. Then on to the top. lots of work ahead!!
-
Hugh, You can also see by my toothpicks that all the tacks were applied to the rear of the frame . Looks like they changed the attachment process by 1925. You have a natural breaking point for the trim where your saddle bolt enters. Mine enters lower in the body.


-
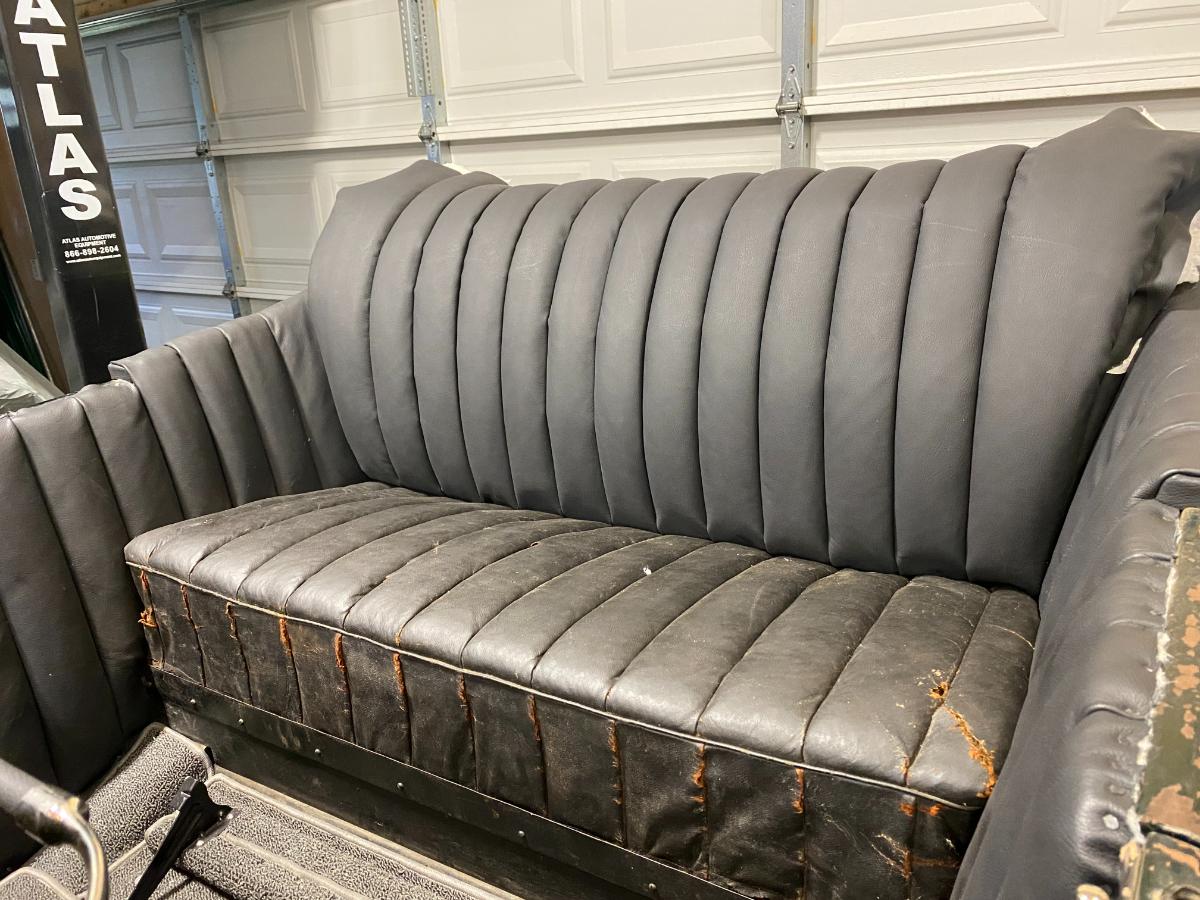
Hugh, Here are the pictures of my original seat upholstery. Both my seat cover and top were attached on the back side of the wood frame. The only tacks that were on the top of the wood frame were the tacks holding the leather straps attaching the springs. It appears that our cars were different in this regard. As far as the trim goes, I am aware that it is not the same as the front. The trim around the back seat will be the same as the door trim. I bought the premade trim that I can stick cording in but I’m thinking of trying to make it out of skived leather. Not exactly sure how I will engineer that yet however. Thanks for keeping me straight Hugh.

-
After stripping the cushion off of the springs, I see that the springs are in great shape. I have no broken springs like I did on the front seat. Also the springs are not rusty. They are filthy however and need a good pressure wash.


-
Now I have trimmed the excess leather and I’m complete with this seat back. Now I’m off to get the seat bottom complete.


-
Today I finished tacking the rear seat back cushion in place. I’m happy with the way it turned out.


-
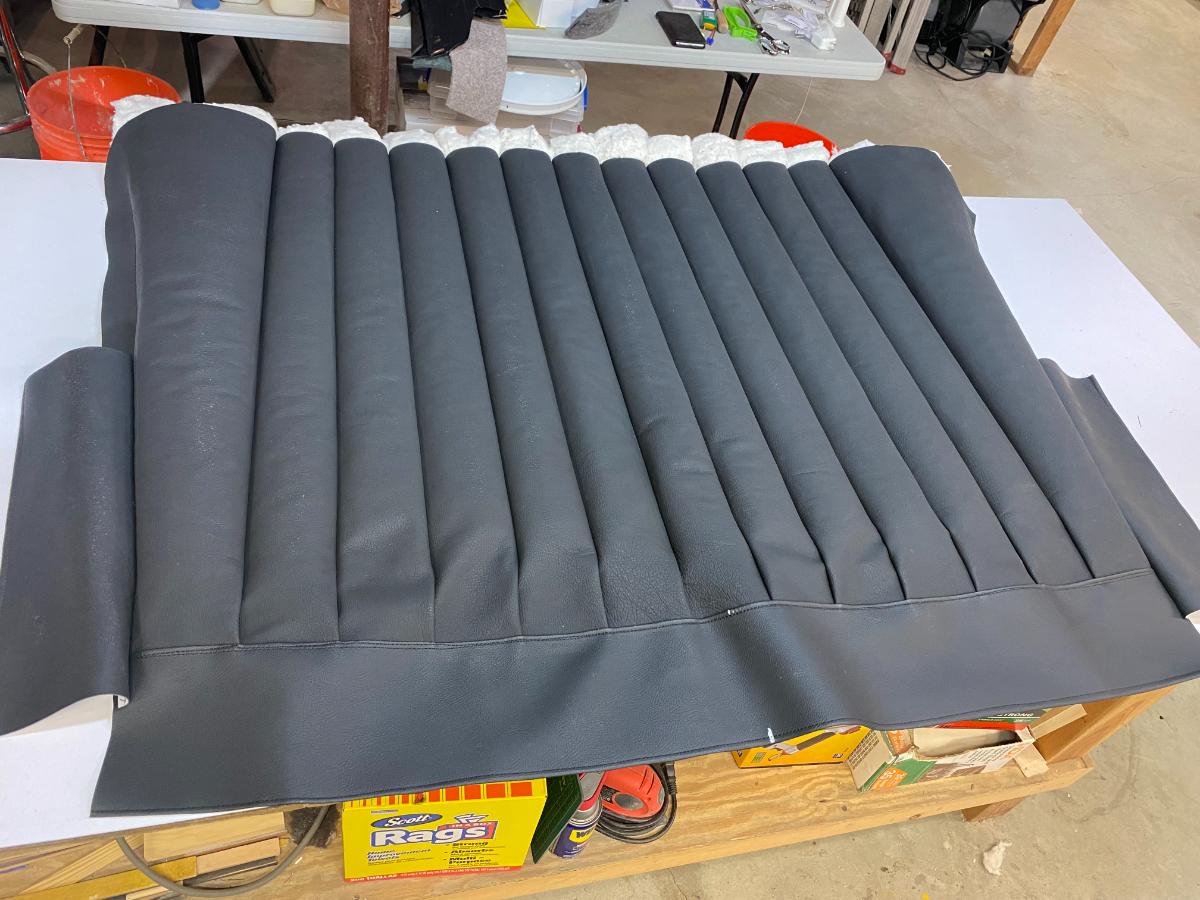
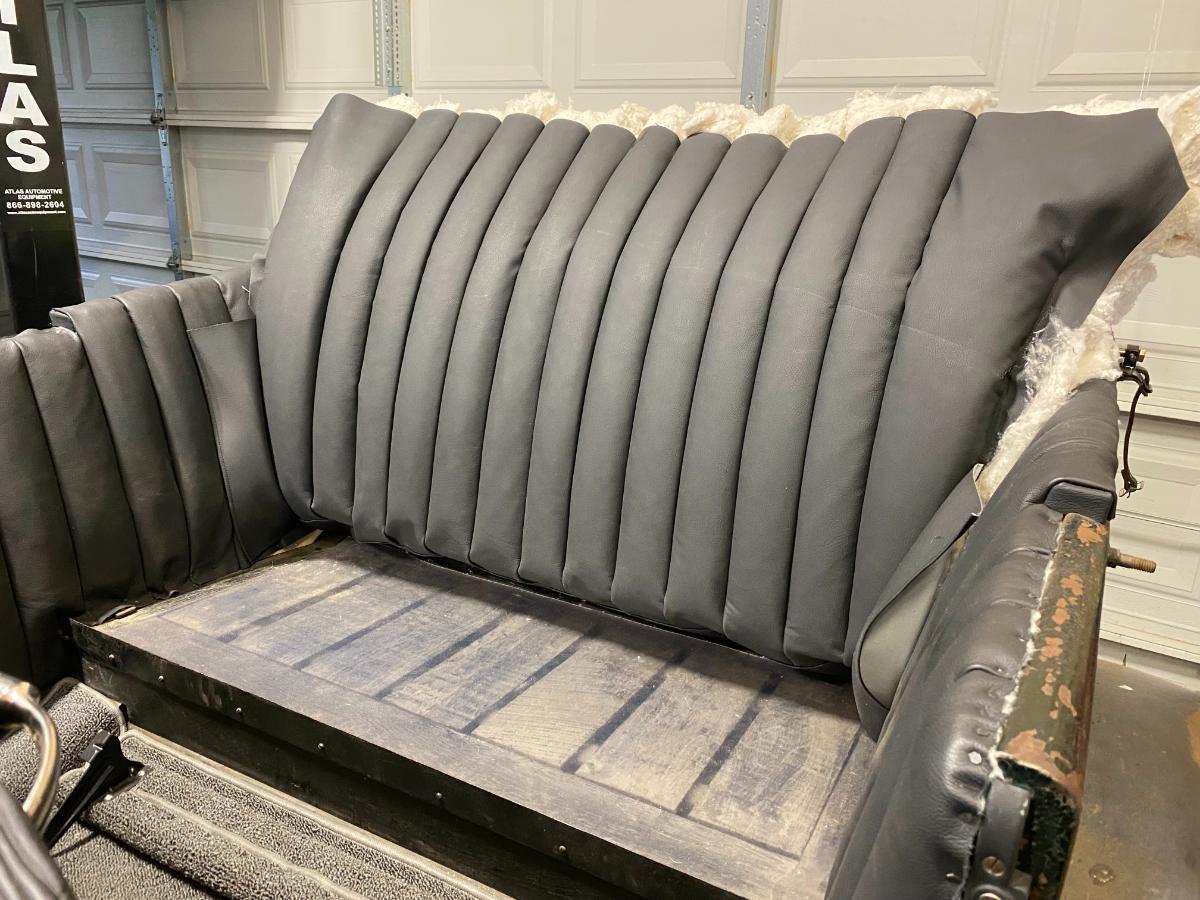
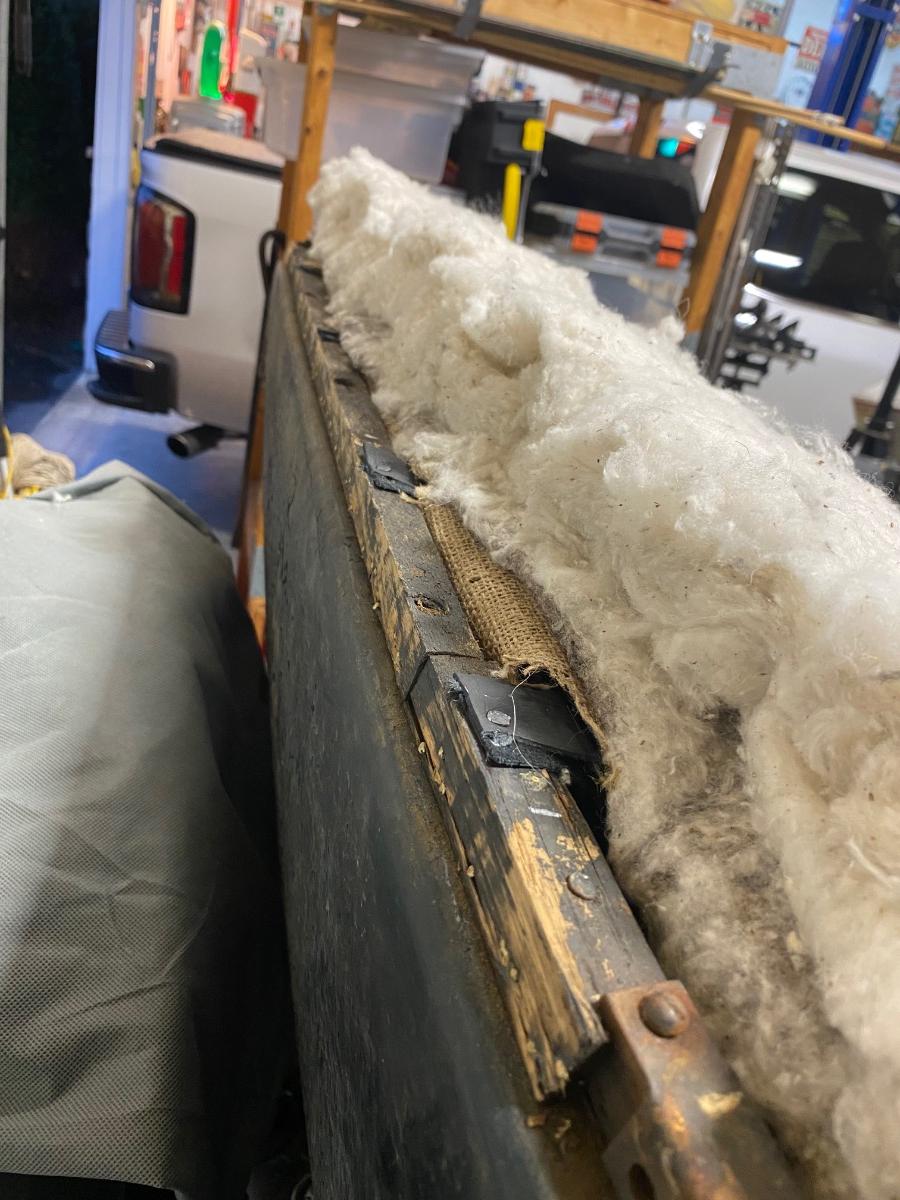
Today I completed stuffing the rear seat back cushion. I have included some pictures of the completed cushion and also after stuffing. You can see how I stuffed the cushion pleats with 1 strip of 1/4" jute and two layers of 1" cotton batting. I wrapped these parts in a strip of a 4mil plastic bag and pushed it through the pleat with a steel ruler. I stuffed them from the bottom because I had more material to hold on to as I pushed the stuffing into the pleats. Once the material was in place, I pulled the ruler out from the bottom and then pulled the plastic out from the other end. Then I took the cushion out to the car and tacked the bottom edge as the original one was tacked in. I used a tack at each seam location across the base. Now I'll use the old seat bottom to push the cushion into position and I'll start pulling and tacking the top edge and then trimming excess stuffing and material. Once this is complete, I'll tackle the rear seat bottom.


- 81 replies
-
- 12
-

-
I had one badly rusted rim so I went in search of a new one. Vin Cassidy helped me find another Jaxon Type 21 rim which came on my 1922 Buick. I do believe they were original on 21 Buicks but my car is a very early car (#602 built in 22 year) and I have a 21 engine in it as well. I believe they had parts left over from 21 when they started 22 production and they used the leftovers first. But the rim I got from Vin did not have the locking tab on it so I had a local machine shop make the tab and rivet. Works like a champ. Here are a couple of before and after pictures of cleaning up my rims and getting new tires.


-
It’s just sewn to the leather. The backing is 2 inches shorter than the leather at the bottom.
-
OOPS Morgan I cut most of it apart to get the measurements. It's all in pieces and some of it is already gone in the trash. Sorry about that. Mark
-
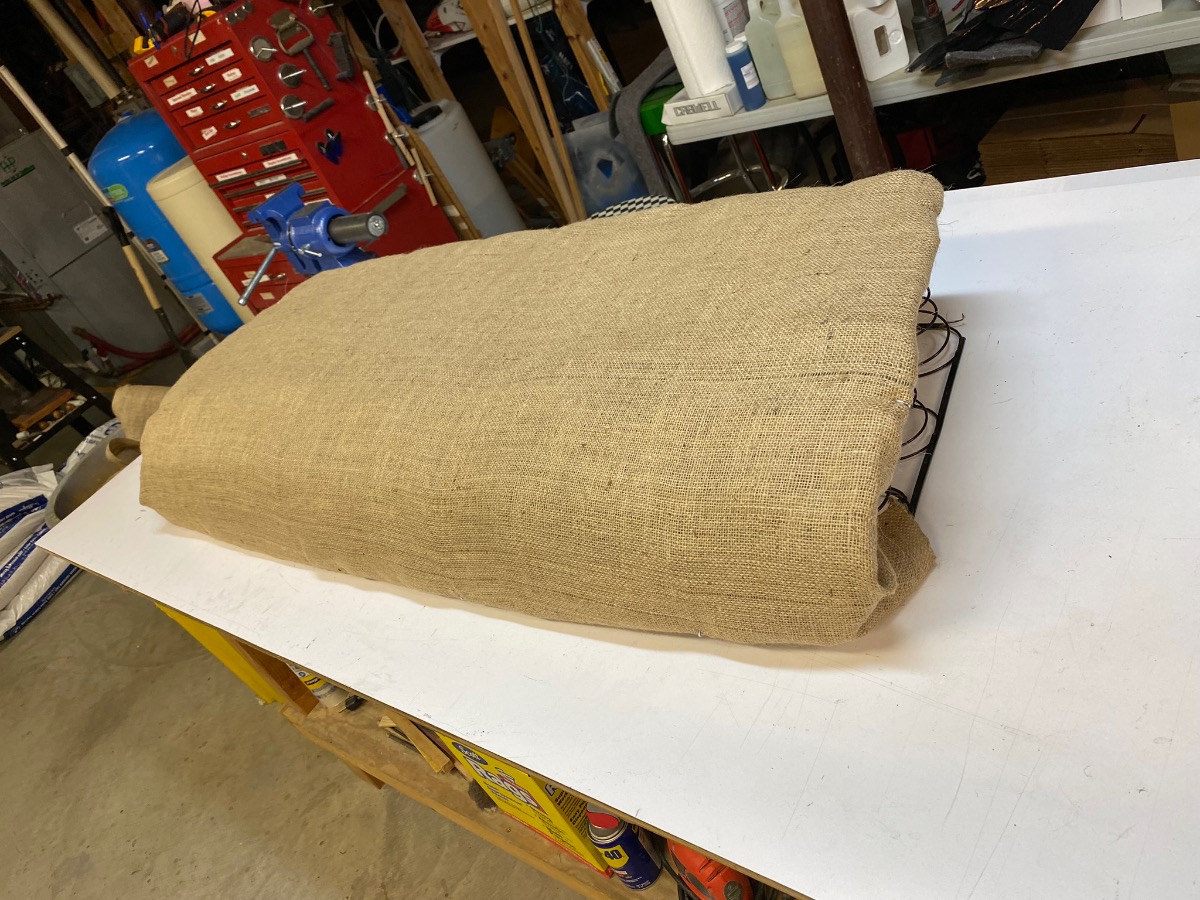
Today I covered the back springs with burlap and a layer of jute, hog ringing them both in place. I then laid two layers of cotton batting on that and attached the springs in place with 5 leather straps. Now as soon as get the pleats stuffed, I’ll be ready to tack it all in place.

-
I have completed sewing of the rear seat back cushion, including the bottom and side flaps. Now I’ll need to cut all the cotton to stuff those pleats.


-
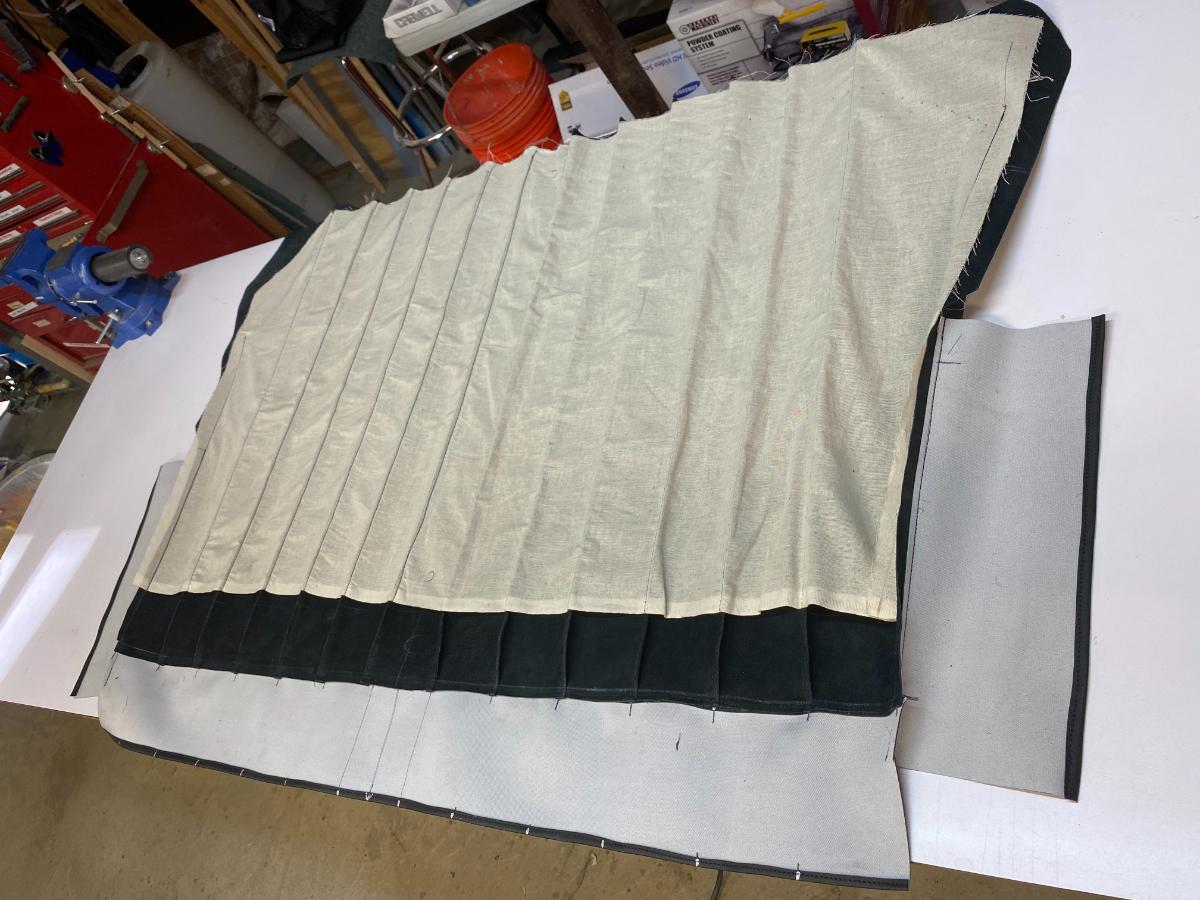
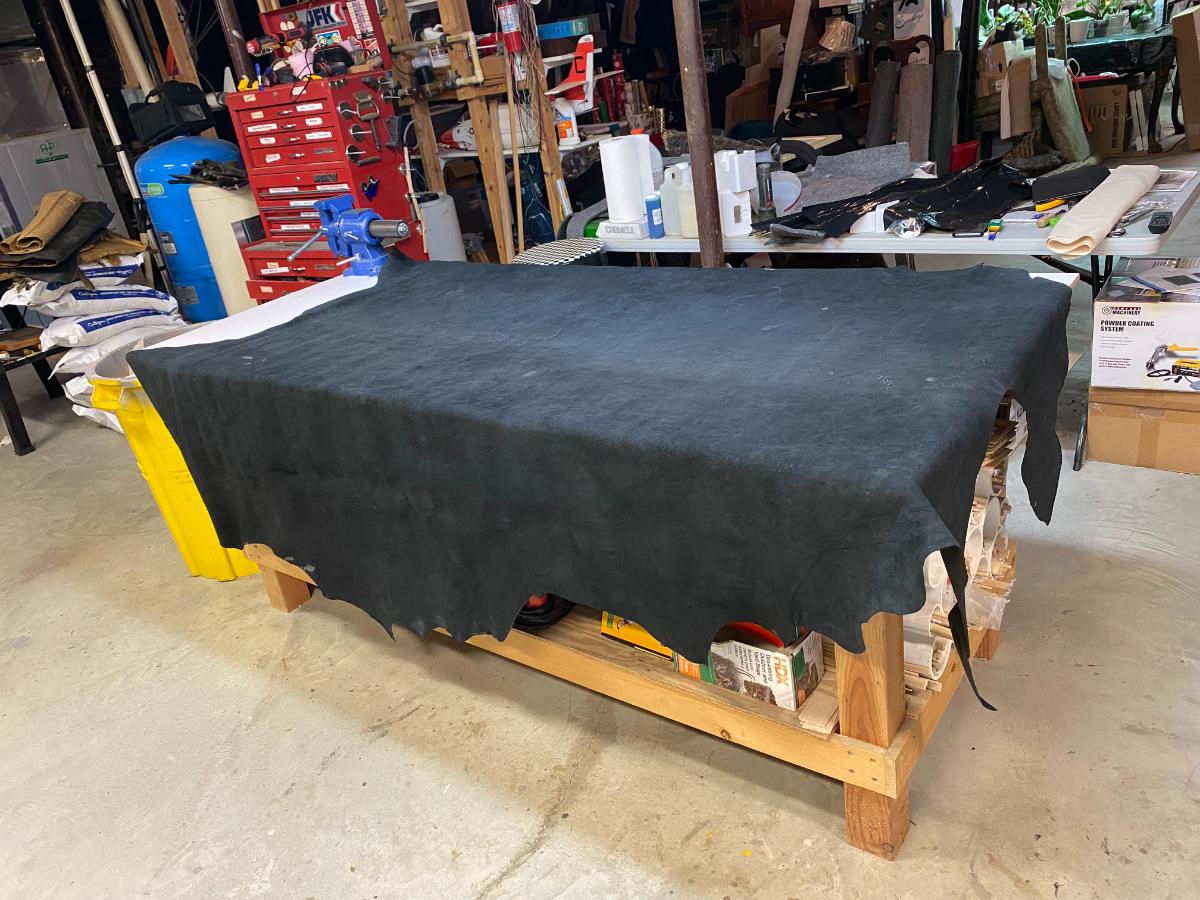
Today I rolled out my roll of muslin cloth and drew the pattern from the old burlap backing onto this new fabric. I used 3 3/4" spacing to get the 3 1/2" pleat because of the seam allowances required. I then trimmed the excess so it is ready to be sewn onto the leather. Next I laid out my leather hide to work on the pattern for the leather portion of the seat back. This was a large piece of leather and I was able to lay the entire pattern out on one side of the hide. After marking each pleat and all seam allowances, I trimmed the leather so that it is now ready to sew together to the muslin backing. Eleven of the 13 pleats are all the same, except for the ends which are wider at the top than the bottom. I noticed that the outer edges of the end pleats were only sewn about 12 inches from the bottom which is about one-half of the length of the pleat. The tops of the end pleats looked to have been stuffed with loose horsehair by hand to get that very full look before they were tacked in place.


-
here are a couple of photos of the underside of my original 1922 running boards. You can see the grooves cut in the underside.


-
So next I’m on to the rear seat back cushion. I will take it all apart and get my measurements so I can make the same size cushion.


-
So I have completed the right and left rear side panels of my upholstery. All I have left to do is put the final trim on to cover these nail heads and give the panels a finished look. I will do that after I install the rear seat back cushion so I can do it all at once. The back edge of the rear seat back uses the same trim and I will need to make that trim. You can also see how I had to cut the seam and cover the armrest.


-
Today I got on to sewing right away. I sewed the leather cover pleats to the Muslin back fabric. I used muslin backing vs burlap which was used originally. In the second photo you can see my pile of cut strips of cotton batting to stuff the pleats with and a strip of jute as well. Each 3 1/2" pleat on the side panels is stuffed with one 3 1/2" strip of 1/4" jute and a double layer of one-inch thick cotton batting 3 1/2' wide. In picture four, you can see my newly sewn side panel just leaning against the side of the car before actual installation. In the last picture you can see the side panel installed except for filling the first pleat at the door. I'll get to that tomorrow.


- 81 replies
-
- 13
-
-
So today I began my installation phase. I first installed 1/4" Jute padding as insulation/sound deadening around the back frame area of the back seat. This replaces the original cotton batting that had been glued in place. My next step was to staple leather over the armrest ends so I could form the arm rest with the sewn padding. After adding the leather, I tacked new panel board pieces in place which will give these side panels the support they need. I copied the old side panel backs exactly. This new panel board is the same thickness as the old panels and is waterproof as well which will give some protection against the weather. Next, I began tacking the new sewn leather panel in place on the drivers side. I made these panels just as they were made originally. I found so far that Buick had a reason for everything they did/or didn't do, no matter how strange it looks. The original panels looked quite strange when I looked at the back of them. Some pleats were stuffed with stuffing the entire length, and others were stuffed only in the top halves. They left the stuffing out of the lower halves so that the rear seat cushion would fit in place easier and would wear on the upholstery less if it wasn't such a tight fit. So I did the same thing when I sewed them together. Here you can see the backside of an original side panel covering. You can see here that my leather panel is partially installed. I have tacked it in place and have not yet stuffed the end panel closed to the door. This panel get stuffed in-place and you tack the outer edge to get the panel tight with no wrinkles. This will be my next step. Then after I stuff the end pleat, I will trim excess leather off of the panel.


- 81 replies
-
- 10
-
-
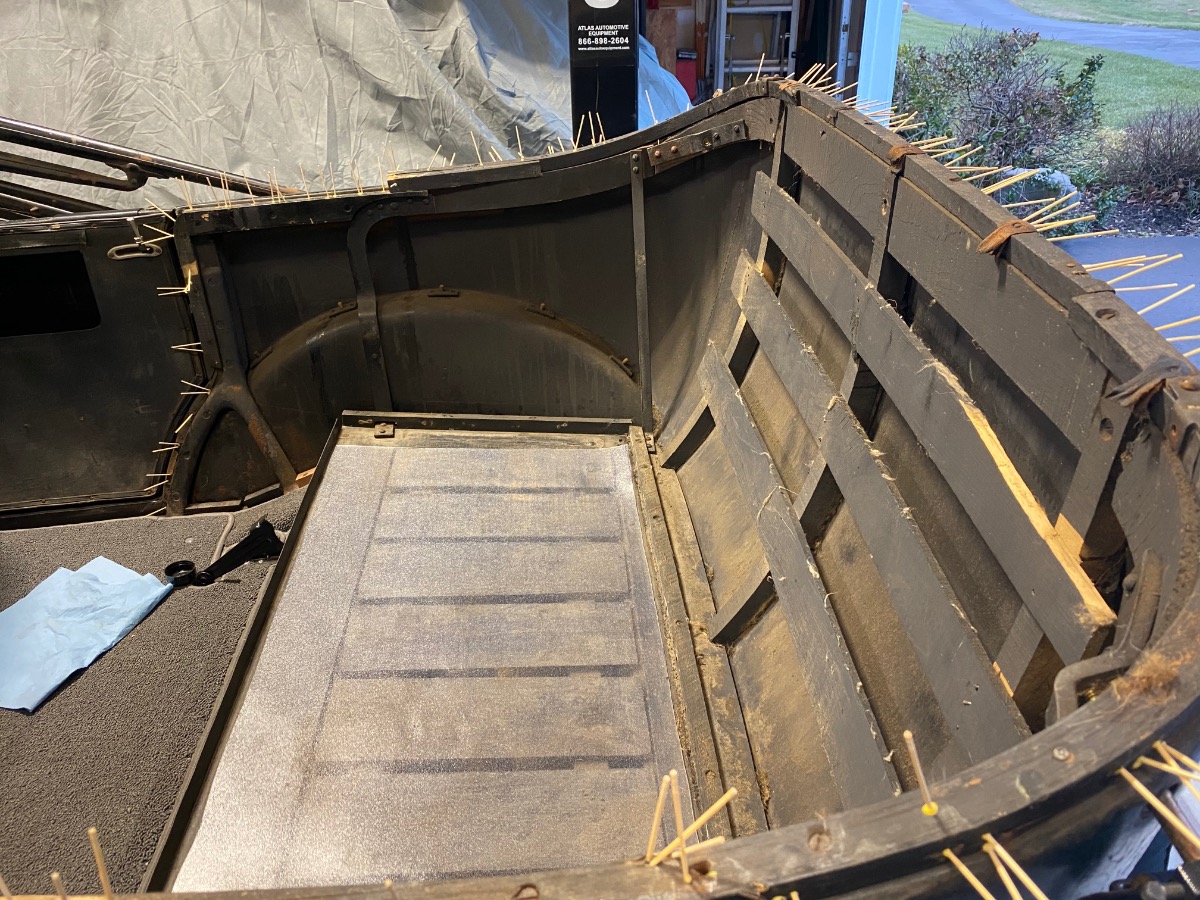
Today I glued a wooden toothpick in every tack hole I could find after removing my upholstery. I want to ensure I don’t have a bunch of holes when I start tacking everything back in place. I counted over 200 toothpicks used.

-
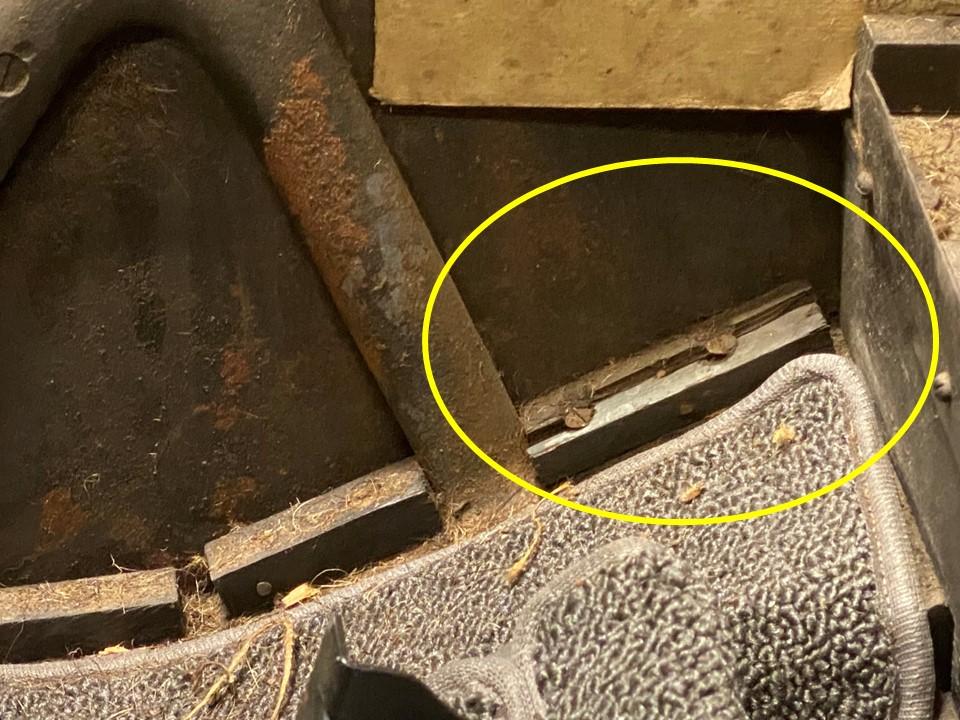
Today I repaired the broken wood tacking piece at the bottom of the upholstery side panel. In that picture you can see the corner of the steel frame piece that holds the rear seat bottom from sliding around.


-
My 1922 Buick is a model 45. The padding on those 3 slats was just cotton batting attached to the slats. The seat springs are held in place by the metal rim (frame) around the edge of the seat bottom frame. This is just like the front seat. Yes it is unbelievable that I saw no evidence of critters in the back seat area.
-
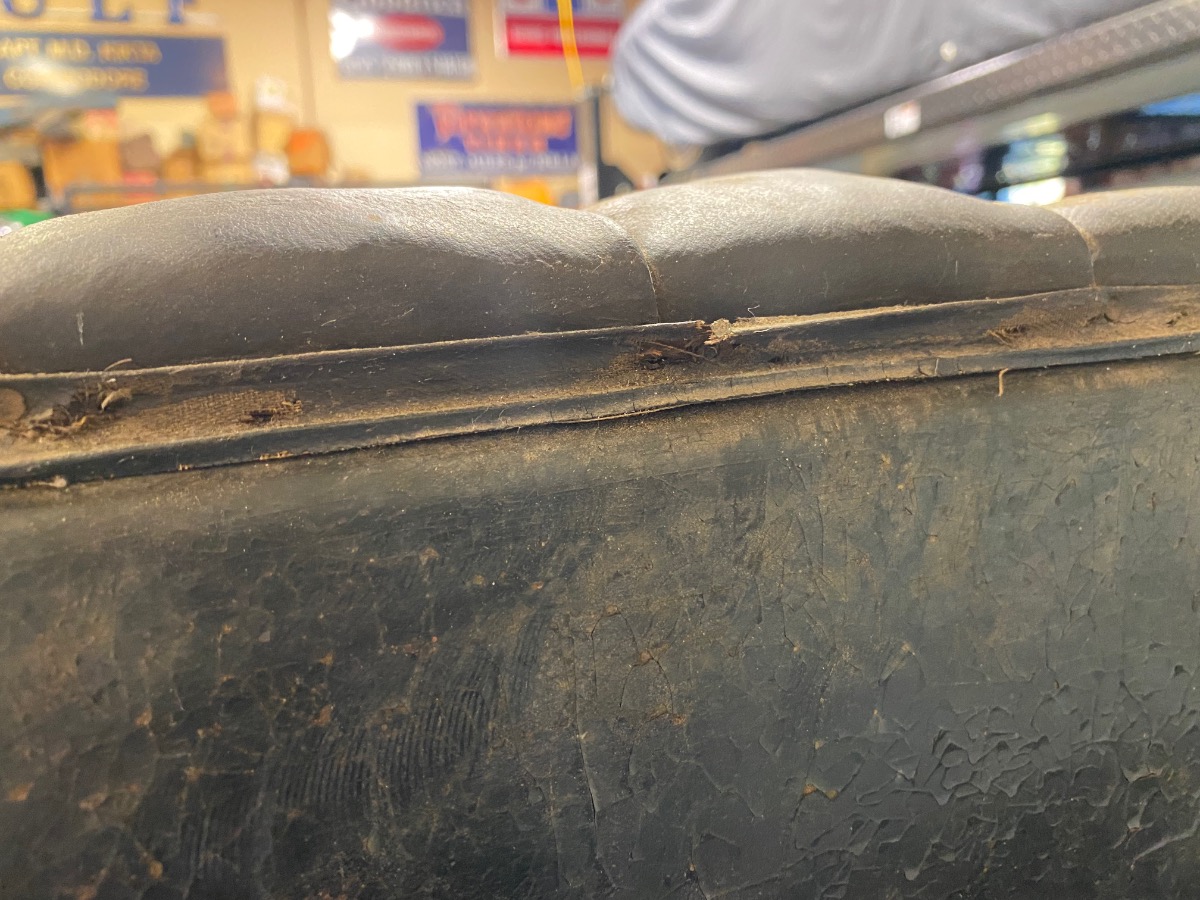
Yesterday I decided to begin working on my rear seat upholstery. I have now fully retired and the holidays are over so it's time to get on with completing my upholstery project. So yesterday I removed the upholstery from the rear seat and sides. While the seat obviously never had much wear, the leather was very stiff and many of the seams were tearing out so it needs replaced. Underneath it all there was no real rust and only one small piece of wood that needs repair because it had been split. There appeared to be no wood rot and it was clear that this was the original upholstery because there was only one set of tack holes which were the tacks I removed. I found it interesting that the numbers "22" had been written on the inside of the body tub in the factory. I guess that was to indentify this rear section as a "22" model during the assembly process. I also found it interesting that as I started removing the side panels, it was clear that as the factory folks were getting the stuffing completed on the end pleat at the door opening that has an irregular shape, they needed to make the pleat more "Full" so they used horsehair scraps as fill material to do that as they tacked that last piece in place. Also the rear back springs are still shiny black and look like new. So I have removed all interior items from the back seat so I'm off to make new side panels first and then complete seat spring upholstery. More pictures to follow.


- 81 replies
-
- 16
-


