


Mark Kikta
-
Posts
1,026 -
Joined
-
Last visited
Content Type
Forums
Gallery
Events
Everything posted by Mark Kikta
-
1956cody, That will be a nice project and you will have a special car when your done! I’m glad I helped!! Markl
-
Well today I completed the rest of my interior project. I completed the door straps after installing the front and rear door panels. I finished making the required trim to complete my rear seat installation also. I trimmed out the side panels for the rear seat along bottom edge, front edge and top. Then I trimmed out the armrest portion of the rear seat that also goes around the back of the rear seat to the point where the top rear strap bracket will be installed. To complete the trim, I trimmed out the rear seat back between those top rear strap brackets. So, this will be my last posting for my 1922 Buick interior project since it is now complete. It has been a two-year journey from beginning the front seat upholstery until today. It's certainly not perfect, but I had a great time learning as I went along and it has given Kathy and I a sense of accomplishment to have done this ourselves. My wife Kathy was a big help as I started this project and as I learned what I was doing more and more, she spent more time doing her own projects and let me do more of this by myself. Also, I certainly could not have done this without all the help I received from a number of members of this forum. Thank you all for your time, advice and encouragement. I guess it's off to start on the new top next!! Since I am retired now, I hope this project takes a lot less time. More to follow!


-
Me too’
-
I have completed the panels and trim so I can install them tomorrow. Then I’ll make the rest of the trim for the back seat


-
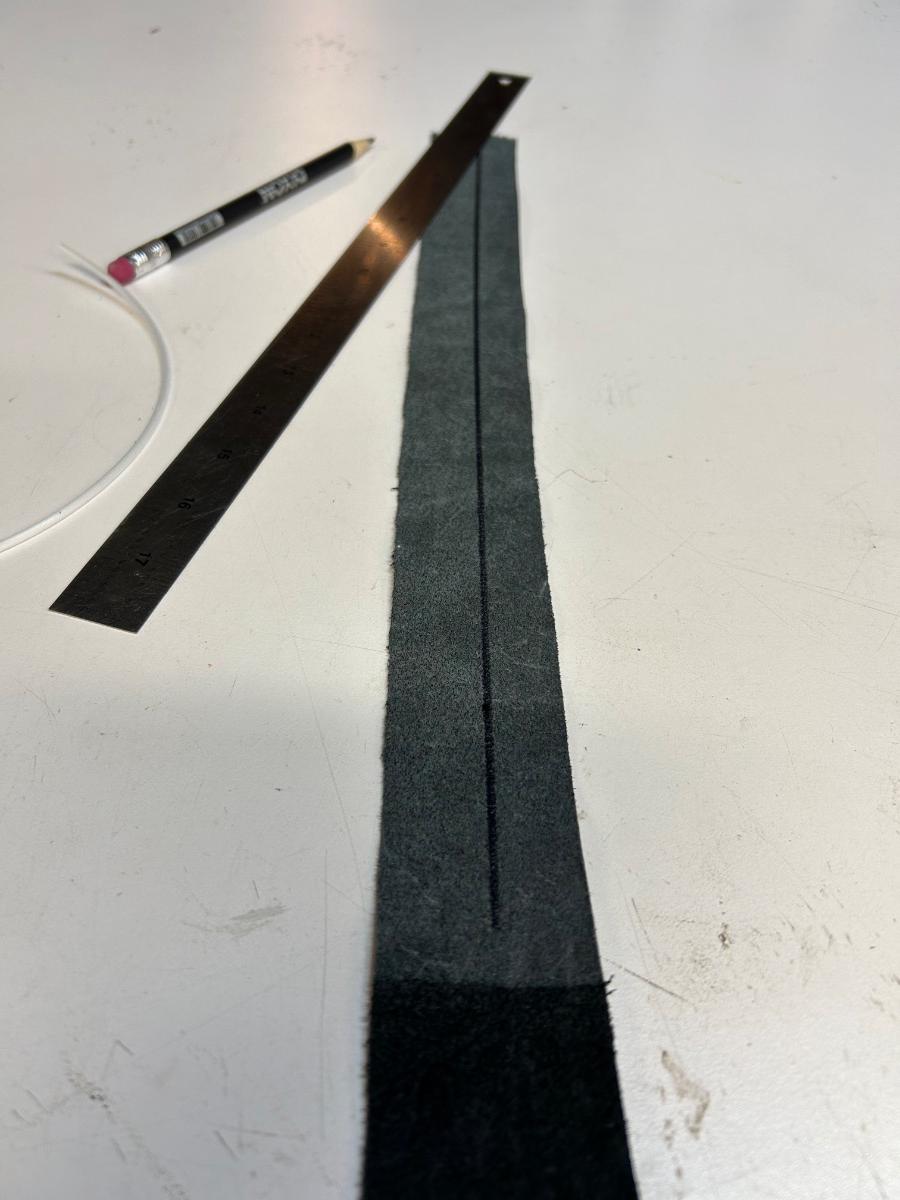
In preparation for completing the doors, I wanted to clean up the pieces of aluminum trim that surround the inside door handles. I screwed them to a piece of scrap wood so I had no chance to bend them while polishing. So I used red rouge and a buffing wheel to clean up each piece then I used white rouge to polish them up nicely. I then sprayed them with clear acrylic paint. Also cleaned up the side curtain rod holders and painted them black for now. Then I skived 2 inch wide strips of leather in order to make the trim I need. I used a marker to draw two lines on the back of each strip. The first line was a reference I used to fold the leather over the piping and sew in place. The second line was my reference for folding the other side over. I used double sided tape to hold that fold in place. Then I put double sided tape down the center back to again fold the side opposite the piping and hold that fold in place. The trim was ready to be tacked in place at that point.


-
So I finally got to spend some more time on my door panels. All of this spring yard work and a vacation to SC got in the way. I covered the rear panels with leather and sewed the flaps to the door panels. I made the flaps with leather on the front, a piece of polystyrene plastic sheet in the middle and some black waterproof canvas on the back side. I used the styrene to keep the corners stiff after I sewed the edging on so the corners wouldn't roll up. In the third photo here you can see that I used double sided tape to hold the skived leather strip in place around the edge and then I sewed them together. This made a very nice corner that will lay flat and never roll up. The steel plate then slipped into those flap pockets before I sewed them to the door panels. All door panels are on the doors and I'm off to make the trim I need to finish the door panels and trim the rear seat and side panels.


- 81 replies
-
- 13
-

-
I decided to add a magnet to my door panels before covering them in order to keep the flap held down a bit. I drilled a hole in the panel board near the bottom of the opening and then glued a piece of styrene plastic (.030 thick) on the back side and glued the magnet to the styrene with contact cement. Then I glued a piece of black outdoor canvas on the inside and sewed the entire package all together. I used cloth on the front side in order to keep the lump to a minimum. Then I glued the leather to the front side of the panel and cut the opening into pieces and glued them to the backside to complete the opening for the flap to cover.


-
Thank sir Brian!!
-
Next we removed the pillar post covers to make some new ones. I used the old ones for a Pattern and covered them with leather. I also decided to fabricate some kick panels. My 1922 Buick never had kick panels and I decided I wanted that look on my car. So I made kick panels out of the same panel board I used on the door panels and covered them with the vinyl I have to match the leather. I left a flap on the edge mating up to the pillar post and takes it in place and then glued a magnet on the forward most end to keep it in place. I am very happy with the look.


-
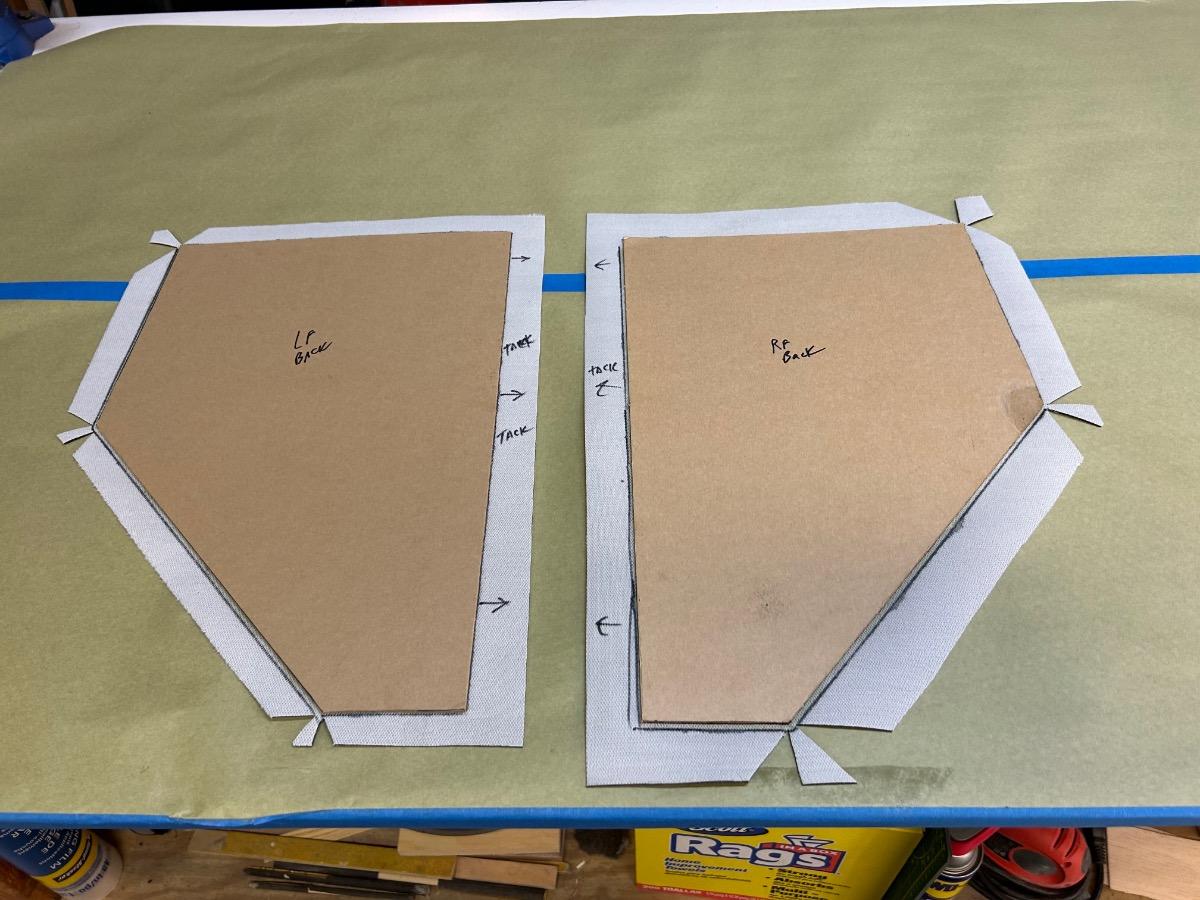
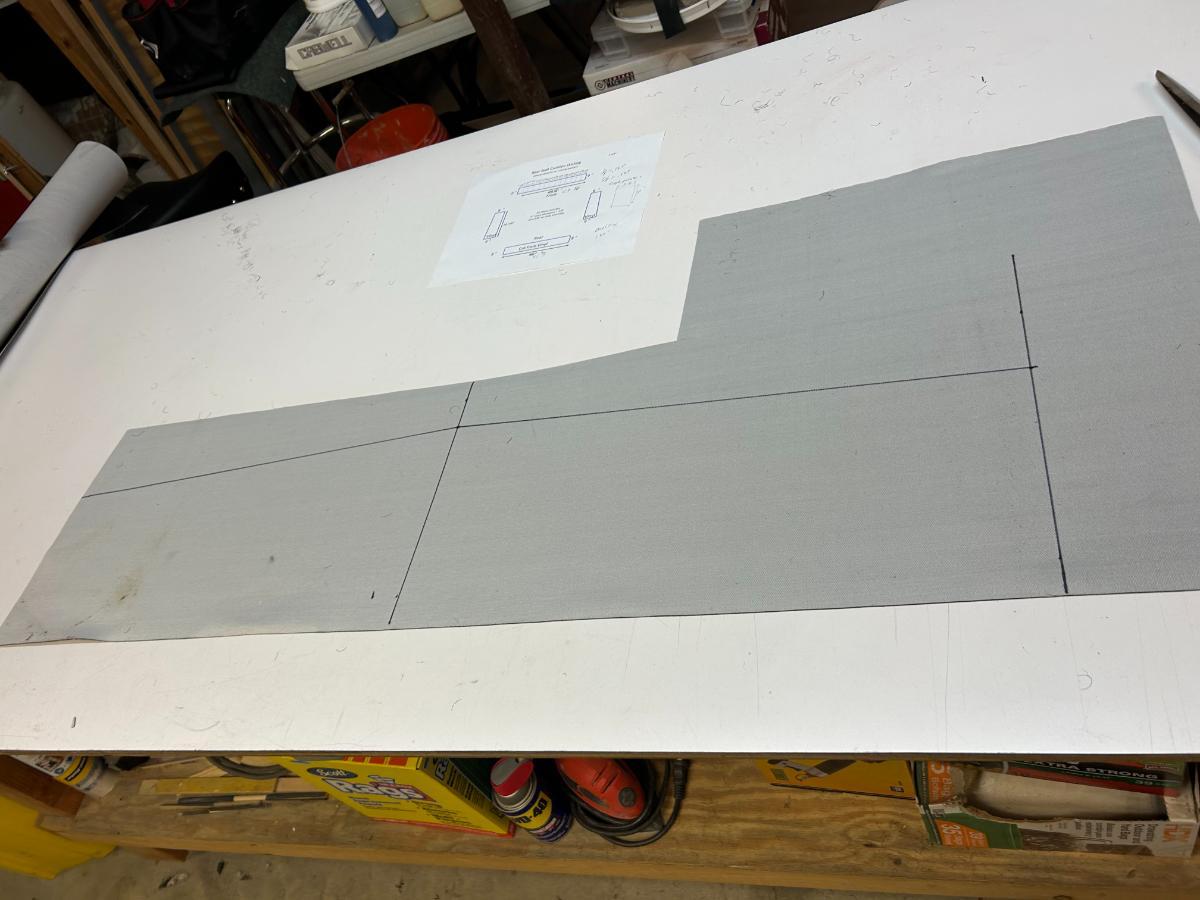
Today I cut all of my door panels. I used waterproof cardboard that won’t soak up water that gets on it. It’s pretty tough stuff so I used a jig saw to cut it and then filed/ sanded the edges smooth. Also starting experimenting on making the trim for my back seat and doors. It looks like I will skive two inch wide pieces of leather to sew some 4/32 cording on one side and then glue and fold the other side over to end up with something like the next to last photo. Last photos is comparing the old and the new potential trim. I think that will work


-
Hugh, I got a close enough scan off of my body but then thePPG library told me the right color for my car. I bought a small sample and it’s right on. Not Brewster green. I think it was Buick Green. I was thinking about using White Grease??
-
Oldtech I hope the pictures are a good reference for years to come, Thanks
-
Now I need to clean the inside of my doors and lubricate the latch mechanisms. Has anyone else done that and if so, what did you lube everything with?
-
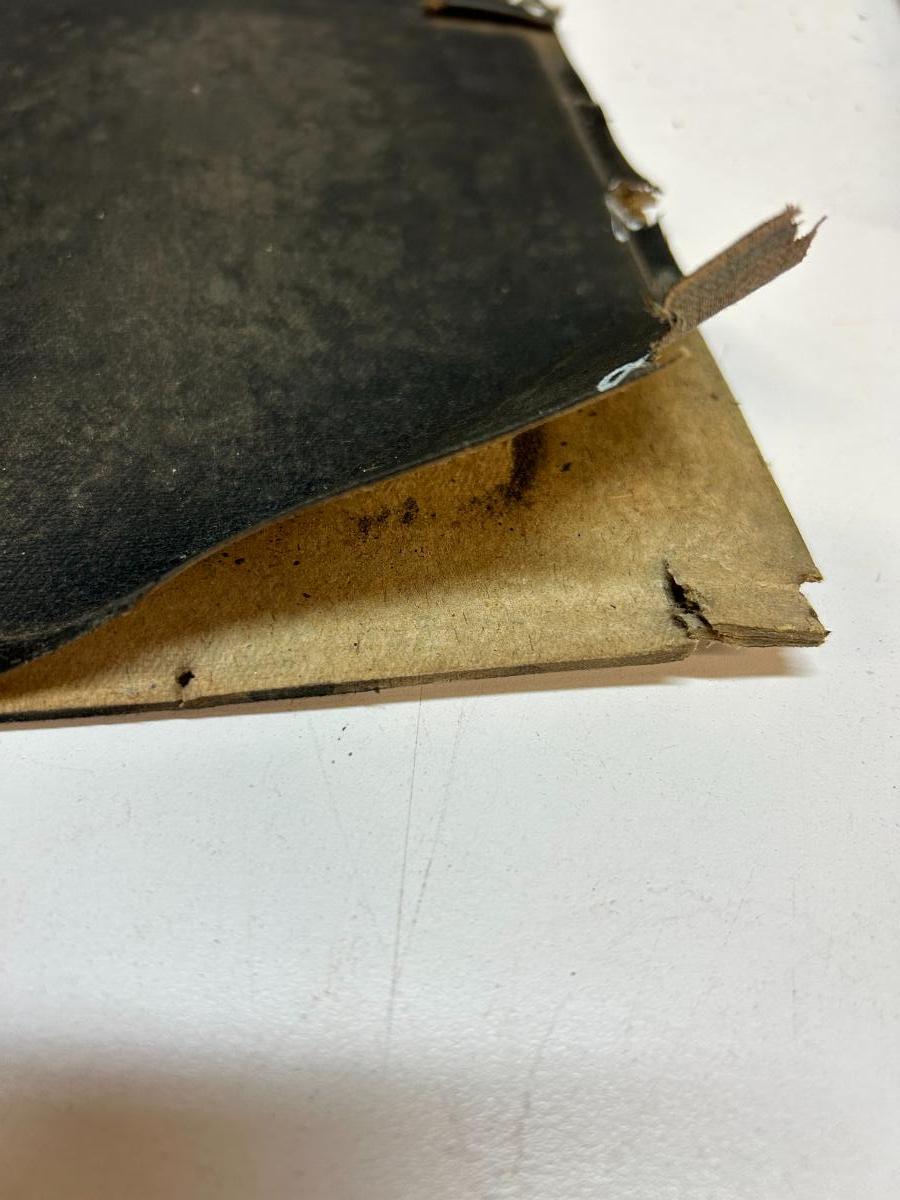
Here the first picture shows the door flap that fell off of my 1922 Buick. The flap design for the 1922 Touring car was almost square. The flap was covered in a totally different material that looks very grainy and feels like some type of old vinyl. The backside however is covered in a very thin material that almost like a thin paper, but I'm sure it isn't really paper but some very thin fabric. The third picture shows my right front door condition the day I bought the car with the flaps still attached.


-
All the decorative tacks were the same around the perimeter of the door panel except for the two tacks at the arm rest pad on top of the door. These tacks were almost 1 inch long and used to hold the inside edge of the door pad in place. I also found a logo stamped on the back side of one door panel seen in the second picture. It looks like "R V Co"! Wonder who that was?? I was hoping I would find some great finds as I took these door panels apart, but I did not. I found a couple old cigarete wrapping pieces and one business card that had worked it's way into the bottom cavity of one rear door. The card was from Tripp Lake Lodge in Chestertown, NY. I know the owner before me bought this car in NY Region #2 in 1957 ( I think that was near Albany). Tripp Lake was North of Albany so that makes sense. The Stamoid type door panel covering was quite thin and was glued to the cardboard panel. It was clearly not wrapped over the outside edges of the panel when applied. The material was trimmed right up to the edge of the cardboard. I guess they thought the trim applied around the edges would hide that open edge, or maybe they didn't worry about that?? As you can see in the last photo, they did wrap the covering around the edges for the door flap pocket and glued them in place.


-
It does look good. Yes I got Hughs documentation but it is different than my 1922. Thanks
-
Off working on the doors today. I tried to document the removal of my door panels as I went along. These door panels are original and have not been removed or replaced. In the first close-up picture you can see the type of material used. It was not leather or vinyl but was a Stamoid type of fabric attached to a cardboard backing with tacks, and those tacks were covered up by the vinyl trim tacked around the edge of the door panel. After I removed the aluminum bezel around the door latch handle and the screw that is half hidden by that bezel (which holds the side curtain rod holder in place) along with the two screws holding the door strap, I could begin taking the panel off. First, I removed the 30 trim decorative tacks that hold the trim in place and removed the trim piece. This is the same trim used to trim out the rear seat and side panels. The flaps were already missing so I didn't have to worry about them. All four door flaps were in place when I bought the car in Florida but after I made the trailer trip from Florida to Maryland, all four flaps had fallen off because the vinyl was so brittle. Each door panel was tacked in place to the wood frame by 13-15 tacks each. These were just plain 3/8" tacks. After I removed the door panels I could see several things Buick did to keep things looking Black. First, I saw that they tacked a piece of vinyl over part of the latch mechanism so that you could not see anything through the groove of the door handle bezel but black. Then I saw that they glued a piece of black vinyl to the inside of the latch mechanism so you couldn't see that when you looked under the door flap up and they also glued a piece of black cardboard on top of the wooden center frame piece so you saw only black when lifting the flap and looking down inside of the door.


-
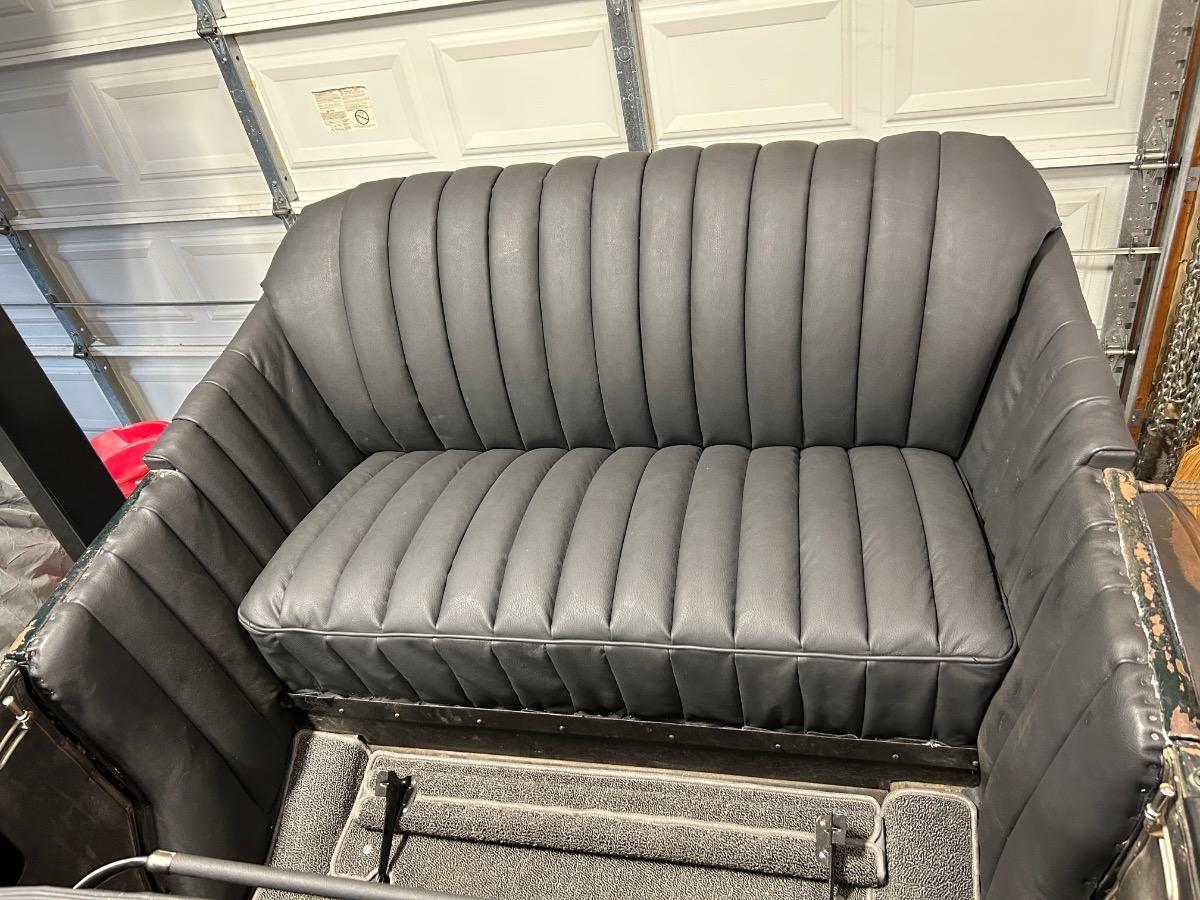
Well I did a test fit of my back seat cushion this morning before I trimmed the excess leather off the bottom. I wanted to ensure the pleats lined up ok in case I needed to untracked the cushion and slide it a bit to line up. It looks good to me. Those seats were a lot of work for a rookie but I’m glad to be finished with them. Now I’m on to the doors! More to follow😁


-
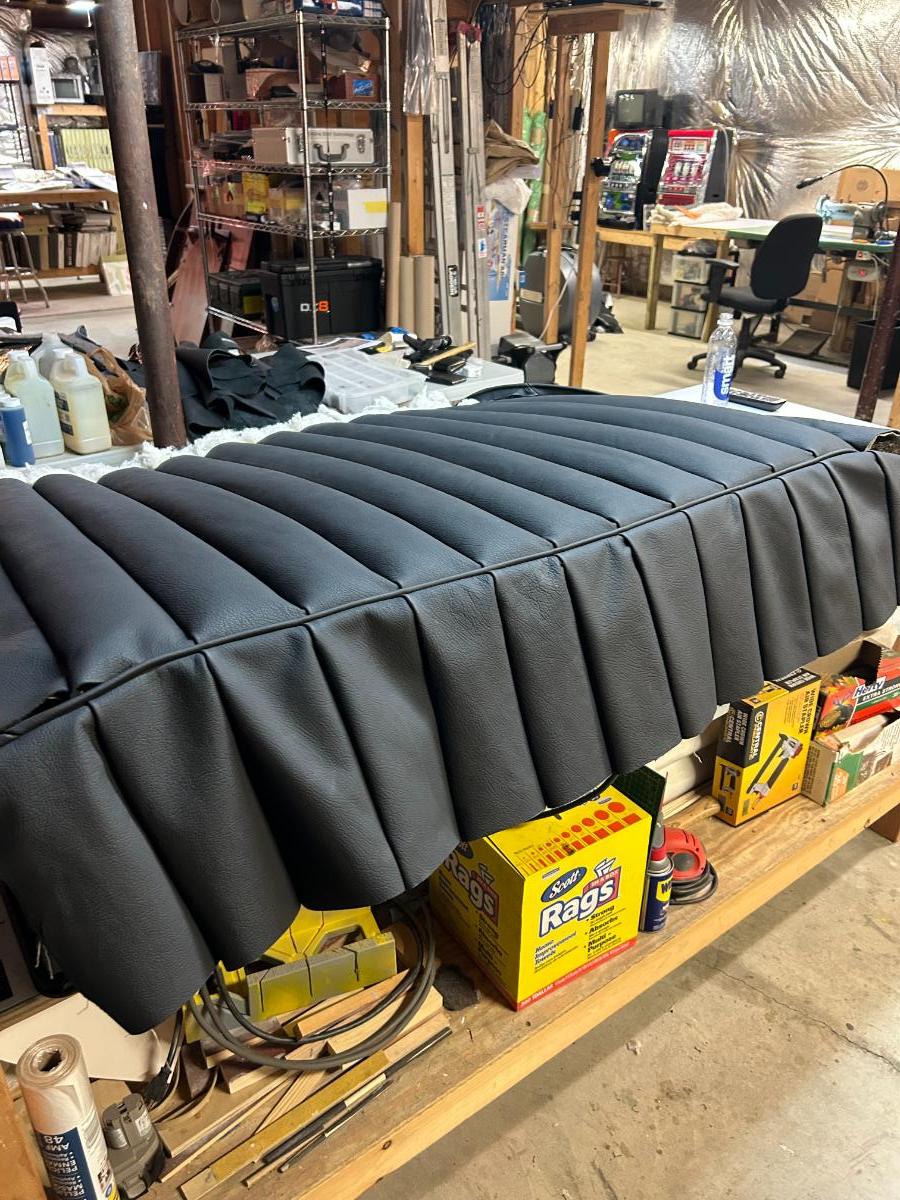
Well I’m almost complete with my rear seat cushion. I finished the sewing and then used some balsa wood sheets to stuff the front pleats. After that I tacked the seat cushion in place. All that is left to do is trim the excess leather off and make some trim to cover the nails with. I think I’ll do that after I finish the doors so I can just make all of that trim at once and then install it all together.


-
Next I laid out the sizes I needed and I cut the seat sides and back from the vinyl I have. This vinyl looks just like the leather except it's vinyl. So I'm off to sew the sides and rear together in order to complete the covering.

-
Next I used my leather hide remnants to cut the pieces required to make the front skirt for the seat bottom. I'm trying to save my last hide to cut my door pieces and also some long pieces to make all of the trim I need for the back seat and doors. I needed 13 panels for this and as you can see on the first picture, I was able to cut some single panels and some pieces with 2 to 4 panels each. In the second picture you can see that I managed to sew them all together into one long panel so that I can sew it to the seat cushion. I'll stuff them with cotton later. Then I cut four 40" long pieces of leather 2 inches wide and sewed them together into one long piece of leather (130") to make the edge piping for the seat. In the fourth picture I am using 3/32" cording to make the seat piping and I'm using a 1/4" piping foot on my sewing machine to sew it together. Next I sewed the piping to the seat front panel. You can see that I marked the piping with marks at the proper pleat widths so that I can ensure the pleat seams are at the proper spacing and I can make the pleats all line up.


-
IFDPETE thanks for your kind words. I am just a beginner trying to learn. If it were not for experts on our forum like David Coco and Hugh Leidlein I would not have had the nerve to start this project. Thanks to them, I am learning a bunch and having fun, which is what it's all about.
-
Today I cut all of my cotton batting strips and jute strips and then stuffed my rear seat cushion. I’ll stuff the end pleats after I cut them to the right shape after I fit it and mark the correct last minute shape requirements.


-
I don't know of anyone for 1921 Buicks
-
I cleaned my springs with some Purple Power and they look great. After they dried well I began covering them with a layer of burlap first. Next I covered them with a layer of 3/8 inch jute. I used hog rings to attach both of these layers. I hog ringed them to the springs underneath the edge. Next, because this is the seat and I want it to feel somewhat firm, I will lay a piece of horsehair on top. The horsehair is woven into a piece of burlap which keeps it all together and it feels like good padding. I’ll lay the stuffed seat pad on top as I put it all together. Originally the seat had nothing between the pleating padding and the springs. This should feel much nicer.


