


Taylormade
-
Posts
2,396 -
Joined
-
Last visited
-
Days Won
1
Content Type
Forums
Gallery
Events
Posts posted by Taylormade
-
-
Thanks, ply33, will do.
-
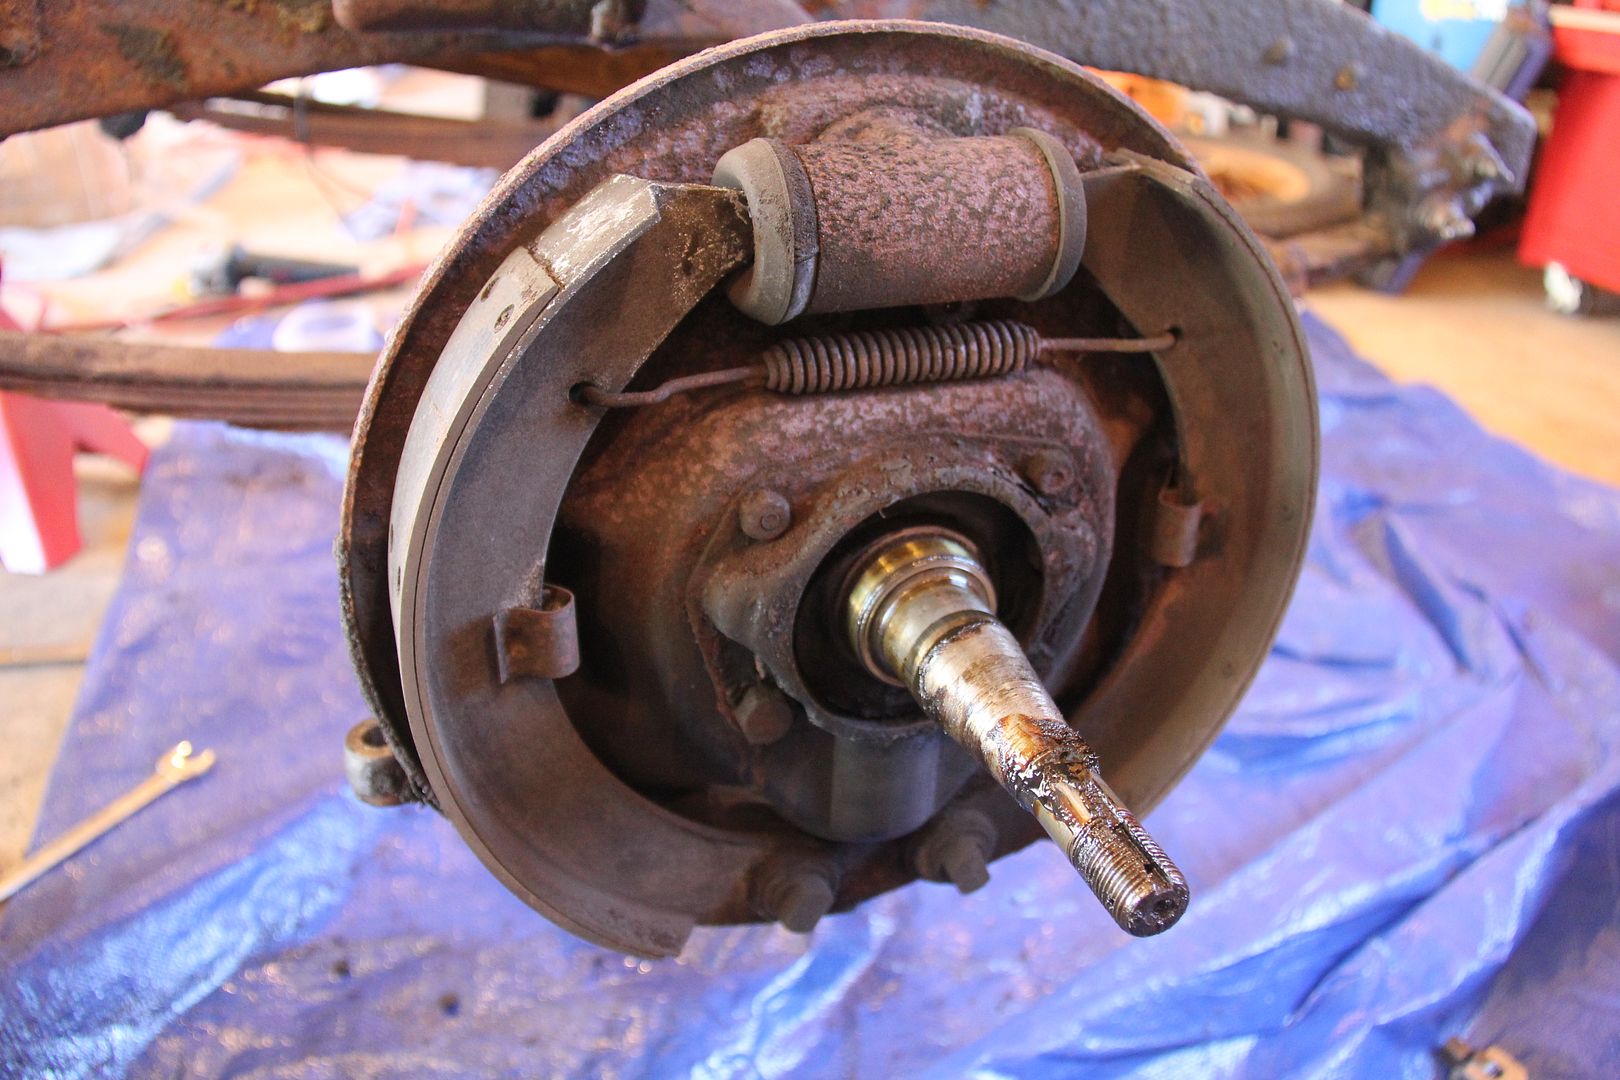
Most articles I found on the internet say that the short pad should face the front. But several people mention that on "older" Chevy, Ford and Mopar, the longer pad faces the front. The difference may be due to the more modern "self-energizing" brakes that appeared in more modern cars. I dug out my Instruction Book and it, too, has the long pad facing the front. I'll go with the book.
-
My relined brake shoes are due back any day now and I was wondering which way the shoe with the smaller pad faces? When I took the brakes apart, the longer shoe pad faced the front, the smaller to the rear, is this correct?
-
I agree, Ian. I guess it was more cost effective to just provide both rather than making individual frames for export and non-export cars.
-
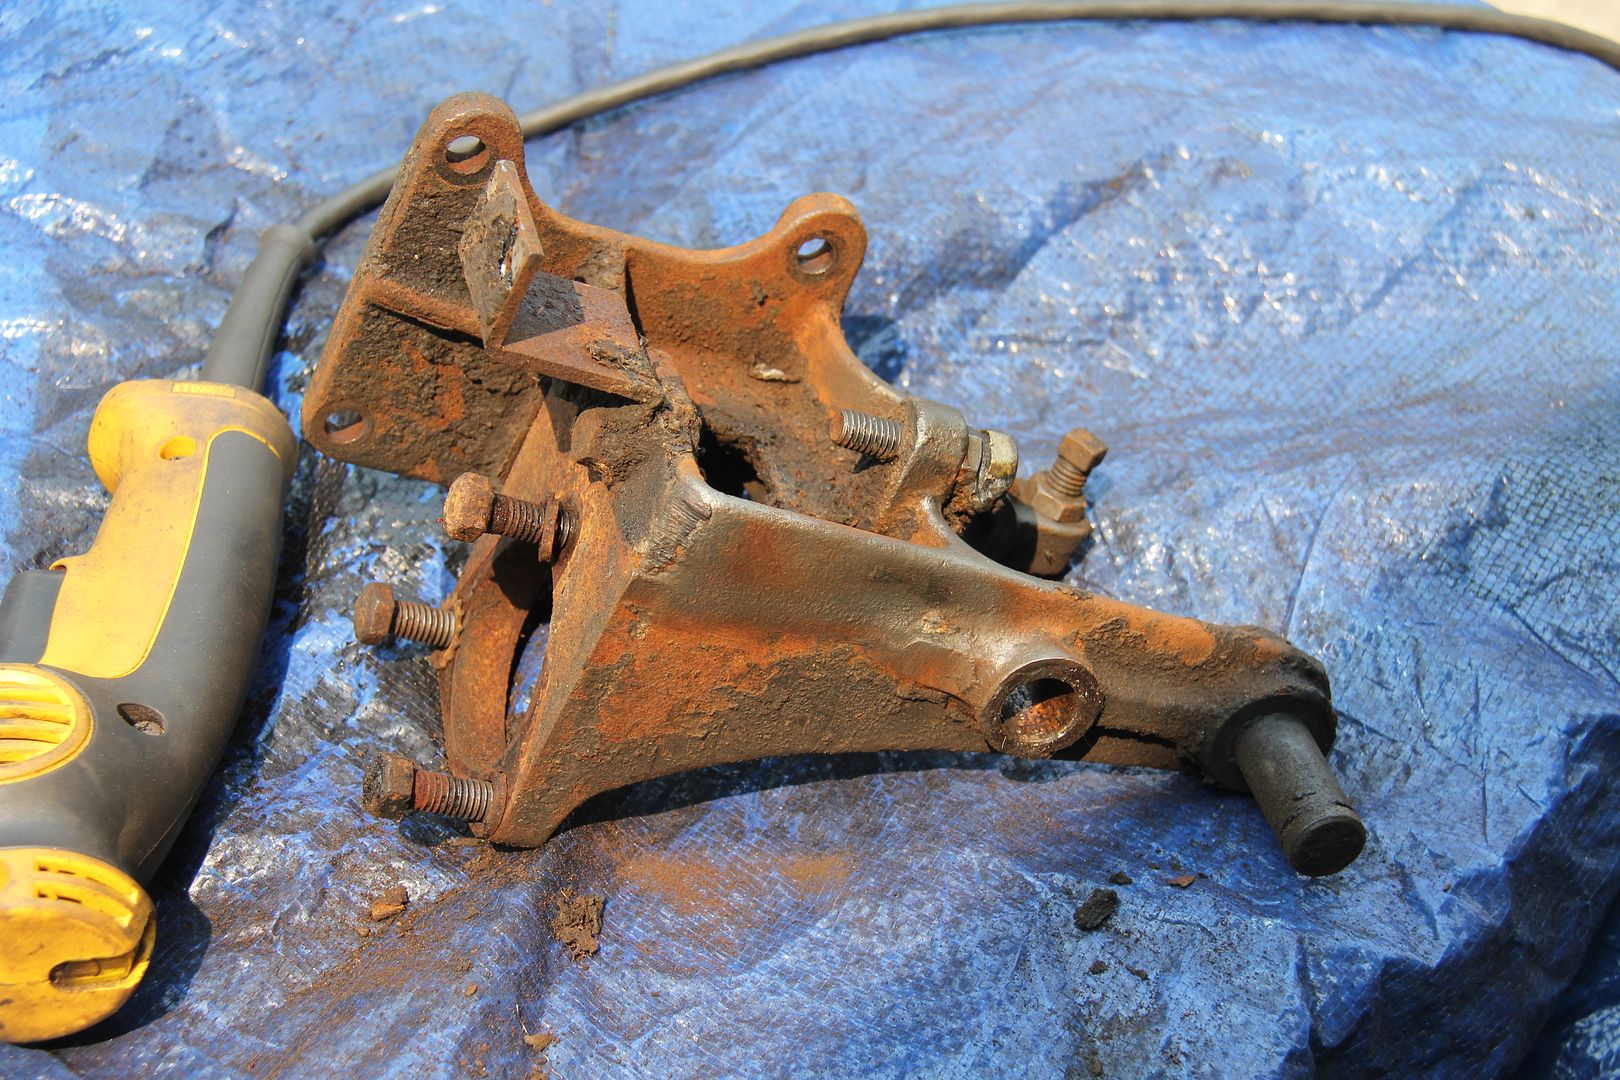
I'm also cleaning up the pedal assembly. Boy is this thing complicated. I'm sure the Dodge Brothers engineers had a reason for all this, but I can't believe there wasn't a simpler solution!
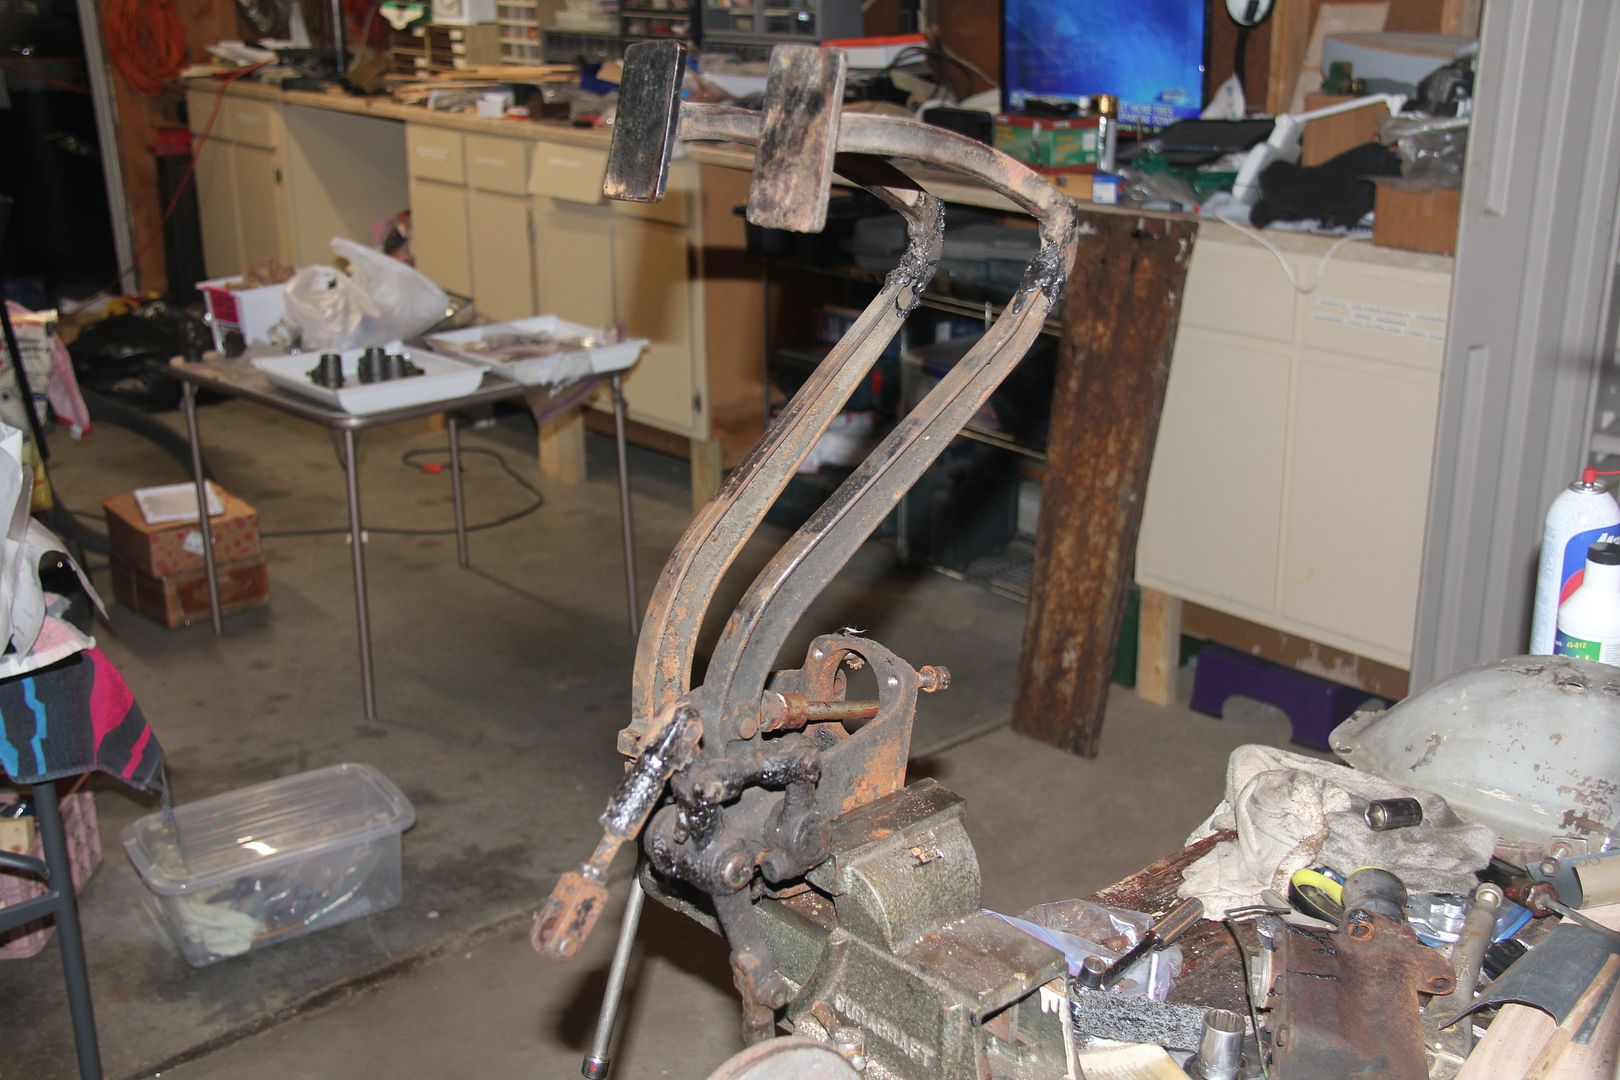
It was also a real mess. Lots of nooks and crannies to collect years of road grit.
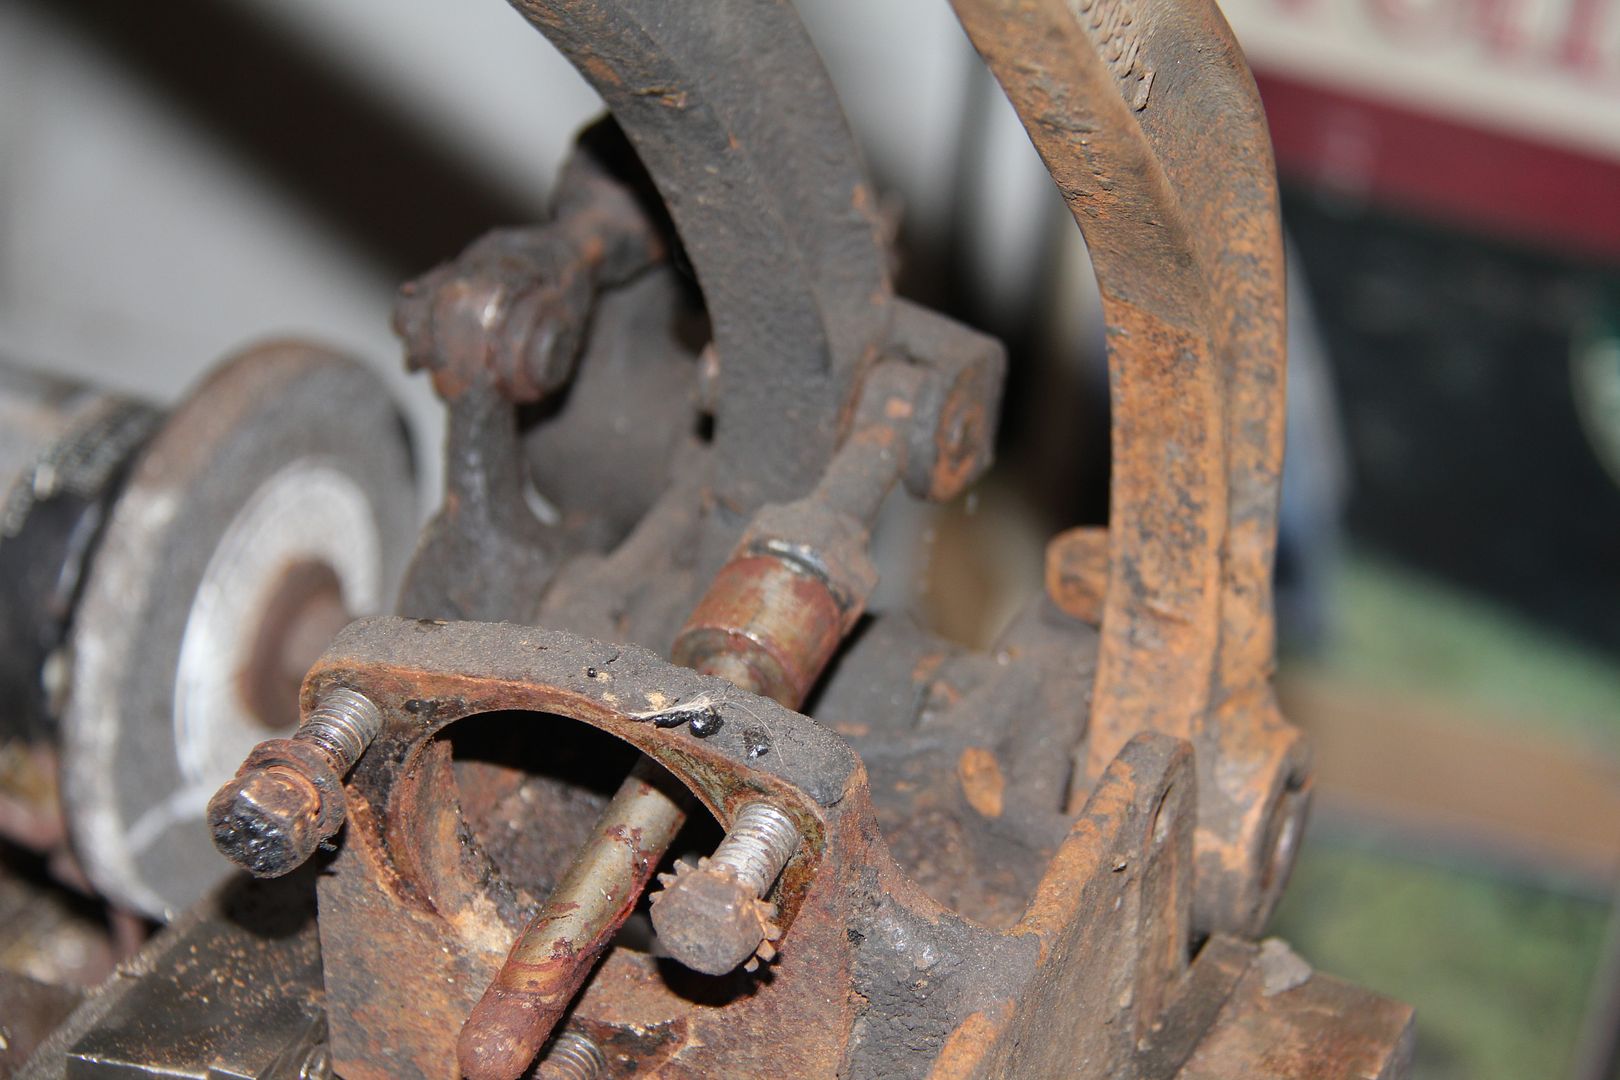
I was careful taking it apart, shooting many pictures and making notes, as getting this maze back together correctly is going to be a challenge. We've all been there - does the thick side of the pivot shaft face toward the casting or away from it?
Once I got down to the basic casting, I went to work.
It came out pretty good for an afternoon's work.
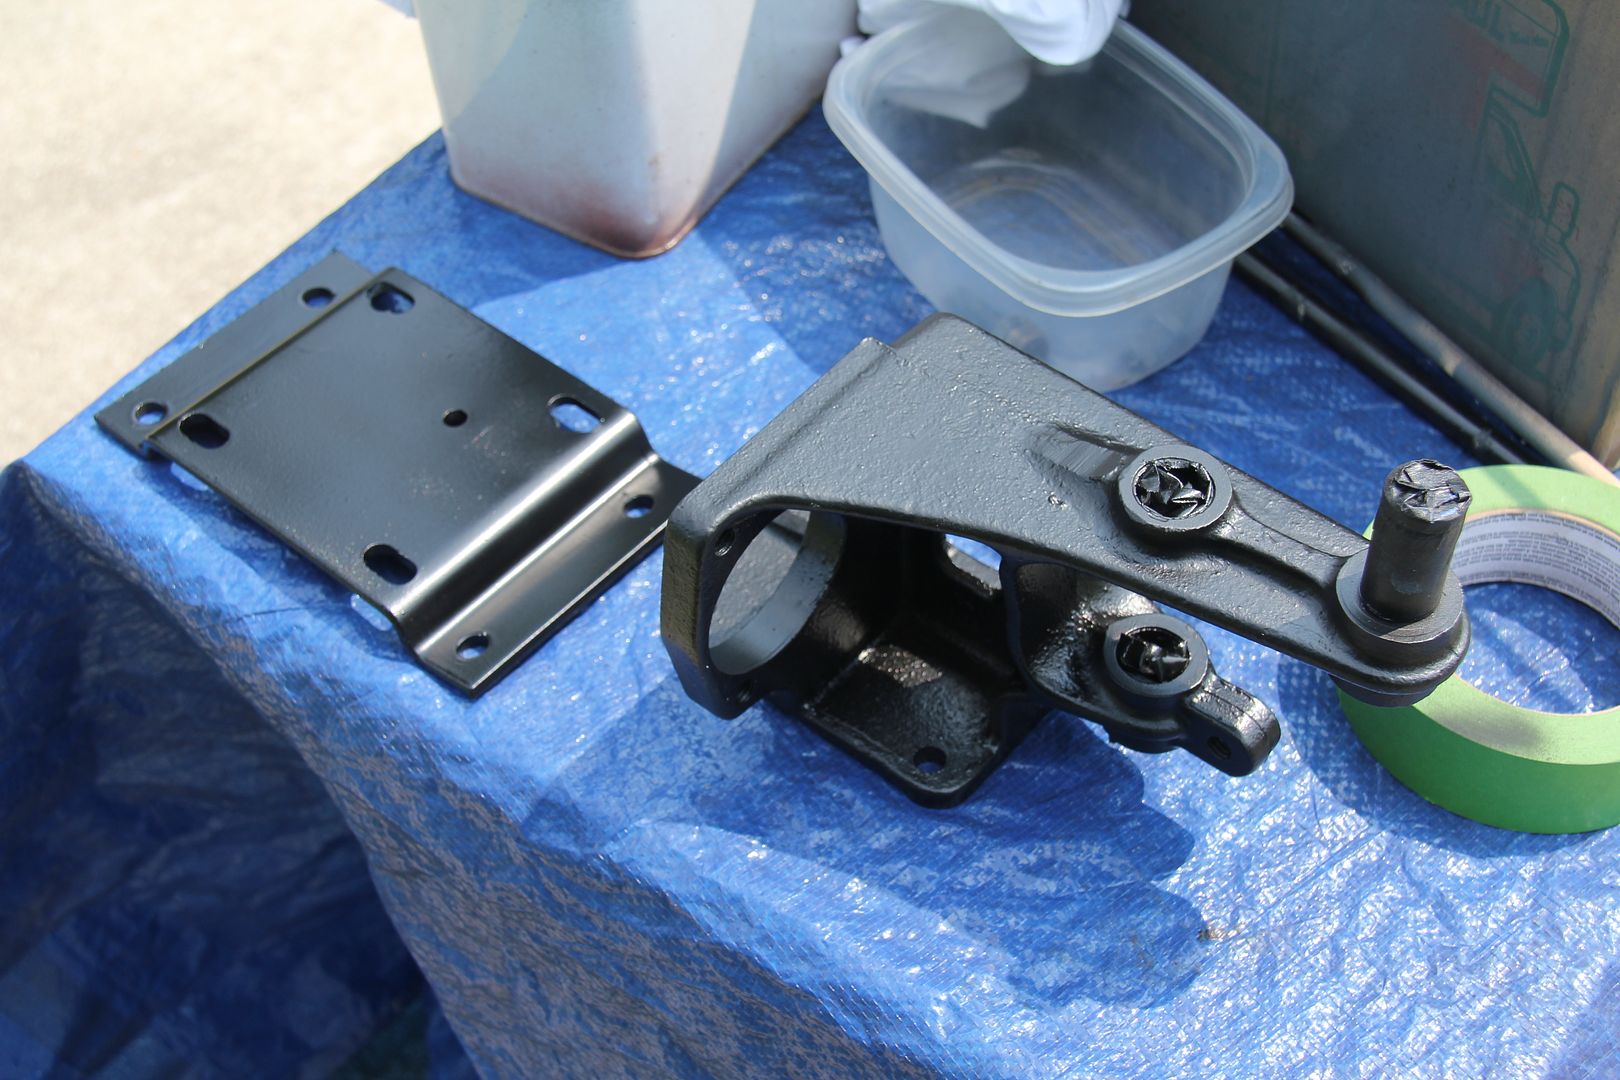
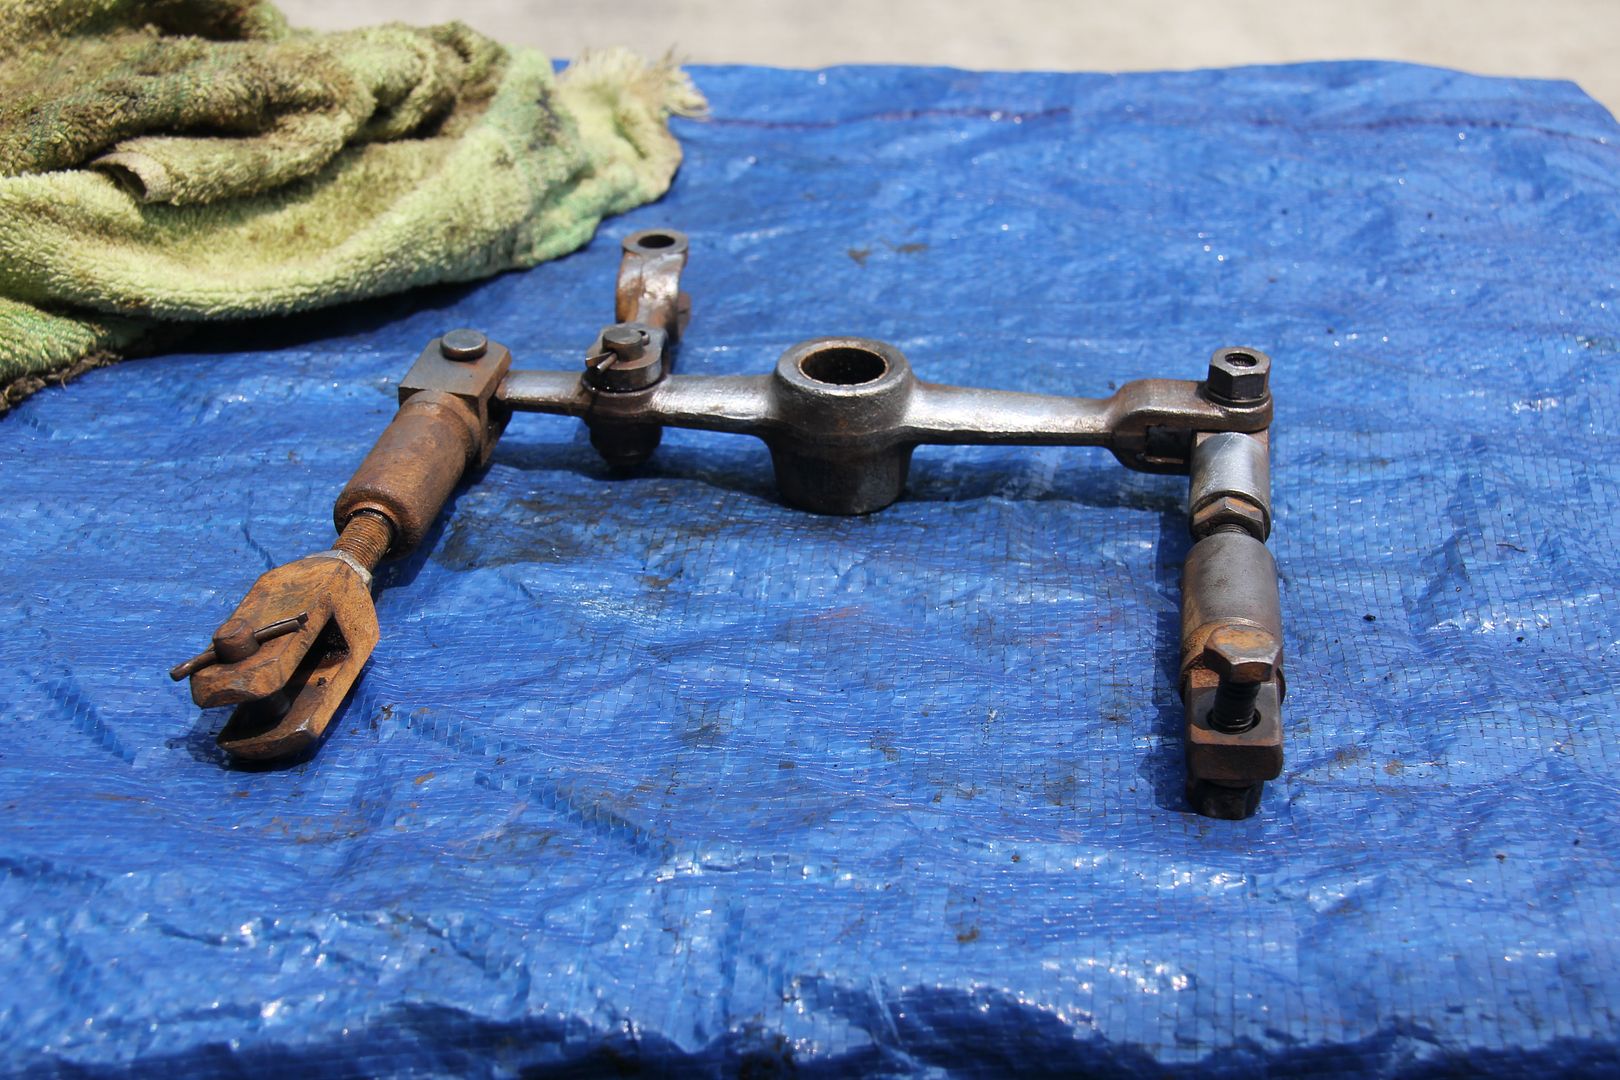
This is just part of numerous levers and shafts that make everything work.
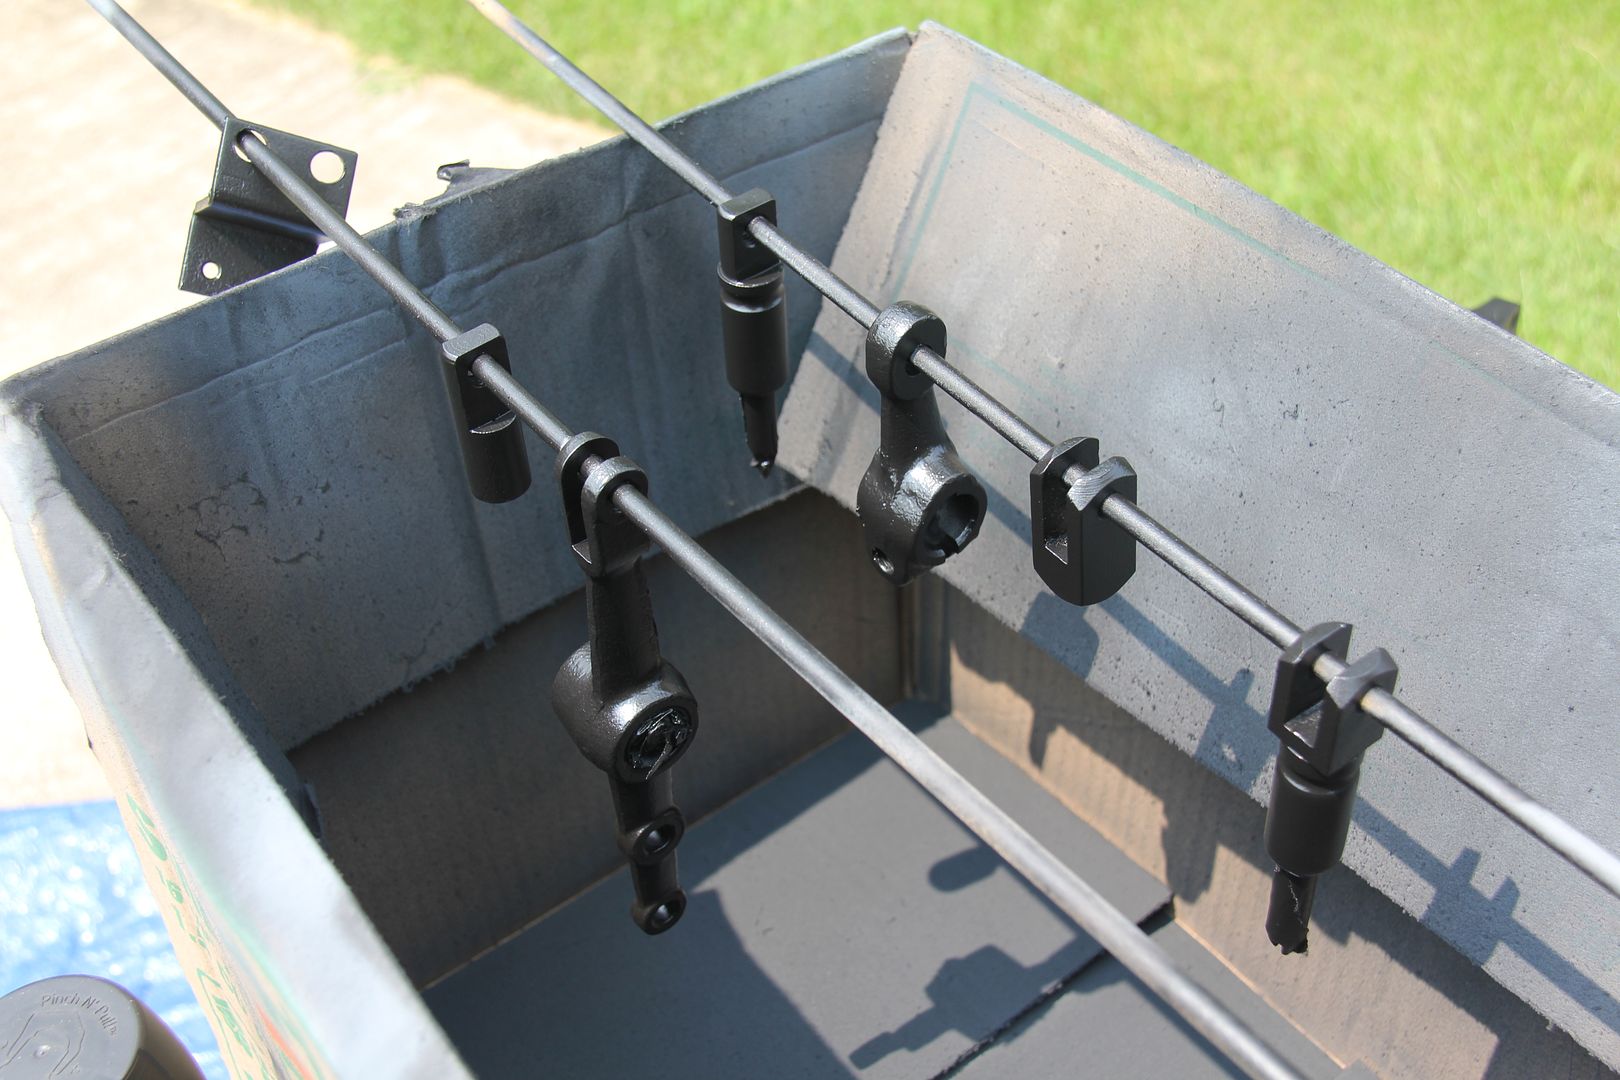
Basically very boring stuff. Disassemble, clean, prime, paint, put back together. I'm not sure posting this stuff is worth your time other than making me feel like I'm accomplishing something.

-
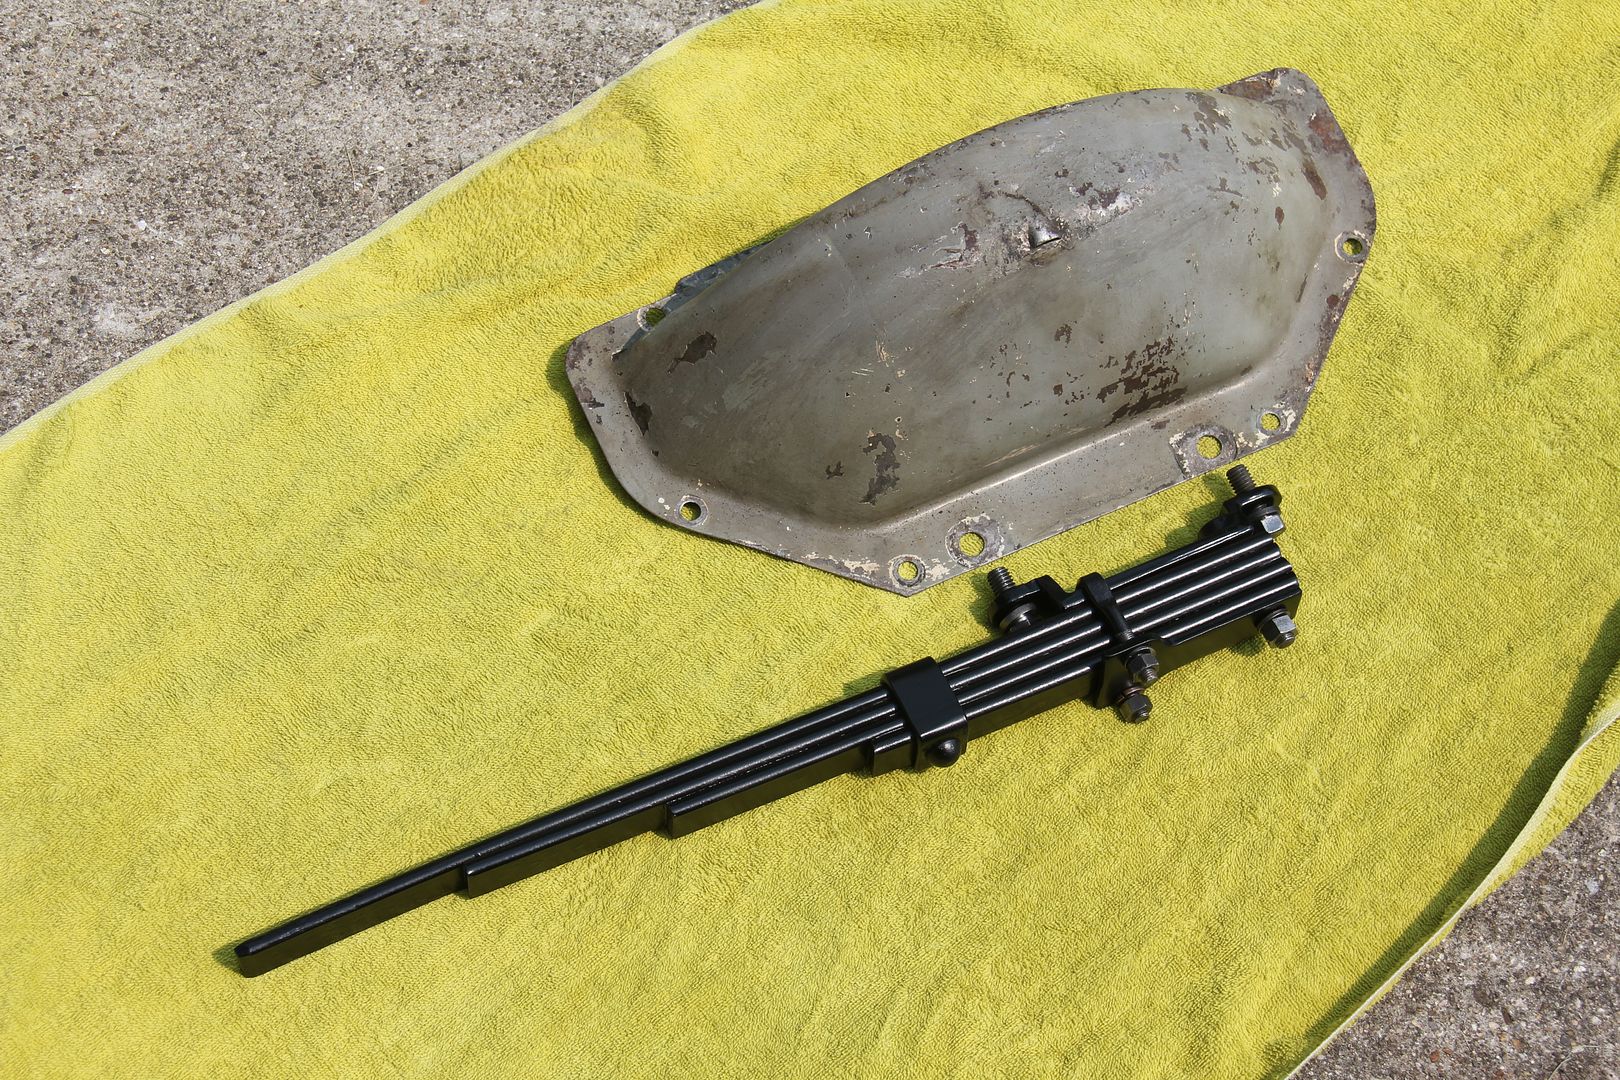
I'm tackling some of the last restoration bits on the frame. Anyone want to guess what this is? I'm sure all you Mopar experts will identify it.
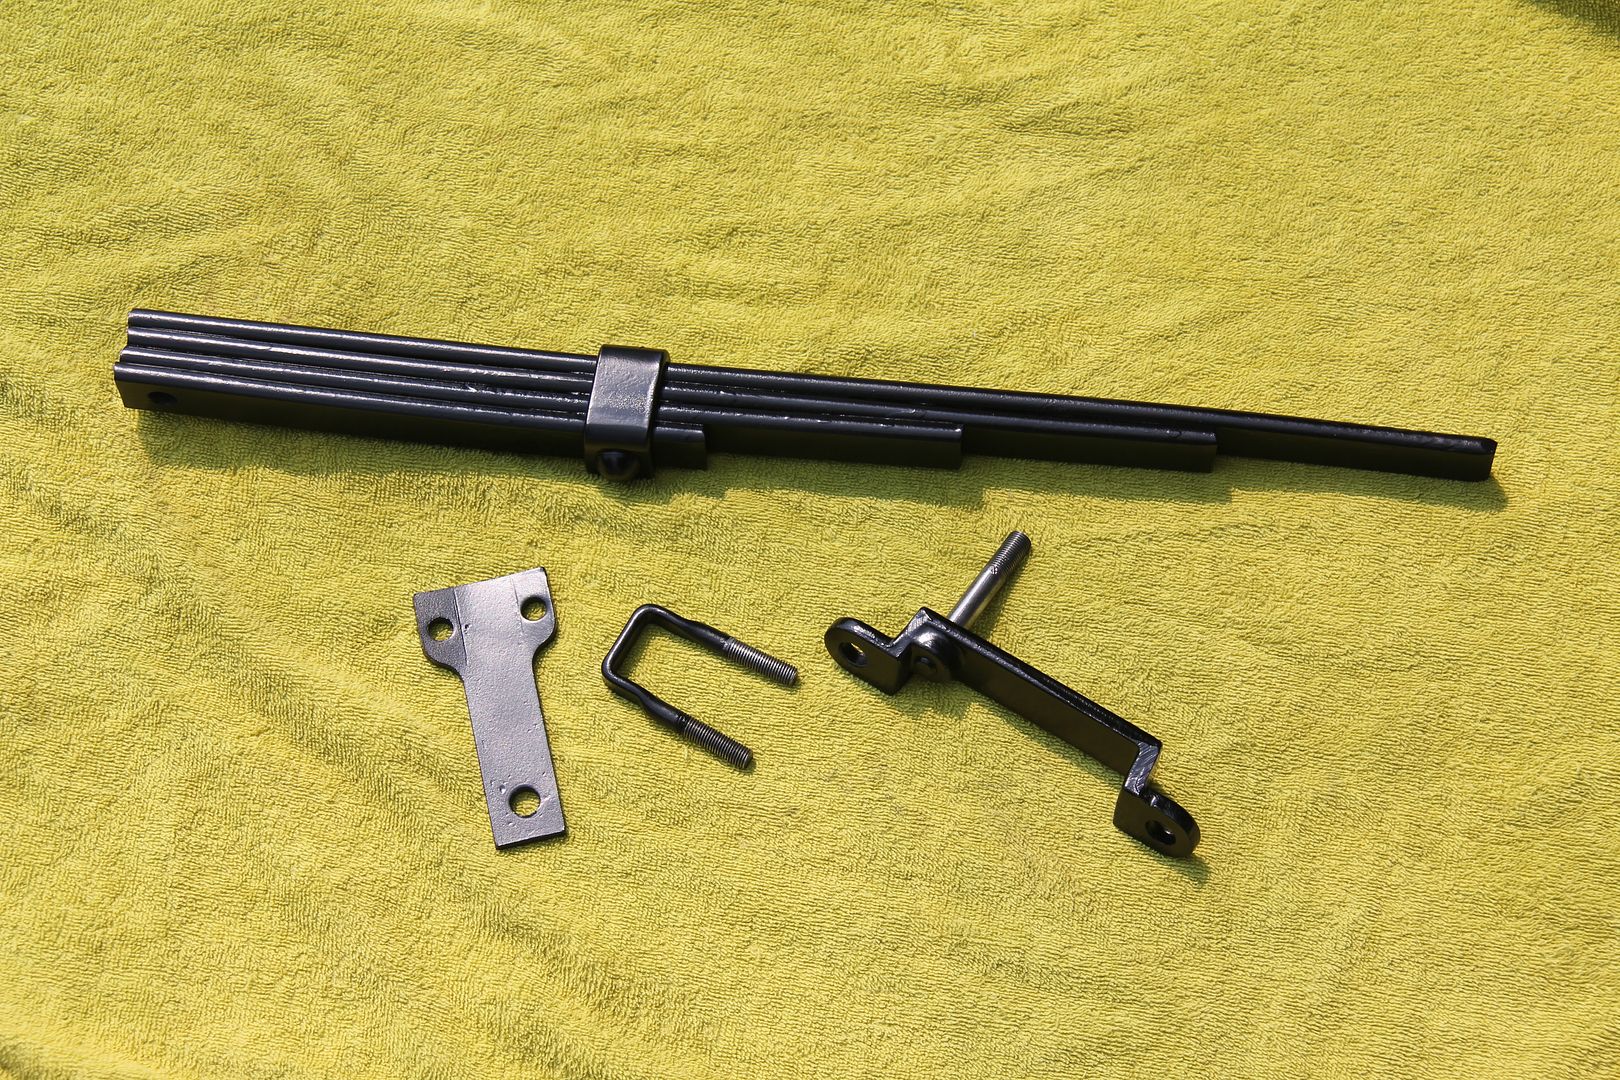
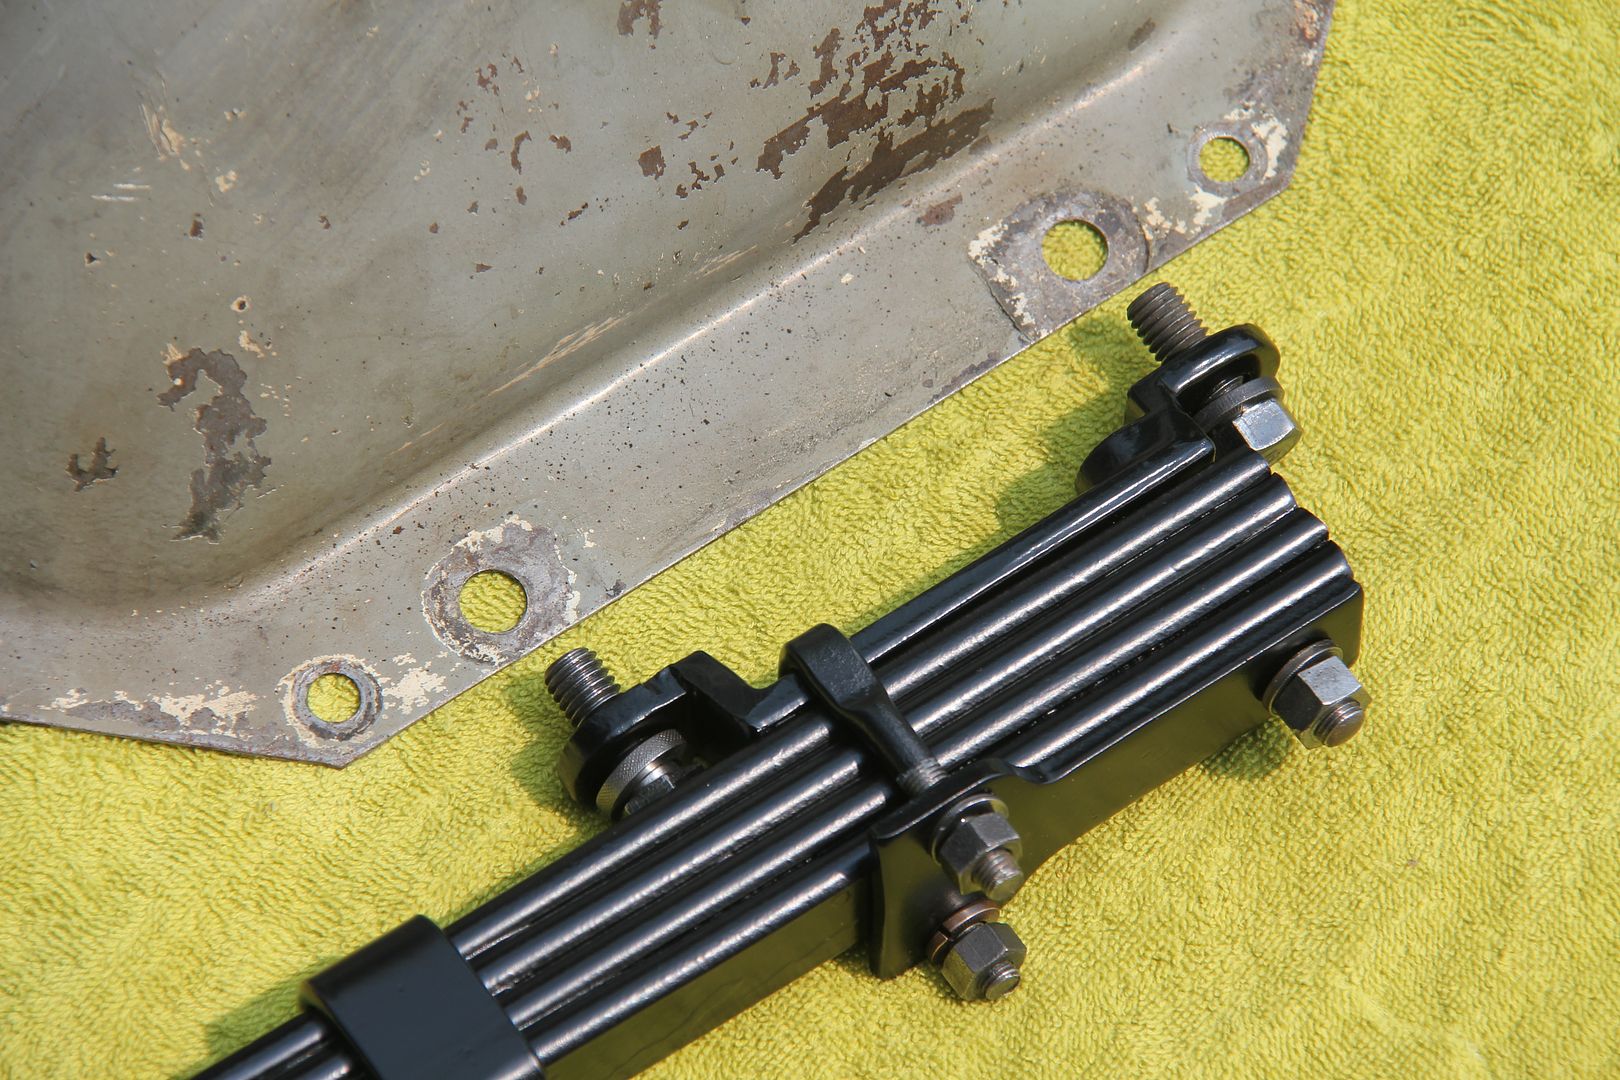
That's right, it's the small leaf spring that runs from the motor to the frame and is part of the Floating Power system. Here it is in all its grungy glory before restoration.
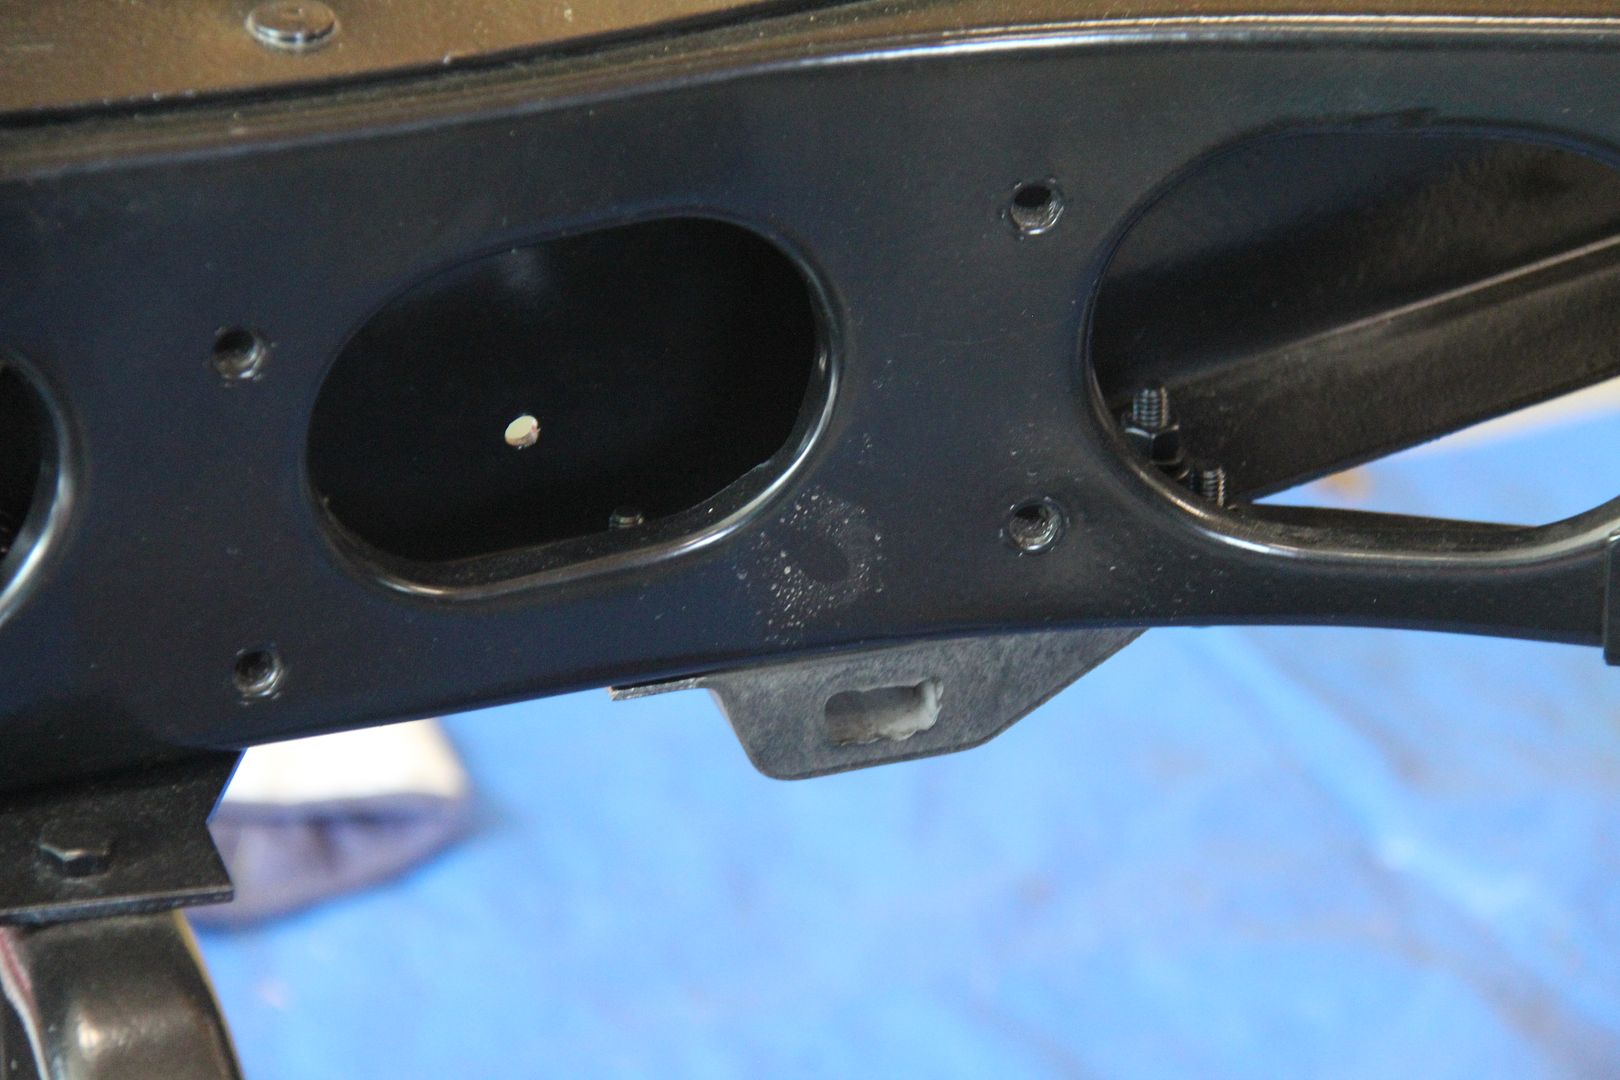
The large end of the spring attaches to the back of the bellhousing, and the spring runs across to the frame where the small end fits into this rubber mount. By the way, those four threaded holes in the frame had me worried for awhile. I couldn't figure out what could go in that spot. Then I realized they were the extra holes for the pedal assembly on a right-hand drive car.
You can see the two large holes in the back of the bellhousing/flywheel cover where the spring mount attaches. Nothing much special about this area, just clean and paint, other than having to have the rubber mount redone as the original had deteriorated into a puddle of muck.
-
Great to see you are keeping things original -and making a hot rodder somewhere happy.
-
The transmission in my 32 Dodge Brothers DL is in good shape with no damaged gears or other problems I can see. It worked fine when parked in 1970 and I really don't want to take anything apart at the moment that I don't have to. I did take apart the top shifting mechanism to clean everything up. My question is what is the best non-damaging solvent to use in getting the gunk out of the transmission case? I figure there is enough room around the gears to get a flexible bristle brush down the insides of the case and get most of the crud loose and then flush it down the drain hole. The owners manual mentions "flushing" the transmission with flushing oil (whatever the heck that is) but warns against using kerosene. It doesn't have to be spotless, but I would like to get rid of some of the slimy, oily residue that is clinging to the walls inside the case with a solution that won't damage the seals or bearings..
any suggestions?
-
It seems that my 32 Dodge DL has a one year only brake system and I'm trying to deal with my brake cylinders. The front cylinders have a 1-3/8 inch non-step bore. The rears have a 1-1/4 inch non-step bore. I'm resigned to having the front cylinders re-sleeved as I can't find anything NOS to fit and the bores are just too pitted to hone out. The bolt spacing on the front is also different than the rear. I did find a new set of very nice cylinders that fit the rear bolt pattern and are the same external dimensions as the old ones. The problem is, when I took them apart to check the bores I discovered that they are stepped bores, 1-3/8 stepped down to 1-1/4.
For all you brake experts out there, can I use the stepped bore cylinders on the rear brakes? Does the step interfere with the original design or put too much pressure on the master cylinder? If I can use them, it will save me about 100 bucks or more and I'd like to keep the money - but not at the expense of endangering my family on the first Sunday drive. And one final question - if I can use them, which way does the larger bore face, front or rear?
Thanks!
-
Thanks, I found a pair.
-
Thanks Gunsmoke. I've been following your adventures with your roadster. Your task makes my restoration look like a cakewalk!
-
It's only twenty-five bucks for early cars (not sure of the cutoff date). Just got mine with the build card and some ads for the car (1932 Dodge Brothers). The build card lists options, body style and delivery destination. Some things on the card are not explained - mine had the numer 103 after the body type, which may be the color code (my car was originally black) and was stamped with the word PLATE, which may mean plate rather than safety glass.
-
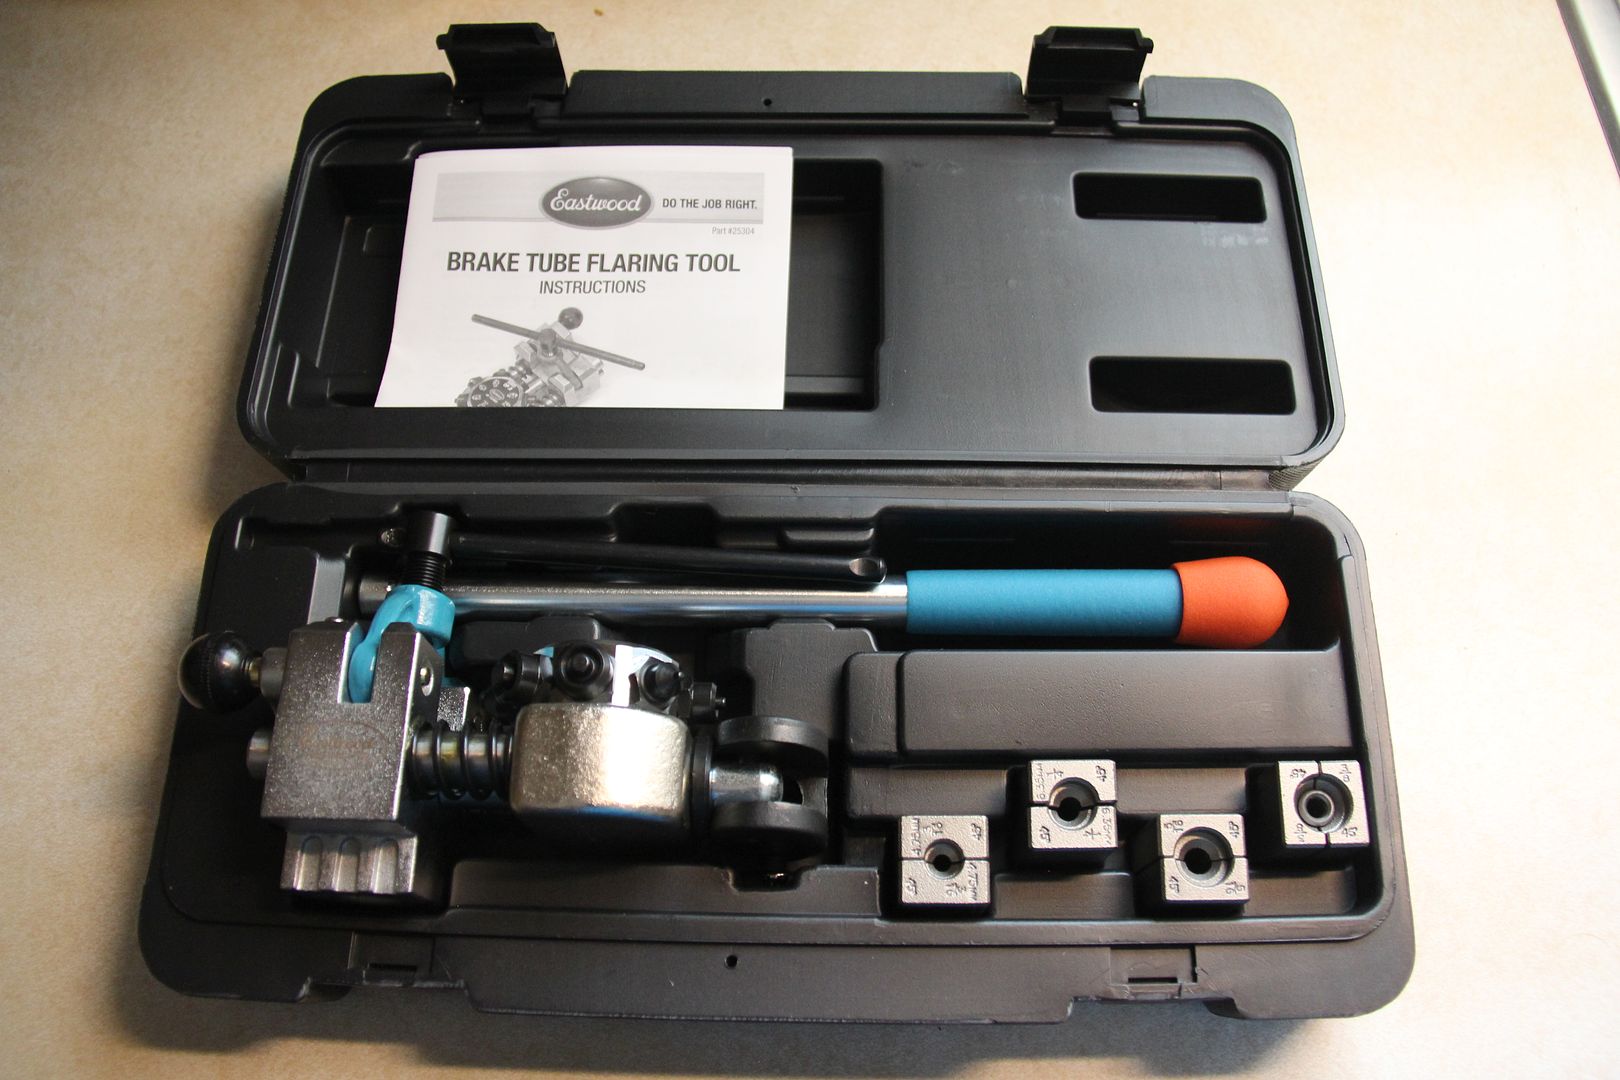
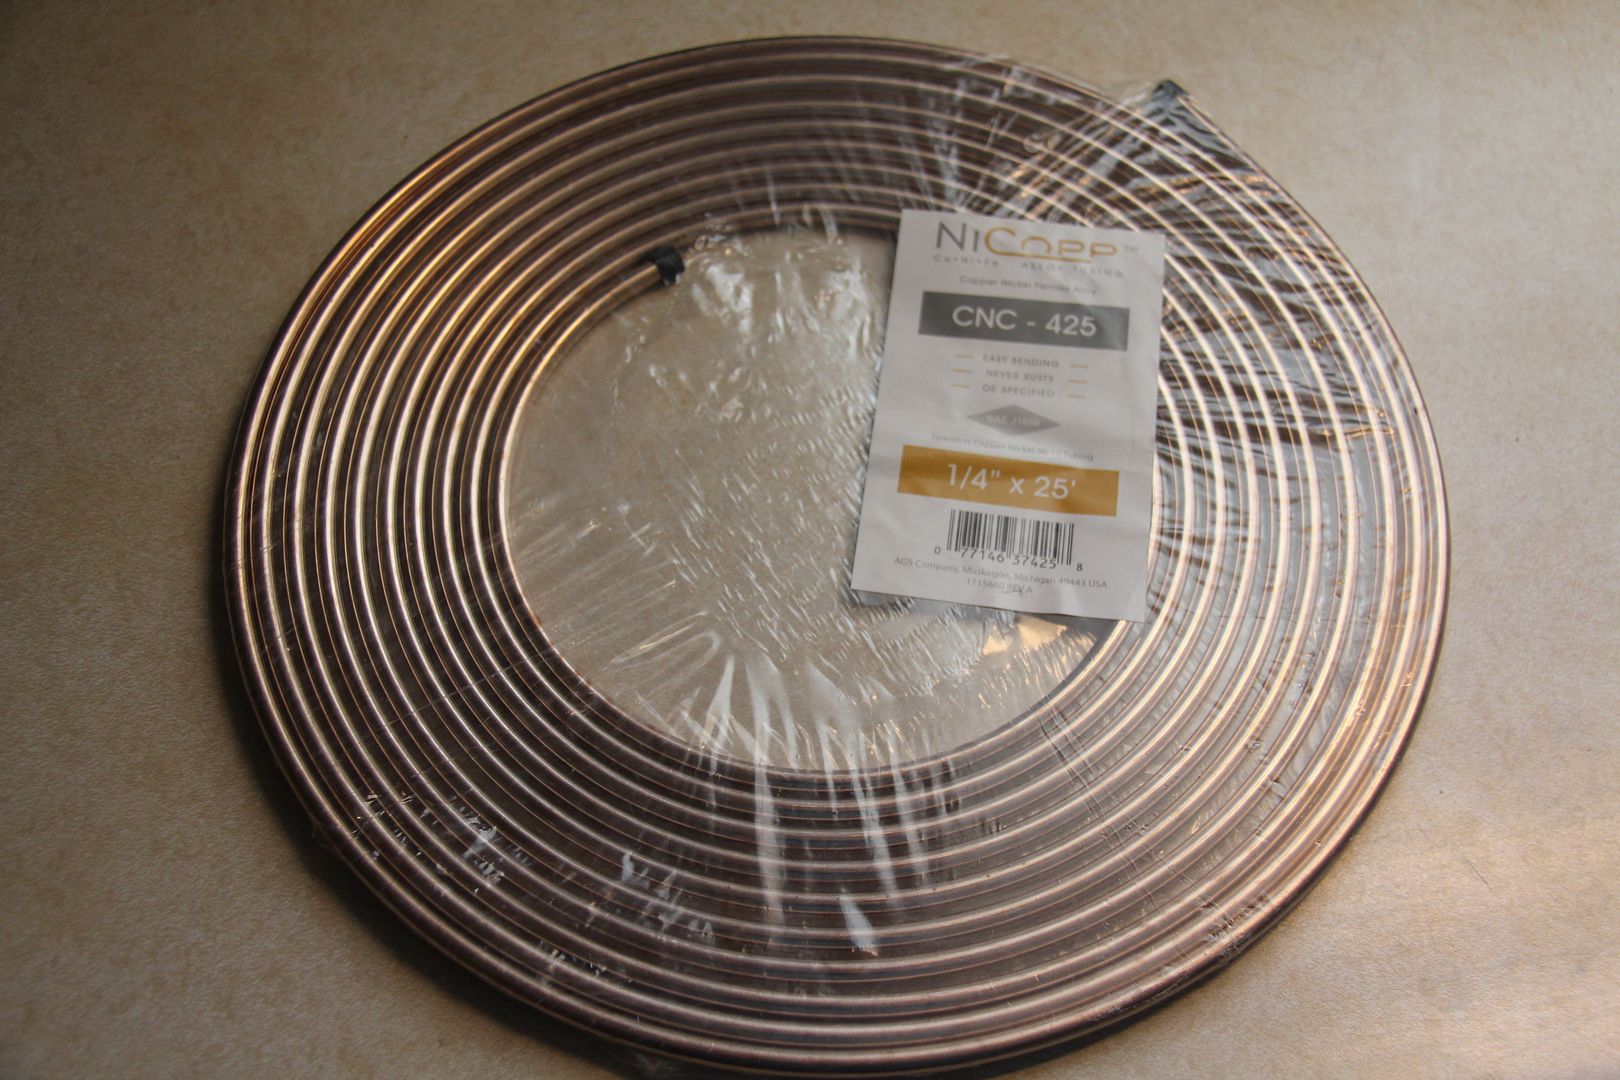
I ordered my Eastwood brake flaring tool and 25 feet of Nickle-Copper 1/4 inch brake line on Monday and they both arrived Wednesday! Different vendors even.
The brake tool looks nice, now if it just works as well as the videos and reviews I've seen and read.
Same goes for the brake line. I love the copper color as it closely matches whatever coating they put on the original lines. I plan to try everything out on the rear axle brake lines in the near future, and I'll let you know how it works out.
-
Thanks for the reply, Phillip. The book is, indeed, talking about an oil change, but here is what the book says -
"It is recommended that the oil be changed in the transmission after the first 500 miles (800 km.) of driving and the transmission be thoroughly washed out with a flushing oil (not kerosene). The transmission should then be refilled to the level of the filler plug on the right side with the proper lubricant. It is recommended that the lubricant in the transmission be removed, the transmission case flushed and new lubricant installed every six month thereafter."
They obviously mean some sort of solution that was used to clean the inside of the case. I wonder what it was? I don't intend to disassemble my transmission because it was working fine and the gears look pretty good, but I would like to clean out the gunk that has been in there for at least 40 years before I replace the top and paint the unit. I currently have it sitting upside down draining out as much of the old lubricant as I can. It's pretty tough to get anything down into the case to clean out the sludge at the bottom and I'm looking for a safe solvent that won't damage bearings or seals.
-
Working on the transmission of my 1932 Dodge DL and in the owner's manual it mentions under maintenance drian the transmission case and then clean out the case once every six months with "flushing oil" before refilling with the correct lubricant. This is a new one to me. I was wondering if it meant kerosene, but a few paragraphs down it again mentions using "flushing oil not kerosene" to clean the case. Any idea what flushing oil is or where to find such a thing?
-
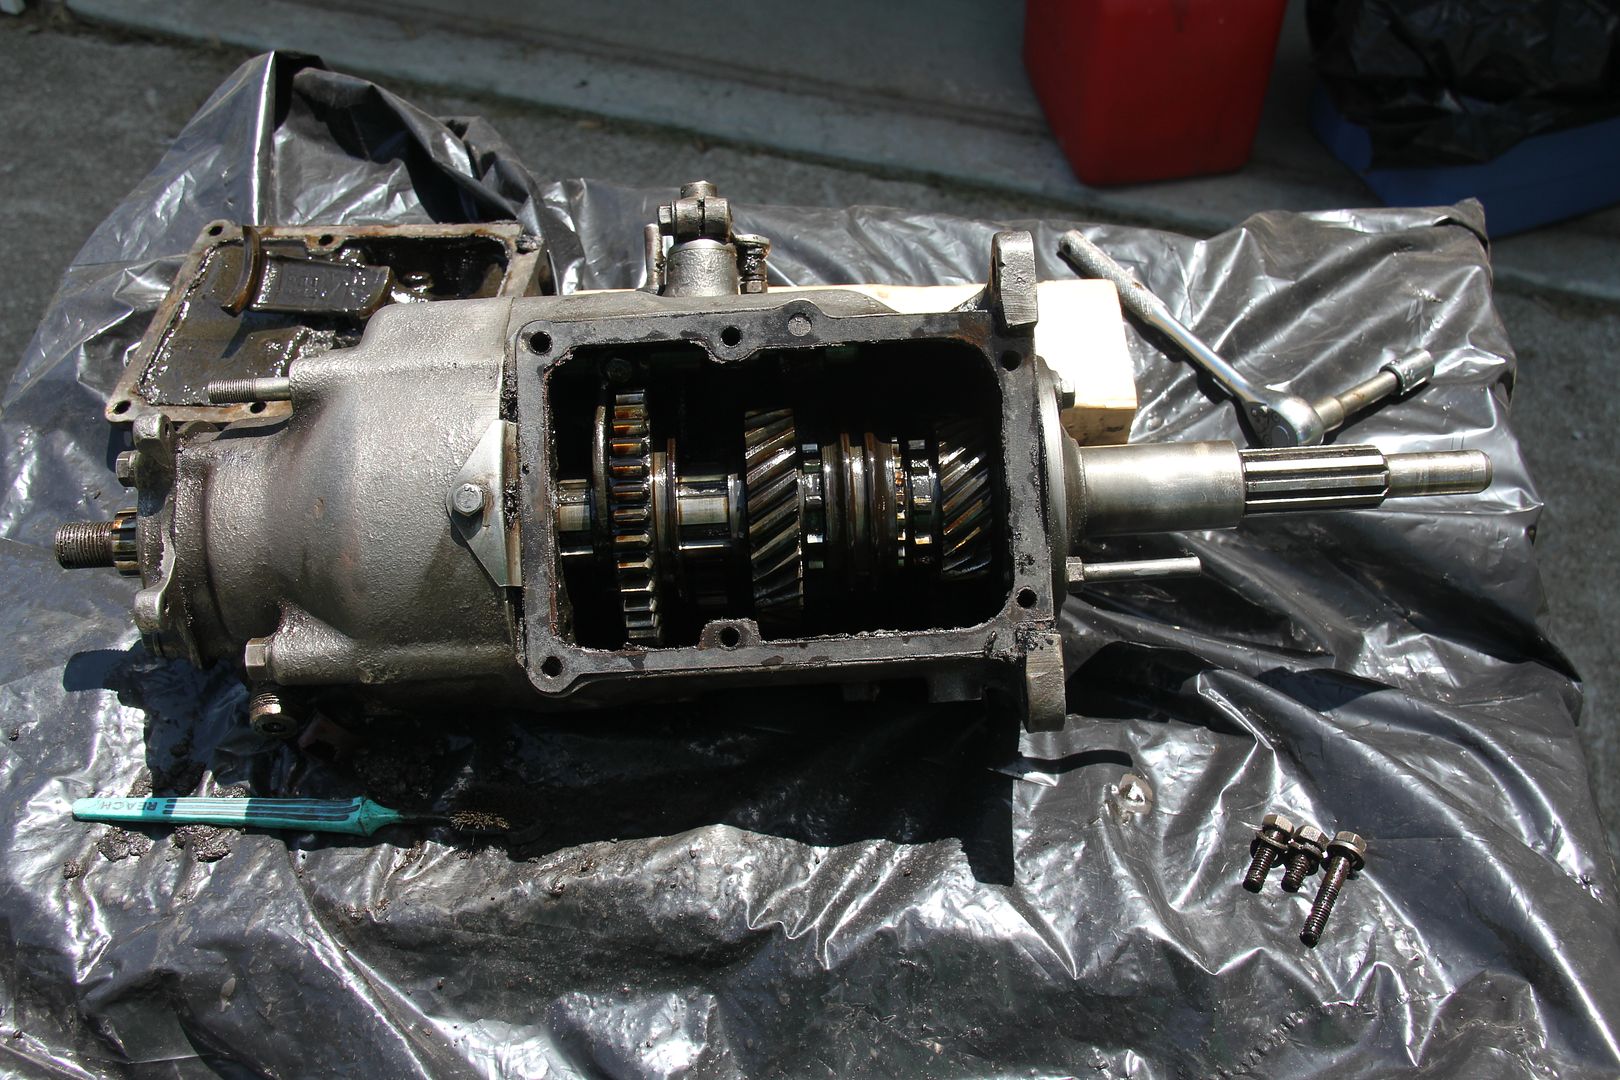
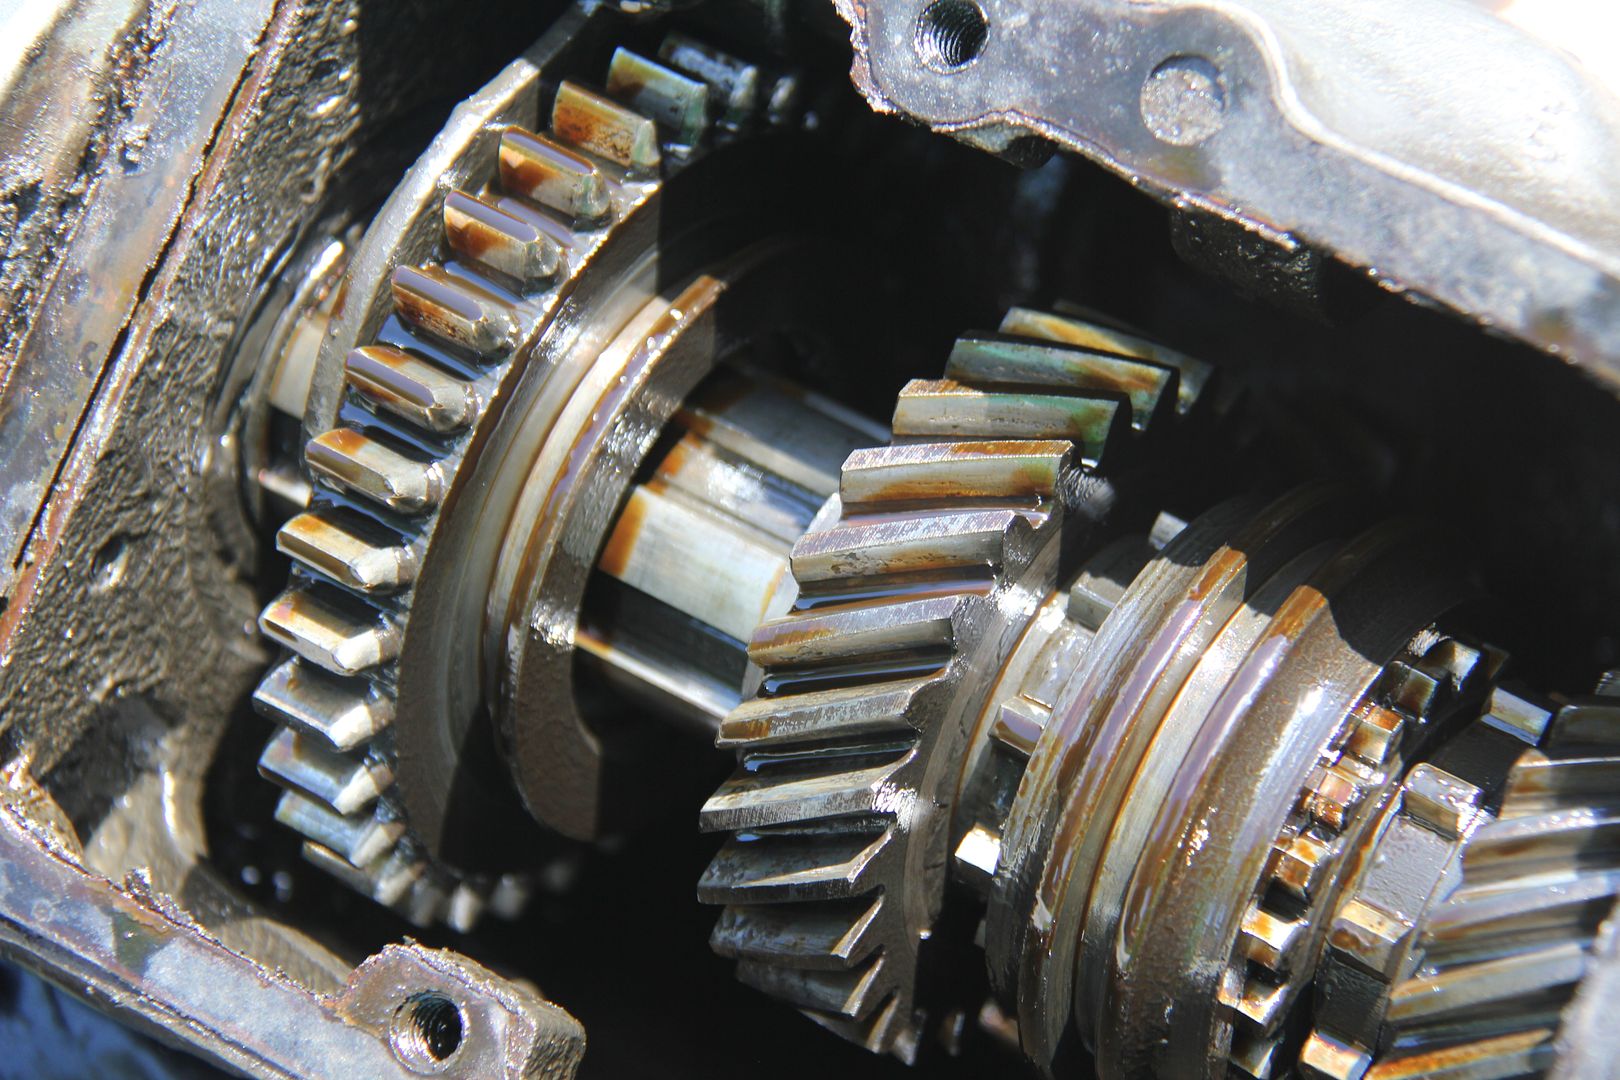
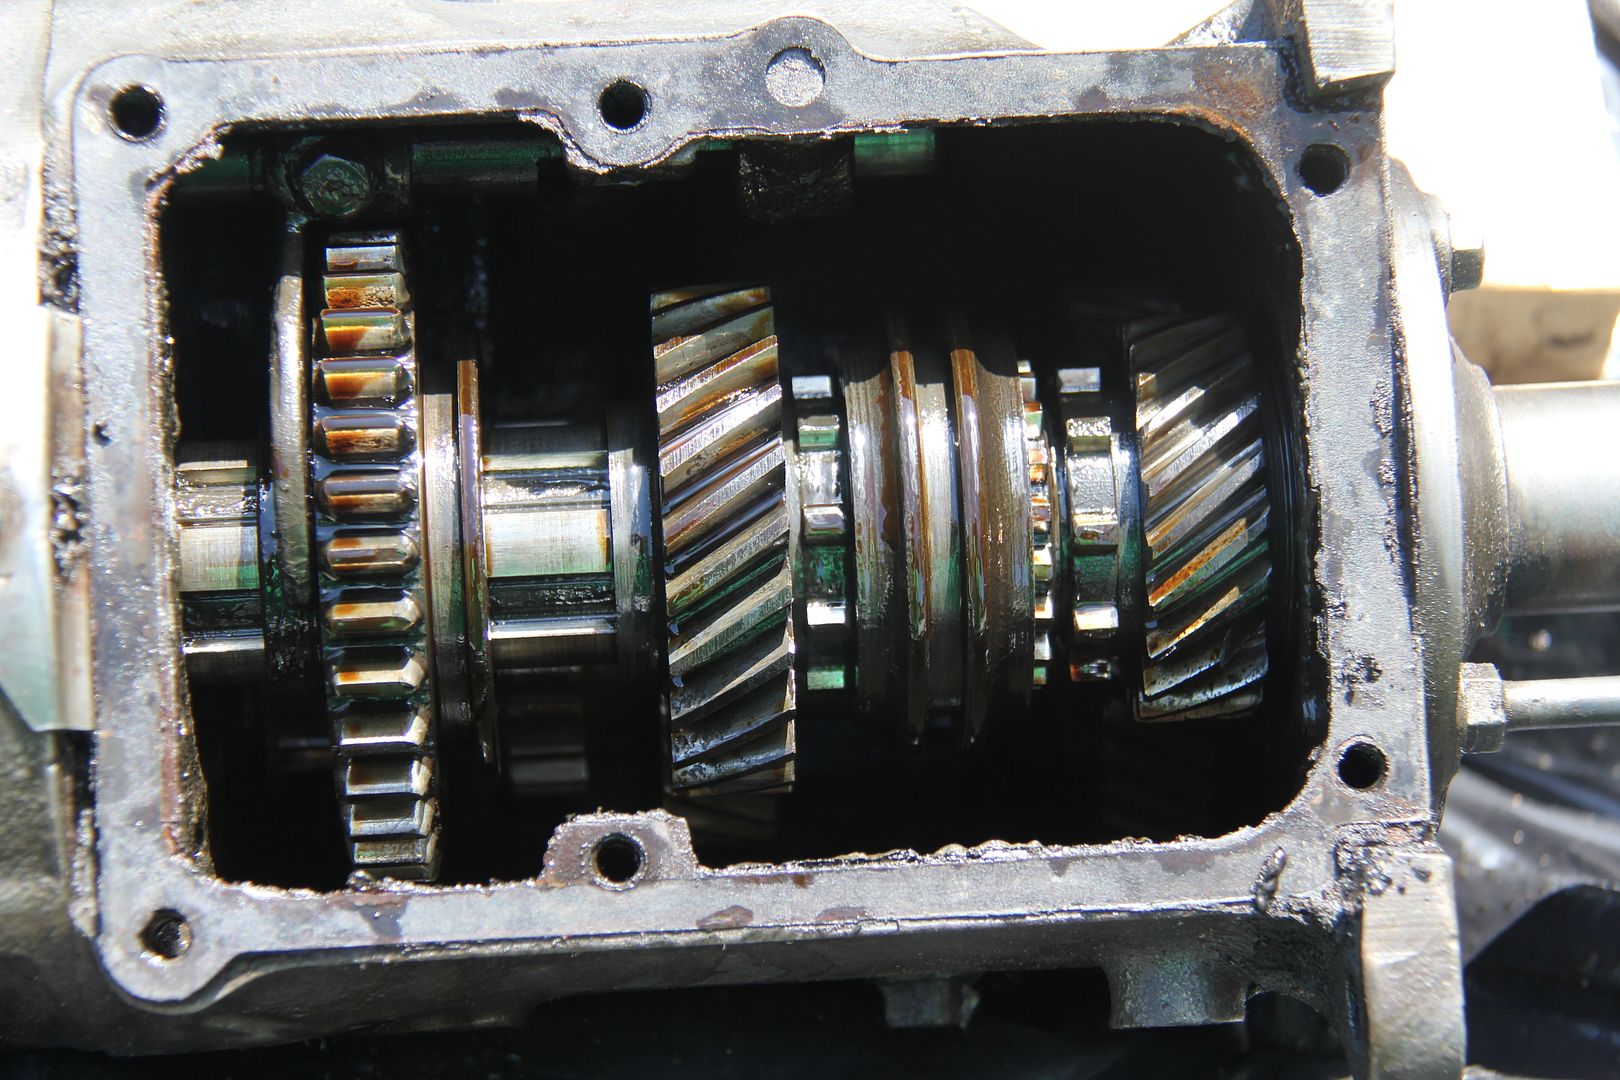
Cleaning up the transmission, getting it ready for paint. What a mess! More oil and grunge on this one piece of the car than most any I can remember. Maybe since everything else is now nice and clean, I don't recall all the gunk that is long gone.
I finally had to remove the top of the tranny so I could clean the shifting quadrants. I was hoping for good news inside the case, and, for once, I got it. The gears look very good, with no real wear, no chips or other problems. The brown areas are old lubricant, not rust.
The shift levers look good and should clean up nicely.
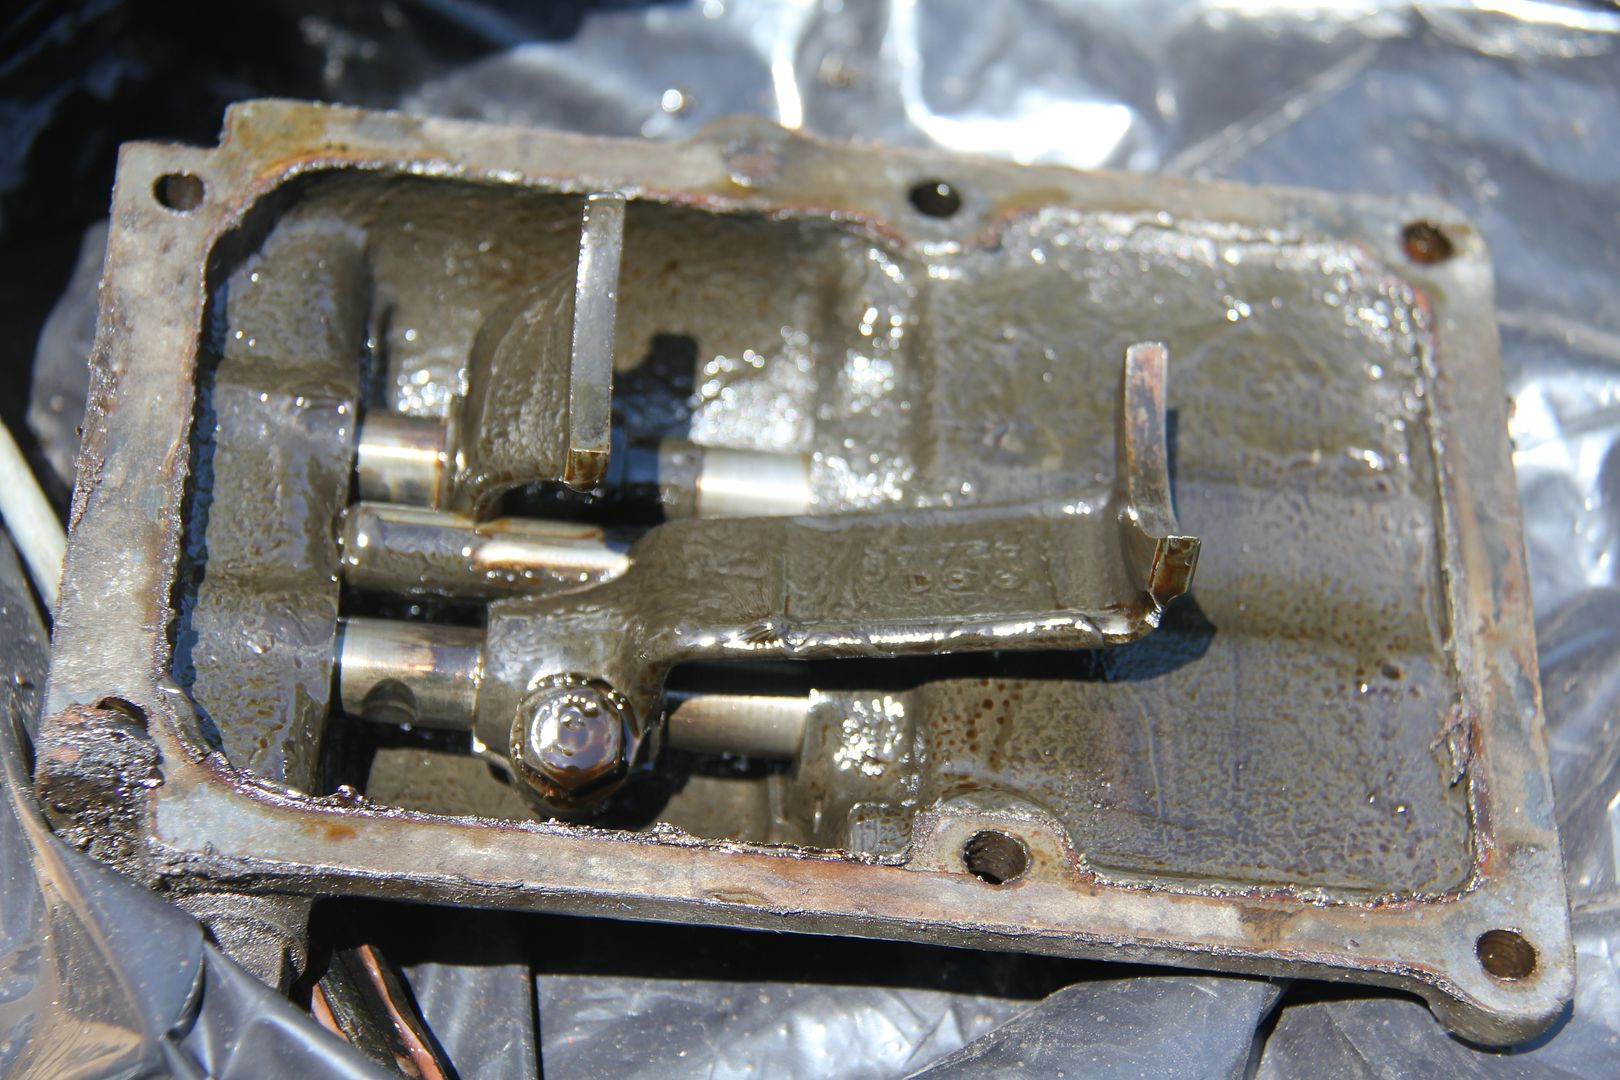
After reading the owner's book about removing the Free-Wheeling unit, I'm not going to touch it. Half a page of instructions on how to use shims and set clearances that I don't need to deal with.
Reading the maintenance section on transmissions in the book, it says to clean out the transmission case once every six months with "flushing oil." This is a new one to me. I was wondering if it meant kerosene, but a few paragraphs down it again mentions using "flushing oil not kerosene" to clean the case. Any idea what flushing oil is?
-
I bought some auto store brake lines and a cheap flaring tool figuring to save some money doing my brake lines. Big mistake. The steel lines were difficult to bend - my lines snake in and out of the frame and up and over brackets and spring perches. Things did not go well in the flaring department, either. I got one good one in three tries on average and the tool left ugly marks on the line. Finally, the lines were black and looked really plain, an aesthetic disaster in every facet of the job.
So I bit the bullet and ordered an Eastwood flaring tool. Expensive, but I figure I can sell it when I finish or keep it if I love it. I also decided to go with Cunifer brake lines. The original lines on Daphne were a coppery color, apparently some sort of coating over the steel lines. The new Copper-Nickel lines have a really nice golden yellow shine to them and polish up beautifully. They are supposed to be the easiest lines to bend and I hope they meet my expectations. I'll post on the result of my adventure next week after I've attempted the job. Since nothing ever seems to go exactly like I expect it will, it will be interesting to see how things work out.
-
Back on page 20 of this thread (Post # 387) I was wondering about putting spacers for the axle bearing clearance on the outside rather than the inside of the bearing containment area at the end of the axle. Today I put in the new rear axle bearings (cones and races) and solved the problem.
Assembly went like this -
Drive in the inner axle seal.
Drive in the inner bearing race. (The spacers are supposed to go in at this point, followed by the race.)
Insert the axle with the two bearing cones back to back on the axle. I had a local auto shop press the bearings on for me to avoid damaging them.
Drive in the outer bearing race.
Place the gasket on the end of the axle.
Bolt on the brake backing plate.
I then measured the play in the axle - there was none, nada, nothing.
That didn't seem correct, so I though it over for a moment, then put the brake drum on the axle very loosely, put the axle nut on a few turns and pulled on the drum with several sharp raps. Sure enough, this moved the outer bearing race out a bit until it hit the backing plate. Now I had play in the bearings. The secret was me driving the outer race on but forgetting that once the car was being driven, the wheel and hub would back off moving the outer race to the position it was now.
Once again I measured the end play. I had .0235. According to the owners book (they didn't offer shop manuals in 1932) the end play should be .0025 to .0050. Not good! The PO, my friend Phil Kennedy, said he didn't remember seeing any shims when he took the rear axle apart back in 1970 or thereabouts, but I can't remember what I did last week, so there may have been some there at one time. So now I had to decide if I was going to take everything back apart and probably tear up the new inner seal in the process trying to get the inner race out, or could I put the spacers on the outside between the outer race and the backing plate?
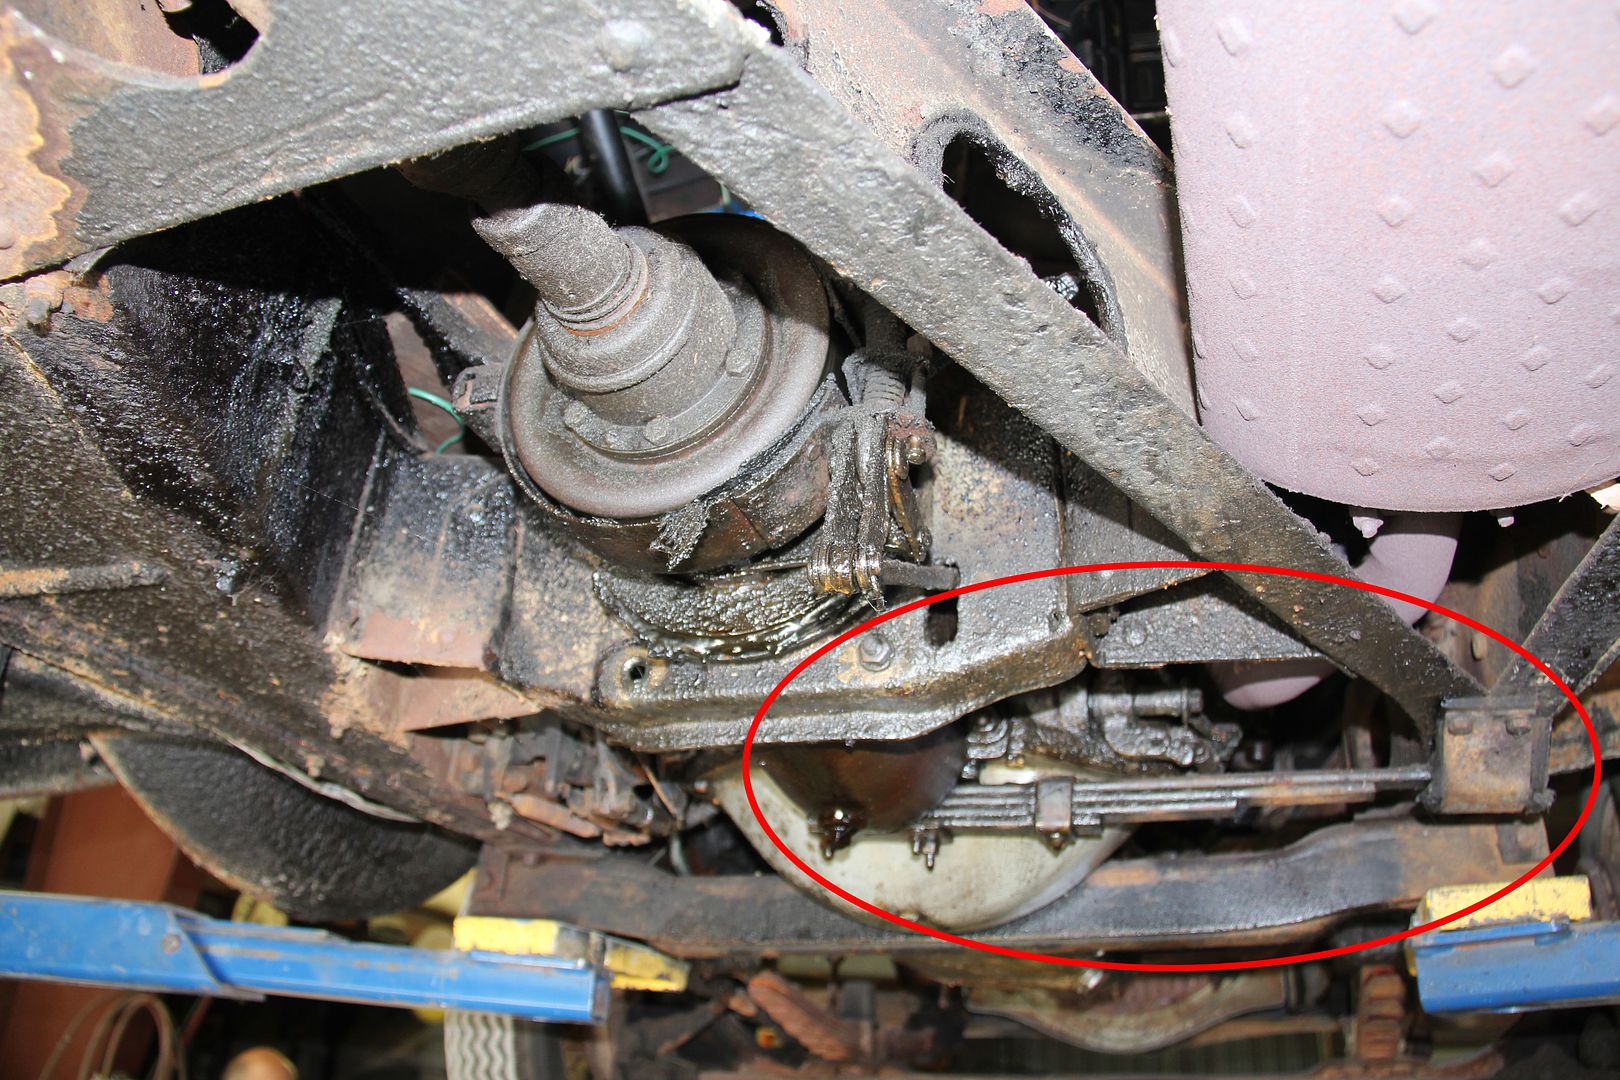
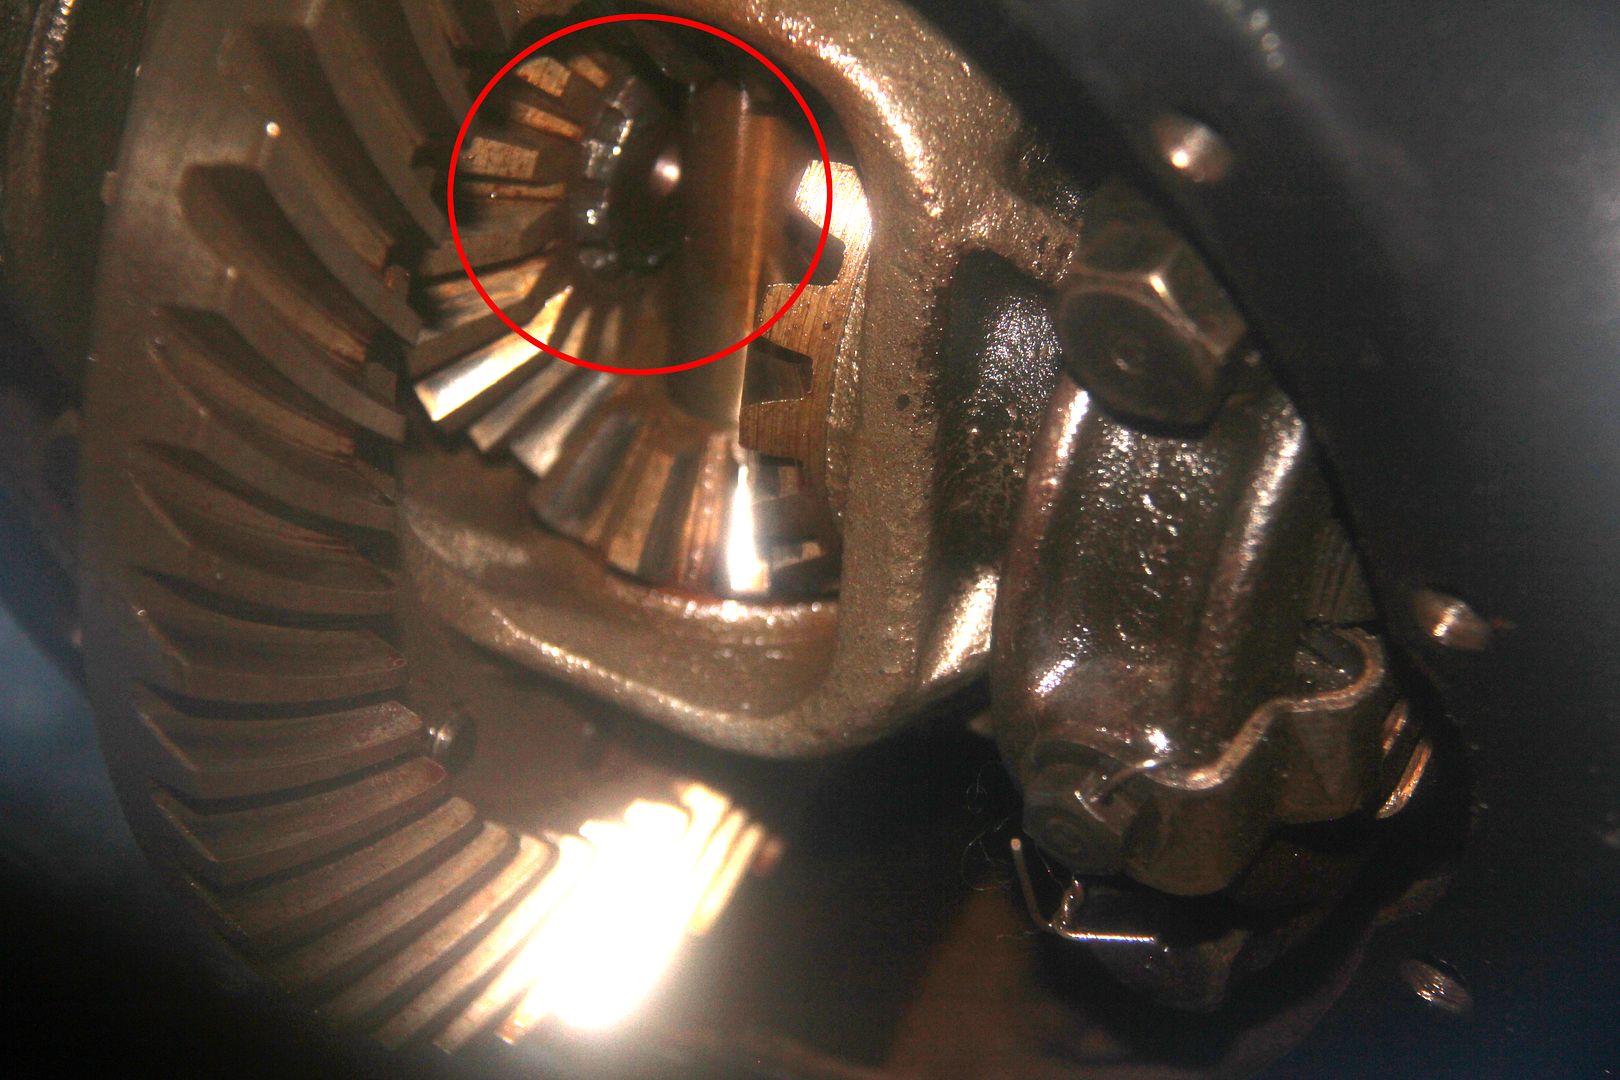
Must of the previous discussion last year centered on whether having the spacers on the outside would force the axles inward and cause clearance problems. I couldn't believe .020 would make any difference, but I checked the differential just to be sure. There was plenty of clearance. The end of the axle protruded just slightly past the spider gear, but didn't come close to the center shaft. I was safe. This picture shows the end of the axle inside the red circle. Sorry for the crummy photo but it was tough to get good focus back in there.
I found shims at Graingers, correct inner and out diameter. I bought some that were .010 thick, figuring that two of them would give me .0035 clearance. They weren't cheap at nearly 30 bucks for a package of ten, but I was lucky and didn't have to double the price by buying two packages of different thicknesses.
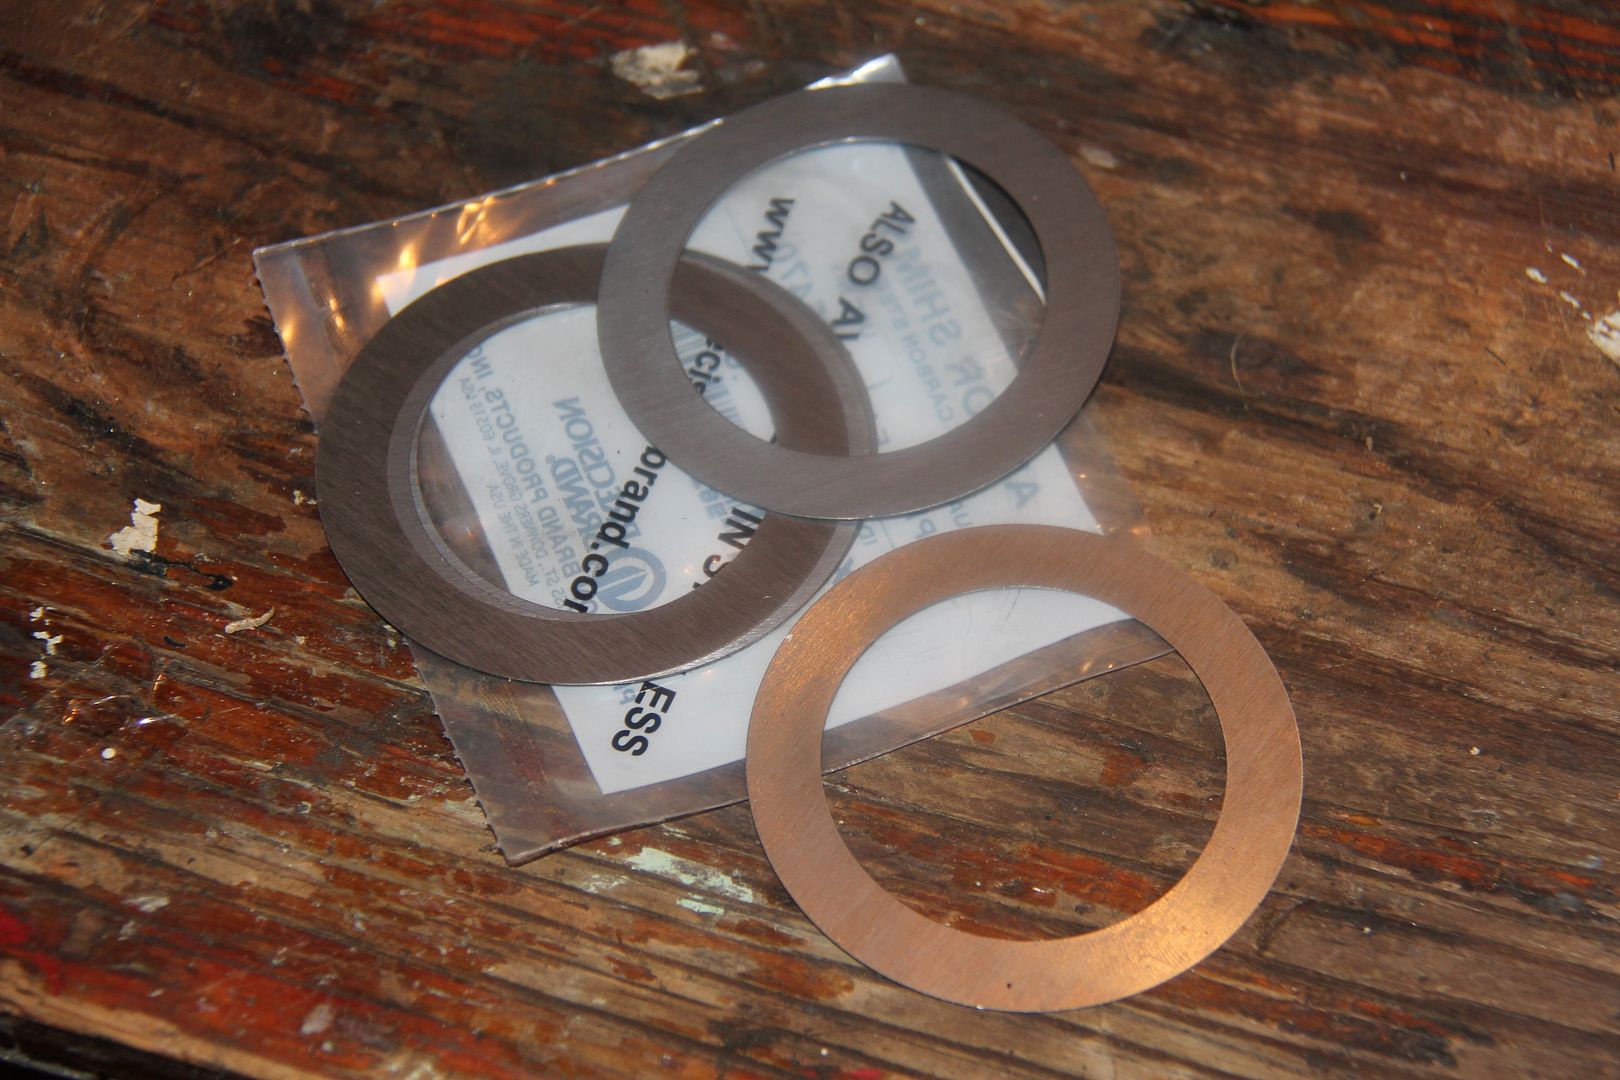
I placed the shims between the outer race and the backing plate, gave the drum another tug and checked the clearance - .0035, right where it was supposed to be.
Yes!
-
This is the type of thing that keeps me up at night. I feel your pain, Ray. The only solace will be that great feeling when you finally figure the problem out.
-
Safety glass for sure. Since you are stripping the frame, try heat on the screws.
-
Looks like you're making real progress. Not to be a nabob of negativity, but does the engine slant a bit too much to the rear? It's a bit hard to see if the frame is level in pictures, but I know my two Dodges and my two Plymouths had/have engines pretty much level with the ground. It may just be the way the photos are shot and not a problem at all. Considering what you have to work with, outstanding job.
-
Thanks, good advice on the bolts.
-
My blocks did not have any depression, the old ones or the new ones. My springs eyes were a tight circle with no gap between the end of the eye and the spring. I had a spring shop install my blocks so I don't know how they did it. I'm not sure if that "hook" is just an illusion because the circumference of the eye is not tight or if it is there for a purpose. Your blocks appear to be quite a bit larger than those on my 32 Dodge.


Our continued...slow...progress!
in Dodge & Dodge Brothers
Posted
Getting close. Great job!