


CTX-SLPR
-
Posts
617 -
Joined
-
Last visited
Content Type
Forums
Gallery
Events
Posts posted by CTX-SLPR
-
-
Matt had fun kinda repeating the pattern that is on the bottom side of the hood. Radiator floats on rubber cushions top and bottom.


-
 1
1
-
-
Need to catch up a bit:


-
 1
1
-
-
How much of a gap did you end up with between the seats and the center console?
Thanks
-
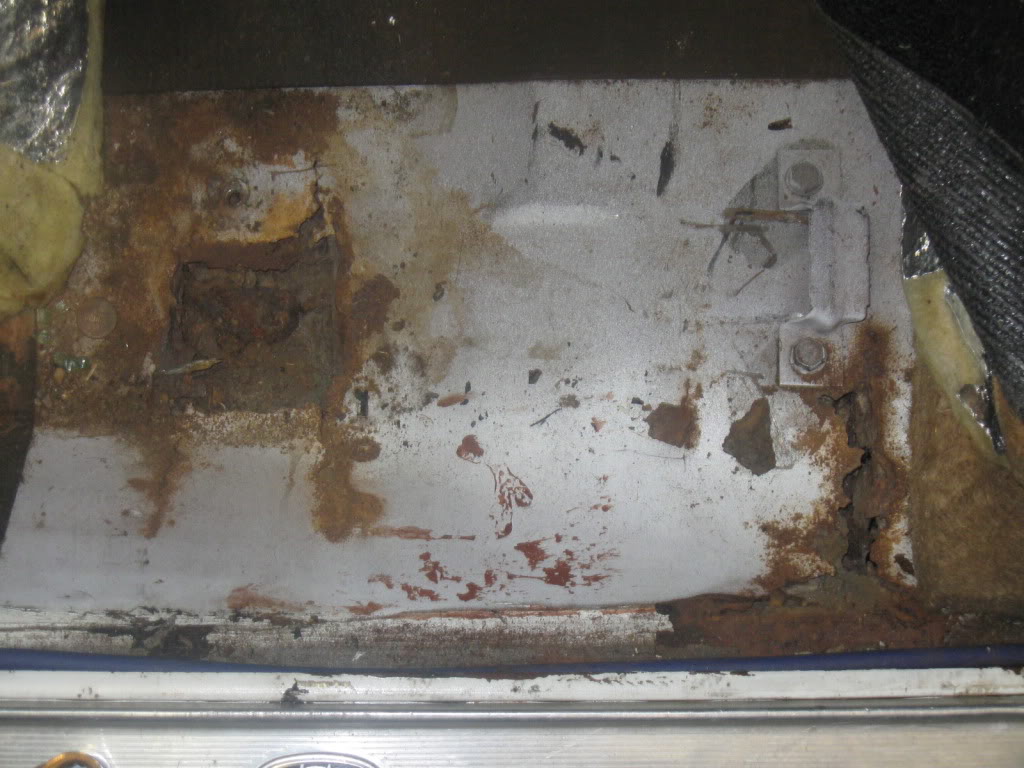
Been working on fixing the floors around the front seats in my '64 and installing some 97-99 Acura CL buckets. They're mixed together since I don't want to repair the floors only to cut things out or restore complicated features that aren't used anymore.Here's how bad it was when I started with it:


 First thing I did was get a spot weld cutter and start drilling out the spot welds on the passengers side between the under floor braces and the floor itself. Other than some large concentrations of welds near the seat mounts that went pretty smoothly as long as I didn't get too aggressive too quickly with the cutter and have it skip out of the center punch on the weld. Got both bad sections of the floor out in about 2hrs of work with other guys standing around talking about stupid stuff we've done in cars as part of a guys group that meets in my garage on Thursdays.
 Interesting that the seat mount on the front is mostly intact but the underfloor brace is completely rusted out on the end while the rear seat brace is basically gone but the brace is pitted but otherwise fine. We suspect the reason the braces rot out is the drain hole is not the low spot and water collected in the end even worse than the debris getting trapped would have.I've been working on mounting the drivers side seat since I need it first to bleed the brakes. Here's some pictures of the seats

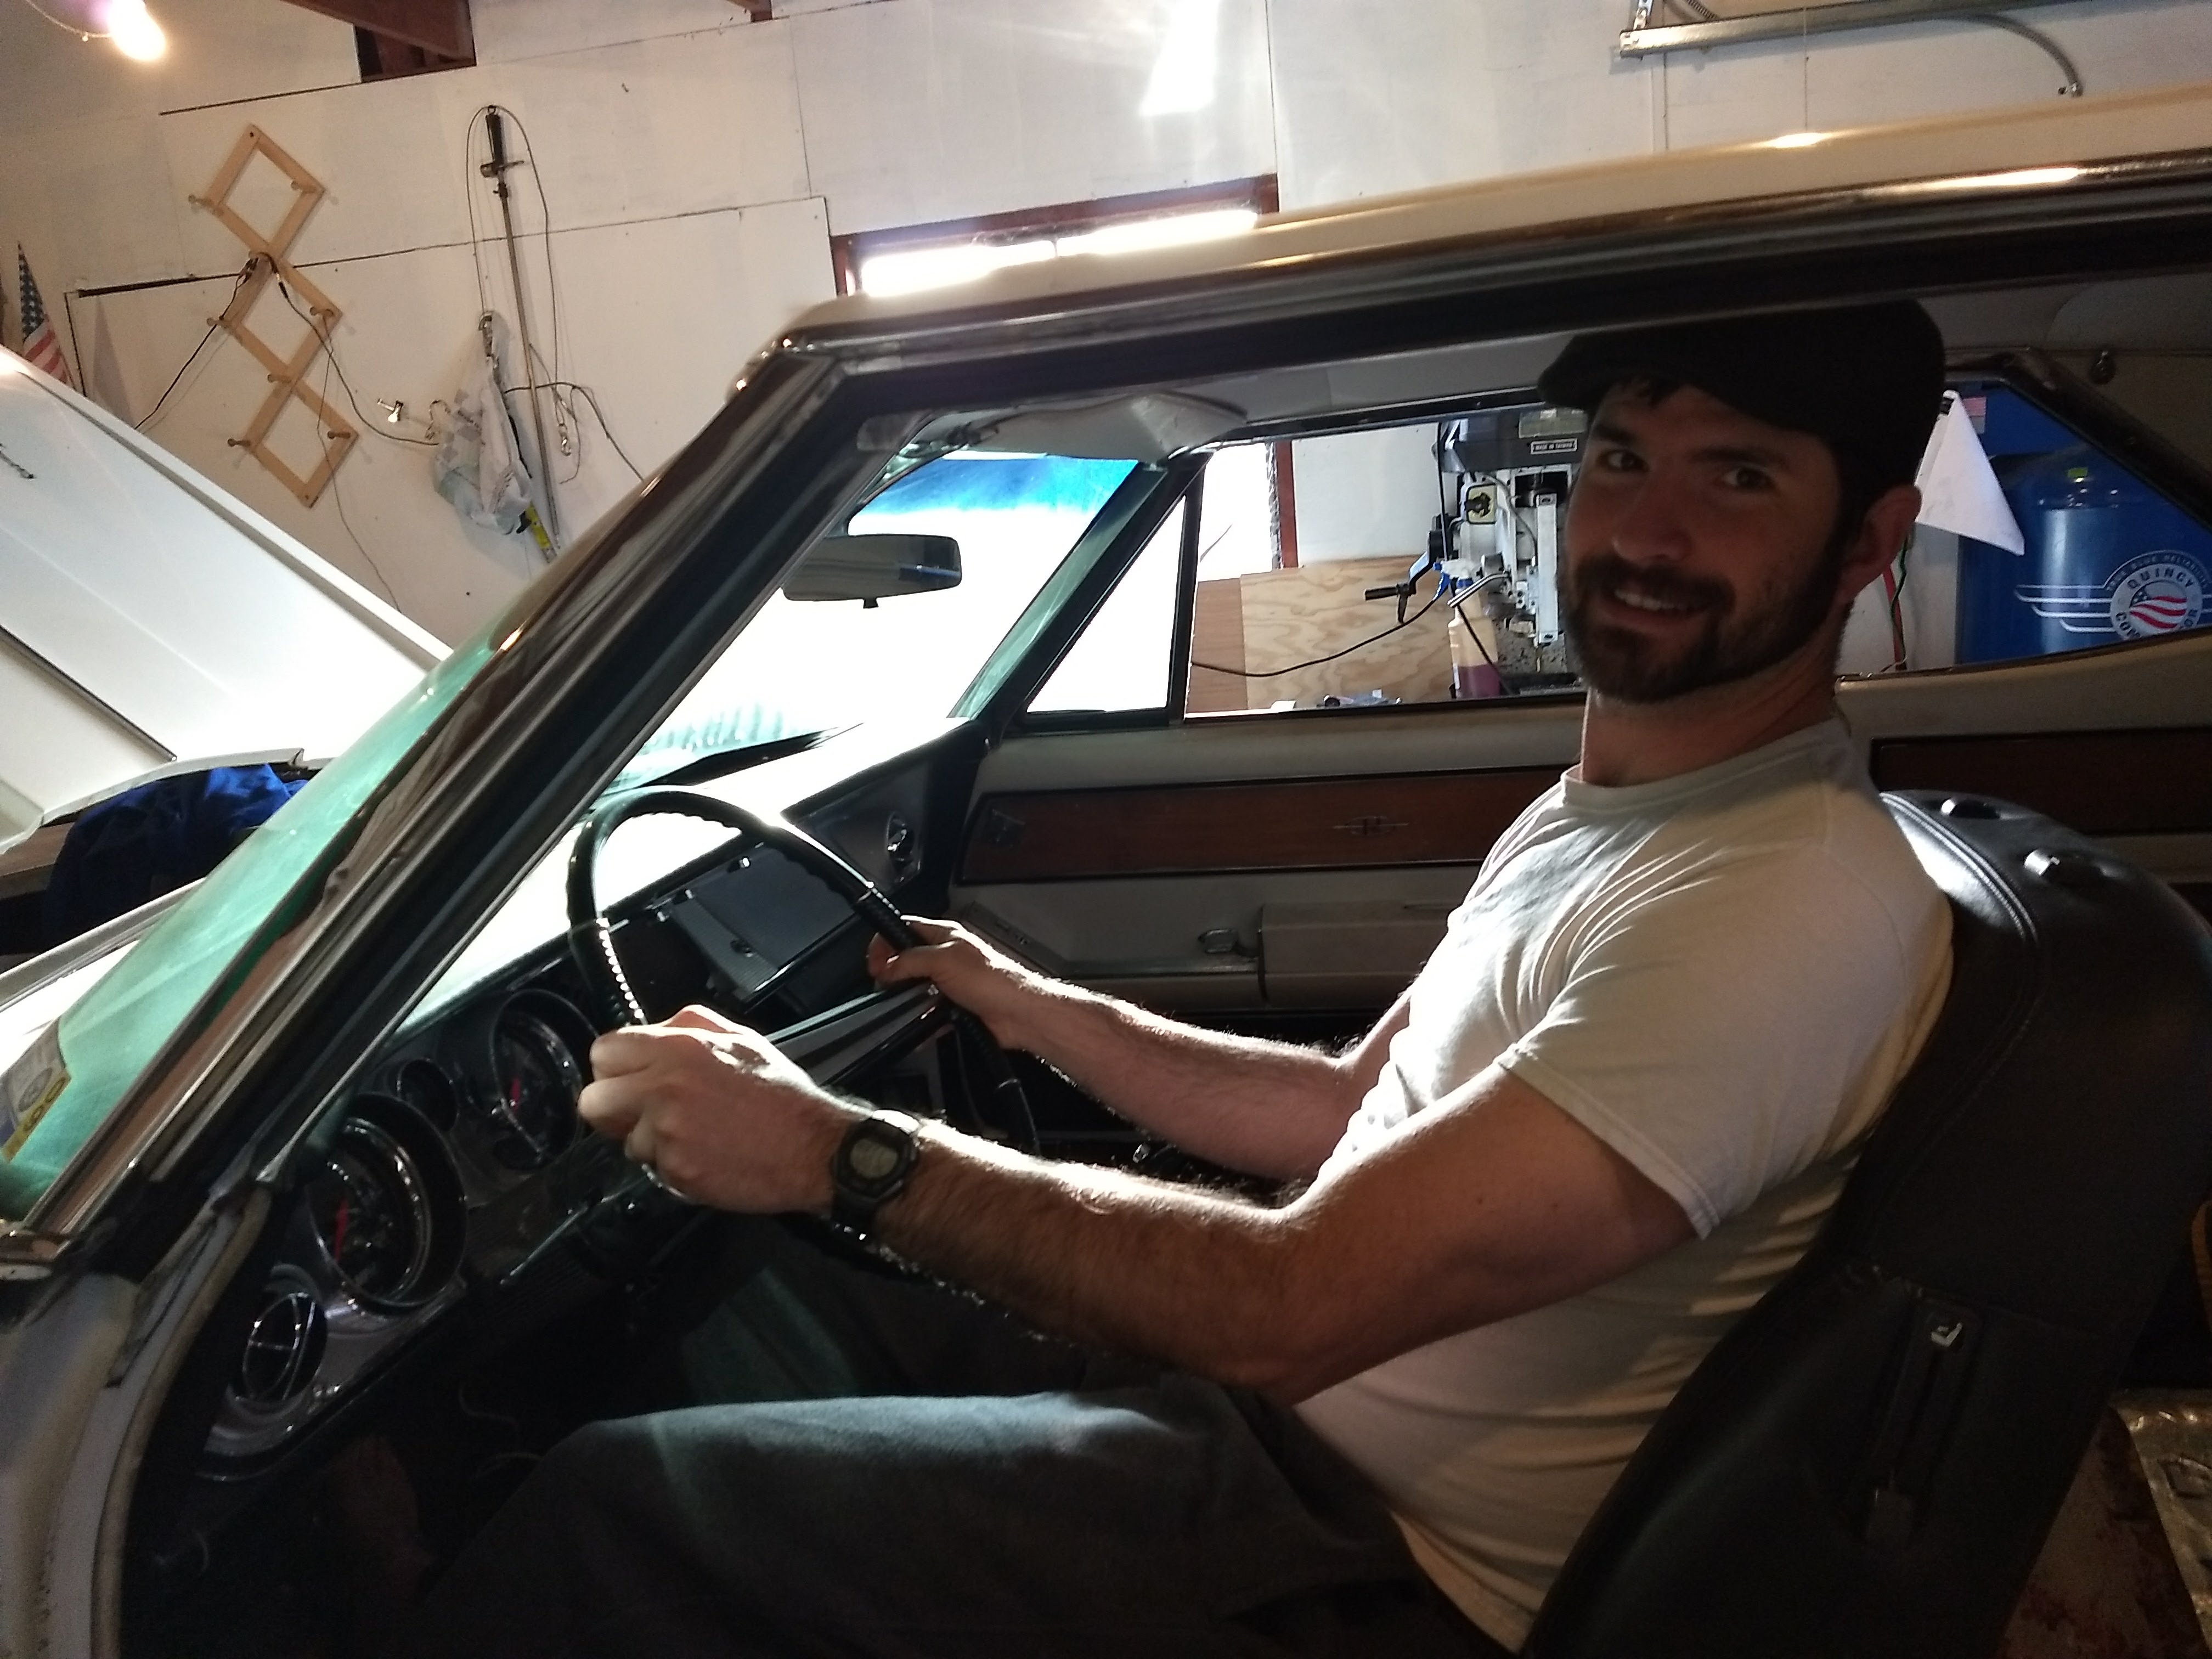
 My first attempt at mounting the seat using the front of the kickup in the floor as a seat mount for those 45ºmounts with a bent bracket in the rear ended up too far forward and too high. I was mostly comfortable but only with the seat all the way back and down. No room to adjust beyond that.
 After a major screw up where I drilled a full set of mounting holes 1.25in too over and ended up off center from the steering wheel I regrouped and came up with a new mount plan that gets me seated pretty much exactly where I want. I've got maybe 0.75in of rearward travel from comfortable for me and even at full up on the seat my head doesn't hit the headliner unless I put the seat back full upright. Quite happy. Need to get some 0.25 plate to be happy with the mount strength but the basic design is intact and even uses the original mounting points for the front. The rear I'll have to make a new version of that bent metal bracket but it should be more than strong enough.


-
1
-
-
'65's have reversed Ohm range from the earlier cars don't they?
-
I had mine done by Lee Manufacturing to both quicken the ratio (2.5 turns) and stiffen the steering feel up. I’m not sure if he’s doing them anymore but a search of a pro-touring board should tell you who is in the business of doing things like this. I’m quite happy with my Lee and so are others on the pro-touring boards.
I’d strongly suggest getting your original box redone vs. a different box. While there are stops on the control arms that contact the spindles (or steering arms), I like the fact that the guts are setup for the car but the spool valve and the ratios can be change to quicken up the steering.
-
2
-
-
I have a Rare Parts Inc. centerlink on my '64 with no complaints. The exchange process did take a while though. I'd do it with a core then pass your unit on to someone else as a core for them to do the same.
-
1
-
-
I redid them years ago (which doesn't mean they have received a lot of use since I've not really used the car in 10yrs) where I cleaned the channels and the rollers as well as lubed things up with white lithium grease. I did pull both the front and rear mechanisms out entirely when I had the car painted so they wouldn't get overspray on them. I couldn't get them to really seal right after taking them out. That's when I ended up having someone else take care of it for me.
Last night I did mess with the passengers side and by pushing the front of the quarter window back while it was on the top of the travel it did end up in the right spot in the seal which allowed the front window to reliably seal against it. Still not an active close but better than before. I've not messed with the drivers door to see if I can't at least get it to seal better while it's sitting.
Dave,
Thanks for the parts offer, I think everything is intact just worn in places. We'll see when I dig in.
-
Looks like the y have window rollers in the "Door Parts and Miscellaneous"

Once I dig into the doors here in the coming month to make an order.
Thanks guys
-
Hello,
One of the big things that makes me concerned about parking my Riv outside (which I have to do) is the windows no longer seal properly. I gave up trying to align the rear windows myself and paid someone to do it who did a good job but he highly suggested that I rebuild the various rollers and other pivot points on all of the windows so they would seal properly. The seals are new so that's not the problem, its the glass doesn't fit into the seal channels reliably when you roll the windows up and when you open the door it doesn't go back in properly either.
Anyone have a good supplier for the various rollers and other bits to rebuild the mechanisms?
Thanks
-
Looks like it's brake booster time for Charley. I've asked for some more info on how he got the pushrod to play nice with the stock pedal assembly. On mine I had to cut the pushrod down and it was finicky to get to work right till I spaced the booster out even farther and knocked the stock pin out of the pedal for a smaller bolt to use a heim joint to keep it from binding.


-
1
-
-
1 hour ago, JFranklin said:
CTX-SLPR,
So your problem costs them battery exchanges? Did you used to get LL Bean stuff too?
No idea what you're talking about beyond yes, my charging system issue costs them battery exchanges...
-
If I've got a charging system issue that can drain the battery on me... I definitely use the Walmart batteries, the return process is simple, they are everywhere and open at most times to boot. Now I'd like something a bit nicer if there wasn't a chance of having it go flat just sitting around but that's always a danger with old cars with their old wiring.
-
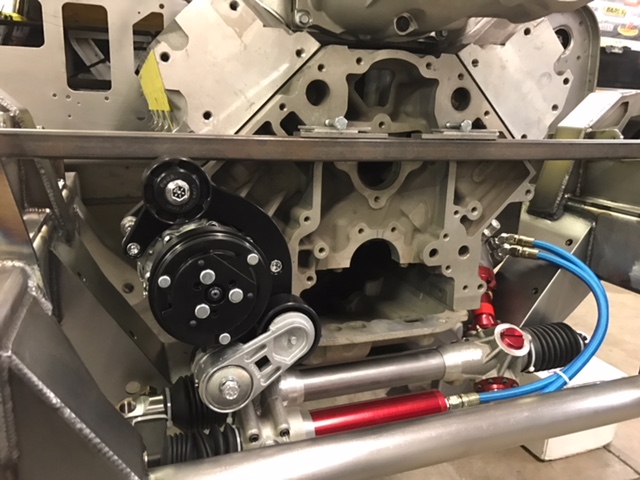
More Pictures!
I love how I can see the bits of the stock core support still sticking around in there like those holes to access the bolts below underneath the factory battery tray that's gone in this setup.
Check out this thread about where the stock stuff is likely to head if the weather will give him a break: http://lateral-g.net/forums/showthread.php?t=56232


-
Updates on this project
Finished machining up the second caliper bracket

New shoes for the Riviera since the old tires are at least 12yrs old and probably more. Just some basic Hankook 275/70R15's to get a decent tire that could last 2yrs or the next 12, who knows. That's my daily driver in the background, 1982 Fuji Del Rey road bike.


Masked and painted the second set of wheels after knocking the centering rings out of them. These are at the local America's Tire getting the tires installed today

Finished machining the brackets and yes the brackets are upside down in the picture compared to the spindles but I have mirror images and they fit on their respective spindles. I did have to grind a bit on the spindle over the middle bolt and around the lower attach bolt since the castings were fairly rough. Most of it was with a sanding drum and a hand file so the removal is fairly light but needed

I then went and painted the spindles, steering arms, and brackets Rustoleum Hi Temp silver

Now onto assembly...


And now they're pretty much done! I do need to make a hardline that goes from the caliper to a bracket on that open bolt hole in the spindle to connect the shown braided steel line to the caliper.


Next month I'll get these mounted and bled since I need to get the car into the garage for that project and I'm not going to have time till then for the major work (i.e. patching up the rusty floor around the seat mounts) that goes along with rebuilding much of the front suspension to account for the lower weight in the nose.
-
1
-
-
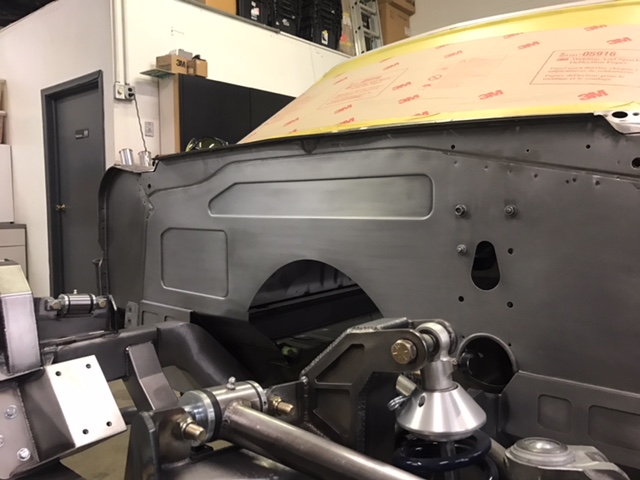
Today's Picture Blast:
That's a lot of attention to detail to blend the new inner fenders like that.


-
1
-
2
-
-
Excellent question! I'll ask them if they weighed stuff before and after.
-
9 hours ago, telriv said:
Not as much strength in those square corners as opposed to radius/rounded like stock. Square corners have a higher tendency to crack/break the reason for so much extra support in the middle.
Just my opinion.
Tom T.
I don't think those inner box sections are there because there is a square corner in that location, more because they want a stiffer body. I don't like it much ascetically but they aren't a production shop with stamping machines and while it's going to be more prone to cracking I doubt this thing will ever seen anywhere close to the miles (even in anger on the autocross etc) to cause that to fail. The more I look at it, the less I see copied from their other full frame products which leave me a bit puzzled at how they did the parts. Honestly looks like they treated the car as a unibody and converted it from there. Weird.

Roadster Shop 62-67 Nova full-frame conversion
The bulges, with square corners, from what I can see are there to route the exhaust through since they did copy something of an X-frame taking up all the space under the floor pans. Because of the flat floor, even with the paneling pieces, they had to add a lot of bracing and it's pretty close to what the frame has. Interested to see what they do for seats and exhaust packaging in there.
5 hours ago, KongaMan said:It's more than just an opinion. Ask the guys who designed the DeHavilland Comet.
I wouldn't ask them, I'd ask the guys who figured out that they got crack propagation out of the window frames... Also there are plenty of square body joints in the factory Riviera and other cars, just because a stressed skin aircraft had cracking issues doesn't mean that a full frame car will suffer from the same. It's be worse if you did that in the middle of a shear plane vs. on the border, sure it could twist like a lidless shoe box but its not that likely to crack.
-
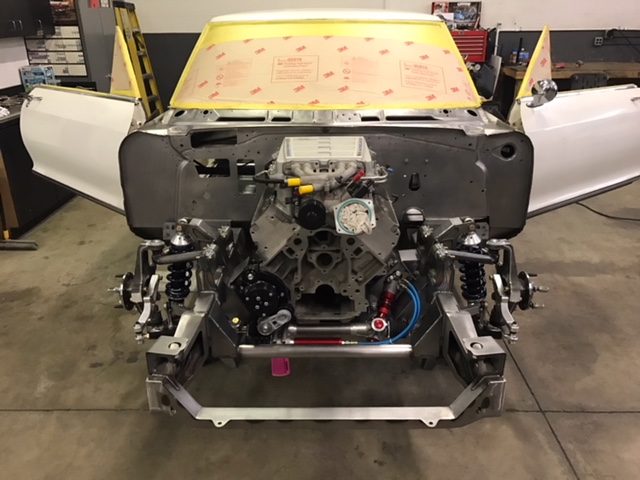
Tonight's picture blast: Original frame with driveline, and engine bay mockup
Looks like they are keeping the factory wipers. Also looks like they are keeping the same brake pedal and steering setup. Be interesting to see how the brakes work for them if they keep the same pedal ratio. I thought it made things long and squishy.


-
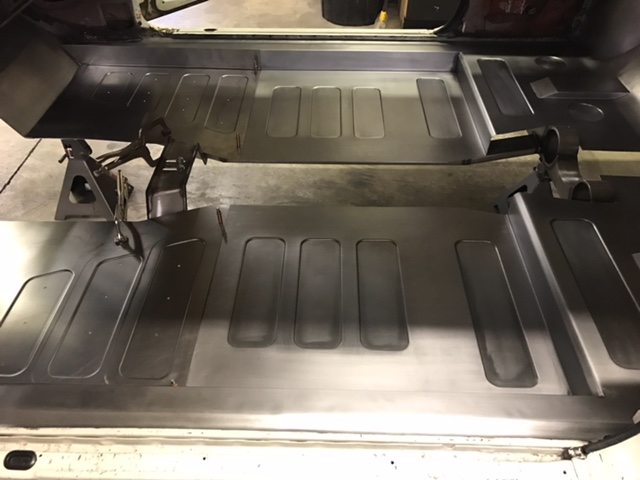
This evenings blast of Pictures:
The floor work and trans tunnel inside and out. Interesting to see the stock parts picking up at various points.


-
1
-
-
1 hour ago, steelman said:
Hope he has some thick skin. As you saw, not much tolerance for anything modified here.
And those Rushforth wheels look amazing.
Seems like its not his first rodeo for something like this. I'm sure he's done worse to something else.
Going through the pictures and found almost the exact Rushforth wheel picture I used myself in there! I'm going to get all of them downloaded then start posting them up. The other thread I linked I'll ask their permission after I'm caught up with the current one.
-
I have the builder's permission to repost his pictures over here and he said he'd come check out what we think of it.
I'll start doing that tomorrow most likely.
-
Those look like the Wheel Vintique units that I'm not sure if they make anymore. Either way they came in 5x4.75in only last I checked so with the Roadster Shop suspension I bet they switched over to that pattern with the C5/6 hubs
I'm not sure if I can afford them but I'm wanting either
]
Rushforth Salt Shaker
or

Budnik Muroc III (I can't find a picture with the webs properly blacked out
-
1
-
-
Here's an older build (the shop that did it is nearby to me though this is the first I've heard of either the shop or the car). Looks to be a bit more along the lines of what a lot of us would want though:
http://lateral-g.net/forums/showthread.php?t=35944&highlight=East+bay
I'll have to see if the car is still floating around here in the East Bay AND call the shop to see if they know where it went. They also used the same supplier for the front suspension "The Roadster Shop" which from what I know from the Pro-Touring world has an excellent reputation for suspension work. Not quite Detroit Speed level but considering Detroit Speed doesn't do custom stuff for anything less than full on show cars it seems, The Roadster Shop looks to be one of the better folks that work off of a formula to tweak a template design for other cars. I'm going to join Lateral-G and see if I can pull some of the pictures over with the owners permission.


'64 Riviera Floor Pan Patching (with Acura CL Seats)
in Buick Riviera
Posted
Continued working on the floor of the car, mainly on the passengers side. Since I paid a fair bit of money for it and there are no good repos, I've very carefully taken apart the passengers side donor section of floor by drilling out the spot welds and the like. This has left me with a lot of good donor sheet metal but it's been time consuming. I finally got the replacement section of inner rocker in the car and spliced in the new section of under floor bracing but when I was cleaning up the welds under the car I managed to get a metal grinder spark/frag in my eye past my safety goggles. I've been recovering from that for almost a week now and it was not fun having them dig a splinter out of my eye with a hypodermic needle!
Passengers side under floor structure is 80% done. Need to redo the last spot welds on the underside of the bracing and patch a small section of the second brace that rusted out. I was poking at the inner rocker and had the screwdriver go through so I'll probably end up cutting the end of the support off so I can patch that section with donor material, weld the end up and then weld the support back into the car. Then it's weld the seat mount plate on and then the floor over it. I'm guessing I've got another 4-5hrs left on the passengers side depending on how long it take to stitch weld the floor back in to keep it from warping. Then it's seat mounts and final paint to wrap the passengers side up.
The drivers side will be easier since I know what I'm doing better and have already taken the donor apart, but harder since I have no drivers donor so I'll be fabbing the floor out of sections of the passenger side and flat sheet. Have to get done by the end of the month so I can take the car to see my students from the auto maintenance class I taught on the last day of school.