


waltmail
-
Posts
557 -
Joined
-
Last visited
Content Type
Forums
Gallery
Events
Posts posted by waltmail
-
-
He described this item as an HVAC control unit for '88-91 Reatta.
Am I missing something here?
-
License/registration/proof of insurance? Yes officer. I have them right here.
-
 1
1
-
-
I don't believe any of the options are worth the cost and effort, but saying that, I will take the vehicle, as is, off your hands for $2000.00. 😜
-
1
-
-
Hydro lock seemed symptomatic to head gasket leak. As mentioned also coolant in oil and oil in coolant. Intake manifold gasket breakdown leaves a trail of white smoke from exhaust pipe. Just from my perspective and experience.
-
Yup. 50- 55 is one of the inputs for the T C lockup to occur. Large drop in rpm when that happens.
-
Throttle Position Sensor ????????????
-
Do the 90s have the power steering A/C cut out switch?
-
The carpeted cover just pops off with a bit of force. It is held in place by plastic posts that snap into the metal underside of the roof ass'y. It is common for the cables to rust in the guide slots. Take the motor drive off of the roof ass'y and work the cables with plenty of liquid lube.
-
Okay. The Parts were claimed. No longer available.
-
Years ago I purchased from Espo Springs and Things a stabilizer bar bushing kit. I never installed them. Cost me $17.00 in 2004. Send me $5 Paypal for shipping and I will send them to you. Such a deal. Even contains a tube of anti squeek lube. `

-
Not an easy job. They are aluminum and anodized. Best way is to power sand the anodization off exposing the base metal. I use 800 grit on an orbital sander. The next step is to polish the exposed metal. Technique is important. Do not use random swirl pattern when sanding. Power buffer with rouge doing small concentrated areas will bring out the lustre. I clear coat the finished product.
-
1
-
 1
1
-
-
13 minutes ago, harry yarnell said:
70# is WAY too high and 125 is WAY too low. Sounds like a bad compressor.
This. Not sure that indicates compressor is bad, but those are out of range readings. I would evacuate system and start over with recharge.
-
10 hours ago, DAVES89 said:
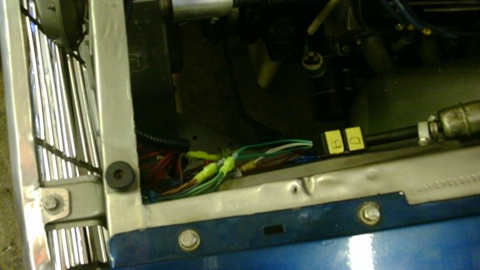
This was a problem for a while a few years back and then I didn't hear anything about it. For most of the guys it was #5 in Ronnie's picture. I believe the quick fix was a zip tie.
Very common occurrence. Occasionally they just pop off at the under hood connection. Pop it back on and if it happens again use DAVES89 suggestion. I get the feeling some mechanics is making a killing charging huge $$$$ for what is probably a 10 cent fix.
-
44 minutes ago, Old Man Jimbo said:
Thank you Barney , good info . The top does need to come off because the paint is bubbling in one spot so I will repaint it. That will be when I clean / replace what may need replaced.
Where does the water drain to ?
The drain tubes run down the pillar and exit on the left and right side frame rails behind the front wheels.
-
1
-
-
25 minutes ago, 63viking said:
PM me please, I am very interested in your upgrade for the lights.
Who are you asking?
-
Up until a few years ago, while my main hobby was restoring 60's muscle cars, I designed and mfd. ( on a small scale ) a retrofit wiring system for headlights, etc. My experiment started when I measured the delivered voltage to the headlights. Some were in the 9 volt range. Performance was like night and day ( pun ). I hung onto a few of these just in case. Powered them right off the alternator . Used the stock switch to kick the relays. No load to speak of on the switch. The actual wiring harnesses to each lamp was upgraded by me using marine quality wire and terminals. Never considered doing it to the Reatta, but see no reason to believe this would not be an easy upgrade.


-
1
-
-
Relating a story I heard a while back. U S 27 West of Fort Lauderdale, FL. Nightly high speed runs. One dude on a Suzuki Hayabusa was so excited when he cracked 200 mph on his speedo ( these clowns actually have a radar gun to check) he sat up straight in the seat to celebrate. Anyone want to guess what happened next?
-
It is not an easy job and I have done this on my '89. I did it on the ground but got it up as high as possible. The toughest parts were getting at the bolts and breaking them loose. IIRC there are 5 or 6. I also recall positioning the high pressure hose in the rack resulted in bruised and bloody hand appendages. Those 25 year old bolts can feel like they will never loosen.
The 2 port and 3 port difference probably has to do with the extra port for the A/C cut out switch. On the 1st production models when parallel parking Reatta's and putting a load on the pump and rack the engine could stall. Buick's fix was to install an A/C cut out switch when the load goes high. This is from memory as it has been about 5/6 years since I performed the swap and I no longer own the vehicle. I believe Ronnie has the full tutorial posted in his Reatta's Owners website. Sorry I don't have the link. Just found the link which was helpful.
Good luck.
-
1
-
-
11 hours ago, BGerrells said:
you’re right I’ll try to find an old post showing the configuration of the belt
Look on the front grille support or shock mount for the diagram decal showing the configuration. It is a factory decal.
-
1
-
-
What is the engine temp? I believe the threshold temp for the lock up is 155 degrees or more.
-
1
-
-
Try to find an owner's manual. Without going into detail some of those Gremlins are 1990 state of the art features. They are not gremlins.
-
I am sure someone will jump in momentarily. Common problem, See this for the usual suspect part.
http://thereattastore.com/acdelco-15-72530-blower-motor-control-module/
-
1
-
-
Sea Foam might do the trick.
-
36 minutes ago, DAVES89 said:
They price I paid included them pulling the windshield and dash. My battery pack went dead so they also pulled the drivers seat. The seats are 16 way and in great shape. I plan on using the drivers seat I just got as the passenger seat in the Red. I would put it in the 'vert but we don't drive it as much.
BTW can I swap the seat backs from a 16 way drivers seat for a matching 16 way passenger seat? I know Jim answered this one years ago but I can't remember and now have extra seats to play with.
I did a "search" using "Seats" and "Jim" and got my answer. The 16 way seat backs can be swapped back and forth from passenger to driver. So I am good to go. Thanks Jim!
Your deal just got better. Is the rear glass just as scarce as the windshield?


Another Hagerty article about the Buick Reatta.
in Buick Reatta
Posted
I am mad at Hagerty. Just attempted to insure my Mercedes and it did not qualify. Not old enough. Must be a 1979 or older. That would exclude very Reatta. Seems odd they would push insurance for Reattas.