


Taylormade
-
Posts
2,396 -
Joined
-
Last visited
-
Days Won
1
Content Type
Forums
Gallery
Events
Posts posted by Taylormade
-
-
I have some NOS bearings that have been in the package a long time. They are in great condition, shiny, with no rust or corrosion, but they are coated with some sort of cosmoline substance that was obviously meant to protect them. The problem is, the substance has dried to a reddish-brown film that is quite hard. What is the best way to get this off? I was thinking soaking it in acetone or lacquer thinner, letting it dry, then lubing the bearings, but I don't want to damage anything in the process. I know you never "spin dry" bearing with compressed air, so will the thinner remove the film and then dry without gumming up the works?
thanks for any advice.
RT
-
Thanks for the heads up. I took plenty of photos, plus you'd have to put the axles on wrong (one is shorter than the other) and I had them well labeled. There is also a notch in the housing for the ring gear that would be in the wrong position if you tried it backwards. And finally, if you did get it on 180 degrees off the back cover would have to be upside down and have the filler pointing up. The 32 must be different than the 33.
-
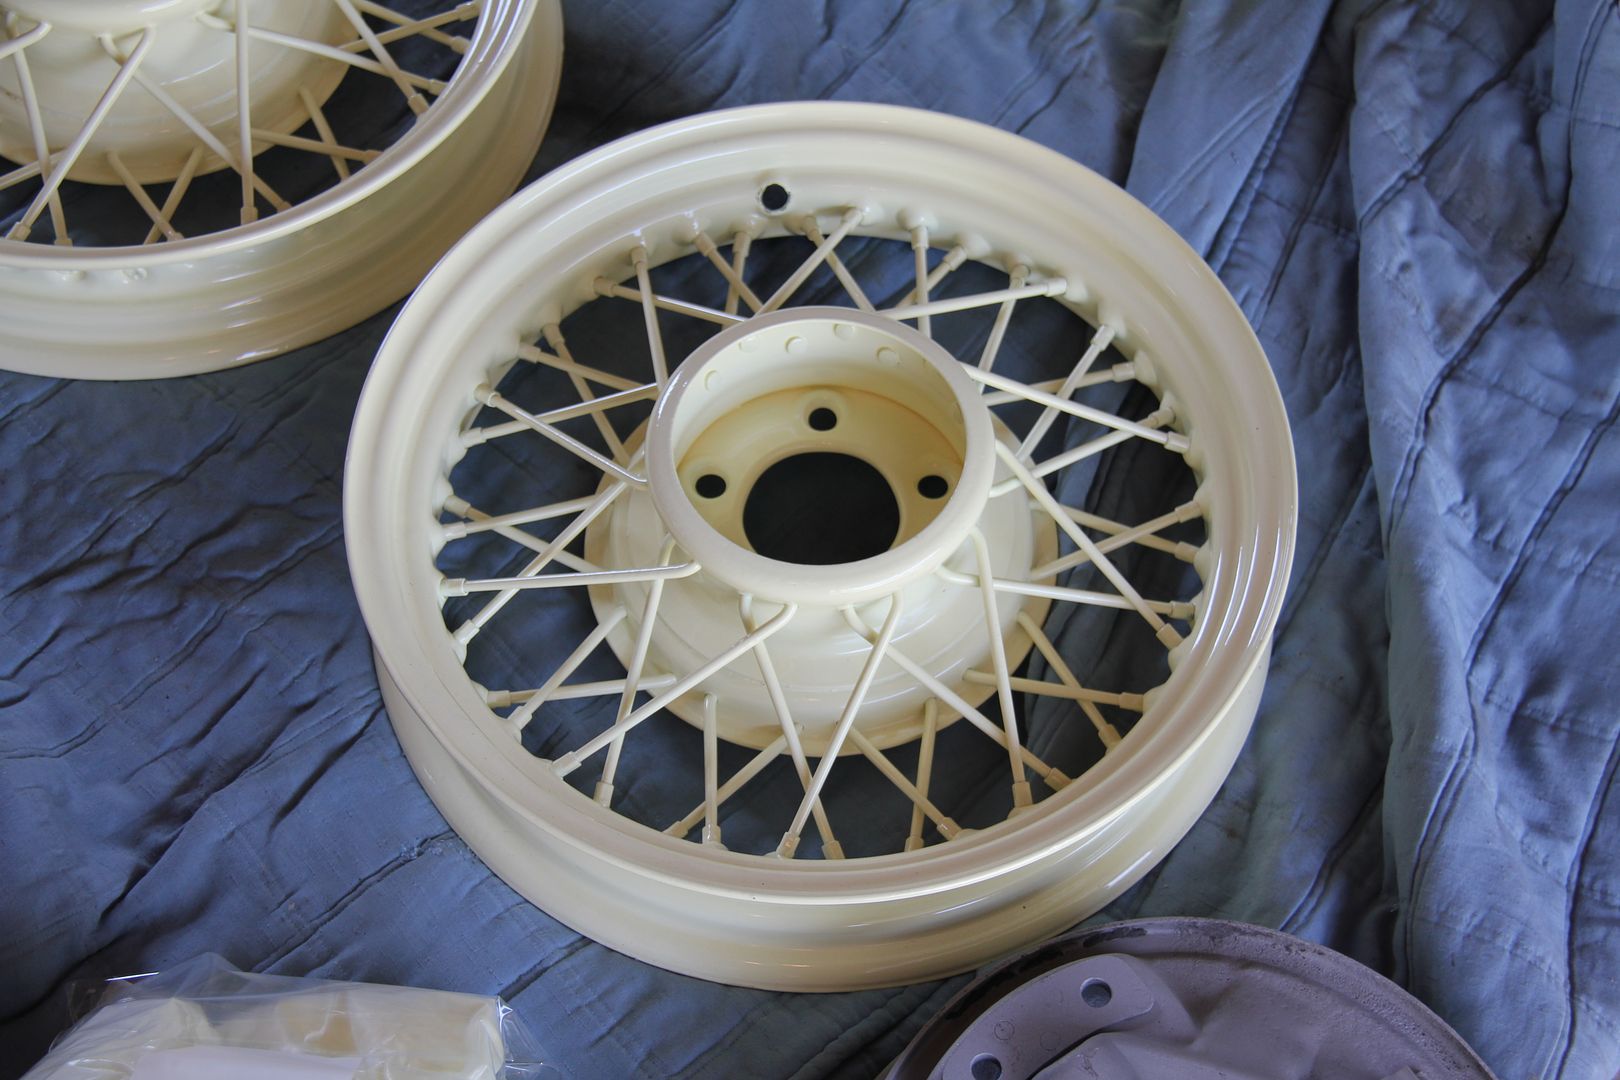
more progress on my DL.
Got the wheels back from the powdercoater.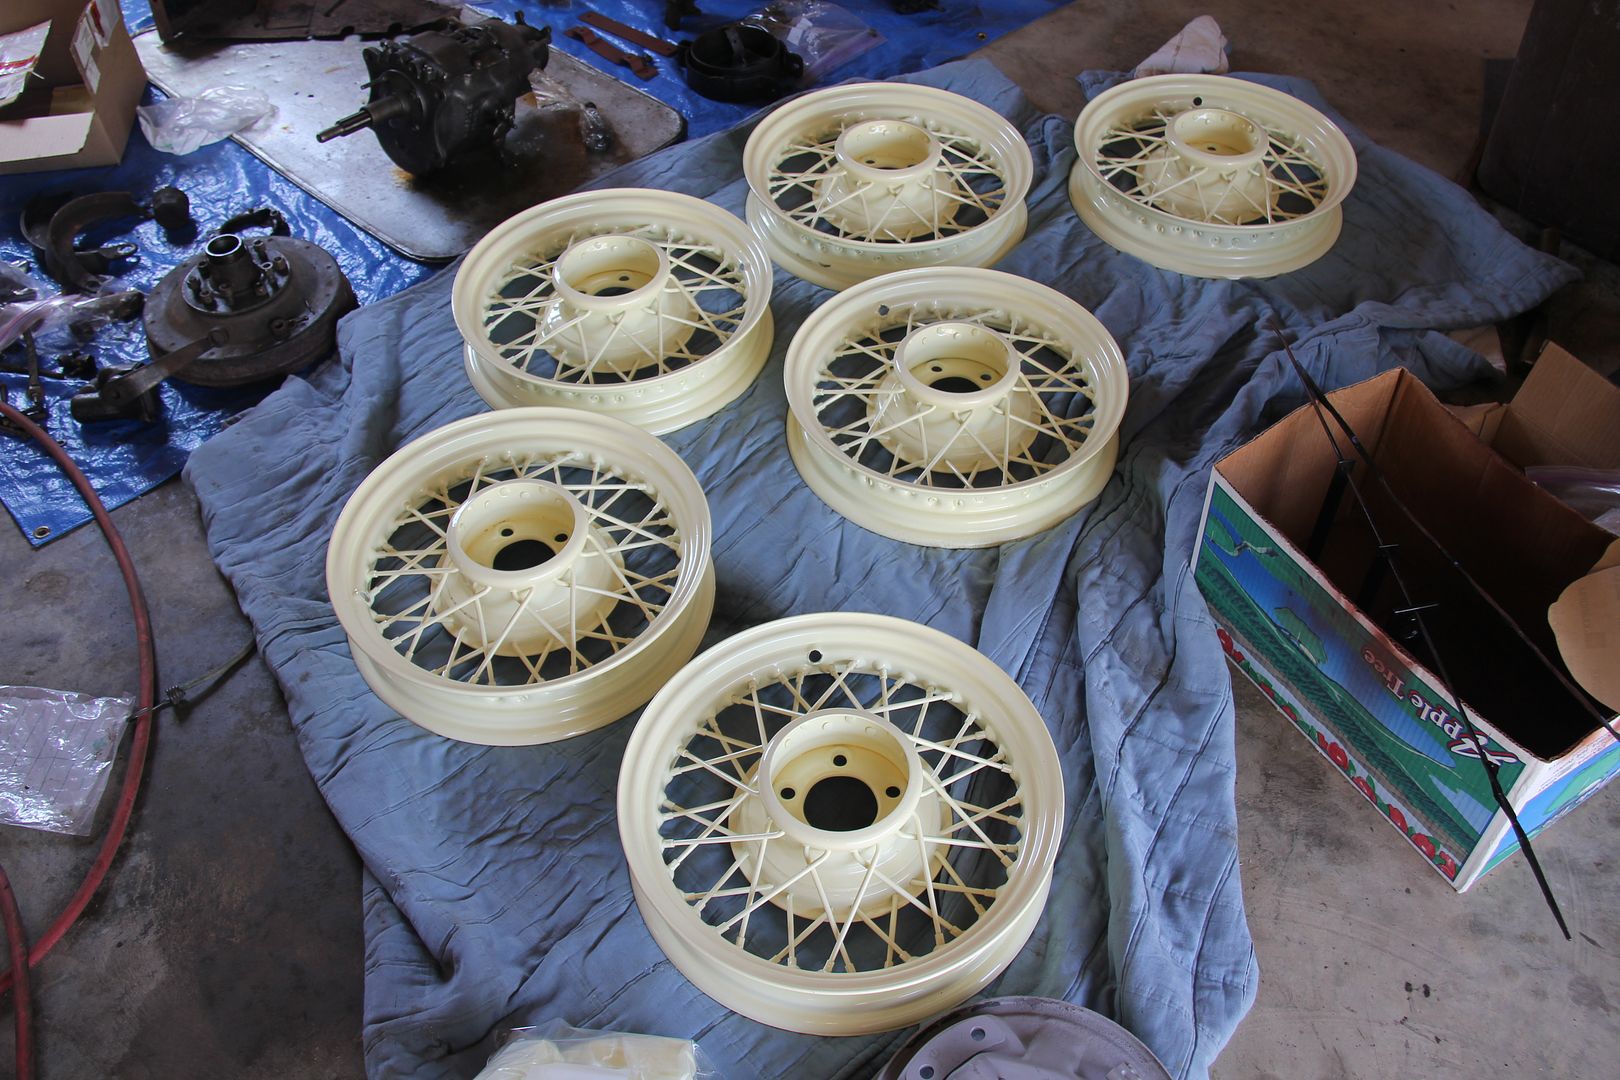
I'm happy with the color match. It's very close to what I found inside the wheels once the tires were off. They appear slightly more yellow in real life.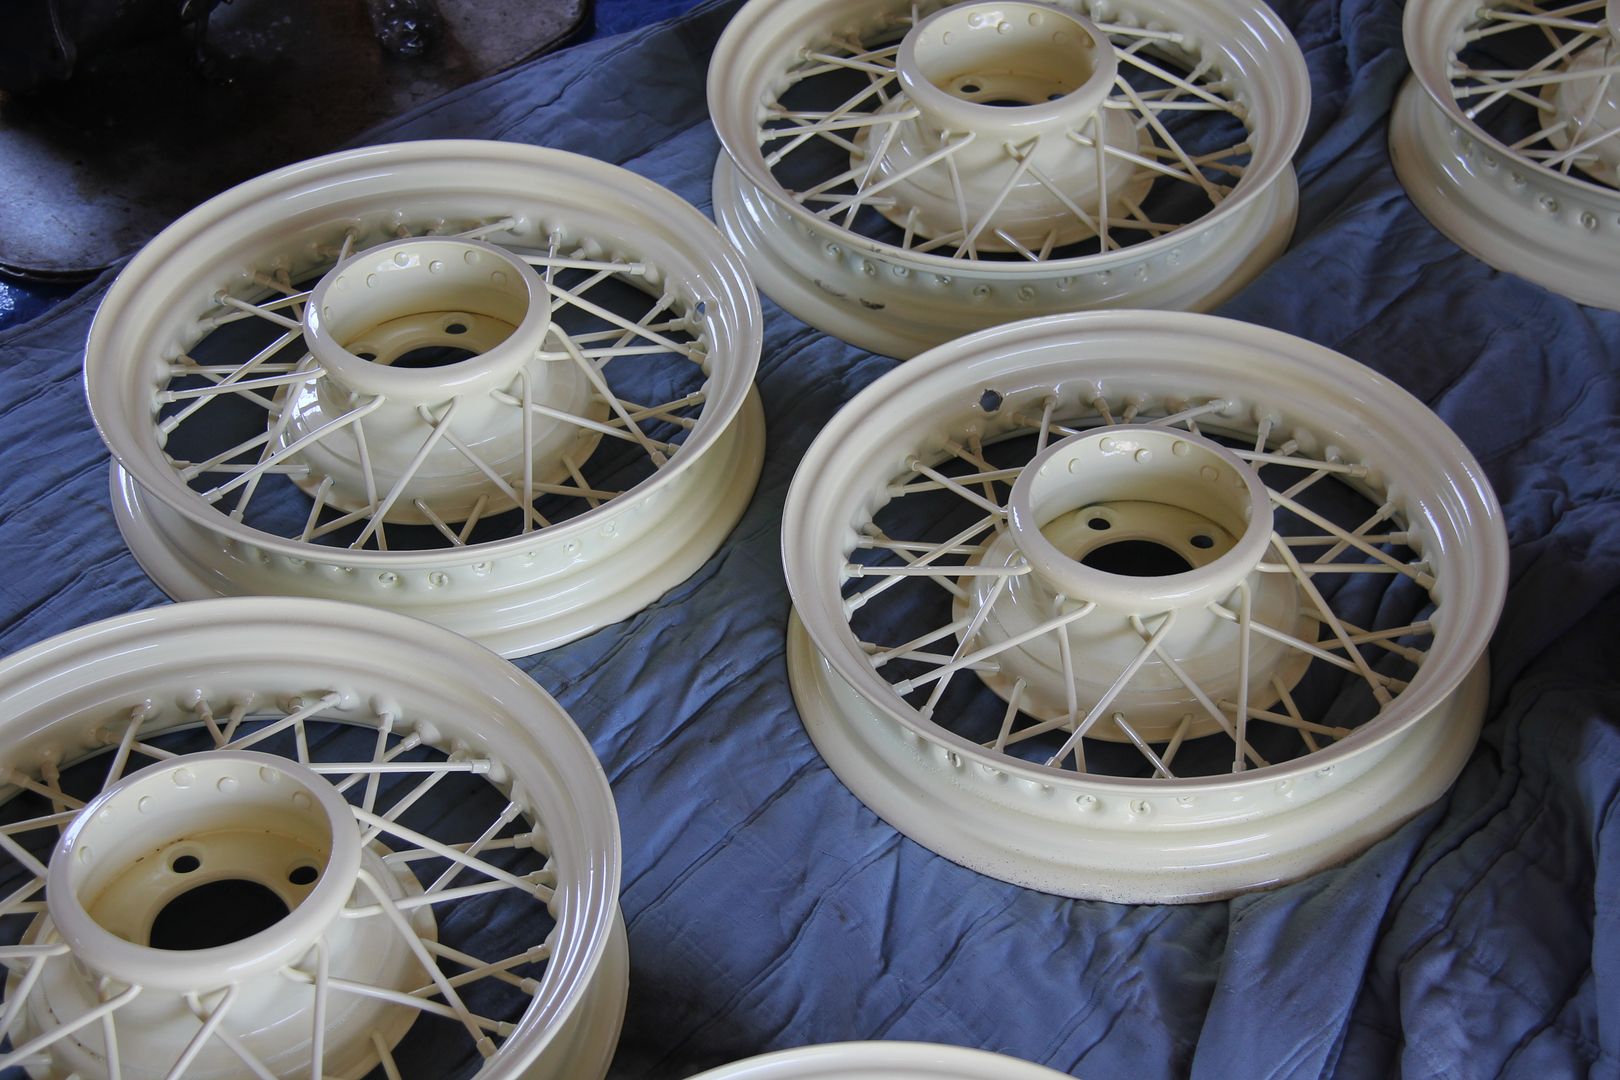
I took the differential carrier off the rear axle a while ago and cleaned and painted the axle separately. Probably a mistake as I now had to figure out how to clean the unit without messing up the gears - which were now exposed. The unit was very greasy and had a thick buildup of road grime. I got the bright idea to cut a hole in my temporary work table and drop the carrier in. It worked great. A shot after I painted it.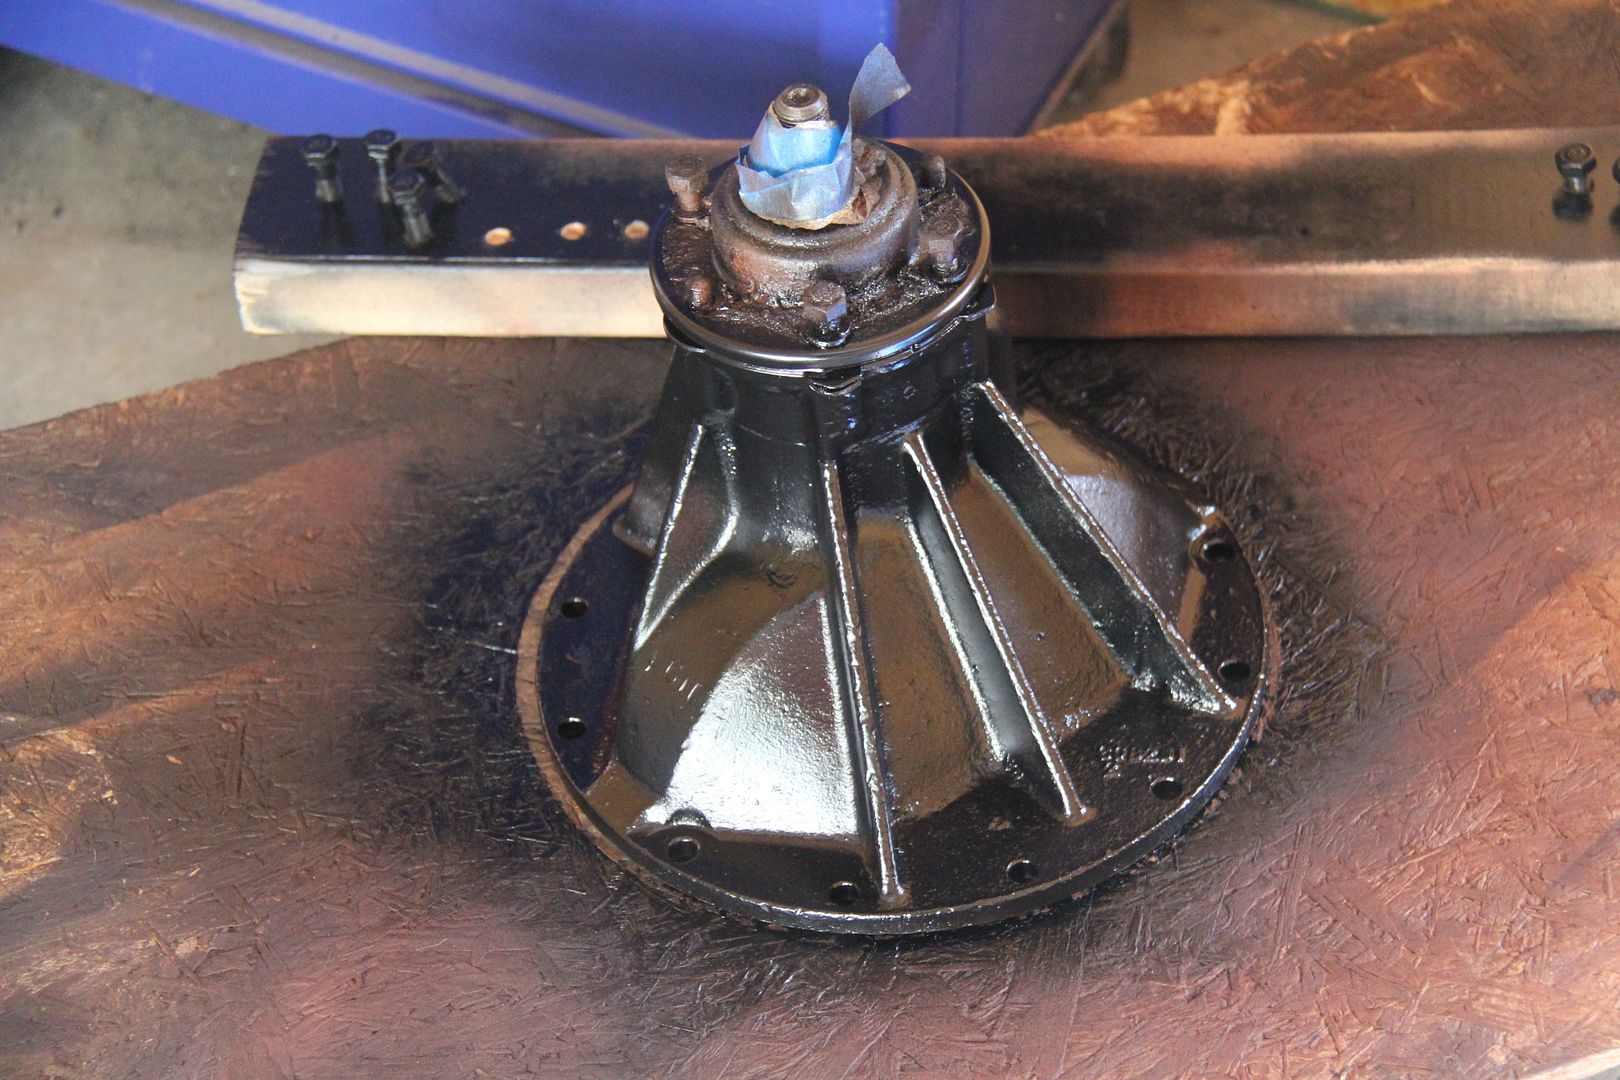
The differential is one heavy piece of iron. Since I'm a one man shop I had to figure out how to get it in place on the axle housing and then get a some bolts in to hold it on.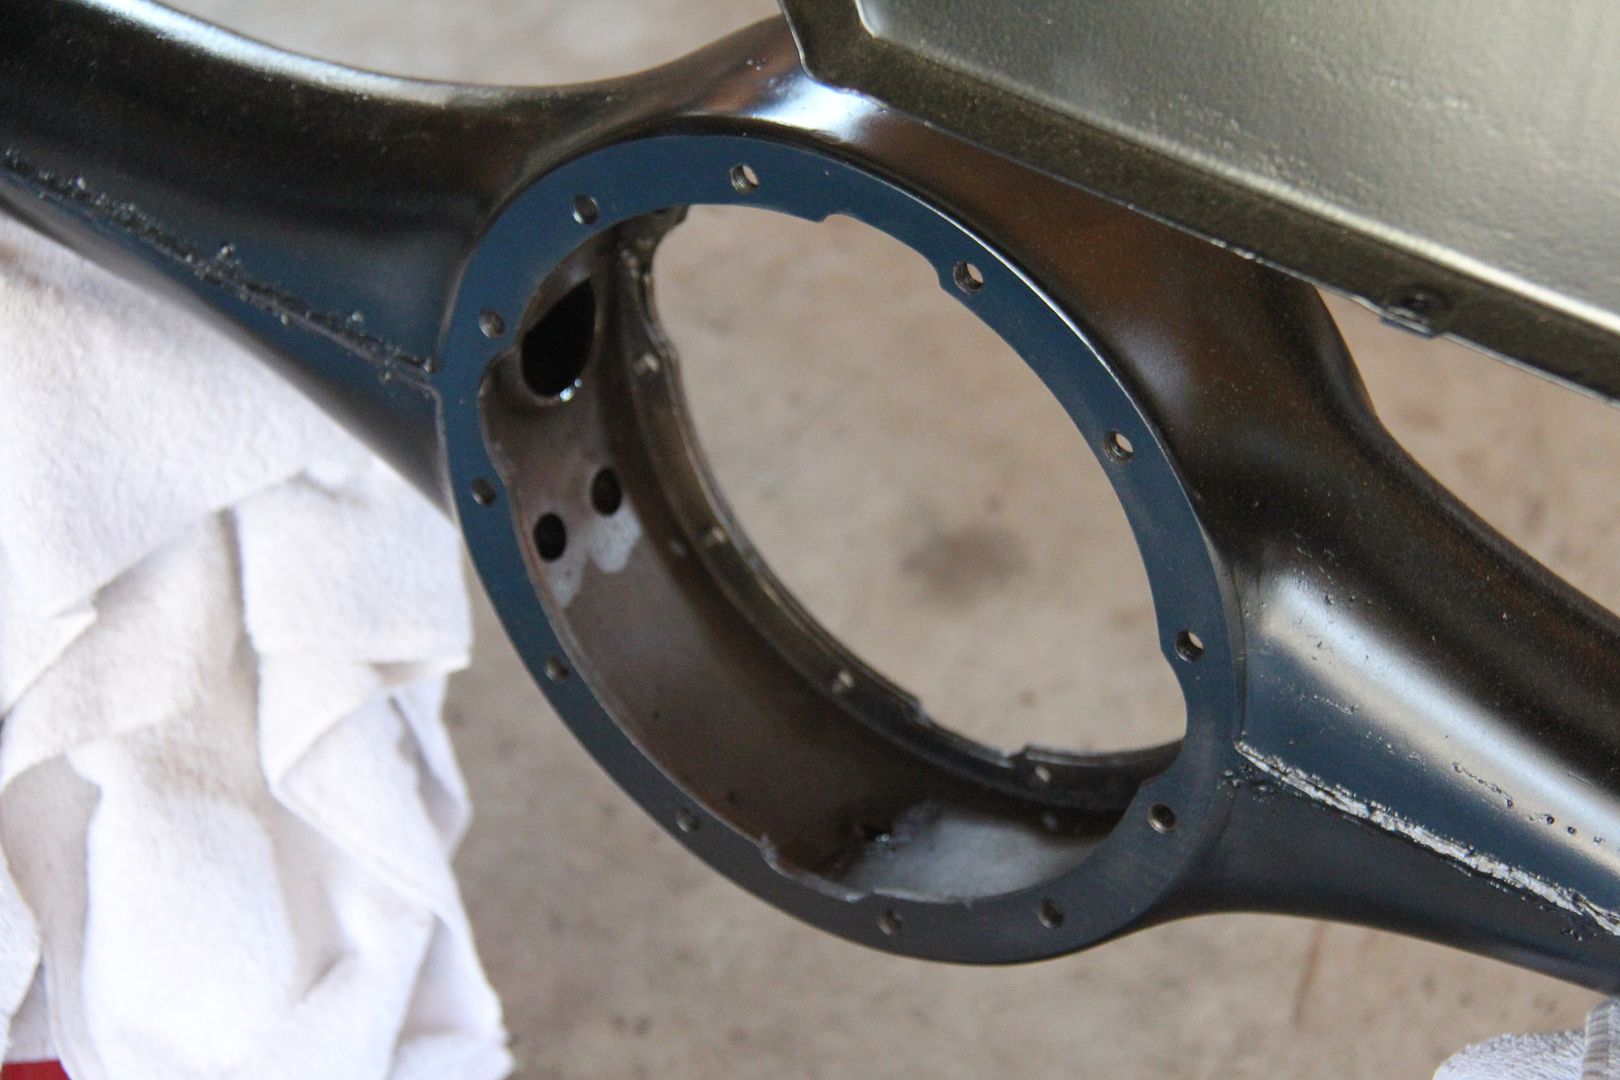
I cut the heads off a few bolts and used them a guide pins.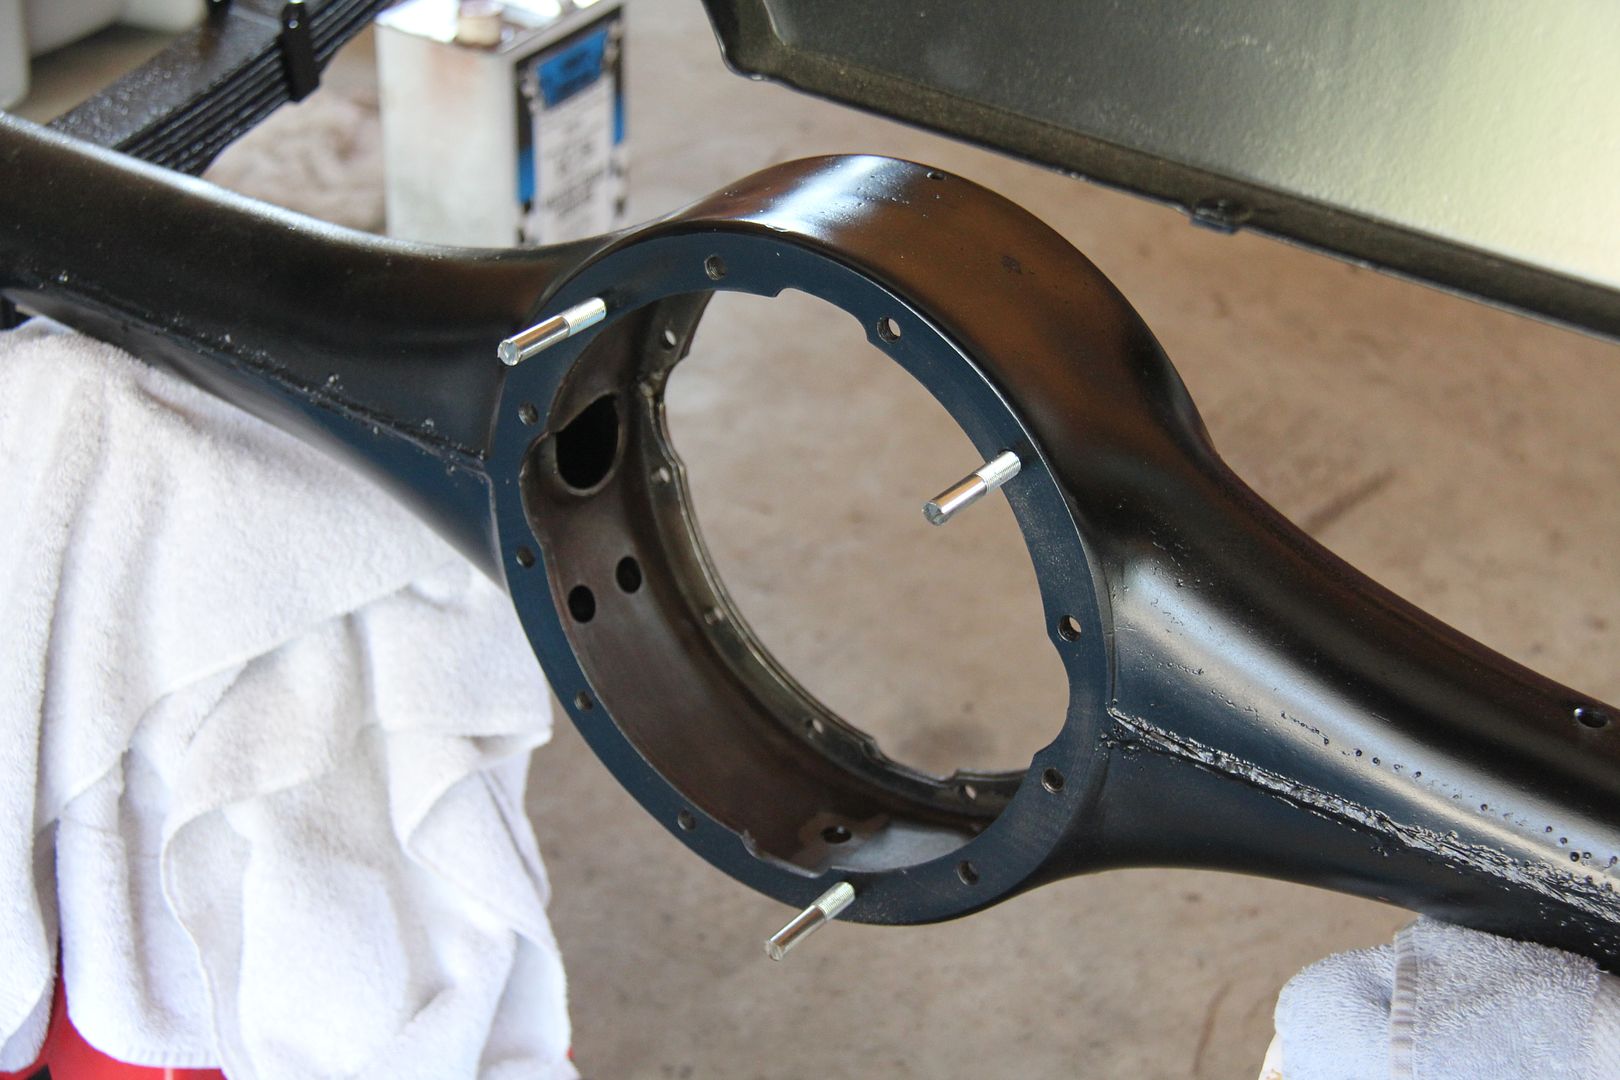
Then I cut a fresh gasket.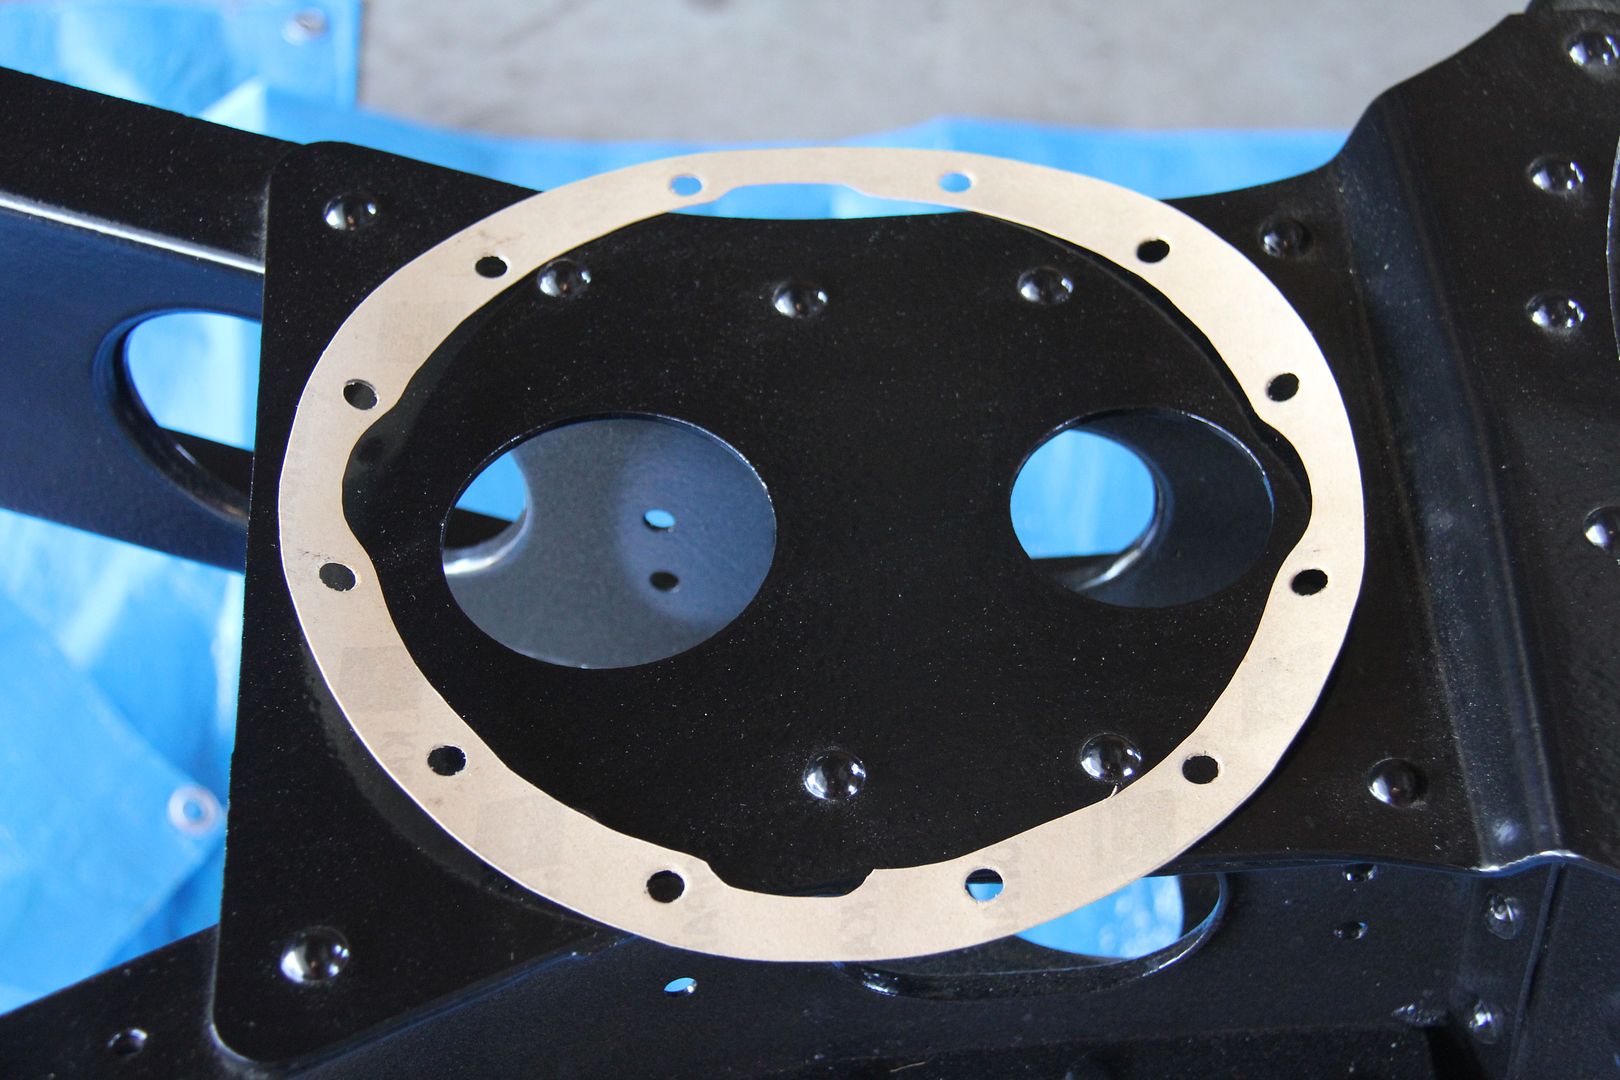
I coated it with sealer and put it in place. The guide pins really helped position the gasket correctly.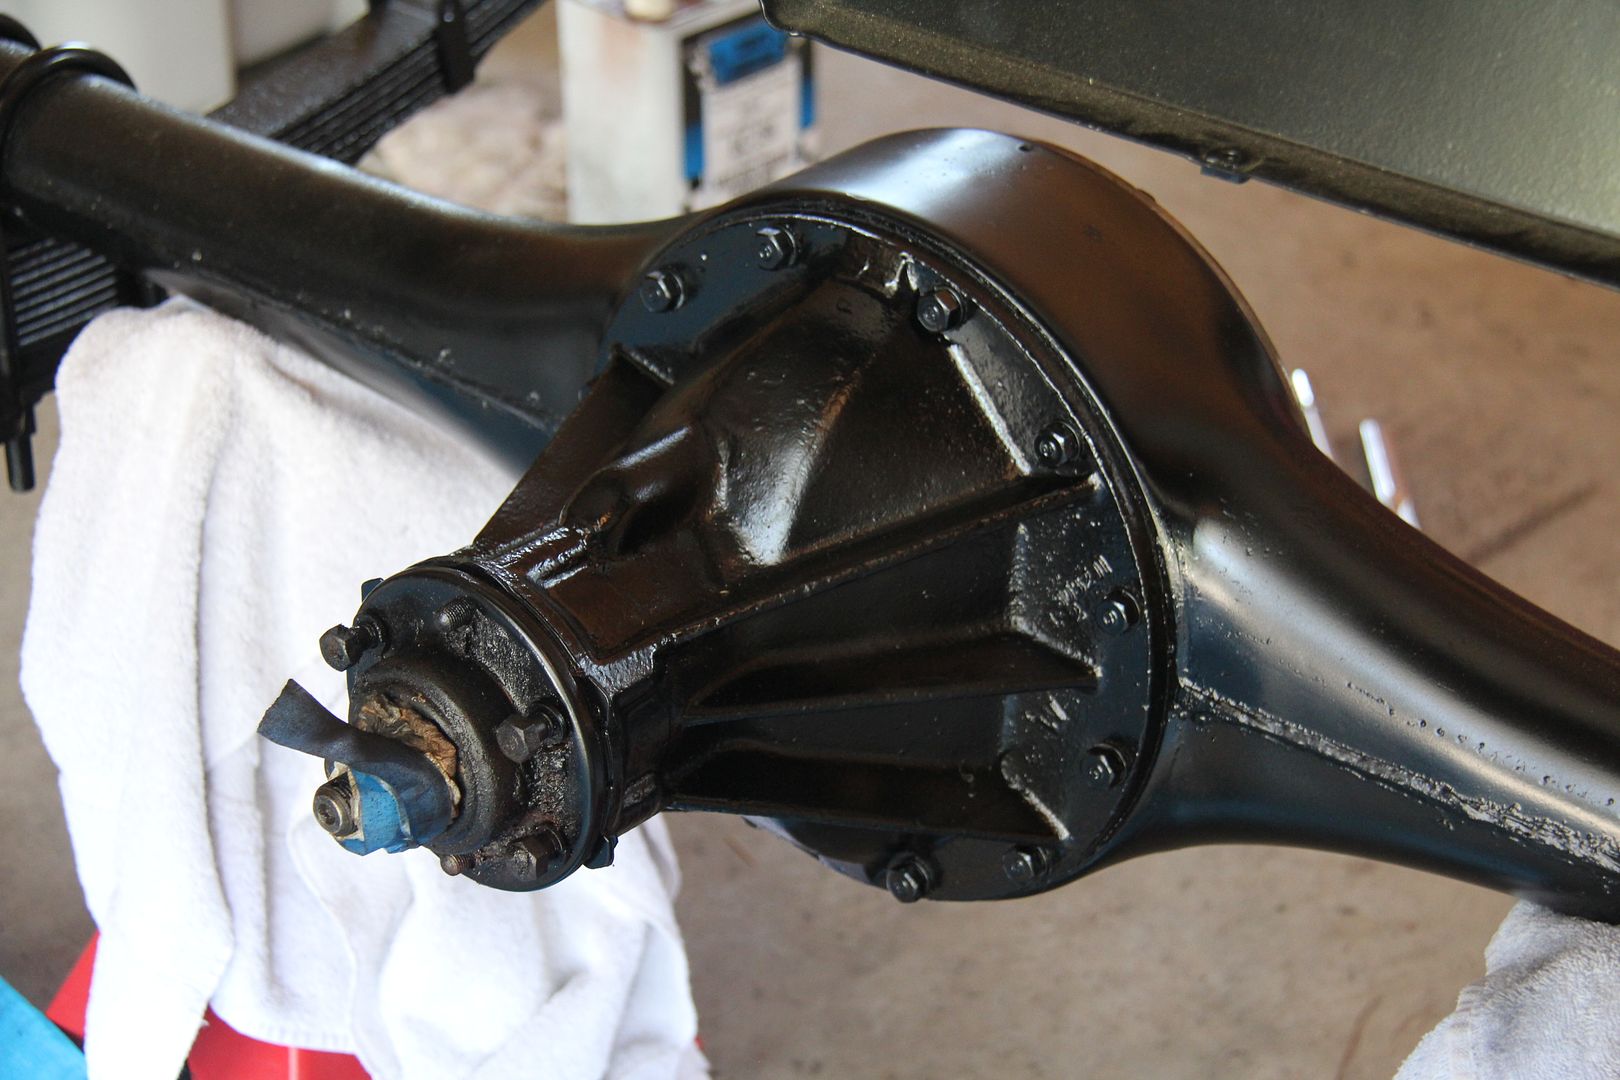
The differential slid right on with no problems and stayed in place while I bolted everything up tight with those DB bolts. My NOS axles arrived today, so the next step is getting the new bearings on the axle and the races driven into the housing. -
-
I'll chime in here since I make videos for a living. A few years ago I pitched a show called the Fatman and the Convertible and actually had some interest from several networks. What they wanted is some kind of drama - competition, rivalries, outright hate or some combination of all three. The Teutuls started it with Orange County Choppers. What was meant to be a simple show about creating custom choppers turned into an unexpected hit when audiences became fascinated with the family dynamics - mainly Paul and Junior's constant arguing - and the trend was started. My idea was a show about me restoring a 1950 Dodge Wayfarer convertible while I tried to lose eighty pounds. I thought the 'fatman" angle might provide enough "drama" although I was mainly interested in a show about car restoration in a home garage. At the end of each show, I would weigh in and we'd see the results. This was a few years before "Biggest Looser." They liked the losing weight angle, but wanted more angst, more tension than that plot device could provide. They suggested that I could get a group of "friends" who would come over to my garage each episode to deride my work and humiliate me, thus providing "motivation" for my continued restoration and weight loss. The "friends" would be a bunch of local numbskulls the producers would dig up through auditions - good old boy types with outrageous mannerisms and off-beat quirks that would provide "entertainment" for what the producers figured was the main audience - people who weren't really interested in car restoration. No matter that they weren't actually my friends or neighbors or even people I would normally associate with. No mater that they (the producers) would write up situations and problems that didn't actually exist to give my "friends" fodder for the show since the reality of a guy working on his car in his garage was "boring as hell.". They said in an hour show, they would allow no more than 15 minutes of actual restoration, but wanted the rest to be interplay among the characters: gags, pranks, verbal exchanges and generally anything to make me look like an overweight nerd fighting for his dignity. They also wanted some kind of deadline to finish the car - some show or auction that would force a tight time frame to pressure me to finish the restoration. Even more drama.
At that point, I gathered up my proposal, left the room and made a nice two hour documentary for NOVA on PBS.
-
Problem solved (I hope) as I just purchased a NOS set of axles. I'll post pics when they arrive. Very excited as I soon should have one less problem to deal with.
-
Nice looking car. I think you'll find parts will show up with a little digging. I'd hit the Hupmobile site here, I'm sure they will provide help and assistance.
-
Try Nelson Pease in Palmer, Mass. He has many old NOS axles, as well as everything else NOS. 413-283-7620.
Thanks for the head's up, Gary. I just got in touch with Nelson and he had a right and a left NOS axle for my car. I bought them and a NOS throwout bearing. Problem solved.
And, Jay, thanks for your offer! Thanks also to keiser31 for the lead.
RT
-
I have pair NOS rear axle shafts I bought for 1929 model 75 Chrysler and never used. Any help?
VMk
I don't think they will work. Could you measure the length when you get a chance?
-
Do you need any special tools to install them?
-
Looking for left and right axle shafts for a 1932 Dodge Brothers DL.
The following will fit:
Left side = 30.25" Right side = 32.25"
Chrysler '30-31 8
Chrysler '31-32 CM6 after #6520501; C16 same shaft both sides.
DeSoto '30-32 8 Cyl.
Dodge 30-32 DC8, DG8, DD6, DH6, DL6
Thanks for any help.
-
Thanks John, too bad they were so far gone.
Anyone with any ideas on repairing what I've got? The one deep groove actually cuts across the surface of the outer seal. Is there any SAFE way to fill these grooves and then turn them down? I assume welding on an axle is a tricky process, but if there was a way to fill the grooves with a weld bead and then turn them down without warping or damaging the axle, I would think it would work. Would a small surface weld like that compromise the shaft?
-
I didn't heat the axle - the coloration is, I believe, staining from old oil combined with surface rust. It cleans off with a little work. I don't know if they had cutting wheels in the fifties, but it's what the cuts look like they were made with.
keiser31, I sent you a PM.
Thanks for the comments and advice.
-
I spent today taking the old tapered roller bearings off the rear axle. I had to split them to get them off and was very careful not to cut into the axle itself. Apparently the last person who performed this task wasn't as careful. After I got the bearings off and cleaned up the axles I discovered some shallow grooves that had obviously been cut into the axle some time in the past. I'm sure the axle is heat treated and I've always heard that cutting into the surface of a heat treated part can substantially weaken it. The deepest groove is perhaps 1/16 of an inch or less.
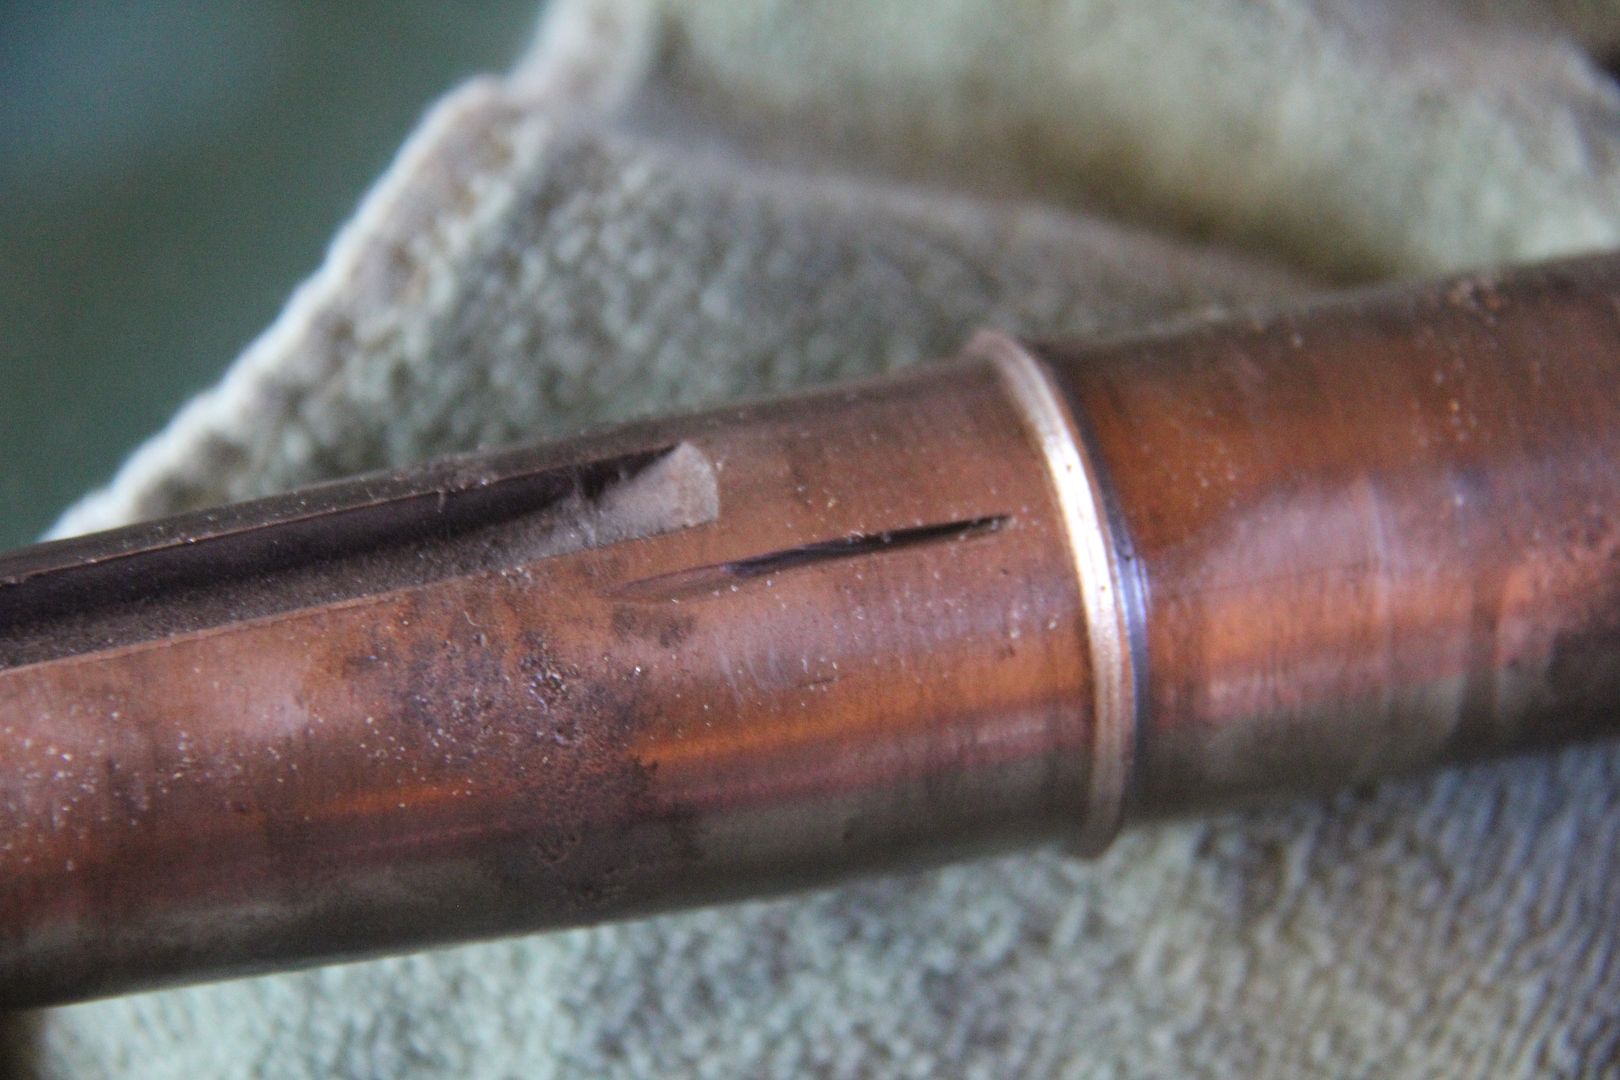
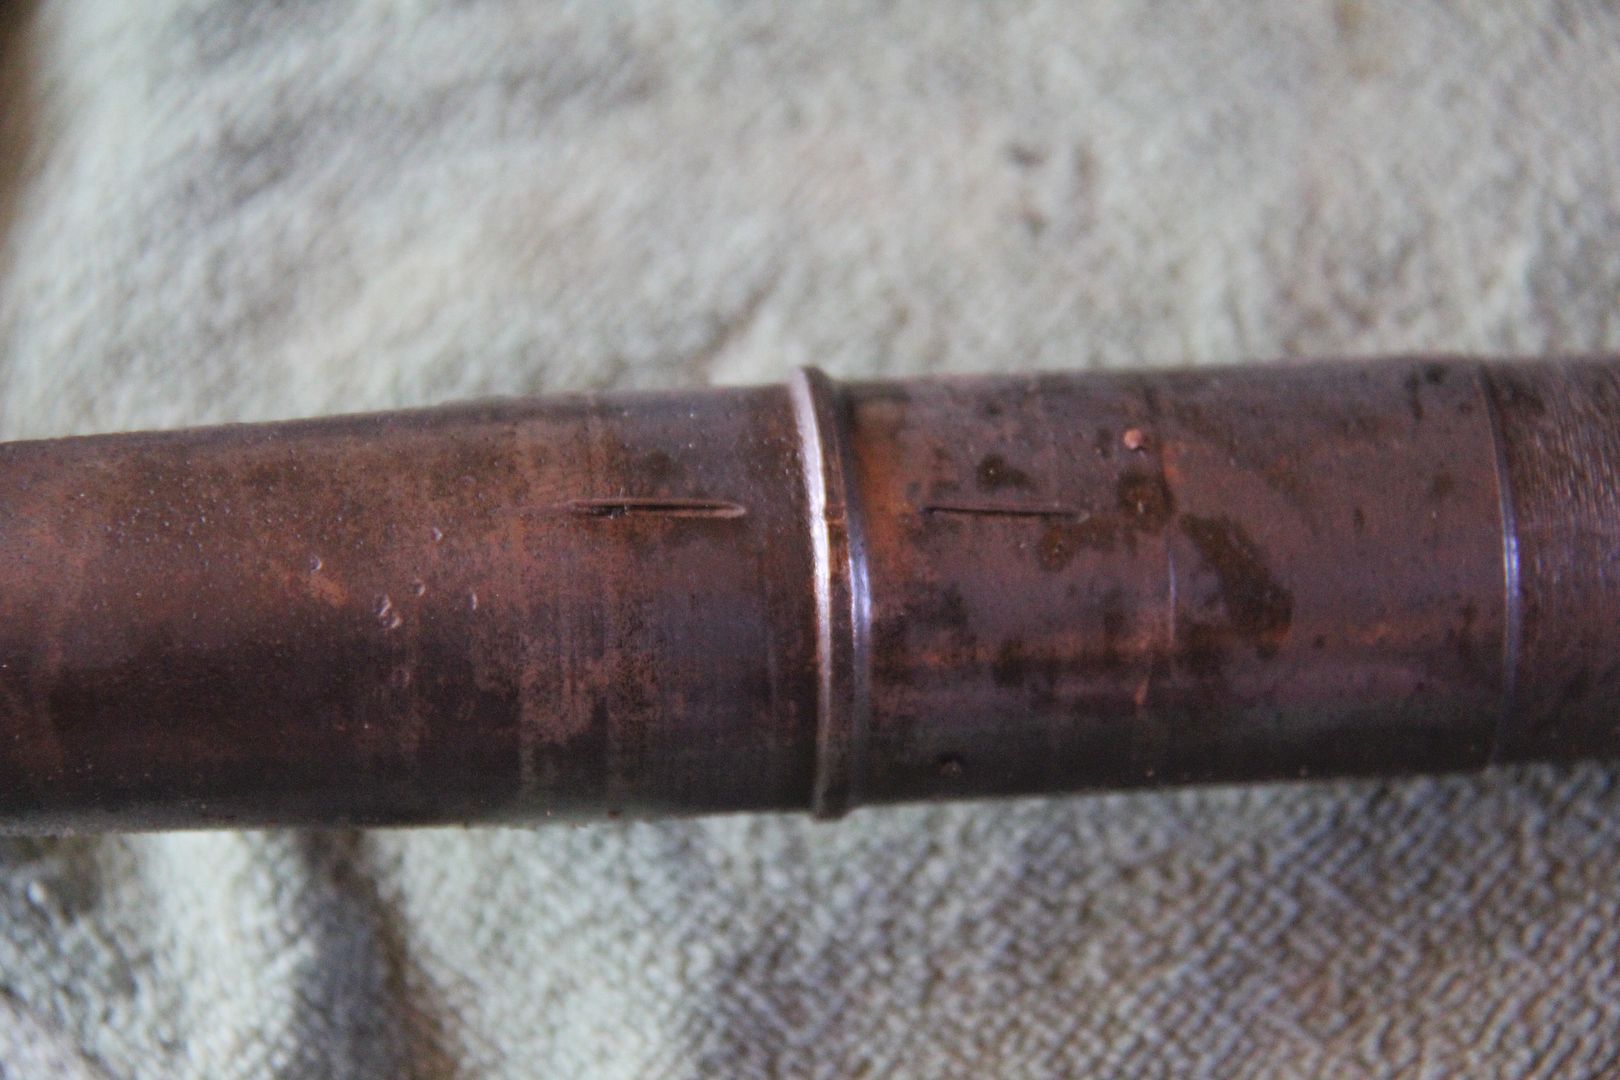 Do I have anything to worry about or are these axles still useable? The axles are off a 1932 Dodge DL.Thanks for any advice.
<!-- attachments -->
-
I spent today taking the old tapered roller bearings off the rear axle. I had to split them to get them off and was very careful not to cut into the axle itself. Apparently the last person who performed this task wasn't as careful. After I got the bearings off and cleaned up the axles I discovered some shallow grooves that had obviously been cut into the axle some time in the past. I'm sure the axle is heat treated and I've always heard that cutting into the surface of a heat treated part can substantially weaken it. The deepest groove is perhaps 1/16 of an inch or less.
Do I have anything to worry about or are these axles still useable?
Thanks for any advice.
-
Phil,
That is really interesting. More detective work - those are obviously factory rivets and your car is a very original specimen. I was really taken aback when I saw my mounts were bolted on. The rivets make more sense - it is really a pain to reach inside the frame through the access holes and tighten the bolts.. Under normal circumstances, I would figure that someone drilled out the rivets on my frame for some reason and then replaced them with bolts. However, the bolts holding on the brackets were all original Dodge Brothers bolts with the logo clearly stamped on the bolt head. Also, if the brackets were ever off the frame, it was a very long time ago based on the dirt and grime that was consistent in this area of the frame. Nothing had been touched or messed with for a period long before we owned the car. There was a slight impression of the bolt heads worn into the surface of the bracket - another indication they had been there a long time.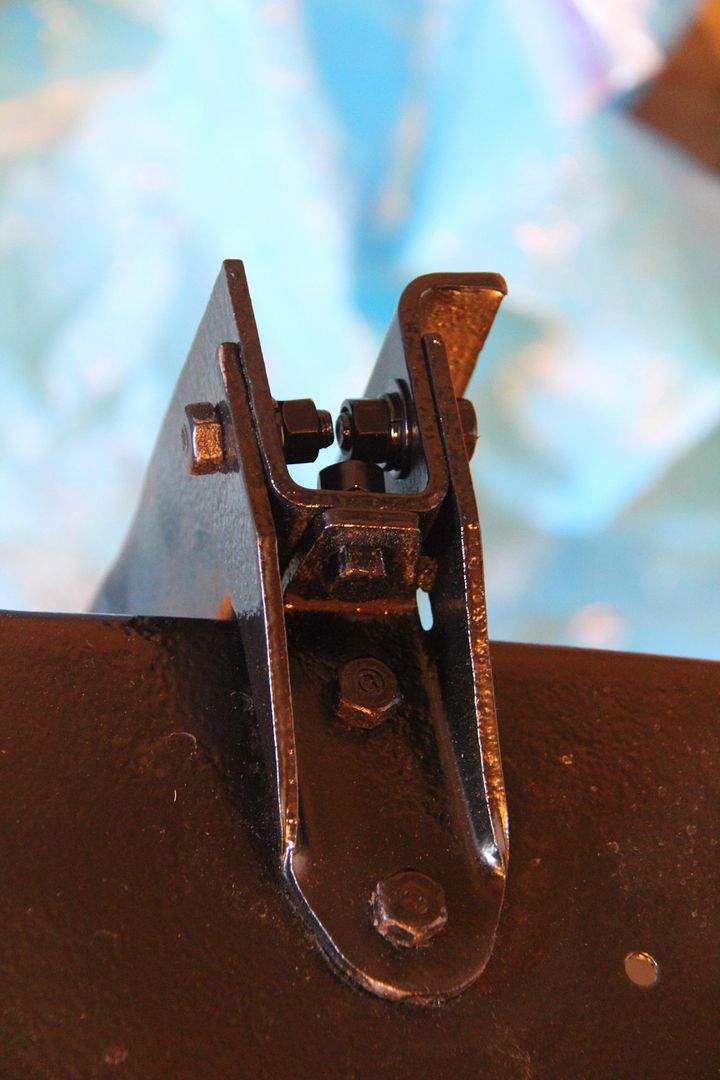
I would have to say that I believe your guess is probably correct - that the early frames may have had the brackets bolted on and then the factory changed the method sometime during the production of the DL. I would love to hear from other DL owners as to how their brackets are mounted. -
For me, one of the most entertaining things about working on old cars is the problem solving and detective work necessary during a restoration. Today's foray into uncharted waters was a perfect example.
Now that I had the springs and axles on the frame, it was time to start putting all the other various bits and pieces on. The 32 Dodge seems to have more than its share. The only other car I've taken completely down to the frame was a 1929 Plymouth Model U. It had a simple frame with everything riveted together. My DL has more removable items than any car frame I've ever seen. Case in point was today's project - installing the rear motor mount. The transverse cross member has a rubber pad mounted on it as part of the "Floating Power" system. It's removable so you can get to and remove the oil pan. It looked like a simple project - the cross member and two brackets to hold it on. I'd already had the three parts blasted and powder coated and I'd cleaned and painted all the mounting bolts, so I was ready to go.
Here you can see the area we're going to address, with a convenient red arrow pointing to the offending part. This was taken during disassembly of the frame several months ago. You can see what was left of the rubber mount on top of the cross member.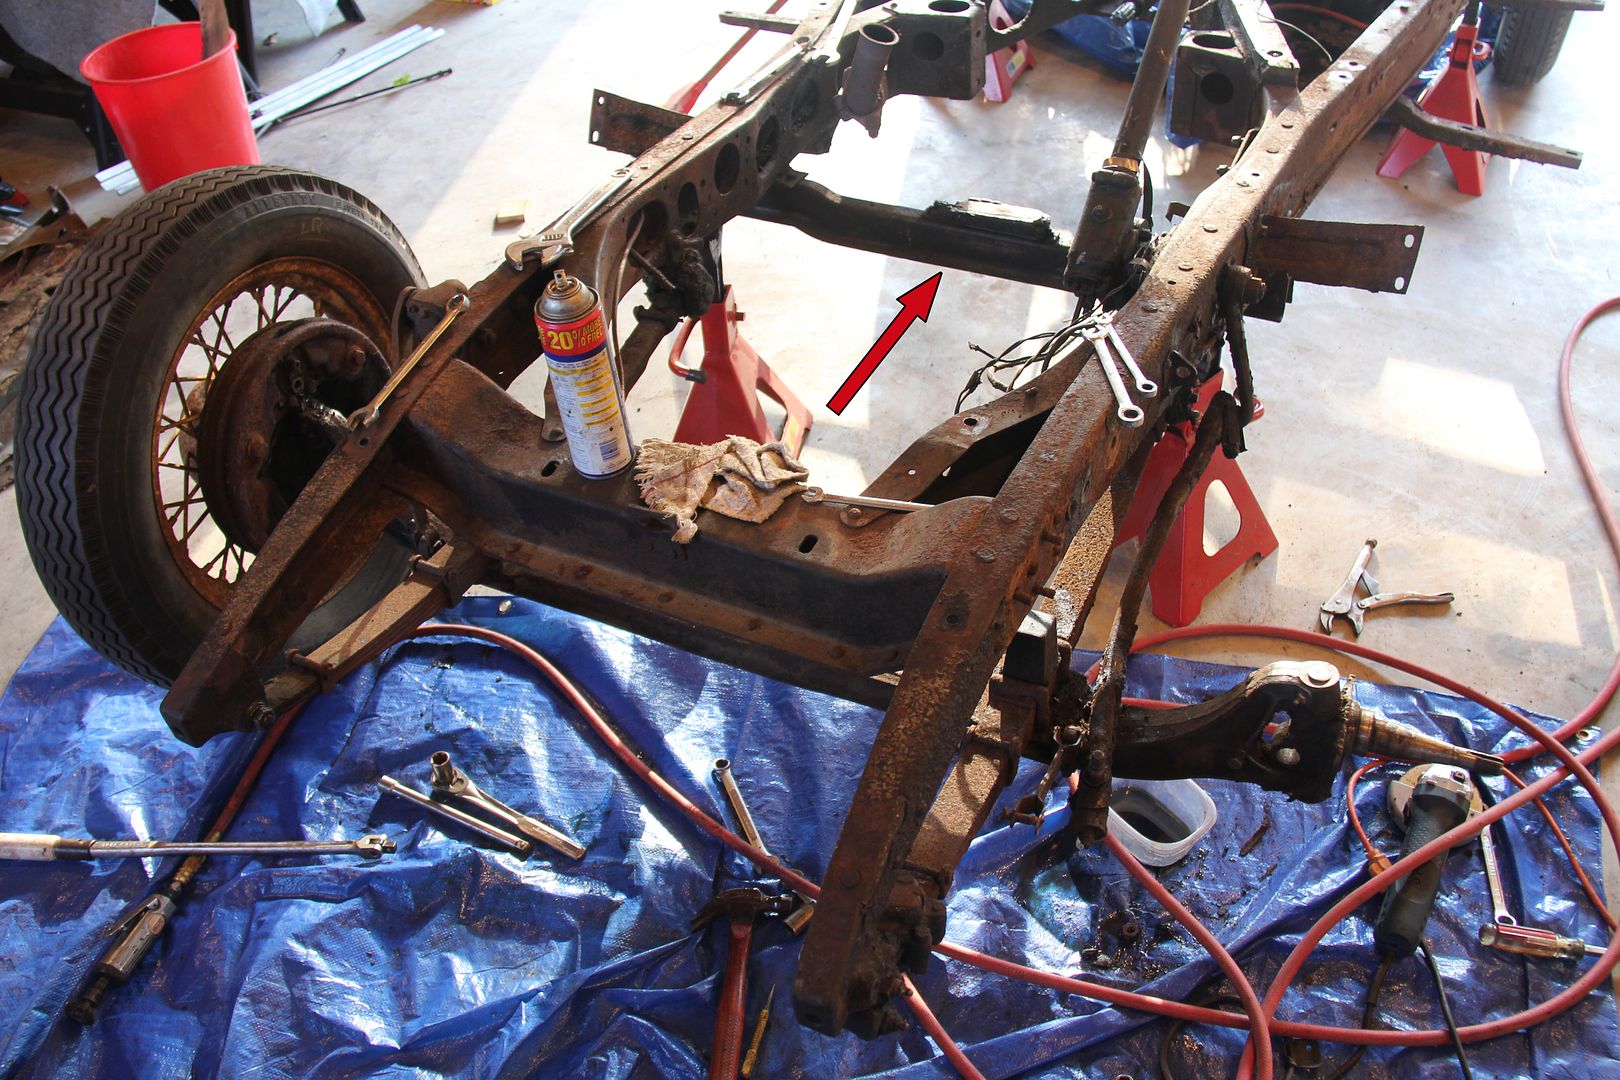
I try and take as many pictures as I can during disassembly and assembly. Despite having over 1200 photos, I still discover areas that I missed or that don't show up well enough to use. I take detailed notes and draw diagrams of parts as I remove them. I also try to bag and label all parts, but I have been guilty of missing a few - "Heck, I'll remember that!" - much to my later dismay.
In the case of the motor mount cross member, things went quickly - maybe a little too quickly. First, I had to determine which direction the flange on the cross member faced. It has a flange on one side and is flat on the other. My photos clearly showed the flange facing toward the front. Problem solved.
Then came the two brackets that bolted to the side of the frame and held the cross member on. They were not symmetrical. One went on the the driver's side and one on the passenger's. The question which was which? The powder coating folks had removed my labels and I had no way to tell. I checked my notebook and "Eureka!" - I had cut several marks on the back of the driver's side mount. Second problem solved!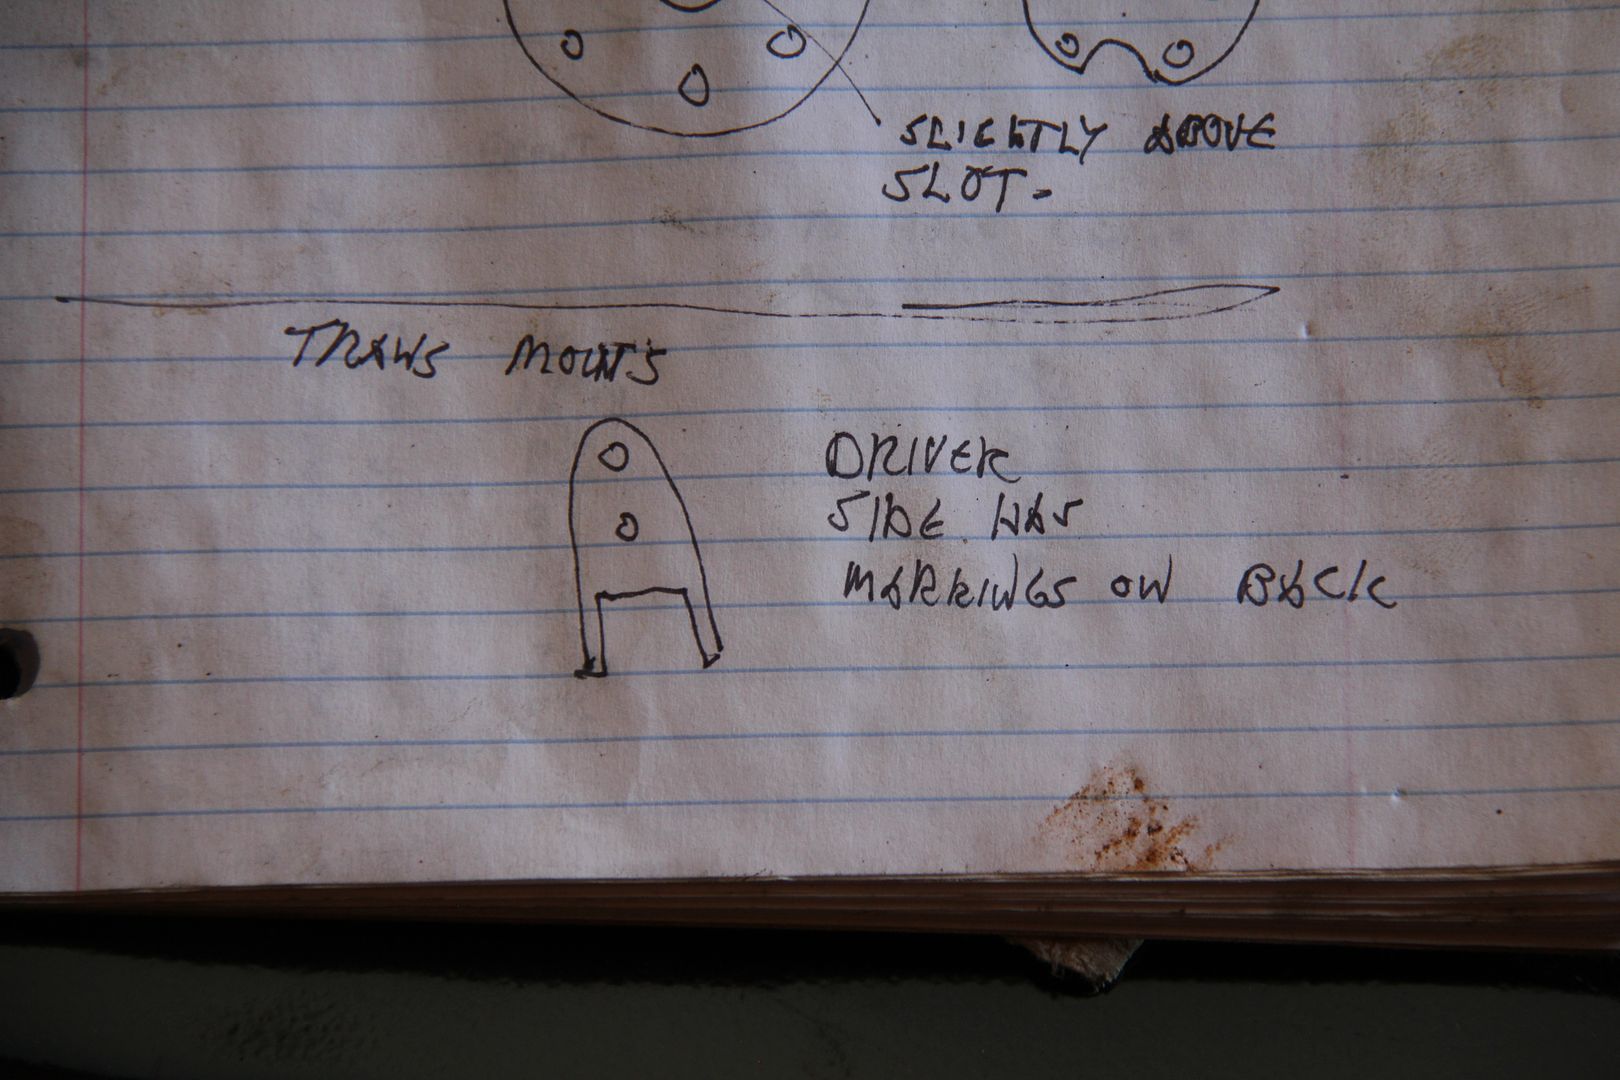
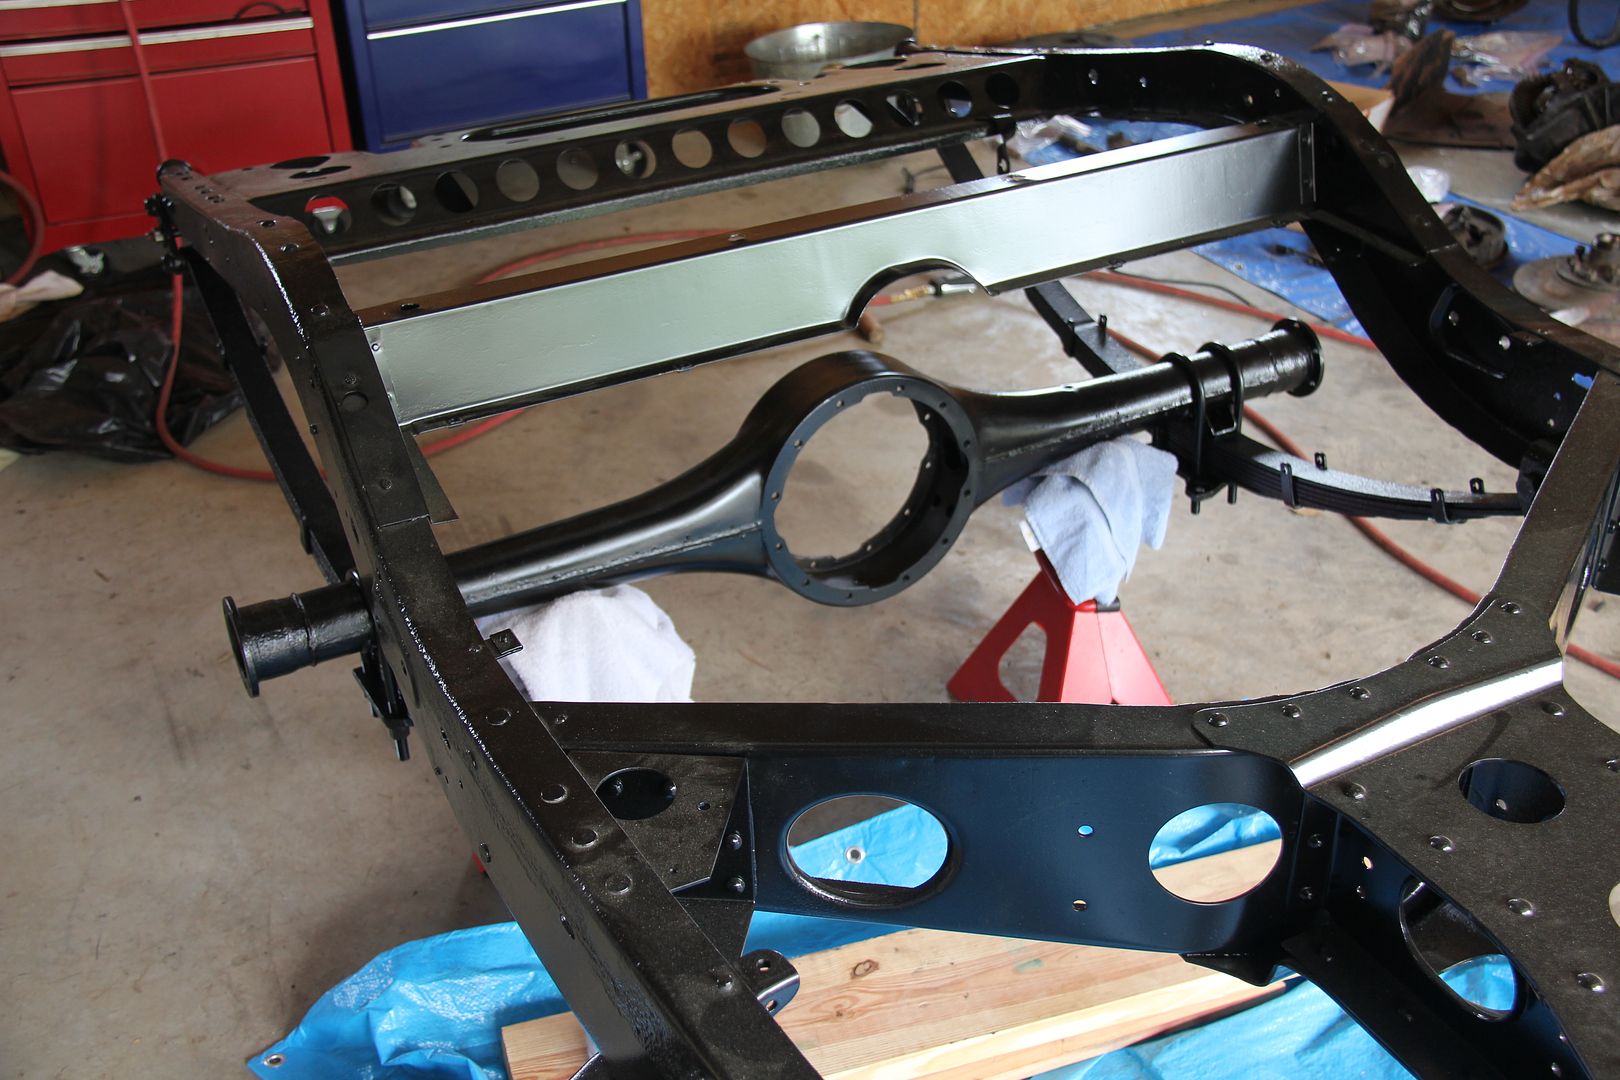
I loosely bolted the two brackets in place, slid the cross member into position, and after fumbling with the nuts and bolts, managed to get everything into place and bolted up. Look at that nice new rubber mount on top of the cross member!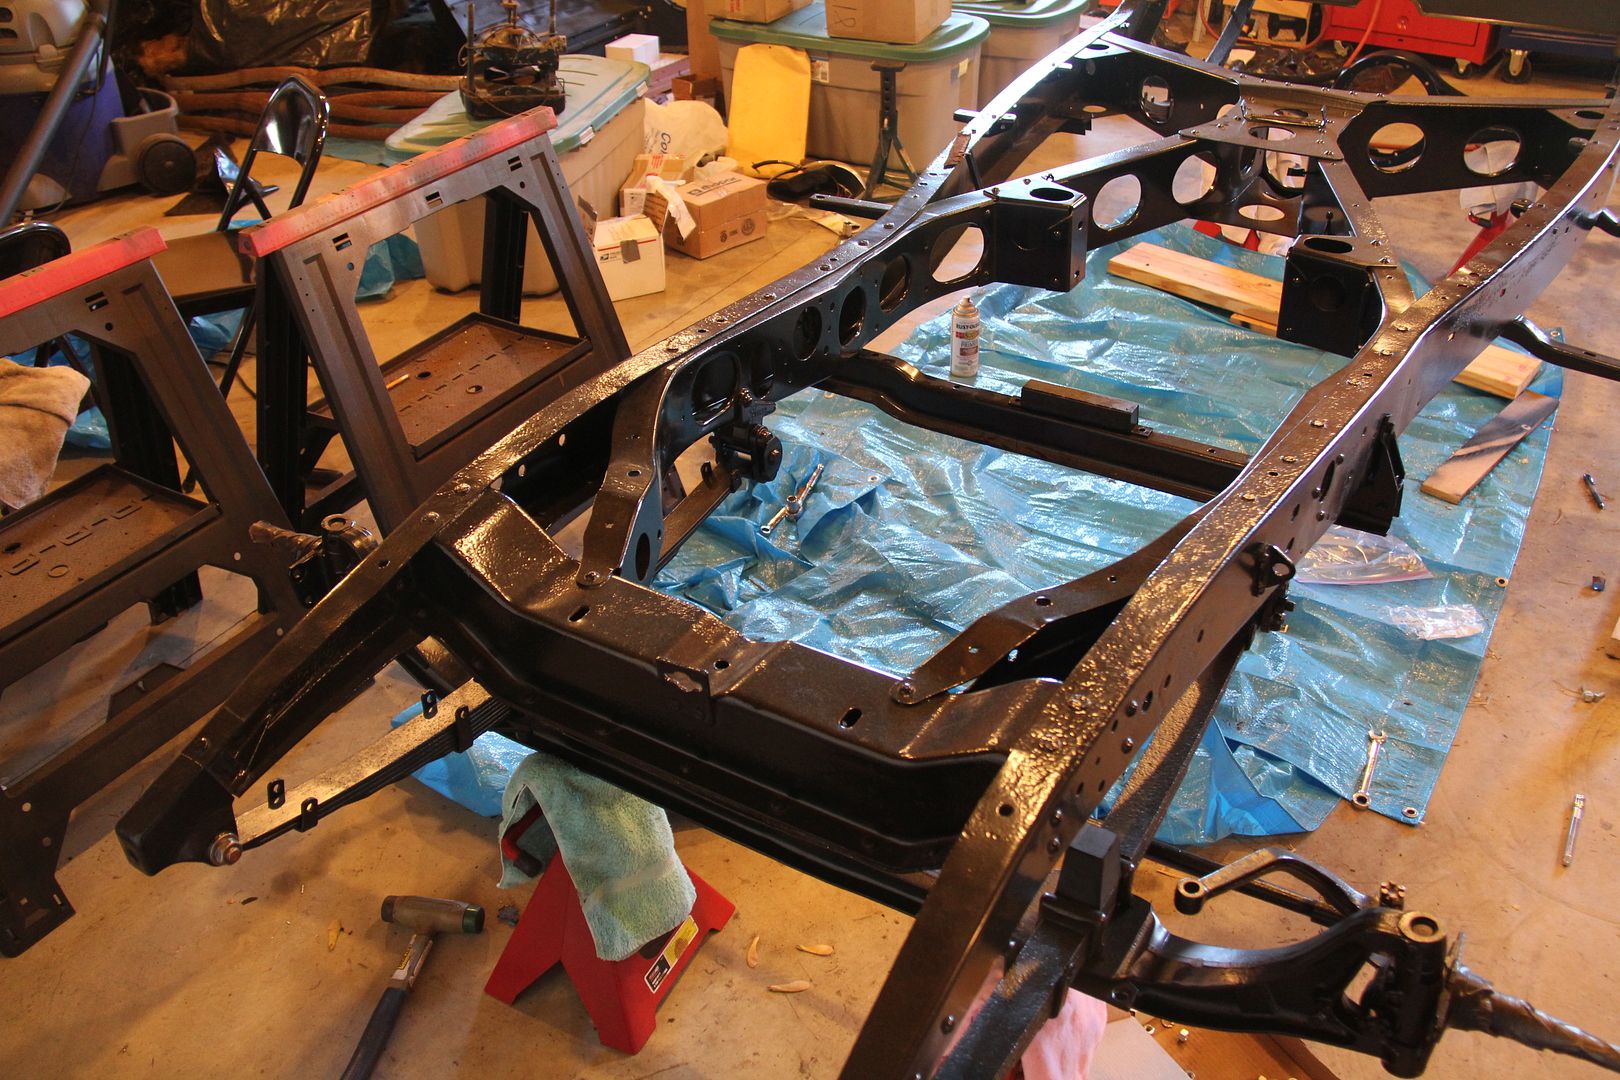
Job done. Take a quick shower and relax. Then I go back to the computer to add the photos I took during reassembly. But wait. I'm looking at my "before" photo and comparing it with my "after." Something is not right. I dive into Photoshop mode and blow up my "before" photo in the area where the cross member meets the inner frame. What do my doubting eyes perceive? Something - a bracket...a plate...a mount? - sticking out on top of the cross member. This blow-up, with another convenient arrow, shows what I'm taking about.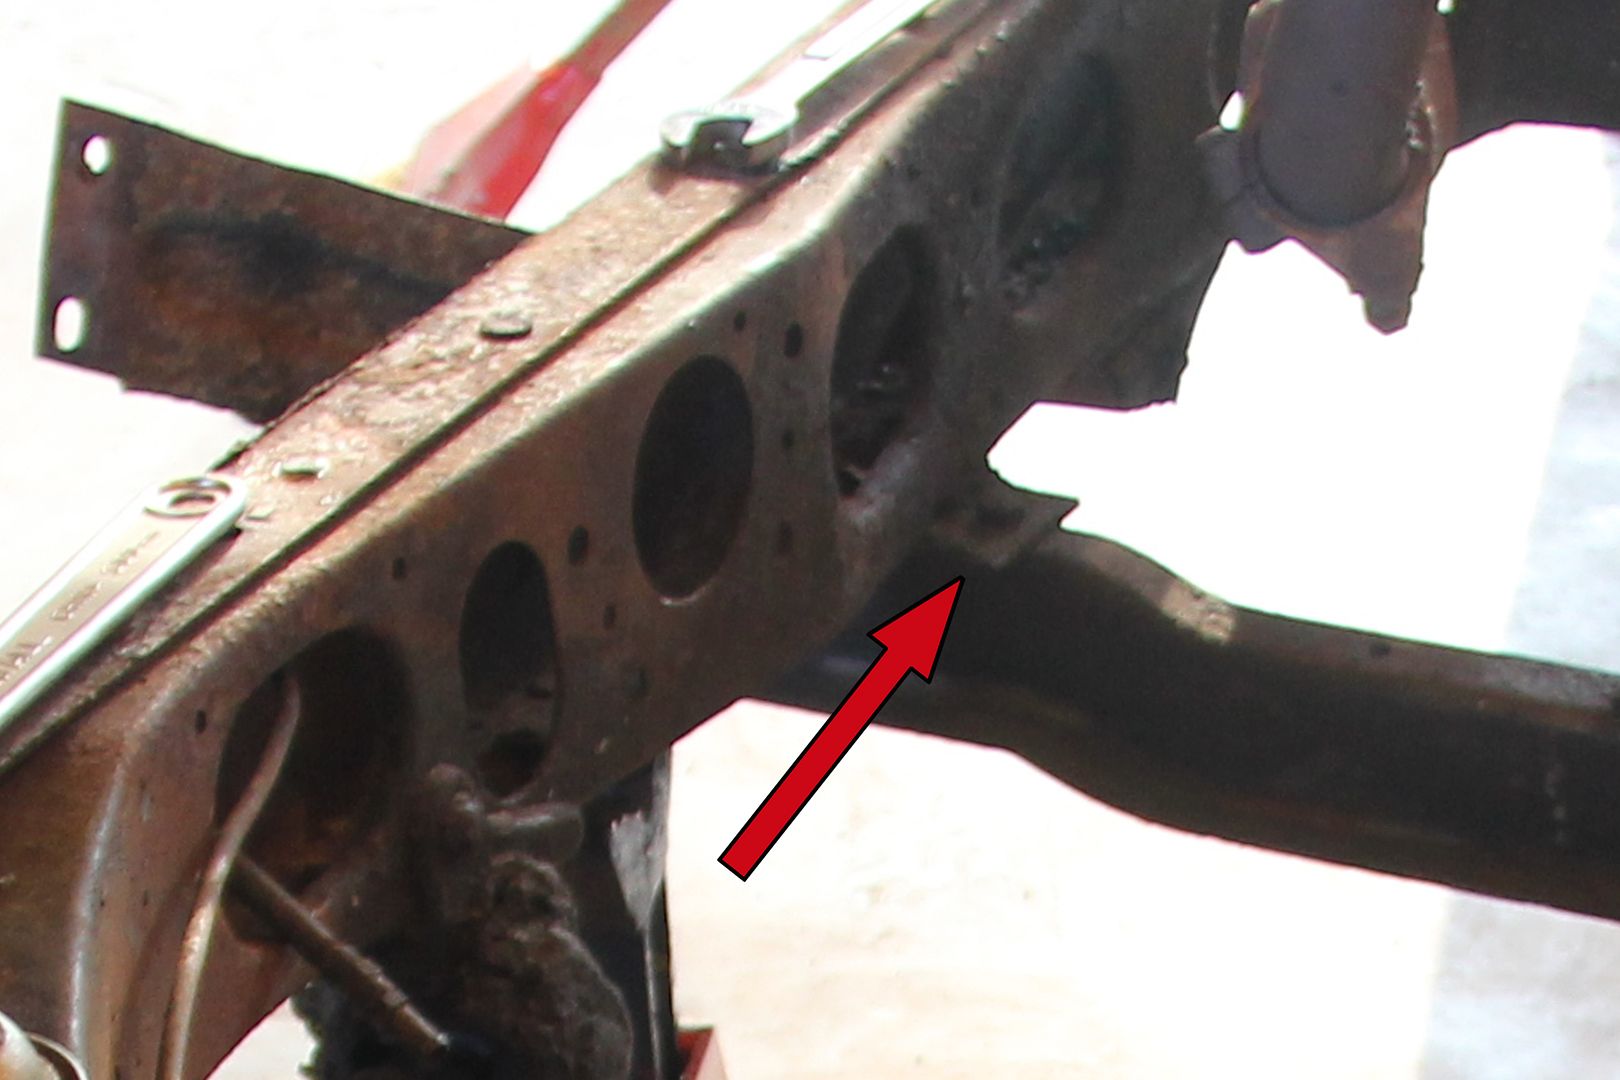
Hmmmmm. I don't remember putting anything like that in place during the reassembly. Of course, I don't remember taking anything off during disassembly either, but that was five month ago. I check my "after" photo. Nothing peeking out in that area, but a nice big mounting hole clearly visible.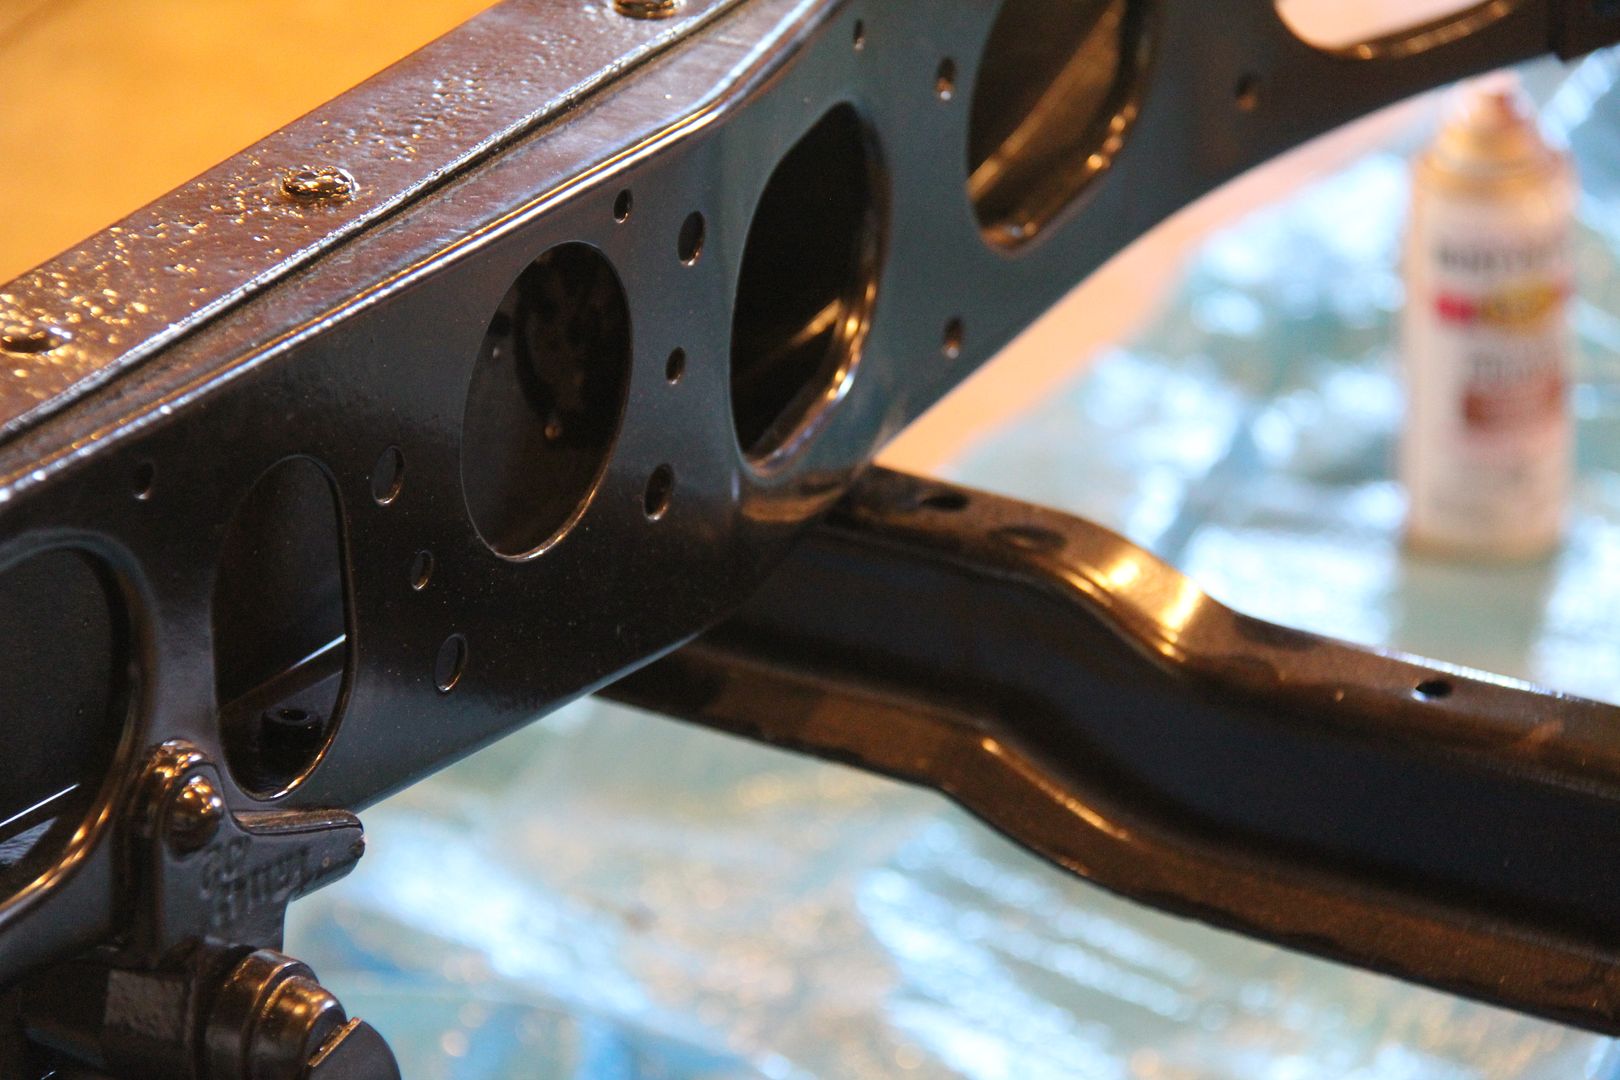
I rush to the garage to make sure. Nothing there. I check several other old photos. It's hard to tell, but there seems to be something there.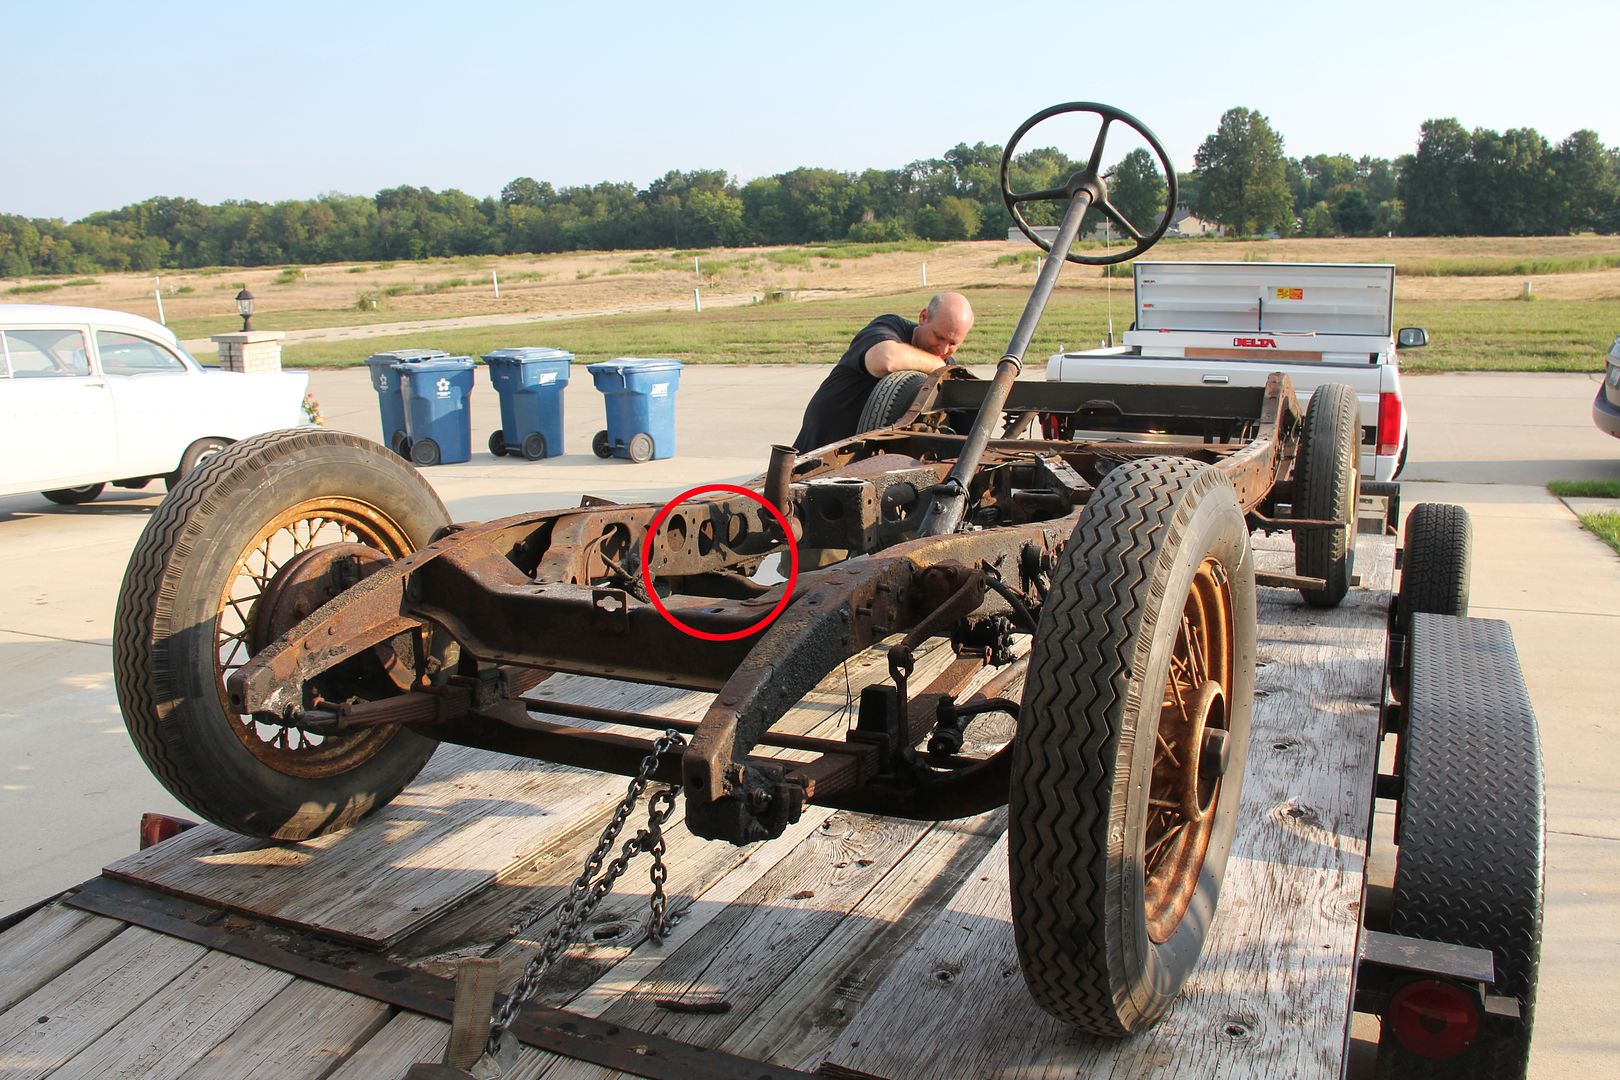
Back into Photoshop. Blow up that area. Sure enough, a plate sticking out, big as day.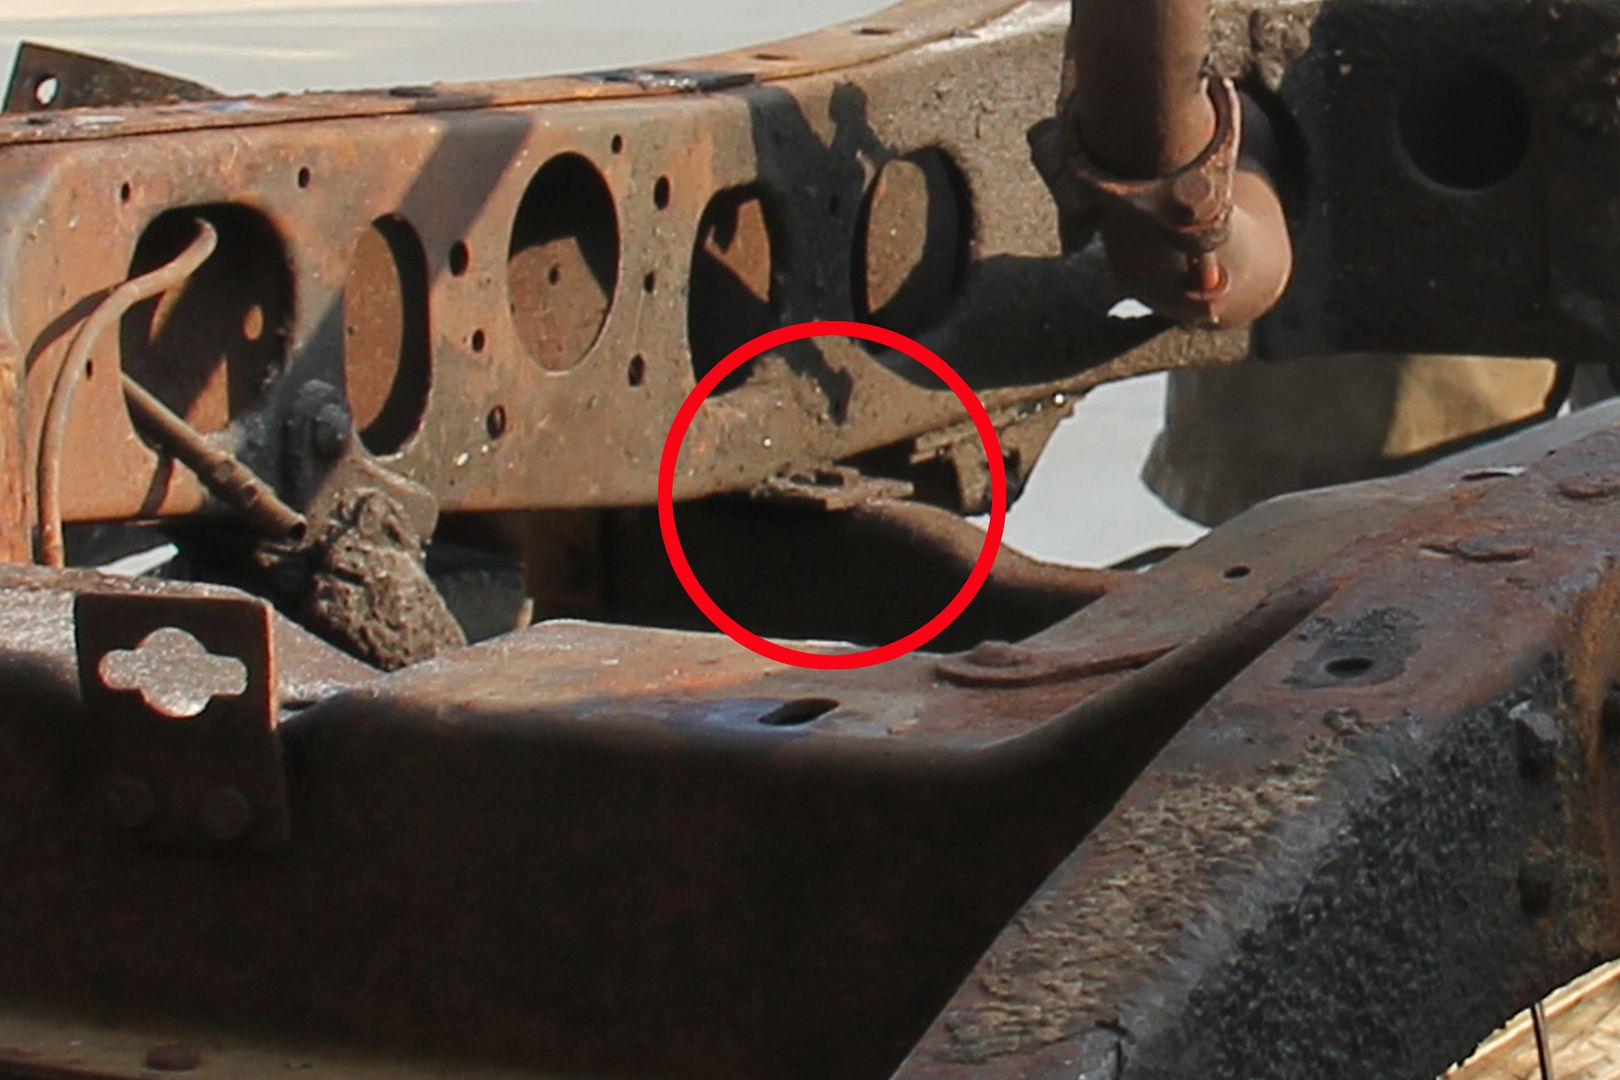
Back to the garage. I had thought I'd laid out all the frame parts long ago. I sort through bags of parts, and there, right at the bottom of the pile, I find them - clearly labeled. how the heck had I missed them?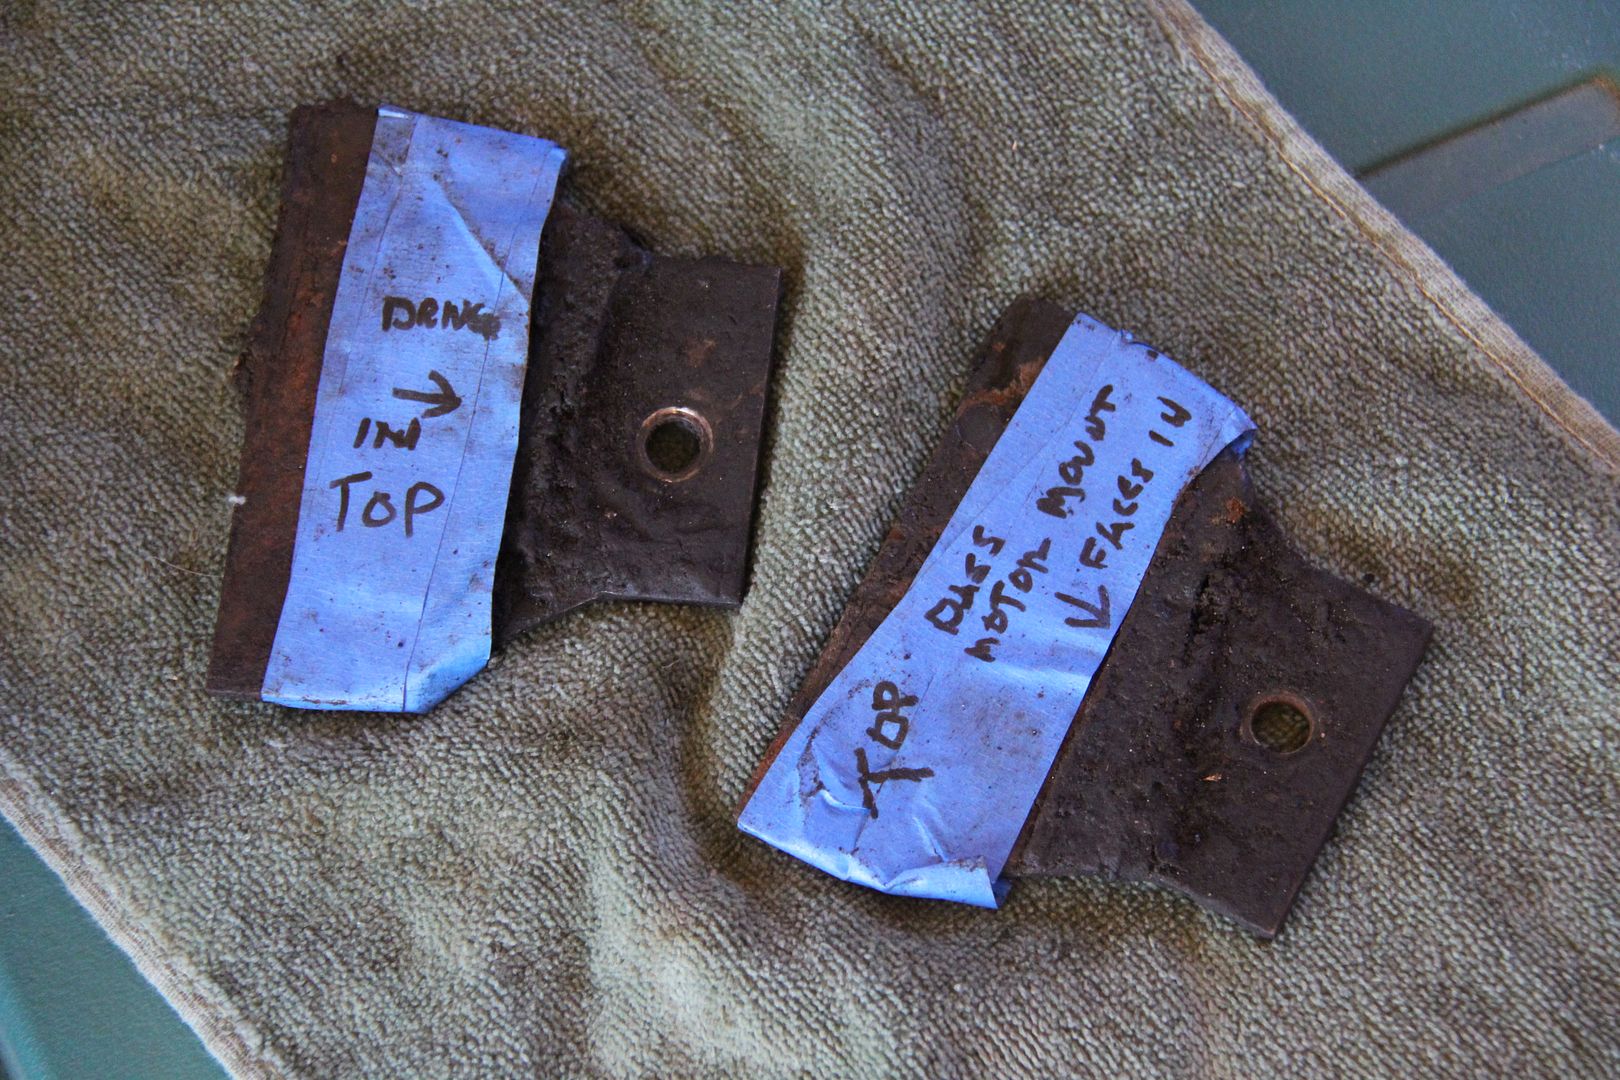
Tomorrow, I'll clean them off and paint them. Then it's just a matter of loosening a few bolts, sliding them into place, and bolting everything down. I shudder to think what would have happened if I hadn't discovered the problem until I after had the engine mounted in the frame. I can just imagine finding that bag right after I had cinched down the last bolt. It would have meant disassembling everything back down to this point. Not a happy prospect.
When you take a car down to the frame - and in this case, beyond - make sure you're getting everything back into the right place and in the correct order. I was lucky in this instance and plan to be a bit more diligent in the future when putting Daphne together. -
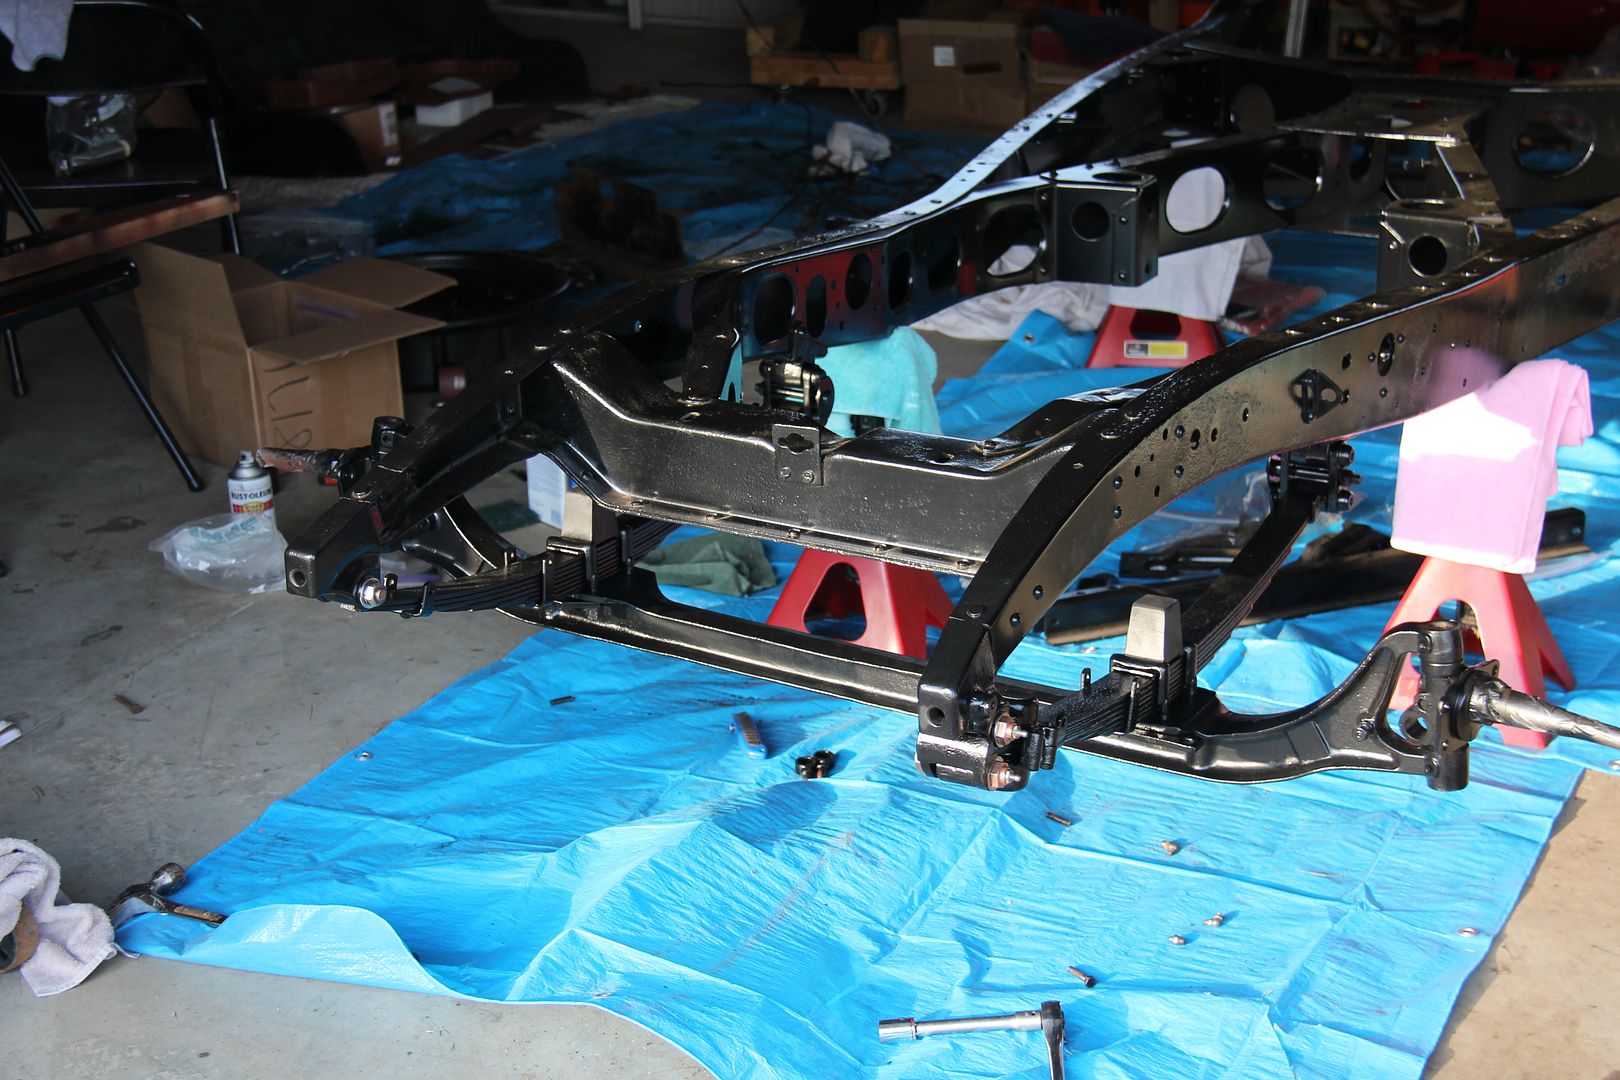
Work continues, but nothing very exciting. I got the rear springs mounted and put the rear axle housing in place.
I was unable to find original pattern U-bolts for the rear axle. The originals (several of which broke during disassembly) have a flat top...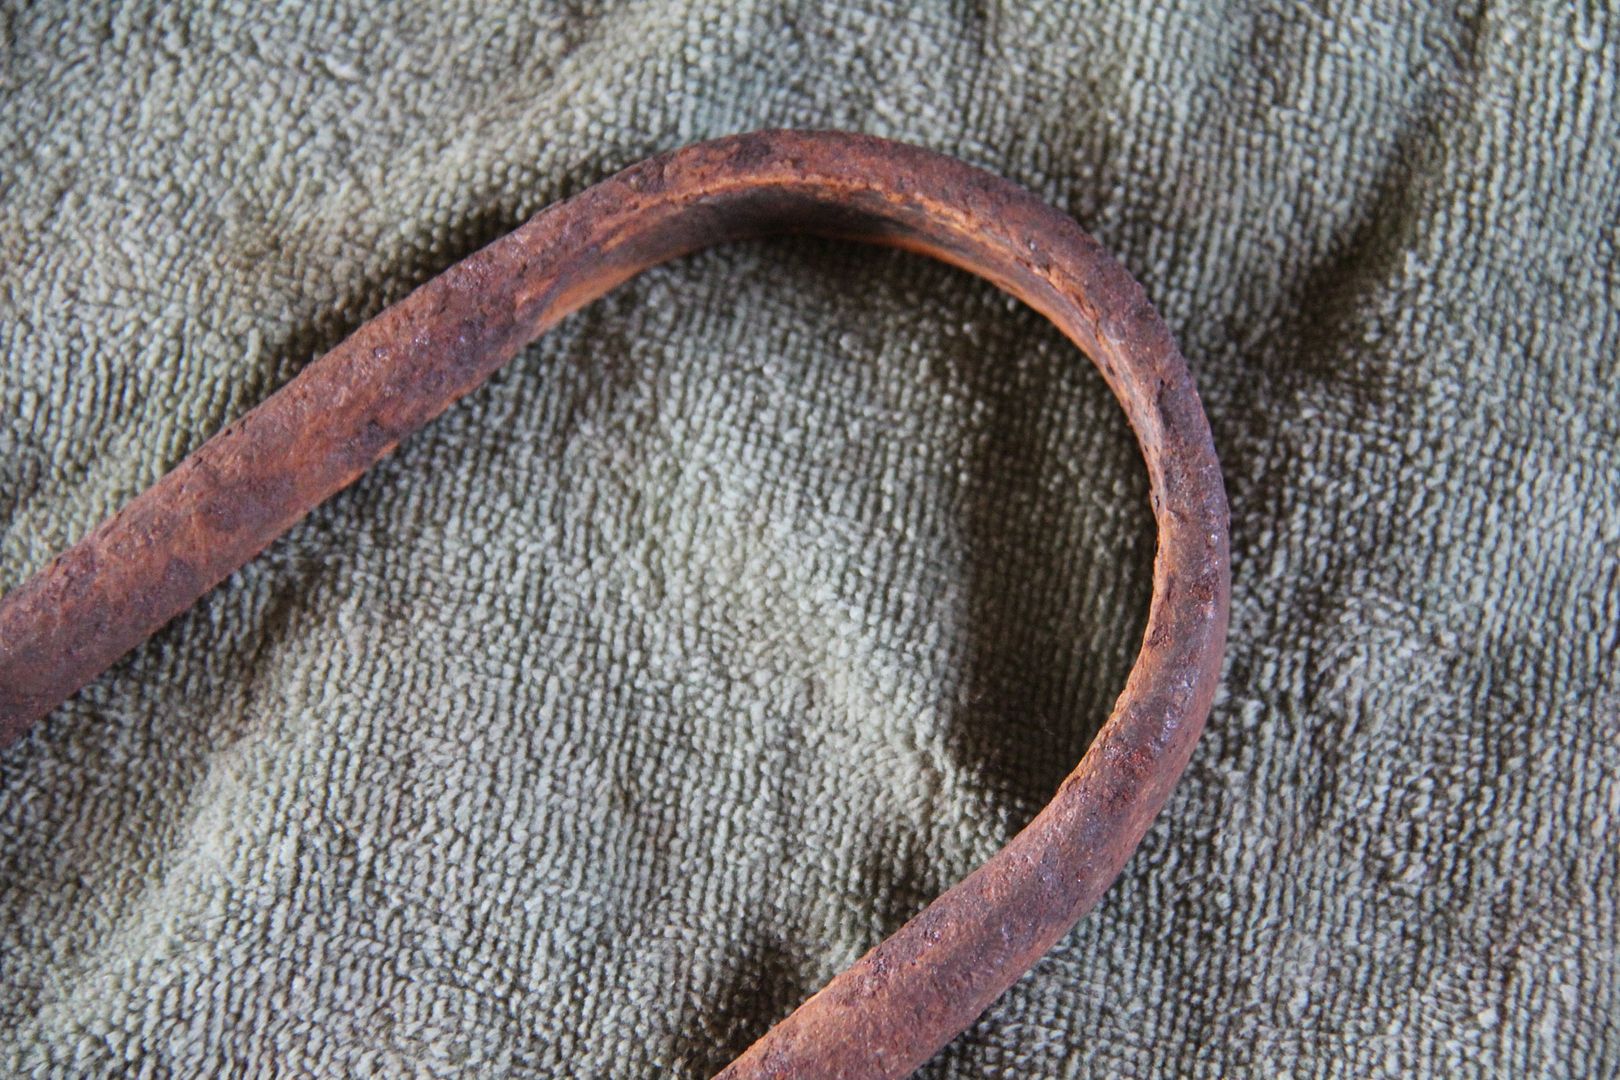
...while my new ones are round all the way around. Daphne will be a driver, so no big deal, but I'm trying to keep her as original as possible.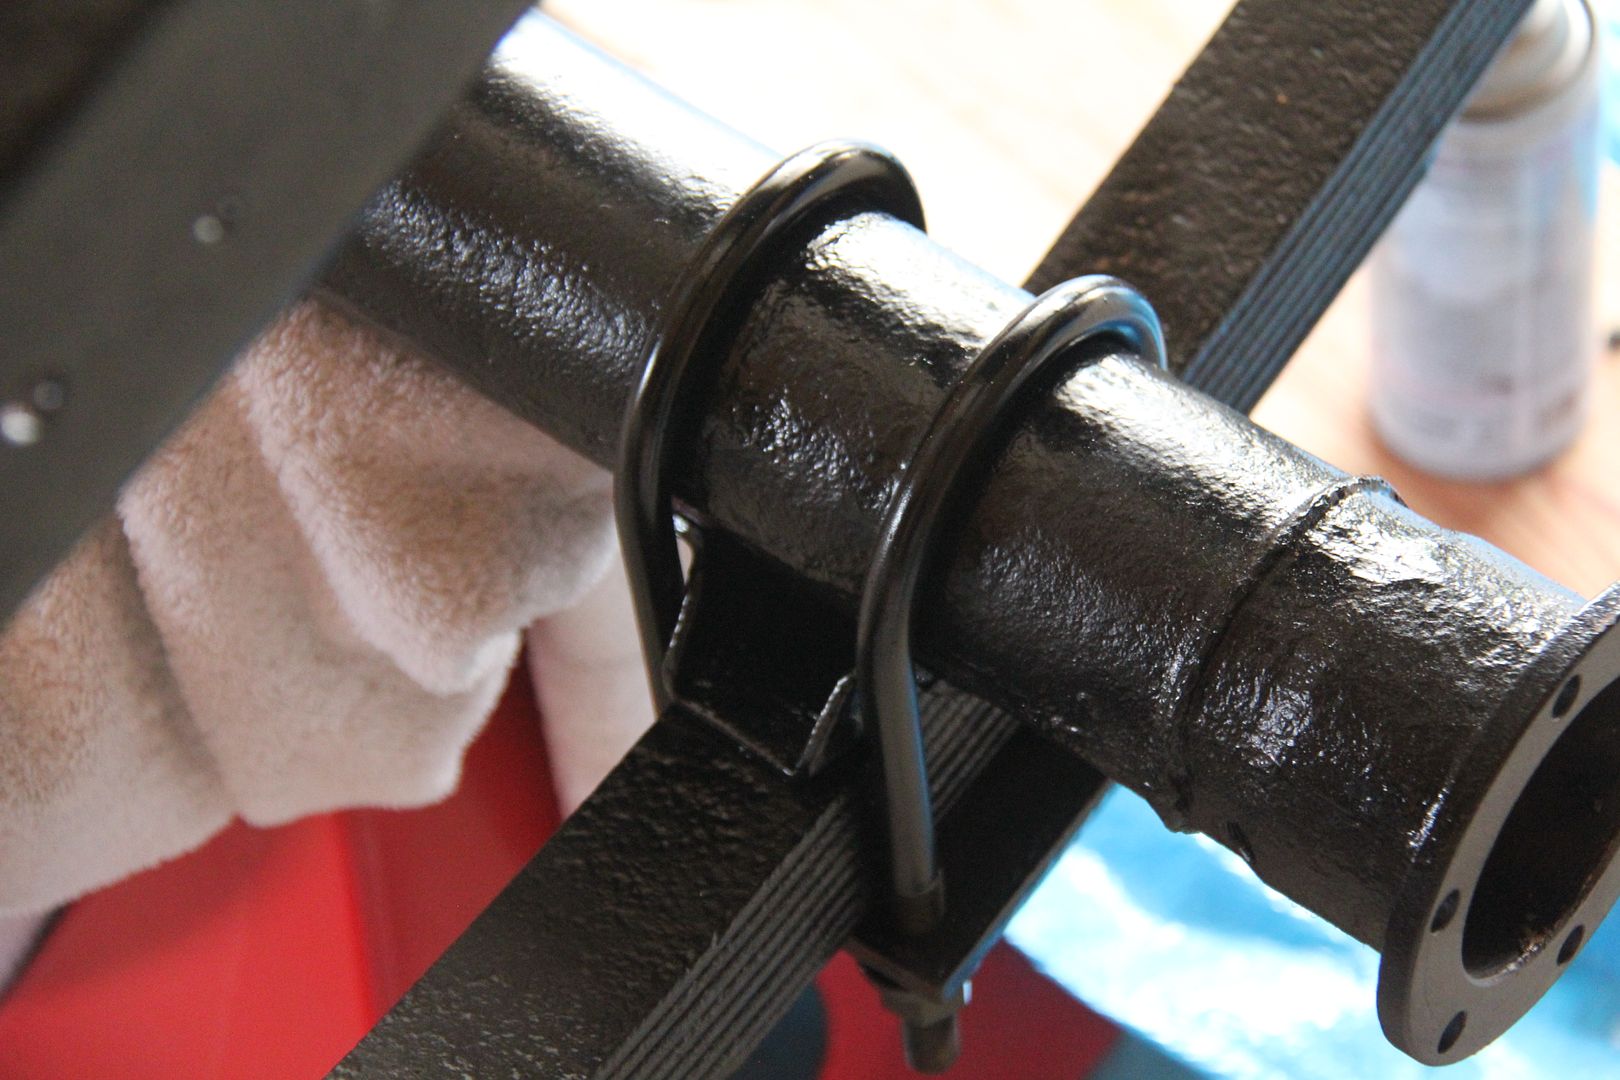
Speaking of original, almost all of the bolts on the car have DB stamped on top of the bolt head. It's a very boring and tedious job cleaning them all off, but they are visible on the frame and I like the original look.
Primed and ready for a coat of black. They'll get nicked during assembly and I'll just touch them up.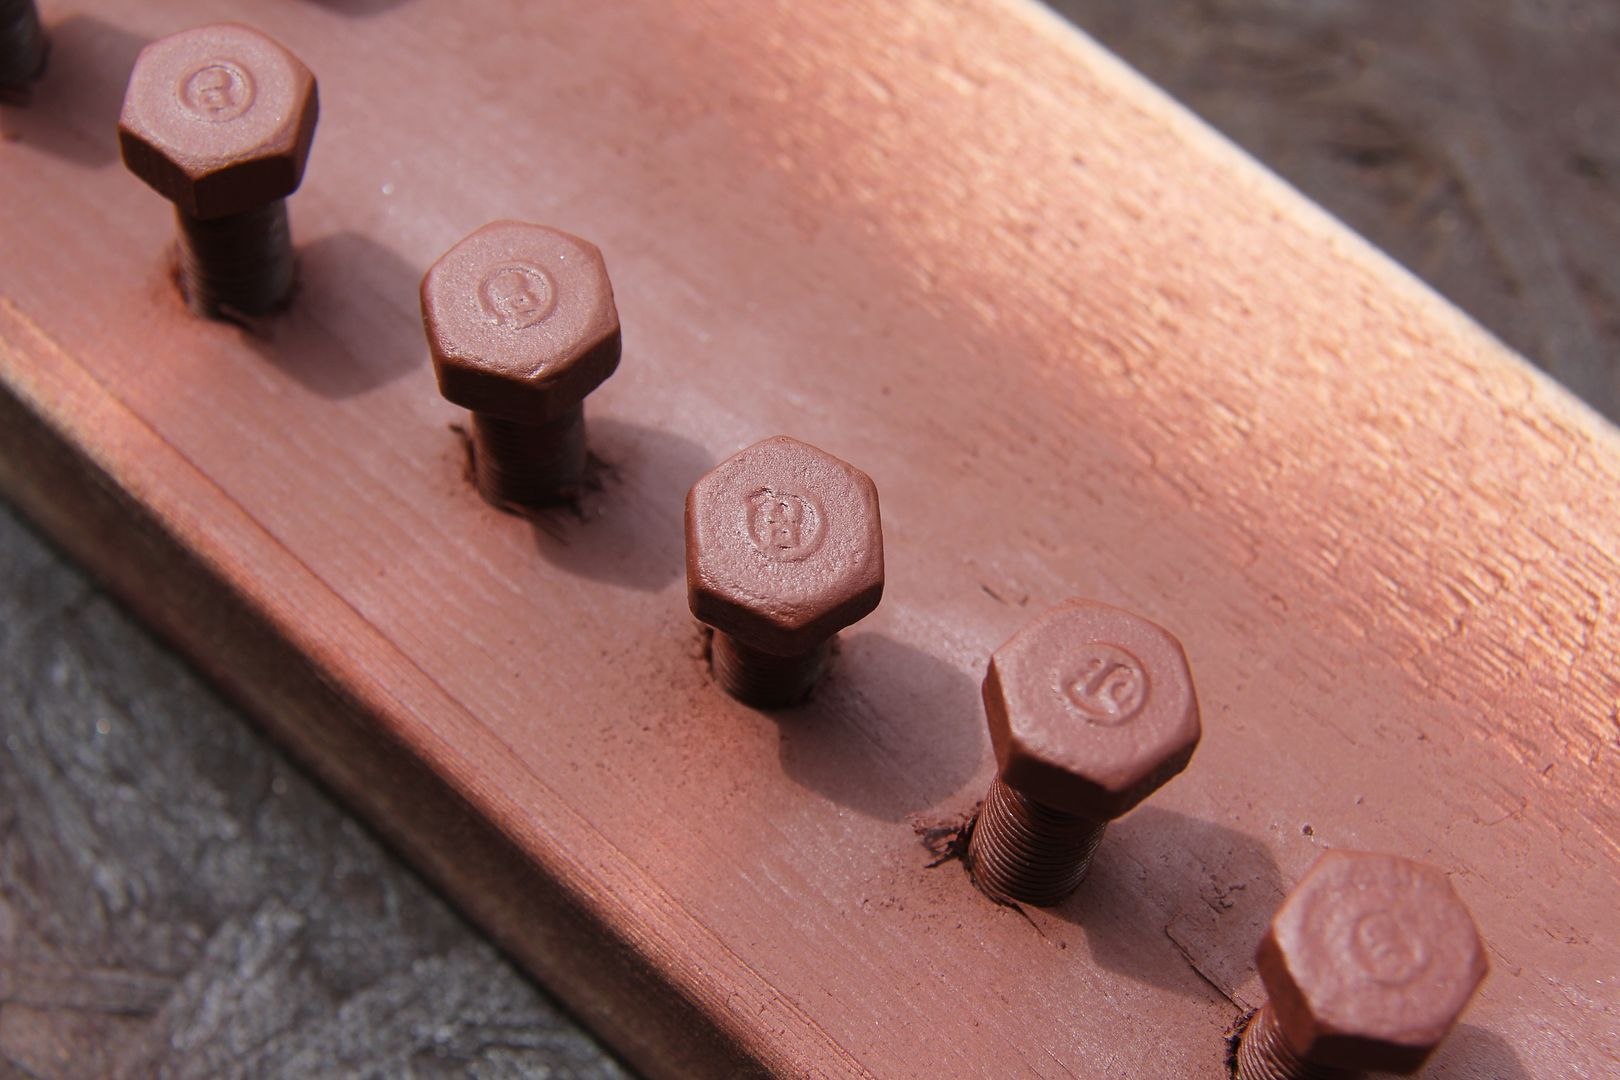
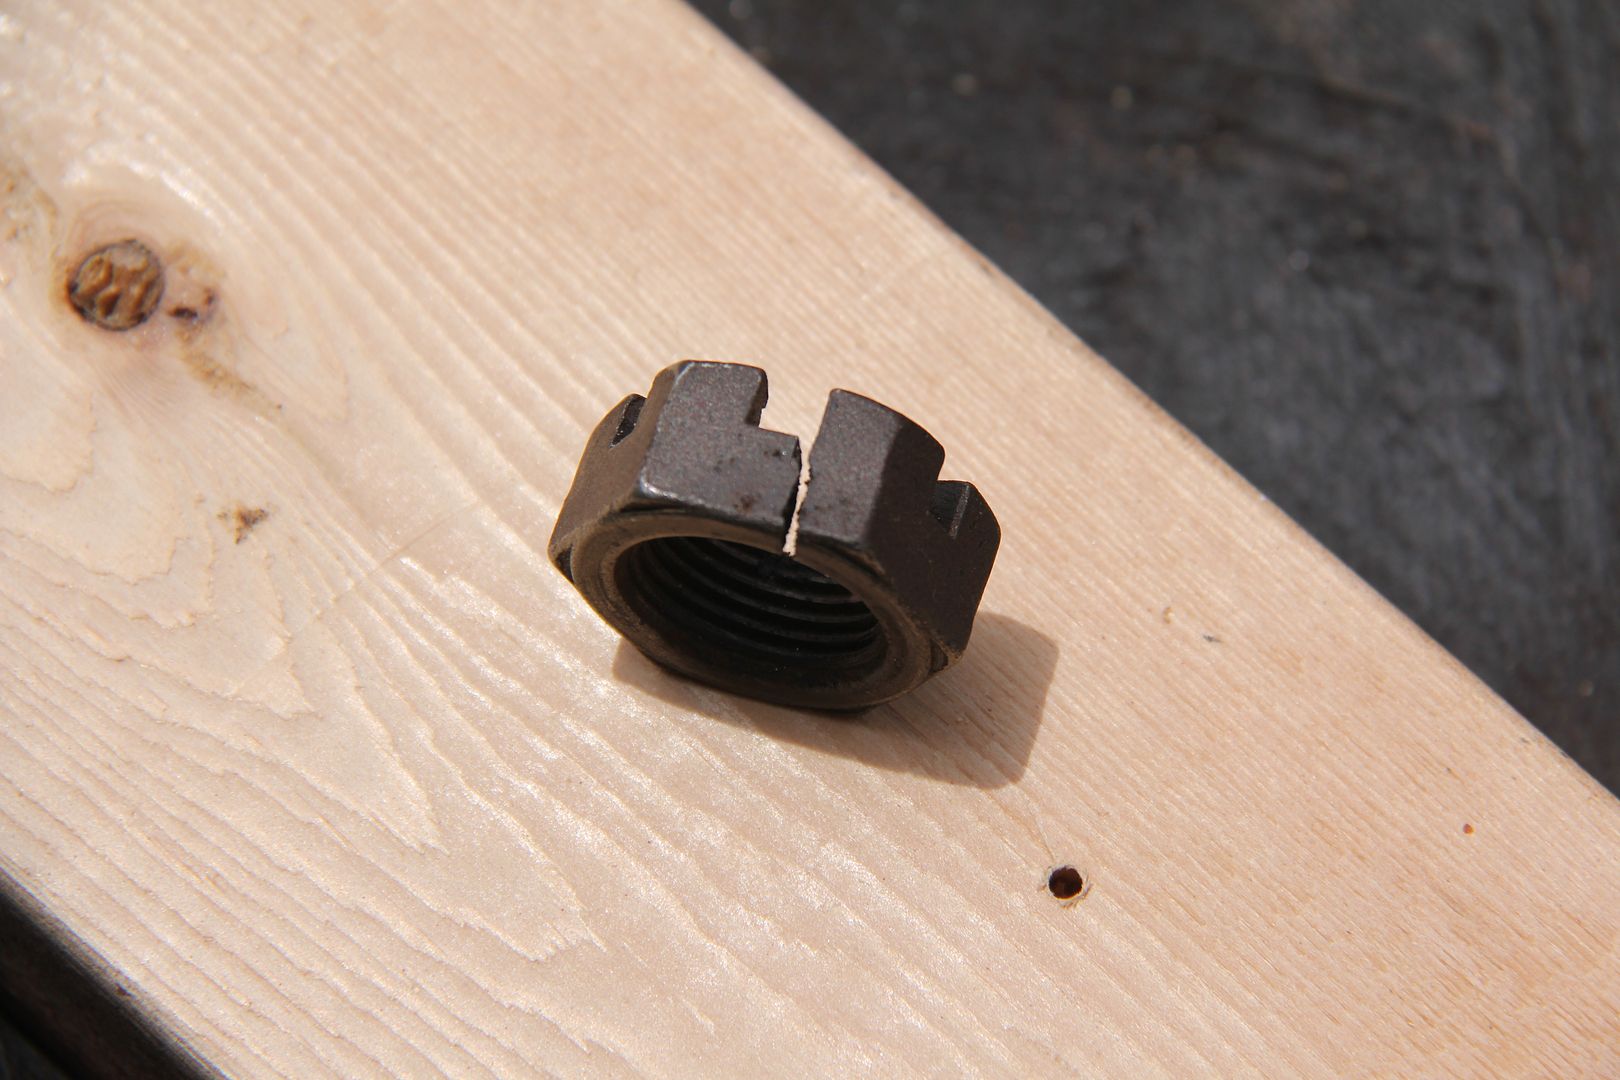
I got the steering arms and tie rod on, but it's just temporary as I discovered one of the slotted nuts that holds on the steering arm was split. They are shallow nuts and rather hard to find, but Grainger has them.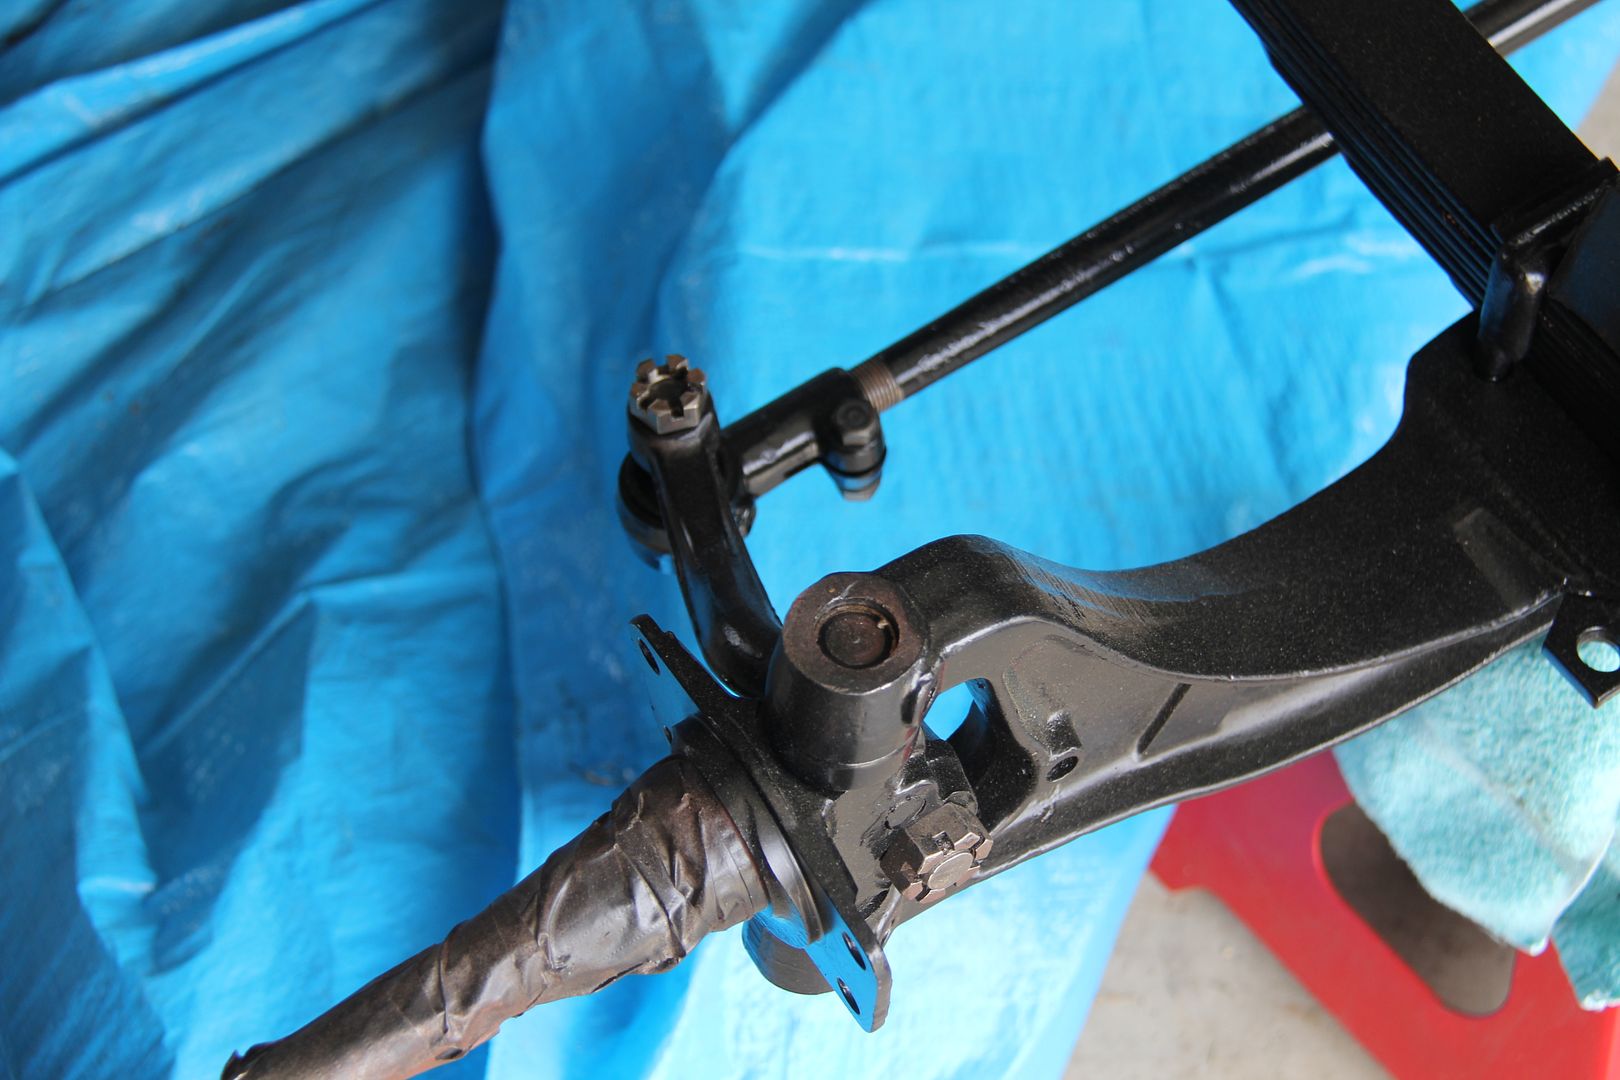
I plan to get the differential carrier cleaned up and back in the axle housing this weekend.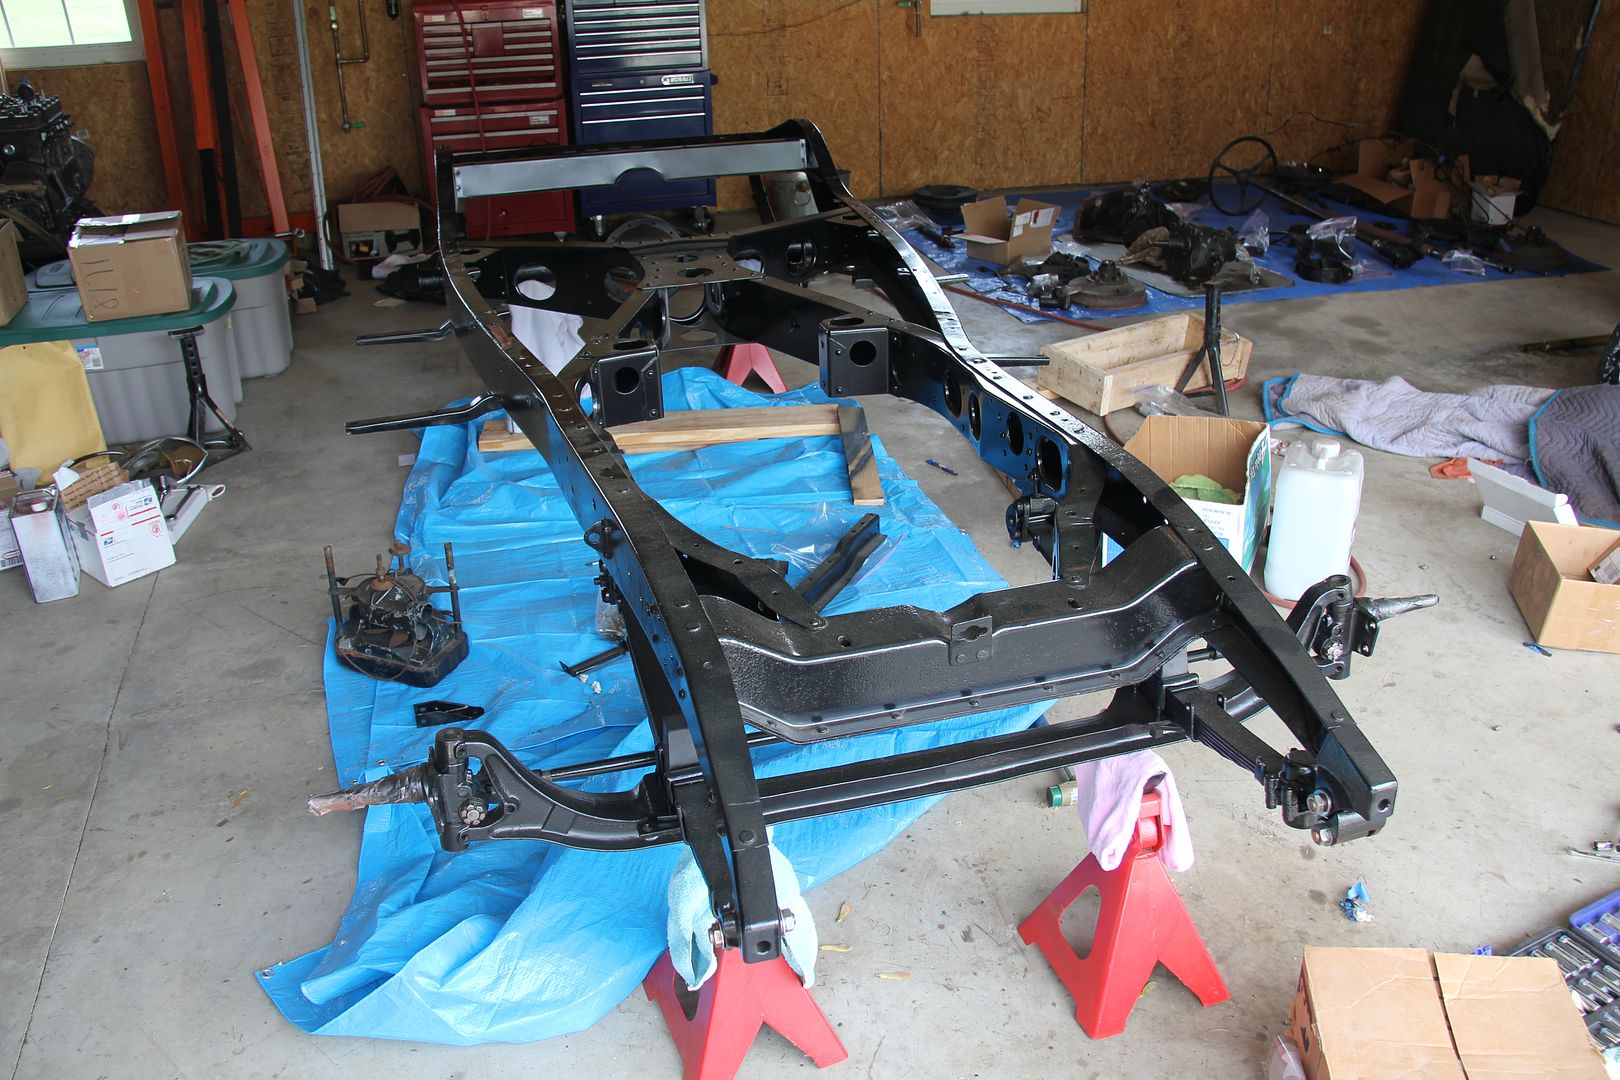
-
im a bunch of mopar forums and never heard of this
The meet is put on by the Dodge Brothers Club which recognizes Dodge Brothers vehicles from 1914 to 1938. 1939 and up are Dodges (No Brothers) and not officially part of the club. Obviously any and all are welcome to this one of a kind event. I doubt any of us will be around for the two hundredth anniversary!
-
I'm pleased to have been chosen to produce and direct the video that will document the upcoming Centennial in Detroit this June. I'm the proud owner of a 1932 DL sedan that, alas, will not be ready for the meet. I'm also a professional film maker and have done shows for Nova on PBS, and many, many documentaries here in the U.S. and around the world.
The reason I'm posting here is that we will need your help and support during the meet. If a husband and wife team shows up and shoves a camera in your face and ask about your car, that's the Taylors and we hope you'll have stories to tell and adventures to relate. The more owners we can feature talking about their cars, the better the video will be. We will be going to all the events and we may want to mount a GoPro camera on a few of the cars as they drive around Detroit - the mounts are soft rubber and will not scratch the car. We may want to interview a few of you inside the car while you are driving.
We'll try not to be too obtrusive, and feel free to decline if you don't want to appear on camera. For those that do, just tell us the story of your car - where you found it, how you fixed it up or restored it, where it's been, and any other interesting tidbits. After the interview, we will take detailed shots of your car taking care to feature items you may have mentioned. We may pounce at any time, so be prepared!
My wife Kathy and I are looking forward to working on the video and meeting Dodge Brothers owners from around the world. Feel free to PM me if you have any questions or suggestions.
See you in Detroit,
Richard and Kathy Taylor
-
That is some really beautiful and inspiring work!!
Thank you. It's really enjoyable to see it all coming together after 47 years. My only disappointment is that I will not finish in time to bring her to the 100 year celebration in Detroit where she was born.
-
After a personal property auction where we unloaded about half of our possessions and a rough bout with an inflamed rotator cuff, I'm finally back at work on Daphne. I must say it's a lot more fun putting cleaned and painted parts back together than taking them apart, cleaning and painting them!
With the bare frame back from the powdercoater, I began assembly. I previously painted the springs and installed new bushings. The first job was to install the freshly restored spring damper that fits on the front of the driver's side front spring. An unusual feature of the DL is the two front springs are different in both length and the position of the rolled area that holds the bushing. This is so the damper can fit on just one spring.
The damper is in two parts that are bolted together around the end of the spring. Inside each part is a coil spring.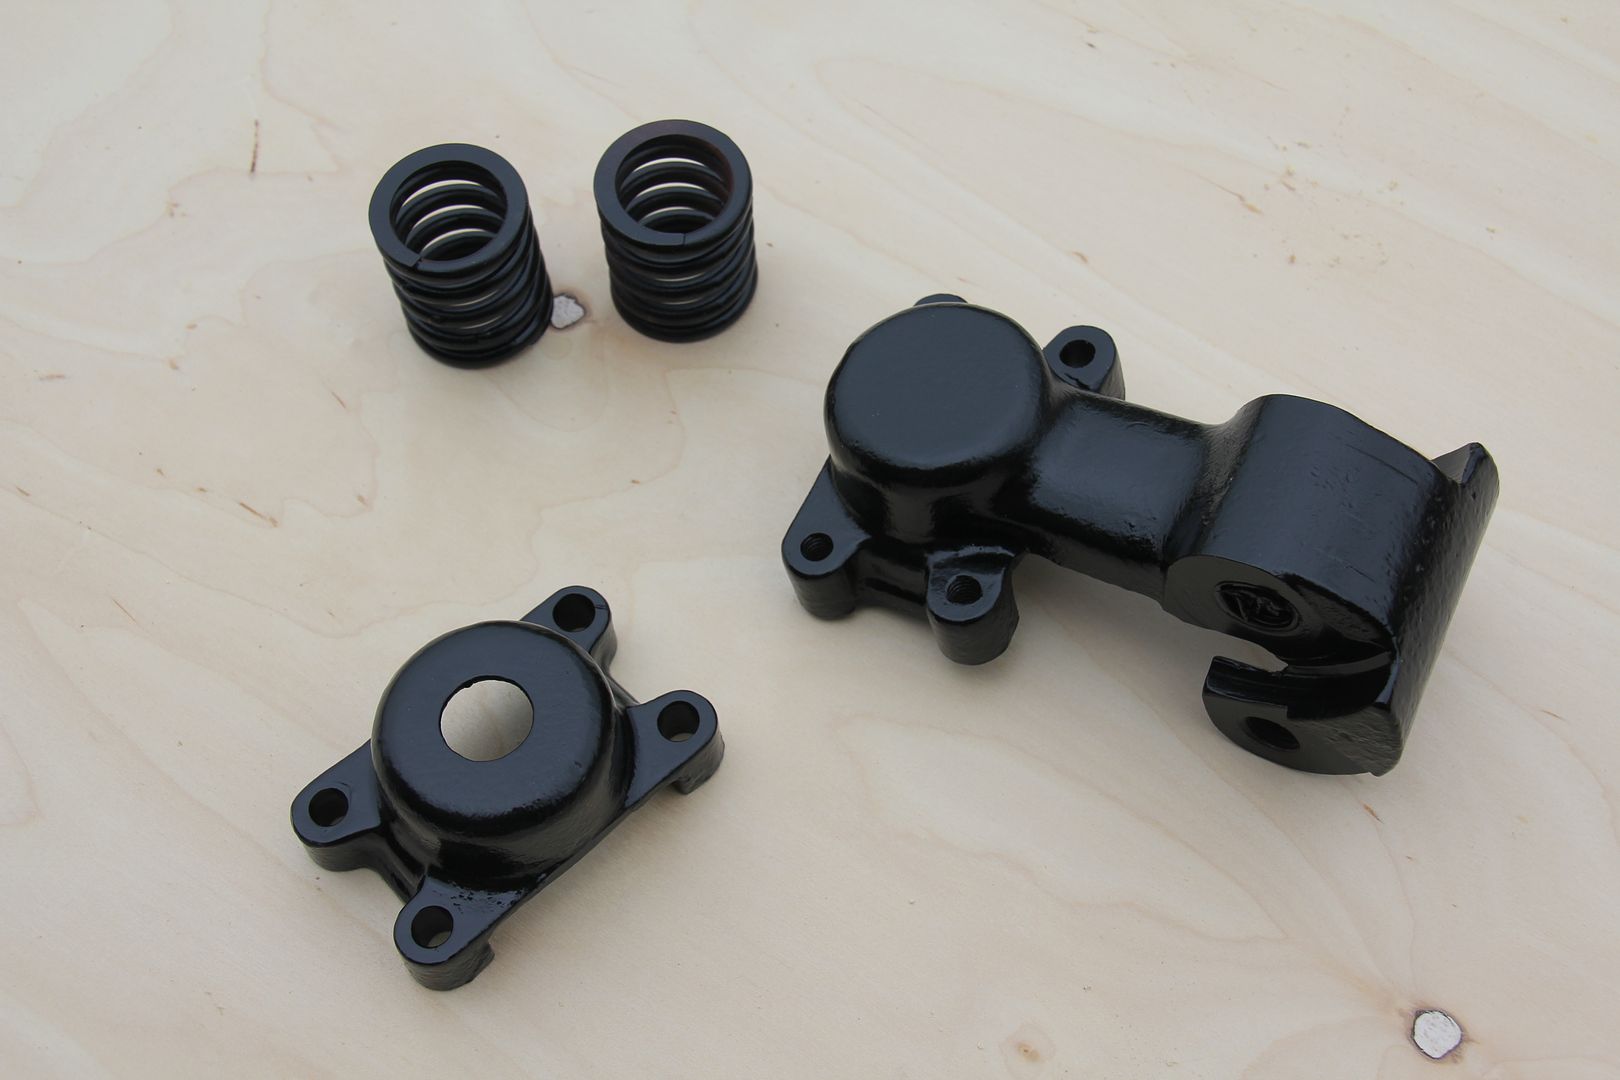
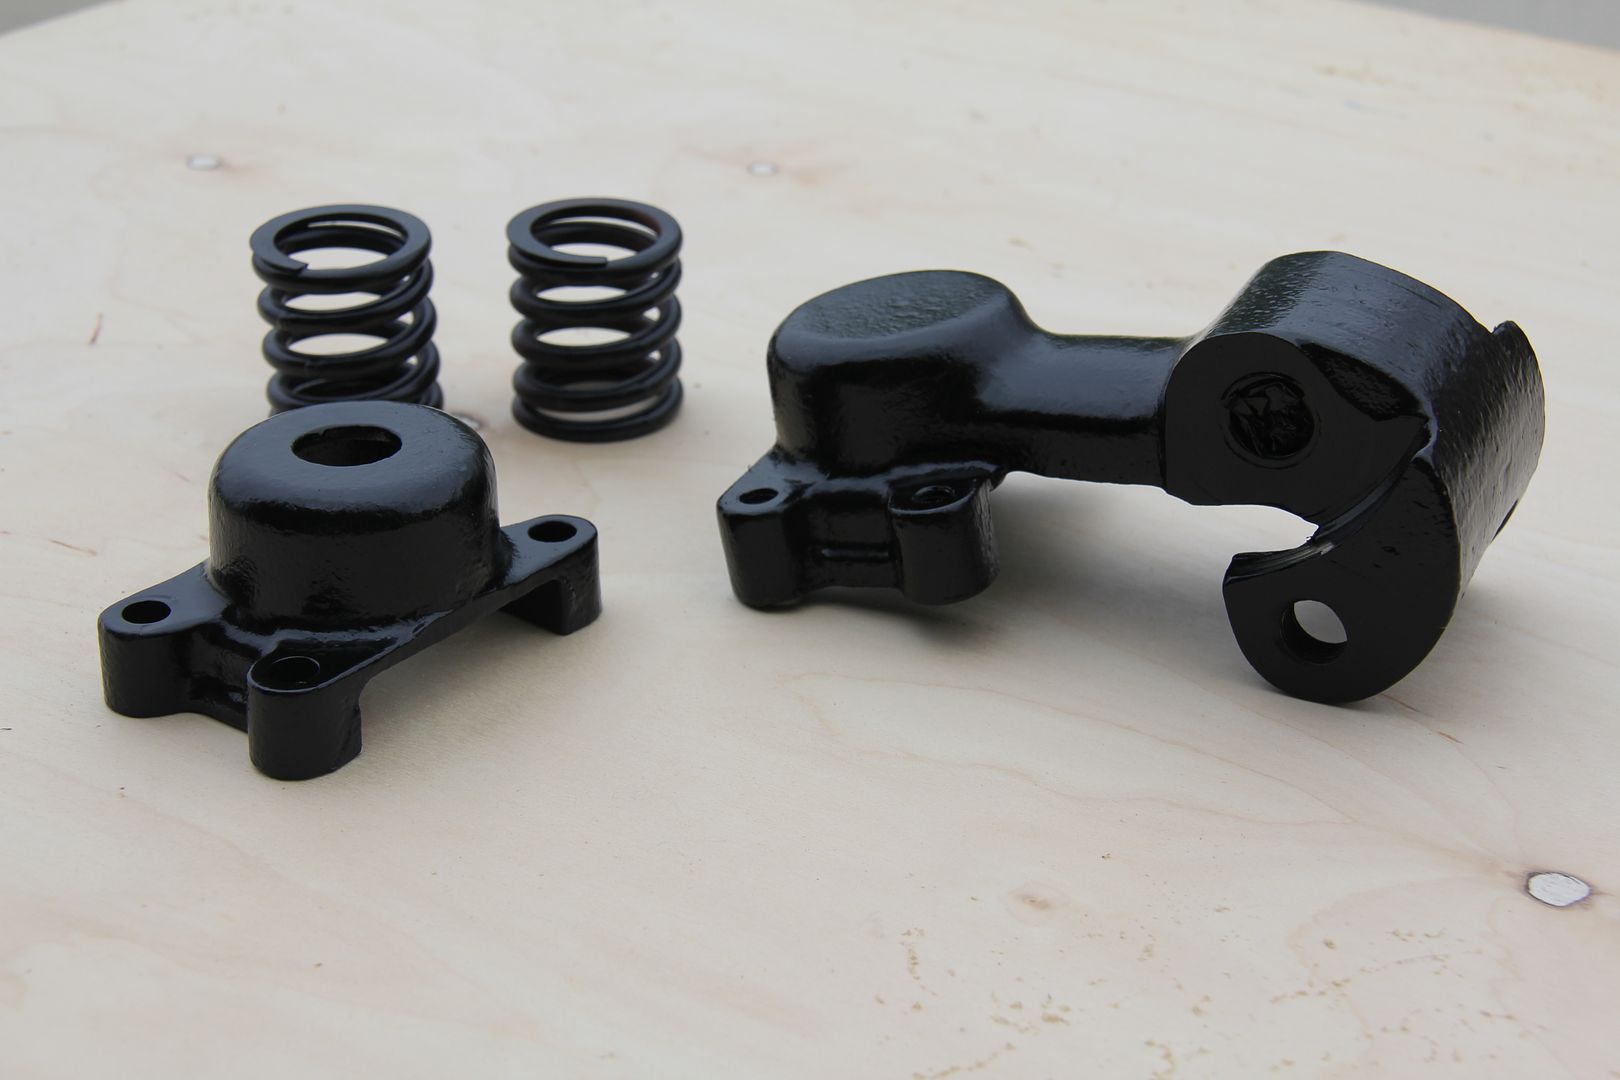
Here are the springs inside each half.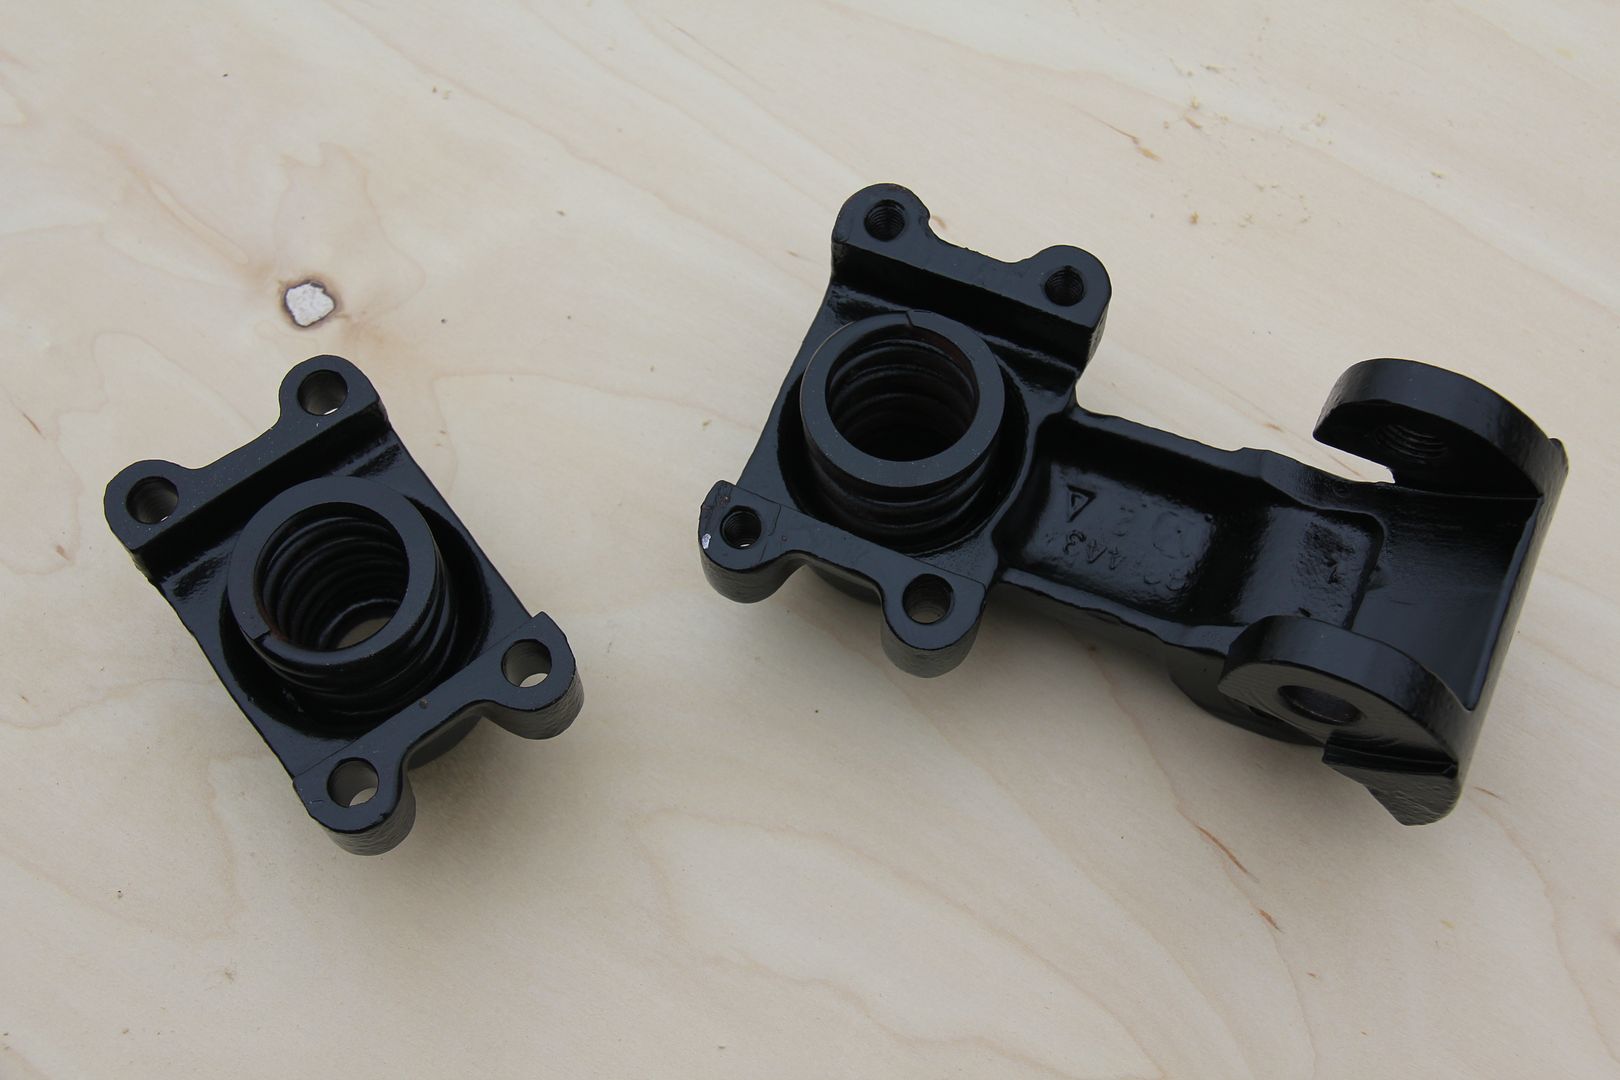
The two halves bolted around the end of the spring.
Here is the spring bolted into place. Two bolts, one in the traditional position and one to hold the spring to the damper. Note the original copper plated bolts which I discovered when I cleaned them off.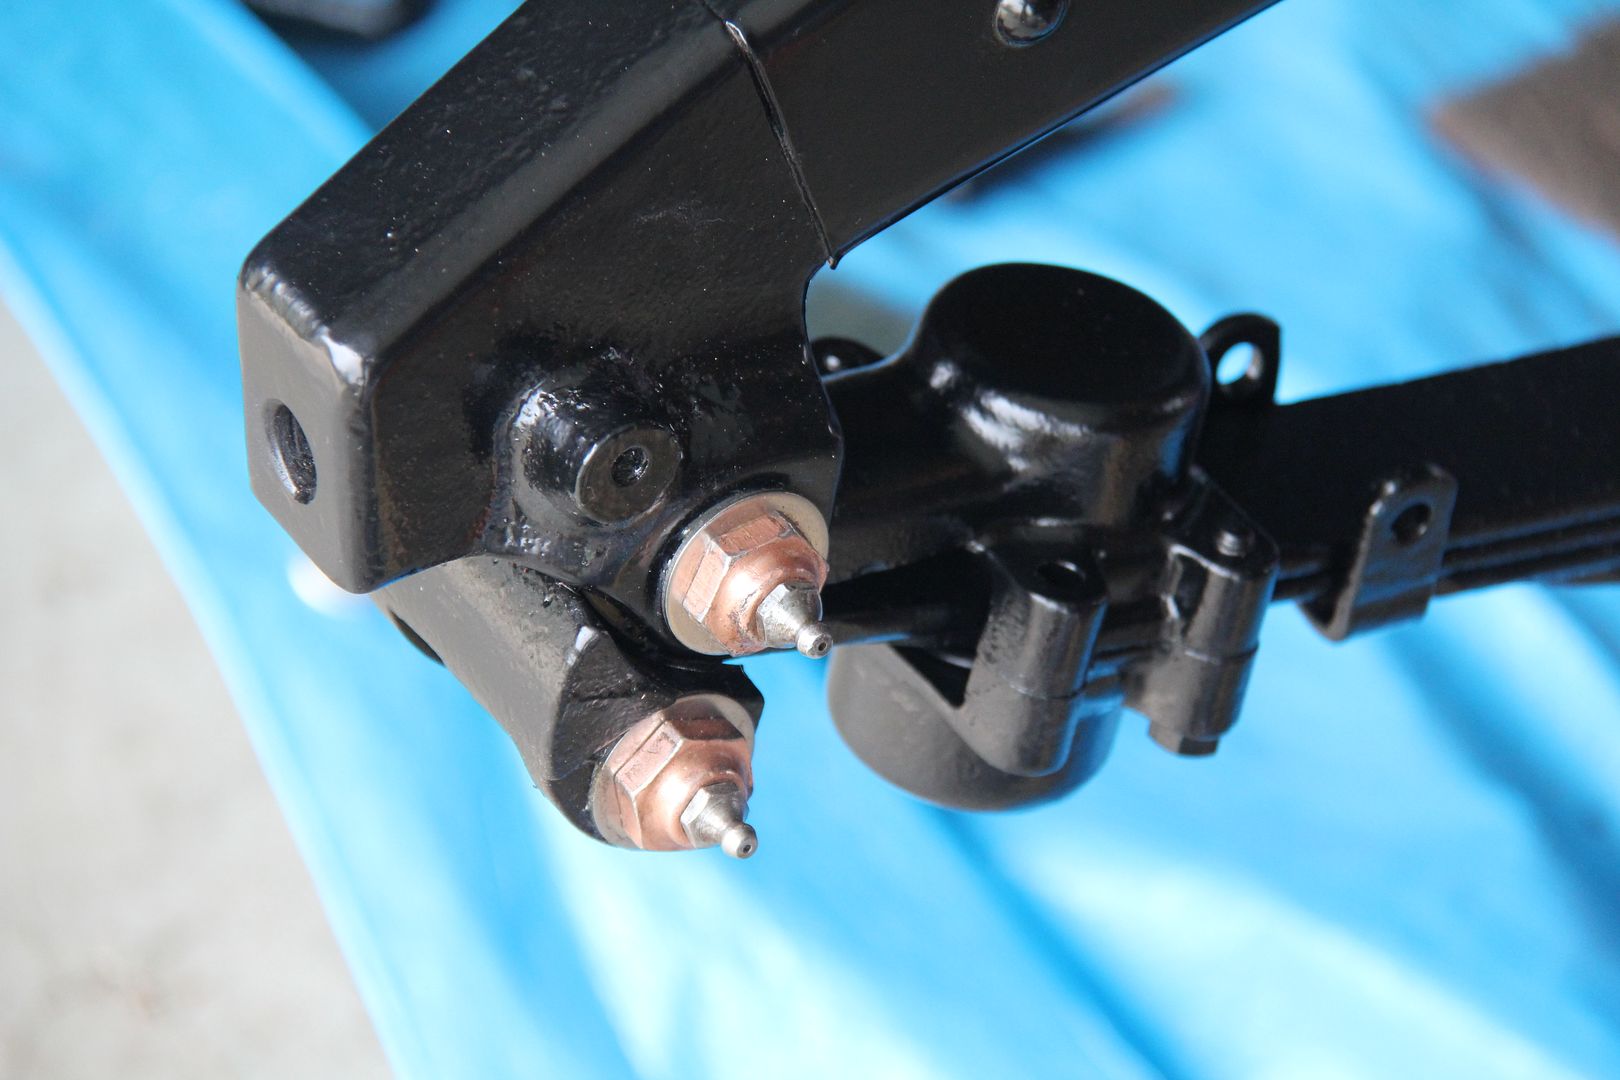
Dodge used the notorious (as in hard to find) Tryon spring shackles in the late twenties/early thirties. I found some at Hershey this year, not the correct number, but good for some of the parts. Luckily, the shackles on the car were in good shape and only needed cleaning and painting. I'm not sure if they are original, but they were on the car when I bought it in 1965.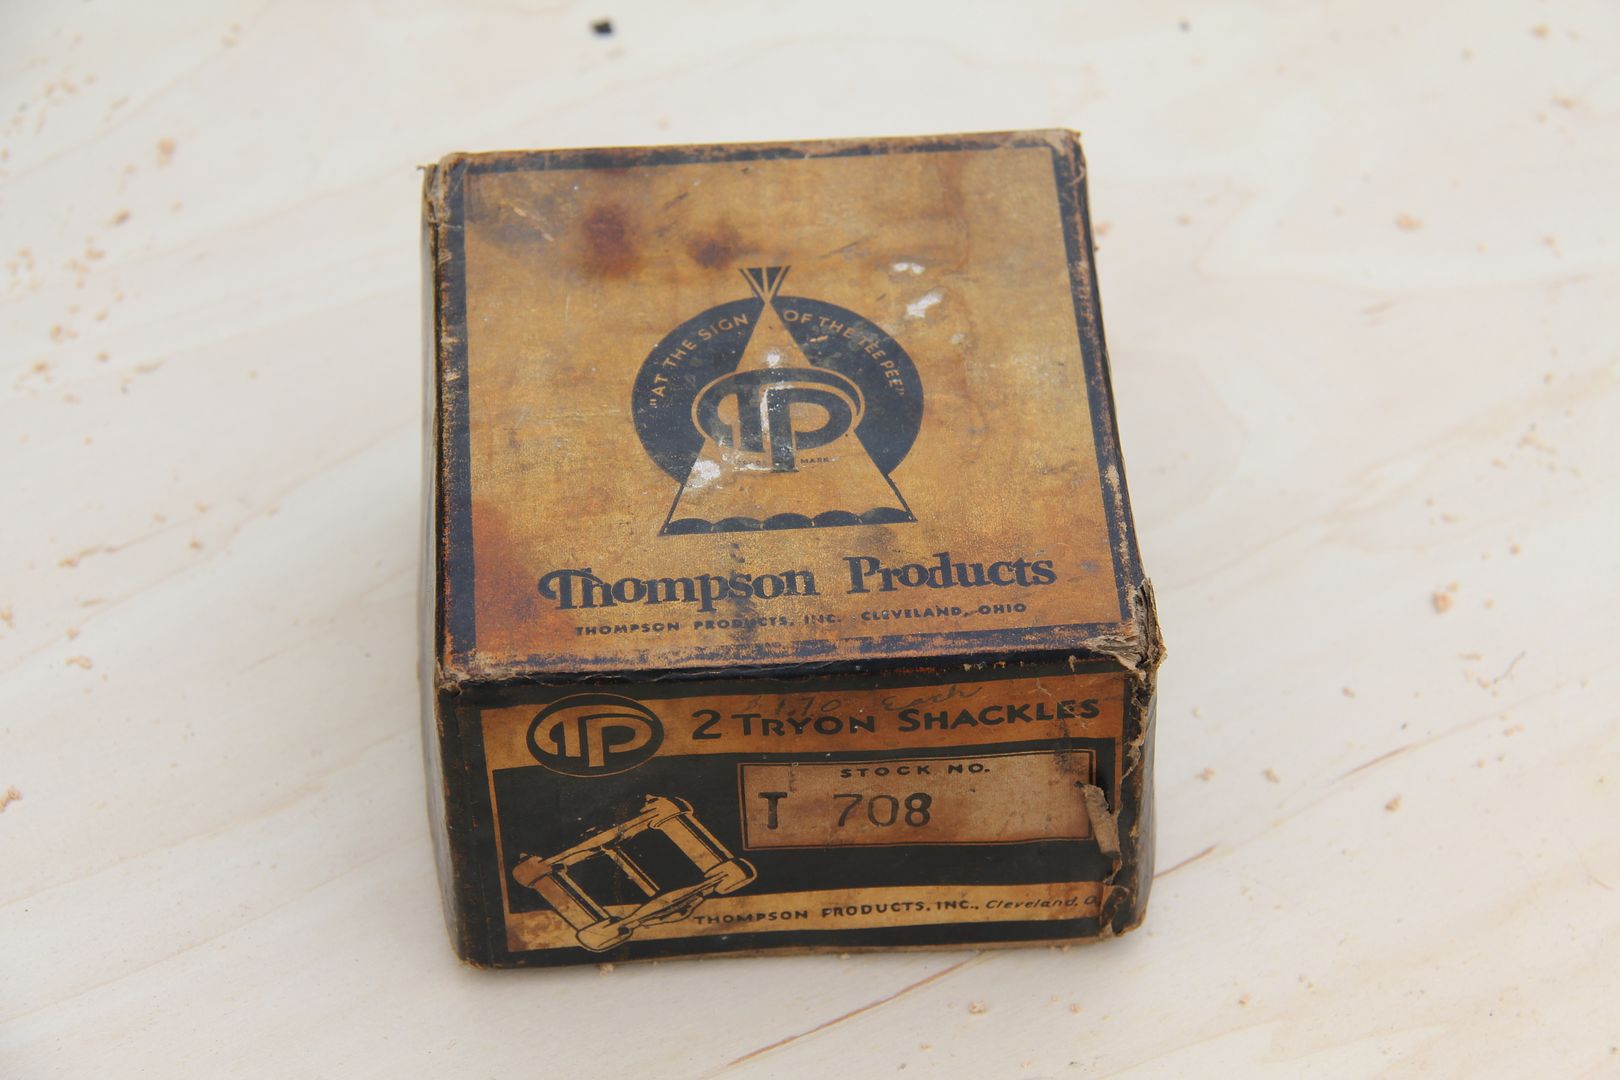
A NOS shackle fresh out of the box.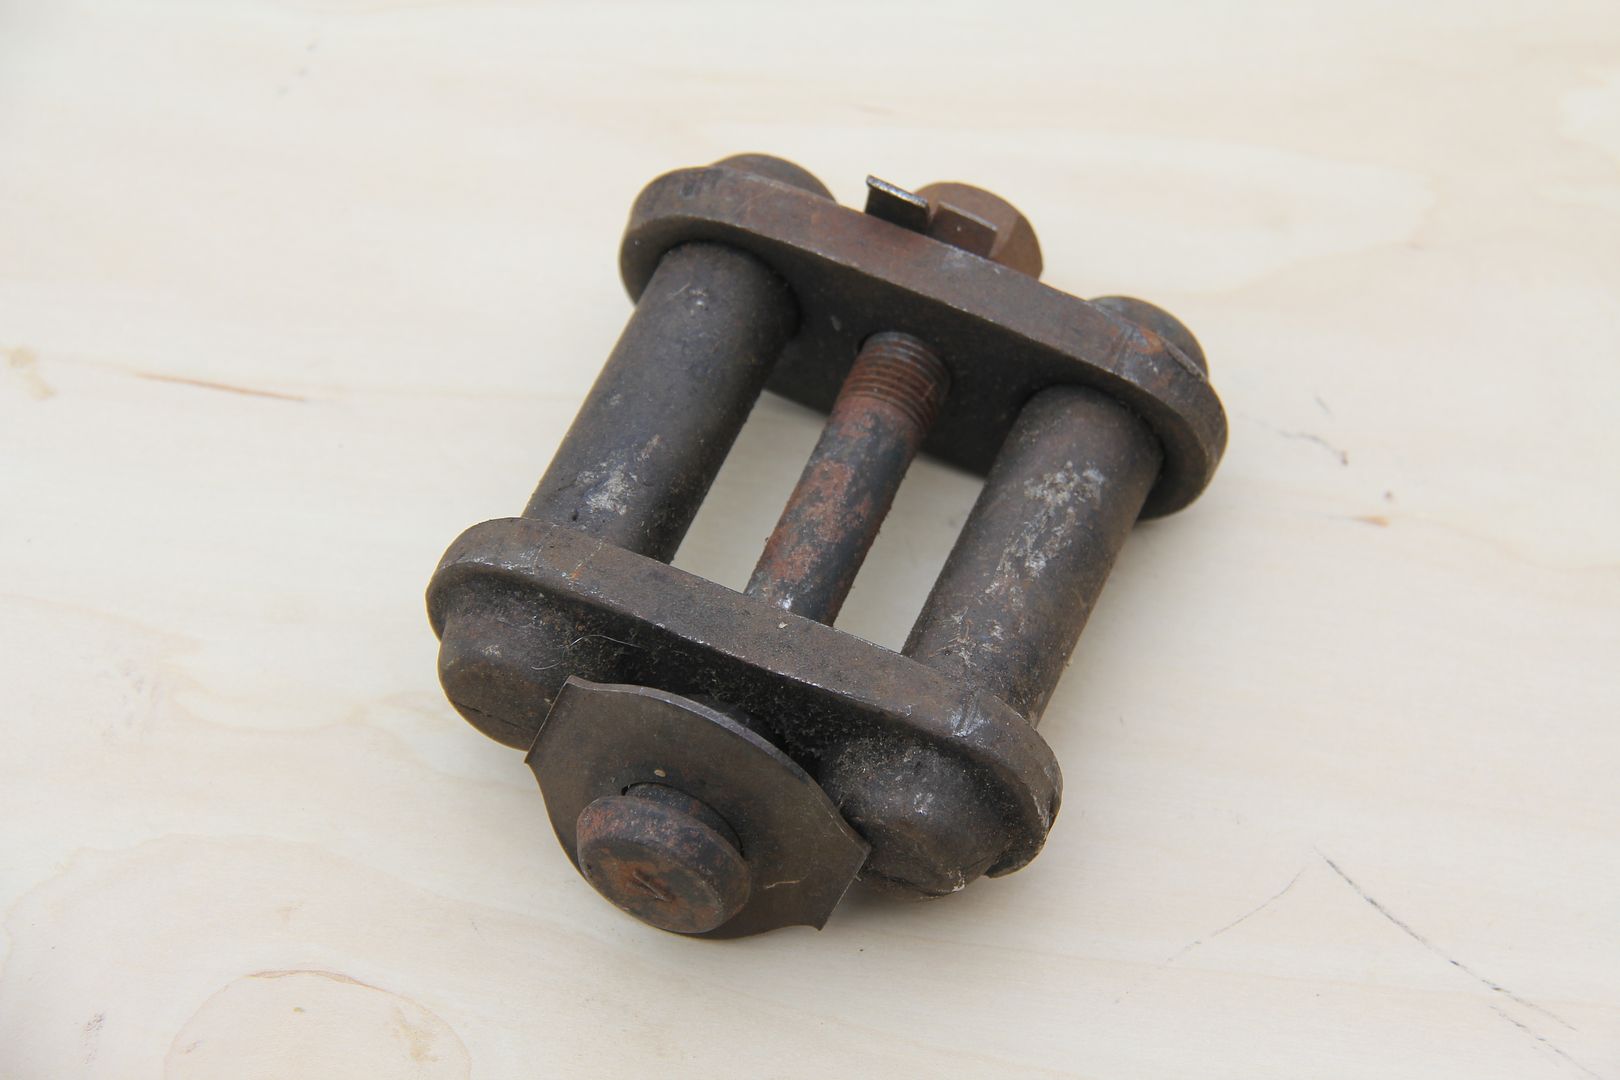

I wondered if they were installed as bare metal as all the NOS Tryons I've ever seen were not painted, but I found traces of black paint on mine when I cleaned them, so I decided to paint them.
Here they are cleaned and ready to go.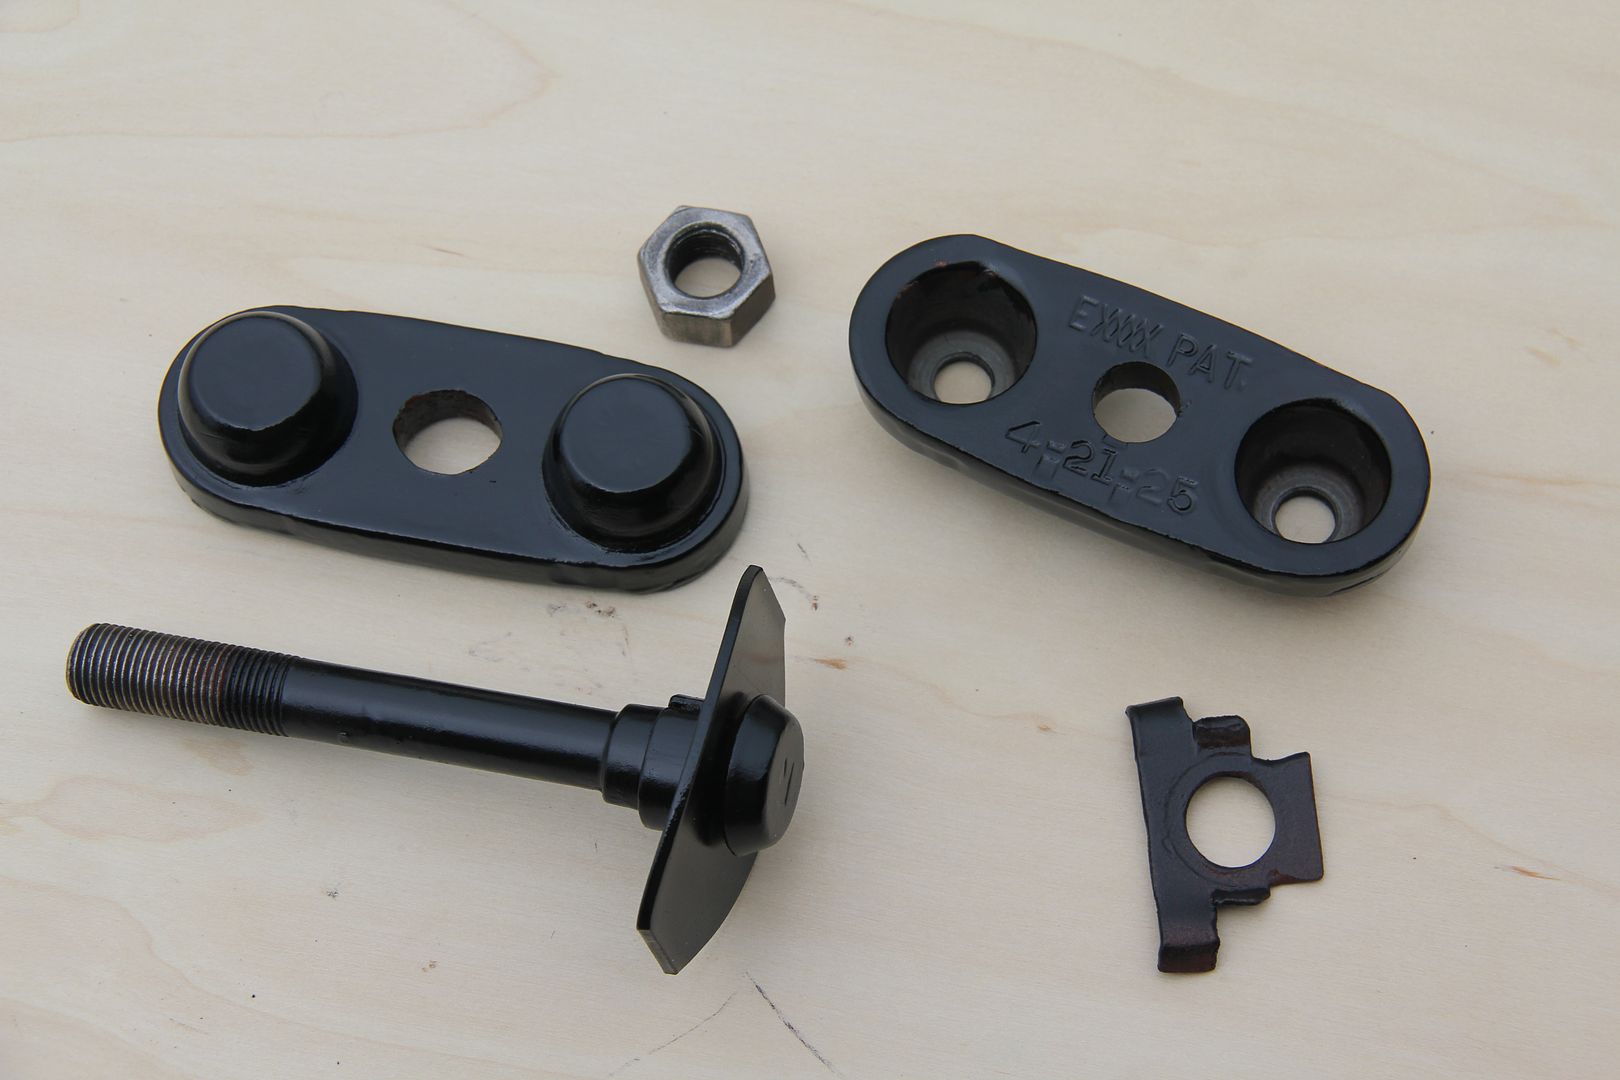
Here are the frame mounts cleaned up. The springs have the same type of mount. The red is a reflection from the jack stand, not a crummy paint job!
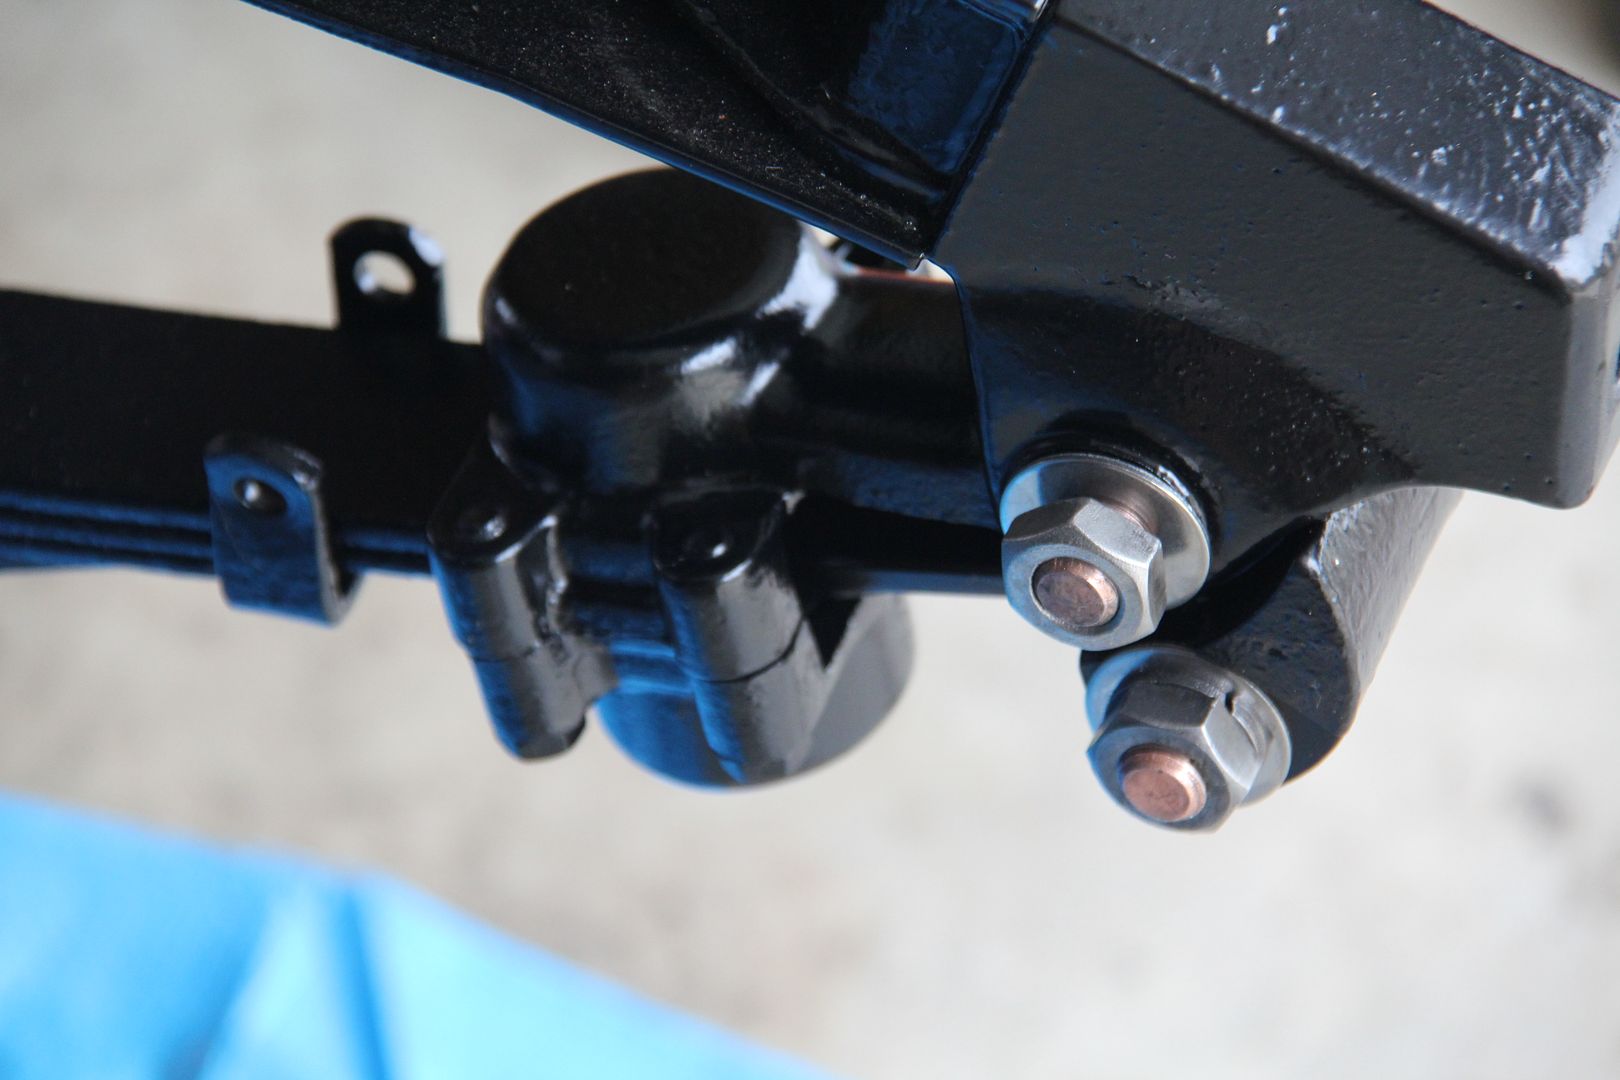
Here's the shackle installed. I haven't adjusted the spring tension yet. Once I do, the tabs on the "washer" will be bent around the nut to keep it from turning.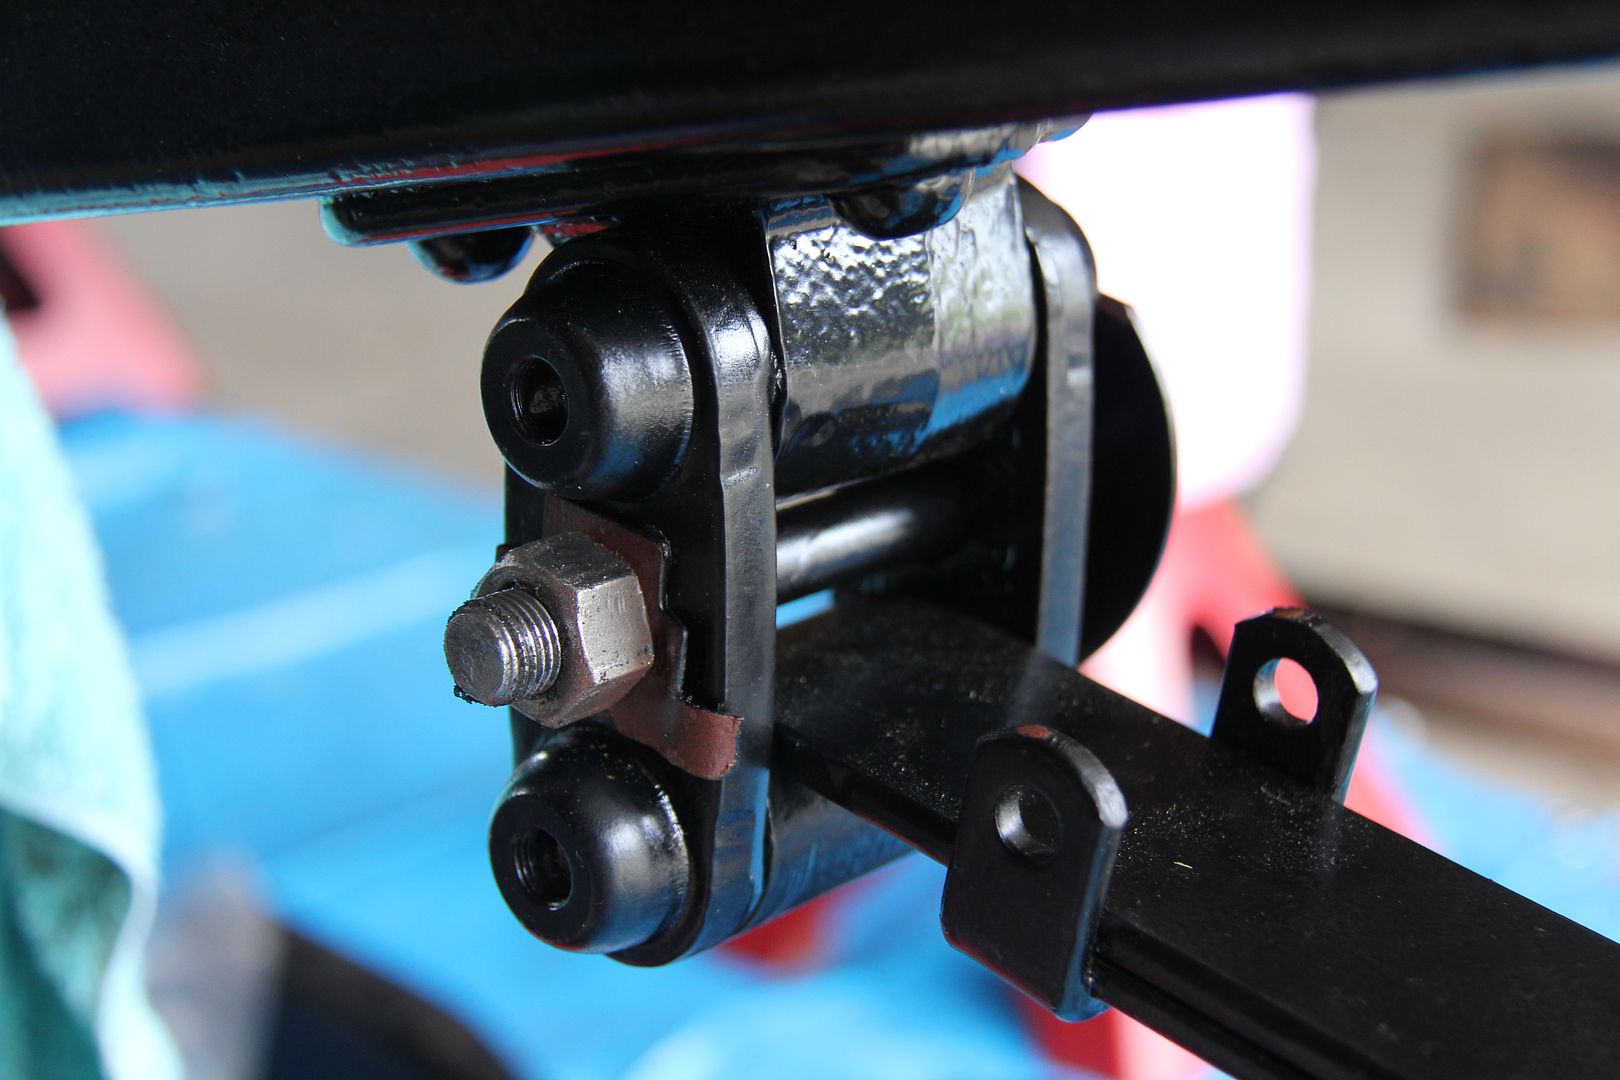
Both front springs on.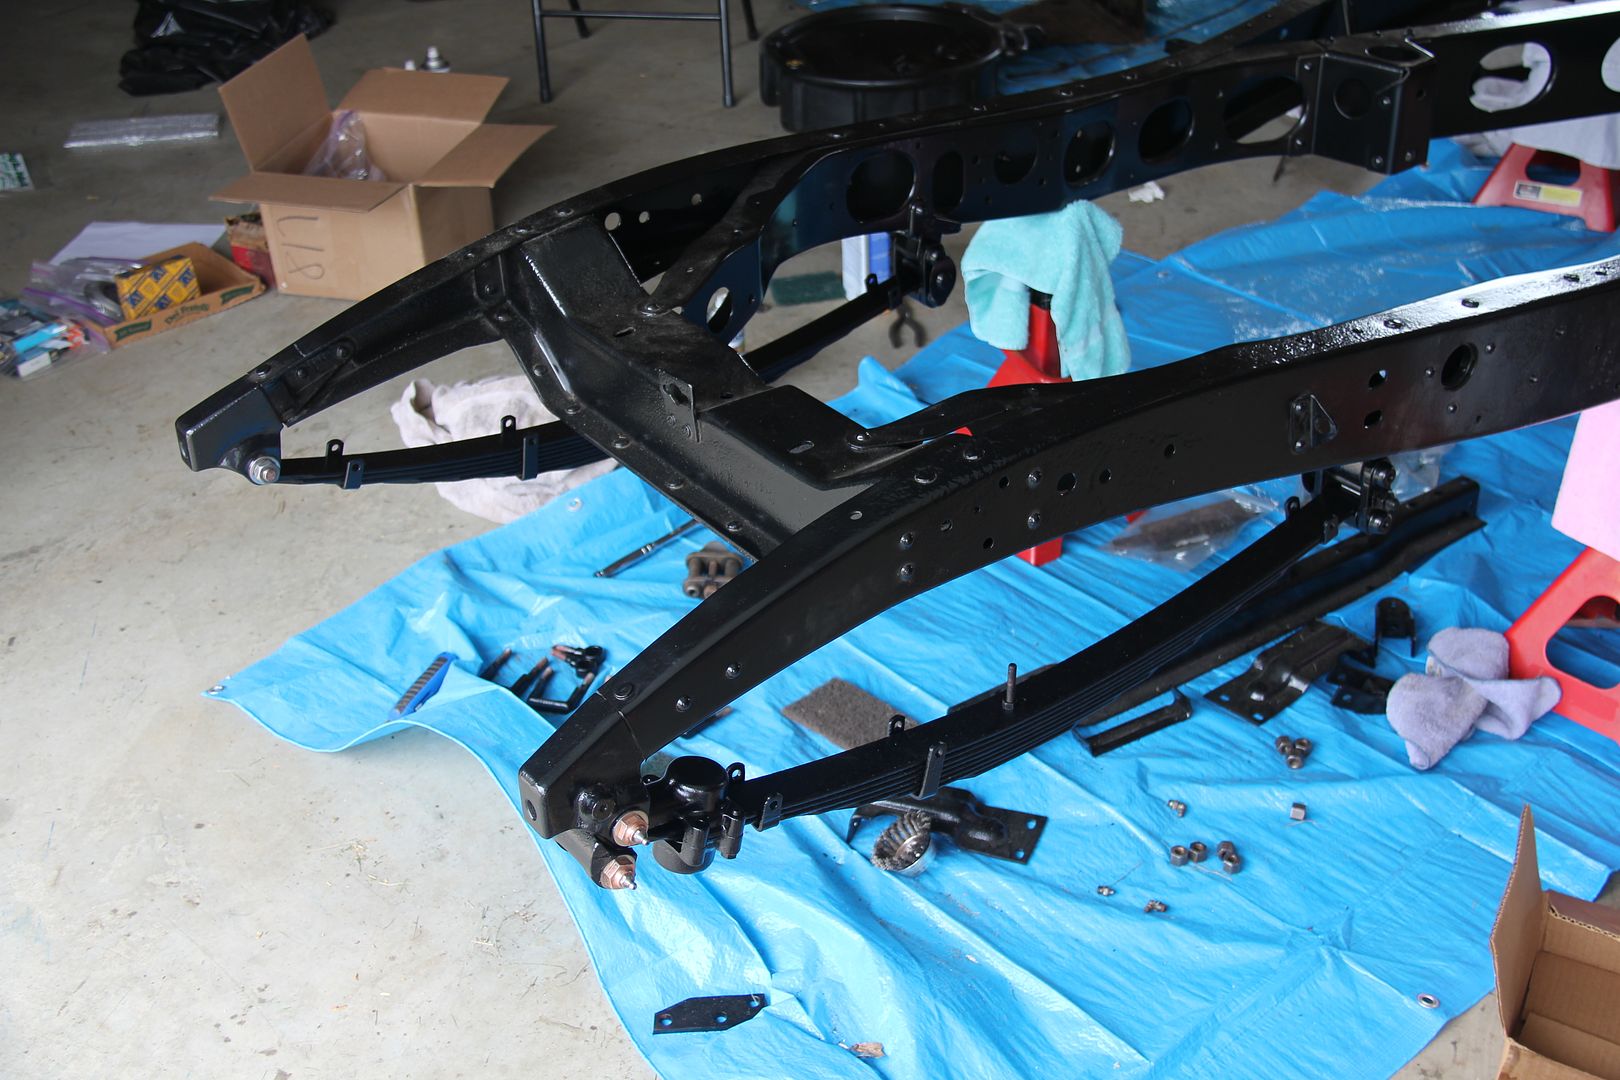
With my shoulder still killing me, I resorted to a jack to lift the restored front axle into place. I know, I'm a wuss, but what can I say?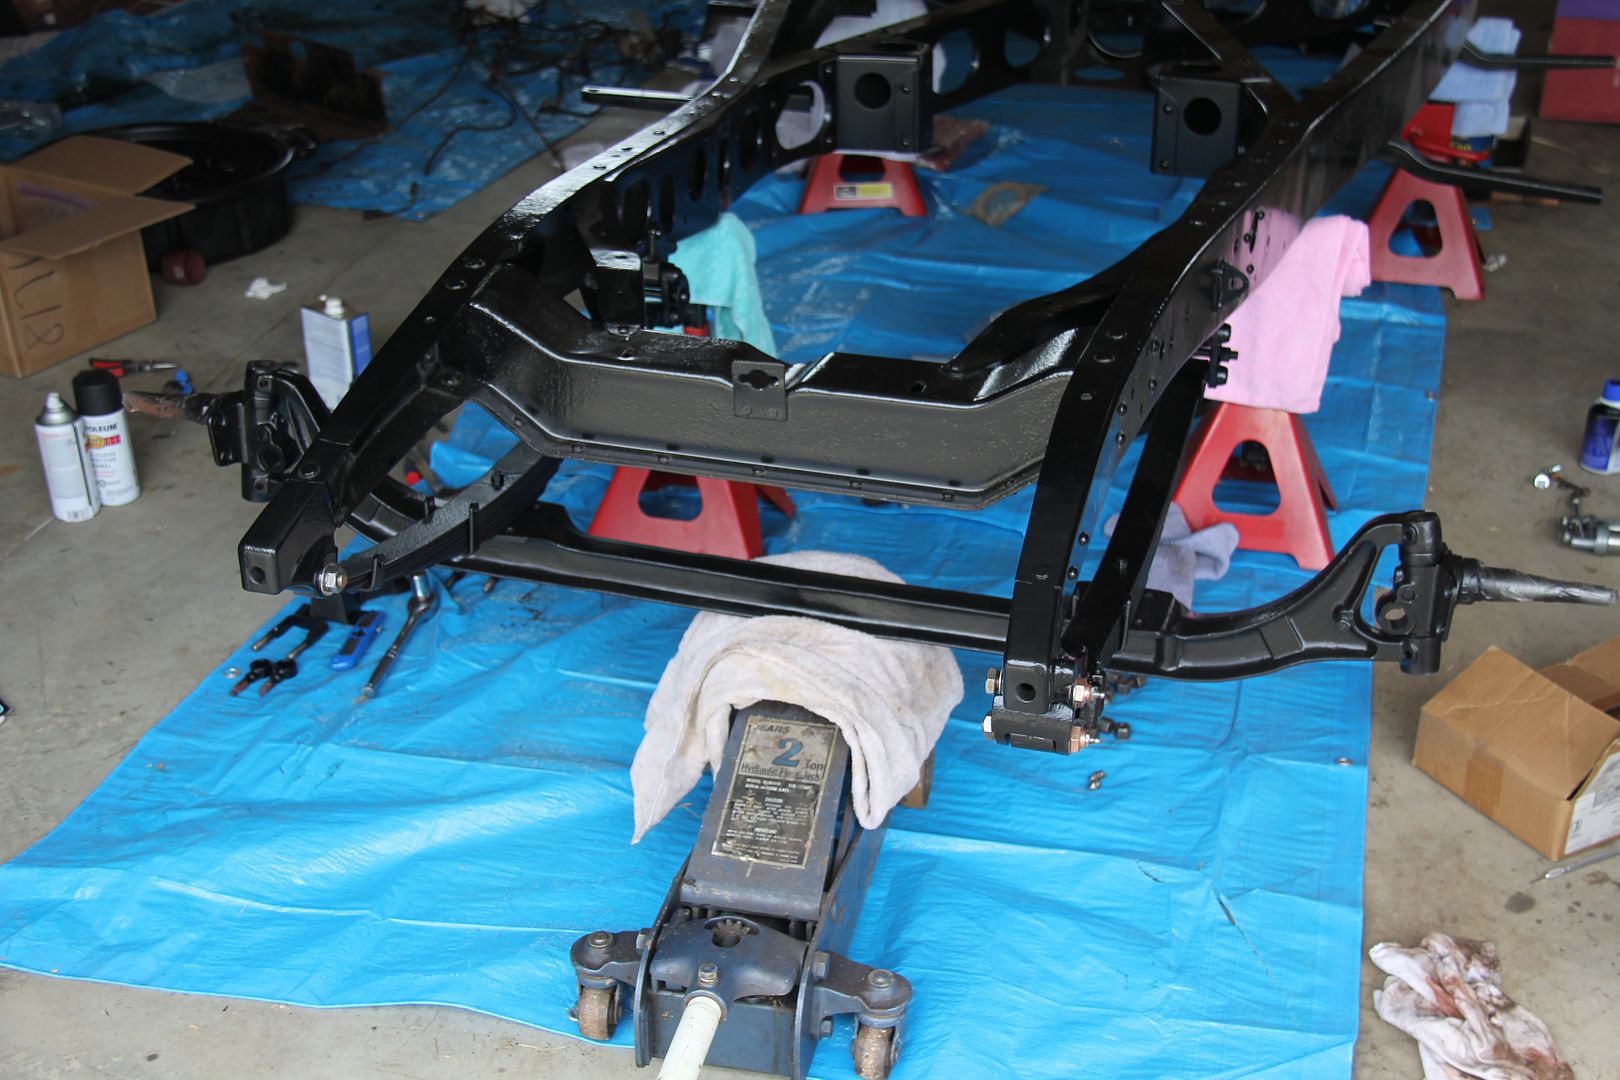
The restored spring bumpers from Now and Then Parts, along with the spring hangers. Notice the two different lengths. The longer ones go to the front to hold on the shock mount plates also seen in the photo.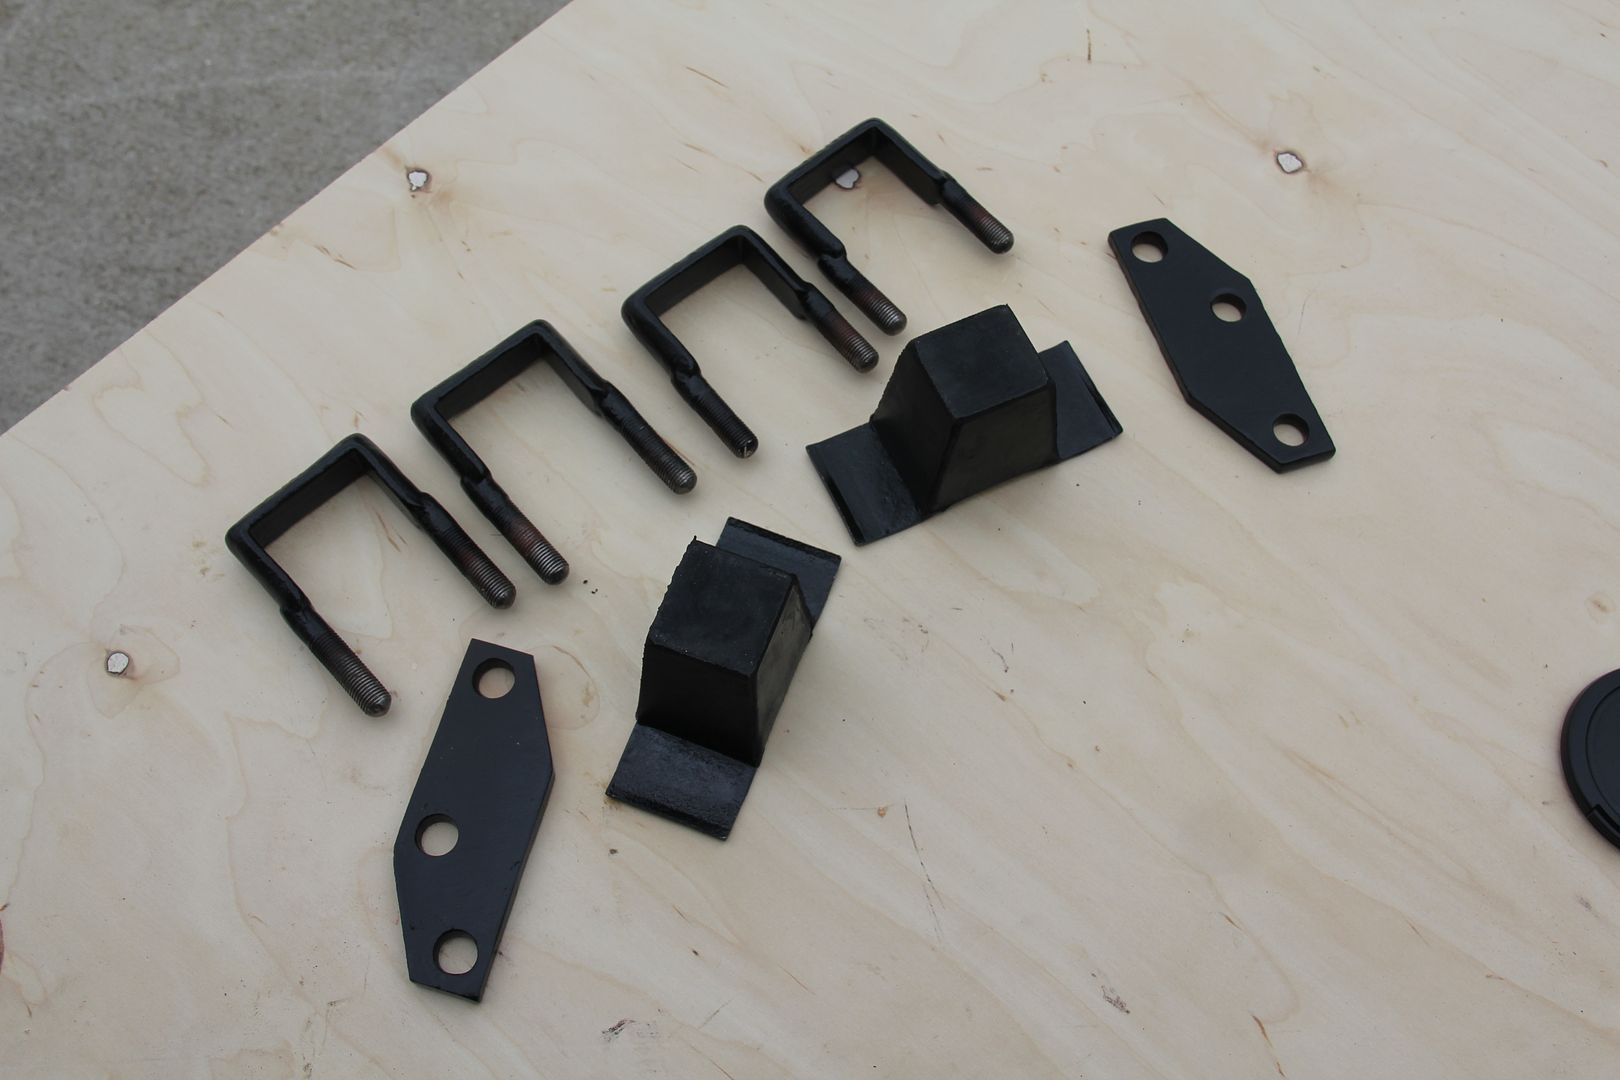
Everything bolted up and ready to go!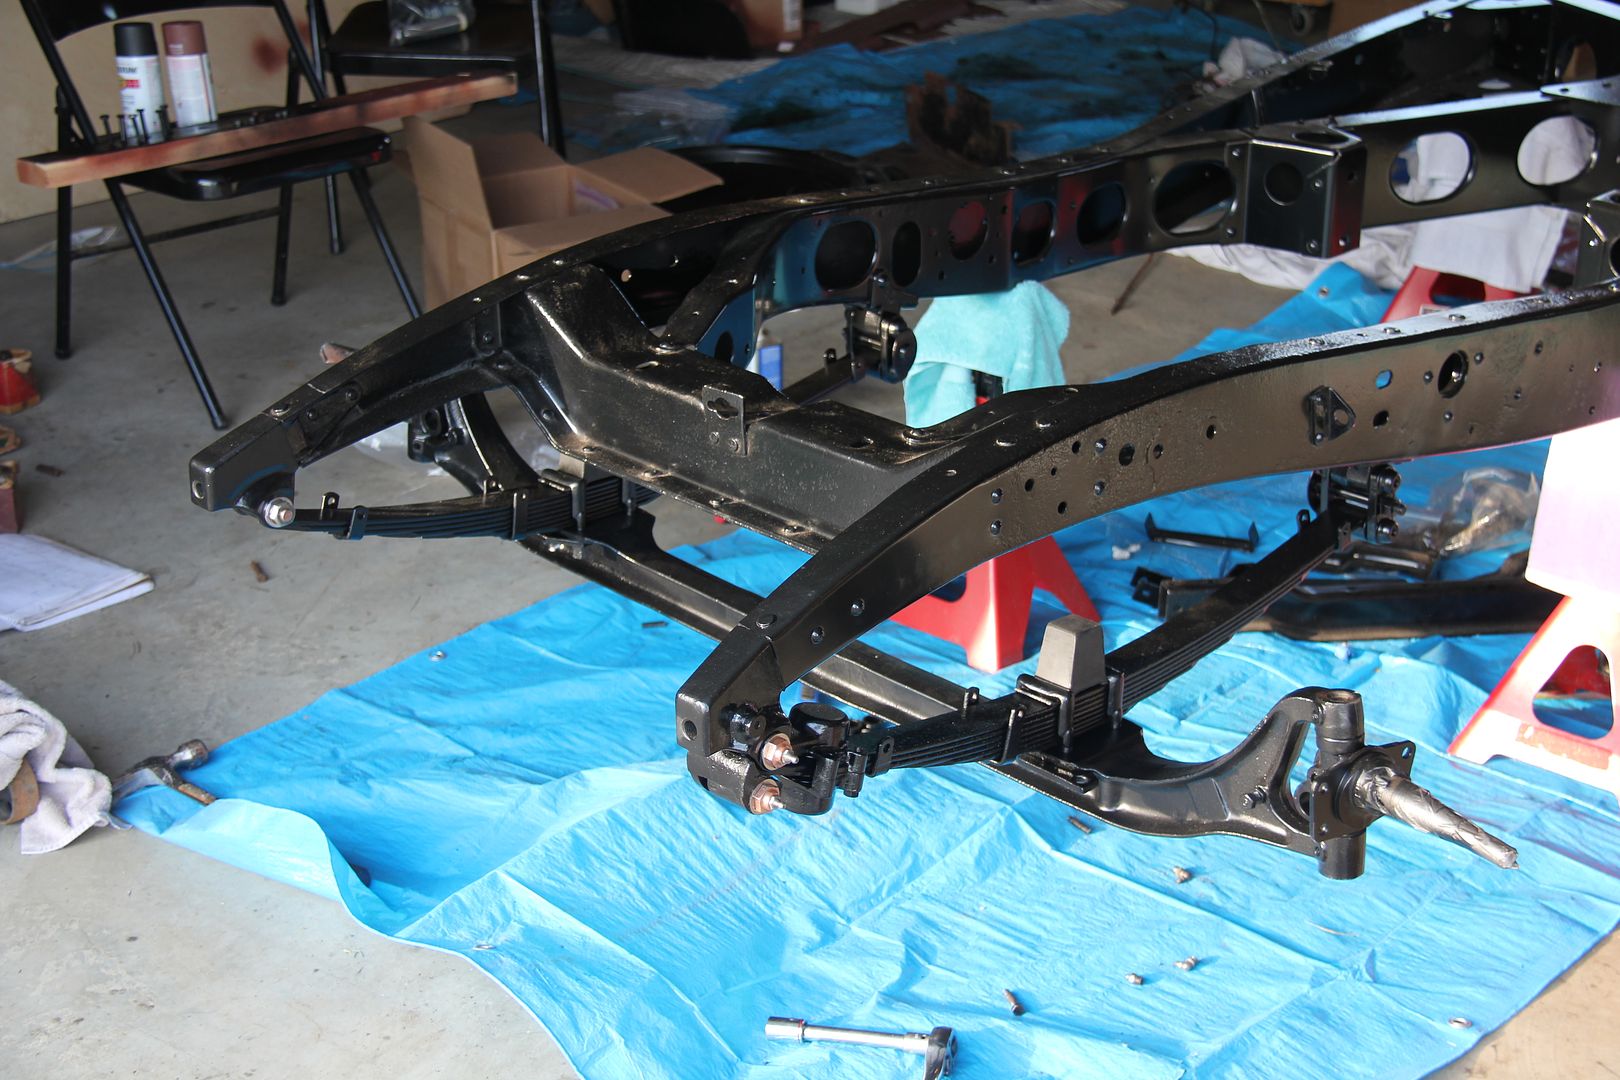
-
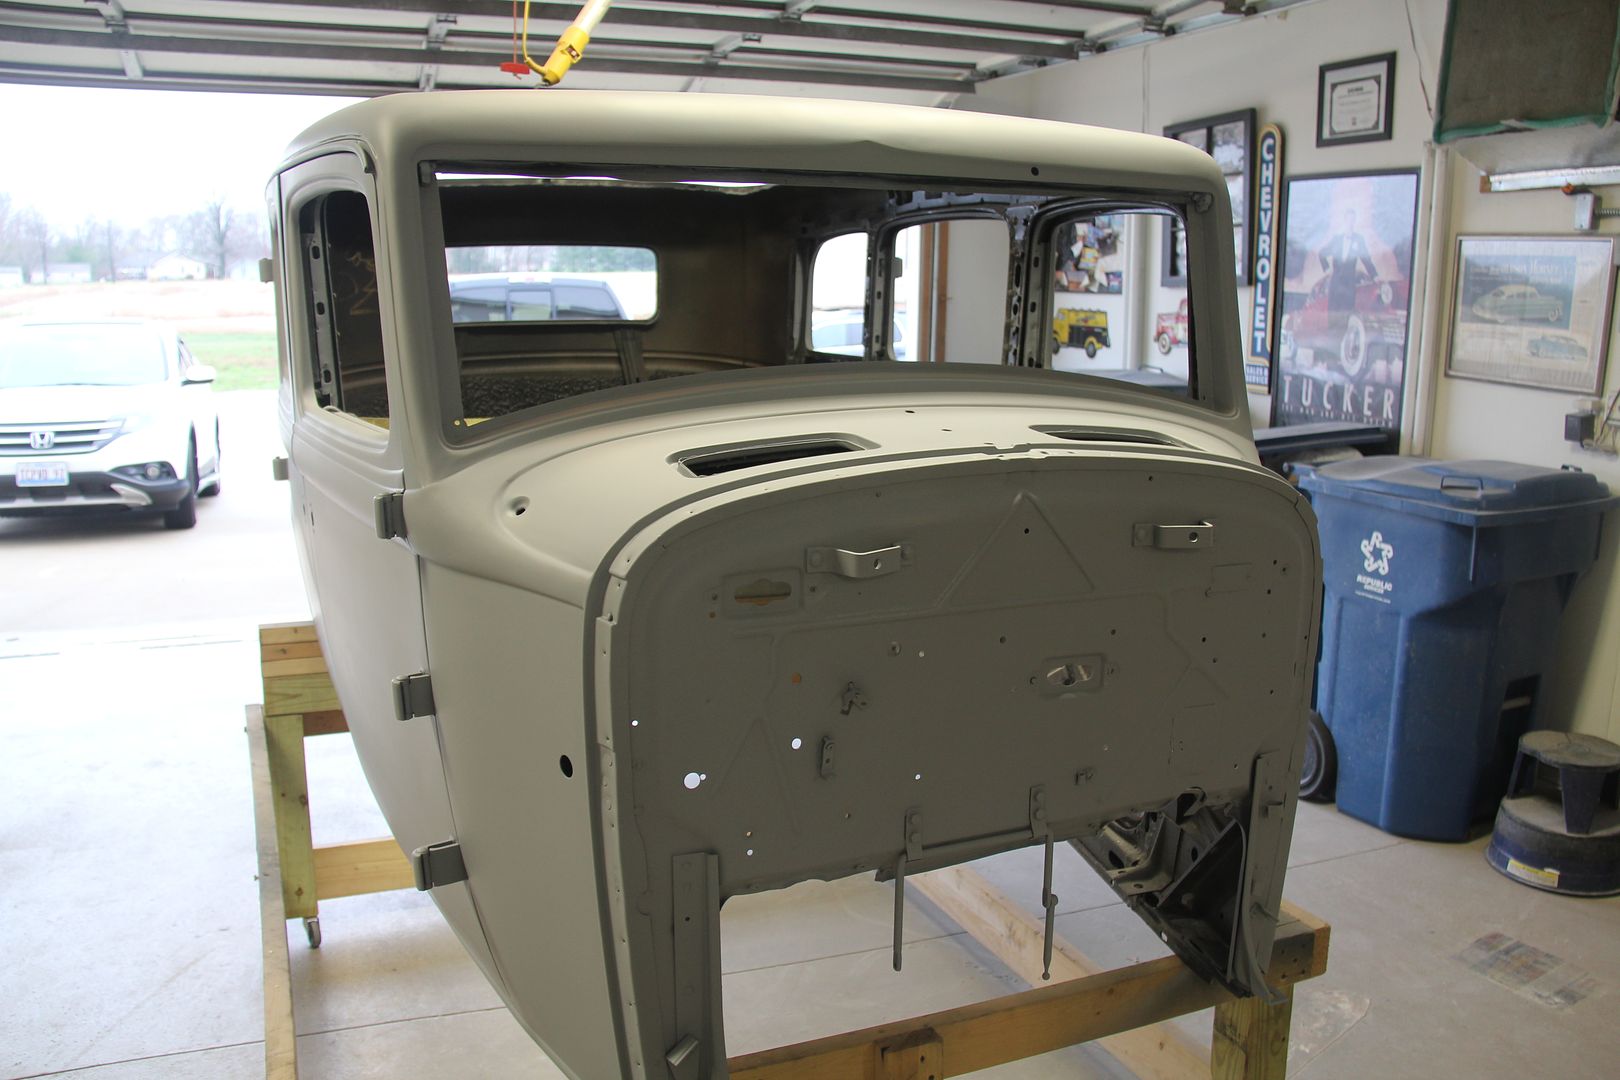
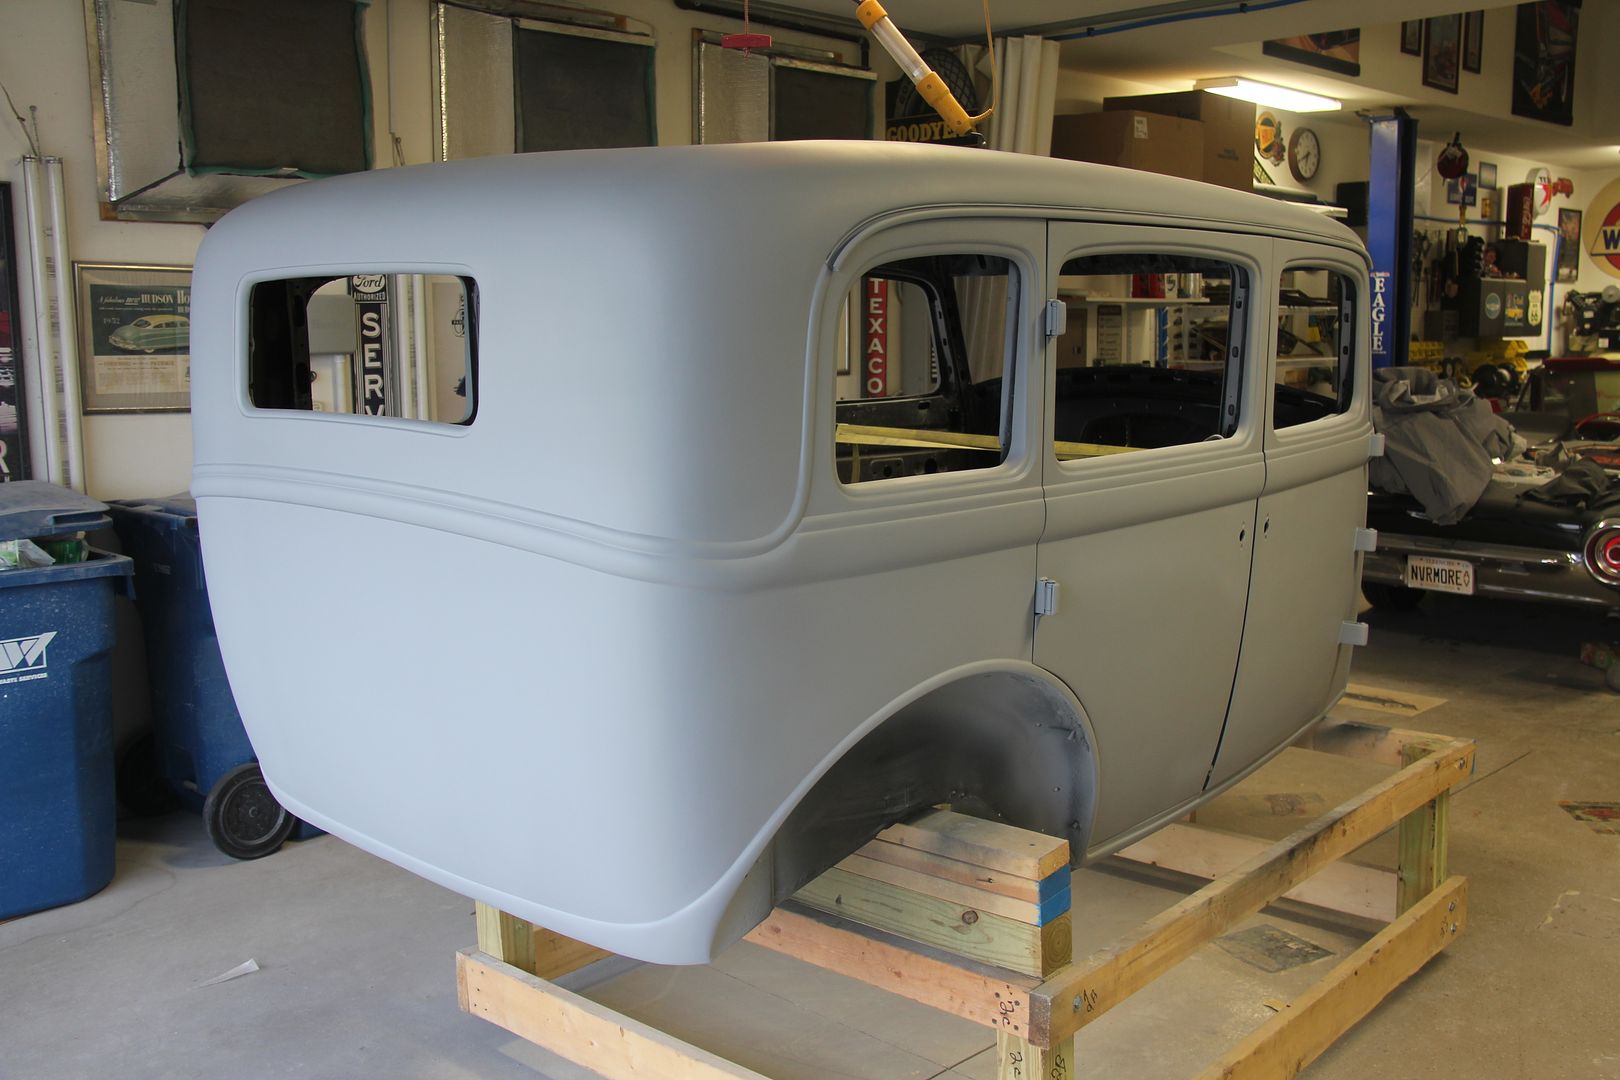
Work on the body continues. It's been a slow and sometimes painful process. As I mentioned before, we have decided to go with single stage black for the final finish. Some experimenting with the hood sides yielded very good results.
We have what I hope is the last application of primer. One corner of the lower body needs a little work, then everything will be guide-coated and sanded in prep for the color coat.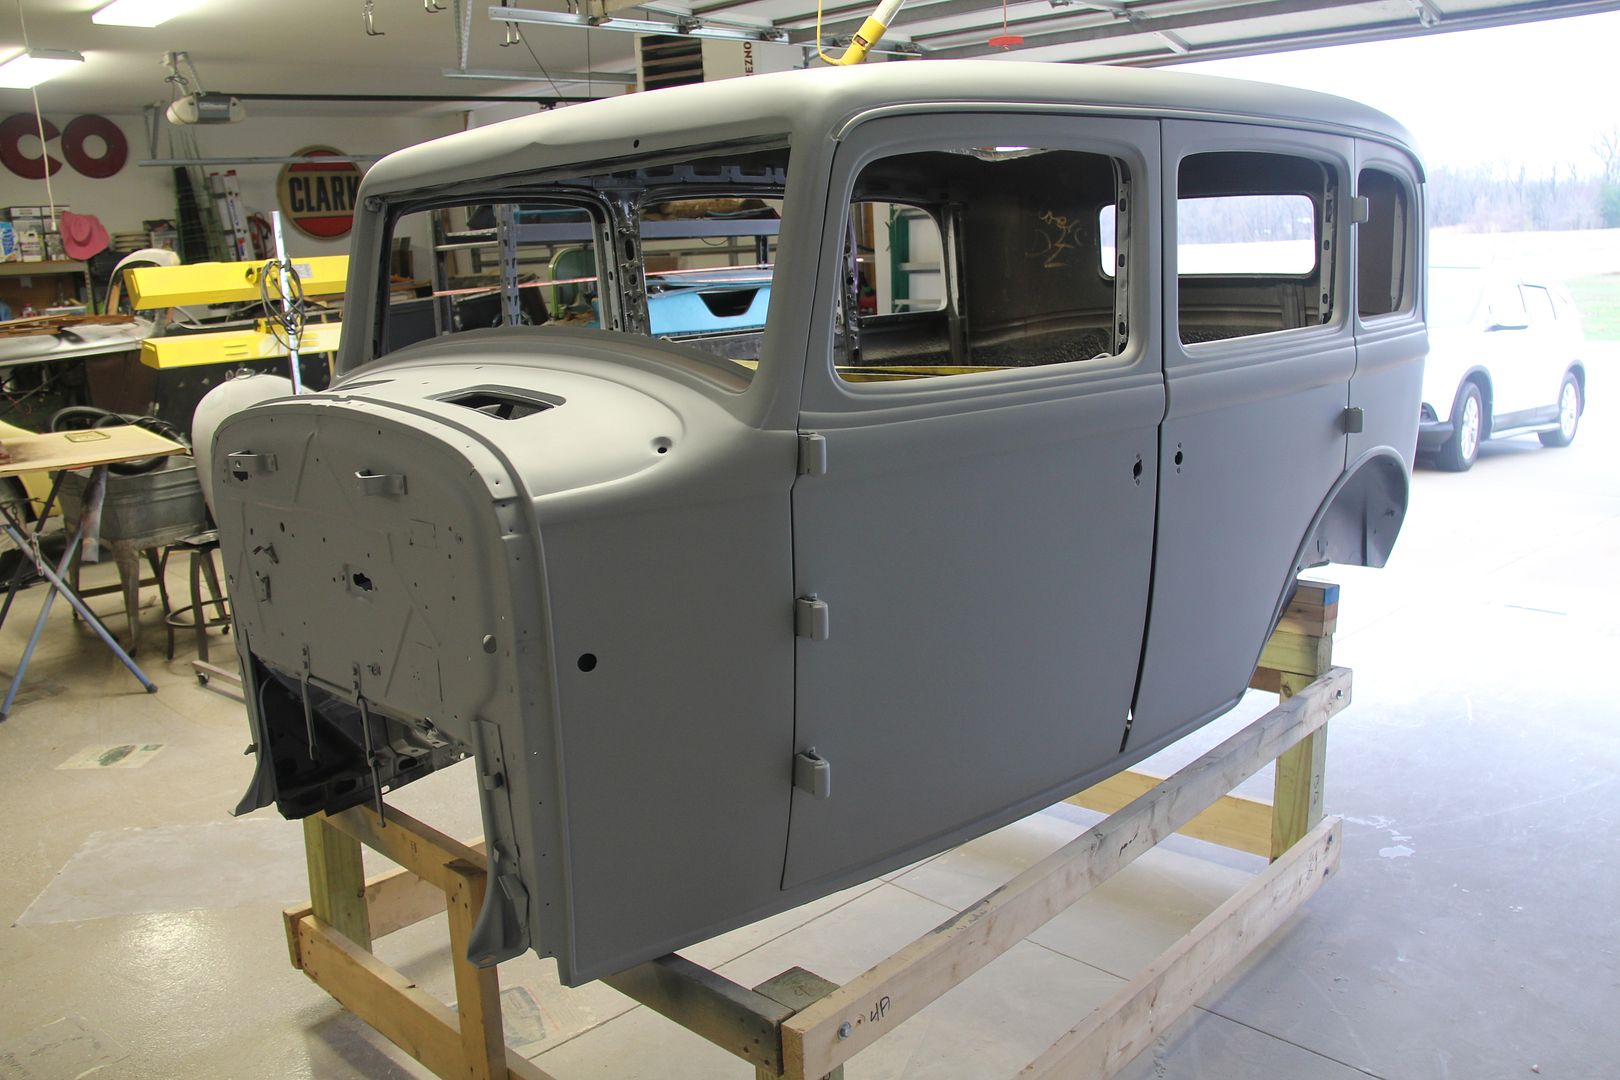

-
Man, that looks great! I wish I was that far along.


rear axle questions
in Dodge & Dodge Brothers
Posted
I think your rear axle set up is similar to my 32 in that the bearings are on the axle and the races are inside the axle housing. In my case there are back to back bearings on the axle and an inner race about three inches inside the axle housing and an outer race flush with the end of the housing. The outer race came free by putting the brake drum back on after I removed the backing plate and outer axle seal. By putting the hub/brake drum on loosely and giving it a couple of sharp tugs, the outer bearing race came out. I could then pull the axle, with the bearings attached, free. This left the inner race inside the housing. I rented a puller from a local tool rental shop that still has lots of old tools for rent. It was a three claw puller with a slide hammer attached. The jaws faced outwards and could be locked into position. Then a few good slams with the slide hammer and the race came right out. You're going to ruin the inner seal in the process. I just did a search on the net and couldn't find anything like it for sale, not even a picture of one. A rare bird, apparently, but the only tool I could find that worked.