


1910Hupp
-
Posts
268 -
Joined
-
Last visited
Content Type
Forums
Gallery
Events
Posts posted by 1910Hupp
-
-
Jeff Both the crankcase and the cam plate are repairable . Cast Iron weldng is difficult but if done by some one who knows what they are doing is very sucessful .
Worse damage on my engine has been sucessfully repaired . The secret is preheating prior to and slow cooling post welding . my repairs are invisable
The secret to doing the camshaft bearings is to wrap the journals in newspaper prior to set up . When you pour the babbitt the newspaper carbonises and gives you perfect clearances.
The other way to do it is to coat the journals with soot from a smokey acetylene flame but the newspaper method is much easier, more accurate and works much better
Watch the nuts on the rod bearings -Its mine and others experience that they tend to work loose over time -The reason for the "leg out of bed" - When I shared off magneto drive of my camshaft and stripped it down we found that after 3000 miles post rebuild the rod nuts were finger tight and the camshaft had a significant bend it it -efforts to straighten it resulted in two short camshafts ! A new camshaft was made and Installed -hence the advice above- Karl


-
 1
1
-
-
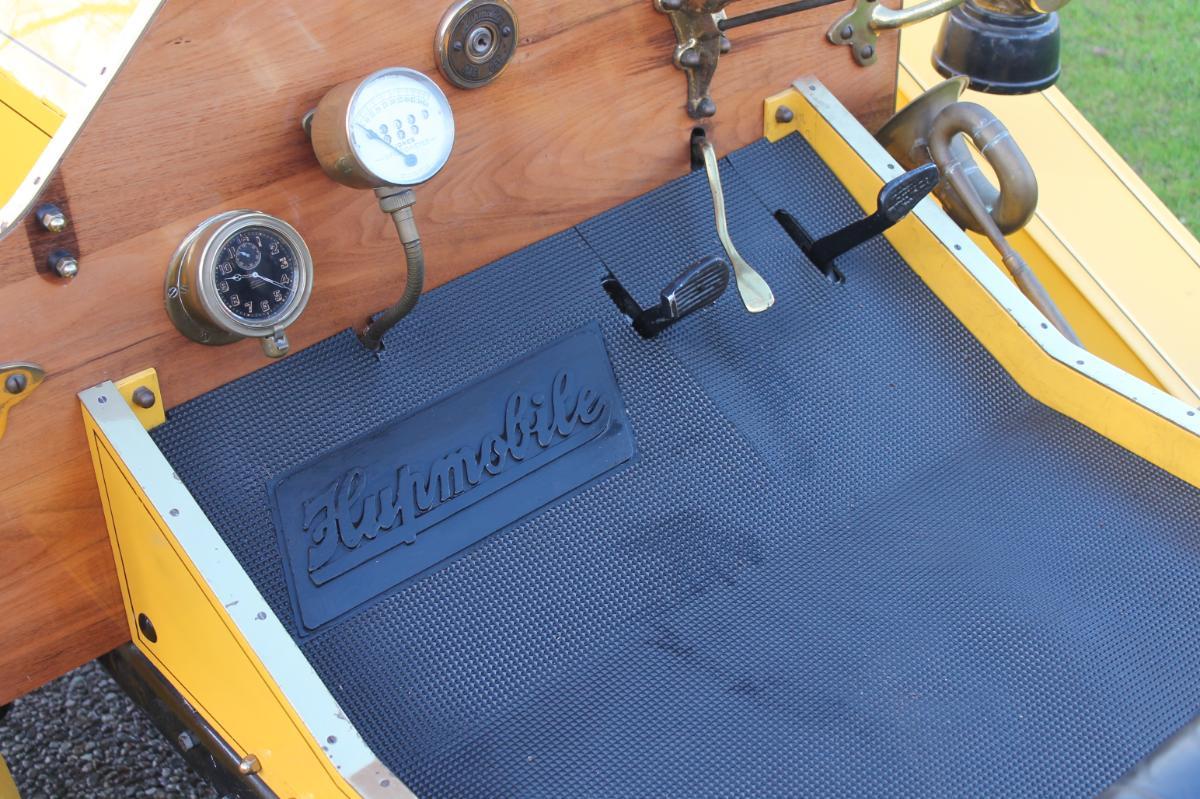
Jeff I used Devcon flexible 80 Urethrane Putty.
I made up a metal mould on a CNC machine . The I placed it on the the mat marked its edges and then chisiled off the pyramids in that area .
Then I coated the area with Devcon FL-20 primer which ensures adhesion of the Putty to the mat . Then I put the mould back in place and treated it to a good spray of canola oil on it and the surrounding mat
Then packed the mould with The Urethane putty and Inverted it on the area of the removed pyramids . Urethane oozed out everywhere . It was weighted and left for 24 hours. Thanks to the canola the mould realised easily and the over flow did not stick on the mat where I didn't want it
-
1
-
 1
1
-
-
Nice original car -First original mat I have ever seen . I made mine
-
1
-
-
David -I'm glad you got it -Karl
-
There is a Model 20 engine on Ebay currently
I would love to buy it but unfortunately the 12000 miles of freight for this heavy item makes it unaffordable for me
However someone else on here might be interested
-
Looks nice - Setting up the magneto is a pain -I'm always amazed at how a small change in the magneto drive as you connect everything up changes the timing so much . A tooth off makes a big difference.
They always seem to move for me as I bring the camshaft gear and magneto drive together on the Hup -One day I'll make a jig to hold the drive fixed as i connect -Karl
-
1
-
-
This afternoon I set up a timing light and looked at the flywheel position when fully advanced which is were I run it all the time -I'm getting about 28 to 30 degrees of advance. It doesn't kick back at this setting.
I was taught at a young age how to crank a car by my father -However I see videos all the time of people with their thumb over the crank handle and pushing the crank down as the spin the engine and shudder . As an MD I've seen my fair share of wrist and thumb fractures and they can cause long term problems -
-
1
-
-
Yes the segments referred to are the brass segments .
Hupp has a funny way of setting the fixed timing -If you follow the instructions in the manual you actually find tdc and then continue to rotate the flywheel by about 5/8 of an inch and then you set the magneto up to fire on Number 1 Effectively the ignition is retarded when set up . I have fiddled with variable ignition and set it up as per the instructions but set the variable timing at full retarded at that point .Interestingly it runs best and starts best fully advanced so I just leave it there
-
Mines pinstriped black and of course non original color. Also has buttoned seats ! All incorrect and how i brought it . I have thought about changing it back to "oriiginal" but really 111 years later who ( other than us-and we're debating it ) would really know or care . Just nice to see them out there being used !
-
Simon I spent several years before I found a complete unit and I suspect the complete unit is more common than the parts which would have been discarded as useless and/or unidentified over the 107 years since Breeze went out of business . You should try Stan Howe in Montana who is the guru of brass carb restorers -If anyone is able to help you it will he him. I know he has restored several Breeze carbs including mine and Phils who posts on here. Sorry I have mislaid his contact details but he should be easy to find via an internet search -All the best -Karl
-
Phil -What did you do with the patterns for casting the inlet manifold ? Now that you have sold your car I would be really keen to make sure that we retain/purchase the patterns for others (who like you and I are mad enough to use the original set up) to use if required . As mentioned previously I have patterns for the exhaust manifold and get get casting done relatively cheaply here in New Zealand (the foundry I use casts parts for Peter Jacksons World War One replica fighter planes ) -Karl
-
1
-
-
I suspect your chances of finding some is pretty low -Just get some made they are not complicated -Karl
-
Quote
We found exactly the same thing when we stripped mine down to replace the stripped cam gear . How the finger tight rod nuts held on and I hadn't but a leg out of bed still amazes me -Karl
-
My starting procedure is essentially the same . However I never use the priming cups unless it refuses to start. I normally flood the carb with the tickler first until gas flows out the bowl and I open the carb by about 3/4 turn until it runs then close it up . I to have little trouble with the Breeze - Probably because Stan Howe rebuilt and adjusted both Phil and my carbs . Before fitting the correct Breeze i was running a Holley NH on a butchered manifold
Designed for the Model T the carb was to big for the little Hup engine and I could never get a good idle but I probably got another 5 mph top speed and quicker pick up -But prefer to be original
-
I had a cam made for mine . Wasn't expensive including manufacture Grinding and hardening at about NZ$1000 ie about US$ 600 depending on exchange rate ,
Of course it would need shipping to the States from here which would probably add another $60 to the cost -Karl
-
I once tried EP oil in the gearbox and severe slippage with this the car wouldn't drive up a slight slope
I went to 30 weight gear oil and it was fine but now i just use 30 wt engine oil and have no problems
Karl
-
On 8/3/2019 at 3:20 PM, Tom400CFI said:
I'm not sure why you're getting gasoline (vapor?) coming from the carb at WOT; it should be sucking it all in. But IMO when you get good throttle sensitivity at low throttle angles and none at high, then that means the that the throttle bore is too big for the rest of the engine. Since the manifold and ports seem large (larger than the throttle bore, and since the cam only opens the valves about a dinky .25" or so...lack of "cam" was my theory. More timing might help, but I worry about stress on the crank.
Tom I think I've worked out the issue . Last night I started the car up to move it to get to some parts . In the dark I could see something like the 4th July going on the front of the magneto . The spark plug wires were shorting out between each other . I suspect this sometimes was causing partial ignition in a cylinder at the wrong time ie with the inlet valve still open and the resulting pressure wave out the inlet manifold was pushing gas out of the carb. Some Insulating tape and there is a much smoother engine and no gas vapour out the bottom of the carb. Karl
-
1
-
-
I agree its probably lack of cam . I do have a recast inlet Manifold on it with the complicated passages inherent in those so hope that there is not an internal obstruction there . I guess i should take the manifold off and check the passages are ok by probing them . I guess I would look pretty stupid if there was some core sand still left in there -Karl
-
Here are some photos of the correct Breeze carb off Stan Howe's website


-
No Its not the correct one -but very close You can see in my photos that the air valve housing is different . I'd always been told that the correct carb was a Breeze H3 but your carb is definitely different to the Breeze Carb on mine and other originals I have seen . Who knows maybe Hup started with your carb and it morphed into my model with a bigger (at least looking) air valve There are no numbers on mine. I will try and get some photos for you of what I and Stan Howe (the guru of brass carbs) believe is the correct carb -Karl
-
On 7/30/2019 at 9:33 AM, trimacar said:
Just a comment on vacuum tanks.
They are really not admired, as a rule, because few take the time to rebuild them correctly.
I won't take credit, my good friend Rob B. Got my '27 Dodge cabriolet back on the road.
The vacuum tank can be dry, and I can turn the engine over six or eight times, wait a few seconds for Mr. Gravity to get fuel from vacuum tank reservoir to carb, and it starts right up.
Go back in time, and your car dealer, selling you the newest Model on his showroom, says, Oh, by the way, if you don't drive your car for two days, you'll have to disassemble the top of your vacuum tank and add gas. Seriously, didn't happen.
The systems were designed to deliver gas, period. Make the original work correctly, and you'll be as happy as the new buyer back when....
I agree David 100% its my pet peeve ! So many times I have been told that the original set up on my vintage vehicles is no good and needs to be upgraded . I've been told this for just about every system you could think of on a vintage car Invariably the person giving this information has a vehicle that has not been restored properly or is relying on someones opinion whose vehicle is also not restored correctly . A case in point this afternoon I took my 34 Ford to run some errands . Its winter here and today is wet and cold . I was travelling at the end of a stream of modern traffic at 30mph on a wet road . The distance between cars was about the same . A car two in front of me stopped suddenly and we all applied our brakes vigorously at about the same time . The car in front of me hit the stopped car I stopped well short of him He had modern Hydraulic ABS brakes I have completely stock standard mechanical rod brakes.. However my brakes have been rebuilt correctly with NOS parts NOS linings which are centred correctly. The Drums are perfectly round and well within tolerance for wear All the clevis are good with no slop The cross shaft is correctly positioned . The rods are the correct length. As well everything is set up correctly and well lubricated . I would love a dollar for every time I have been told that rod brakes are useless and you need hydraulics -mine aren't !
I think we are conditioned to think that we are different or perhaps superior to our ancestors . As you say David when Mr and Mrs Citizen forked out their hard earned depression cash for their new Ford in 1934 they expected it to stop and stop well . If it didn't they would be banging on the dealers door just as I would if my new Lexus didn't do what it was supposed to .
I do lots of miles in my cars and shamefully admit I brought into the upgrade myth and changed (or accepted changes by previous owners ) from original in my early days of vintage car ownership. However over time I have reversed all the changes I made and with good quality NOS parts my cars perform better and are more reliable than with any of the "upgrades".
-
On 7/29/2019 at 2:05 AM, Ben Perfitt said:
“Never seen another with the Breeze Strainer”, and, “I think they are hard to find”...
WOW.
I had to go back to, let’s see, 1911 to even find reference to one. (Is the carb a Maximus?)
No the correct Breeze H3 for the car .
-
1
-
-
This is my one
Had a windshield as per my avatar but given the limited running was more fun to go with the monocle windshield Probably less drag as well !
Never seen another with the Breeze Strainer-Karl


-
2
-
1
-
-
Tom Nice to know some one else has the same problem . I have still fabricated a new bell crank linkage which gives me the full range of butterfly movement without the previous binding- although I have no expectation of lightening performance .
I think the valve lift is the issue. as I've noticed at full throttle there is a heck of a lot of gas vapour pouring out the bottom of the carb. My theory is all the vapour the carb is producing can't get past the inlet valves and hence blows back . I missed a trick I should have made a slightly higher lift camshaft when I fabricated one to replace the broken one !


1911 hupmobile 20 restoration.
in Hupmobile
Posted
Jeff - you do nice work -Even though I made my own mat -I did it with very limited knowledge of what was original -Hence I would be keen to buy one of yours when they are done
Regards Karl