


jframe
-
Posts
979 -
Joined
-
Last visited
Content Type
Forums
Gallery
Events
Posts posted by jframe
-
-
2 minutes ago, 1965rivgs said:
Mark,
Not a good idea to run the power steering pump without fluid, especially a rebuilt pump with no residual fluid which is "dry".
You might want to fill the pump and let it sit overnight in hopes some of the air will migrate back to the reservoir while you`re snoozing.
Tom
Tom, I actually ran the car without the ps belt installed just to check for water leaks from my initial problem having to replace the water crossover. Put the ps belt on when I got home from work, put fluid in it, elevated the front wheels and started it up. Worked the wheels back and forth a few times, and everything seemed ok. Actually overfilled a tad, but drew it out with a turkey baster down to where it just covers the pump. Drove it for the first time since Christmas, and everything seems up to snuff. Hopefully get more wheel time this weekend. Thanks to you and all the others for helping me out with your knowledge and info; it does not go unappreciated.
-
2 minutes ago, NTX5467 said:
Drive belts are NOT absolute in length . . . depends on the WIDTH of the belt for the stated length. In many cases, GM used a .380" wide belt in production, then the parts book could mention the same length with a .440" wide belt to replace it. Techs ALWAYS brought the parts book-spec'd belts back as "*#^$^$U don't fits". Saying "That's what the book calls for" did not cut it, either!
After my first round of that, I learned to match the width and length, not just the length.
IF the OEM production belt is a .380" belt (which sits lower in the pulley groove), to go to the wider .440" belt, ADD ONE INCH to the .380" belt length.
IF the OEM production belt was a .440" belt (which rides higher in the pulley groove), to go to the narrower .380" belt, SUBTRACT ONE INCH from the .440" belt length.
Using that rule of thumb, I had zero technicians who brought back "don't fit" belts.
Perhaps that same issue is causing the issues you are encountering?
From my experiences,
NTX5467
Ended up using a one inch longer belt that is just a bit wider as well. Had to do as Tom suggested above and work them on the pulleys, but once in the grooves, I had a little adjustment to tighten them. Got the car started and warmed up for the first time since Christmas, and so far, no leaks from the replacement water crossover, and the Alan Grove a/c bracket really fits the Sanden compressor well. Need to get the power steering pump filled and bled and get the belt on it, but I wanted the car running first to check for water leaks, and to be able to back it up just a bit to get my floor jack under it so I can get the front wheels off the ground to bleed the pump. Getting closer, hopefully.
-
 1
1
-
 1
1
-
-
As usual, something always goes wrong at the last minute, lol. Alan Grove says to use 62-62.5 inch belts with their a/c brackets, well you can see this is WRONG. Went to three different parts stores; nobody carries one an inch longer, so I had to order, and hopefully it will fit. Car's been down over a month, and I was chomping at the bit to get it cranked tonight and check for leaks, but not to be.

-
Finally getting this car back together after my water crossover replacement. Had the ps pump resealed; what is the best bleeding method, or just follow the service manual? Never have bled one before so I am a newbie at this.
-
On 12/14/2022 at 6:29 AM, Machine Gun said:
I've never wanted a show-quality car, or a "perfect" car for a few reasons. First, I never had the money to farm out restoration work, nor do I have the skills to do paint and body work myself. Second, I don't have the patience to lay up a car for years while I work to get it on the road. Finally, and perhaps the most important reason is that my enjoyment of having an old car comes simply from driving it. My car needs to be safe, reliable, as original as practical to maintain safety and reliability, and preserved from (further) deterioration. Now the car has to be reasonably presentable to start with. I don't want it to scare children or serve as a visual substitute for ipecac.
I take my Skylark everywhere: the supermarket, cruise-ins, church, Route 66, etc. And I don't park at the farthest, most desolate corner of a parking lot...I park among the plebeians. The closest to perfection I want in my car is for everything to work. If the car has an accessory that's not working, I have to fix it, regardless of whether I will use it. It's an OCD thing. I honestly appreciate and applaud those who have the desire, skill, and means to bring their cars to their standard of perfection, but I'm not sure that I'd go that route even if I could.
This makes perfect sense to me as well. My 65 Riviera gets driven as often as possible. Been down a month with a broken water crossover, and all the accessories off the engine to replace it. Buddy of mine says I need to make sure and clean the block and heads, and repaint them before I put it back together. I told him there was no sense in that because I'm going to drive it just as often as I always have. I did repaint the brackets and water crossover and so forth while they are off, but I just don't get degreasing the block and repainting a bunch of stuff that gets covered up by the accessories anyway. The car really doesn't look bad under the hood at all, it's just not PERFECT, and if it was, I wouldn't drive it, and what is the sense in that?
-
4
-
2
-
-
11 hours ago, XframeFX said:
I too used the 2nd pole of an SMP Blue Streak PS133 oil pressure switch to energize my electric choke only when the engine is running on a dedicated circuit. I don't see any boot, would be a nice touch.
Go by that Tee illustration only. You want three 1/8-27 NPT threads, 1 nipple and the other two female.
Correction: Ray is using a 12SI Alternator. However, what Sanden AC Compressor would that be and what Alan Grove brackets?
I couldn't get my console and glovebox door to fit so nicely😎
Oil Switch schematic:

The Sanden compressor on mine is a 508. I think that other numbers have superceded this number, like an SH type number or something. Laid mine up in the bracket when it came in and it seems it will fit perfectly once I use the supplied hardware and spacers. Best part is that it eliminates the rear bracket that goes over the valve cover and all the long bolts/bushings that I had to use to make the compressor fit, and it also eliminates the brace under the factory bracket than ran from it to the motor mount bolt on the block.
-
1
-
-
On 1/26/2023 at 2:23 PM, RivNut said:
When you look at the manifold you’ll see that one of the outlets has a wider casting than the other. As Tom said, inserting the bolts into the manifold will tell you which bolts go where. You’ll want the longer bolts in the wider end.
Yes, I see that now, makes sense. What I am wondering now is that I have to put my ps pump and brackets back on when my friend gets done with the pump. I think the water crossover has to go on first because I can't drop it in with the front ps bracket in place; it gets in the way. Would it be possible to go ahead and seal the crossover up with the new o ring and gaskets, and simply just remove the bolts when I'm ready to put the accessory brackets back in place so I can sandwich the ac and ps brackets back where they were originally? I know lots of dumb questions, but this is as deep as I have had to go in this engine and I really want to do it right. Just don't want it pouring coolant when I get done lol.
-
Another dumb question: the water manifold has two different length bolts. I can't remember if the longer ones go on the passenger side or driver's side. Thought it was the passenger's, but I'm not 100%
-
On 1/23/2023 at 10:18 AM, 1965rivgs said:
Mark,
I would suggest you start with a method to remove the P.S. pulley before using a gear puller. If you notice on a typical, later model power steering pulley puller tool, the tool applies pressure to the hub of the pulley by installing in a groove in the hub, not the outside diameter of the pulley. This is because the pulleys are stamped steel and are not strong enough to withstand substantial pulling force on the outer perimeter of the pulley. P.S. pulleys, including the nailhead, are just stamped steel and very easily bent.
If I encounter a stubborn pulley, I use two pieces of "one by" behind the pulley and suspend them and the pump over a small metal shop can. You want whatever you use to back up the pulley to be wide enough to provide a flat surface for the edges of the pulley to bear upon, and to get as far inside to get close to the hub of the pulley if possible . Orient the pulley "up", and with the nut loosened until the face of the nut is flush with the end of the shaft, tap on the nut/end of the shaft with a small dead blow hammer or a small brass hammer, to free the pulley from the shaft. Short, sharp blows are the order of the day here, nothing heavy. On a rare occasion, I need to apply a little heat from a small MAP gas torch to the hub of the pulley to break the bond between shaft and pulley. If you dont have one of the above mentioned hammers, a small piece of wood over the shaft/nut will protect the nut and threads so as to use a typical hammer.
Between my own and customer`s cars, I`ve probably used the above method 75 or 100 times with success, as resealing the pump assembly is a very, very typical repair. Also very typical, is a request for a straight power steering pulley from a member who has bent theirs, attempting removal. I have sold quite a few!
Also, I have rarely encountered a bad power steering pump on these old Buicks. If your pump was producing pressure and was quiet, the reason for your leaks is most likely the shaft end seals and/or the orings which create a seal between the pump and the reservoir. The reseal kits are very inexpensive...but removing the reservoir from the pump assembly is for another post!
Tom Mooney
Tom, your trick worked like a charm. Few whacks with my dead blow and off it came. Got a friend that's going to put a reseal kit in for me, since I've never done it and I think this pump will be fine. Got a water manifold today from Matt Martin that looks absolutely cherry. Thanks again for the pulley tip, now to get this thing back together and hopefully not leak from every pore lol. Still got to get that ac bracket ordered from Alan Grove; think it's my best bet since it's designed to fit the Sanden compressor and has all new hardware to go with it.
-
14 minutes ago, 1965rivgs said:
Mark,
I would suggest you start with a method to remove the P.S. pulley before using a gear puller. If you notice on a typical, later model power steering pulley puller tool, the tool applies pressure to the hub of the pulley by installing in a groove in the hub, not the outside diameter of the pulley. This is because the pulleys are stamped steel and are not strong enough to withstand substantial pulling force on the outer perimeter of the pulley. P.S. pulleys, including the nailhead, are just stamped steel and very easily bent.
If I encounter a stubborn pulley, I use two pieces of "one by" behind the pulley and suspend them and the pump over a small metal shop can. You want whatever you use to back up the pulley to be wide enough to provide a flat surface for the edges of the pulley to bear upon, and to get as far inside to get close to the hub of the pulley if possible . Orient the pulley "up", and with the nut loosened until the face of the nut is flush with the end of the shaft, tap on the nut/end of the shaft with a small dead blow hammer or a small brass hammer, to free the pulley from the shaft. Short, sharp blows are the order of the day here, nothing heavy. On a rare occasion, I need to apply a little heat from a small MAP gas torch to the hub of the pulley to break the bond between shaft and pulley. If you dont have one of the above mentioned hammers, a small piece of wood over the shaft/nut will protect the nut and threads so as to use a typical hammer.
Between my own and customer`s cars, I`ve probably used the above method 75 or 100 times with success, as resealing the pump assembly is a very, very typical repair. Also very typical, is a request for a straight power steering pulley from a member who has bent theirs, attempting removal. I have sold quite a few!
Also, I have rarely encountered a bad power steering pump on these old Buicks. If your pump was producing pressure and was quiet, the reason for your leaks is most likely the shaft end seals and/or the orings which create a seal between the pump and the reservoir. The reseal kits are very inexpensive...but removing the reservoir from the pump assembly is for another post!
Tom Mooney
Great tip; thanks. I actually happen to have a reseal kit that I bought a while back, thinking I may just get it resealed. The reservoir looks like it may be a bear to remove, like you said. The pump itself is quiet and the car steers well, it was just soaking wet on the bottom when I took the belt loose trying to get the brackets off so I can get the water crossover off.
-
1 hour ago, RivNut said:
To my eye, the o-ring is still in the front cover; it’s just smashed in there.
You were right, got it dug out with a little screwdriver. Here is the updated picture.

-
27 minutes ago, RivNut said:
To my eye, the o-ring is still in the front cover; it’s just smashed in there.
May be right, I just got cold and tired and came inside. I'll check that better tomorrow
-
Got it all disassembled, FINALLY. Got the water manifold off, ps pump off and all brackets removed. Started with a razor blade on cleaning the head surface where the crossover mounts. Quite time consuming lol. Took these pics of the timing cover where the manifold nipple goes in, and to my definitely amateur eye, it really doesn't look bad. Weird thing was, I could find NO evidence of the oring, either in the timing cover or on the water manifold. Odd because the original leak was around the housing gasket, not the nipple. Now got to try to get stuff as clean as I can and wait on parts, get new ps pump, etc. Thinking that Alan Grove ac bracket is the way to go, it has all new hardware and comes with detailed instructions sheet on where it all goes.


-
2
-
-
1 minute ago, gungeey said:
One of these bro
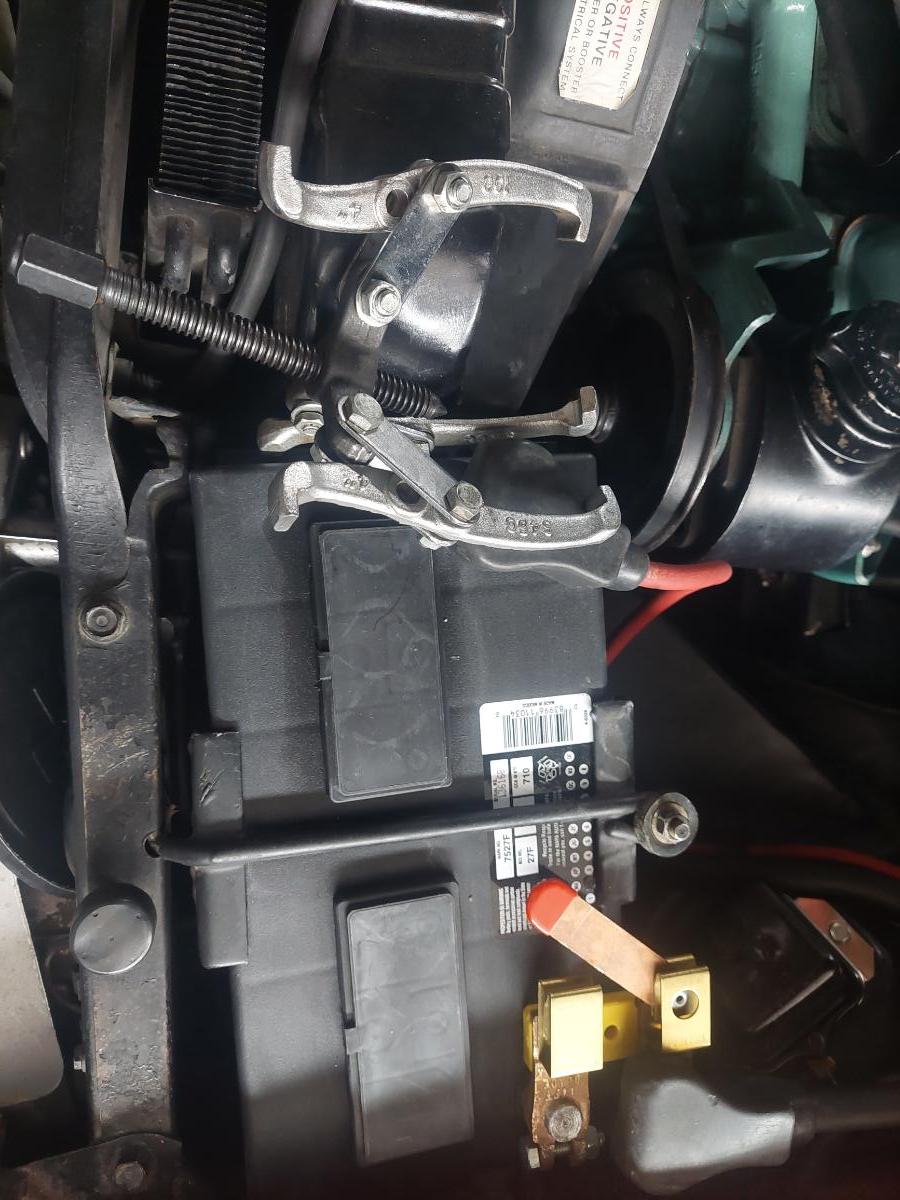
Yep, I see O'Reilly has one in four inch and six inch. Think I need the larger
-
Also replacing a leaking power steering pump in this process. Got the nut off the pulley, how does the pulley come off in the car? Heat and pry bars? Rented a ps pulley puller from O'Reilly and can't see how it would work.
-
Slowly but surely. Got the water pump bracket bolt out without issues. Poured coolant from the hole; must be in a water jacket. Discovered the top tab for the ac bracket was snapped clean off, no telling how long it's been this way. Anyone use the Alan Grove bracket for the Sanden compressor before ona Vintage Air install? Looks like it has all bolts, nuts, and spacers to mount it in factory location and appears to mount the compressor without having to use the support bracket on the rear that crosses the valve cover


-
Going to have to pretty much remove all the front end accessories. Got the driver side to lift up but it hits the p/s bracket where it folds over. Got to crawl under the car and take the brace off the bottom of that bracket to allow the pump to just slide forward some. Tha a/c bracket is held with a head bolt at the rear and water pump bolt at the front. Really kind of spooked to loosen either of those.
-
Just now, EmTee said:
Can you safely get a little heat on the joints to loosen up the sealer?
Prolly so. Most likely need to remove the heater hose off the water pump first. Have also heard to try a putty knife and hammer as well as spraying the area with penetrating oil as well. I mean this thing is STUCK
-
1
-
-
Okay, I got the four bolts holding the crossover on out with no issues; just took some penetrating lube and a cheater bar. Problem now, is that the crossover just won't budge. I wonder if someone has gotten all crazy with RTV in the past when they had it off? I know that this thing has to pull UP rather than OUT to avoid timing cover damage, but does anyone have any ideas on the best way to go about it? Is there a way to try to dissolve some of the gasket sealing the crossover to the heads?
-
Got to looking closer and discovered the water crossover is broken at the hole where the bolt wouldn't tighten. Either yours truly overtightened it or time and age caused it; don't know, but either way, I'm going to have to find one. Prolly why it was leaking to begin with. How difficult is this job? Never done it; it's really only about 4 bolts but do the ac and power steering brackets have to come completely off or is there enough wiggle room to slide the old one out and a new one with gaskets and o ring back in?
-
44 minutes ago, EmTee said:
Are they blind holes? I had an issue with my '67 where someone replaced one of the bolts with one slightly longer than original. That was enough to cause it to bottom-out in the threaded hole on the manifold. Since it couldn't be properly torqued, every time someone 'tightened' the bolt all it did was twist the head, which snapped off when I tried to remove it. Make sure your bolts are not too long for the holes...
Same bolts that were in it when I replaced the t stat this past summer. I may try a shorter bolt
-
When it rains it pours. New housing on with Right Stuff gasket maker. The left bolt hole appears to be stripped; it won't tighten or torque. At first I thought the flange on the new housing might be thinner, but nope. It's a great match. Any ideas before I start thinking I have to replace the water manifold? Possibly chase the hole with the same size tap as the bolt and see if that works? Maybe find a shorter bolt for that hole? Any idea on the thread size? Wish my old man was still around; he was an old time tool and die maker for over 30years, and he could not only tell the thread size by looking, he could also engineer a good fix without replacing anything.
-
1
-
-
Back when I was a young parts man, I had a parts manager at the Nissan store I was at then look at a key in the driver's seat of a car, locked up, and read the code and cut a key. Pretty amazing. Been in dealerships for 29 years, and I still can't do that lol. Of course, now we have an automated machine that cuts the key by the code; just input the numbers and let it do it's thing. Back when I learned, we had a code book and a hand stamp that had 8 (later 10) cuts on it and you hand stamped the key.
-
30 minutes ago, RivNut said:
Someone needs to come up with a way to cut matching grooves into the water manifold and thermostat housing to accept an O-ring.
-
3
-


Bleeding ps pump
in Buick Riviera
Posted
Good point; I will keep an eye on it.