JP75
-
Posts
71 -
Joined
-
Last visited
Content Type
Forums
Gallery
Events
Everything posted by JP75
-
Hi im trying to choose a supplier and the correct headliner material for my 1953 deluxe sedan. I have ordered samples(so small) and its hard to get an idea of what the finished product will look like. So I have been trying to look at pictures on-line and shockingly headliners are not highly photographed (especially on cars that are not restored in mass numbers) and when a headliner is shown there are no details about what they used. I know I'm being over cautious but I want to be happy with what I choose and thought maybe there are others out there trying to figure this out. I'm hoping there might be a few folks out there that have finished their headliner installs that may be willing to share some pictures of their finished headliners and what type of material was used and who made it. Thanks for your help I hope this makes since and this does not seem like an odd question.
-
Hi I am looking for a source for the correct clips or a proven alternative clip to install rear door shark fin belt trim on a 1953 Pontiac 4 door. The ones I have have are long gone or rusted to nothing. Before i start on making something work i thought I would ask if anybody has found a source for the proper clips or has a proven substitution. Thanks in advance for your help.
-
Im asking to avoid the obvious and hoping for a better answer. Can a rod bearing go bad in the first minute or two of running after a rebuild? It ran about 30 sec or so nice and smooth a little throttle to clear it out then a solid knock knock knock at idle. If it is it sounds like one rod. I didn't let it run long. Has oil pressure but not sure how many pounds didn't run long enough to check. Any other ideas of what it could be? I'm pulling the pan off this weekend to inspect. Oh it's a Pontiac straight 8.
-
Hi John the top is going to be the 1953 version of Stardust blue and the body will be Cirro gray.
-
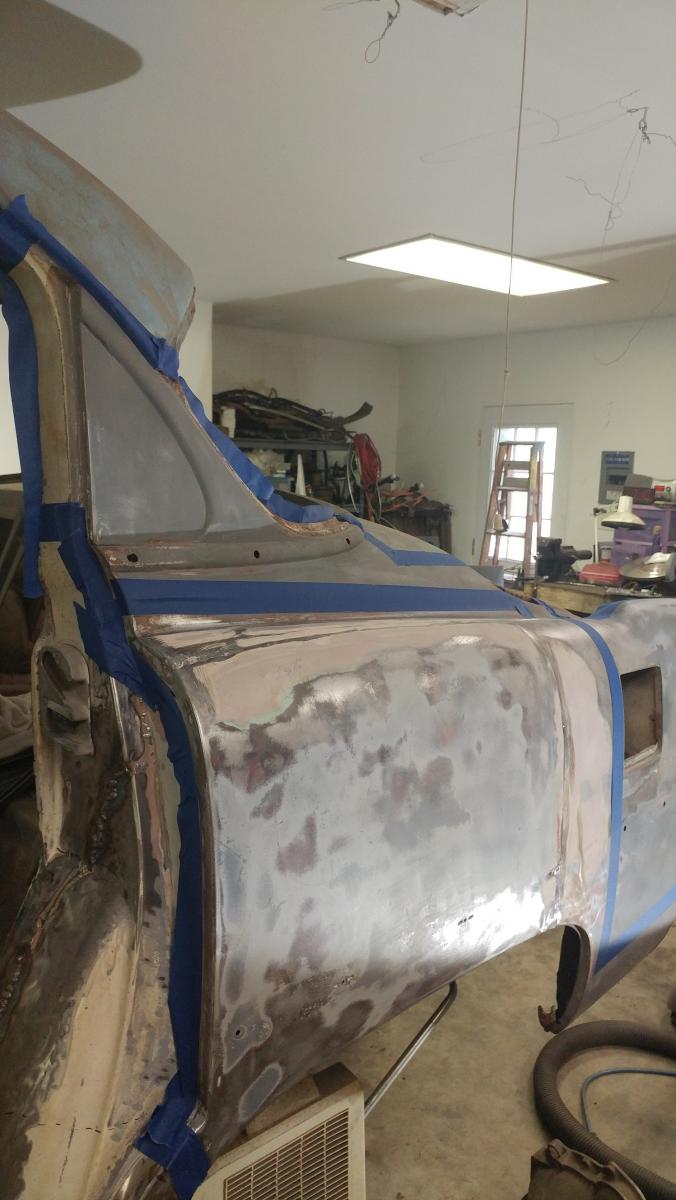
Hi it's been awhile since I last shared but I just crossed a major mile stone. Well a major mile stone for me and thought I'd share. To catch up on the progress i have painted the firewall, put the body back on the frame rebuilt the trunk hinges, aligned all 4 doors repaired the wheel well from the 60s repair (it had bathroom caulk in it) and I just got the rear quarter completely tack welded in place. This has been a huge battle with all the accident damage not repaired properly back in the 60s. Its not perfect but it better than 1" of bondo and rust traps. Just a few more rust repairs to go might get it in primer before winter. Got to have a goal or I'm never going to finish.


-
Major accomplishment today. The body is back on the frame. Now the fun begins😄

-
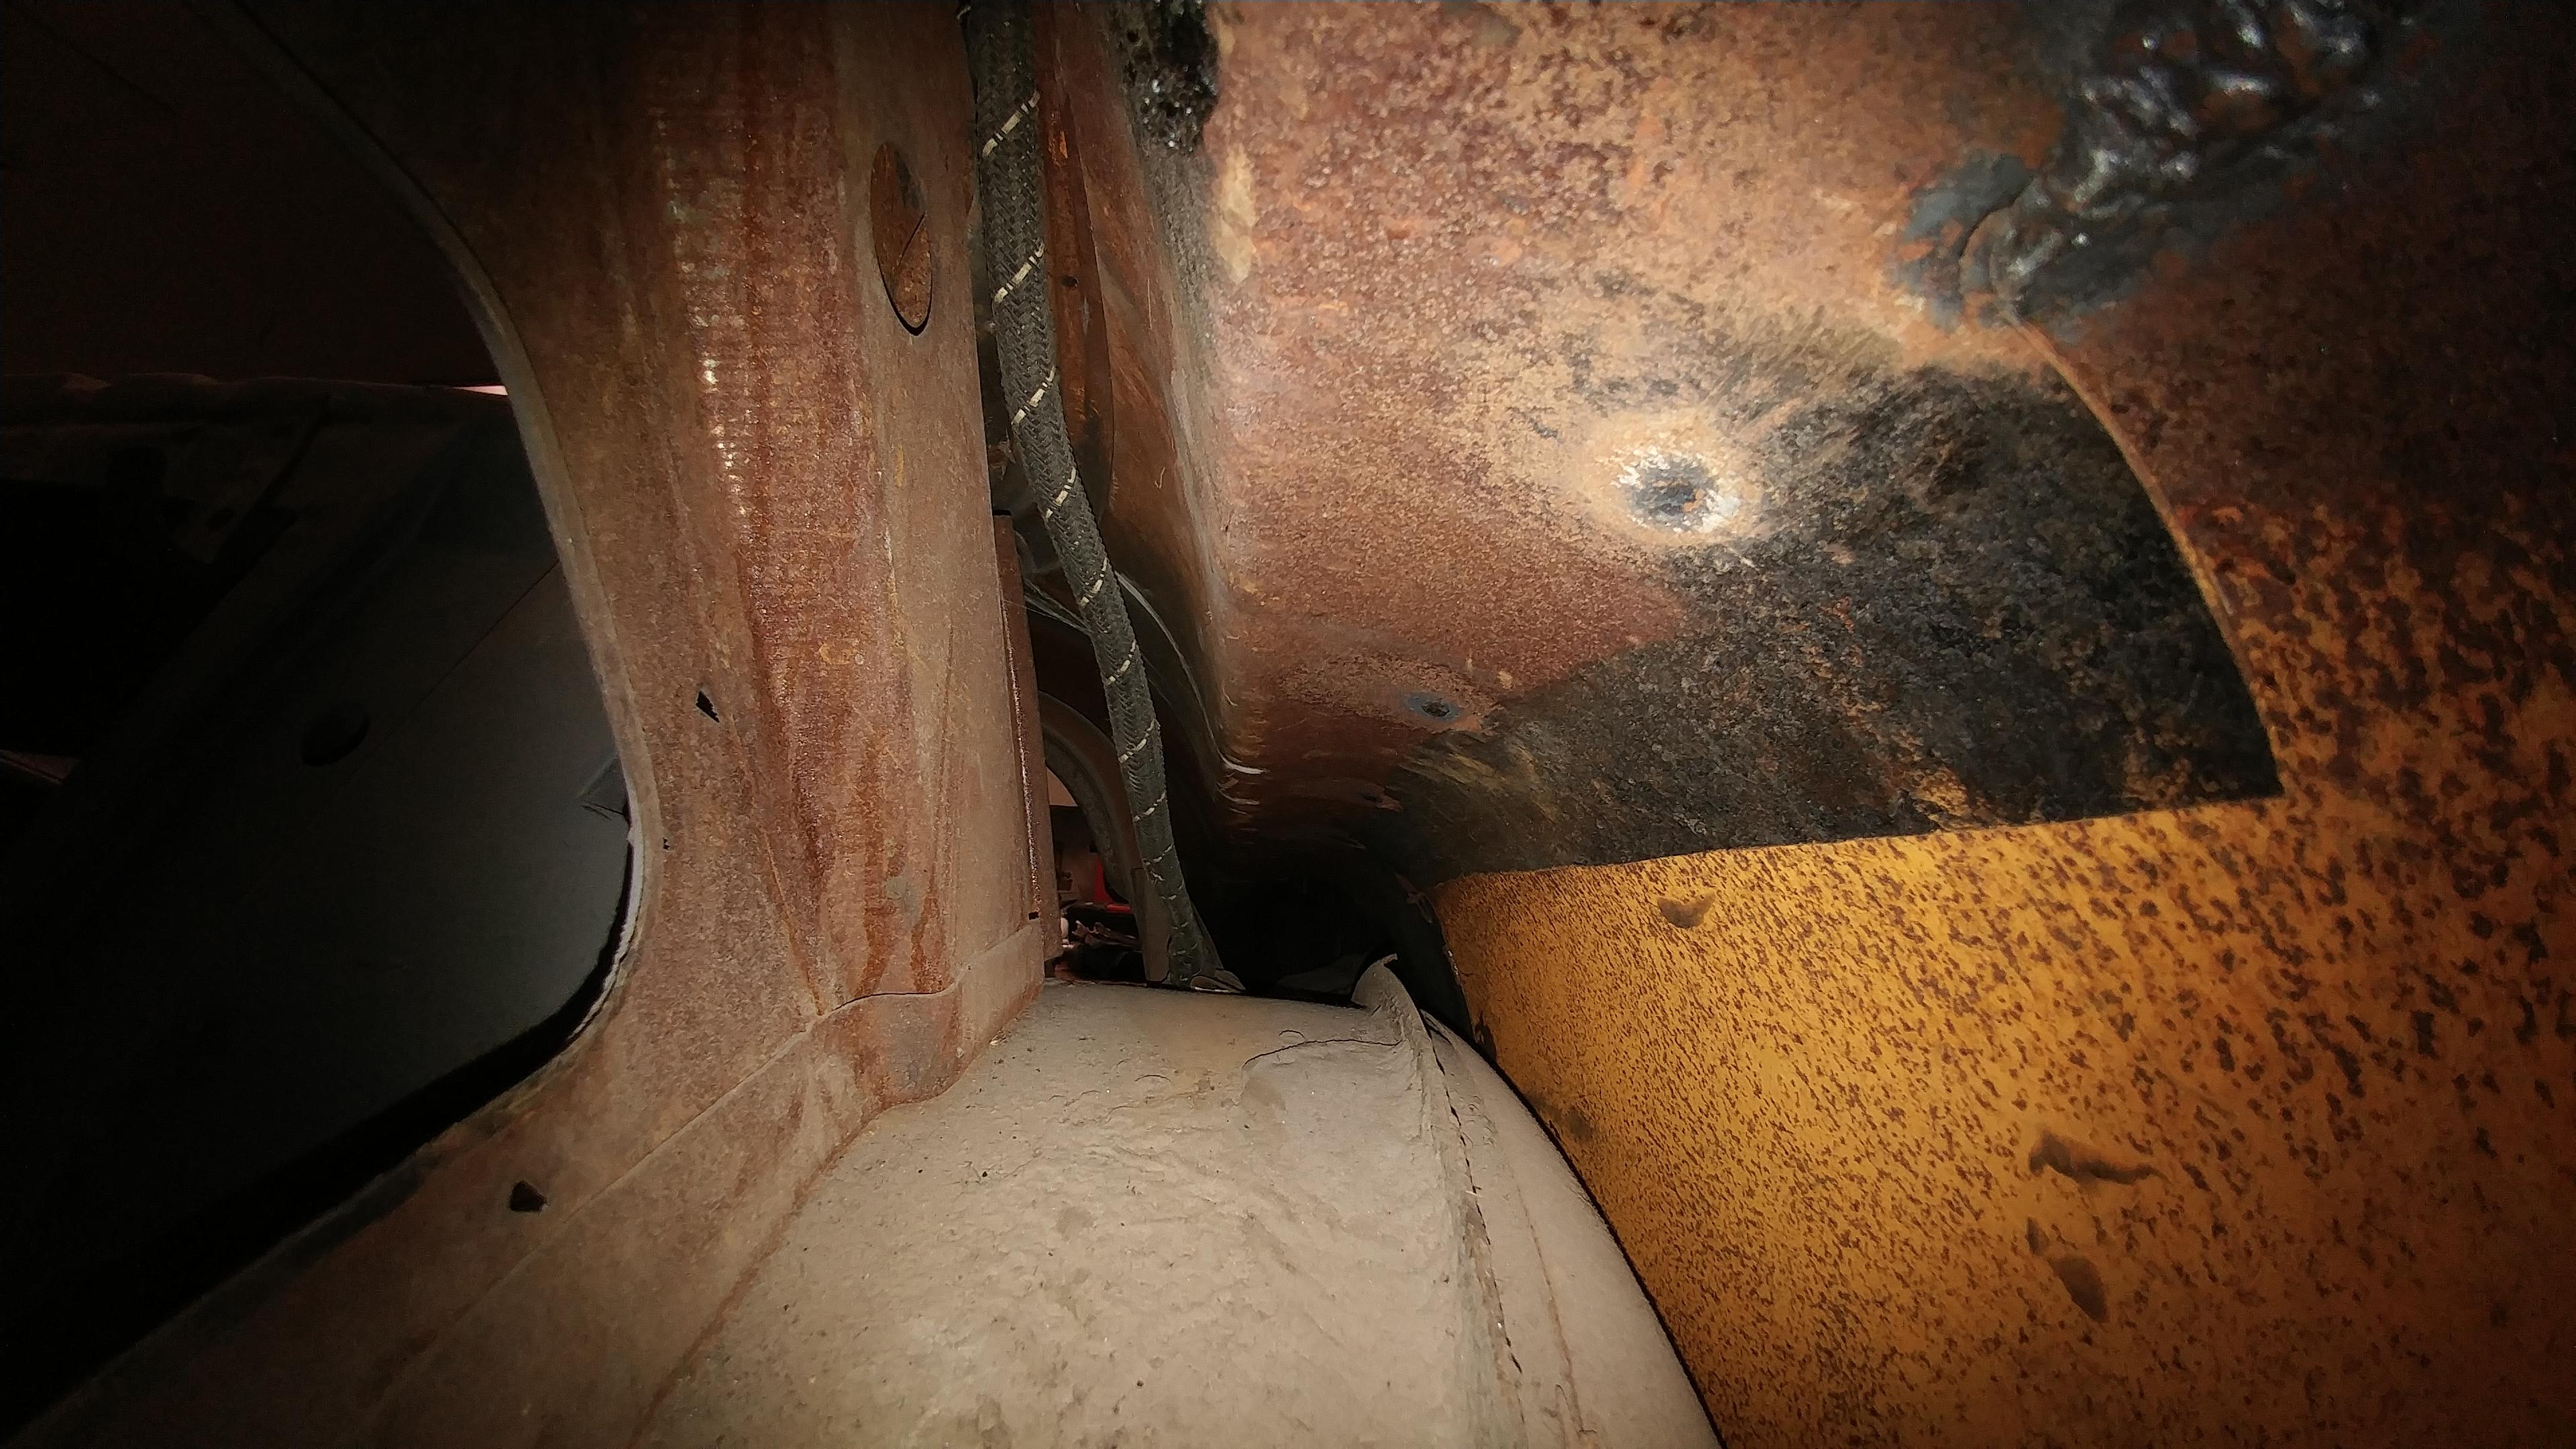
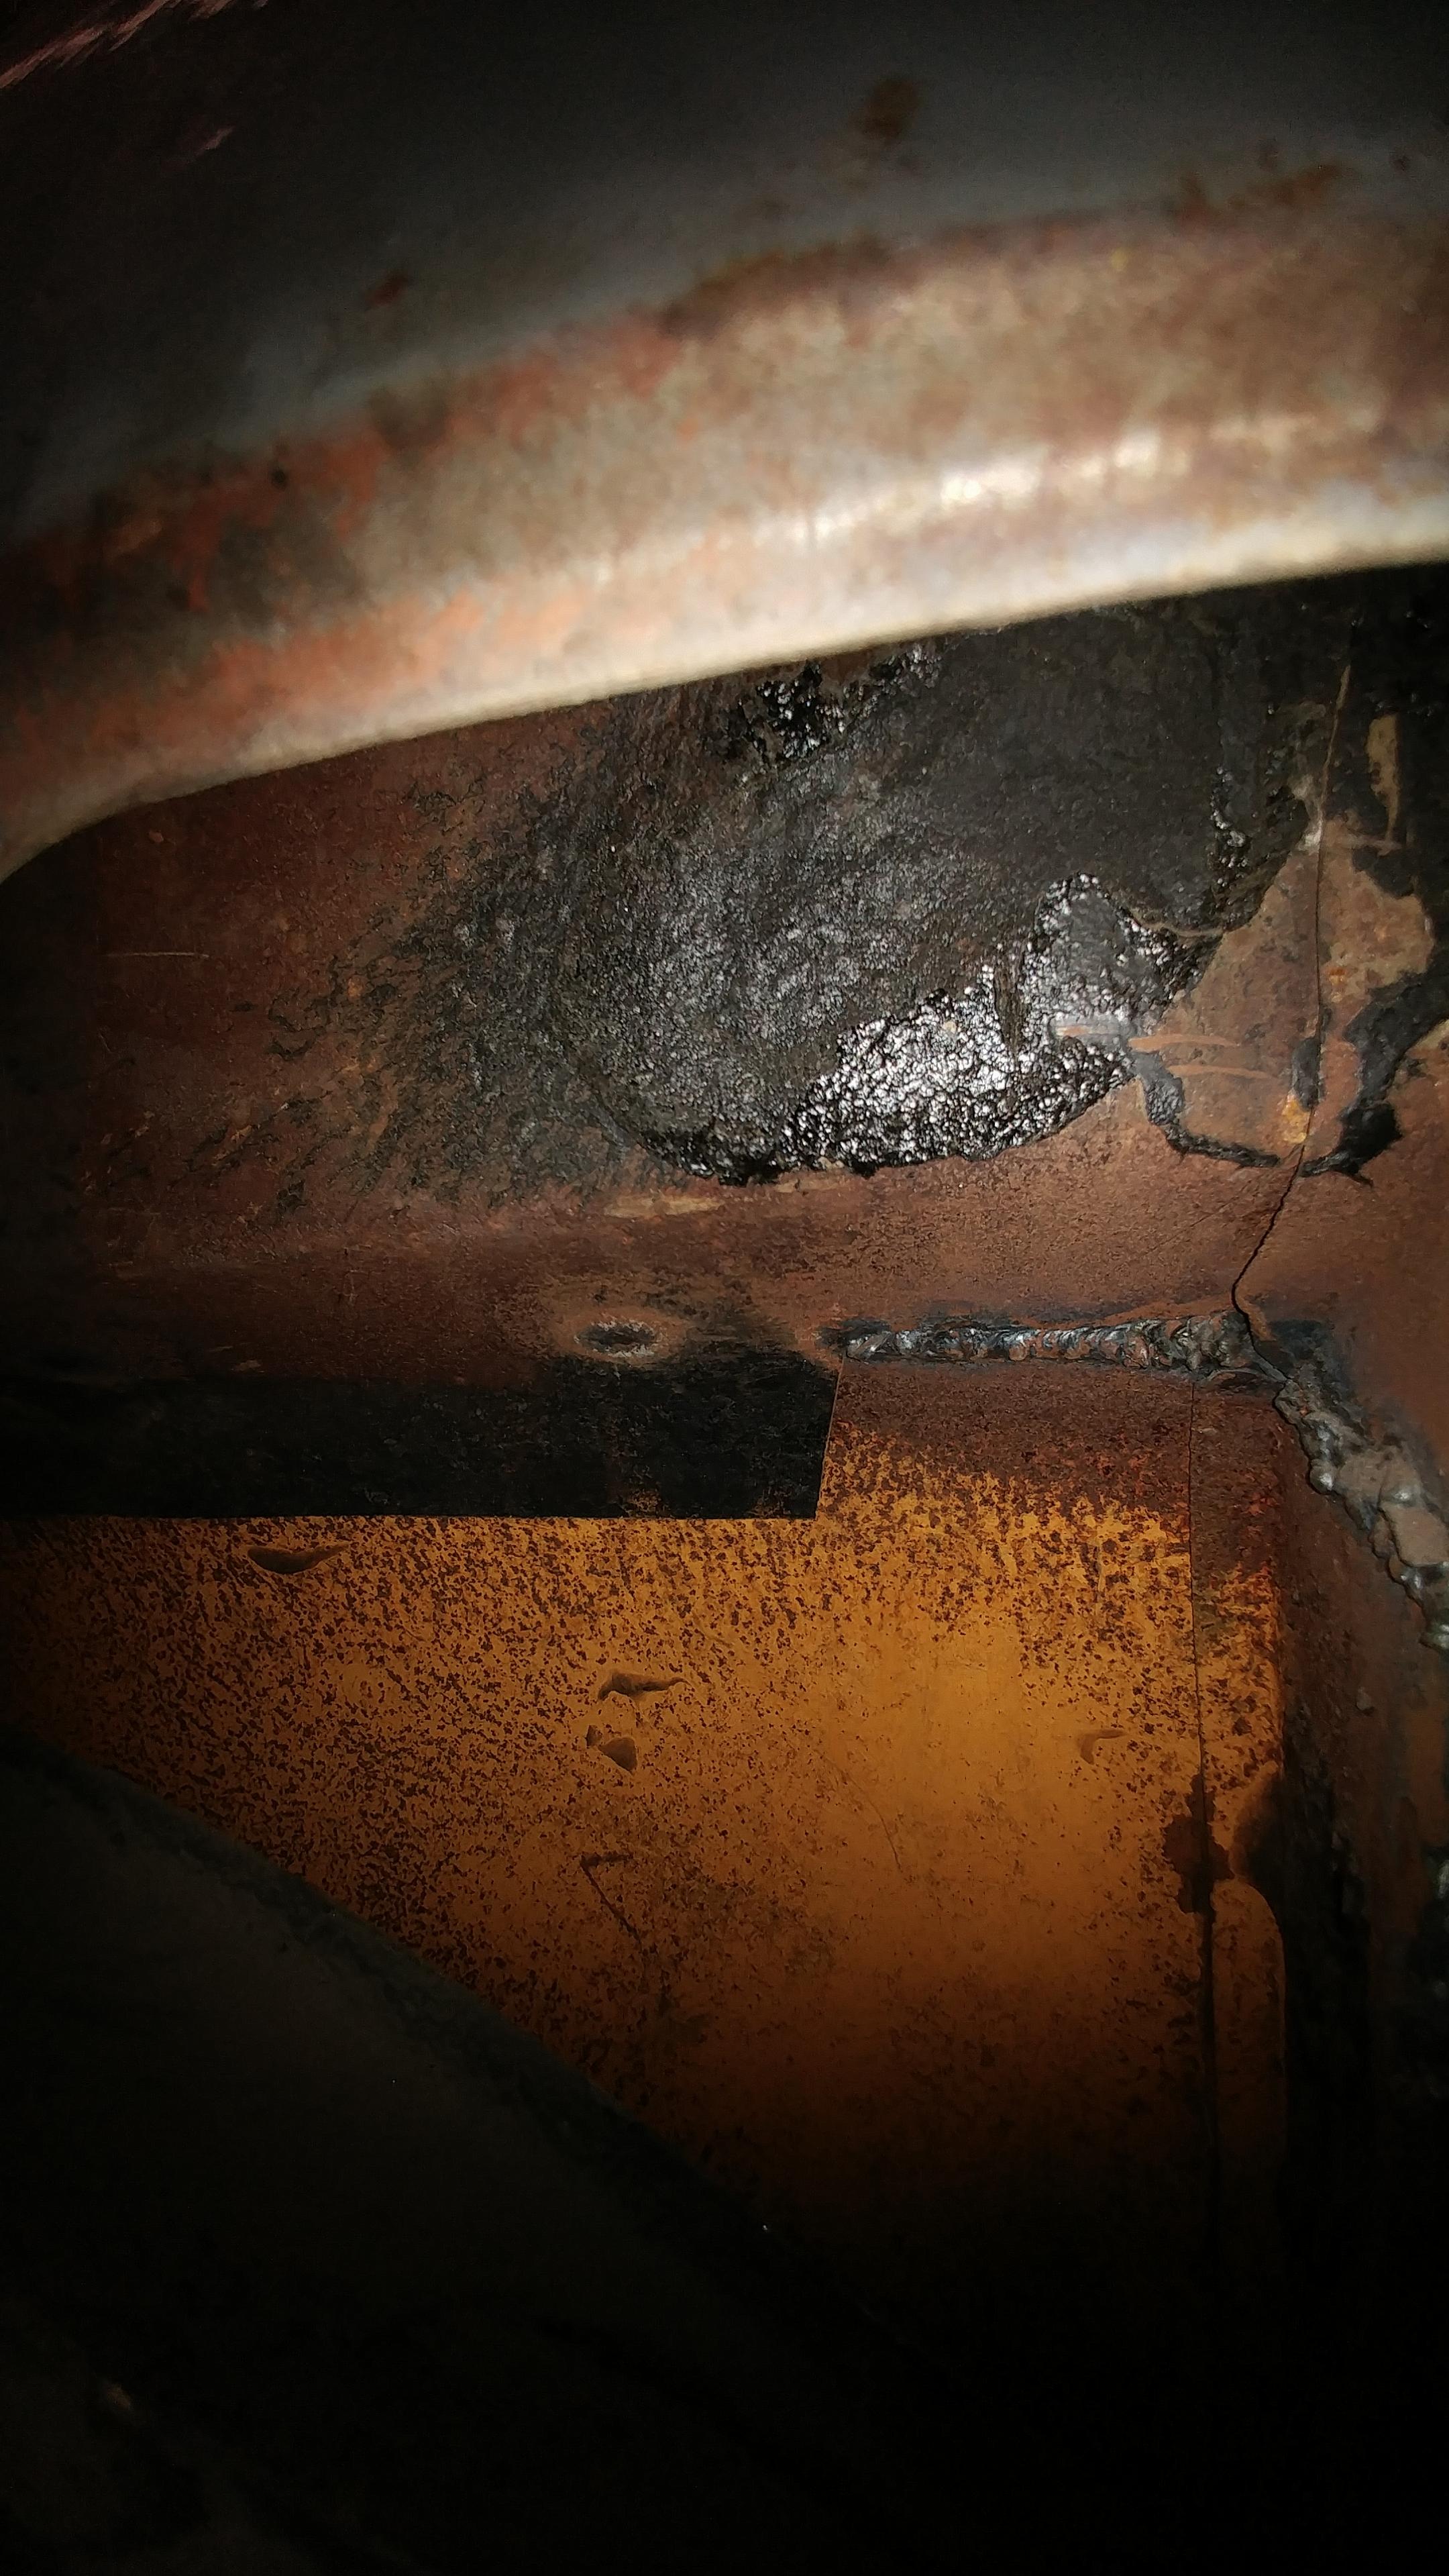
Hi its been awhile since I posted any updates. I have a new focus and drive to work on the car again and I have made some good progress this Spring. This past weekend I got a little ahead of myself and dug out the repair done in the 60's. Lots and lots of Bondo and not a lot of welds. I have a question I would like the advise of the resident experts. I have what I believe to be a factory replacement quarter panel or a good aftermarket one and the question is should I cut it up or try to replace the whole panel? Hopefully the 4 pictures load and you can see the two blue tape out lines. The larger oddly shaped blue tape line is the outline of the actual panel. The smaller straight lines directly around the damage would be the smaller partial panel replacement option. Of course none of this will happen until the body is back on the frame and the rear door hung. Thanks in advance I appreciate any of your suggestions, opinions, tips or advise that can be shared.


-
Hi my question is about the fan belt install clearance between the harmonic balancer and the top of the front motor mount on a 1953 Pontiac 8. Is the belt supposed to freely slip between the harmonic balancer or is it supposed to be a tight squeeze? I put my old belt back on and i had to force the belt between the two. It was no more then a tough push by hand but seems wrong. If it is supposed to slip freely is there supposed to be flat washer between the harmonic balancer and the front engine mount to gain some more room? There was not washers when I removed the engine and had never taken the belt off before. Thanks for your help.
-
Hi Again one more helpful hint that will hopefully save you some grief. In addition to the dropping the oil pan flush the cooling system out as best as you can before you run it. These engines have a water distribution tube that runs the length of the block behind the water pump that delivers water for each cylinder. If the holes in this tube get clogged you will be in a constant battle fighting cooling problems. My engine had less then 50000 miles on it and its water passages were almost completely blocked. Good luck and keep the posts coming.
-
Hi Nice car it is nice to see another 53 Pontiac brought back to life. I am also working on a 53 4 door and I have restoration page on this site if your interested with lots of photos(1953 Pontiac Chieftain 4 door). I agree with Unimogjohn try to get it going and enjoy it. I wish I could have enjoyed mine before I tore into it but,I didn't and it has sat in various states or disassembly for years. The important parts required to make it go are fairly easy to locate there several sites that sell parts for this car. Even though it looks a lot like a 53 Chevy they do not share any mechanical parts and just a few body panels. From the few pics yours looks fairly sold and the paint may even be okay to enjoy and may even hold a shine. You mentioned redoing the chrome yours does not look to bad and may clean up better then you think. There is a lot of it is stainless steel on these cars and will polish up nicely. Can you give us some more details. Is it a straight 8 or 6? Hydra-matic or 3 speed? Oh and more pictures. Good luck and have fun.
-
More pics of the repair done in the 60s. The replacement panel has several inches of overlap and the stick weld recessed and then brought back level with body filler. The edge of the replacement panel shows in the fender opening.


-
Hi again not much progress to comment on I finished the starter refresh and installed it on the engine. However I thought I would share my latest find. I shared early in my posts that the car was hit by a Gray Hound bus in the rear left quarter back in the late sixties. It has been a chore figuring out the poor repair work in the rocker and why the door would not line up and the amount of body filler I have pulled out of the door jamb and found in the quarter has troubled me. I have been watching a rear quarter keep coming up on e-bay for a while and after I scrutinized the pictures as much as possible I finally talked my self into buying it. How often does what appears to be a NOS panel for a 1953 Pontiac show up. Well it showed up today and the more I look at it the more I think it is an NOS panel. Fedex only damaged it slightly at the front of the fin you can see the small buckle in the attachment flange. I think I will be able to straighten it. What have I gotten myself into!!


-
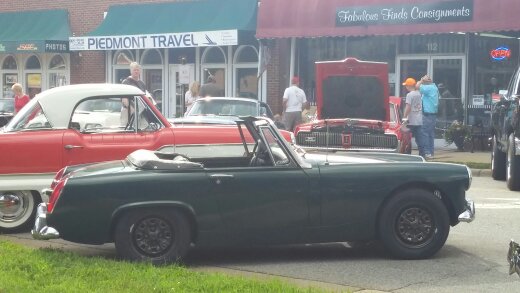
Hi I cannot believe it has been a year since my last post. I am finally back in the mood to share I have not made to much progress on the Pontiac but I have been busy. Last year I really wanted a classic car as daily driver or as close to a daily driver as possible. I finally realized I had the Midget and spent the Winter, Spring and most of the summer getting it back on the road and dependable. I had completed a beginner (no money) frame off restoration in the early 2000's and and spent this year fixing the items I did not have money to fix or did a bad job rebuilding. I went through the engine and gear box again and completed a few other tasks that I had been putting off. That and its first alignment in 10 years got it back on the road for about two weeks. Then one of the rear wire wheel hubs spun. I knew the splines were worn but did not realize how bad. I got lucky it spun and loosened up the nut coming off the interstate. I then took another two months switching it over to steel wheels. I will switch it back to wire knock offs when he budget allows. I am not sure how the pictures will line up but I thought I would share a few pics of the Midget and I thought at least this group would get a good laugh of it sitting next to such a large Nash at its first cruse in. The rest of the pictures are of the small projects I have completed on the Pontiac. Now that the Midget is behaving I have started working on the Pontiac and will hopefully make some good progress in the next few months. Mostly I have been acquiring new grill parts to replace the parts damaged years ago. I still have about 4 pcs to go. So the short update includes installing the the last rear wheel bearing the grease was not dried up like the right side was but it was very thin and starting to leak. The fuel pump was rebuilt and installed, shocks both front and rear, and the exhaust installed. I made a new fuel line out of the correct size tubing I had bought a 3/8 but it just was not right and it bugged me. I have started cleaning up the starter this week. It was full of sand not sure how that happened but I am glad I decided to do this it was working well when I last had it running and could have just been painted and installed. I found the engine green paint on both the ends of the starter and ran out of paint so another can will have to be ordered. I need more for touch ups anyway. Just to be sure does anybody know for sure what the color the body body of the starter should be? I am thinking engine green.


-
Hi thanks for the replies. I was able to get into the garage atic last night and look at all of my glass. The windshild,all 4 doors and the 4 vent windows have the same markings including the E-Z eye mark. I was not able to locate any markings on the rear window. Is this normal for GM in 53/54? I have decided to look for a tinted rear window to match the rest. If any body has a tinted rear window for a 2 or 4 door sedan Chevy or Pontiac 1953 or 1954 that they will sell in or near North Carolina please let me know.
-
I have been finding new storage for some of my parts and I realized today my rear window is clear and does not have the E-Z eye tint like the rest. Is this normal? When the buyer selected the tint was it an all or nothen option? To narrow down the time line I am refering to a 1953 Pontiac 4 door sedan. Thanks for your help.
-
 Hi I am looking for a harmonic balancer for a 1953 Pontiac straight 8. I believe years 1937-1954 are interchangeable and the non power steering part# is 511499. However if a power steering unit is available I may consider it part # 517358. Please e-mail me if you have one for sell. Please send pictures if possible. Thanks jpcaddell@yahoo.com
 -
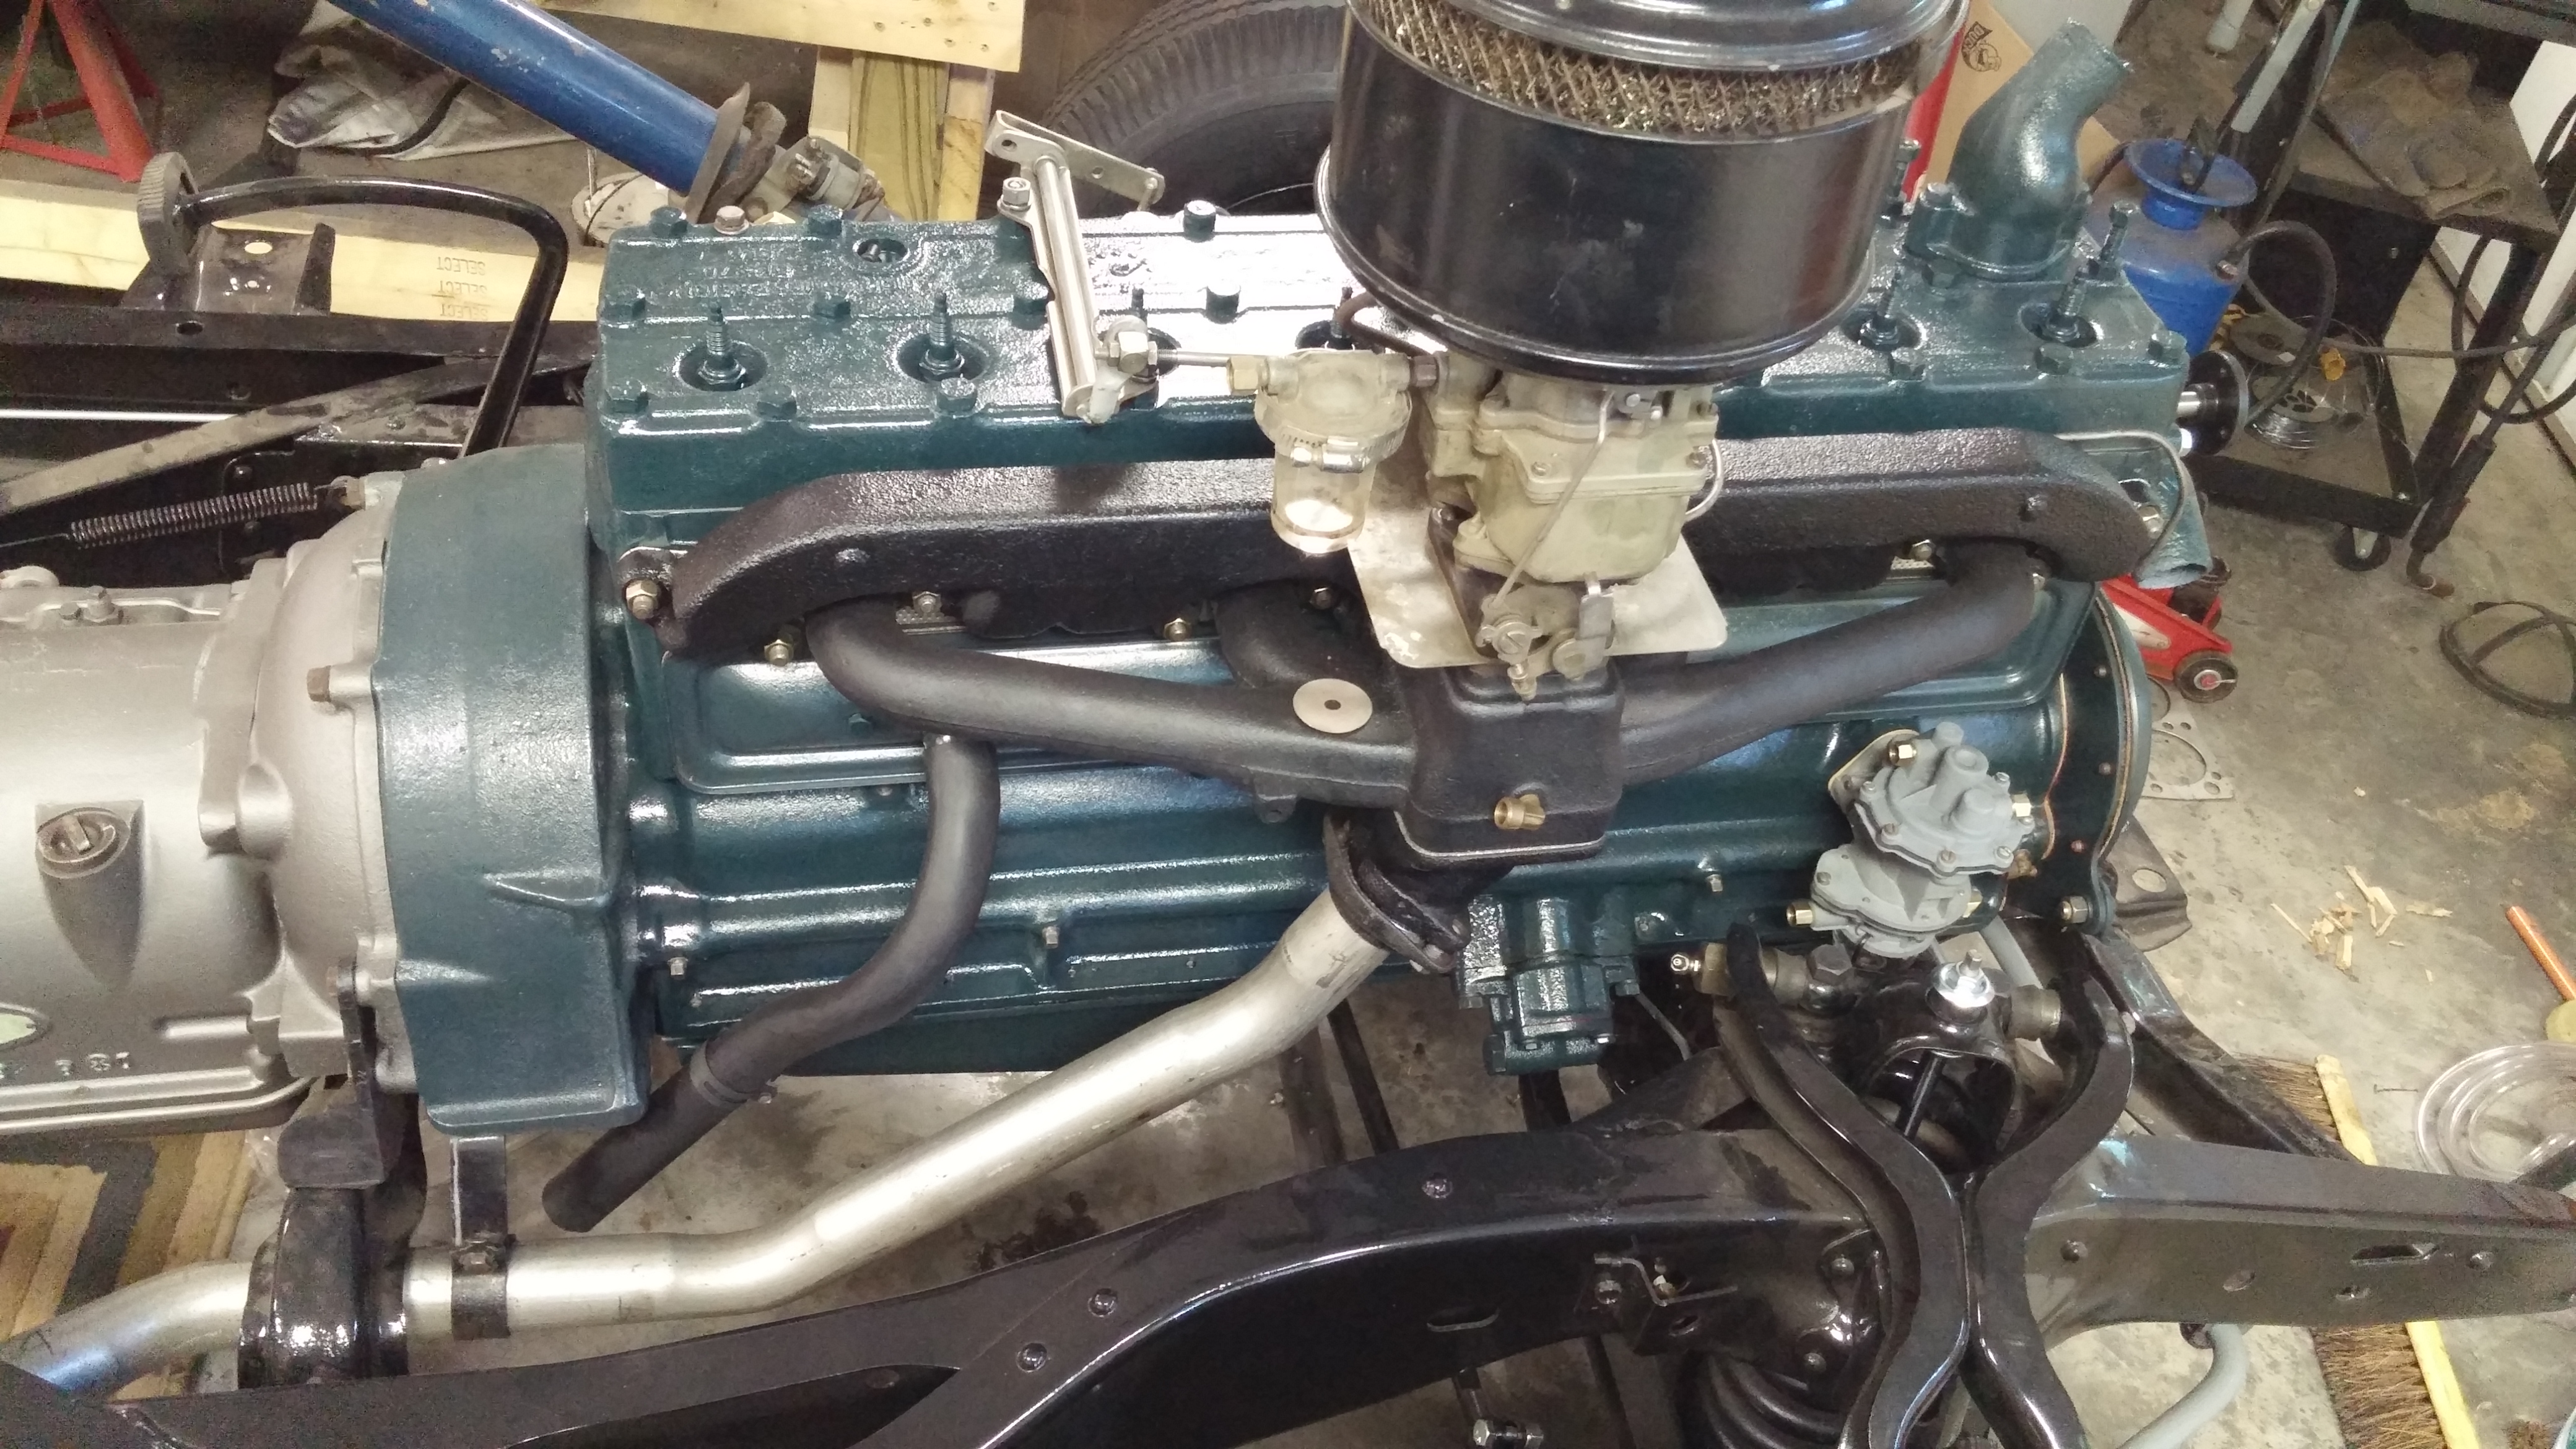
Hi Paul funny you should ask a major mile stone was achieved tonight. A couple pictures of the engine assy. So far the engine has gone together without any issues and what should be the easy tasks have been the most trouble. I got lucky and picked up a 2nd gasket set at the last Charlotte Auto fair. I had to dig into the 2nd kit because I managed to ruin the timing chain cover gasket. I wish a I had a picture to show how the timing cover and front motor mount go together. The new gasket is cork and what I took off was something else (much harder). The front motor mount share the bottom bolt holes with the timing cover and when I tightened the motor mount the first time I squeezed out the cork gasket and ruined it.Bits were cut off. The second one I used some Indian head gasket sealer and took my time and let each step set up and so far it has worked. Also the timing chain was a bare to get back on. I even tried the original chain and speokets with 3/4 inc of slop and it was a bare. If the gears were not lined up just right the cam gear would not slide on. It took an hour to get it on. Almost on slop at all. Dad came over tonight and we were able to set the engine and transmission in the frame. I think he was more excited about it then I was, am. My biggest fear was the gasket between the flywheel and the torus. I was not let down it must have fallen off a half dozen times. We finally got the two units together and did not damage it. I had read it would be a chore to install the 30 bolts that hold the two together but I did not have a problem at all. I just hope it does not leak.


-
Hi everybody it has been awhile since my last update. However this has to be one of the best ones yet. MY engine is back !!!!!!! What started out as a simple freshening up turned into a full rebuild. Now I just have to put it back together. Its freshening up turned into a 30 over bore, new pistons, all 16 new valves, all 16 new valve guides, the block and head decked, the valve seats cleaned up, new cam bearings, and the crank turned 20 thou.


-
Not to much to show on this update. I am still waiting on my engine. I spoke to the machinist this week and he has replaced all of the valve guides and has bored it 30 over and will have it honed this week. The major tasks should be completed this week and the final operations will be completed in short order. Deck the block and head, valve job and cam bearings. I have found something a bit odd. There are 5 or 6 carb gaskets in a stack between the intake and the carb heat shield. I will have to do some looking to see if this is correct it seems a bit odd to be factory but, this could have been a solution to reduce vapor lock. Any ideas? The intake and exhaust are bolted together and for the most part came apart easily. Only one bolt broke and once the exhaust and intake were seperated direct heat from the inside allowed the bolt to back out. Still looking for a correct replacement heat riser spring. I have a spring for a Chevy stove bolt 6 I am going to try with a torch to see if it has enough strength to rotate the shaft and weight. Before I can try the Chevy spring I have to find a way to remove the remains of the old spring from the heat riser shaft. So far it is very happy staying were it is. The shaft is in good shape and there is no play were the shaft goes through the casting so I would like to be able to make it work properly. The intake cleaned up nice. I have not decided what to do with the exhaust. I have read most paints will eventually burn or peal off so I am thinking I might clean it up and leave it as it is. I did get the crank back last week. All of the journals were turned 20 over. I am so glad I found a new machinist. He is not the fastest in the world but the attention to detail has been out standing. The first machinist I took the crank too said it will be fine with standard bearings and did not need to be turned. He recommended running the correct 30 weight and it will be fine and all he had to do was polish the journals. The journals still were not smooth when he was finished (reason I found a new shop) so I took it to the new guy to look over and he showed me how bad it was.


-
Hi Buckster I normally do not post comments but something with this post has generated a comment. I am glad you have found a car that inspires you and I hope you take lots of pictures and post your progress as often as possible. I love reading and looking at the pictures of people bringing something old and tired that most people would consider scrap back to life and beautiful. Like several have said you will spend more time and money on this project then it will ever be worth but if your are like me that does not matter. I gather this may be a project that once is done will not be sold. I have read about restorations that were in far worse condition then yours appears to be in and end up beautiful. In regards to your straight 8. I hope you try to bring it back to life. I have seen pictures and restoration stories that appear to be in far worse condition then yours that were rebuilt. My 2 cents would be to find an engine shop were the machinist will take the time and answer your questions and guide you through the process before you make any major decisions on what needs to be done and replaced. You never know you may only need an over bore and new pistons and rings. Any way take your time search the net look at Ebay daily and i hope to read about your progress weather they are small large.
-
Progress is being made small amounts but progress. I have the trans back together new seals and gaskets. It worked fine when I briefly had it running so knock on wood it will not need to come out again. I started cleaning up the torus and fly wheel mating surfaces. There was some sort of yellow gasket glue that came off easy and small gasket pieces that are stuck in the many grooves running around the mating surfaces. The last thing I want is to leave some old gunk and have a leak that was preventable. A future task that I have started pondering. It is hard to see in the pictures but the shifter linkage and shifter arm to the trans are both warn and have a little play. Not crazy sloppy but enough that can be felt when I put the two together. I have read the shifter adjustments have to be spot on or the trans will shift funny and I am concerned this may impact the adjustments. I may be worried about nothing so I would appreciate any insight on this topic. What I am thinking about doing is adding some weld to the worn areas and then filing it smooth. This sounds easy in theory but, I keep thinking it may be hard to get the round surfaces in the correct shapes. Any better ideas on how to correct it?


-
Not much to update. I have taken advantage of some of the somewhat nice days. I have painted the Hydra-Matic I think it has come out real nice. I still have to replace the rear seal and I am contemplating replacing the front seal. I have not been able to find directions on how to replace it. I do not want to dissemble anything I do not have to. I can not wait to get my engine back so I can put all these clean parts back on the frame. I am getting so close to starting body work again. My goal will be to have the body back on the frame this summer. Gotta have a goal. I found my last major missing piece over the new years shut down. Story is my Uncle gave away the spare long ago when he was using the car as his daily driver. I was able to go to an old salvage yard that is slowly disappearing and he still had whats left of a 54 Pontiac and it had two wheels left on it. I now have a spare wheel. It us not as nice as the 4 original to my car but, I think it will clean up nice.


-
It has been a while since my last update. Not much has happened my engine is still at the machine shop. What started out as just a freshening up has turned out to be full rebuild. I took my block to the machinist to have it bored 30 over and it has just gone down from there. So far I am really impressed with the owner. I told him what I wanted out of the engine and he has been showing me things and answering all my questions. I am not a big fan of working in a cold garage so the time he has taken has not been a big deal. The block has been cleaned and it took several soakings for all of the oil passages to come clean. The block is going to be decked with a straight edge across the full length of the block a 3 thousand filler gauge would fit under the straight edge above the 4 center bores. I am going to have him clean up the head and check it and deck it if needed. Next all 16 valve guides are going to be replaced. The 8 intakes were in worse shape then the exhaust. Which is the exact opposite then normal. The guides were like upside down funnels and rocked back and forth. The valves matched I have 8 new intake valves in transit now the originals were beyond savings. The owner and I were talking about the engines condition and I told him it only had 47-48 thousand on it. He thought it 150,000 on it due to how much wear. He asked if it was run with out an air cleaner for a long time because sucking in dirt would explain its condition. I then told him the history of the car that it started out on a tobacco farm Outside of Pinehurst NC were the ground is all sand and rarely saw a paved road. In the summer the old sand roads throw up a cloud of sand dust like talcum powder and the old air cleaner must have sucked fine sand partials for years. We think that has to be what happened to this engine. While the block is at the machinist I have been working on painting the bolt ones like the timing chin cover, bell housing and the oil pan. Don't do what I did. I had the engine sitting on 4 x 4s on the floor and bumped it one day and it fell forward and dented the oil pan. It has been a blast trying to fix it. I l all most have it fixed. The baffle will not hit the crank and all I have left to do is finish the knocking out the small high and low spots and It will be ready to paint. Question - is it okay to use a very small amount of filler on the oil pan?


-
Well a big mile stone happened today. I took my block to the engine machine shop today. I am going to have it cleaned, bored out 30 over, install the cam bearings and clean up the valve seats. The shop has a lead time of about 3 - 4 weeks not to bad. I can not help to be nervious that is a lot of money I just dropped off and left. However if something goes wrong I hear the 53 Pontiac was designed to have a V8. Always have to have a plan B. While the engine is out I am going to clean up the hydramatic and hope it is in better condition then the engine is in. It shifted well when I had it running so I am hopeing a good cleaning, painting and change the rear seal will be all that is required. Maybe in a few weeks I will have a few pictures showing the engine and trans back on the frame. I'm excited just thinking about it.
-
Took my block to a machine shop yesterday afternoon. I had stopped by this shop earlier in the week to ask about the vertical scratches. His first question was have I had the bores checked for being out of round or funnels. He said if I brought it by he take some quick measurements and depending on what they were would determine the next step. Well to quote him I have "8 perfect funnels" He could tell they have had some work done in the past but, they basically did what was needed to put in a new set of rings. One good example that stuck was one of the bores was 13-14 thousands larger at the top of the bore then the base. He recommended a 30 thousand over bore would be enough to fix it properly. So I have started looking at new pistons. Any body have any suggestions? I have read about problems on other posts but, I think it is like any other item. People only post reviews when things go wrong.