


Model56s
-
Posts
398 -
Joined
-
Last visited
Content Type
Forums
Gallery
Events
Everything posted by Model56s
-

1956 Chevrolet 1/2 Ton Panel Truck
Model56s replied to Model56s's topic in Our Cars & Restoration Projects
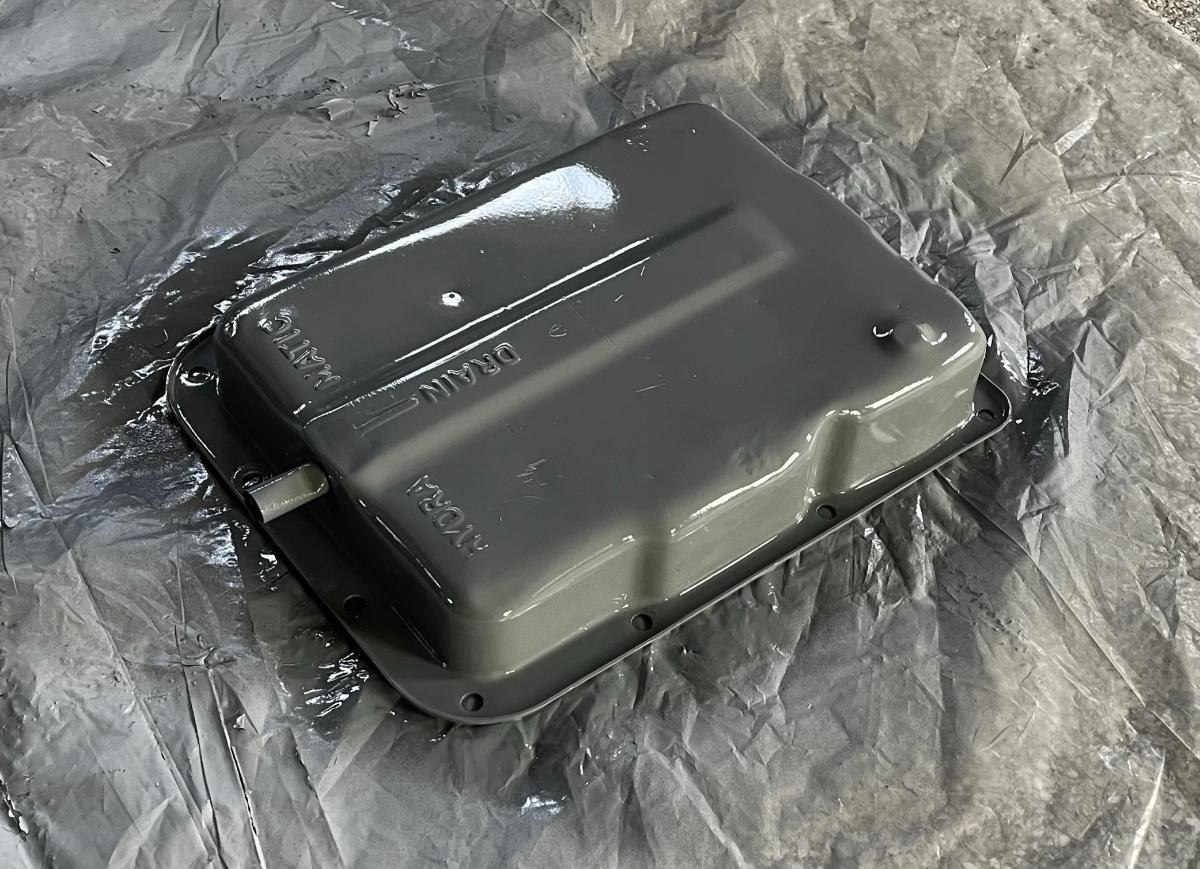
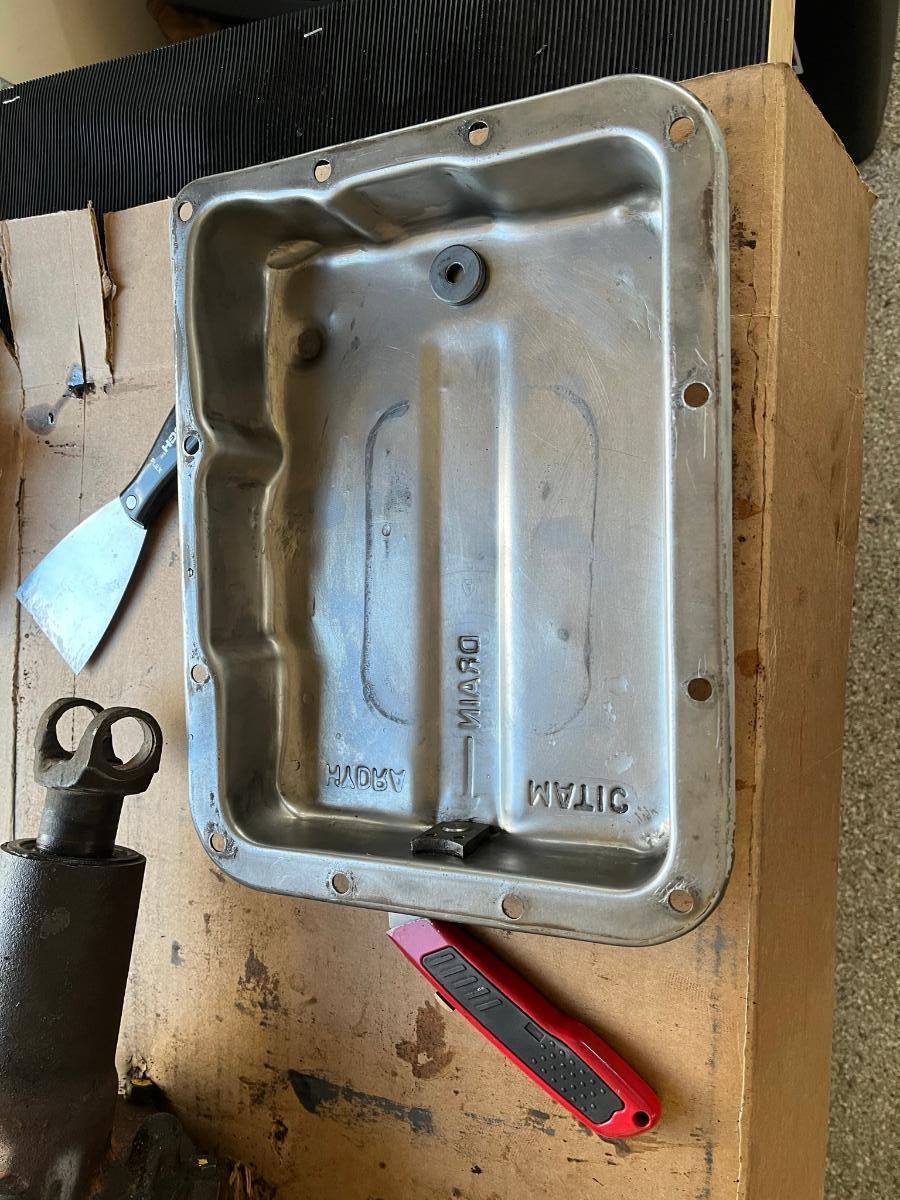
Today the transmission is half way done; what you see represented four hours of labor cleaning and painting. I'm just cleaning the pan and side cover, replacing pan and side gaskets, and cleaning and painting the exterior. I plan to finish it tomorrow (do the side cover and paint the top side). I bought the gaskets in late September from Dave Edwards in Needham Hts., MA. He's knowledgeable and was generous with his time on the phone. In a future post I'll list all of my parts sources. Like the engine, I found the Hydramatic clean inside with a little magnet on the bottom of the pan to catch metal filings. There was very little metal powder in the pan. Many years ago when I changed the fluid in my Skylark's TH350 I found a considerable pile of filings in the pan, not like this time. The filter just pulls off and is designed to be cleaned and reused. I intend to have the engine and Hydramatic reunited and on the chassis this week, then it's install the fuel tank and lines, brake master cylinder and lines, parking brake cables, both manifolds and forward part of the two exhaust pipes. The seller of the engine simply cut both of them a couple feet back from the headers when he disassembled his truck. They are super clean and I will try to incorporate them in the new exhaust system.


-
1956 Chevrolet 1/2 Ton Panel Truck
Model56s replied to Model56s's topic in Our Cars & Restoration Projects
Painting of engine and factory Hydramatic bell housing adapter was completed this afternoon. What looks like a nasty run toward the rear of the valve cover is actually a reflection. When I downloaded this picture and saw this, I went over to the engine and it wasn't there.Tomorrow the Hydramatic gets new gaskets and paint.


-
1956 Chevrolet 1/2 Ton Panel Truck
Model56s replied to Model56s's topic in Our Cars & Restoration Projects
The sand blaster called Friday to let me know they found body filler. It was lunchtime, so I drove there to see what they found. On the way I called Adam to ask what he wants done - keep it there or remove it. He wants it removed and wondered how old it was, since the older it is, the less stable. I called the previous owner who owned the truck since 1985 - it wasn't his work, so I told the sand blaster to remove it. The filler in the roof covered a crease; we don't know what's under the filler in the lower part of the quarter and the driver side quarter hadn't been done when I arrived. I expect to see the same thing on the driver side. However, the inside of both quarters is visible and there is no rust through. Since I cut the floor transversely to remove it, I needed an accurate measurement of the length of the bed while at the shop - 90 3/4". I have the old floor for a template and width measurements. I had taken care to mask off the VIN and body tags, and a portion of the original blue; the blaster had taken care around these. We are scheduled to pick up the body & panels Monday afternoon. On my way home I stopped by a local and very well known specialty hardwoods store to get advice on cargo floor wood. I looked at ipa ("ee-pa") from Brazil. This stuff is amazing: very (like verrry) tough, dense and strong, so strong and durable it is becoming popular for decks (if you have the money). As you can imagine, expensive, about $1200 to do the floor. The grain is so tight, ipa cannot be stained. I was very tempted, but they sell it only in 5.5" widths and it would have to be ordered and shipped from Brazil, too many ifs and maybe as an upgrade later. I will use hard maple which will come in at $750 to do the floor. I've been thinking of doing the ceiling in maple slats, like the overhead in a wooden boat cabin. Designs and intentions are still evolving, with "better is the enemy of good enough" thoughts always in the room.

-
restoring my 36 Dodge humpback panel
Model56s replied to 36humpback's topic in Our Cars & Restoration Projects
36h., I'm doing a body off restoration of a 56 Chevy Panel truck. I love these vehicles, and appreciate your dedication to originality. How extensive will the restoration be? 30's styling is among the best and you have a great truck with provenance. -
1956 Chevrolet 1/2 Ton Panel Truck
Model56s replied to Model56s's topic in Our Cars & Restoration Projects
Thanks Adam, your help was huge today! -
1956 Chevrolet 1/2 Ton Panel Truck
Model56s replied to Model56s's topic in Our Cars & Restoration Projects
I masked off the VIN tag, body plate (like new!) and the original factory blue that was exposed when the fenders were removed, using blue painter's tape with an overlay of aluminum foil (HVAC duct) tape. I wrote up and delivered a scope of work document for the blaster with pictures to protect these items and otherwise define the work. The painter also has a very specific scope of work document. being in the software solutions business, Statements Of Work are critical for protecting both the craftsman and the customer. They also minimize surprises in cost.


-
1956 Chevrolet 1/2 Ton Panel Truck
Model56s replied to Model56s's topic in Our Cars & Restoration Projects
We delivered the body inside the blaster's shop. Without a forklift inside, the back end of the body shell was lifted by hand and walked down the ramps. This was the shop that did such a great job on my chassis.


-
1956 Chevrolet 1/2 Ton Panel Truck
Model56s replied to Model56s's topic in Our Cars & Restoration Projects
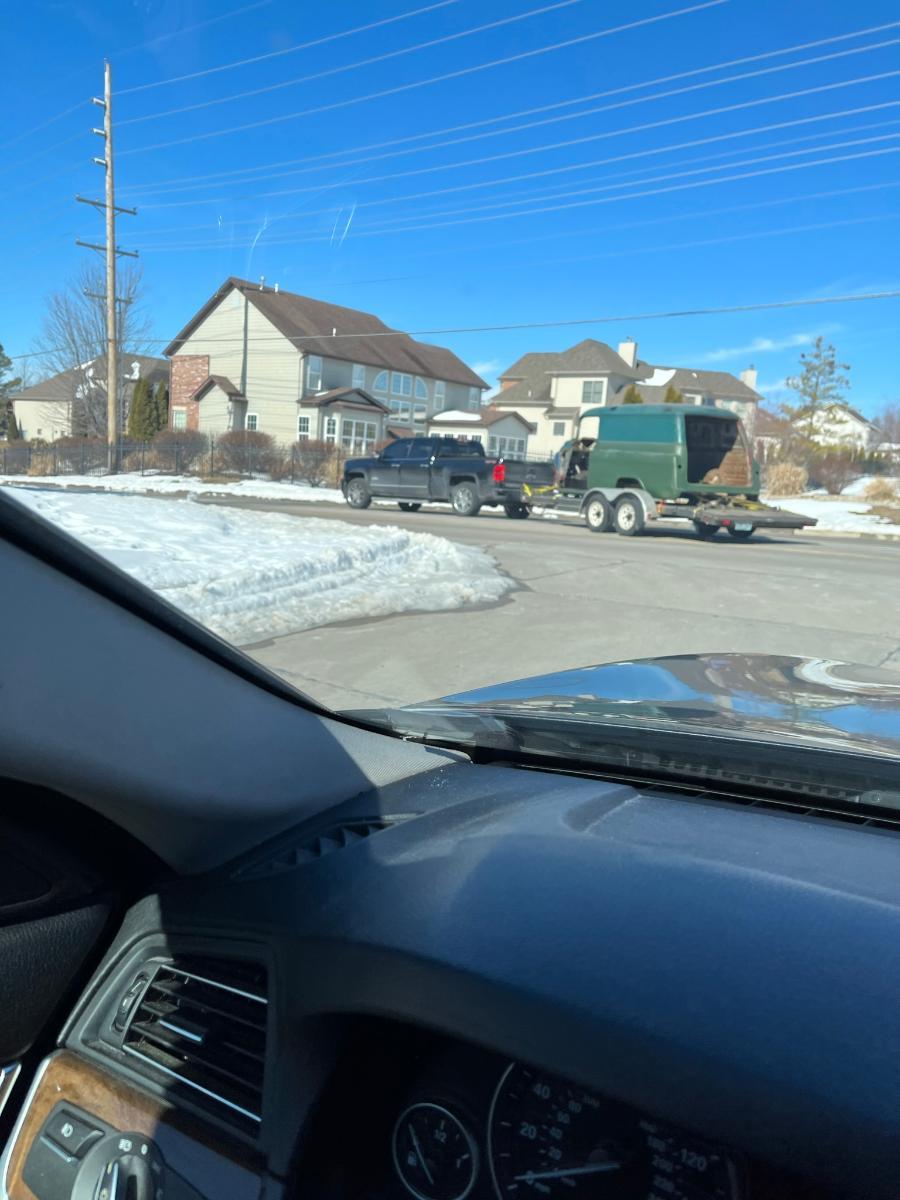
We delivered the body shell and panels to the media blaster this morning. The timber frame is so low that the back of the body needs to be lifted as it's loaded and unloaded from the trailer, but the operation went without incident. They start media (plastic) blasting the body tomorrow and will be completed by Friday. We pick it up Friday afternoon (forecast is cloudy, dry and a high of 54) and deliver it to the painter about 40 minutes away. Since the body and parts will be in bare metal we're hoping all of this snow is gone then and the roads are dry! Paint should be done by the first week in March when I'll bring the completed chassis to the painter's shop where we'll mount the body for transport back home and I begin final assembly. The goal is to be on the road by April 30th. I'll split the pictures among two separate posts today.

-
1956 Chevrolet 1/2 Ton Panel Truck
Model56s replied to Model56s's topic in Our Cars & Restoration Projects
The body shell is now on the timber frame. It sits too low, which I expect will be a problem loading it on the trailer, but I'll use the shop crane to lift the rear to clear the ramp/trailer bed peak, then take the crane with us to to the media blaster. This took 5 hours to build, another lesson on the reality of projects. What remains is to prep the front fenders, doors and hood to accompany the shell for media blasting: removal of glass, window regulators, headlights, bezels, parking lights and hood hardware. Oh, there's a door handle or two in there. This is getting scary as I now have to produce a running truck! Before, with the 6 month delay in the painter's schedule I was able to take my time and think about how I would do things, travel and just be lazy. I expect the body to return at the end of February, so now I have just a few weeks to mate the transmission and engine, deal with the freeze plug, buy and install U-Joints, phase them, install the fuel and brake systems, etc. My dedication to having the truck on the road by 30 April motivates me and prioritizes my activity. There has been a lot of dead space in the project with weeks going by and no work. Again, that was due to life and the delay in the body work schedule, but I also know that I needed time to think things through. Plus, I can forget how a part fits after just a week! I've taken hundreds of pictures to deal with this, but sometimes a picture here and there should have been taken from a slightly different angle. Next post is of delivery of shell and panels for media blasting. I've settled on the factory blue for the exterior and top of dash, and factory grey for the interior and bottom of dash. Fortunately, samples of both colors are preserved by being covered.

-
1956 Chevrolet 1/2 Ton Panel Truck
Model56s replied to Model56s's topic in Our Cars & Restoration Projects
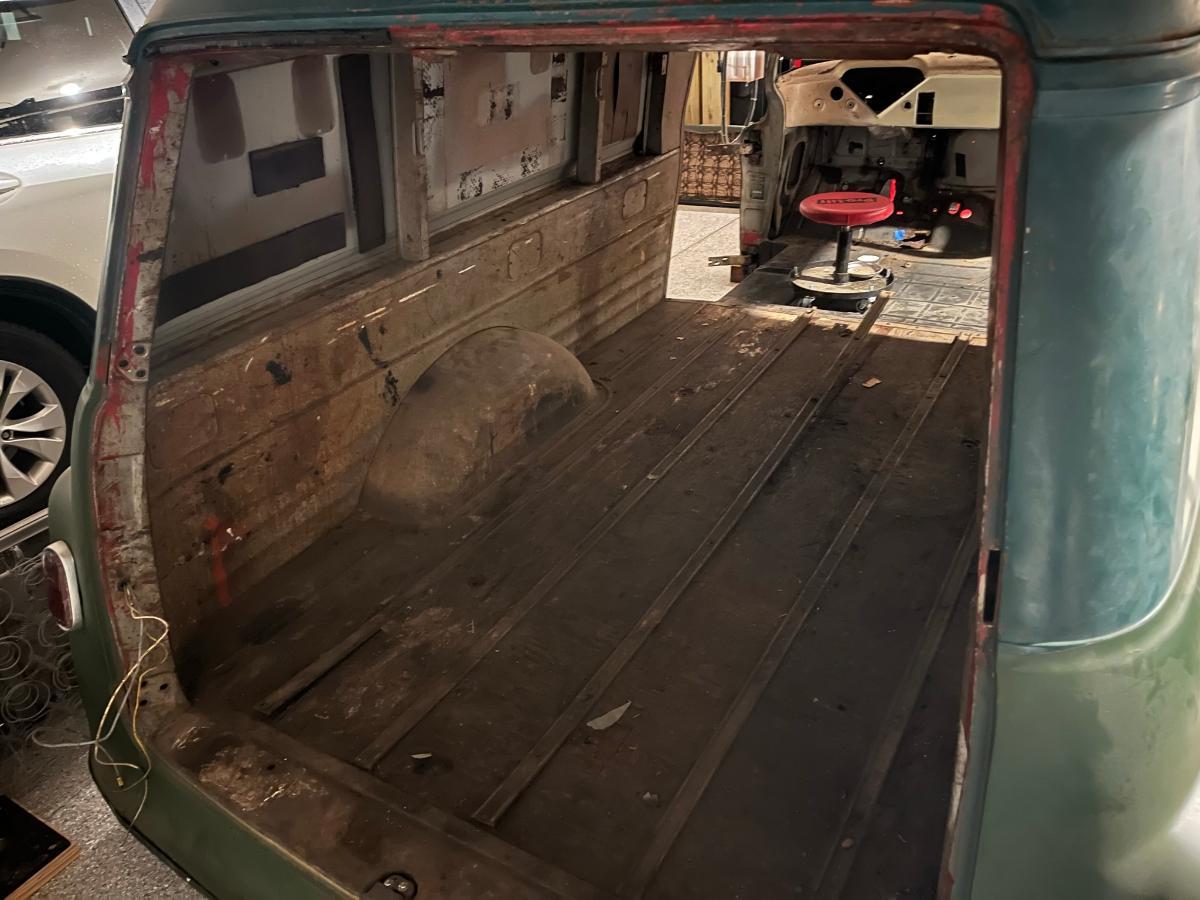
The cargo floor was removed today, requiring 6 hours labor. I thought there was a plywood subfloor under the floor seen from inside of the truck - not so. It was cut from a single large piece (about 8'X6') of 1" plywood and has to be replaced as the interior facing side is soaked in old oil here and there, worn through as much as 2 plys in some places, and filthy. I was going to remove it as a single piece, but decided to cut it in half with a jig saw making it much easier to remove. The cargo floor is almost 6' across at the widest (48" at the wheel wells), exceeding the standard 4ft width of plywood sheet, so I will need two sheets. I intend to make a plywood subfloor and top it with maple planks. With the front and rear supporting lip and 2 transversal braces, the two sheets running longitudinally will have four transverse supports. The maple planks will be secured with through bolts using new stainless steel cargo strips. Although I found some wood rot, all of the steel in the transversal support brackets and in the front and rear floor supporting lip supports is good. No metal in this body needs to be replaced. I was concerned about lateral body distortion with the floor, as a structural member, removed. Not so; the mounting bolt holes in the plywood floor measure the same center to center transversely as in the body with the floor removed. I will still cross brace it at the wheel wells, but will use a single 2X4 with plywood gussets on each end. I saved all the steel cargo floor strips for reference since it looks like I'll need to cut stock long bed strips to length; I cannot find panel truck strip kits that I'm confident will work. I figured out the timber frame design and need to pick up a couple pieces of lumber tomorrow. It will be on the timber frame and casters by the end of the day tomorrow, ready for transport to the media blaster Monday afternoon.


-
1956 Chevrolet 1/2 Ton Panel Truck
Model56s replied to Model56s's topic in Our Cars & Restoration Projects
This is the refreshed engine, in primer and the cleaned and primed Hydramatic which still needs the new pan and side cover gaskets. All the engine needs is the new freeze plug to be installed. Ordinarily freeze plugs are inserted with the convex end inside the block, so installing is straightforward. Not so this one. I bought two of them because I suspected that I would distort one in the learning process, which happened. This freeze plug opening was a very rough cast resulting in an irregular opening, only somewhat round (see the image). Because the thickness of the block at that point is maybe half an inch, the opening was machined in only a quarter inch or so from the surface. This then requires that the freeze plug be inserted convex side out, otherwise it would "bottom" too soon on the narrower unfinished flange inside. The brass elbow fitting on the thermostat housing is to channel hot coolant to a chamber cast in the intake manifold to provide heat to vaporize the fuel-air mixture. This is necessary since the original exhaust manifold provided this through the heat riser plus being mated directly to the original intake manifold. This housing plus the receiving plate with fittings to be mounted on the Edelbrock dual carb intake came in a kit from Langdon's Stovebolt. The manifold was designed for this system - no drilling or tapping needed. Today the body man revised the work estimate, very reasonable. His work is flawless and consistently wins awards at major car shows, most recently the Muscle Car and Corvette Nationals in Rosemont, IL several weeks ago. The body will be on the timber frame & casters this weekend, with the wooden floor removed and braced as necessary. He's helping me deliver it to the media blasting shop Monday afternoon (that was his truck and trailer I borrowed to deliver the chassis). It should be completed and in his shop for body & paint work by next Friday. As things look today, it's conceivable to have the finished body back on the frame by the end of February, which means I'll have three weeks or so to install the drive train, fuel tank and lines, brake system and lines and parking brake cable and mechanism. I have the first few feet of the two exhaust tubes (from the headers back); when the time comes I'll temporarily attach two Flowmasters to them to drive the truck to a muffler chop for completion.


-
1956 Chevrolet 1/2 Ton Panel Truck
Model56s replied to Model56s's topic in Our Cars & Restoration Projects
This is the Dynacorn dash. I was a little disappointed that it consisted of three separate stampings, with the seams needing finishing. The spot welds for the center bracket were particularly crude. There is no sign that the factory dash was not done as a single stamping. I'm replacing the dash due to a crude previous blanking job in the center portion and other defacement. I'm still OK with this dash and it will turn out very well. I included the dash finish work and installation in the revised scope of work for the painter. I expect the expansion of the scope to double the cost, but it was reasonable to start and I have financial room in the restoration to keep this profitable. I'm tracking every expenditure in Excel.

-
1956 Chevrolet 1/2 Ton Panel Truck
Model56s replied to Model56s's topic in Our Cars & Restoration Projects
The painter called yesterday morning and said he's ready for the body and panels. I was a little panicked since I still had prep work to prepare the body: finish removing all removable items, build and install the timber frame with casters for transporting it, and prepping the panels (removal of glass, regulators, lights, bezels, etc.). so last night I finished removing the under dash items. The pictures are of a clean body shell with the exception of removal of the wood floor and sub floor. I finally settled on the design of the timber chassis, so building and attaching the body are the next steps.

-
1956 Chevrolet 1/2 Ton Panel Truck
Model56s replied to Model56s's topic in Our Cars & Restoration Projects
Thank you Hursst, I appreciate the interest! -
1956 Chevrolet 1/2 Ton Panel Truck
Model56s replied to Model56s's topic in Our Cars & Restoration Projects
I wire-wheeled the valve cover, side (push rod) cover, timing cover and oil pan. I ripped the timing cover seal out (comes out from the front) and tapped in a new seal using a piece of wood to cushion it. All were primed with engine primer and reassembled with new gaskets and RTV. I'll post a picture of the painted engine with covers and oil pan in the next update. In one of the pictures you can see the new floor. I'm very happy with it and surprised how it motivated me to de-junk the garage and keep it clean.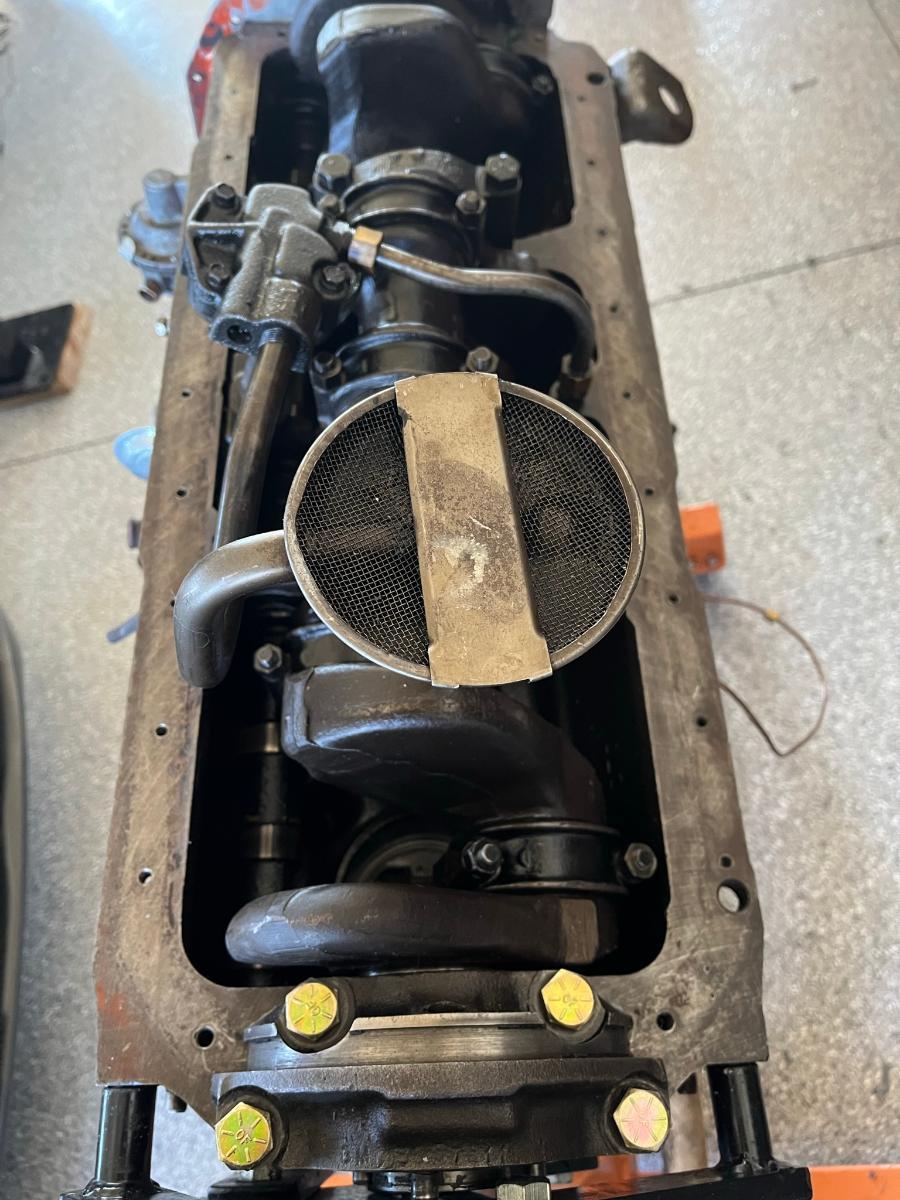


-
1956 Chevrolet 1/2 Ton Panel Truck
Model56s replied to Model56s's topic in Our Cars & Restoration Projects
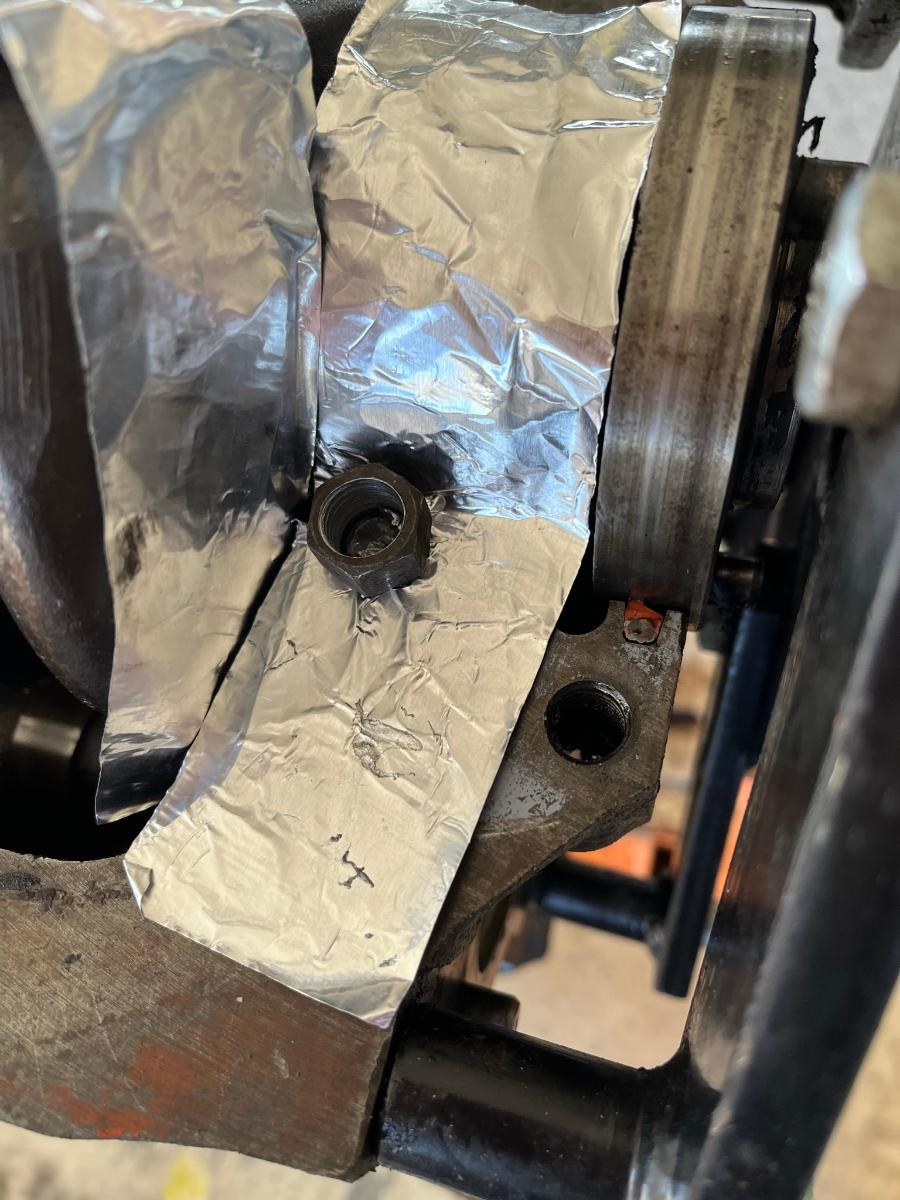
My final updates tonight catches everything up to date. I am now finishing the engine and transmission refresh, which consists of gaskets and torus seal replacement. I removed the valve cover, side (push rod) cover and oil pan. I found a very clean engine, except for the water jacket. More on that later. To separate the 235 six from the transmission, the two halves of the fluid coupling (is it a true torque converter?) have to be separated since the pump is bolted to the crankshaft and those bolts are not accessible until separation. The seal between the two halves is a large O-ring that fits in a machined groove. I thought I had drained all of the trans fluid, but the torque converter was full. That, plus removal of 22 bolts for separation made this messy and tedious. But that wasn't the most fun I had. Along with the gaskets I bought a new rope seal thinking that since the engine was on a stand and the oil pan removed, I'll just take care of that. Removing the rear 4-bolt bearing cap revealed a lip seal, so I decided to grease the crank and just put it back on with with a film of hi-temp RTV where the cap meets the block. The problem was that I decided to reuse the bolts and sure enough one stretched to failure. A friend in the Buick Club came over with his MIG welder and a nut drilled out to the bolt shank diameter to maximize exposure to the exposed part of the shank. He welded the nut on and the broken shank came out easily. It surprised me how easily since it wouldn't respond to tapping an edge with a cold chisel. Four new Grade 8 bolts are securing the cap now. One of the two freeze plugs on the back of the block (upper one) was rotted through, so out it came. Inside the water jacket was a lot of black sludge, to the point that the petcock channel was clogged. I rotated the engine over with the head on bottom and thermostat housing removed and ran water with a hose in the freeze plug hole until it flowed clear. I plugged the hole with a large rubber stopper and righted the engine, then filled it with Evapo-Rust. After several days of rotating the engine, I drained and rinsed it, put in a couple quarts of Zep de-greaser and let that sit with the engine upright. I then inverted the engine, removed the plug and hit both sides of the inside jacket with my power washer and 0 degree nozzle. It's clear and the petcock channel is open. I'm struggling with the new freeze plug though.


-
1956 Chevrolet 1/2 Ton Panel Truck
Model56s replied to Model56s's topic in Our Cars & Restoration Projects
The truck was missing a seat, so I went to Facebook marketplace. Here is the seat as I found it about 2 hours from my house. Once I got everything cleaned out of the bottom (including a mummified mouse), it went with the chassis to the sand blaster as seen on the pictures in the previous post. Under the cover was a layer of burlap, then batting, then a vinyl-like fabric (see pics) covering the springs to keep the batting from shredding. This was a mess, but apart from partially rusted bottom sheet metal and a broken spring support rod, it is in good shape. The piece of 2X4 provided support and the broken support is just in front of it. The rails and position adjusted work OK. The seat back is excellent. Once I remove the upholstery on the seat back, I'll paint both back and bottom springs and frame. The local Joann's Fabric has batting and burlap, as do the vendors who sell the upholstery kit. I haven't decided if the seat will be grey or light brown. The interior will be grey as from the factory, so it'll probably be light brown. I've decided on blue for the body as suggested on the forum - thank you!


-
1956 Chevrolet 1/2 Ton Panel Truck
Model56s replied to Model56s's topic in Our Cars & Restoration Projects
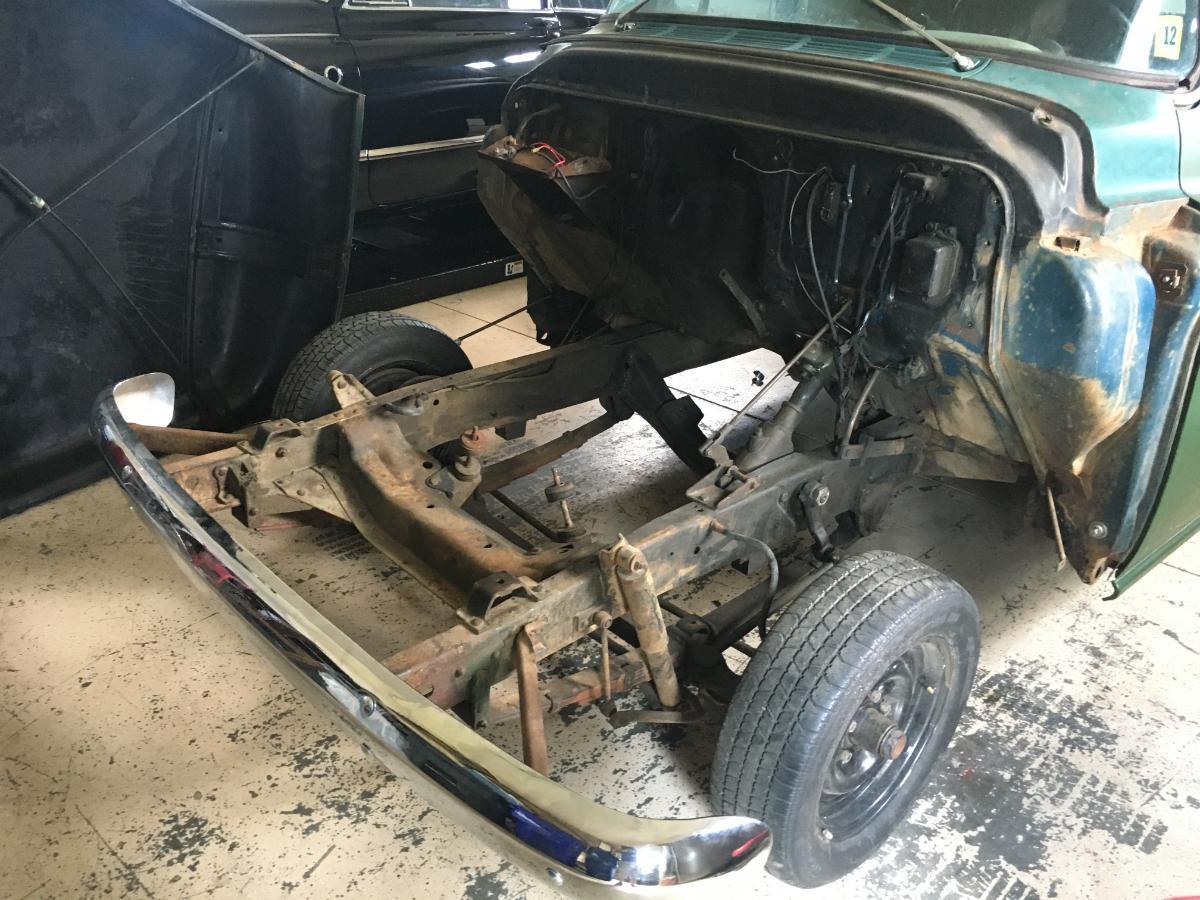
Attached are pictures of the before and after chassis sand blasting and painting effort. For the record, I had the garage floor refinished. I chose GarageForce, which I am very pleased with. The painted frame was set upside down on a receiving rack at the sand blaster, so that is how they loaded it on the trailer and how I delivered it to the floor of my garage on four furniture dollies to assemble the chassis components to the frame - upside down made assembly much easier. I used the shop crane to lift one side and tilt it past the balance point to drop it down right side up. The wheels were then installed and I have a rolling chassis. The body shell is on three furniture dollies which makes it very easy to move around the garage. I store the chassis on the lift and the body fits under the chassis for storage..JPG.253ea8dc320e9407549b9dbec3d15fbc.JPG)


-
1956 Chevrolet 1/2 Ton Panel Truck
Model56s replied to Model56s's topic in Our Cars & Restoration Projects
I’m writing this update on my iPad on I40 somewhere west of Needles, CA. My son is driving BTW. I appreciate the interest, and it looks like it should be blue. I have been on the road the last few days helping my middle son move, but the chassis is back from the sandblaster who painted the frame and front axle. I painted the remaining chassis parts and got it reassembled, so it’s rolling. I have to remove the cargo floor and its plywood subfloor then get the body shell and panels to the same blaster for media blasting (plastic). They are local and have a lot of experience with bodies, plus my paint guy recommends them. With the floor out I’m thinking I should run some angle iron cross braces to keep the body rigid. A small effort for piece of mind. I’m delivering the body to the blaster in the first week in February, then straight to the paint shop. The timing was driven by the painter’s availability. Meanwhile, I’ve cleaned and flushed the water jacket in the 235 which had so much build up that the petcock wouldn’t drain! It’s clear now. I also refreshed the gaskets and primed it and the Hydramatic, both now need final painting. Then it’s reassembly time! I decided to order a Dynacorn repro dash from H&H Classic. If anyone has experience with them, I’d like to hear about it. Lots to do before the end of April! I’ll post more pictures when I get home in a couple days. Thank you for your interest! -
1956 Chevrolet 1/2 Ton Panel Truck
Model56s replied to Model56s's topic in Our Cars & Restoration Projects
With the front clip off, I removed the four doors (4 bolts each). I decided to remove the front suspension as a unit (axle, leaf springs, sway bar and steering sub assembly) and do the same for the rear. This allowed me to photograph and disassemble a lot more conveniently. Both the front and rear suspension sub assemblies were supported, then disconnected (brake lines, shocks, sway bar links, steering box & Pittman arm, etc.). The shackles and 11 of the 12 leaf spring pins were in good shape - I purchased a rear leaf spring pivot pin which came with the locking pin and new bronze bushing from CarID. I trailered the disassembled chassis components (all except differential) to a local sand blasting operation. I decided to clean and paint the differential/rear axle myself. I'm impressed with the robust repro parts aftermarket. Due to some sloppy repair work on the original, I'm probably going to buy a repro dash, available from Dynacorn and Ecklers (both probably use the same stamping source). I'm having a hard time finding a new correct gas tank though since all I've found for the 55-59 Chevrolet/GMC truck is that for the pickup (mounted in the cab behind the seat back). The long & narrow (47"X11"X9") panel truck fuel tank was mounted to the inboard side of the frame on the passenger side. Tanks, Inc. offers several universal tanks of similar dimensions and filler neck placement, and ironically the replacement for the 39-47 Dodge truck is also a reasonably close match. I'll discuss with them this week. I'll update later this week. Happy New Year!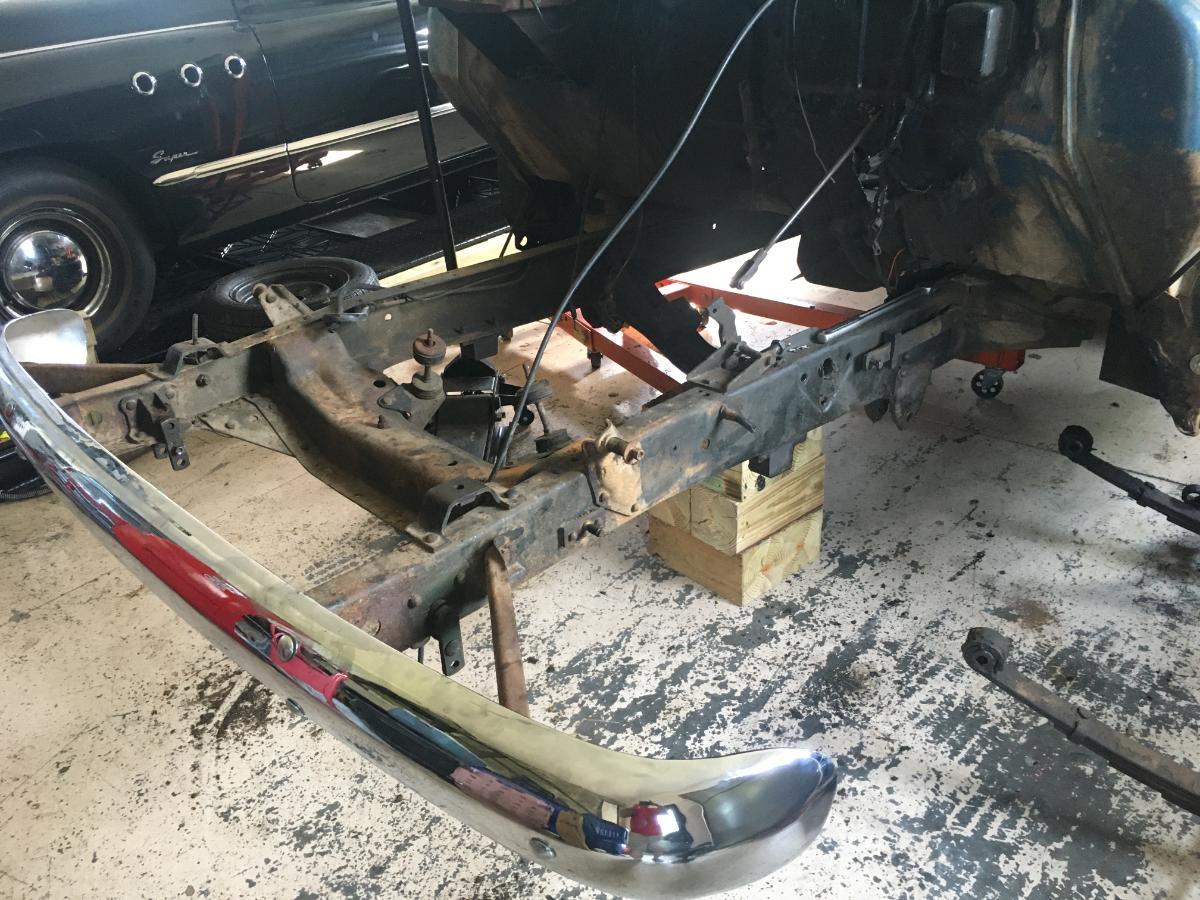


-
1956 Chevrolet 1/2 Ton Panel Truck
Model56s replied to Model56s's topic in Our Cars & Restoration Projects
My goal is to have this truck on the road by the end of April. Once the decision is made regarding the extent of the restoration, planning and dismantling begins. Since the truck is simple, especially the interior, I decided on a body-off restoration - I want it clean, but the truck will not be brought up to flawless show condition since I intend to drive and use it a lot. I'm using the standard bag and tag method of parts sorting, taking care to be very remedial in labeling. Also, digital photography has been a boon to this hobby - you can see immediately if the image is sufficient and picture storage & retrieval is convenient. First up is disassembly of the front clip. This was straightforward and a pleasure as there were no nasty surprises. The inspector Steve Linden did a thorough job evaluating the truck. The original blue can be seen on the side below the cowl, very close to the Washington Blue of my 37 Ford Coupe (sold years ago). I'm still on the fence on color - factory dark green (wife prefers this) or this blue. My 3 year-old grandson didn't hesitate when I asked him - "blue!". I even considered Ferrari red with an off-white side panel above the belt line. I'm storing the large parts in my basement and smaller parts in two large horizontal 2-drawer steel office cabinets in my garage. In May I bought and installed a 4 post lift (Greg Smith, a good choice), which will be put to use for single bay chassis and body storage. I'm posting the last few weeks of work since I've been away from the forum.

-
1956 Chevrolet 1/2 Ton Panel Truck
Model56s replied to Model56s's topic in Our Cars & Restoration Projects
It was a good as in the pictures. Thanks, -
1956 Chevrolet 1/2 Ton Panel Truck
Model56s replied to Model56s's topic in Our Cars & Restoration Projects
Thanks Dave, appreciate your comment! -
1956 Chevrolet 1/2 Ton Panel Truck
Model56s replied to Model56s's topic in Our Cars & Restoration Projects
Thanks JR, that is true and the reason I bought it. Update on the project coming this afternoon - the holidays and end of year activity for work has kept me busy. -
WTB - 1949 Buick Super Fastback Body Parts
Model56s replied to lasmith03's topic in Buick - Buy/Sell
I have a restored 49 Super Sedanette. The rear quarter trim is next to impossible to find. The 49 Buick Sedanette is one of the most beautiful cars of all time. On the street it somehow takes on a longer and more dramatic look than when parked in the garage. Good luck with your build!


.JPG.253ea8dc320e9407549b9dbec3d15fbc.JPG)


