


gfw2
-
Posts
136 -
Joined
-
Last visited
Content Type
Forums
Gallery
Events
Posts posted by gfw2
-
-
3 hours ago, Morgan Wright said:
Since the mouse is in the part that attaches to the exhaust manifold, I can assume that and the muffler are a regular Disneyland inside.
Hi Morgan
You might want to pull the manifolds to see if they made it into the cylinder head or into the engine as they have no problems getting by an open valve.
George
-
 1
1
-
-
Hi Mike
I found the carb and manifolds i will separate the carb and get you some pictures. My son and grand kids have arrived for a couple days so it might be until sat. before i can get them apart.
George
-
Mike i have found the pump,it looks the same except the fuel outlet on the fuel bowl side goes strait along the engine where as the one in your picture is facing you.
Mine is NOS rebuilt and i also have a new Kanter rebuild kit in the package. I have at least two carbs one is complete with manifolds and air cleaner. I'll get you some pictures.
George
-
1
-
-
Hi Michael
i'll check my spare parts i think i have a couple fuel pumps, i also have a couple carbs.
George
-
-
I could be wrong but the back of the truck looks very similar to a 34 ford pick up.
-
Try Donald he might have the headlight parts you need.Headlight HeadquartersPhone: (781) 598-0523
-
Donald Axelrod
owner
Phone | (781) 598-0523
-
-
This is on eBay,its not mine but i have bought from him in the past.
George
-
On 1/16/2017 at 9:38 PM, Daves1940Buick56S said:
Yeah. I am sure I was the first one to remove them since April 1940 when mine was built.
This is what I did:
1. Remove padding and rotted rubber (carpet had already rotted away).
2. PBBlaster on the screw heads and what screws I could get from underneath.
3. Carefully clean the gunk out of the screw slots and scrape clean.
4. Get one of those 3 ft screwdrivers.
5. Grab a local 17 year old teenager and have him get in the car with the screwdriver.
6. Have him really lean on the screwdriver while turning out each screw. (They will likely have more upper body strength than you)
7. Have a beer and shout occasional encouragement while he works.
The above worked for me...
Cheers, Dave
If no willing teenagers are to be found i have used an air chisel with one of the chisel's ground down to fit the slot in the screw, use plenty of penetrating oil then i put a pair of vice grips on the shaft and with downward pressure on the gun give it some short easy bursts and the vibrations help loosen the screws.
-
a couple more


-
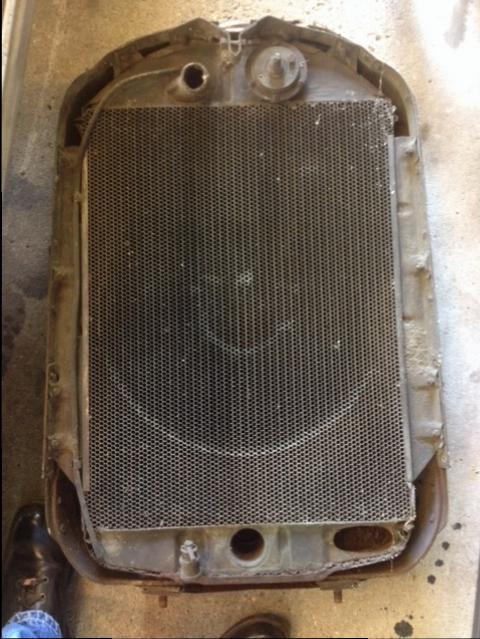
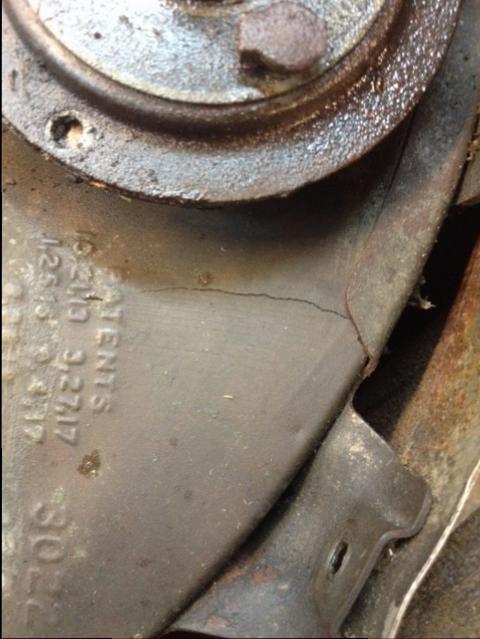
Hi Mike sorry about the delay in getting back. The radiator does not want to come out of it's shell. Seems to be stuck around the pines thermostat soaking the threaded shaft now maybe i have missed a some other attachment point. Its loose at the bottom but not at the top. Sadly i found two cracks on the top tank. Best guess is there are more on the back in the same area.I dont know how bad your tanks are this is what mine are like.
George


-
I use evaporust for most of my small parts but for the larger parts i use a 55 gal plastic drum with a molasses mixture of 10-1. 5 gals of molasses feed grade ($35.00)total last batch. I use the liquid from agway. Works much better in warm weather so i put it in a heated shed. It does smell and will attract unwanted guests.
George
-
1
-
-
I got mine home from storage and will take it apart to see what it looks like out of the frame.
George
-
-
Hi Michael
Ill check the one i have in storage that came with my 68. If i remember correctly its missing the bottom outlet.
George
-
Hi Mike
Inside to inside at the top of the B pillars right by where it meets the top wood cover (over the door) and if open the same at the top of the quarter panel behind the B pillar.
Thanks
George
-
Hi Mike
The pictures were still there, it took me a while to to get back in as i haven't been on that site for quite a while. If you are near your coupe any time soon and can get me the distance between the doors at the top and bottom, front and back that would be a great help.
Let me know if you are missing any other parts for your restoration. I have been gathering extra parts for mine for the last seven years and i'm going to try and trade for some of the parts i need,.
Thanks
George
-
Thanks Michael I had forgotten about those pictures. I'll go back and look.
Thanks again for getting the measurements.
George
I'm starting to put together a list of chassis parts,brake parts and extra rims that i have and will be parting with also I'm also looking for a front bumper for my 30 and have 28-29 bumpers that i dont need and will part with.
George
-
Thanks That would be great. At this stage measurements are more important than the pictures.
George
-
It looks like you have found yourself a great place to have the do buisness. $1400 and that included replacing the trans seal. I hope you asked if they would do other repairs if needed. Some shops will do more than just what it advertises.
George
-
1
-
-
Measurements between the A pillars and B pillars and in front of the rear seat Left to right. Just trying to get the width correct.
Thanks George
-
Hi
I'm trying to piece back together a 1930 model 68.I bought this years ago as a left over parts car and now it's time for me to put the body together .Only problem is it came without 90% of it's wood. If i can get some pictures of the complete sills with measurements (Inside and outside please) at front, rear and the cross sills . It would be a great help.
Thanks
George
-
Just saw this on ebay. its not mine
-
1
-
-
passenger door


'31 Body color
in Buick - Pre War
Posted
try here
https://www.autocolorlibrary.com/pages/1930-Buick.html#parentHorizontalTab1