


Mike Mahar
-
Posts
28 -
Joined
-
Last visited
Content Type
Forums
Gallery
Events
Posts posted by Mike Mahar
-
-
I would like to purchase your frame of rust parts. FYI it's a 1913 or later REO. Please let me know. Thanks, Mike
-
I would like to buy your mag/generator. Mike
-
Larry,
I did get the flywheel off! This crankcase you can pull the crankshaft and flywheel out as a subassembly. Then I stood it up in a wood frame and hit the end the crankshaft with a sled hammer. That separated it.
-
 1
1
-
-
That's a Remy 4 starter motor and they where an option on 1913 REO. If you want to sell it let me know.


-
Larry,
I have a 1915 REO engine I have been trying to disassemble. The flywheel is stuck on the crankshaft. A lot of heating and beating hasn't budge it. How did you get yours off?

-
Sir,
I would like to buy a tank. And it not for resale, will be used on a 1913 REO. Do you have the brackets? Mike
-
Brent,
It not a REO the fifth, That covers years 1911 to 1917. From the sheet metal the car is later that 1917. I would say the car is from the 20's. But I can't id the vehicle. Mike
-
What do they look like?
-
-
Sir,
I am looking for brushes and springs for a 4 Remy electric 12 V motor. Made in the teens. Mike
-
I have a Brass era car. What are you asking for it? Or did you decided to keep it.
-
Remy 4 Starter motor; planning to install into a 1913 REO. Please see attached Photos! I know it fits since all the mounting holes line up between the starter motor and frame. I am also sure this was used by different automotive manufactures. I would like to thank who ever replies in advance. The variety and amount of expertise on this forum is astounding. Any way a few questions on how to get this starter motor assembly to work!
1. How do you get all the corrosion and crud out of the frame of the electric motor. See attached!
2. I am missing the linkage between motor and whatever was used as a starter button. I am planning on making up the linkage, just what? Any photos would help a lot.
3. Also I am missing the gear that mounts on the drive shaft. REO the fifths had a separate drive shaft between the engine flywheel/clutch. I don’t have any information on how it was done.


-
Terry,
I have a REO The Fifth if you want that badge to find a good home let me know.
Mike

-
1
-
-
My 1913 REO has that same kind of joint. Like Mark says you need to slide back a sheet metal covering.
-
T Brown,
I bought the 1913 REO that was for sale on Craiglist in the Columbus Ohio area. If you want to sell the engine let me know. It would make a great spare.
-
I bought the 1013 REO that was on Craig List. I am not sure if this is the deal ship your interested in or not.


-
I have disassembled and reassembled W-K 20 and Model 56 engines. The WKOR Club has a very good instruction book on how to disassemble these engines.
-
Greg,
Been awhile since I have peek on this site. So what happen with W-K? Does the engine spin? If not keep soaking it with oil and patients. Mike
-
It's alive!
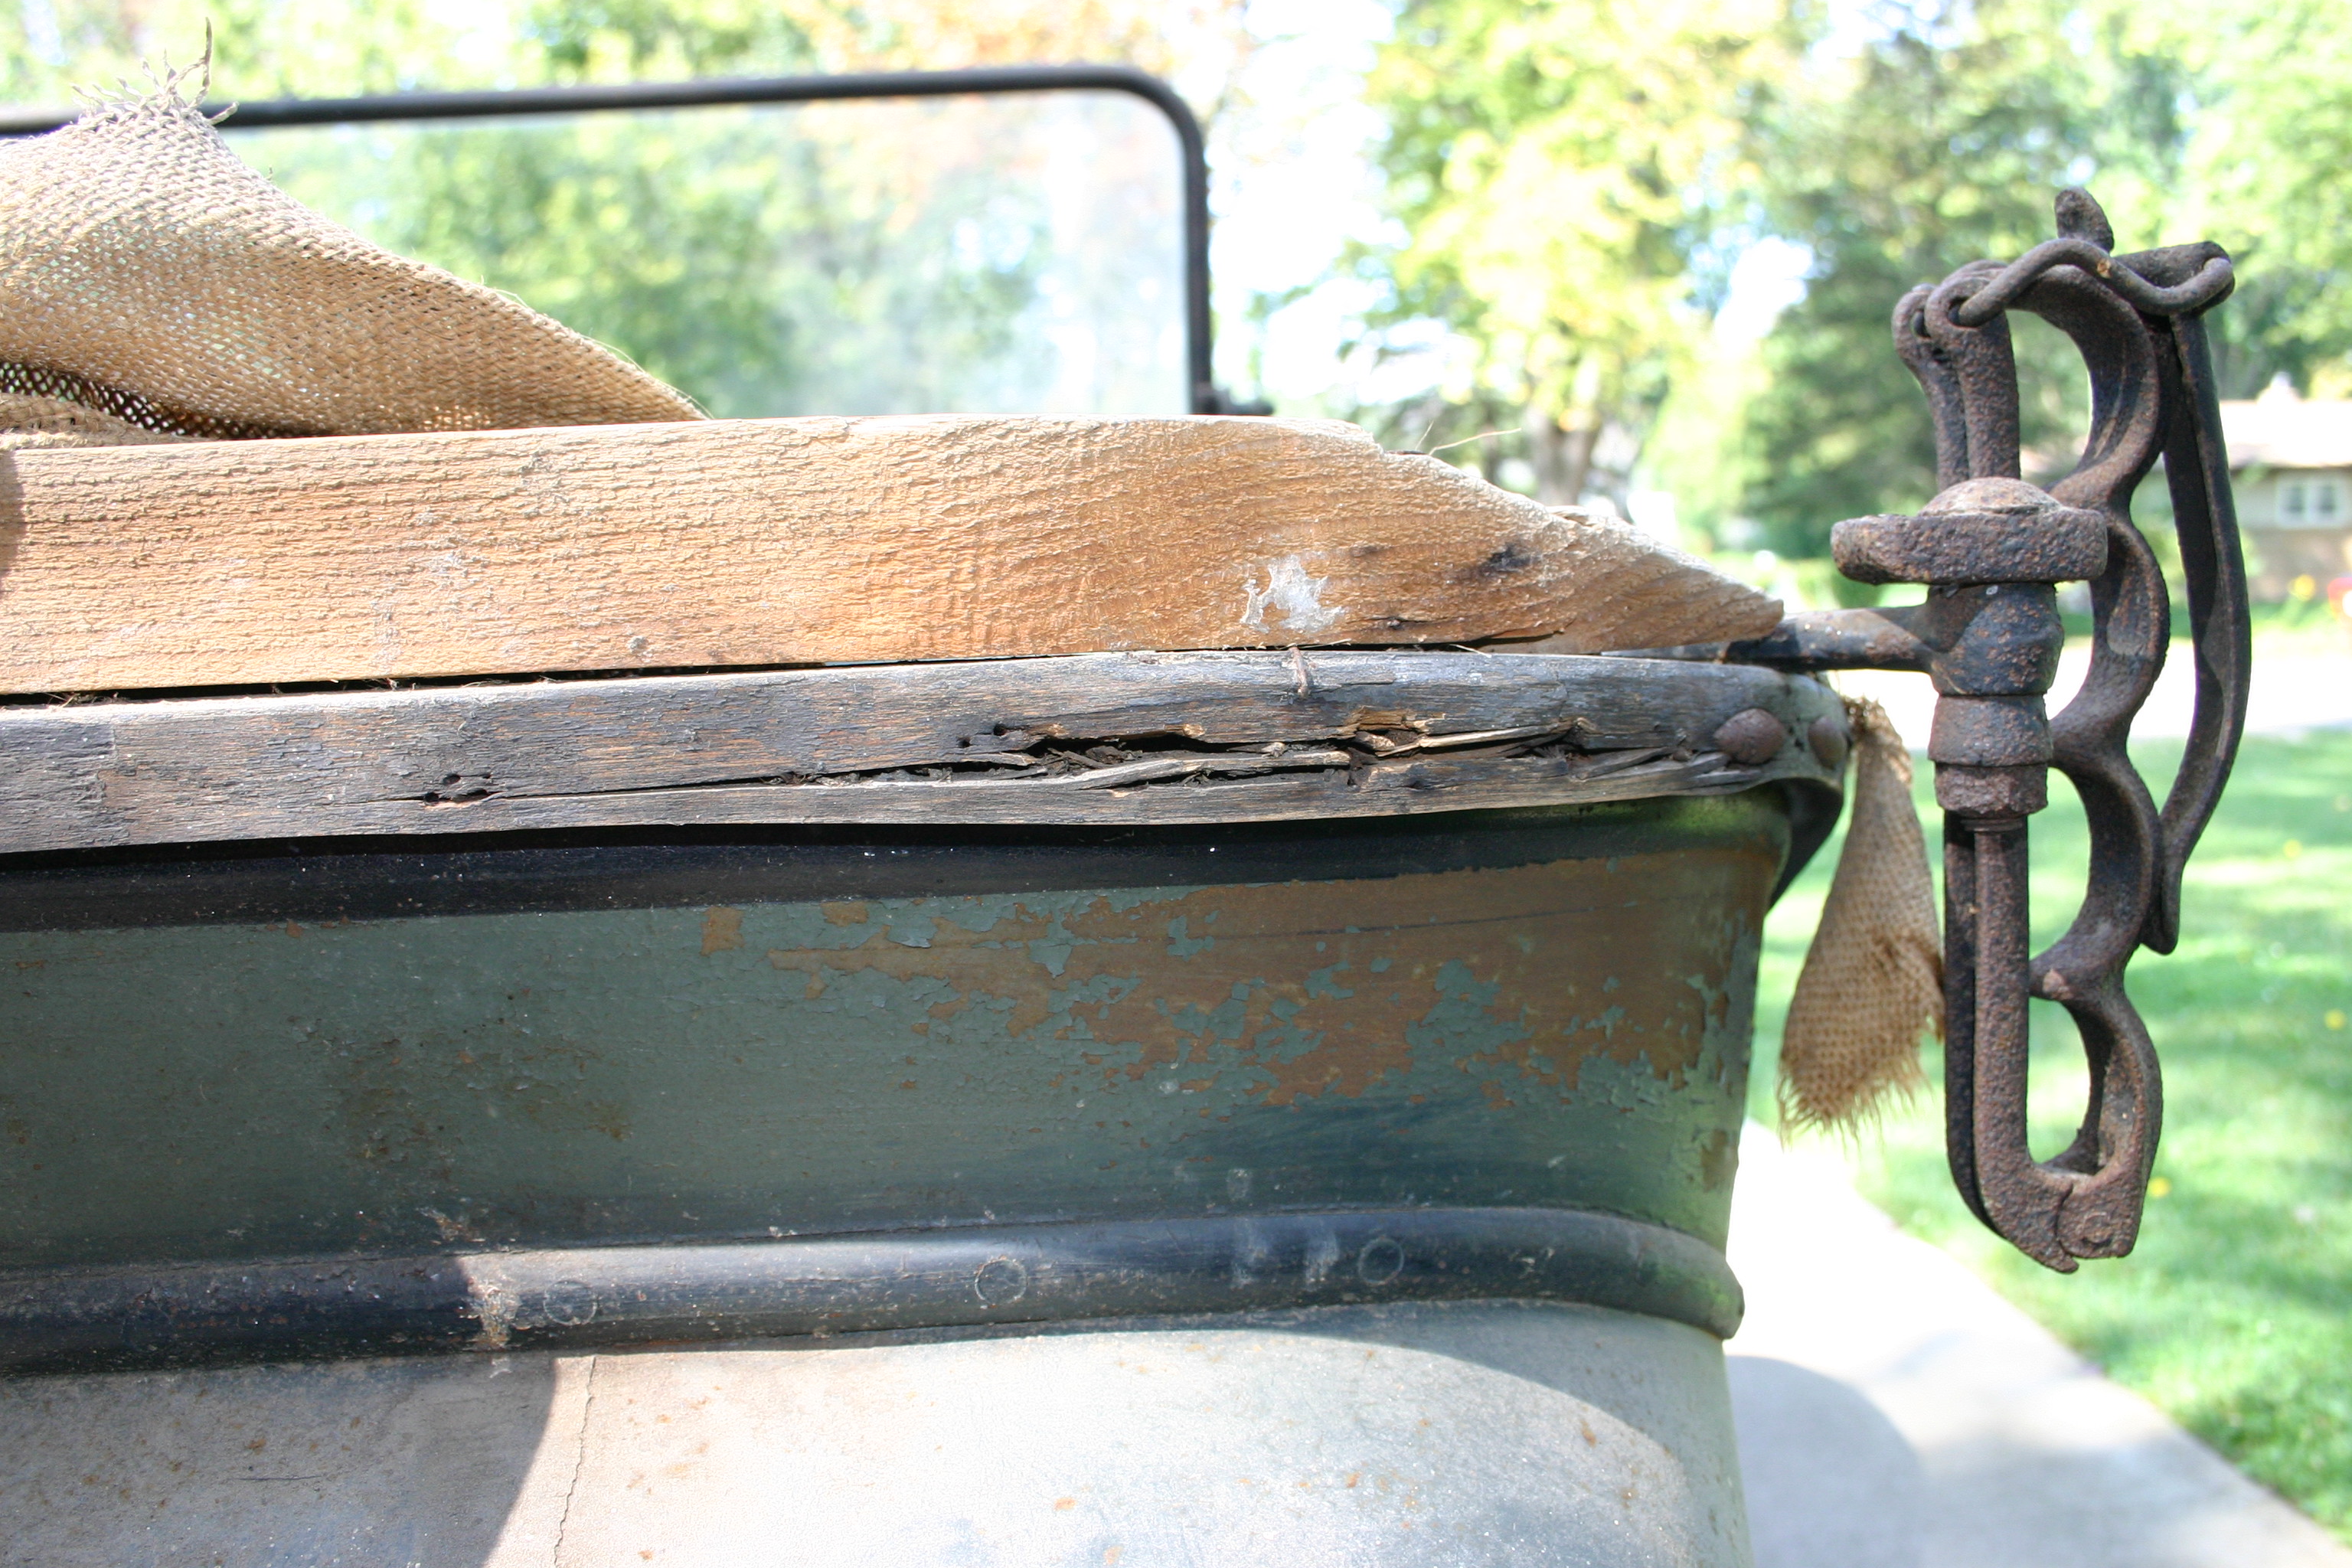
After spending fifty some years in a barn the REO runs again. One of nice things about being retired is you have time for a project like this. Still have a list of engine issues but I know it runs and don’t think it needs babbit work or major machining. This car has only twenty-eight thousand miles on it.
Well, here’s the list of what it took to get it to run; some of the repair where per good advice from fellow AACA member’s.
1. Replaced all the rocker arm roller with Delrin plastic, I think it had Phenolic, the rollers are not metal.
2. Reset valve clearances, several times. Intake .008” / Exhaust .010”
3. Rebuilt the Dixie 44 magneto, the original was a Grey Davis generator/distributor/magneto. The original wiring is still on the car!
4. Made a new magneto support bracket. The retro fitted one, when the Dixie Mag was installed had alignment issues. See photo.
5. Repaired the preheat intake tube (I am not sure what to name it) the internal copper tube had a split. I assume it wasn’t drained properly one winter! See photo.
6. Rebuilt the Mag to engine coupling. Another earlier repair!
7. Removed and replaced the connecting rod bolts with grade 8 bolts. Two of the connecting rods had excessive play, one over .100 (for you metric guy 4 mm). That was a major failure waiting to happen!
8. Rebuilt the carburetor, that still has issues. Leaks and consistent float level. I never had a carb where you can watch the float level.
9. Removed oil pan plugs and front to rear pan pipe. Removed as much sludge as I could scrap out and made a new oil screen. Now the pipe leaks a slow drip. The plugs are some really chewed up brass. See photo.
10. Repaired the ignition wire tube and replaced all the wires. See photo.


-
1
-
-
Greg,
Did you buy W-K Model 20? FYI; I own one. Does it run? Mike

-
Nice find. Any manufacture name or mark on them?
-
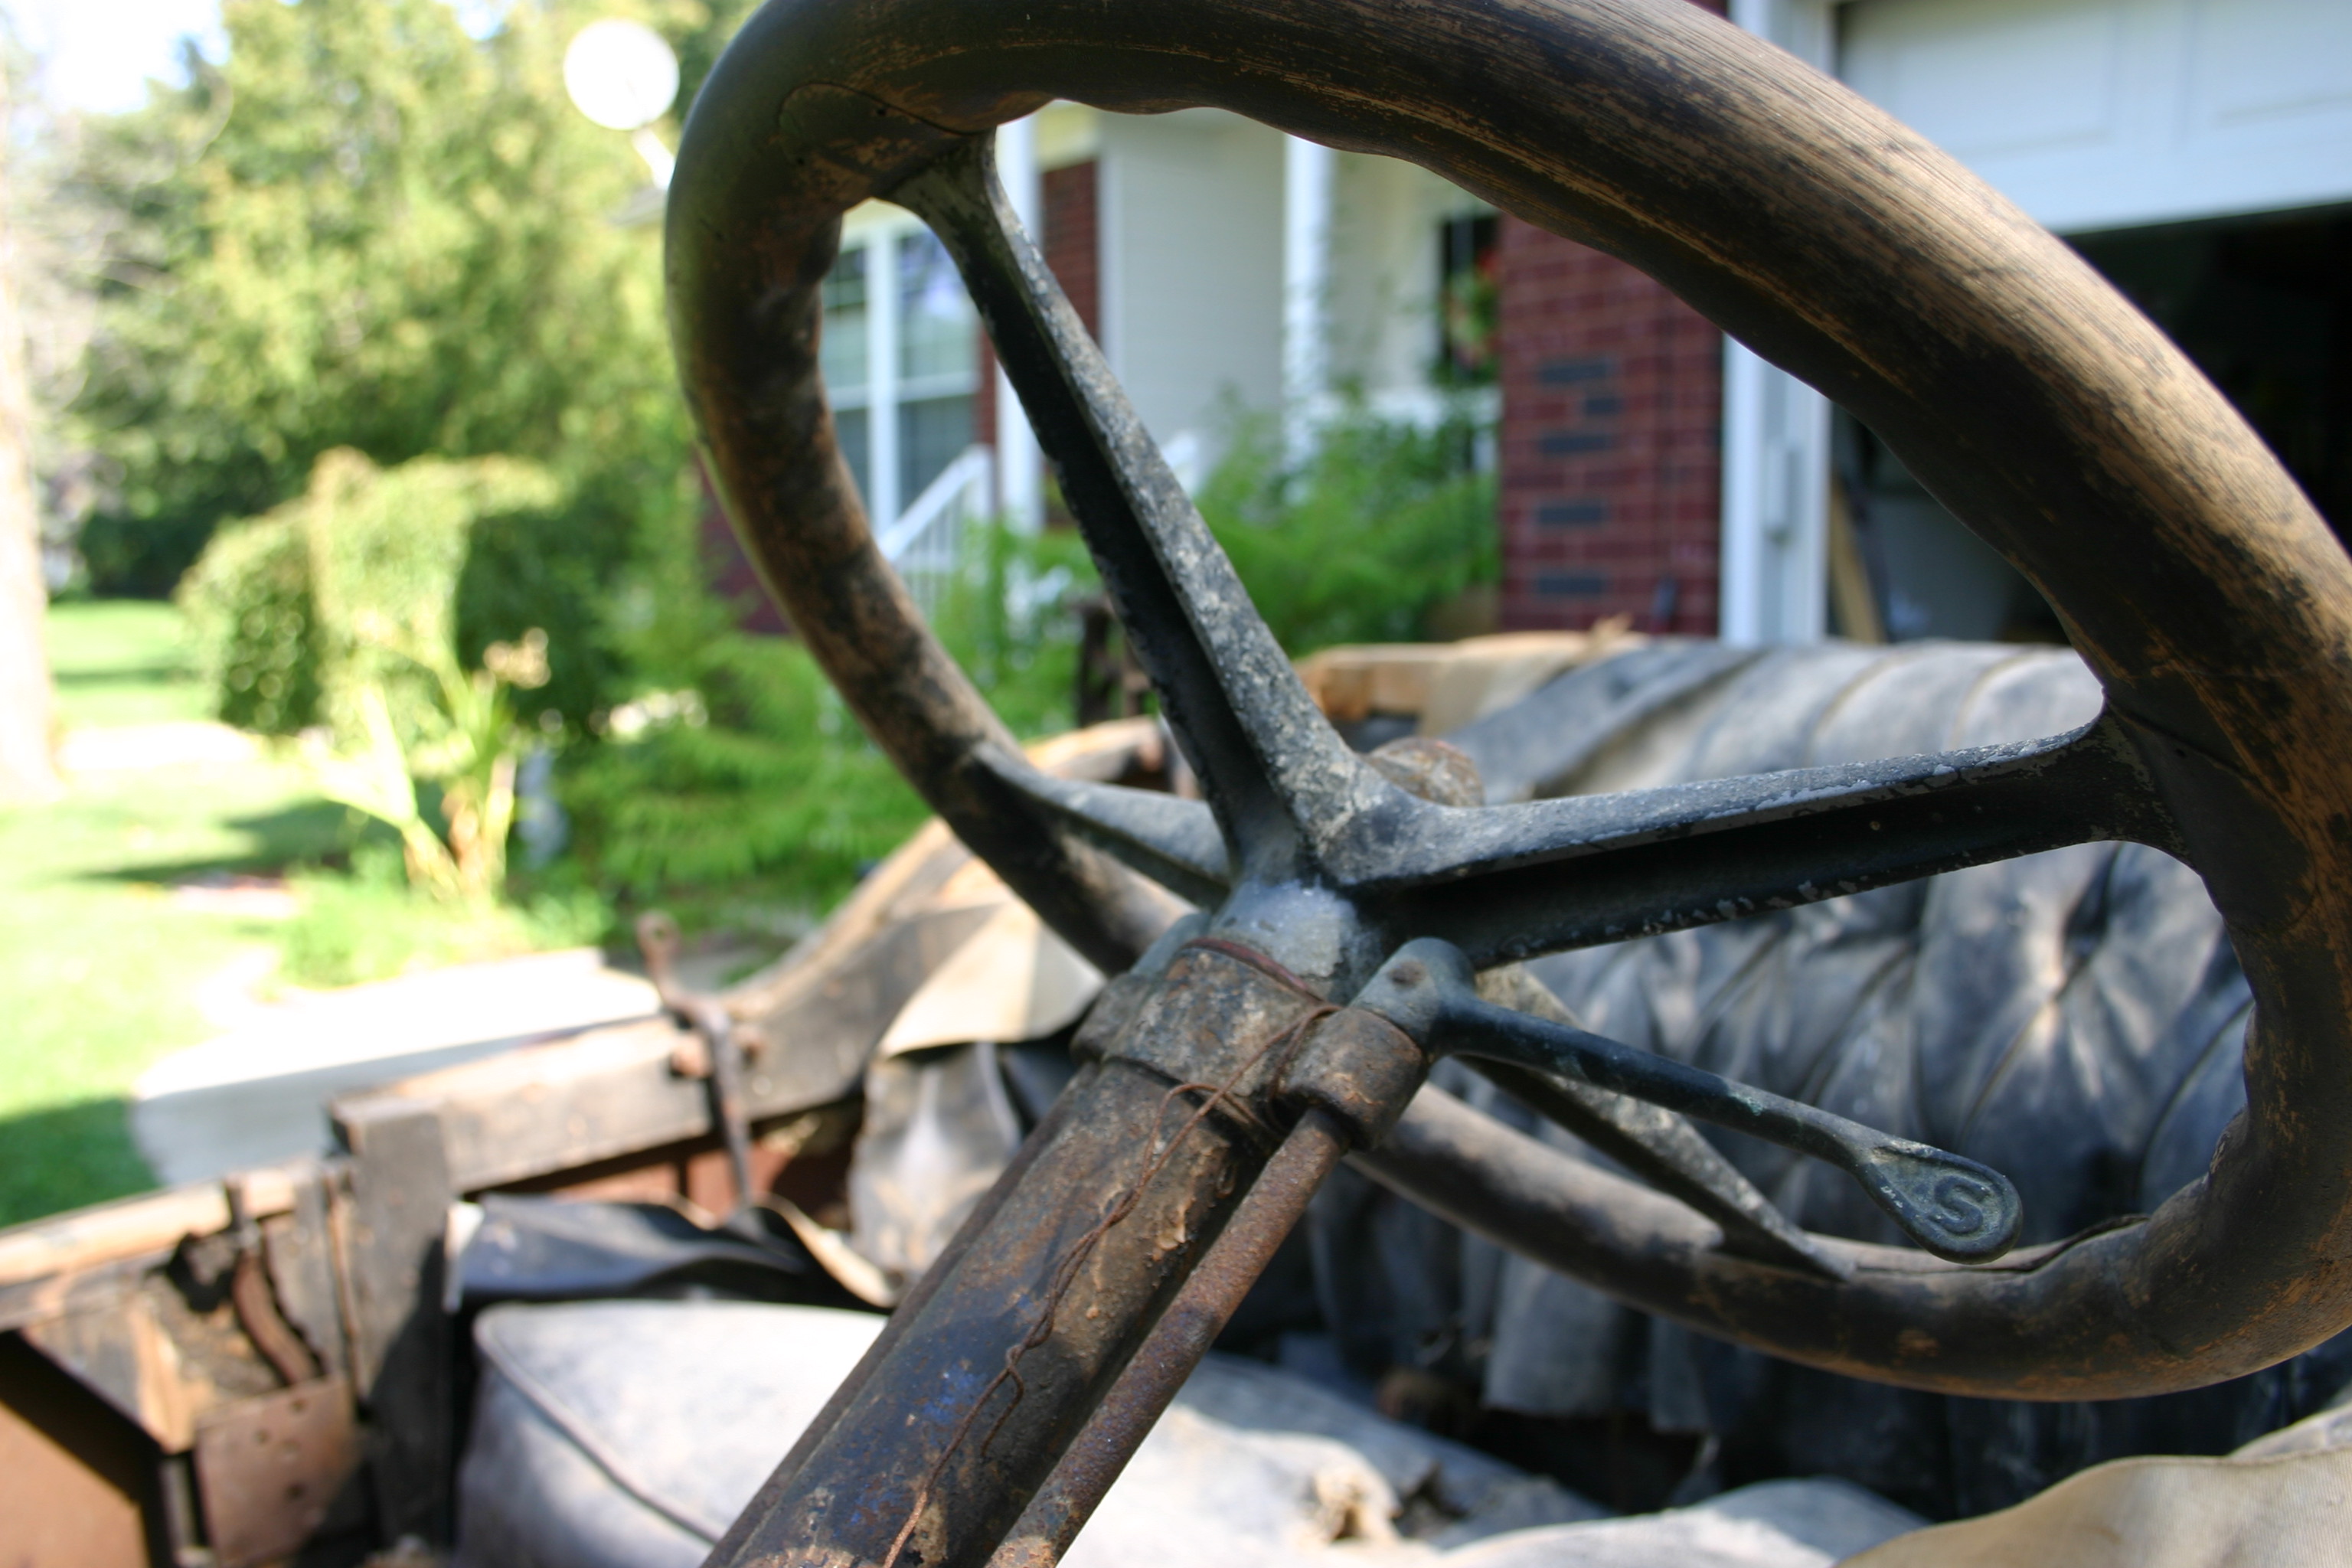
1913 REO as is pictures.
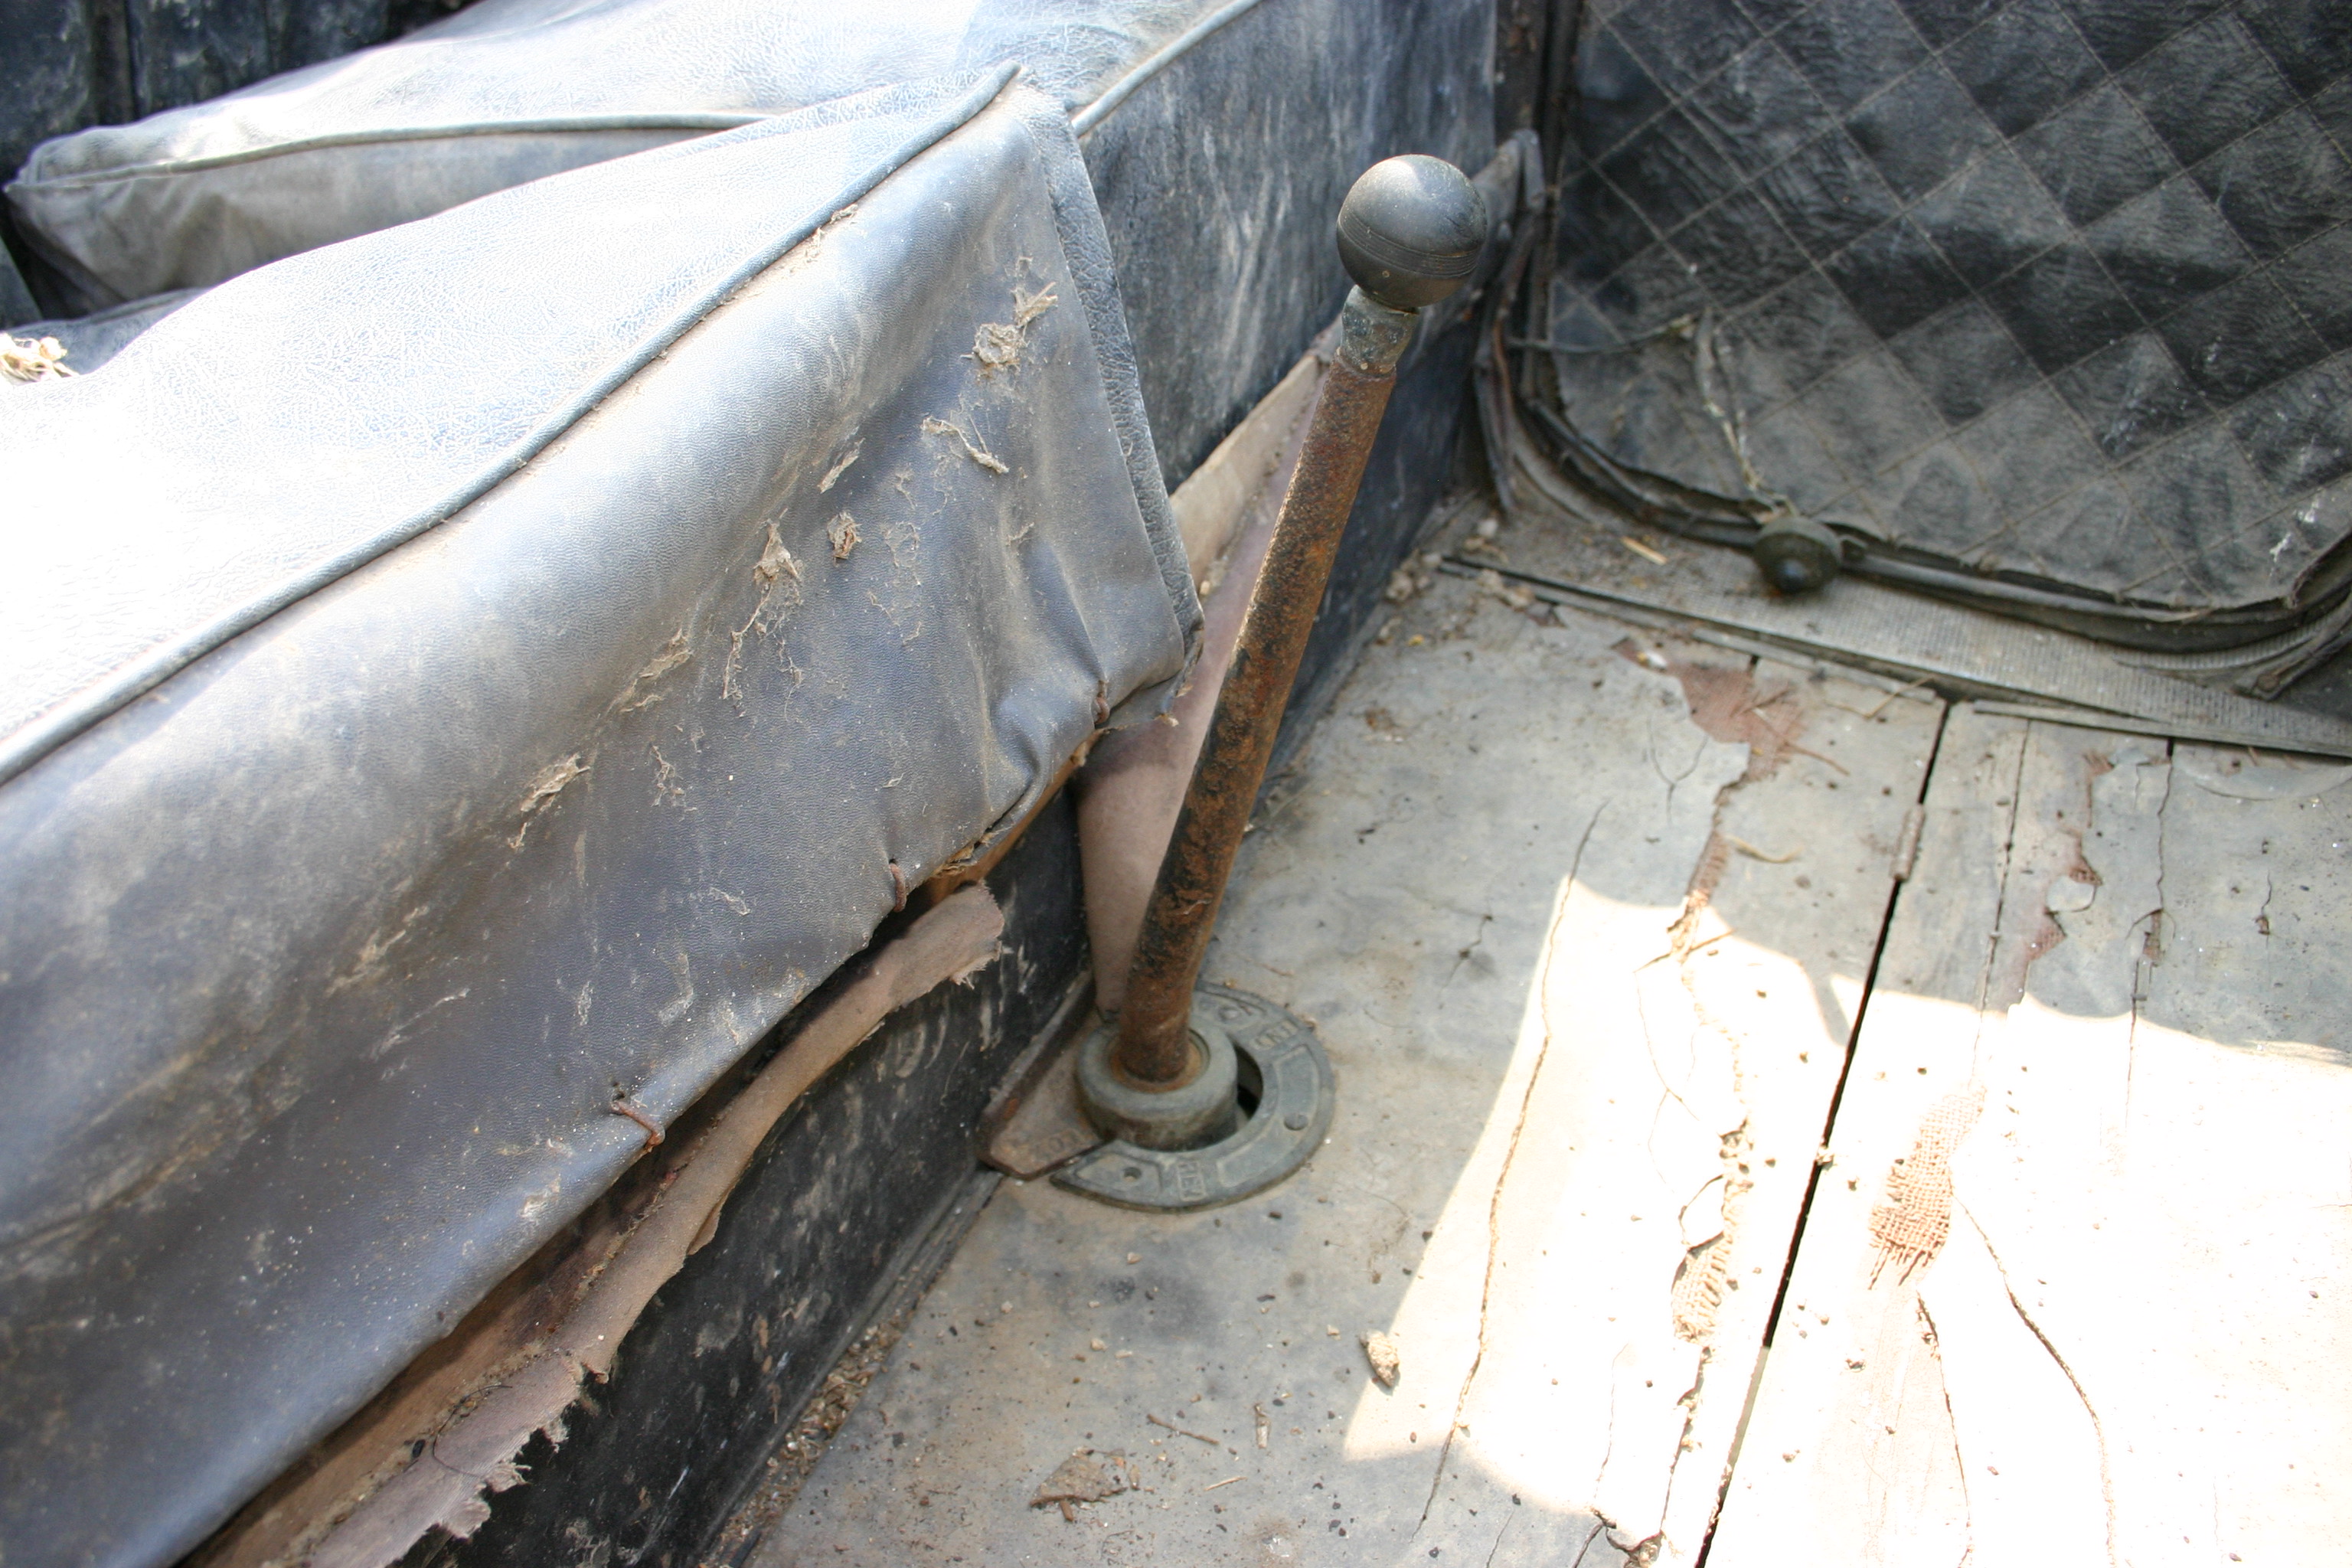
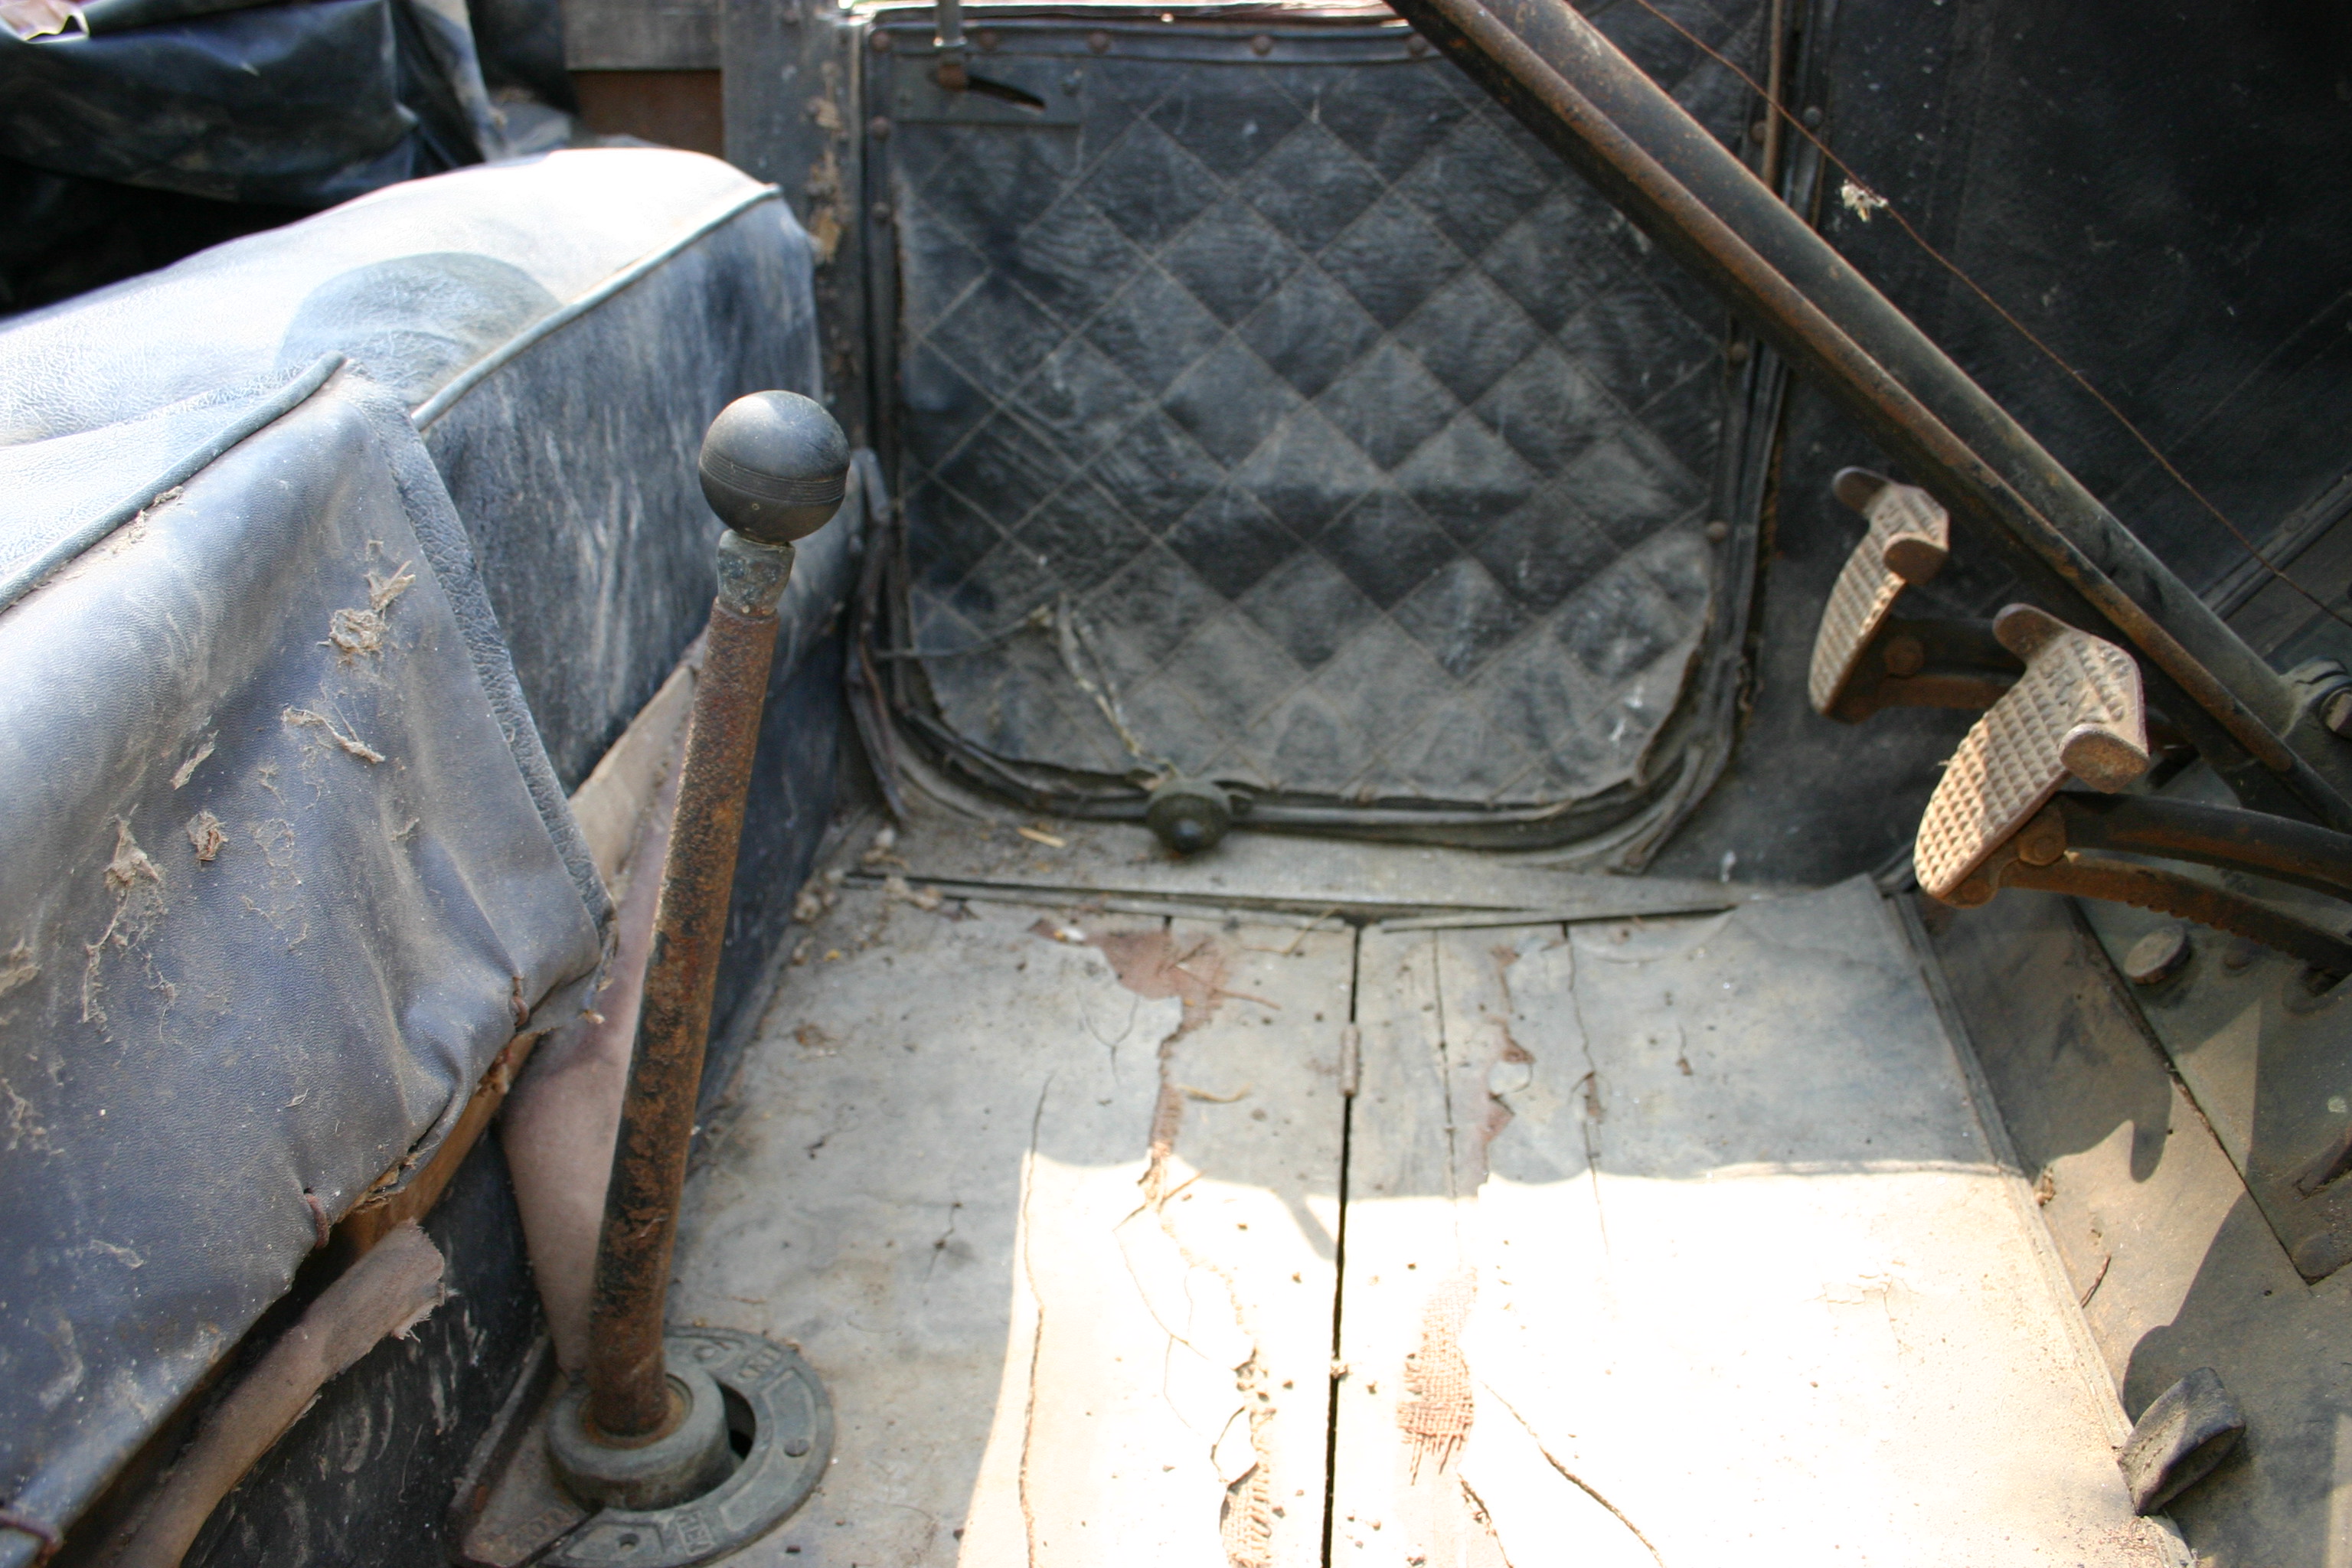
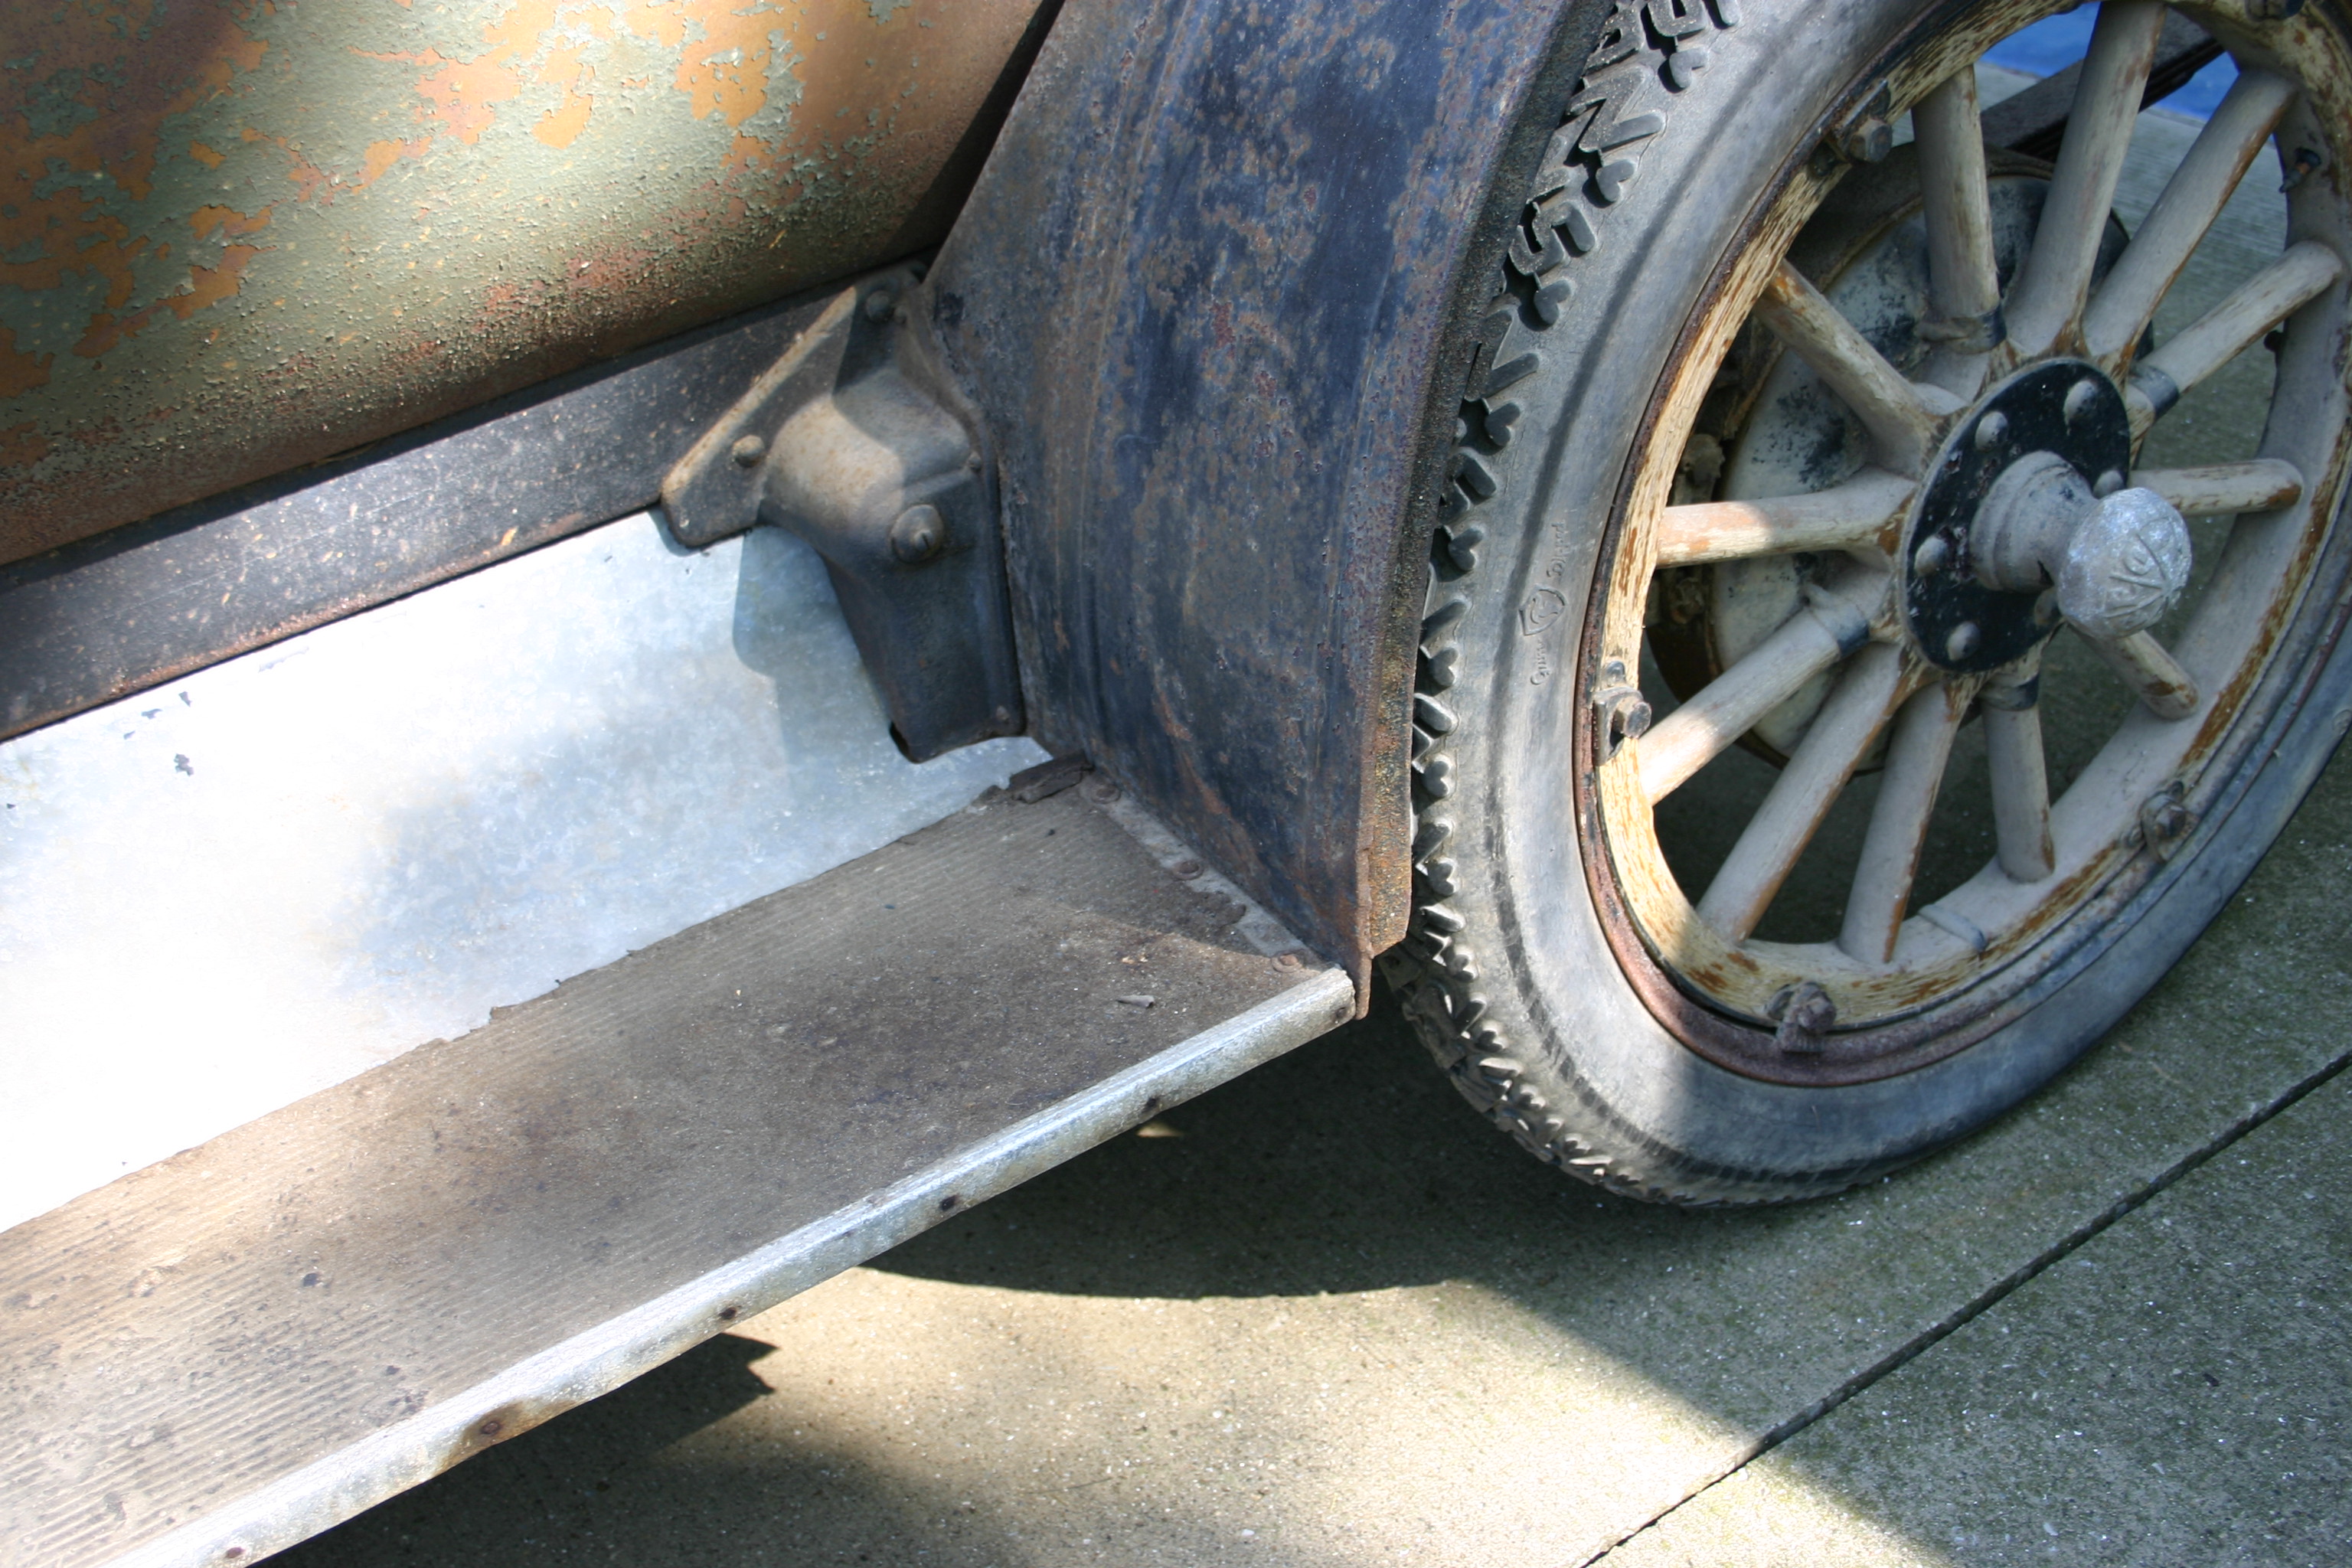
Yea, I bought the 1913 REO, it cried out to me, so I bought it. Vehicle was stored in Chivington's, Marion Ohio, auto sales showroom till sometime in the 60's. Then in a barn! I saw the REO in Craiglist ad and it called out to me! Has some earlier repairs and modification, also all the brass was taken off the car at some time, lights, gas generator, etc. Two guys from Marion sold it to me; one was into antique motorcycles and the other had a collection of tractors. Then bought at an estate sale.
And like a lot or "restores", I am looking for a few parts. My plan is to see if I can get it to run and hopefully I don't need to pull the engine apart for babbitt and machining. If you would like a photos of any particular item or detail that I didn't include, just ask. I have already been in contact with several AACA members and their in put and advise have been an engine saver!
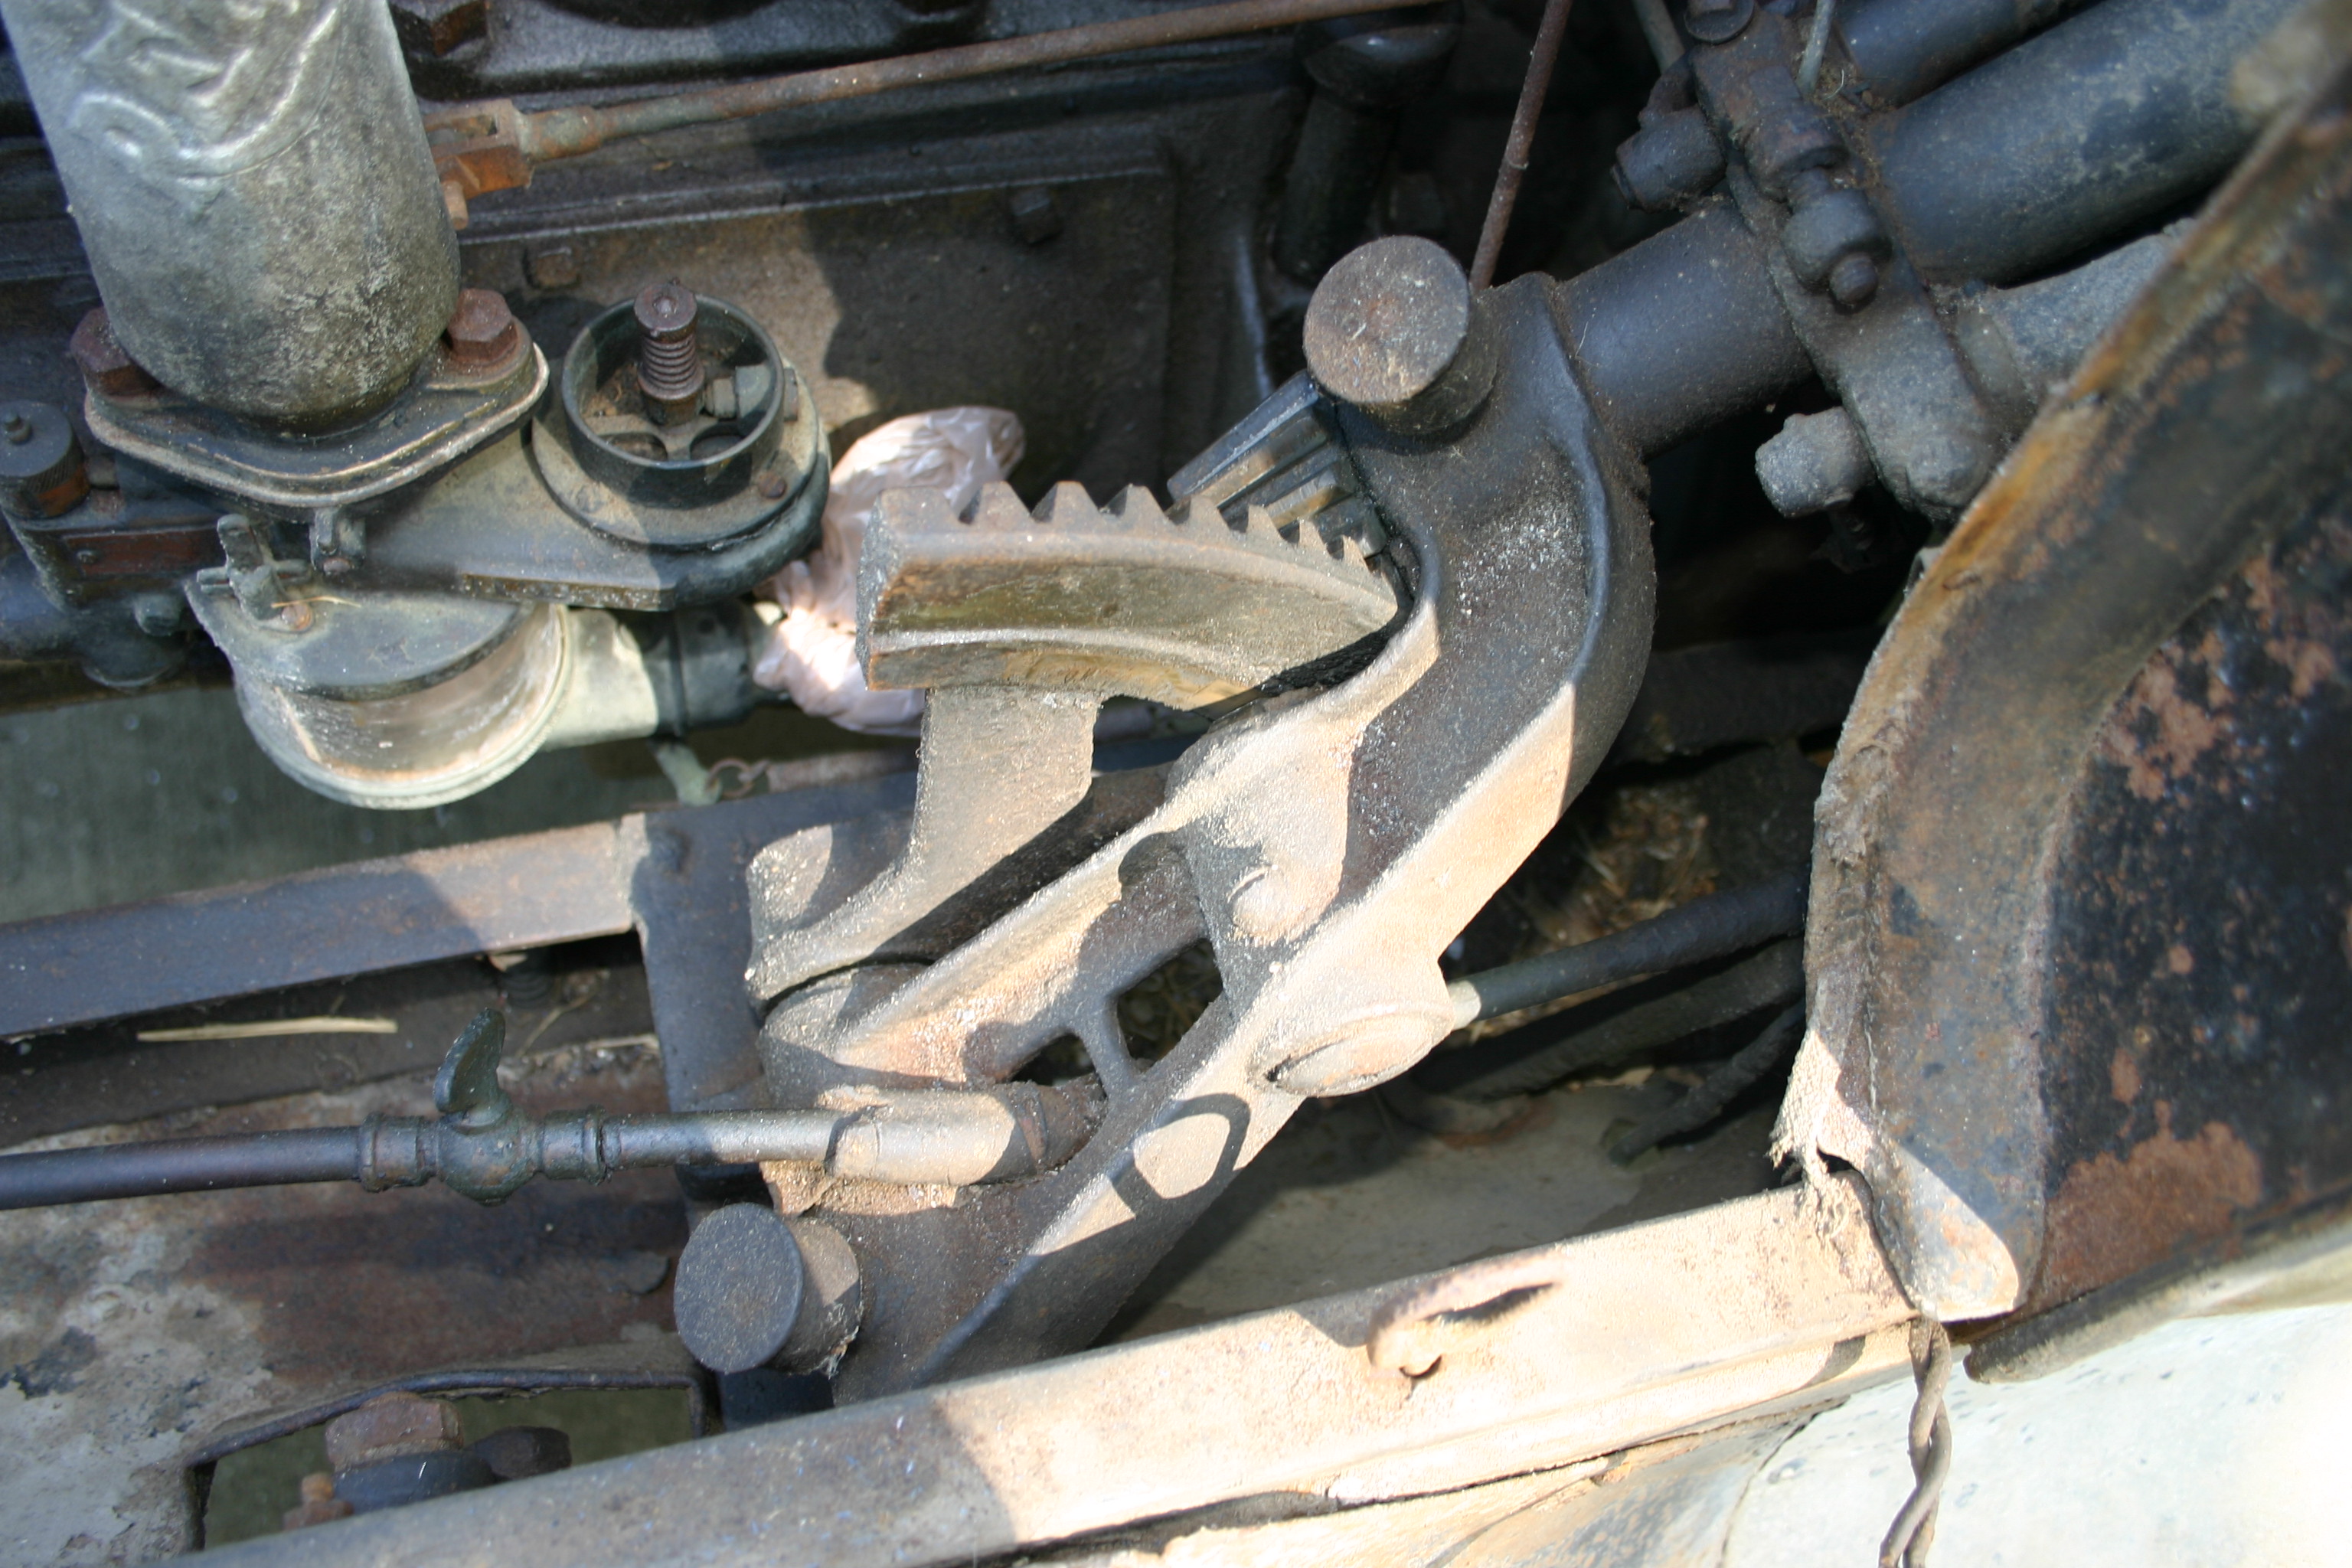
Currently; the Dixie 44 Magneto - what came with the vehicle - has been rebuilt and ready for installation. The rocker arm roller have been removed and replaced. The carburetor has been cleaned and needs seals/gaskets and reassembled / reinstalled. So there is still a list of items to address before I even try to start this vehicle. The rod cap bolts need to be inspected and possible replaced, oil pickup screen cleaned. See if it will hold coolant . So I am counting on all the old brass car guys to wisdom and experience to help me out with this project. See attached, Mike


.jpg.3d13db855a412d376a7bcf8ce7a0cc7e.jpg)


-
4
-


.jpg.3d13db855a412d376a7bcf8ce7a0cc7e.jpg)


3D Printed Replacement Part Marketplace
in Parts Wanted
Posted
If there REO the first parts I'll design them for free!