


flh73
-
Posts
112 -
Joined
-
Last visited
Content Type
Forums
Gallery
Events
Posts posted by flh73
-
-
RRB,
I'm feeling for you man. One part at a time. So the fittings have to be torqued not just tight?
Gary
-
Picked this up at a flee market. Two page large print ad. Anyone ever seen this one.
Gary

-
I've never hear of Slip Plate. I've used Eastwood manifold paint with good results. I have the brush on but i prefer the spray on. Calyx manifold paint has been brought up a bunch as well. Eastwood sells a version of this to. I think the key is, even after blasting clean it really well then paint away.
SHOW RESULTS when finished...
Gary
-
Dick,
Even a small drain on a new battery shouldn't have killed it, yeah drained it but should have allowed a charged back up. New "bad" battery that's a first for me. Glad its all set...
Enjoy
Gary
-
Tom,
As usual your RIGHT "Flash Chrome" not anodize. Anyhow it comes off (i've only sanded it off) and allows the stainless to be polished. Mind you my trim had to be worked to smooth out, fix dents etc. I then sanded smooth and yes removed this coating and polished.
From Hot Rod:
"Actually, there are corrosion issues with some kinds of stainless parts, and there are some that don’t respond well to polishing. Early automotive stainless was of very high quality, and it restores well, but as a result of the Korean conflict in the early ’50s, quality stainless became in short supply. So the car makers were forced to make due with stainless that contained a high amount of iron. This inferior stainless can have rust on either side, and a magnet will have a mild attraction to it. Making restoration of these parts even harder, they were flash-chromed to prevent rust. this causes a problem similar to what we have with anodized aluminum. Anything that compromises the thin chrome veneer-a stone ding, a slight scratch, and so on-allows water, salt, or whatever to get at the stainless and cause rust and pits that can create a hole right through the piece. With some flash-chromed trim, the more you try to polish it the worse it looks. If you over-polish it, it can take on an orange-peel-like appearance because of the iron content. I’m sorry to have to say this, but not all stainless can be restored to like-new appearance, even if it is straight and has no dents"
-
Tom, I'm not talking about a color its the stainless trim with a clear coating on it to help protect it. I have run into on both a 67 GS 400 and my 63 wheel well moldings. I'l try to find the article i read about the oven cleaner to strip it from the stainless.
Gary L.
-
My car had one of these on it. Original tube with insulation was still in place. i'm sure somewhere it rusted away from the manifold. The repair heat shield and clamp to manifold was in place with tube lying on manifold under this cover. I clean them and reused it this way. Choke works as it should. Maybe not as fast or accurate as original but manifold heat reaches the choke and turns it off as expected.
During resto i eliminated the tube and heat riser valve in the manifold.
-
GM and i think Ford coated the SS on some of the high traffic areas (wheel well moldings) with a hard like anodizing coating (not sure what it is). This clear coating, in the past, i removed by sanding until this coating was removed (not easy but necessary prior to polishing). I've read recently that oven cleaner will melt this coating right off! This could have saved me hours. Anyhow, there are some pretty good videos online of people removing dents, sanding (100-600 grit) and polishing SS. There are companies you can send your stainless to and they will handling all the details work etc. for $$$. I 'm a little cheap so i figure hey labor is like free on my own stuff. Either way you get them polished this details work really pays off on the look.
Post pictures when finished!
-
I restored mine. Many hours put into these small detailed parts. Clean, sand, polish than tape off and paint, i clear coated (satin or matte finish as this wasn't gloss) as well for added protection. If you need re-chrome then do this first.
-
One additional option has me dismayed. foot button on the floor next to the brake pedal to change the radio channel (first stab at hands free:). Iv'e seen it on other cars i think older though. Was this an option for the Riviera? or maybe dealer installed?
-
Dick,
Thank you for the kind words and it was my pleasure. Please enjoy looking at and driving your new car.
That picture of the interior cannot do it justice. This interior is absolutely beautiful as close to A1 as I’ve seen. Very few wrinkles if any, nice foam and soft feeling leather. Headliner, sail panels, door panels, lighting, carpet, trim all look and fit very well. The company that did this interior also did the trunk all be it not original material but the look of original with more durable stain resist material and yes it’s as nice as the interior.
Best regards
Gary Lowell
-
 1
1
-
-
Yeah Tom i'm clear about this fact. The evidence is obvious as i'm taking these components back apart and draining / blowing out alot of oil. I had the system apart when building the car but maybe didn't clean it our properly. My final step is flushing system with a cleaner and alcohol as possible. This is why i think the service manual is onto something when considering how much oil to add to the compressor. If its NOT a completely empty system 10.5 ounces maybe too much oil. I think the system especially the compressor and reciever dryer can trap some oil. This is why they recommend less oil on an a/c system that has gone through repair versus complete replacement. Once my system is cleaned i may go back down to 6 ounces. I believe this will be sufficient to lubricate the compressor / system.
-
I'm impressed with your diligent and amount of time and money you’ve into this. I hope it turns out.
I've been working on getting my a/c up and running as well. Not to your point yet so thanks for all the information.
Your last comment worries me a little 10.5 ounces is for a "new" compressor with no oil. The service manual breaks it down 4 ounces, 6 ounces etc. based on the work that is done if unable to measure what came out, like most of us. I loaded my compressor with the 10 ounces yes after super draining it and had A/C apart leak checks the parts individually. My gauge had a leak so after pulling vacuum for a couple hours it wouldn't hold. I decided to go ahead and load 1lb of R12 and see if it held . After fixing gauge It did hold overnight . So I started loading the additional 2.5lb required to reach 3.5lb. At about 3lb something plugged up and pressure spiked and blew out an over pressure valve built into the back of the compressor. Once pressure came down which was quick it held again. I even ran the compressor some more to see what would happen. I've since emptied the system and taking everything apart again. Long story longer haven't found the problem yet but can note there is a TON of oil in the system. I'm starting to think TOO much oil was present. I'm going to clean out blow out etc. and try a find a blockage first. I've rebuild the STV using a kit (mine was very clean inside and looked ok). New Receiver Dryer. new oil but only 4-6 ounces, leak check and see what happens.
-
I've received much help from the forum and for awhile belonged to the RoA but has since lapsed. Maybe I can return the favor. I live just south of Flint MI 20 miles. I have an auto technician background and spent 3 years restoring my 1963 Riviera all be it from the engine compartment underneath to the rear Bumper. Engine,tran, rear axel and everything nut and bolt in between Metal work with floor pans, and trunk work as well. Still needs paint but at five feet away looks pretty good. let me know if i can help.
-
1
-
-
I used there front and under seat floor pan, well pieces of driver side and under seat. All fit pretty well and matched. They are over sized which is a good thing. I was happy with the product. Not sure where you live but i have the whole passenger pan left over if you wanted to look.
-
I'm messing with this a little as well. I charged mine with R12. The system was clean except for the original receiver dryer. got about 2.5 pounds in the system not really cooling down but high pressure side spiked and blew the blow off valve to relieve pressure out the compressor. Sight glass looks murky shortly after so i figure desicant bag inside blew apart. So i'm at new dryer and flushing system again.
Now to your questions, the service manual describes the STV adjustment to change pressure. I thought this was fine tuning but maybe we can get 20-30 lower pressure. I have a questions as well. Does it make sense to rebuild the STV (new seal etc.) or upgrade and convert to a more modern and reliable system. I've searched and got some pretty good information, see link.
-
I bought new unit from CARS. Price was comparable to recore but NEW. Nice piece, i did however give the core area a little extra love in the paint department but probably not necessary.
-
1
-
-
Ed,
I know accuracy is important. When I originally made my profile I thought it was a 94 but you corrected me so it must have been a 95. Can’t remeber all cars especially the ones I don’t work on that much. So I’ve tried to go and change this error in my profile, unfortunately I’ve been unsuccessful.
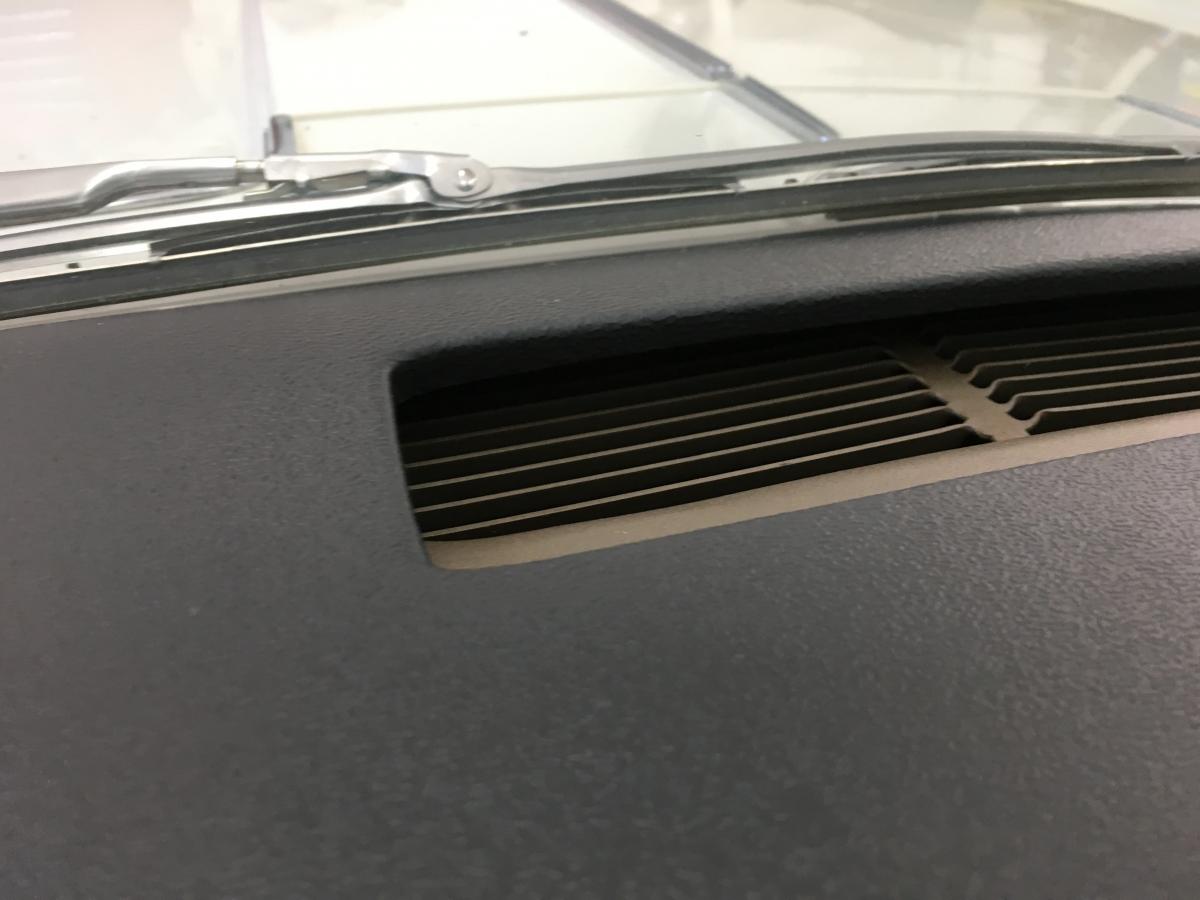
Adding finished dashtop pictures. Came out nice. At first I thought it’s was to glossy but once installed I like it.


-
2
-
-
No, the dash was pulled (quite easy four screws as Ed explained). Cleaned dash. lightly sanded and cleaned again. The cover fit properly off the car with some minor adjustments. The issue is fitting the cover while the dash is still installed. With the slope and how tight the windshield fits to the dash this is not possible. once the cover is fitted off the car and glued it slid back into place and fit properly. Pictures coming of final install.
-
Dashtop is installed and painted. A problem came up when in the sun. It wants to pucker through the middle when heated. This is not a good look. I follow the direction to NOT glue the center and only glue the edge. when cool it sits flat with no issues and a good look. I guess I'll call Palco help line Monday to see whats up.
-
It shipped and arrived in less than two weeks. I like the look and grain is really close. Once painted should do really good. Now onto fit. Tried test fitting, side to side looks good but I’ve been unable to get it to clear the windshield. It seem simply too tight. I may have to remove dash to complete the install. I don’t really mind if this is my only option. I thought I read some simply slipped on without taking it out.
Anyhow onto pictures.


-
I ordered my "Dashtop" from CARiD at $154 free shipping. Decided to paint myself to try and match it best. Probably use SEM paint from paint supply house. It said will ship in 3-5 days we'll see.
-
Oh no, not the only crack. I agree though small cracks I would definitely fix. This pic is for color only. Thanks though.
-
I used “Inline tubes” stainless steel pre bent tube set on a 63. They were really a nice fit and I’m very happy with them. I went to a duel m/c and had to bend and flare my line here ( using stainless). A little stiff to work with but went fine. This was all completed with body on frame with no real issues. Fishing tube through frame was not that difficult as the tube enters and exits twice. Just cap the end going through to prevent contamination.


Found-Great Degreaser and Rust Remover-Power Seat Assembly Finished
in Buick Riviera
Posted
Evapo rust works even better and faster heated. I use a small crock pot dump all the bolts and small brackets wait a couple hours, done.
the seat tracked look good. The paint reminds me of Eastwood detail gray.