


herm111
-
Posts
213 -
Joined
-
Last visited
Content Type
Forums
Gallery
Events
Posts posted by herm111
-
-
Long Story, but this is a rebuilt Boring machine in 1945, and never used again, as they bought another new one to do rods, as they were getting behind.
I took it all apart to paint it, and it is rebuilt, in new condition.
If you look up Hydro-Borer, on the net, it does all kinds of jobs.
I was going to build a jig to bore different size ball caps, never got around to it.
2,800.00, plus shipping.
Has manuals.
Web site phone number 515-303-0363 It will ring, shop, house, and my cell phone.
Herm.


-
1903 Olds Pictures.
I have many, it won't let me list any more.
That Sucks !
Herm.
-
Pictures of another 1903 Curved Dash Olds.
First two pictures are on a new made crank, that they messed up the radius on at a crank grinder in Texas, where the owner had sent it, you have to watch! Arnold Motor, in Spencer, Iowa, had to fix it.
This is all this post will let me post ?
Herm.


-
 1
1
-
-
I went back and looked at your burnt out rod, and the last time they were poured, somebody, used Lead Babbitt.
In any case, the tinning was not very good, as there should be some showing in the rod part.
The two half flanges show to cold of pour, as the flanges did not stick to the sides of the rod, and they are always the first part of the bearing to go. I will put some pictures up of lead, and tin base babbitt, difference in color, Lead id the dark.
Also pictures of a bad flange not sticking, and the way they should be, and some others.
I couldn't find the 1931 Plymouth rods, and mains we did for the race from Peking, to Paris, so I put in a set of 1930 Buick Rods, and Mains.
About a month ago, we got done with another 1903 Curved dash Oldsmobile, i will see if I can show them.
Thanks,
Herm.


-
1
-
-
When a Babbitt Bearing go bad, you can normally limp back home, and put in another rod.
When a insert goes bad, your dead in the water.
Also, inserts have a way of going obsolete, or in the size you want, or chewing up the crank, where it has to be ground.
Herm
-
1
-
-
On 9/26/2019 at 11:59 AM, Tinindian said:
My babbitt guy would not just re-babbitt my bronze backed replacable mainbearings in my Pontiac. He however re-cast the bronze backing and the babbitted the new shells. He said simply removing the bronze shells from an old engine could/would/might distort them and the only correct repair was new shells. $1500 for three bearings and shells which I thought was very reasonable.
I have used old parts from other engines and reused parts from the same engine and have never found it to be satisfactory. If it was a trailer queen or a car that was just used around town it might work for a while but certainly not reliable. Drove home almost a hundred miles in an old Chev with a piece of belt to replace a burnt out rod brg and almost the same distance on five cylinders with a rod and piston removed. No money for a tow and needed to get home.
There is really only one way to repair an engine. That is the problem with a new to you vehicle, you have no idea what or how any repair has been made in the past.
If the old main inserts are not hammered, cracked, or lost and I am not talking about the babbitt, as that doesn't enter into it. There is no reason in this world, to ever make new inserts. Sure, I know it adds more money to the babbitters cash flow, but I am telling you, it is a waste of money.
When heated to pouring temperature, old or new shell, makes no difference, they both will bring there parting edges, together, and you fix that step, during the machining operation.
Now, steel backed shells, will, hardly move at all.
Herm.
-
On 9/25/2019 at 5:50 AM, PFitz said:
Your not just talking about money out of pocket. There's also the value of what you have to be considered.
Yes, you can save money by taking short cuts, but how much will it be worth if the bottom end of the motor gets trashed ? The main and rod bearings have to withstand tremendous forces and be the correct fit to maintain the correct oil film thickness to support those loads, reduce friction, and carry away heat. When they aren't, the damage - clock starts ticking.
Paul
" AGREE "
Herm.
-
On 9/25/2019 at 1:48 AM, hchris said:
The fact remains that if you fit bearings that don't conform precisely to the crankshaft dimensions then you have every chance of damaging the crankshaft, and then you're back to where you started.
Yep, it doesn't take long for an out of line crank, to break!
Herm.
-
On 9/24/2019 at 4:23 AM, Buffalowed Bill said:
The discussion here assumes that there are new bearings are available for the application. In the case of the Ford new bearings are available, but in a broader sense there are some cars that become derelict because inserts don't exist. Case in point of real world concert for those of us who own 1936-42 Studebaker Presidents. Insert bearings for this engine have not been available for years, and that's how long some people have been looking for them. In this case trying to piece together a bottom end from parts from another engine beats the alternatives.
Pour the old inserts, and align bore, and your back to New!
Herm.
-
On 9/24/2019 at 9:48 AM, Ronnie said:
I can't see any competent mechanic installing a crankshaft that has been ground into an engine using used standard size bearing inserts. The engine would knock like hell if you did and oil pressure would be almost non-existent. I guess you could find a mechanic that would be willing to do a half-ass job by grinding, shimming or modifying the inserts in some manner but don't expect him to stand behind his work. That is the kind of thing that's done when your objective is to get the engine to run long enough to push the car off on someone else. As a mechanic and machinist for over 30 years my conscience wouldn't allow me do that.
I Agree, Herm.
-
On 9/21/2019 at 6:03 PM, JV Puleo said:
All bearings have Babbitt surfaces. Insert bearings just have a very thin layer of Babbitt.
Not all bearings are babbitt topped these, some are Aluminum, and other alloys.
Herm.
-
On 9/21/2019 at 4:39 PM, AHa said:
There is also a question as to quality of babbit. I understand the old original babbit is not near as good as the stuff we have now. I guess it depends on what you trying to accomplish. The old bearing can be fit to the ground crank, all it takes is time and experience.
There is no way you can fit old bearings to any crank, as you don't have enough babbitt to work with.
Herm.
-
On 9/21/2019 at 4:39 PM, AHa said:
There is also a question as to quality of babbit. I understand the old original babbit is not near as good as the stuff we have now. I guess it depends on what you trying to accomplish. The old bearing can be fit to the ground crank, all it takes is time and experience.
We use the same Babbitt formulas today, as was in 1900. If the foundry, doesn't have what you want, they will mix i for you.
Herm.
-
They fit a early Ford V-8
-
The first thing is to check the crank pin size. Measure up and down, and then at a Quarter turn. Then across the pin, from one side to to the other. If over a 1/2 to 3/4 of a thousandths, the crank should be touched up. So what ever the desired clearance would be, say, on a 2 inch pin .002 thousandths, your actual clearance would be .002-75. you always have to fit to the largest diameter.
Check the rods for cracks, gap between the babbitt thrust and the rod.
Having all the shims, is a Plus!
By all means, have the rods checked for alignment, twist, Bend, and Off-Set.
Most old GOOD shim pieces are is .002 thousandths increments, the cheaper ones, as today are in .003 thousandths pieces.
So, if you have .003 thousandths pieces, first only remove one shim from side one side, if it is to tight, leave the .003 out, and put in the .002, and if that is to tight, take out the .002, and replace, with a .001. square foot sheets of .002, and .001, are sold in Mc-Master-Carr.
I don't know your bolt size, so I won't say the torque.
If you use Plastigage, do NOT use it dry.
Your rods are still factory, with Tin base Babbitt, another Plus.
If usable, the crank pins should be polished. But the biggest concern is the 100 years of grit in the engine that is going to go through the bearings when you run it.
These are 1930 Buick, Rods, and Mains.
Well, I have told you more then I know.
Thanks,
Herm.


-
1
-
-
4 hours ago, Warrior goddess said:
Bear with me/ i've researched a lot! i have a 1920 continental 6y engine in my 1920 columbia. we did a lot of work and i managed to get 8000 miles on my newly babitted connecting rods. however, one day i was doing about 50 mph and blew /melted one out! after a tear down/ only takes about an hour on that car/ i noticed some cracking in other bearings also and sloppiness in my wrist pins on my new aluminum pistons. so, i added an external 12v oil pump and filter! works great! we sleeved the wrist pins to tighten them up, and went thru a lot!!!! of effort to machine insert bearings from modern volvo aluminum something or another! it has all failed! It couldn't handle the pounding and every few hundred miles i was adding shims behind the inserts to tighten things up.so, i went into my shed and retrieved my old pistons, rings, wrists pins / all look great! i had only switched to alu
uminum pistons because i thought newer is better! WRONG! here.s the kicker(s)!!! i think with the electric oil pump i solved the problem of doing 45mph. but i'm debating weather going back to babbitted or trying nickel bronze as inserts! i researched and can not find what the first inserts were made from in the early 20's when they were first used. did they already have the technology to have layered/ coated inserts? also, with my aluminum inserts, since they were machined as a complete unit and cut in half, they weren't true halves. and then the problem of spin. we drilled and pinned them but they still wanted to rotate and the pin simply gouged the aluminum until it allowed some movement. has anyone had success with home made inserts in an engine that rpm wise i guess falls in between the slow pre 1920's and the faster rpm of later engines. i'm guessing i hit 2000 rpm but don't know. just judging by sound. i often run at 35/35 mph. it.s a strait 6 200 cu inch or so. if i do go with babbitt should i try and straighten the rods/ 2 have very slight bend / or can i make up for that with the line boring of the babitt with the wrist pin angles?also, how many 2000th brass shims should i use under the caps for future tightening? also, has anyone tried to
strenghten a connecting rod by welding stock on either side the full length after straightening them. if i use inserts then there's no correction possible.the rods have a slight twist also but i don't see how that would matter as the piston would just be slightly turned. i know this is a lot of questions, but i like driving my car a lot without a tear down every few hundred miles. i,m about ready to try the old method of cutting strips from my leather belt. many claim to get 1000 miles this way and thats a lot better than what i.m getting, and only 10 bucks to boot. thanks, steve noll
It sounds like there were many things wrong that gave your engine no good chance to survive the 8,000 miles.
Yes, the rods on any engine have to be straight, in its twist, bend, and off set, or the stage is set for an automatic, failure. The chance of you getting a good babbitt job, can be slim, to none. I would like see a few pictures of the work. I would think in 1920, the babbitt would be poured solid in the rods. What was the clearance on the pistons, to cylinder wall?
All Aluminum piston pins have to be checked for clearance, as many are to tight to survive, they can gall.
What was the Bearing clearances?
Is your engine pressure fed?
Herm.
-
10 hours ago, Durant Mike said:
I guess another question I have is can any machine shop restore and rebuild an engine with Babbitt bearings without destroying the original ones My engine was not running when I got the car so I have no way of knowing how it ran. I know machine shops do various processes to get the engine back to tip top shape, such as boiling the block, honing the cylinders etc but will this process destroy the original babbitt? Or can they do all the work and just put the old crank back in and be good to go?
The best is J & M Machine in Southborough, Ma. They work on the exotic engines, no one else will touch. They also have a web site, and is very interesting. Talk to Mike, or John. 508-460-0733. You won't regret it!
-
12 hours ago, stakeside said:
Are the mains bearing shells or new Babbit. I was told the old shells could have Babbit added and then line bored. Was this method used?
Yes, we babbitt the steel shells and left .070 thousandths more babbitt then the size of the crankshaft journals, after grinding. Then the inserts are fit, to each saddle, and align bored.
Herm.
-
1
-
-
On 4/7/2019 at 12:31 AM, C Carl said:
RAP !! RAP !! RAP !! , tapped the drummer. And just before he blew some scorching high notes in announcing his arrival by way of a solo, Oran "Hot Lips" Page held his trumpet in hand and cried out : "Hear y'all havin' a party ! Mind if I join you ?"
Actually, from my experimentation, Joe makes a valid point. My 1924 Cadillac had about 59,000 miles when I got it, 30 years and 4 or 5 thousand miles ago. My intention was to have put about 10 times that on it by now, but my life was brutally hijacked. Previous owner had it for 12 or 13 years. Put only about 250 miles on over the period. Used 40 wt. non-det. I am addicted to synthetic lubricants, the oils of which are the most detergent of all. In order to change over in preparation for the intended mileage, I had an unemployed aero machinist whittle out, and re-bush to shaft dimensions, what you see below. Fortunate to have the external oil pump, I installed a large area of 40 micron full-flow filtration.
The last oil change had been done a few miles before I bought the car. It drained out clean. Dropping the pan, there was ZERO sludge in pan, or on screen. Although maintained only in parade, or drive down to the park condition, the car had never been owned by anyone who didn't understand it.Just a very small amount of light yellow wax on the main bearing webs. Bearings were beautiful, and in spec.Filled with detergent oil, first change came at about 200 miles. I think it was about 1/2 pint of crud and crap in the filter. Fresh oil changed at about 300 more miles, IIRC. This time about a thimble of crud. Next change at less than a thousand more miles, the filter had some, but an insignificant amount. I really don't HAVE to clean the screen at changes now. I would like to drop to 20 microns.
BUT : the oil gets very black very quickly after change. Now, at 60+ thousand miles, the never opened up engine is (over) due for the old time traditional 40,000 mile ring and valve routine. High oil consumption, though compression is not all that bad. Plenty of blowby. But still, the quickly blackened oil indicates an internal source which is continuously being cleaned out. Doesn't take a lot of carbon to dye oil black. No danger, no sweat, but little by little, whatever "sclerosis " exists, is being eroded, ever so slowly increasing oil the oil flow. Synthetic oil can also break up carbon seals at the rings.
I don't know what to do. I am getting "short". (Really; short on EVERYTHING, actually). But the doctors say the checkout counter appointment is indeterminate. So I want to enjoy what I can for a while. I am thinking of popping the top off the blocks and measuring taper. Lap the valves, new timing chain, and ?????????. Light hone & rings if that's all it needs, sure. But if it needs to be bored, I will be in mission creep territory ?????????. Clay the chambers and design higher compression aluminum pistons from Arias ???????????
But on topic, at a minimum, if I survive long enough, by getting into the engine at only the minimal level, more data will be revealed. More access will show where some deposits of sludge are being molecule by macro-molecule washed away. And don't forget the old-time periodic flush procedure. What was it ? How often? What : a flushing charge with fresh oil and i dunnow, was it 1/4 kerosene ? Run it at fast idle for a few minutes and drain ? How often did some of our mechanical ancestors do this ?
"Hot Lips" blew way up into the high registers. A great admirer of Louis Armstrong, he could muster up a respectable challenge. Thanks for the Saturday night party !!!! Been listening to KNKX.org since 6:00. No "Lips" Page yet. Ken Wylie on his acclaimed "The Art of Jazz" program tomorrow 3:00-6:00 has the better chance. He does play him from time to time. Something for all jazz lovers, he sometimes gets a bit far out for me. But I am the only member of Puget Sound Traditional Jazz Society who actually met Clifford Jackson and heard him play. On a good night, Ken will spin him too. - Carl


It looks like the filter measures, Two Feet, 4 inches, and 13/16's long !
Herm.
-
1
-
 1
1
-
-
On 3/31/2019 at 11:59 AM, 29hupp said:
Steve,
I admire you for taking on a project like this yourself. I have a 29 Hupp A sedan that started in a similar condition. It appears you plan on doing the lion’s share of work yourself as I am doing also. Curious if your engine transmission upgrade is by default. I almost went the same newer engine route when the first restoration shop I got a quote from for new bearings was $13.500. Fortunately I later found a man that only charged $50 per bearing. I had the same issue with removing the door hinge pins but wound up removing the hinges completely where I could turn them upside down and drive the pins out. Looking forward to see how you progress.
Dick Arnett
I would sure like to see close up pictures of all those 50.00 bearings.
Herm.
-
On 1/31/2019 at 9:58 PM, maok said:
More progress today. Torqued down all the main crank caps (except the rear) and conrod caps, and inserted the split pins. Mains 50ft lb +/- 2. Conrod caps between 30 -35 ft lb.

Still need to make a decision on the rear main cap seal. Felt or cork???


Cotter pins have to be tight, as heavy oil splash can loosen them, and take them out. Also use the size of pin that the bolt holes have in them. If the holes do not line up with the nuts, drill with the size of bit, and open a clean path for the pin. While drilling, use a shop vac. to catch any drill chips. It works like a charm.
Also, do not for get to check your Rods for alignment, twist, bend, and off set!
Herm.

-
23 hours ago, maok said:
I am having second thoughts on the conrod stud nuts at 30-35ft lb, they are only a 3/8" stud and nut though. Should I go to 40-45ft lb?
Do NOT go over 40 Pounds, on a 3/8's fine thread bolt. 35# is good. start at 30#, and then pull for the pin hole.
-
1
-
-
On 1/31/2019 at 9:58 PM, maok said:
More progress today. Torqued down all the main crank caps (except the rear) and conrod caps, and inserted the split pins. Mains 50ft lb +/- 2. Conrod caps between 30 -35 ft lb.
Still need to make a decision on the rear main cap seal. Felt or cork???
Cork, with a thin layer of clear RTV .
Herm.
-
On 1/4/2019 at 2:00 AM, maok said:
Anyone know what this hole is designed for? The old engine was gummed up with oil and grease.


This is the reason why you check everything before installing.
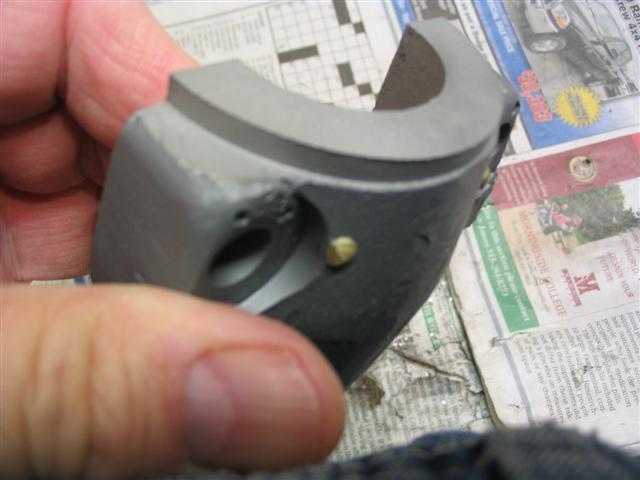
But it was only 4 of the rods...🙄 The old rod big end oil hole, much small than the new one.


What is the best orientation of the small end of the rods? Four options I guess, all bolts facing to the front, all bolts facing to the rear, bolts alternating from 1 to 6 or bolts alternating with like cylinders, ie 1&6 etc.


Those squirt holes should be small. Many rebabbitters drill bigger holes, because they are special sizes, and break easy!
Herm


Vulcan Connecting Rod Lathe
in Model T (and older)
Posted
This is a Vulcan Rod lathe, later bought out by Storm, and then renamed the company, Storm Vulcan.
The Vulcan Rod lathe is the same as the Storm Vulcan, except the Storm Vulcan has two free standing belt guards, one on each end.
It will do babbitt rods, Bore wrist pin bushings in the Rods, and will bore the big end of the Rods, for resizing of insert Rods.
Excellent Condition, 3,500.00
Herm