


unimogjohn
-
Posts
4,151 -
Joined
-
Last visited
-
Days Won
2
Content Type
Forums
Gallery
Events
Posts posted by unimogjohn
-
-
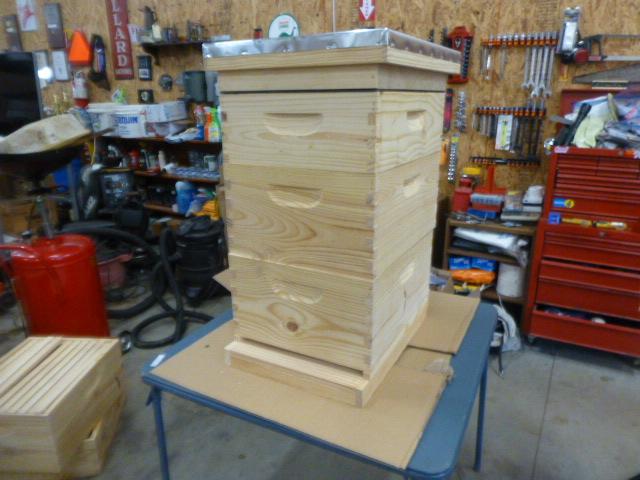
It is Sunday, January 27th. I wish I could say that I am deep within some old car project, but that is not the case. Vacation to the northwest/Seattle and then lots of farm maintenance has taken most of my time. And of course I had to take a beekeeping class for my new endeavor. I have two hives coming in a month or so, so am preparing new homes for them. Have to finish painting the new hives. I am also hauling big rounds of hay for the llamas and donkeys.
But Greg is slowly plugging along on his Oakland engine. Here is his report.
Felt like some shop work tonight so I got in some lathe time on the idler gear mount that the gear spins on. Since my gear has more play than I'd prefer i've been experimenting with offsetting the mounting stud to bring the idler in closer to the crank/magneto centerline. Might get to test my work tomorrow night.
GREG.


-
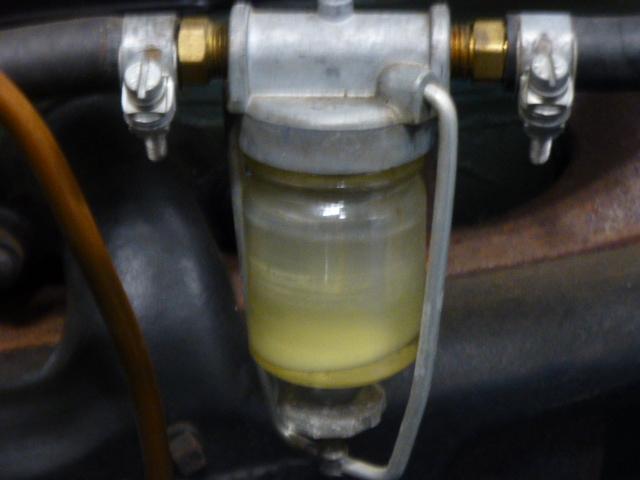
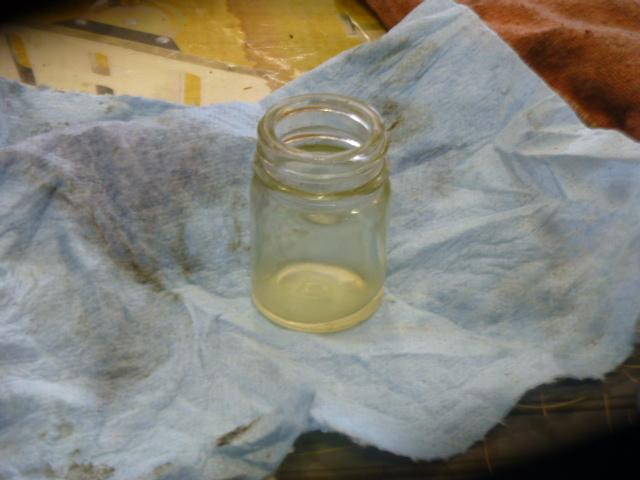
It is Sunday, January 6th. Oh forgive me, it has been over a year since starting the 1923 McLaughlin Buick. It looks like the fuel has gone bad. The gas in the little filter has all evaporated and turned into a white mess. So I cleaned the glass with carb cleaner and the little wire mesh filter also. I then pumped out two gallons of gas out of the main tank. It is almost brown. I know that I had put Stabil in it before putting it to sleep. I then decided I better see what was in the vacuum gas tank, nothing. But decided to spray the inside with carb cleaner and see if anything came out. Well, out came lots of crud. You can see the little chunks of stuff in the white plastic plate. After a few long squirts of fluid, it came out clear. I have the battery on the charger so tomorrow will put in some fresh gas and see if she will start. I do remember running the carb out of fuel so hopefully it is not all gunked up. I also have to fill up the vacuum tank with fuel also.


-
It was recommended to me to use .002. All of them were within that range, and it was newly rebuilt.
-
 1
1
-
-
Wow, those bearings look really dry, even for sitting so long. Getting just a little movement is a good thing. It will allow the ATF to get past the rings easier.
a
-
 1
1
-
-
Mark, I hate to say it, but mine was stuck for almost three years. In the end it was just a slight bit of rust between the piston rings and the bores. The previous owner had left the spark plugs out during storage and his container had a lot of moisture in it. Every day I would squirt in more aft/acetone into the cylinders and press/jump on the hand crank, being careful to hold on to something so I would not fall over in case it let go. Then one day the rust just gave up and the engine as free. It was a very happy day indeed. I really did not care about the time it took as there was always something else to do. I guess the moral of this story is patience and do not harm. Good luck.


-
It is Thursday, December 27th. Of course I pulled a muscle in my lower back yesterday attempting to lift an awkward box of about 100 lbs. It got me good. Felt a bit better this morning so decided to see if I could finish up the Passat. Well, the little car is DONE! The bumper is on, and she is ready to go. And the headlights work too!
I did check the fluid by opening the full port and some came out, actually a lot, so closed it back up very quickly. Only lost maybe an ounce. I was surprise to see not red, but almost brown. The new fluid is dirty with only a few minutes on the transmission. We will run it a few hundred miles and then change it out again. I guess at $100 a change it will be insurance so to speak. And now I know how to do it so will only take a few minutes. I will not drop the pan or change the filter the next time either.


-
1
-
-
Congratulations on getting four tires done in one day. Mine usually took a day each with a lot of sweating and cussing. Of course by the time I got to number five the job went in about 20 minutes. You are officially in the 20s club now. Great job.
-
1
-
-
Christmas Eve, Did not have a lot of time to spend on the Passat today. I did fix the problem with the non-working turn signal. I did not have the harness clip in far enough. Everything works now. And I put on the grill brace. That is it. But making progress. I need just a couple of hours now to put the bumper cover on and she will be ready to go.
Wishing to all a Merry Christmas. Hope that you have a great time with family and friends.
-
It's Sunday, December 23rd. Any time I work on the Passat I am amazed at the German engineering. However, on the down side everything is just so complex with lots of little parts, levers, gears, etc. The headlights are no exception. Today, I spent six hours retrofitting the new headlights with new bulbs. Each bulb was a challenge to remove and replace. I did find that the silver coating in the old unit was completely gone (see pic) and also a little white plastic coupling, which controls the auto adjustment of up and down was broken. So I got everything back in and decided to just test them without putting back on the plastic. Glad I did, the driver's turn signal is not working. So I have to remove the headlight unit and see what is up. But I am getting closer to being done. More work tomorrow.


-
December 20th, Thursday. Worked all day on the Passat. It was a struggle to get the front axle in, just really tight. I am sure glad I was able to get it in without taking apart the suspension. So everything is nice and tight and torqued to specs. I found out the tail on the transmission is full of gear oil. Found the plugs, and drained and put in new synthetic oil. It has an oil seep. I will watch it and replace the seal another time. It too will be an involved job as you have to remove the exhaust, heat shielding and some other stuff, none of which wants to come off after 15 years.
Tomorrow, headlights.
-
December 18th, Tuesday. Worked all day on the Passat. Changed the brake fluid. The fluid was very dark, the new DOT 4 fluid is almost clear. The Motive bleeder worked great except for a rotten clear line. I had to replace it with rubber fuel hose. But in the end all worked great and the fluid was 100% changed. All the bleeders opened easily.
I also rotated the tires.
I then turned my attention to replacing the front CV axle. Now that was a job. Had to use long extensions to get the bolts to let go. And had a struggle to remove the axle without undoing any suspension parts. Hopefully, the new axle will go in easily. A job for tomorrow.
Then onto the headlight replacements.


-
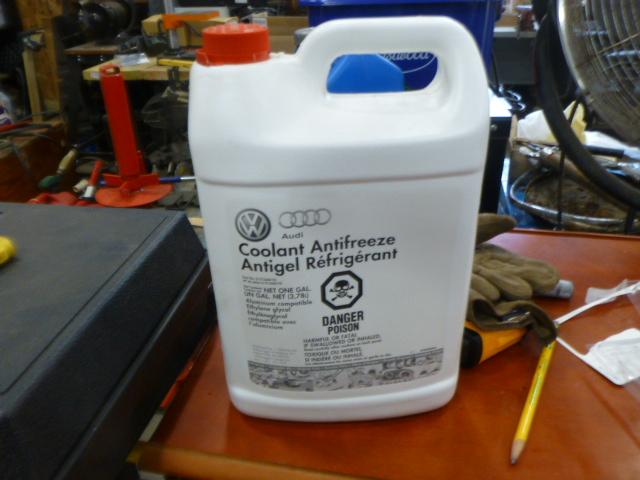
I had a chance on Friday to change the coolant. All went smoothly. Actually, the coolant still looked pretty good.
Tomorrow I hope to find the time to replace the brake fluid. Going to use a Motive Pressure unit that I have. I hope that all the bleeder valves come loose easily.


-
It is Saturday, and we have an Oakland report from Greg.
I find myself without adult supervision and left to my own devices. Overland engine work is about caught up with some things being done out of house.What to do? Back to the bodywork, especially the doors and doorways that I'd begun quite some time ago.Having rolled and attached the sheet steel skins over the wooden framing and already having spent too much time forming the aluminum T moldings, it was time to attach them. I guess. Off and on innumerable times, this time I used our old trick of bonding them with JB weld as well as screws. And Temple I also ran a bead of 3M Urethane Seam Seal around the edge of the Mounting flange .You know I walked away from this project months ago and I sure hope I was ready to secure the moldings. I'll do the other door tomorrow with lots of other detail work to come. Hinges, latches and more moldings. And then getting the doorways to fit them will be a real b1+(#.Even though this car only has two doors, cars with no doors are easier.OK , got in more door time. Temporary attachment of the hinges and tried the left door on for size. Not too bad.Bead lines on door and seats parallel in both planes and decent gaps but when the door was pressed the last 1/8" home the door itself would lift in the opening. Did some noodlin around to find the bind without any real conclusion and then devised a method to find the confliction. Masking tape on the lower molding and some carbon paper (you oldtimers remember carbon paper?). A couple swipes at the tell tale with coarse sandpaper and the door closes now. There will be lots more of this going on. Might be gaining on it but like moving the Pyramids by hand.


-
Mark, if your key/lock is the same as my 23 you will find that the pot metal has swollen and locked everything tight. I have been told that it is impossible to remove the lock without destroying everything. Mine is frozen and have decided to just leave it alone. I would never lock it anyway. Who would know how to start it?
Can you remove your key?
-
1
-
-
Must have been exciting to hear that little engine roar to life and head down the road. Glad that you got it driving too. Great job. The next part of the journey will be fun as you actually have a car that runs. Congratulations!
-
1
-
-
It is Thursday, December 13th. The transmission filter and fluid change is complete. Cleaned the pan really well, installed the new filter, installed the pan with a new gasket and filled it with fluid. Ran the car through the gears and then put in another quart until it started to run out of the fill hole. All done and not too messy. Pic also of the various tools to do the fluid change. Thanks to Alice for doing the pumping to fill the transmission.
Tomorrow, a coolant change.
And Chris, to answer your question. 141,715 miles.


-
1
-
-
Wednesday, December 12th. I got a few more hours with the Passat. Drained the transmission fluid, which was black, not red. So much for being "life time". I wonder what VW engineer thought that one up? Anyway, it was real dirty. And the magnets in the pan were deep with cruid. I put my finger into each one of them so you could see how much. Tomorrow I will clean the pan and magnets, put in a new filter and fill the transmission.


-
I told you that Greg was moving on his Oakland. Here is his latest report.
Dave Coleman called me over today to see how the flywheel is coming. Indicated and true in his Sebastian gap lathe, he's taken some light cuts to true the clutch taper . There are some pits that remain but the leather face and iron wheel should mate nicely.
Next friend Dave is going to check the rotating balance of this ninety pound millstone.Good to see some progress even if someone else is doing it.

-
Oh forgot. The Tesla told me that it needed to go into the Tesla Service Center as it was having some 12 volt battery issues. So we headed in to the Rockville, MD Service Center and they replaced the battery. This battery runs all the electronics and lights in the car. It gets charged up from the main battery pack when we charge up or just going down the road.
A couple of months ago we were in KY and the car told us that it had to be serviced or it may not restart. So we took it into the Service Center. It was there for a week. They found a failed main battery coolant pump and a out of spec drive motor. So they replaced them both. The drive motor consists of the electric motor, inverter and transmission. All one big lump. Sure nice to have a warranty.

-
It is Tuesday, December 11th. The 2003 Passat celebrated its birthday today, 15 years old. So a few weeks ago I started buying supplies to do a major maintenance service. So today the work started in earnest.
First up is to replace the headlights, bulbs and complete housings. Expensive, but the old ones would not pass inspection as the coating was flaking off the inside of the bulb housing and the light was not projecting. So I found a new set, but now I am waiting for bulbs. But the old ones are out. Of course had to take off most of the front of the car to get them out.
Next was a oil and filter change. Done.
To do over the next few days. Coolant change; brake fluid change; transmission oil change; and cv axle change/boot torn on the old one


-
Greg must be excited about getting the Oakland running again. He is pushing forward on the engine.
Progress on the Overland. Their oil pumps were made from zinc die cast and aluminum. Perhaps OK when they were new but didn't live long. Through the network I located an Overland enthusiast that had duplicated the pump in bronze and had an extra on the shelf. Then having lain on my shelf for a long time, when I went to test fit the thing....there was a difference. The driving shaft was different. After a few nights' work, I've replaced the shaft and also reproduced the coupling that I'd lost . Coming along.


-
1
-
-
Speaking of engines, Greg also has a Ford Model T engine report for us. Progress on many old car fronts.
Guys,
Tonight Nate and I ventured to darken Mitch Sine's doorstep. He's been handling the initial cleaning of the Model T block and crank. Initial inspection shows no cracks, .003/.010 cylinder taper, the deck fairly true with original inspectors stampings. All in all, he says one of the better blocks he's seen.The crank, he thinks would clean up with .010 on the mains and .020 rods.....should it pass magnafluxing. which is the next phase of the rebuild.Enjoyable evening.GREG.


-
December 7th, Friday. It is becoming winter fast. We have had a few snow flurries over the past couple of days. But good old Greg continues to plug along on his Oakland engine. Here is his latest report.
The Overland oil pan spent the day on the rotisserie. Holes plugged and mounted on the machine I made to rotate the Model A wire wheels for painting ( a long time ago). in order to clean the scale clinging to the chamber inside.
First was a solution of Pine Sol and a handfull of drywall screws found nearby, then a bath of mineral spirits, an hour or so of dishwash detergent and followed by water. Next I'll take the pan outside and hose it out.
One of those chores that needed to be done. That machine made from scraps has a lot of miles on it.GREG.
-
The BMW Z4 has been struggling to start. I decided to replace the battery with the correct size. Pics of old and new for comparison. Any easy install. Put in an AMG battery. Starts much better now.


Avanti R2, 1963, refresh
in Our Cars & Restoration Projects
Posted · Edited by unimogjohn (see edit history)
Monday, Feb 11th, and we have a great report from Greg.