

NTX5467
-
Posts
9,770 -
Joined
-
Last visited
-
Days Won
2
Content Type
Forums
Gallery
Events
Everything posted by NTX5467
-
1968s did not have the Switch Pitch for less transmission fluid heat build-up and greater durability, as a result.
-

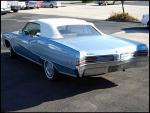
'63 Riviera Rochester Carburetor - modern alternatives ?
NTX5467 replied to OldGerman's topic in Buick Riviera
The current E10 fuels have less "heat" potential in then, due to the addition of ethanol. I understand the optimum air/fuel ratio is about 14.2 to 1, whereas all of the older cars were calibrated for 14.7 to 1 in days past. Which means the calibration can stand some richening of sorts. Using that proportion, about 4% richer to optimize the mixture, most likely. Of course, EFI optimizes for such things (using an oxygen sensor) AND letting the system also control spark timing also helps (in a coordinated fashion), too. The "accelerates well, then bogs past that" sounds like a "power system" that is not working as designed. On a metering rod carburetor, that can be a broken or missing spring under the power piston. On a fixed-jet carburetor, a failed-closed power valve? NTX5467 -
Greetings! A gentleman has just created an informational thread on GM THM400 and its variants at www.NastyZ28.com. It was created on 01/20/2024 so it might come up under the "What's New" icon or in the dedicated forum for automatic transmissions. I mention this for information only. Enjoy! NTX5467
-
I mistakenly put "1967 Buick LeSabre model listings" into Google and it found a Team Buick website page for the 1967 Buicks. Prices, production figures, and the order codes they used in 1967. In 1967, the codes were a letter and number, compared to what is on your build sheet, but I suspect they can loosely correspond. I did not find such a page in the 1968 Buick page in Team Buick. There is even a link to get into the factory service manual or download the file with one for a small amount of money, if desired. Team Buick is at www.teambuick.com, but can also be accessed from these Buick forums, at the bottom of the forum list. Quicker to just go to the bottom of the list of Buick Forums on this AACA website to get to the "Home" page and all of the listings it has on it. In the General Information section of the service manual, it has enough pages to detail the various cut levels of the keys, which removes a lot of the mystery of how to cut keys! Enjoy! NTX5467
-
DFIIERENT generation of Buick V-6, period! The engine in those cars was the first crude, very crude, version of turbos and electronics to control such. They were "famous" for the turbo seal on the exhaust side wearing/failing and suctioning the crankcase of oil as the car was running. The first detonation limiters allowed for "clattering" on mild acceleration, too. Other than the engine issues, they were nice cars. The BEST way to upgrade the car would be with a Buick 350 and a beefed THM200-4R automatic replacing the turbo motor, to me. Maybe going farther with a full self-learning/timing control EFI system? Then do some upgrades to the rear suspension to handle the extra torque, probably using Chevy Malibu or Gen III Camaro items. Would make a very nice daily driver/sleeper car! A later model GN or Turbo T it is NOT. NTX5467
-
Of all of the pcv valves on my vehicles, I have never had one to fail or get so completely gunked-up that it would not "clean" by flushing it with spray Berryman's B-12 carb cleaner. In the few new ones I've bought, NO difference in performance. Yes, the pcv is a variable vacuum bleed situation. Little flow at high vacuum, more flow at low vacuum. It should rattle, which is the main criteria I used to judge if they needed bi-directional cleaning. Plugging one end with a finger, filling it with B-12 cleaner, plugging the other end with a different finger, then shaking it back and forth to move the plunger around. Then drain and flush in both directions. Usually not much needed before the cleaner came out clear. There should be NO rubber in the valves to facilitate a tight seal between the plunger and the valve's body. Hence what you found, machined surface against smooth metal or plastic surface. Yes, there are flow ratings for the valves. The ONLY place I've ever seen them was in a 1970s-era Exxon Tune-Up Manual, in the back. In the realm of Chevy engines, the L82/LT-1/Gen I and II Z/28 engines had a higher-flow valve (had a purple dye on the metal/bottom portion) than the normal valves. Apparently to help with the higher idle air requirements of the bigger-cam motors? I tried both in my '77 Camaro 305 after I upgraded to a "more cam" situation, but could really not tell a significant difference in hot base idle speed. The only thing that might fail in a pcv valve is the spring. If it should break, there will still be some spring pressure to resist the valve closing all of the way, with the air passing through it being restricted more of the time. Pretty fool-proof, it seems. To me, the best valves to have would be the older OEM ones, cleaned, of course. PCV is needed to decrease crankcase gunk and sludge from happening, especially in cold weather. More reliable than the prior road draft tubes, which needed vehicle road speed to work well. Only about 10 weeks to April 1st! NTX5467
-
The options of the vehicle are detailed in the center section, with the option codes. The upper section will detail the particular components the car was built with, standard equipment and optional items. Either as an option code (i.e., L77 Engine) or by the letter codes on the parts tags attached to some components. Springs, wiring harnesses, etc. What vehicle is this sheet for? Enjoy! NTX5467
-
Upholstery Material for ‘79 Estate Wagon, help
NTX5467 replied to MrEarl's topic in Buick - Post War
The "heavier fabric" is more related to the higher GM carline than specifically "wagons", I suspect. In the 1980s, we needed to get the seat fabric replaced on one of our cars. I had decided the "velour" in the downsized Caprices seemed to be long-lasting and there was a color which ended up matching dead-on, so we went to the upholstery shop the dealership used for their warranty work. There was a very experienced upholsterer there, too. I told him which fabric I was thinking about and showed him the color. He immediately said "there's something better" and went to pull out a bolt of fabric in the same identical color, but of heavier weight. He said "This is for a Pontiac", which is why it was twice as heavy in the weave. So that's what we used as he had it in stock. Cost about $1.00 more a yard. That fabric "wore like iron". Putting them side by side, there was NO comparison of which one was best. Just my experiences, NTX5467 -
The original GM ACDelco filter number might now be different than it used to be, back then. Check the ACDelco website for their latest part number, for good measure. Might even find it at WalMart or similar? Just buy a "normal" name-brand filter. Normal pricing. It'll be good enough. Many people dislike Fram filters for their internal use of "cardboard" end caps on the filter media, as others use metal. You can probably find some filter comparisons on YouTube so you can see what they are talking about. Most of these videos are done by non-professionals and some of their dialogue might not be completely accurate, but the visual depictions should be accurate. NONE of them talk about filter media ratings or efficiency, it seems, just the construction orientations. You can also check out the oil filter area of www.bobistheoilguy.com to become more "educated". Enjoy! NTX5467
-
In your quest, you need to first find a durometer gauge. They do exist and a friend who used to be in the left-hand turn dirt racing had one. I borrowed it years ago to check durometer readings on various tires, in prep for trhe first Muscle Car Club Shootouts (sponsored by Comp Cams in the 1980s, and Muscle Car Review magazine). I went to the new Super Shops nearby my shadetree shop and checked tires they had laying on the showroom floor. Interestingly, the Mickey Thompson tires they had were just harder than their minimum hardness spec. At 51 or 52 rather than the spec of 50. At the time, that was the stickiest street tire around. The other interesting fact was that I checked the tires on some C70 cab/chassis trucks we had on the lot and they checked "50". So, look in the dirt track racer magazines and seek out a durometer gauge. Then start checking tire treads, sway bar mount bushings, sway bar link grommets, and other body mount rubber items. I suspect the most common-to-find "in the wild" will be for Chevrolets. As the body mounts on muy '68 LeSabre have Chevrolet casting and part numbers, that would be a good place to start. When I had the subframe mounts on my '77 Camaro replaced, I also upgraded to Grade 8 OEM bolts. Body bolts can also deteriorate/rust in their hidden location, so the corrosion-resistant, MIL-spec coating helped there. In body design, there are places designed to flex and tolerate flexing and vibration, as others are designed to not tolerate such. Which can mean that as one part of the combination is strengthened, that just transfers those forces to places which were not designed to deal with them. Certainly, a 10% additional flex-resistance might not hurt, but there is a limit which will reveal itself over time. Enjoy the project! NTX5467
-
Consider . . . in earlier times AND at the dealerships, parts were/are installed "as is", no more no less. Cam degreeing is generally in the realm of machine shops and such where racing engines are built. Not to say that anybody can't degree-in a cam if they want to. It does become more important in a high-power race engine than on a stock street car (even a higher-horsepower street engine). IF done at a machine shop where the engine is being built, always good to see "where everything is" so it's known rather than "where things should be" according to supplier specs. The OTHER thing about a machine shop doing it is that they generally are capable of correcting things with an offset bushing in the cam sprocket, like up to about 4 degrees variation. Otherwise, a multi-keyway'd crank sprocket should be used. Usually, some customers need to bleed-off a bit of low rpm torque so they can get the rear tires hooked up sooner, with the 4 degree retard also making for more top end power to compensate, for example. Or if the engine will be for a "pulling" vehicle, then advancing the cam 4 degrees might get a bit more low end torque, but a bit less top end power. These differences would show up on an engine dyno run, but you'd probably be hard pressed to noticed it unless you knew what you were looking for in general street-driving performance. Not to forget that any power gained will have 15% or it absorbed with the remaining 80+% getting to the ground. So, is it worth it? IF you like numbers, it can be. Will it make the car run better/faster? Not necessarily, unless the two vehicles are exactly-matched, which is also when "driver abilities" can come into play. Now, at an engine shop or with the engine on an engine stand, you an get a degree wheel and attach it to the crankshaft. Verify TDC by #1 piston position, and then roll the engine over to check for when the valves open and close, to compare to the cam card, or to see what's there. THAT type of quality check is normal for any engine builder, I believe. Take care, NTX5467
-
For the 1968 Buick big cars, the hinges are the same for LeSabre, Wildcat, Electras, and Rivs. As of the 05-72 or the 1946-72 Buick Chassis Parts Book, the part numbers were 1387100 rh and 1387101 lh. While the hinges were the same for all 1968 large Buick models, the springs are unique to LeSabre, as the others used a different (probably stronger) spring. But they should work, just have to make sure the hinges are lubed well for minimum internal friction. Eaton Detroit Spring was (and probably still is) the supplier of GM and other current vendors for front springs. Just tell them about the car's equipment (engine, factory a/c, etc.), although you can order then online, and get the ones for "factory ride height". The advantage of using their website is that on the top menu bar, on the page with the part numbers and specs, at the rh end of that upper bar is a car brand Logo, click on that to bring up a sales brochure! Good luck, NTX5467
-
Upholstery Material for ‘79 Estate Wagon, help
NTX5467 replied to MrEarl's topic in Buick - Post War
The "Detroit" and "DeLeo" books are like 12"x18" or larger. Usually bigger than the OEM "Color and Trim" showroom books. Not a bunch of fabric swatches on a pair of 4" binder rings, like a Rolodex. Good Luck, NTX5467 -
Dang! I keep forgetting Terrell is around. Probably about an hour's drive from me. Thanks for the update, NTX5467
-
Upholstery Material for ‘79 Estate Wagon, help
NTX5467 replied to MrEarl's topic in Buick - Post War
Mr. Earl, when you went to the upholstery shops did you just ask if they had anything like what was in the car OR did they dig out their "Detroit" or "DeLeo" upholstery parts books of OEM upholstery fabrics and vinyls? If they'd dug out the old books for your model year, you would have seen the same things you are seeking to find, PLUS the "industry part number" for them, I suspect. With THAT information, they could go to their suppliers and seek some. Probably the same part numbers which SMS operates off of? Basically the "weave" trade name GM put on it, followed by the interior color codes listed in the OEM trim book. At this point in time, it would be "a find" to find a place with that fabric in stock. Unless the particular shop did a lot of Buick warranty repairs, they would not have any reason to have it as "left overs". It was possible for GM dealers to order the items as they had GM part numbers on them, but I suspect that was something where they'd refer the order to the fabric vendor, back then. Most dealerships had a relationship with a high-quality upholstery shop for warranty repairs, so they'd just take the car to them and let the shop deal with getting the fabrics and such for the repair. Good luck NTX5467 -
On the side of the existing OEM rubber body mounts is a casting number, which usually coincides with a GM part number. The nuimber sequence will determine if that part is "Buick only" or if it was used on other GM vehicles. For example, the body mounts on my '68 LeSabre are "Chevrolet numbers". You might also put them into Google to see who might be selling them, too. NTX5467
-
Yes, many GM alternators differ only in how the rear case is clocked in relationship to the front case. At the OEM/dealership level of things, what comes out of the box has to match what's on the car as is. NO clocking allowed, lest the factory warranty be voided. At the auto supply realm of things, "clocking allowed" so they only have to have ONE alternator to match many applications. When I went to work in Chevy parts in late '76, I noticed that no new alternators or starters were cataloged, just "Reman" from Delco. To look at the in the box, they looked as new as anything else I'd ever seen. As I later learned, about the only part of the orig item they used was the case, with everything inside the case being new. I do know they lasted as new, every time. Haven't needed one since they went to their present multi-line products, though. It is easy to replace brushes and diode trios in the GM alternators. Which were the main things we sold for them. Starting in 1988, with their then-new series of alternators, suddenly there were no rebuild parts in the Chevy parts books, just listings for "Reman Generators", yet we could buy rebuilt alternators in the aftermarket, so repair parts were available, just not from GM. Key thing was that for a better customer feeling, they wanted us to replace the alternator, which had a warranty on it, rather than try to repair them (with sometimes sub-optimal results). So the customer got a better value and piece of mind, as a result. If GM's going to pay the repair bills, they can dictate what they sell. BTAIM Do you really need a 100A alternator for a car with no electric-heated back window? Or are you anticipating a future EFI system or similar? NTX5467
-
'63 Riviera Rochester Carburetor - modern alternatives ?
NTX5467 replied to OldGerman's topic in Buick Riviera
Now, here's what I might do with a first-gen Riviera. The carb would come off and be put in a safe place. Perhaps even the intake manifold, too, opting for a later-model NailHead 4bbl. As to the carburetor, if a spreadbore, then a Street Demon and matching the metering calibrations to a Buick 430 QJ, as close as possible. If using an AVS2, then modifying the intake for the larger primaries, with an appropriate thick OEM-style GM base gasket. Ignition? Something drop-in, electronic conversion kit, with a faster mechanical advance and adding vac advance just to the edge of clattering on mile/heavier acceleration. Magnetic suppression resistance plug wires leading to NGK V-Power or Iridium plugs for a better "POW" when they fire. Sorry, my only experience with Bosch plugs was in the 1976 time frame and they were worse than the Champions I was using back then, although one friend put Bosch plugs in all of his turne-ups back then. Just my experience. Transmission? An internally-beefed THM200-4R automatic (as seemed to be popular with other Riviera owners 15 years ago). A bit better low gear, plus OD, PLUS less power consumption, so more power gets to the wheels with less fuel needed. If the stock gearing and tire size was maintained, that might require EFI for best lower-speed response. Otherwise, calibrated so OD happens past 55mph, with the kickdown linkage set to allow easy part-throttle downshifts and a bit higher min-throttle upshifts, for more acceleration with less throttle input. Maybe replace the A-6 a/c compressor with a Denso item or a full Sanden conversion. With a parallel flow condenser, too, for R-134a use. Adjusting the POA to match. Then, to the chassis . . . . First place to look for better shocks would be KONI, then possibly KYB. Add a rear sway bar, hopefully from an OEM application. Some good radials with the correct (or close to it) whitewall width. 32psi frt/30psi rr, on the normal wheels. Sorry, not a fan of Bilsteins. Better brake linings than OEM, for better stopping under intense situations. Everything in my orientation of "incognito upgrades" that can increase drivability and performance without getting away from the orig orientations of the car. Quiet exhaust, too. Sharp throttle response generally makes me happy, using less throttle to make things happen. Reading the old road tests of 1963-64 Rivieras indicated they were more in the "refined performance" orientation, which I would hope to build upon with my proposed upgrades, if I had one of those cars. Or perhaps I might just do the ignition system and chassis upgrades and call it good? Just some thoughts, NTX5467 -
'63 Riviera Rochester Carburetor - modern alternatives ?
NTX5467 replied to OldGerman's topic in Buick Riviera
What ever keeps you busy and happy! On my side of things, I'm past the "Design it" phase and know that many suppliers have done better things to refine than I ever could, although any FI system will need some tweaking for the individual vehicle/engine combination. I'll admit that I don't have the intimate knowledge of Carter Carburetors that @carbking has, which I fully respect, but I've had an AVS on a car since about 1975, so I'm not afraid of them and the OEM ones seem to be even with the '67 OEM AFB that I have had since 1981. As much as I like the Carter TQuad, the aftermarket version I got new did not live up to its billing, to me. So, I'm not afraid of a new Edelbrock AVS2, although matching OEM metering characteristics can be in the mix. I'm not afraid of an aftermarket EFI kit, but I know some are better than others. I've been pleased with the results @Ben Bruce aka First Born has had and that might well be the one I'd chose, if so motivated. I do have one of the much-earlier Holley EFI 2bbl kits, when you had to build your own harnesses out of what was supplied AND get the computer to run things at WOT . . . still in the box. I bought it for a vehicle which came with a factory ignition computer on it. A TBI EFI and a carb do the same thing, mix air and fuel. Just that the EFI will do it more accurately and compensate for lots of things that carburetors do that we might not like. Which is good! So the newer AVS2 with the annular discharge primary venturis would be my pick, closely-followed by the Street Demon TQuad clone, as to carburetors. I have learned to tweak the electric chokes, over time. Just as I tweaked the OEM divorced chokes on every carburetor I've had, to get it to act more like I wanted it to (get to "more open" sooner, being at base idle within three blocks in cold weather). Which also included NGK V-Power plugs for a better burn, with the later NGK Iridiums coming later. When I upgraded the Stromberg WWC 2bbl on our '66 Chrysler 383 to the newer OEM Holley 2210, as a pure bolt-on situation (other than the fuel line), I immediately noticed better throttle response and the fuel economy went up too. Like 20mpg @ 55mph, which the OEM Stromberg never did, although it ran well for the time. As much as I fully respect the engineering which went into the older vehicles, I ALSO know that some modern versions of earlier components are better than the original ones, back then, as to performance in normal driving conditions. Considering how I have been able to finesse settings and equipment choices, for improved performance that makes me proud of what I did, I often wondered why the OEMs did not do similar things, all things considered? Of course, I know there are other operating areas they had to "hit", too, which might be why they chose something more mediocre, by comparison. For many years, I've wondered how much better older engines might run with a dose of modern technology. Electronic ignition, EFI, a dose of modern camshaft tech, and 8-speed automatics. Controlled by computers that optimize everything for best performance and results. Which is what @Ben Bruce aka First Born is doing, whether he intended to or not. I'm glad he's had the achievements he has accomplished! I know we all have our own sensitivities to these things, which I fully respect and understand. These are my own experiences and orientations. It's been a "learning curve", for sure, spanning many decades. I've had fun and learned a lot. To me, that's important! Y'all enjoy! NTX5467 -
'63 Riviera Rochester Carburetor - modern alternatives ?
NTX5467 replied to OldGerman's topic in Buick Riviera
TBI EFI is a possibility, but one which is not financially-viable from a fuel economy increase alone. One of our chapter members did an "Affordable EFI" kits on his '50s straight 8 using a "DIY" tubular intake manifold. I like that unit as it uses the GM ECM and custom-built PROMs to run it. He later switched to an upgrade ECM which also does spark timing and such. Initially, he noted about a 1.5mpg increase in highway mileage. In the BCA Post-War forum, a few years ago I was conversing with a many who had one of the earlier self-learning kits put on the 430 in his Electra. Unfortunately, something did not work out right and his highway mpg went from the high-teens to 9mph. Never did find out if he ever got it figured out or it got better on its own. All of those self-learning kits will require a particular style of distributor, too. Not in the kits, but needed. Holley came out with some 2bbl carb replacement kits, too. Also one model which is "spreadbore" QJet style. As time progresses, it seems that Holley's offerings get a bit more advanced and easier to install. There is also a "fuel sump" which Edelbrock came out with so the factory pump pumps fuel into it, but the sump has the needed high-pressure pump to supply the EFI unit. That's about another $300.00USD or so, but could also be a good deal if there is room under the hood for it. Holley might have one, too? Lots of YouTube videos to watch on installation and such! Take care, NTX5467 -
'63 Riviera Rochester Carburetor - modern alternatives ?
NTX5467 replied to OldGerman's topic in Buick Riviera
Thanks, Jon, for those links! On the GTO 4-spd AFBs, might their flow ratings have been (without the dummy hot idle compensator) equal to or a little bit greater than their 3x2bbl set-up, on a better-flowing intake manifold? Take care, NTX5467 -
'63 Riviera Rochester Carburetor - modern alternatives ?
NTX5467 replied to OldGerman's topic in Buick Riviera
PaperMate pen? I guess that whatever could be had to work, back then, must have worked. Seems like that section on changing the shape/weight of the AFB secondary air valve counterweights had some pictures, before and after? Enthusiasts, in general back then, did not have access to many "factory" or "supplier" information we came to discover later on, by observation. Back when carburetors (at least in the JCWhitney catalog!) mentioned "Square Inches of Venturi Area" as a gauge for more or less ultimate air flow, in a time before carb CFM was mentioned. With the ultimate AFB size being that of the Chry 413 2x4bbl motor, IIRC. Things were definitely more isolated and "shadetree" back then. In those earlier 1960s days, having a friend at the dealership parts dept AND a larger salvage yard could be a "hot rodder's best friends". Enjoy! NTX5467 -
The blower motor resistors and the related modules for the auto a/c system are under the hood, in the a/c case housing. Should be a wiring harness which attaches to it, on the top of one of the hvac case halves, in plain sight. Look for where the a/c compressor lines go into the housing and the resistor plate should be nearby. As I recall, the MaxiFuse just plugs in with no special drama in changing it. Is it also blown? From my recollections, NTX5467
-
'63 Riviera Rochester Carburetor - modern alternatives ?
NTX5467 replied to OldGerman's topic in Buick Riviera
Thanks for that information, CarbKing. On the surface, I would have suspected more differences between the "Cruise" and "Power" sections of the Buick primary metering rods. My other question, related to that would be, with what size main jets? MIght the wear on the power pistons be somewhat compensated for by using different springs under the power pistons( supplied in the tuning kit)? In the Chevrolet Performance Handbook which Petersen published in about 1962, it mentioned filing the counterweights on the AFB air valves to get them to open quicker. But once weight was removed, it would be hard to put it back on, usually, then trying again to hit the right combination of weight and shape for best results. I suspect it was an art to remove weight from the correct part of the counterweight to get the desired results, not unlike where to remove weight from on a crankshaft counterweight in balancing a motor. On the other hand, the OEM AFB which was on my '67 Chrysler 383 had no air valve above the secondary throttle plates. A full "mechanical secondary OEM carb". With the smaller sizing, I could hit WOT from idle with no hesitation, but after smoothing the casting flash on the outer venturis and throttle bores, doing that would cause a slight bog instead, which I took to mean I had increased the air flow just a bit. Although that is not my normal driving style, then or now. NTX5467 -
The first car we bought with factory seat belts was a '66 Chrysler. The anchors for the front belts were on the driveshaft tunnel, criss-crossed so the "pull angle" of the inner belts would be more gradual than if they had not been crossed where mounted. This made them more comfortable, too. As I recall, that criss-cross mount was the recommended way to do add-on belts back then. Which meant that with the belts anchored about 1/2 way up the driveshaft tunnel, the belts also laid on that tunnel before they went through the front seat. That car had the upgraded amenities of outboard seat belt retractors in a sleeve/retainer mechanism. Worked great to keep the outboard belt easily near at hand and not laying on the floor beside the seat. Retractors were also available aftermarket, too. Back then, it was more common for the front doors to fly open in a crash than not, so staying inside the car was important for crash survival. Not to forget the driver being more anchored into their normal driving location for possibly better vehicle control, in all driving situations. Something you don't really realize until you get used to wearing seat belts all of the time. Especially with shoulder belts in the mix, too. When I discovered Julianos a good while back, I was impressed with their website and related information. Happy Shopping! NTX5467


