

NTX5467
-
Posts
10,000 -
Joined
-
Last visited
-
Days Won
2
Content Type
Forums
Gallery
Events
Everything posted by NTX5467
-

How do I convert my 60 Lesabre to a dual master cylinder?
NTX5467 replied to joseph demeyer's topic in Buick - Post War
NOT to be flaky, but we drove gajillions of miles with a single master cyl on our cars, for ages. Yes, those single master cylinders were co-conspirators in many car chase movies where somebody wanted somebody to die in a "off the side of the mountain road" car crash, too. So we KNEW to keep the systems in good working order, addressing any leaks and such when and IF they ever happened. But that was also in the days when most every service station had an open gallon of brake fluid sitting on their workbench, with a rubber-bulb dispenser sealing the top. No worries about moisture intrusion into the brake fluid, it seemed. So, the single-circuit master cyl did NOT cause itself to fail. The fact it was a single-circuit master cyl just made it more dangerous when it did. A dual-circuit master cyl would still have needed some special attention to get the car stopped, if one circuit failed, so "special attention" would still have been needed. I, too, am curious as to @60FlatTop's question of what it took to repair the brakes on the car. Might the 1962 Cadillac master cyl (mentioned above) be adaptable to your earlier-year Buick? NTX5467 -
It has more zddp than an "SL" oil has to have, with the appropriate "counterers" to keep the additional zddp from becoming "toxic" in the mix. Which also means it's NOT approved for direct injection gas engines! NTX5467
-
As I recall, the ST400 should have an idle switch that modulates the stall speed at idle, then when the throttle is in the cruise area, then the low stall happens due to the switch not being in the high stall operation. That is the IDLE switch. The ST400/THM400 has an electric kickdown switch at WOT, for second gear "kickdown" or "passing gear". On the ST version, that switch would be wired into the high stall at idle circuit, to again put the converter into the high stall mode. Seems like I remember seeing some Buick and Oldsmobile throttle linkage pictures where there was an electric switch at the lh front of the carb, contacted by the throttle lever on the carb, which handled the idle speed stall issue, with a different switch on the lh rr corner of the carb, which handled the WOT things related to WOT kickdown and high stall, too. Seems like, too, that the first little bit of throttle linkage travel, by my observations, was to change the stall speed first and then the throttle linkage opened the carb a bit. I don't know that for sure, but I observed many '65 Oldsmobiles move off-idle with NO additional engine sounds doing it. I have not researched the differences in the Buick and Olds systems, though. Seems like I saw this in my 1966 MOTOR Manual? Enjoy! NTX5467
-
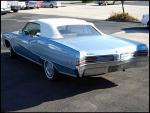
Nice looking car! Took a while for my eyes to focus on the armrest covers being what they were. NTX5467
-
AT THE ASSY PLANT . . . many times, the seats in the correct color and such, are in "a que" which is supposed to be accurate for the cars coming down the line. IF the que sequence is not the same, but the same seat option, nobody looks at the attached build sheet, just doing a visual confirmation of what the car's supposed to have. I first heard of these things in the Mopar hobby, in the 1980s, after I'd learned what a build sheet was and where they might be located in the car. As mentioned, it could have happened at ASC if they had two of the same interiors in different cars. There are SOME cars where a build sheet documents the car and its value, related to options or color combinations or other things, but for most cars, a build sheet is not that important outside of the assy plant. "Outside of the assy plant", the later GM Service Parts ID (SPID) label takes the place of build sheets, as to replacement parts look-ups, paint codes, equipment, and such. On more current models, that is now replaced by a QR Code, I believe? NTX5467
-
The basic transducer was the same for everything. The differences that I know of were . . . If the car had a dash-mounted indicator light for when the cruise was "on", an electric terminal would be marked as such. Some, as the Chevy models, were always "on" and the button on the turn signal stalk was punched. Press the brake for "OFF". Cycle repeat. All of the vac source nipples had a restriction in them, except the diesels which had none. Never did understand this, but must have been trying to avoid some harmonic or something. This might be where some of the part numbers come from, as that hole might have been varied in size for particular engines and such? The later 1970s models which had "Resume" on the turn signal stalk, had a vacuum chopper that mounted on its own bracket, on the bottom of the main transducer. On the 1980s ro so cars, the brake light and"kill switch" for the cruise were combined into one unit. Prior, they were separate items. The Delco Radio warranty service station who also rebuilt cruise transducers, the rebuilts were "universal", other than the diesel items, per se, but I believe a diesel unit would work fine on a gas rig. I'm not aware of why a Corvette transducer would be different from a Camaro or Nova transducer. I suspect that the number of rebuilders has shrunken greatly since the later 1970s, but I suspect there should be somebody that still does them. Just some thoughts, NTX5467
-
Yes they did. When the API said a dual rating was not possible, a few years ago. From the oil analysis, Rotella diesel-rated oil evolved into a little bit lower zddp from when I started paying attention to that, when the "CI" rating was in effect, but still was about 1200ppm zddp, down from the prior 1400ppm zddp. So still above the "SL" (gas) level of 1000zddp level. I need to do more research to better understand some of the "conflicting data" I've been seeing on YouTube on motor oils. In the mean time, where's that VR-1? NTX5467
-
I'm glad all is working well! Car looks good, siting there being scrutinized. As BG normally sells to service shops and dealerships only, that could be where the "For Professional Use Only" comes in. But when vehicle sellers claim something was "professionally done", that just means that they got a sales receipt for work done, no more, no less. Enjoy! NTX5467
-
Over the years, there have been many items "they ought to produce", so this is not unique to Rivieras. Problem is that by the time they estimate the market size, bit enough to support ONE production run, the selling prices are much more than the "desirers" would ever pay for what used to be an inexpensive OEM part. In our modern age, it would not be hard to do a casting from items available at a larger arts/crafts store. Years ago, a chapter member showed us some red tail light lenses he had reproduced that way for his 1940s Buick sedan. The detail was extremely good. Then he explained how he did it (show and tell). Everything purchased from a chain arts and crafts store! Step 1 -- purchase the needed plastic resin molding kits for the size of the desired object. Step 2 -- following instructions to make the mold from the desired item. Step 3 -- after the cure time for the mold, remove the mold material from the item. use it to insert the mold into a holder. Inject the plastic. Step 4 -- after the cure time for the plastic, gently remove the mold from the plastic for inspection. Step 5 -- using a hi-def camera, make a picture of the lettering on the item, to make a "water slide" decal of it via Photoshop, "cleaning it up" as needed. Step 6 -- print the waterslide decal (on special "paper", using your computer's printer) and install it on the clear plastic item to complete the item. I have heard this is how many vintage instrument faces are "re-faced" by professionals. There used to be a thread (with pictures) of how to do this whole deal was done on an early Pontiac sedan's speedometer face. Might search for it in here or via Google. So, lets say the materials could all be had for about $75.00 to do ONE lens. Then what is their time worth to do it? Of course, once ONE is done, the process is known, but "scale" would not decrease the costs very much as I don't know if the DIY molds will support multiple injections. Even at $50.00/hour pay rate for labor, that would mean each one could ultimately cost over $100.00 in time and materials to make. Upgrade the mold materials and process and that number might take a good while to come down with scale. I have not bought any of these molding items at the store, nor any pages of water slide decal printing stock, but they are available. I'm just estimating prices of what I perceive to be reasonable, to me. Any volunteers? Regards, NTX5467
-
I highly suspect that anything OBD-II would have roller valve lifters already. In one respect, as Mr. Speed, Jr., mentioned, the high zddp oils also had lots of calcium in them, back then. Those two need to be "in balance", I believe. He also mentioned that with less calcium, then less zddp is needed. The current API SP rated oils have less calcium due to the affect of calcium on low speed spark knock (and the massive piston damage that can result!!!) for Gas Direct Injection motors. Woith less calcium, the 900ppm zddp spec level works just fine. With the prior high-calcium formulations, the least amount of zddp that was considered "safe" was 1000ppm, which is what the old "SL" rating had, dino or syn. Enjoy! NTX5467
-
The API changed their certification process that such dual-certifications can't happen any more. I'm not sure what the real-world implications are for used engines running diesel-rated oils in them are, as to the alleged "diesel" type of zddp rather than the car-rated zddp. Lake Speed Jr claims there is a difference, but there are still LOTS of wear areas in a diesel engine that can benefit from zddp, too, other than just the camshaft. Like crankshaft and rod bearings. Note that "Rotella Gas Triuck Oil" meets the same OEM specs as normal car oils do. Enjoy! NTX5467
-
How do I convert my 60 Lesabre to a dual master cylinder?
NTX5467 replied to joseph demeyer's topic in Buick - Post War
Probably because if you lost hydraulic brakes, it would be an emergency to stop, so the mechanical brakes could then be used, but only on the rear wheels. NTX5467 -
There ARE scenes in some YT vids of guys with an elec buffer using it on completed bodies, somewhere after the paint cycle. More as a "touch-up" than a whole vehicle buff. I suspect that due to lacquer's drying cycle nature, any paint not on an outside or otherwise "Class A Finish Surface" would be from overspray than not. Which would mean a somewhat dull surface result, usually. Of ALL of the GM makes, into the 1970s, it seemed that Cadillacs had better paint on them than other GM brands did. Just glossier and smoother, by observation. I was not aware that acrylic lacquer would re-flow at elevated temperatures. If so, that would mean a different and more expensive chemistry than was available in the aftermarket? My observation has been that how "wet" the lacquer is sprayed-on has more relationship to the ultimate smoothness and gloss than later buffing would. As lacquer can be sprayed "too dry", then color sanded and buffed, which should work, in theory, but does NOT yield the same results as if it had been properly sprayed. Enjoy! NTX5467
-
The main thing would be getting the load rolling. Which can mean slipping the clutch a little more than normal, initially. Once underway, only thing holding you back would be available power. Of course, you know what has to happen to replace a clutch? NTX5467
-
Better find a place to install the biggest aux cooler you can find, I suspect. Might also consider changing the atf to Dexos VI, which is full-syn, too. PLUS a top-tier trailer brake controller and HD shocks all around. Enjoy! NTX5467
-
I suspect that MOST front end alignment place employees are NOT aware of torsion bars as all they have seen on fwd cars is struts on the front. NOR do they know of any adjustments to them! Aim for a rocker panel that is level with the flat road surface, or a smooth garage floor. The rocker panel is better as it is what all of the other body panels attach to when the body is built. Then check for side-to-side differences, too. Inflate the tires to their normal pressures before doing these things. Just some thoughts, NTX5467
-
Consensus on best headlight upgrade for 1st generation
NTX5467 replied to RivNut's topic in Buick Riviera
Some "street rod" headlight bulbs have had the integral DRLs for many years. ONLY thing is getting the circuit to run them! Does NOT mean they have a decent beam pattern, though! Unless the headlights were from the later 1950s or so, all headlights still have the same wattage ratings. Halogens were NOT more than the lights that came before them. Just a better use of electricity and updated beam patterns to corral more of the light in a more useable manner. Using relays to run the headlights, rather than after the current goes through the headlight switch and bulkhead connector, can raise the available voltage to the bulbs by a volt or so, resulting a little more light output. IF that might really matter. NTX5467 -
If the hesitation happens only on heavier throttle movements, it can be more related to the accel pump not having enough shot. As to the ign, set the dwell first, then base timing . . . in that order. Is hot base idle speed to spec? What happens when you "leave fast" from a stop sign? It thinks about it for a second, then goes? Coughs? Dies? THAT could be accel pump issues. Like on a 1/2 throttle punch. Slamming the throttle from idle to WOT, after a stop, normally does not work well, no matter what. If it falls flat on accel up a hill, that could be the power valve not kicking in on cue. Please advise, NTX5467
-
Consensus on best headlight upgrade for 1st generation
NTX5467 replied to RivNut's topic in Buick Riviera
Check Daniel Stern Lighting website for halogen headlights. Many with the sharp upper cut-off Euro beam pattern, which pute a LOT of light "down the road" rather than in front of the front bumper. Much better for seeing at night. Plug 'n' play. With a defined beam pattern, you then realize just how "everywhere" the USA beam pattern is. Can aim them higher without light getting into oncoming driver's eyes or the mirrors of other cars. MUCH better. Replaceable bulbs, too. The Holley Retrobrights have a good beam pattern, but NOT as good as the Euro-code lights. Hate to spend the money for Holleys, even on sale! NTX5467 -
("Astute price shoppers" = "cheapskates"?)
-
INSPECT the tire tread, too. Might be a nail or something that is just short enough to not yet have penetrated the full distance "to air", so no air loss. NTX5467
-
Remanufactured cruise control transducers are still out there. Choose a vendor close to you should it not work correctly. NTX5467
-
TWO cables. One from the transmission to the cruise control transducer and the upper cable from the cruise control transducer to the speedo head. Can be accessed from under the instrument panel. Might be a retainer which holds the cable end to the back of the speedometer head, which can be depressed and pulled away from the speedometer head connection. Need to determine which cable it is, upper or lower. Might be an internal issue with the cruise transducer. ACDelco started to service the inner cables in three different lengths, cut to fit. Then attach the supplied plastic end with its adhesive in it. There used to be a vendor in Michigan, who retired from AC Speedometer, whose retirement job is building correct speedo cable assemblies "to spec" for each application. More diagnosis needed to determine where your problem really is. NTX5467
-
I have read that Startron is enzyme-based. I used to use Lucas "Green Stuff" (my name for it) ethanol-shield additive. It IS green in color and has no "over-treat" issues. I used to use it in my push lawn mowers. After 3 months of sitting outside, they 'd usually start on the 2nd pull. I did manage to over-treat a few times, with nothing other than the white ceramic on the spark plug got a green tint to it. There is a website (www.pure-gas.com, or similar) that lists alleged ethanol-free fuel sources with available octane levels. Might help you find a different vendor? NTX5467
-
Thanks for the grrrREAT pictures! Thanks for putting them all together as you did! NTX5467


