NZ Buick
-
Posts
88 -
Joined
-
Last visited
Content Type
Forums
Gallery
Events
Everything posted by NZ Buick
-
That’s what I thought too so I measured my fathers D45 leaves and came up with the same measurement but then realised the D had 8 leaves and the E/H has 10. I’m not sure if this means the thickness of them is different or whether it’s just a bigger spring.
-
Would anybody be able to clarify what the thickness of the spring leaves for these are? I have sent this diagram to a spring maker and he said it should be possible to make them but needs to know what thickness material to use.
-
I am stuck for some front springs for my E/H45 Tourer project. The front axle and suspension was taken for a trailer when the car was parked up years and years ago and I haven’t been able to locate some replacements as of yet. Are there any design plans etc. out there that I can get hold of to have some new ones made??
-
Just received the new gear set for my diff. Absolutely stoked with how they have come up and should be a perfect solution for what was looking like an unsolvable issue after 3 diffs all with broken teeth!

-
What is the overall height of your 1920 radiator Rod? The shroud I have with the cast brackets is quite a lot shorter than the others and seems to match my father’s 1916. I’m pretty sure I’m right to stick with the taller one with pressed brackets for my 1919 although the coolant outlet pipe off the engine doesn’t align very nicely with the radiator inlet. I guess I’ll find out the hard way if I’m wrong when it comes to lining up my bonnet between cowl and radiator later down the track.
-
I think I may have figured out my radiator bracket issue. It would appear to me that perhaps 1918 had the cast brackets and a shorter radiator and 1919 the pressed steel type brackets with a taller radiator. Can anyone tell me if this is correct or am I completely wrong? I seem to have two different radiators and need to be sure which one to use on my tourer.
-
What models are these brackets from? Can they be interchanged? I have a really nice radiator shroud I would like to use with the cast brackets on my 1919 tourer but the gusset underneath fouls on the front splash apron.

-
What is the difference between these radiator shroud mounts? Can they be interchanged? Which are correct for a 1918/19?


-
Bit more progress, chassis all blasted and painted and managed to find a spare bit of time to sit the motor in place. Feels good to see something coming together finally!


-
I will have a look at what I have and let you know
-
Which panels are you after? I may have some that are salvageable.
-
What is out there in the way of replacement crownwheels and pinions for these early Buick diffs? I’m onto my third rear axle now trying to find something useable only to find it has a few teeth missing inside! The first two have already had there innards removed previously so I’m guessing these gears are a bit of a weak point? I’m becoming quite desperate to find some replacements now as I will never be able to get this project going without them.
-
Are there any 1918/19 crownwheels out there for sale? I’ve just opened my ‘new’ diff and there are teeth missing unfortunately.
-
Thankyou very much for all of these photos! It gives me an idea of what I’m in for. I’m not trying to set any speed records with this restoration so am not really concerned that it will take me a great deal of time to piece something together it’s all part of the adventure in my opinion. Plus I don’t think it is a viable option to attempt to ship such a bulky item out to NZ and expect it to survive the journey.
-
would it be too much to ask if you could possibly take some basic measurements of this subframe to give me a starting point to work from? It looks really nice!
-
Well, it has been a very long time since writing on here. Basically I could not locate a useable diff for my project anywhere here in NZ so put everything in a corner and forgot about it for a while. Recently however I came across the remnants of a 1919 HX45 Tourer which included a diff and a relatively complete (although completely disassembled) Tourer body. After promptly buying these parts I have now made arrangements and got them home. After going through what I have now acquired I have been hit with a wave of enthusiasm as I’m sure I now have enough parts to put something together! My next question is… Does anybody out there have photos of 1918/19/20 tourer wooden subframe??? Mine has completely rotted away and left me with a floppy shell of panels? I’m happy to muddle away and make what I can but without patterns etc. it is very hard to get a starting point.
-
Quick update, new crossmember is coming along slowly but surely.

-
I agree that the longevity of a ball bearing in that application may not be any good but I’m of the opinion that with the tension of the valve springs in an old engine like this being relatively low (compared to modern engines) I have decided to give it a go anyway. My hope is that the shim washers I have used either side of the bearing are of a size that shouldn’t allow any balls to fall out into the sump and if I keep a close eye on valve clearances I will hopefully be able to catch one if it fails before it is too late!
-
Yes that was me you sent the carb to. It took plenty of soaking and a bit of heat to get apart but after a thorough clean out I’m hoping it will be good to go now! I just have to get an O ring for the adjustment needle in the bottom as I hear this is the way to remedy leaks.
-
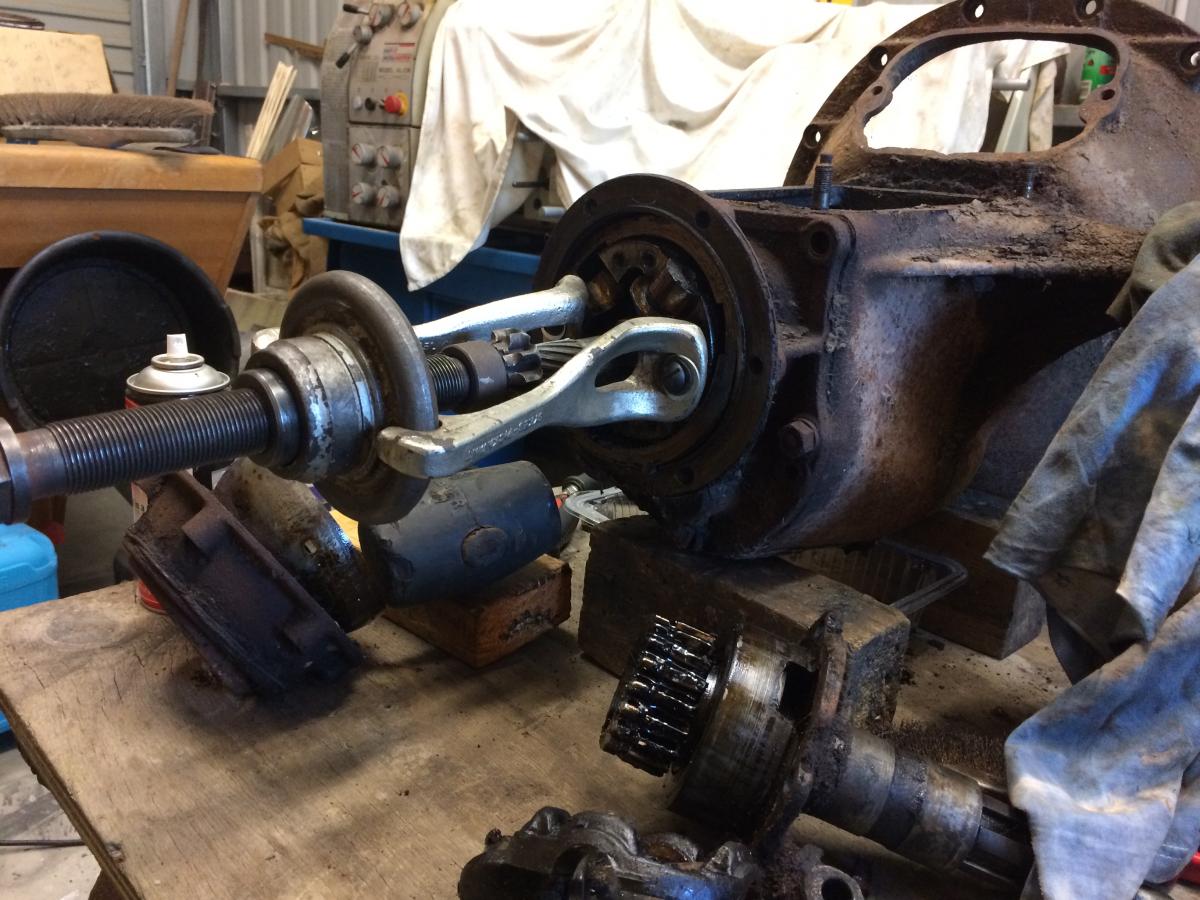
After sitting a week with as much tension on it that I can safely apply it still hasnt budged! Unfortunately it is quite worn and I do need to remove it to repair it. I will try to remove the complete rear housing and press it off hopefully without breaking it!
-
I have removed the retaining nut and big square washer from the end of the shaft and was expecting it to slide off but it appears to be extremely tight! I have it under constant tension with the puller in the hope it will release of its own accord but if not I will have to remove the rear housing and press it off as suggested above.
-
Has anybody got any magic tricks to remove the universal yoke from the output shaft of the transmission? I cannot get mine to budge!

-
Well with the engine to a stage that I’m happy with it I have moved onto stripping, cleaning and painting the chassis so I can soon have something to bolt it into! I have removed the first cross member ready to use as a pattern to make a new one and while I source some suitable steel to do so I have started dismantling the gearbox so I can give it a thorough clean out. Does anybody have suggestions as to how the rear universal yoke is removed from the square output shaft of one of these gearboxes? I have removed its retaining nut and washer but can’t seem to be able to remove the yoke!


-
Another milestone reached, valve gear is all installed and have set the clearances to .005” I will check it again after some running and adjust it where needed. I had a great deal of trouble trying to free up the solid rollers on the lifters so they would spin smooth and freely and was worried about damaging cam lobes so have managed to find a ball bearing of very similar dimensions that I have managed to graft into place. Will be interesting to see if this is a success or not! Starter generator is dummied up so I can drill my water pump shaft for the coupling with the required clearance. Manifolds are ready to install I just have to make two exhaust port rings as they were missing. Marvel carb is cleaned up ready for reassembly and I have just got a vacuum tank off my father to rebuild or sneak an electric pump inside of.


-
And here it is all sealed up ready to be turned upright and have all the valve gear installed. What are people setting their valve clearances at on these engines??