


AB-Buff
-
Posts
312 -
Joined
-
Last visited
Content Type
Forums
Gallery
Events
Everything posted by AB-Buff
-
 Model "A" will not work, 1934 and 35 switch is very unique. It has a passing beam. Low, passing and high beam. The passing beam turns the passenger headlight on high beam while the drivers side stays on low. difficult to find
 -
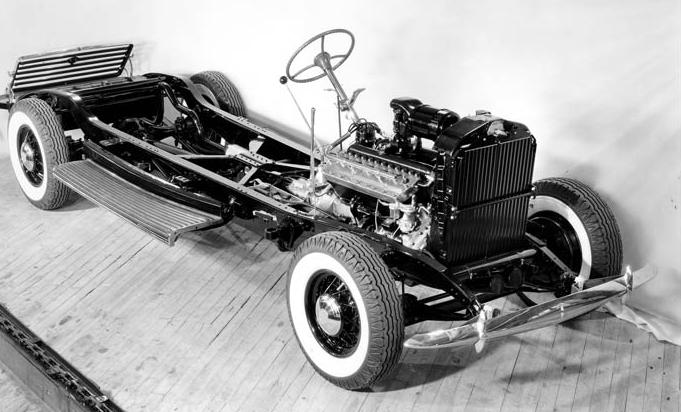
You throttle linkage attaches to it also, this one is 34 has the spark advance
.JPG.71e9c7d816f01e4812c25a6ae94a9cbd.JPG)
-
Wanted ignition switch for 1935-39 Lincoln
AB-Buff replied to AB-Buff's topic in 1931-1939 Lincoln Model "K" Only
I got this from James (Jim) last night, I also had another issue I didn't know about that Jim pointed out for me. He had me check the voltage at the regulator and at the battery. Mine was 7.2 at the reg. and 6.4 at the battery. That's a big voltage drop. He said to check the connections at the amp meter. Sure enough mine were finger tight at best. They are a real pain to get to but after changing the nuts and tightening them I fired it up and at the battery it now showed 6.86 volts, I was also charging 10 A. I charged the battery last night and I will check to see if it's a little better. I bet those connections on the amp meter were getting hot. Here is what Jim said. "Regulator is typically set for 7.25 volts regulation. Output capable of over 35 amps continuous. It uses MOSFET rated at 70 amps to control output using heat sinks. Problem with using diode for cutout is no one uses a heat sink to dissipate the heat. A 10amp , 20 amp or 50 amp diode all create the same heat. They all have 0.8 volt loss across them times current thru them say 20 amps would create 16 watts of heat. Unless that heat is removed it will soon get over 300 F and destroy itself. A diode can safely run at about 175F. I’ve restored Ford cutouts using a copper bar to mount the diode to and solder copper bar to inside of cutout. Case as a radiator to dissipate the heat. This can reduce heat by over 100 F and give continuous use. A good choice for diode is a schokky diode which has about 0.5 v loss which will further reduce heat." -
Wanted ignition switch for 1935-39 Lincoln
AB-Buff replied to AB-Buff's topic in 1931-1939 Lincoln Model "K" Only
I haven’t gotten anything from him but I sifted through some old emails that we sent back-and-forth, it’s supposed to maintain voltage at 7.2 at the regulator and he sets them for 28 A. I hope it works like it does now for many years. I have 7.2 volts at the regulator, when I look at my amp meter I can turn the headlights on, low, passing and high and I'm running 52 cp bulbs on high and it’s maintaining everything on the amp meter, shows about 1-2 amp charge. It’s not going to over charging the battery. Fingers crossed -
Wanted ignition switch for 1935-39 Lincoln
AB-Buff replied to AB-Buff's topic in 1931-1939 Lincoln Model "K" Only
It’s a modified stock cut out/regulator, now it’s a solid-state unit. It’s done by James Peterson, I’ve asked Jim for a technical information that I can post here. When I get it I’ll post it. -
Wanted ignition switch for 1935-39 Lincoln
AB-Buff replied to AB-Buff's topic in 1931-1939 Lincoln Model "K" Only
Well so far so good. Turns off and on car starts car runs I’ll have to take it for a road trip soon. I just installed a new voltage regulator solid state. I love it. No more over charging the battery and it also keeps up with my headlights. -
Wanted ignition switch for 1935-39 Lincoln
AB-Buff replied to AB-Buff's topic in 1931-1939 Lincoln Model "K" Only
Just laped this in a bit. Someone apparently worked on this before and tried to sand the divots out. They were a little heavy handed on that corner but this should work well. It’s definitely gonna last my lifetime. I will put it in a few minutes will see, I get to do a little more standing on my head. 🙂 I keep forgetting to mention that I made that contact area just a little bit bigger. As long as it turns off I’m OK.
-
Wanted ignition switch for 1935-39 Lincoln
AB-Buff replied to AB-Buff's topic in 1931-1939 Lincoln Model "K" Only
I decided to machine the pin out and make a new one for it. If it gives me any trouble the relay is going in. I have a relay in a 33 Chevy with a borg-warner overdrive. I must flip that relay in and out 50 times every time I drive it. I’ve been doing it for 10 years. Delco Remy relays are pretty stout. But we’ll see if we can’t make this switch work properly. Here are a few pictures of it. I need to sand it on a on my micro flat, I left the pin sticking up about .002 inch. Should work out OK. The last photo is of it in the oven with a thin film of epoxy over the top. I’ll sand that flat.


-
Wanted ignition switch for 1935-39 Lincoln
AB-Buff replied to AB-Buff's topic in 1931-1939 Lincoln Model "K" Only
Yeah I thought about taking it back apart and sanding it. I’m getting tired of standing on my head to get it out, it’s a really bad design. I may go ahead and put a relay in there and just flip the switch click the relay in the relay were carry the load. Still thinking about it thanks for the advice. -
This is what’s on my 35. I’m not saying this is 100% correct but I believe a slotted screw is the right way to go. Definitely not a hex

-
Hi I am looking for another ignition switch from my 35 Lincoln. I have taken this apart cleaned it put a little dielectric grease in it and it still won’t carry the current through to keep it running consistently. Anyway if you have one let me know please see photos Lynn


-
After Jack Passey had passed away, Mona called me and said I’ve got to get rid of everything here the scrap metal guy will be here on Monday. So I headed over the next day, Sunday. I was rooting through a wood bin that was about 6 feet wide by 20 feet long 2foot high full of pinenuts and leaves with some piece parts in it. I pulled out three of those water pumps and set them on the top edge of the bin. I got a call from the person that I was with me went over to the main garage got totally sidetracked and left with them sitting on the edge of the bin. Monday morning I remembered, called Mona and she said that’s where the scrap metal guy is working. I described what it was to her and she went over to see. The the scrap metal guy said he didn’t see anything like that. I’m pretty sure it was the first thing he threw in his truck and he wasn’t going to get it back out. Irritating 😞
-
Thank you for the comments. I love the car. It fell in love with it when I first saw it. I did have one thing that happened to me, I’m going to relay it to Matt. There is a ignition switch, it’s leaver activated, it just puts the power to the coils and then you have a button to push for the starter. When I was about 150 miles into the trip on my way hone I passed through a town called Santa Nella, I got a phone call pulled over and shut it off, Chatted for a couple minutes then started it and pulled out in the traffic which was bumper-to-bumper for a short ways and it died. I reached over and hit the starter and it was nothing, it starts literally in one second. So I knew something happened. I checked for spark and there was nothing. So I flipped the starter switch on and off and reached underneath and touch the wires, there are two terminals, the out going wire terminal (not the wire) was hot enough that you couldn’t put your finger on it. I ended up flipping the switch on and off several times and it started, when I got to a better spot to stop, I remove the wires and looked at them, other than showing their age the terminals looked OK. From that time on they remained cool and it ran fine. So I have something going on inside that switch causing resistance. I’ll have to pop the switch apart and clean it, I doubt if it’s ever been done. Lynn
-
Love that shirt!
-
Took the Lincoln out today, thought I would give it a good shake down to see how things are going to work after all the work I did on it. It was 175 miles round-trip. I have not filled it up with gas yet to see what kind of fuel economy I got. I’ll try and do that soon I hope. But I took it over Highway 152 in California which goes over Pacheco Pass you basically start a little above sea level and end up going over about 1400 feet it’s a freeway or highway and the speed limit 65 I ran the Lincoln about 63 miles an hour and it did real well. I fluctuated the speed from 62 sometimes 70 and back did not overheat didn’t lose any water and ran fantastic. The temperature was 86°. Looking forward to traveling up and down the coast a little bit in it. The photograph at the lake is San Luis reservoir. Man-made lake that they pump water from the Delta into it in the winter and use it during the summer for irrigation. They generate electricity when they drain it back to the Delta. Happy camper! Lynn


-
I’m with Matt. I believe Black is correct I don’t think I’ve ever seen one not black. I believe I have some more photos when I get back on the computer I’ll take a look. You have to remember these are show room photos.
-
Here are a couple of factory photos. first two 1935 and 1936 Looks like Matts car is in the photo 🙂


-
Hi Chuck I took off .150 inches at least that’s what I asked for I ended up at .160” off. That seems like a lot but the aftermarket heads seem to be deeper than the original heads. When I CCed them the volume much larger than stock. When you take that much off you have to go in and mill out for the valve clearance. Which I did myself. Anyway I would not take more than .100 inches of the face of a stock head. If you do you’ll have to go back in and spot face for valve clearance. I ended up at 7.56 to 1 compression ratio which I think is good. It runs fantastic I can literally go out and just bumped the starter when its cold for about two seconds and it starts. I’ve also advance the timing to 10° before TDC and I’ll try and go a little more later. If I remember correctly on a stock head, if you take .100 inches off depending on your bore and the head gasket you use you’ll end up somewhere around 6.5 to 6.8 to 1. Do some measurements before you cut! Lynn
-
1933-1934 Lincoln Gas Cap "Pebble Beach Quality"
AB-Buff replied to AB-Buff's topic in 1931-1939 Lincoln Model "K" Only
Thank you Ashley!!! Lynn -
I have a 1934 Lincoln Two Window Town Sedan in my shop, it was missing a lot of pieces but I have fond everything I need, I think. I had a lot of stuff chromed and nickle plated last year when the plate shop was slow. Hoping to restore it but I may sell it? We will see. Lynn


-
Matt Put me down for a set! THANK YOU! For getting them made! Lynn
-
I bought the .812. I ended up using a thicker washer that I had that’s .845. If I had not needed the thicker washer I would use the .812. They both look nice with the nuts. You don’t want something that’s real big. I took material off my head to raise the compression ratio. That’s why I use the thicker washer. Lynn

-
Looks fantastic. The two window town sedan is a very very nice looking car
-
Hi Well I thought it was necessary. When you are looking for a V-12 "K" part it's much easier to not have to sift though a lot of Zephyr and Continental parts. There are completely different. Lynn
-
Hi Matt. I want to reiterate that I’m not having a heating issue and I’m not losing water. But I do feel the water isn’t spending enough time in the radiator. They put a pretty darn good pump on these things so I think I’m going try slowing it down just a little with restrictors . I made two of these today they’re a half inch thick cupped on each side leaving a quarter inch thick web then I put a full radius on it the ID is 5/8 of an inch. I think this should work well if not I can always slip them right back out. And you won’t see them. I think the in-line thermostat is perfect. If I would’ve found some of those when I put this together I would’ve use those. I do like the shutter system in the front and that it warms up quickly and once it opens it maintains that temperature. When I took this for a ride last winter it would never warm up enough to come off a choke. I forgot to mention this is 304 stainless steel so it’s not going to go away


.JPG.71e9c7d816f01e4812c25a6ae94a9cbd.JPG)


