


rodneybeauchamp
-
Posts
1,638 -
Joined
-
Last visited
Content Type
Forums
Gallery
Events
Everything posted by rodneybeauchamp
-
Hi, there were only BUICK lettering on the boot lid and nothing on the bonnet (hood). The Riviera was new in that it had very little chrome or badging …… less equals more! Cheers Rodney 😀😀😀😀😀😀😀

-
 Hi all, am now searching for my next Riviera and wanting to find a ‘98 or ‘99 model. Wanting a good, clean rust free car with low mileage, prefer less than 50,000 miles but happy to look at higher mileage for one in exceptional condition. Willing to pay good money for the right Riviera. Have recently sold my ‘63 so now searching for my ultimate Riv. Many thanks Rodney 😀😀😀😀😀😀😀
 -
Hi all, Looking to buy a 1998 or 1999 Buick Riviera in extremely good condition. Wanting low mileage, prefer less than 50,000 but willing to look at higher mileage if in exceptional condition. Needs to be rust free, clean vehicle with good service records. Willing to pay good money for the right Riviera. Many thanks Rodney 😀😀😀😀😀😀😀😀
-
Correct, base idle screw contacts base of carburettor to adjust idle. Fast idle screw is the other and sits on fast idle cam. Fast idle spec is 650 rpm in N (assumes N = neutral) and hot idle is 525 in N according to Rochester Products manual but Buick quotes a figure in Drive. Everything else appears OK. One thing that puzzles me is you have to wind the fast idle screw in a fair way to make one adjustment but if left at that setting, fast idle is way too high, 1500rpm or there abouts. This means you then wind it back out to set the correct high idle. Would not this change the previous settings? Will dig a bit more into it today perhaps and see what I find. Possibly I am not setting one of the adjustments correctly. Perseverance will win out eventually 😀😀😀😀😀😀😀😀 Rodney 😀😀😀😀😀😀
-
OK so big test today. Reset the choke coil as Jon suggested to just lightly close the choke valve with minimal pressure while engine was dead cold. Choke thermostat gasket was still good and appears to seal. Started immediately but had to drop the fast idle back. Put the air cleaner back on and did a short drive around the block. Interesting because at the fast idle setting suggested by the Rochester instructions the rpm seems way way way too high which means I have to alter it achieve a 625rpm instead of about 1200rpm that it seems to run at. 🤔🤔🤔 So next morning, with a dead cold engine at 7.30am it started on second try after using correct technique, pedal to floor then release but then stalled out. Required a few pumps then started but wanted to stall while in park. Managed to feather it enough to back out the garage with one more stall then it was fine. At a rest stop for coffee, started fine but again wants to stall, so will have another look tomorrow and perhaps up the fast idle. After going through all the settings carefully to get them right, perhaps a bit disappointed it did not behave. On the good side, now at least it will start …… but doesn’t want to keep running. It hasn’t beaten me yet ….. and it won’t. Rodney 😀😀😀😀😀😀
-
Hi all, I’m having fun learning about automatic choke set up on a Rochester 4GC on a ‘63 Skylark. Have converted back to the automatic choke from a previous owners folly. Have set up carby to specs in the Delco Rochester information (three times now 😀😀😀😀😀) and I thought I had got it correct. Started easily and had to back off the high idle down to 625 as it was racing about 1100 to 1200 rpm. But it does not want to come off the second step of the fast idle cam unless you manually pull the choke valve plate open. The heat coil on the choke is new and working (tested with her hairdryer 😳😳😳) and is set so there is slight resistance when cold. Does not seem to be any binding of the linkages that operate it all, but frustrating that it doesn’t do as it’s told. Have looked at countless videos and blogs but still not getting it right. Gunna persist on this till I get it right as it should. Initial problem was difficult starting on the manual choke. At least it now starts….. so that part is good. pictures show where fast idle screw wants to stay and also where the choke vale was until I pushed it home! Rodney 😀😀😀😀😀😀 BTW ignition is good, points with dwell and timing correct.


-
Hi, I have moved this from the Cadillac forum as I have had zero responses. Hopefully I can get some here. Thanks Rodney 😀😀😀😀😀
-
How to Sort and Maintain a Prewar car
rodneybeauchamp replied to alsancle's topic in General Discussion
Huge believer in period turn signals on any vintage car. But you need to make the effort to make ‘em look like they was there from day one. On my ‘38 Buick a previous owner took the easy and cheap way out, get some used motor cycle indicator lamps (make sure they are Jap) and whack em on and hey presto …… the ugliest looking feature that attracts your attention away from the majestic lines of the ‘38. Then the new owner, (me)who takes pride in what things look like found the perfect lamp at a Swapmeet, but only one. It took a almost ten months and a lot more swap meets and then that happened to be interstate before finding not one more but a pair! (Painted red) Painting them black let’s the chrome give a small bit of bling and the orange globe is not too obvious when not lit. The fronts were relocated into the park lamps, however if I located another I would contemplate putting them on the front bumper too, with either white or yellow bulbs. What a difference a little bit of effort makes, and it is all part of the fun! Rodney 😀😀😀😀😀😀


-
for sale 1963-65 Dealer Service Bulletins
rodneybeauchamp replied to Jim Cannon's topic in Buick Riviera
These are great bed time reading for those with insomnia. Nah just kidding, these are a great resource for trouble shooting our Buicks. The parts listing is an excellent resource for good diagrams of where the watchamacallit fits onto the thingamebob. Because the Riviera was new in ‘63, they included many diagrams specific to Model 4747. Has certainly helped me on both my Buicks. And the Service Bulletins are interesting as they often show close up views of the engine or other parts which shows how things looked originally such as firewall wiring, heater hose routing etc. So even if the topic is about something else, the pictures or diagrams are invaluable! Highly recommended Rodney 😀😀😀😀😀😀😀😀😀😀😀 -
I just did a similar thing on a ‘63 remote mirror with great success. I had one brass retainer ferrule thingame missing on one wire so removed it from another mirror I had. Drilled out the wire with a small number drill and soldered it back on. Found I had to cut each wire back to the same length to get it to adjust correctly but that is normal on a Buick to do things twice 😀😀😀😀 You should have enough length in the cable to lose an inch or two (25.4mm or 50.8mm) and still function correctly but just check before you cut it. As a previous responder has mentioned, check that the right colours are in the right slots. They are often faded so repainting them helps both on the wires and the control knob. Failing that you might be best to find another mirror with good internals that you can swap out! Just my two bobs worth Rodney 😃😃😃😃😃😃😃😃😃
-
Show us the hack work you've found
rodneybeauchamp replied to Matt Harwood's topic in General Discussion
I agree, some people should not be allowed near anything electrical. PO installed an ignition immobiliser and as a result discarded the original ignition switch and keys for some aftermarket crap. Removing it cost me a new switch and cylinder and keys plus time plus frustration $&&$##@##$&&$##$&$# 😤😤😤😤😤😤😤😤😤 Their install certainly leaves a lot to be desired! Rodney 😀😀😀😀😀😀😀😀😀


-
Show us the hack work you've found
rodneybeauchamp replied to Matt Harwood's topic in General Discussion
These three are the pick of many on my ‘63 Skylark convertible. 1. using PK screws to hold on the globe sockets into the instrument cluster printed circuit board. 😡😡😡😡😡😡 2. installing the smallest battery you can buy and bending the plastic hold down bracket to keep it secure. 😤😤😤 3. making up a cover for the fuel pump opening that does not seal and leaks oil everywhere. 😫😫😫😫 4. using a bodgey oil cap that just sits on the filler pipe as a fuel filler cap. 😫😫😫😫 Still, I have the satisfaction knowing these have been put right. 😀😀😀😀 Rodney 😀😀😀😀😀😀😀😀😀


-
https://www.google.com.au/url?sa=t&rct=j&q=&esrc=s&source=web&cd=&ved=2ahUKEwj9roS68I76AhXp-TgGHYRUArIQtwJ6BAgZEAI&url=https%3A%2F%2Fwww.youtube.com%2Fwatch%3Fv%3D_BTEdWt2V3s&usg=AOvVaw1kp-_-PofoO_7_jbTGgiSd hi all, have just changed a previous owner installed manual choke set up on my 1963 Buick Skylark back to the original hot air style automatic choke. Was having some difficulties understanding how to set it to operate and came across this great video showing how their automatic choke functions for cold starting. Gave me a better understanding of the operations that happen on the carburettor using the correct starting methods. Brilliant! Rodney 😀😀😀😀😀😀😀
-
Rodney’s 1963 Buick Skylark convertible
rodneybeauchamp replied to rodneybeauchamp's topic in Me and My Buick
You can see how feeble the aftermarket manual choke is ….. a piece of @#$&$#@ plastic that fits poorly in place of the original. And how sturdy is where the metal shaft goes thru ….. weak as wervils wee wee 🙁🙁🙁🙁🙁 And not sure if I am missing a tube that goes into the air horn here. Any clues? Will also try to insulate the copper tube to protect the plug wires and retain the heat. Rodney 😀😀😀😀😀😀😀😀

-
Rodney’s 1963 Buick Skylark convertible
rodneybeauchamp replied to rodneybeauchamp's topic in Me and My Buick
Had time today to make further progress. Was able to borrow a tube bender from a friend and got some welding rod filler wire to make a pattern to bend it to. Lots of funny angles but it was simple enough to bend with the right tools and it looks OK without interfering with the number two plug wire. Then spent time cutting a circular baffle that fits inside the choke housing in the carburettor from aluminium but it was too thick so I omitted it. Possibly used to retain the heat within the coil area. I might make another from thin steel (jam jar lid) but not today. Tested the choke unit I got from Mikes Carburettor Service and it pulls back when attacked with a hair dryer ( don’t tell Jo 😀😀😀😀) which I think is opposite direction to the Carter. So I tried to figure out how it should work but not 100% sure. Anyway it is fitted and seemed to pull the choke off when it got warm but danged if I know how it applies the choke when cold. Going to study up on it while it cools down. It certainly run OK on the fast idle and it did drop back to idle when I stabbed the throttle (second attempt) I think I need lessons 101 on Rochester Automatic Choke units and settings. Anyhow pictures otherwise it never happened 😀😀😀😀😀


-
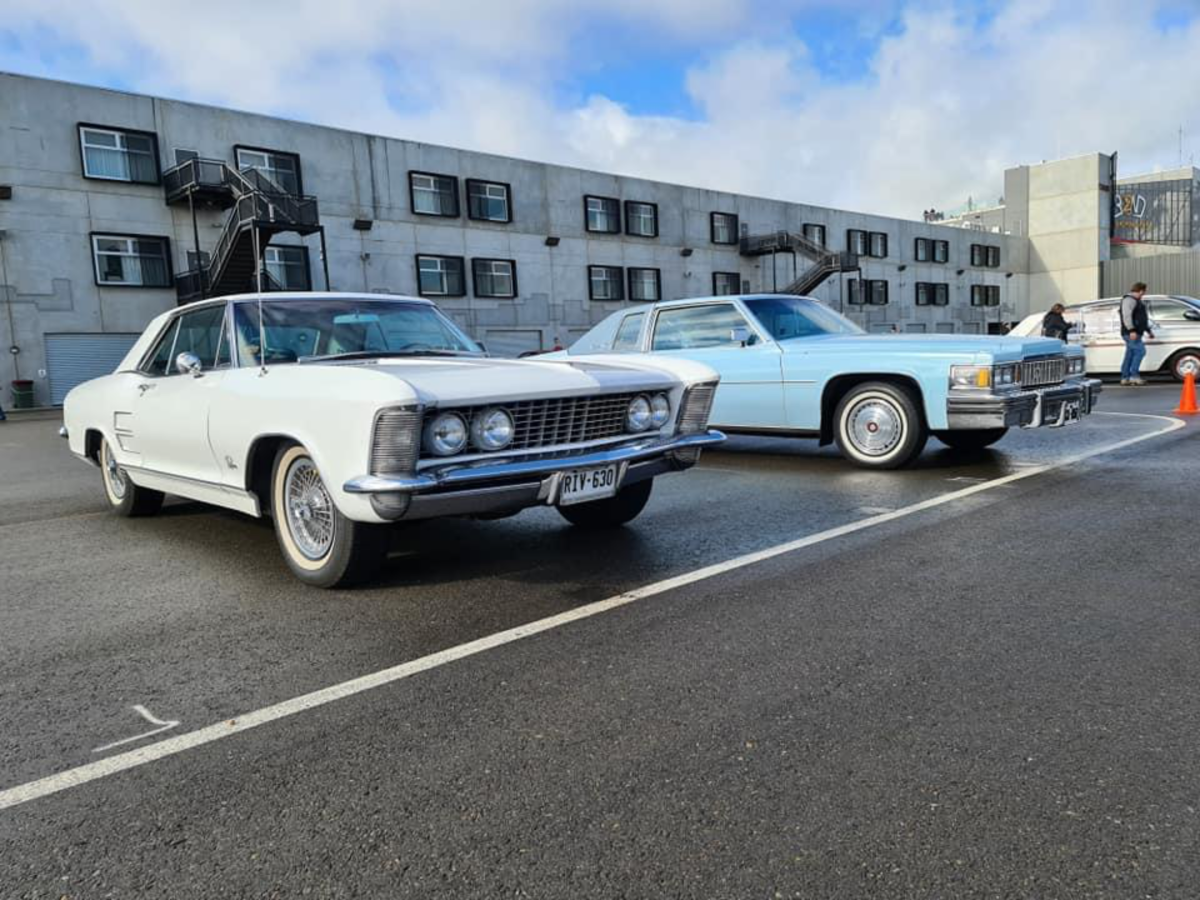
Hi all, For several years I have ragged a friend over the terrible orange turn signal lamps retro fitted to his Columbia Blue Coupe De Ville to pass Australian laws for compliance. Well, I have been given the task to refit them back to original red flasher and brake light. Don’t mind as I enjoy electrical work and love getting things back to how they should be. (did the same on my ‘63 Buick Skylark convertible some months back) Would a forum member be able to post some photos of how the wiring connects to the lamp? And would someone have a wiring diagram I could use. As far as I know without seeing it yet, they have just extended the existing flasher wire into a new LED lamp screwed to the rear bumper ☹️☹️☹️☹️☹️ With a horrible fast flash rate. Anything I need to be aware of when digging into these lamps? TIA Rodney 😀😀😀😀😀😀

-
Those appear to be the cables that operate the heater valve, defrost door, and other manual doors for the Heater etc. The two fresh air doors in the kick panels are operated by seperate cables. Unsure what the plastic dooflickies are …. may be for adjustment. Making sure they are free to move is a good idea. Most of the parts are able to be refurbished with some penetrating oil and working them back and forth. In my opinion much nicer to get the originals working again as at least you know they fit. cheers Rodney 😀😀😀😀😀😀😀😀😀
-
What Is The Longest You Have Waited On A Part?
rodneybeauchamp replied to TAKerry's topic in General Discussion
OK, had to reply to this. Sometime in the late eighties I ordered a set of knobs for a Marantz AM/FM stereo cassette player that went from being installed in a 1967 Pontiac Parisienne to a 1982 Mitsubishi L300 eight seat wagon to a 1964 Buick Skylark. Only the Fast Forward button was missing but you had to buy a full set of knobs. OK no big deal. The place I ordered them from had to special order them in as they never had stock. And as I was leaving the counter person said “Oh, by the way, we only ring you once!” After all this time, I’m still waiting on their one phone call. In the meantime I improvised and made a new one from aluminium and painted it black to match. Sold it at a Swapmeet several years ago, still with the improvised button. Go figure! Rodney 😀😀😀😀😀😀😀 -
Friday old car fun- headlight aiming
rodneybeauchamp replied to rocketraider's topic in General Discussion
Are you suggesting that aiming on four headlight vehicles always be done on hi-beam? If that is the case, I might redo mine. On all my cars I have to replace the sealed beams for ones that dip to the left for Australia right hand drive. Headlight aim is always a concern for me and I do drive at night and early morning. Currently I use my garage wall but my driveway slopes downward once out past the door. Can someone explain why the adjustment is done on high beam? Thanks Rodney 😀😀😀😀😀😀😀😀😀😀 -
My 58’ Century Caballero Estate Wagon Build
rodneybeauchamp replied to jackofalltrades70's topic in Me and My Buick
Matt, can I ask what media they used to blast. And what sort of pressure. It looks an incredible difference. I have used a grit blaster before on a large fender and wheels and other parts but it can easily warp and damage panels if not careful. Just curious. Rodney 😀😀😀😀😀😀😀😀 -
Rodney’s 1963 Buick Skylark convertible
rodneybeauchamp replied to rodneybeauchamp's topic in Me and My Buick
OK, still no road test but some further progress. The automatic choke coil thermostat arrived yesterday so gave me another project that should improve the start ability. A PO had installed a manual choke conversion but I was never happy with it. Besides if Buick wanted a manual choke it would be standard. But it ain’t! But like most things when you delve further there is always another hurdle to jump. The original choke tube had rotted or had broken leaving a small section stuck in the manifold. A few feeble attempts to remove it yielded nothing so I decided to remove the exhaust manifold to gain good access. You can see in the photo with the lead light the limited access. Surprisingly it came off with little trouble, removing the two flange bolts underneath first then the eight bolts that hold the manifold. Seems when the engine was rebuilt they used a never seize compound making the removal straight forward. Apart from one odd short bolt all looked good. I discovered that the transmission filler tube comes out easily as it is held in by the end manifold bolt. Surprising how much fluid leaks out all over the garage floor when it is removed. 😳😳😳😳😳😳 Still the stove pipe tube came out quite easily using drill, going up in size in a few stages until the last one drew it out. I will fabricate a new one using 1/4” copper tube left over from the ‘38 Buick choke set up. I was going to reuse the old manifold gaskets however one is not real flash so will see if I can get a set locally tomorrow. Some pictures otherwise it never happened and to be continued……. Rodney 😀😀😀😀😀😀😀😀


-
Have a couple questions 48 Pontiac streamliner
rodneybeauchamp replied to Biggins81's topic in Technical
Yes, I spent good money after my much loved and cared for 30 plus year old Optima ( by Bosch ) dwell meter/tachometer/voltmeter/timing light died due to a blown xenon’s globe that I could no longer buy for that model. What I bought is a new fangled digital extravaganza which does everything but make coffee but is not super easy to use, unlike my old analog Optima with a needle. So imagine my frustration when it failed to work on my 6Volt ‘38 Buick. After reading the instructions, same mentioned about solid copper wires and we got it working via a 12V jumper battery. I would swap it in an instant for my old Optima 😀😀😀😀😀😀😀😀 So much for later technology 🥲🥲🥲🥲🥲🥲🥲🥲 -
Have a couple questions 48 Pontiac streamliner
rodneybeauchamp replied to Biggins81's topic in Technical
If you opt for solid copper wires, be aware that later style digital dwell meters with timing lights won’t work, so you need to have at least one resistor plug wire spare to substitute when you hook it up. Ask me how I know this 😀😀😀 Rodney 😀😀😀😀😀😀😀 -
Yes, pictures showing the results of your chalk marking at various pressures. That way we understand what you are experimenting with. As they say “A picture is worth a thousand words, several pictures would make it a book or two!” Rodney 😀😀😀😀😀😀
-
Hi Keith, Is it possible to mock up a temporary shroud using cardboard or thin timber or similar held together with masking tape? Then if this works a sheet metal version could then be made, perhaps in sections screwed or bolted together. Probably an easier and cheaper option and may look more authentic than an electric fan. Keep us posted cheers Rodney 😀😀😀😀😀😀😀


