


Kenneth Carr
-
Posts
309 -
Joined
-
Last visited
Content Type
Forums
Gallery
Events
Posts posted by Kenneth Carr
-
-
4 hours ago, R W Burgess said:
They do indeed, lots of templates. Would be a good seminar in Philly this February. ?
The seminar is a great idea. I make it to the Eastern Fall Meet but not to the
Philly awards meeting. If you decide to make a presentation, possibly in PowerPoint,
it would be great if you could make it available here.
-
 1
1
-
-
On 8/28/2018 at 3:11 PM, R W Burgess said:
Looks great. You can also do it with Publisher.
Thanks, Wayne.
I have tried Publisher for creating nice looking emails to send out to
the members. I made some progress. I need to work on it more. I
was able to do 2-column stuff and mix text, photos, and graphic
art.
I have not tried it for magazine covers. Is there a storehouse of
templates somewhere? Maybe they come with Publisher?
-
Our car club, the Westerly-Pawcatuck Region of the AACA, just had our annual picnic.
I featured this photo on our webpage. Online software helps me make magazine covers from original photos.
It was a great picnic and our women members enjoyed it just as
well as the men!

-
1
-
-
Neil .... Yes it was easy to disassemble the gauge exactly as described.
These are things that I have to be told are possible before I attempt them.
I'll do almost anything if someone says "it worked for me".
I did not want to remove the rocker cover and go that route except as
a last resort. I have a habit of getting myself in trouble.
Those holes I drilled in the sensor never really penetrated the inside of
it. They essentially scraped the inside and cut through the rim of the
sensor (just like the rim of a rifle cartridge). I think that allowed the
PB blaster to get underneath everything and help out. I may have chipped
the shelf it was pressed against but a little sealer of some kind should
take care of that.
-
I finally extracted that pesky water temperature sensor from my
1941 Buick.
It took days. I squirted it many times with PB Blaster and wiggled
the center pin that protrudes from the piece.
It would not budge. I was using long nose pliers.
Next I bought needle nose locking pliers (like vise grip).
These allowed me to yank the center pin in all directions. I had
to be careful with all this because I did not want to ruin
the threads of the cavity.
Then I drilled two small holes in it and blasted more.
No movement. Then I stuck a nail (about 6 d) in one of the holes
and moved it from side to side. No movement of the sensor,
so I thought. I also heated the base of the sensor with a 30 watt
soldering iron (the biggest one that could fit in the 1/2" diameter space). I
followed this by packing it with ice and tugging some more.
No dice. What I neglected to notice was that for some reason it was now
easier to see that center pin. More PB Blaster was applied (drenched).
Finally today went to tug on that pin again and noticed that it was
actually sticking out of the well. Movement? I tugged again with the
pliers and it began to move. Then out it popped with about 2 cups
of antifreeze. I would celebrate with several beers except that
I would get sick ... on some nasty antibiotics now.
I am so relieved!
PS: while trying to explain the problem to some friends I made a drawing
to illustrate the bind I was in. That is attached below too.


-
1
-
-
I took up all the insulating material in the area Dave mentioned. I have no access
hatch on my floor, either side.
Then I remembered : one of the first things I did upon buying my car (some 16 years ago)
was to have new front floors welded in. the driver's side was like a Flintstone
pedal car ... you could watch the street go by. The passenger side was not as bad.
The doglegs that made the junction between the floor and the firewall area were all shot
too. All this was repaired. So, I figured the repair shop just cut it all out
and did not replicate the access port (too late to complain now).
But reading Neil's response makes me wonder if the '41 did have this port.
Someone here must know!
Today I jacked up the left (driver's) side. I have one horse under the spring perch
and another under the frame. I also have cement blocks and boards under the
front left tire and chocks at the rear wheels. I believe I was able to see the
cable. I quit for today ... 100% humidity left me soaked to the skin. See attached
photo. The floor panel patch is the smooth black area near the top. It looks like they
put it together with rivets?

-
Dave ... Thanks so much! You are a life saver.
I have no carpet so this will be an easy one.
You just kept me a little bit safer!
-
I need to replace my speedometer cable. I have not been able to trace it to the connection on the
transmission by just crawling under the car while it is not jacked up.
>Is there any way to get to the connection on the transmission without jacking
up the car?
>Where on the transmission is the connection (top left, top right, etc.)?
Thanks.
(if you have a file photo I'd love to see it)
-
Neil ....I read the speedometer thread quite a while ago. Just now I went out in the garage
and disconnected the speedometer cable from the dash end. My plan was to next go
back and study Dave's thread. We are thinking alike!
I have bought some really nice stuff from Skip Boyer before. I contacted him a few months
ago and he said that production was suspended for a couple of months due to
recent deaths in the family. He asked me to contact him again in 3 months or so
when he hopes to resume production (one at a time). I will do that. I need a bunch
of stuff.
I may have the current price list ... don't know... will PM you if I can figure out how.
Love this board ... just not sure on PM.
Thanks again.
-
My Pleasure, Neil.
Today I removed the ammeter/water temp. gauge from the car.
I needed to remove the wiper vacuum hose to get the end of the temp. sensor
through the firewall. I also had to remove the grommet in the firewall. That just
fell apart. I took the gauge cluster apart by uncramping the bezel that goes
around the glass front. Then I replaced both meters with NOS units.
I still have the old water temp. sensor stuck in the block. I will be draining
the radiator soon and begin work on that. Next is the speedometer. I need
to put in a new cable.
When all that stuff is done I need to either close it up or buy an entire
new front end wire harness and go for broke. At present I am inclined to
put in a new harness. If I don't do it now I will be taking this stuff apart
all over again in the future. I attached a couple of photos.
1 Gauge cluster with bezel removed and water temp. gauge removed - note plastic turn signal
bulb mask which is repeated matches front of gauge. I had to re-glue this in place on its cardboard perch
2 Close up of ammeter showing needle stuck due to warped plastic
3 Gauge reassembled


-
Don, Thanks so much.
Before I read your post that is what I started doing.
I'll be removing the vacuum hose to make room for the
sensor to easily fit through the hole in the firewall. I need
to replace that hose anyway. I'd be done by now except
I was called away and am just back now. Too tired.
90 degrees and 100% humidity here.
No problem pulling the sensor since it is already broken off. But I will need
to get it out eventually. I was not aware of the method you
mentioned so you just solved another problem I had!
I assume that the gauge opens by prying off the bezel at
the crimped areas? I don't see another good way to get at
it..
Thanks again!
-
I am at the point where I need to remove the Temperature / Ammeter gauge cluster so I can replace
both of them.
How do I remove the temperature sensor cable without breaking anything?
It looks like I can pull back the protective fabric sleeve by expanding the split collar.
What's next? The replacement unit I have seems to have the end of the cable
crimped onto the back of the meter. I'd hate to pull on that and destroy
the capillary tube and let out the gas it is filled with.
Am I supposed to remove the sensor from the block first, then remove those
two screws and thread it all through the exit hole in the meter?
Photo below.
Thanks!

-
This thread and a couple others have been very helpful to me
with the removal of the instrument panel in my 1941 Buick.
I wrote a blog post that may be helpful to someone who has
to do the same job. Just click on the link above to arrive there.
A couple other related threads that may be useful:
Removing the trip odometer knob
Thanks to all the good folks who participate in this forum!
-
1 hour ago, kgreen said:
Nice little detail of things good to know when I get to the same point.
I'm also looking at your dash panel engine turning detail with regard to another thread on this forum. Thanks for your post.
Glad I can be of some help ... I get more than my share of help from the good people here.
-
1
-
-
Thanks to the help received here the vent is out!
I'll clean things up and replace the gasket tomorrow.
While doing this I noticed that the hose to my wipers had fallen off.
I guess that means I will be installing a new wiper vacuum hose.
Maybe the wipers will work better?


-
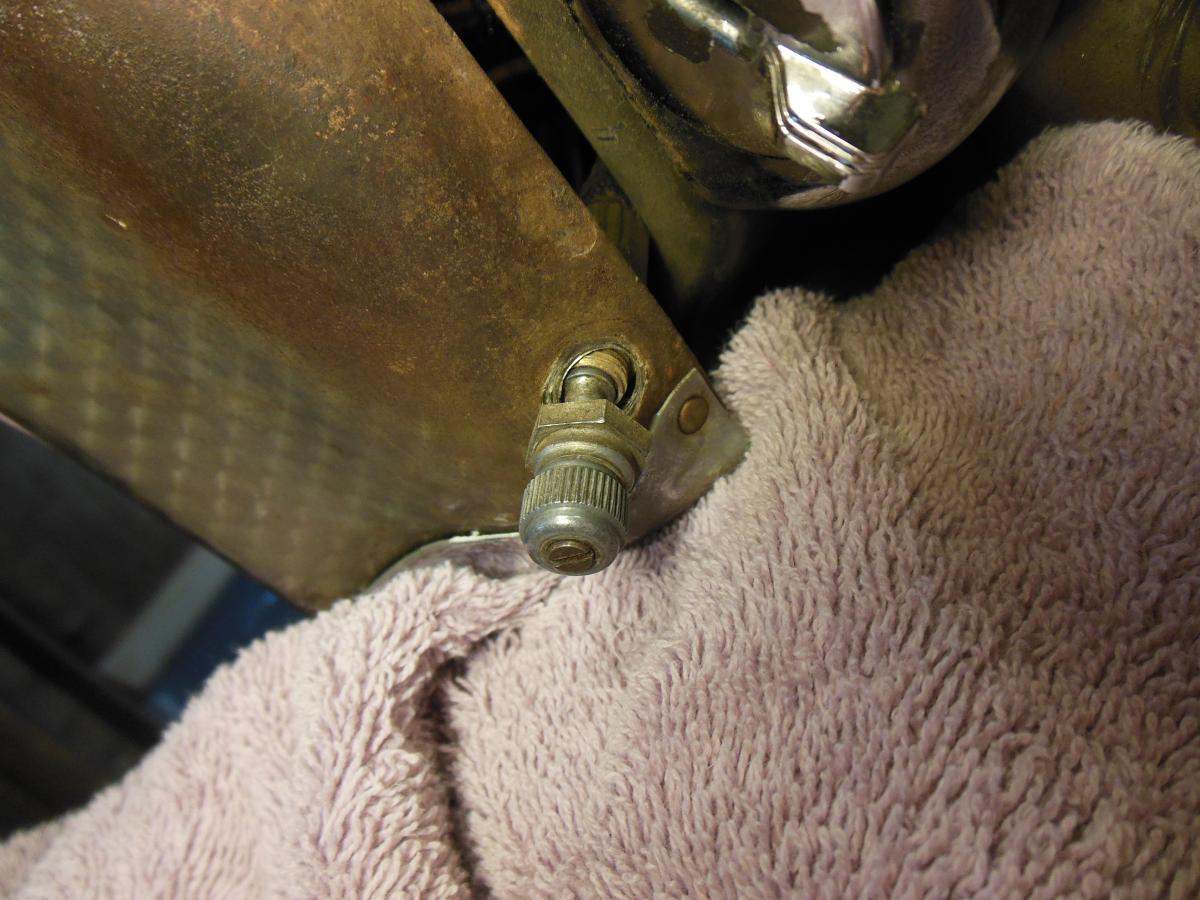
Tinindian ... that make sense about throttle clips. Possibly a source of replacement parts?
I think my '41 uses through holes and cotter pins ... but I'm not sure. I do know that it was
very easy to pull apart and replace when I swapped out my front carburetor.
Thanks for the hint.
-
Bob ... Thanks ... I will give it a try. I had poked it with a screw driver before but
was afraid to break it. I'll put more effort into it now!
-
Thanks to Neil I was able to remove the knob off of the trip odometer. First I re-tightened the
hex nut to keep everything lined up. Then I braced the shaft with long nose pliers
(the vise-grips were too cumbersome) and inserted a spring-loaded seam opening tool between the
knob and the pliers. Several tries with lots of force popped it off.
Then I was able to remove the shaft and put the knob back on (don't want to lose it) loosely with a couple
turns of the screw.
The seam opening device is the one I used many years ago to open up Macintosh computers
that I needed to work on. It's a great tool to have.
A photo (best I could do with only two hands) is attached. At this point the knob has popped off.
And yes Neil, the shaft has a definite taper! You have the mind of an engineer.
If you lived around here I'd invite you right over for a few beers (or iced tea .. your choice).
Bonus: In the 16 years I have owned this car the trip odometer was stuck at 44,609 miles (or something
like that). Now it suddenly works! I set it to 000000.00 miles. Maybe when I get the new speedometer
cable in I will be able to track mileage and apply for the AACA M.A.P. (Mileage Award Program).


-
1
-
-
Neil, Thanks for the input. I will give that a try.
I have been documenting my progress with notes and photos. The first thing I did was to
read the excellent thread on this board that is all about pulling the instrument panel.
Boy was that a chore. Now I am working on removing all the gauges and wires and
sensor cables.
It's a lot of fun at 68 years old spending time on your back under a car dashboard.
I don't usually do this stuff but I know the guys in our local AACA Region club (WPRAACA)
have got my back. They encourage and lend a hand when I am really stuck.
Eventually I will post to that other thread and make a posting to our own club
blog. (I'm more comfortable with computers and writing than fixing old cars.)
-
I am attempting to remove my instrument panel and replace several gauges , speedometer cable, and the panel itself.
I got the 5 nuts off the panel and some of the other nuts are off too. But now I am having trouble with
the trip odometer knob.
I loosened the hex nut. I removed the small screw that is in the center of the knurled knob (replaced in attached photo).
The knob still won't come off. Do I have to first release the cable from the speedometer and then feed it through the
hole for the knob? I'm trying to do this without damaging anything.
Suggestions welcome. Thanks!

-
I started with a plan to replace my instrument panel with a nicer one. That led to
removing the radio and ashtray & buying a new speedometer cable.
An entire wire harness may follow.
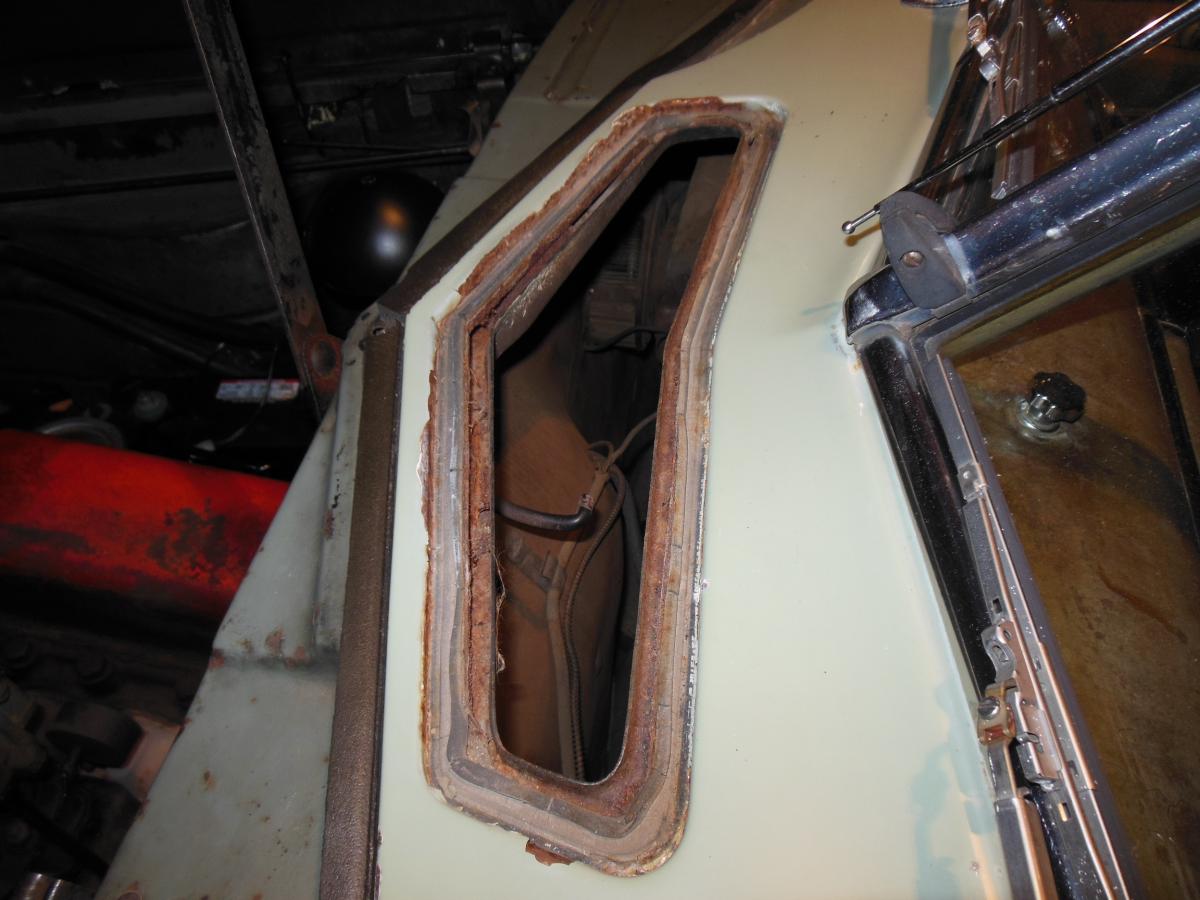
But before I get to all that I am now looking at the fresh air vent for which
I have a new gasket but never installed it. I am having trouble figuring out how
to remove the spring steel lock that prevents the linkage to the vent opening handle
from slipping off. I did remove the four adjusting screws from the brackets but
that does not loosen the vent enough for me to remove it and properly install
a new gasket. I'm trying to get this off without breaking it.
Any suggestions? Photo below.

-
I spoke with Doug Seybold when I stopped at his booth (I think last year) at Hershey.
He told me that it took him a long time to develop his technique. He claimed that
the originals were a decal. I asked him about the green tint that I see on many originals.
I thought that it was due to a lacquer overcoat. He said that the green is a result of
degradation of the chemicals in the decal over a very long time; thus, it is not proper
to tint a restored item green.
For reference I have attached a photo of my 1941 Buick glove box door. This is a used replacement part I bought many years ago. I am pretty sure it is fully original.

-
1
-
-
My car ran just fine as long as it was revving in the driveway. But while driving it began to miss when I put it in gear.
It was most evident in third. I found that one of the spark plug cables was bad. The distributor end was not
seating tightly .. the terminal appeared to be of the wrong type.
I made a new cable with the proper terminals and the problem is now gone.
So, are all the cables good? How about the distributor cap? So many choices. I'm sure you will figure it out.
-
I tried the ammonia for one night. It helped a little. The best thing was leaving it outside with all windows open.
I am now leaving the windows open while it is in the garage. Because of that I have re-baited about 10 mouse
traps (even though the mice tend to stay away in the warm months.)
The first day I left the car outside in the sun with all the doors open happened to also be the day that
the maple trees decided to lose all of their winged seed pods. They flew right into the car along with
all the caterpillars that are now hanging from the oak trees on silk threads. Oh well.


41 Buick: How to remove temp. sensor cable from gauge
in Buick - Pre War
Posted
A quick update on my replacing of the water temperature sensor ...
I threaded the new sensor in tightly and made sure that the cable exited
with just enough curve to pass through the undercut in the spark plug
cover. Before securing the cover I started the engine to test everything.
The temperature rose slowly on the meter and was well stabilized at
about 179 degrees after about 7 minutes. I shut down after 10 minutes.
The only problem was the heater shutoff valve that leaked. I removed
that, wrapped it with pipe tape again, and tightened the valve nut.
Now that is good. I also installed a new thermostat housing that I had
previously painted. Of course when I was removing the old housing
I broke one of the bolts off. My friends Tom and Bob (our AACA club Gaslighters patrol)
drilled out the old bolt and retapped the hole. All is secure now with a new radiator
hose thrown in for good measure.
I developed other problems but I will leave those for a blog post when I
finally get beyond this instrument panel job.
It never ends!