midman
-
Posts
355 -
Joined
-
Last visited
Content Type
Forums
Gallery
Events
Everything posted by midman
-
Hugh, You can see the inserts in post #6. The rods and caps only have a couple of thousands clearance against the crank as you can see in post #8. I really didn’t discuss how he machined them other than I told him to go ahead with the inserts. Chuck
-
I also want to throw a question out there. The cam gear retaining bolt had some damaged threads. I cleaned up both the male and female but I am concerned about putting too much torque on it. I tightened it to 20 ft pounds with red thread lock but I’m not sure that will do it. Any thoughts.

-
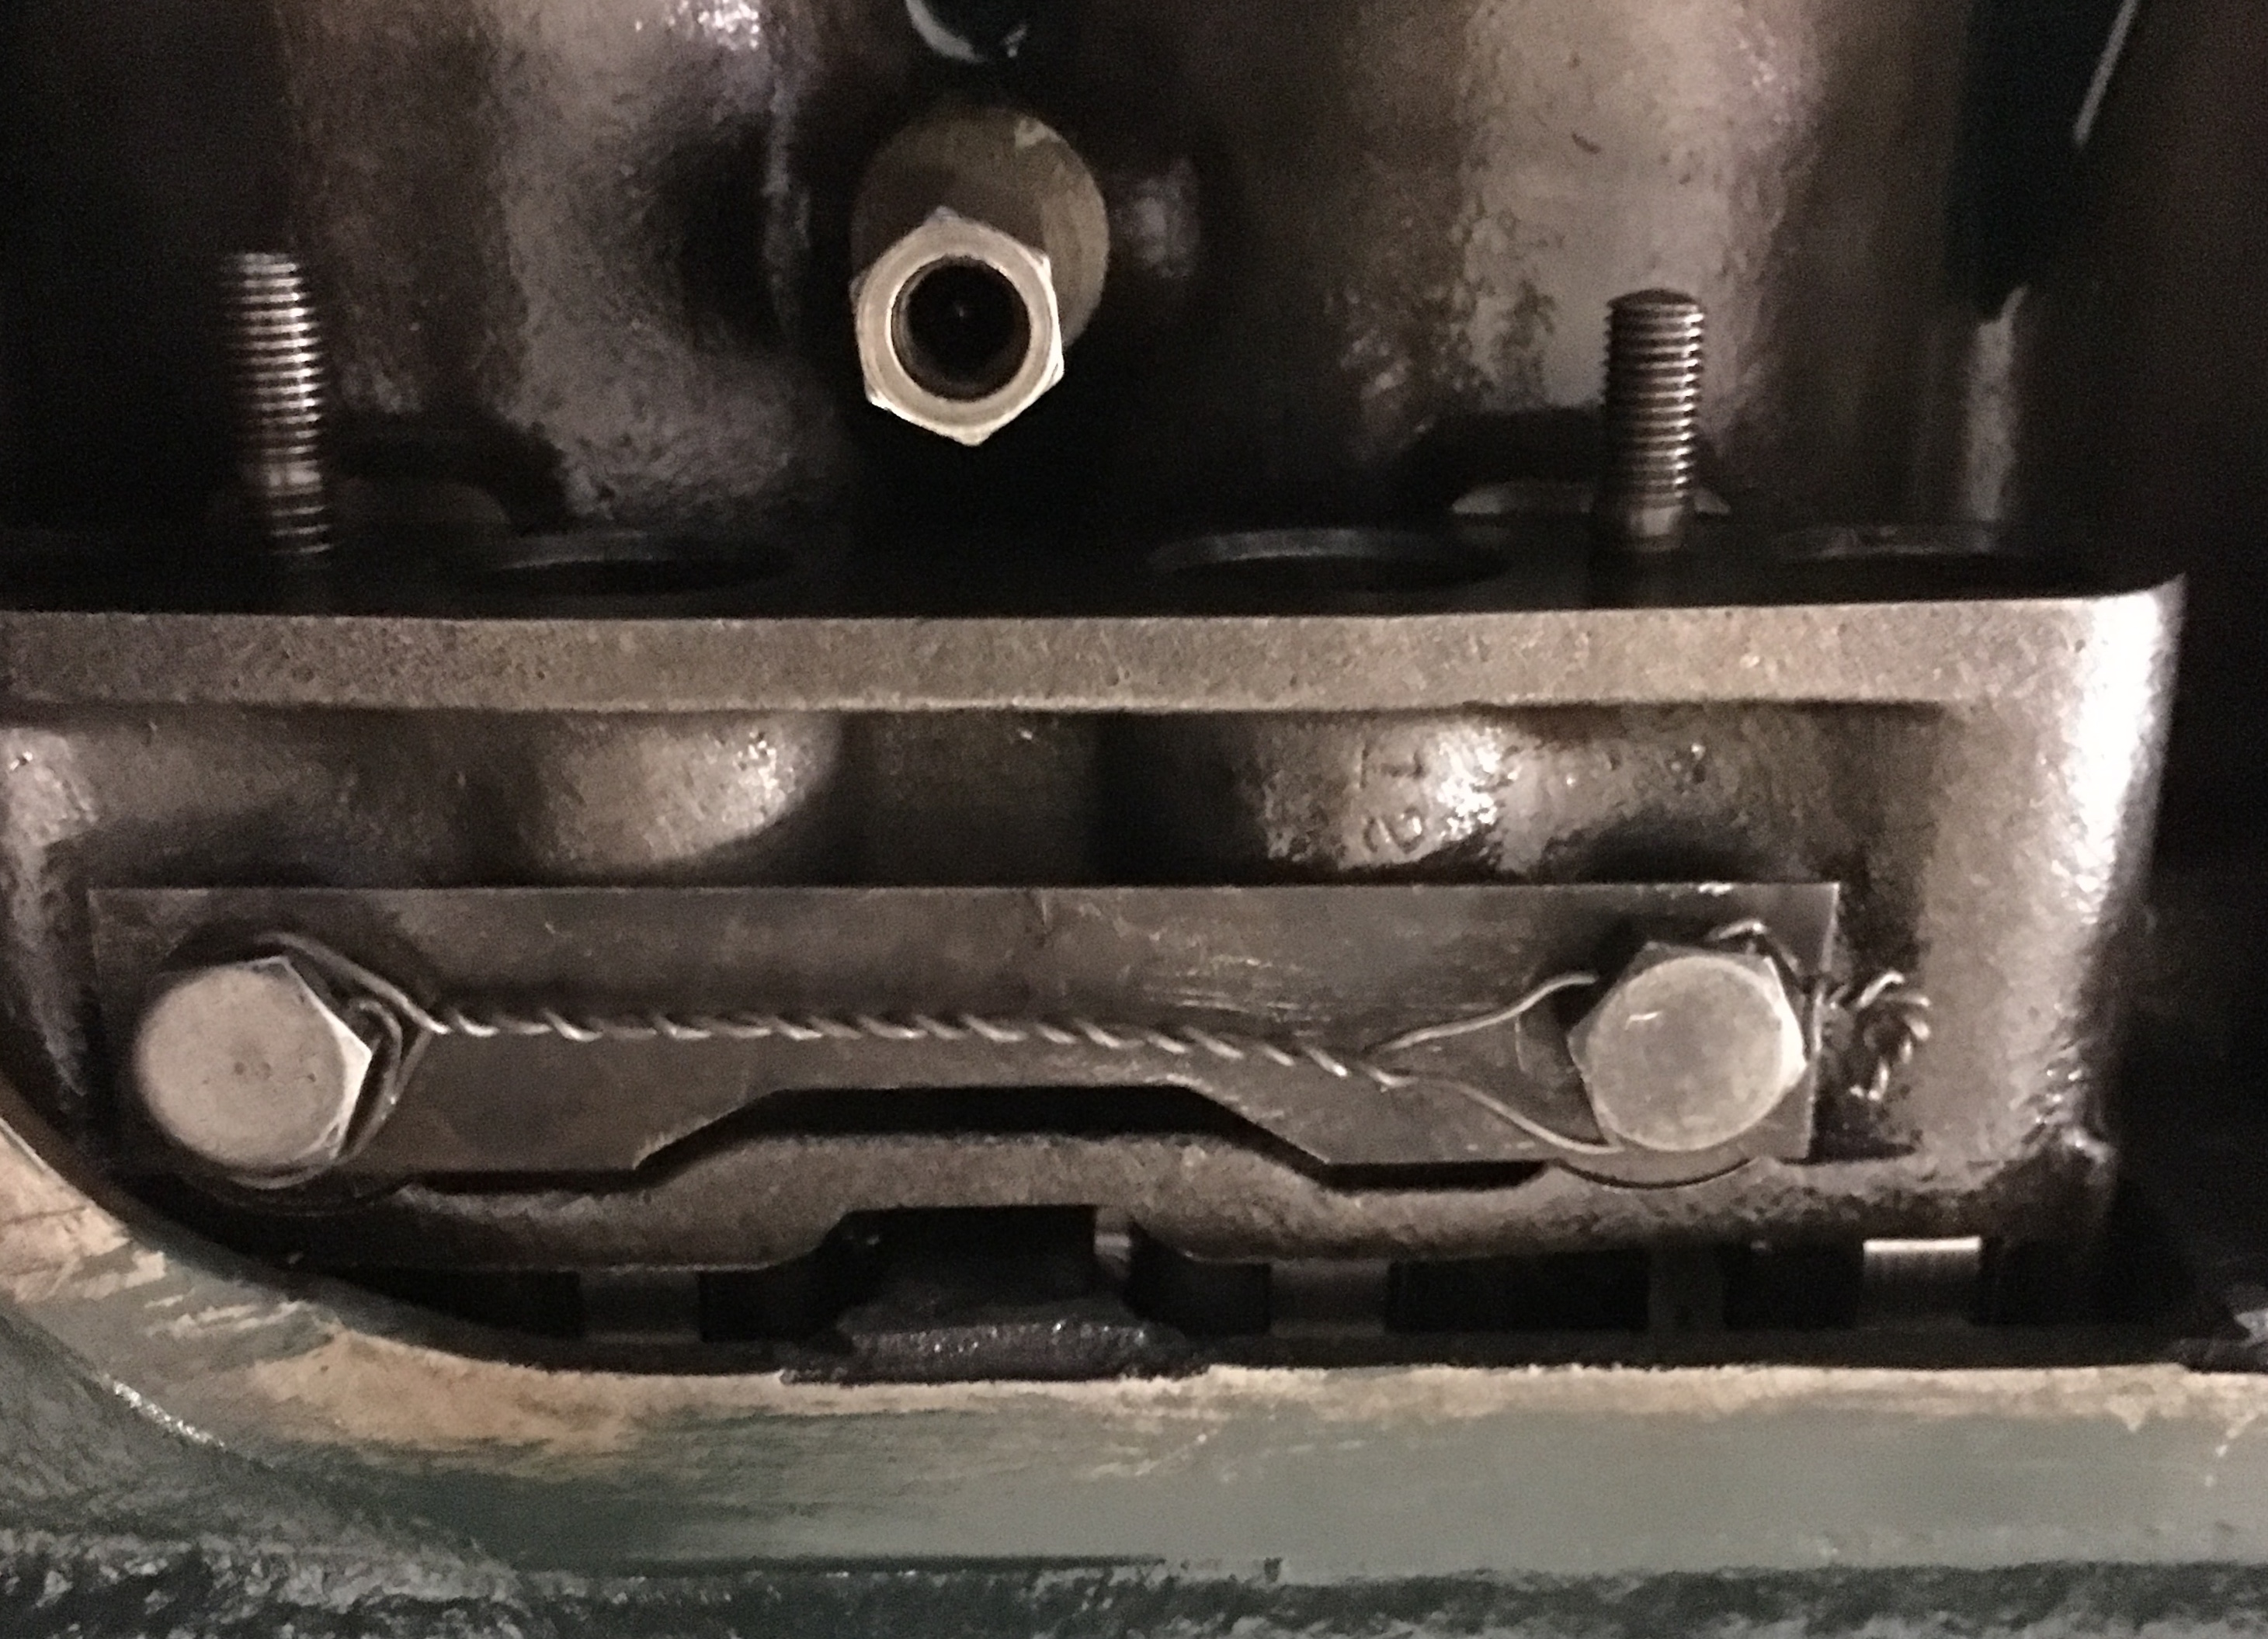
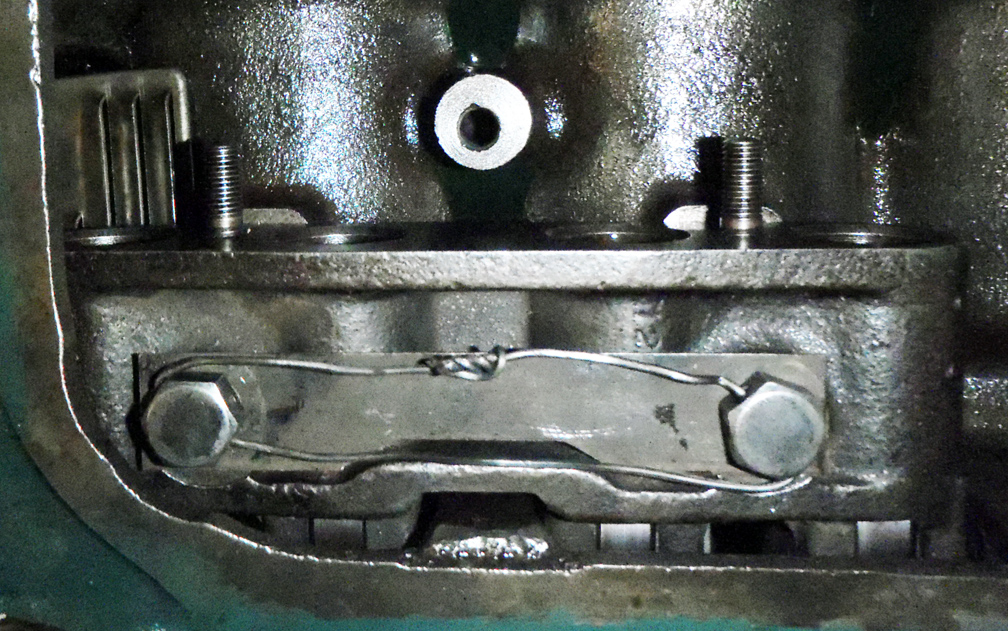
OK Ladies and Gents, Here is how I rewired them per Tinindians helpful link.

-
Now you see one of the reasons I post this stuff. Thanks for the helpful feedback. When I tore the engine down that is how the bolts were wired. In fact the oil manifold in the pan was wired like that too. I know this engine was repaired in the past though so it can certainly be incorrect. I’ll do some more research and rewire the cam follower housings if that is the correct procedure. As far as the mechanical brakes go, you are probably correct in that the surface contact size of the tire is minimal compared to today’s cars, being the biggest issue to better braking, but the fact remains that I decided I am not going to drive 70 miles an hour on the interstate with this car so I did not bump up the compression. In my opinion hydraulic brakes are better, but that is more because they are easier to maintain and more consistently apply equal pressure to each wheel without lots of adjustments.
-
Well the front gears, cam roller assemblies and oil pump are installed. Next will be the oil distribution manifold (This manifold uses copper sandwiched gaskets that I could not find so I'm using the old ones), bellhousing and flywheel and front cover as well as the oil pan. I am going to install the engine without the head to help with the weight, hopefully next week it will be back in the car.


-
Dave, I remember one of my seals being a little bit of a struggle. Did you coat them with oil first? I think I just had to make sure the hub was square on the shaft and put a coat of oil on before it would go.
-
I was going to go to this estate auction but I just do not have room for another car right now. I contacted the auction company and it has a title. Just an FYI if anyone is interested. Brochure attached April-21-2018-1.pdf
-
Carl, We did discuss compression. Originally I was looking at putting an overdrive unit in and bumping the compression to make the car more tour friendly, but after some thought I kept coming back to the shortcomings of mechanical brakes and decided to keep the car a back road tourer, so I kept the pistons at the standard profile. I do have the overdrive unit if I change my mind once I start driving more. Chuck
-
The pistons were made by Ross. I could not find original pistons standard or oversize anywhere. I did find a couple sets of oversize piston pins. Ross will need the pins along with the specs to machine the pistons. Not cheap though. Over $100 each
-
Well, It got warm enough to get the engine thoroughly washed down!! Finally. I decided to put the motor together on a heavy duty table I made because this thing is just too darn big for my engine stand. It lays on its side cam on the high side. We picked up the crank with the engine lift and swung it "gently in. Worked well. I installed the pistons and pushed them through first since the big end of the connecting rods are bigger then the engine bore and I did not want to deal with taking apart the harmonic balancer and screwing around with installing them from underneath after installing the crank. It worked great. Pushed them through, installed the crank then pushed the pistons back through as I assembled the connecting rods to the crank. Installed the cam no problem. Next step will be installing the cam gear and bellhousing and flywheel (that's why the rear main is still off. I need to get to the crank flange bolts when installing the flywheel and bellhousing. Then the cam followers and oil pump and oil lines and buttoning up the bottom end.


-
I hope those of us that get the digital Bugle are going to get a ballot card again, or some other way to cast our votes. Chuck
-

1931 Buick Country Club Coupe
midman replied to Laughing Coyote's topic in Automobiles and Parts - Buy/Sell
Missing the landau bars and radiator cap. Wheels and running boards look like they are redone. Body looks good from the few pictures. What’s under the hood and under the body shell, who knows. Buy it because you like it and want to save it, not to make any money. Mine is a money eater, but I think it’s cool and one day its appetite for greenbacks should at least slow down enough that I can spend more on gas then parts for a while.
-
Well the cold weather that hit here set me back since I wanted to get the block outside and wash it down thoroughly before beginning assembly.......Still waiting for it to be warm enough. In the meantime I assembled the pistons and connecting rods and installed the piston rings. Reeves machined the rods to take inserts. Hopefully not something I will have to deal with again in my lifetime but done all the same.


-
Welcome GR8, That is a nice looking car. I just got the motor for my Buick back from the machinist. I didn’t know I had a crack but they found 2 very small ones by pressure testing the block. You might want to give it a try if the crack is not obvious. Good luck and keep sending those pictures, it would be cool to see the rest of the car. Chuck
-
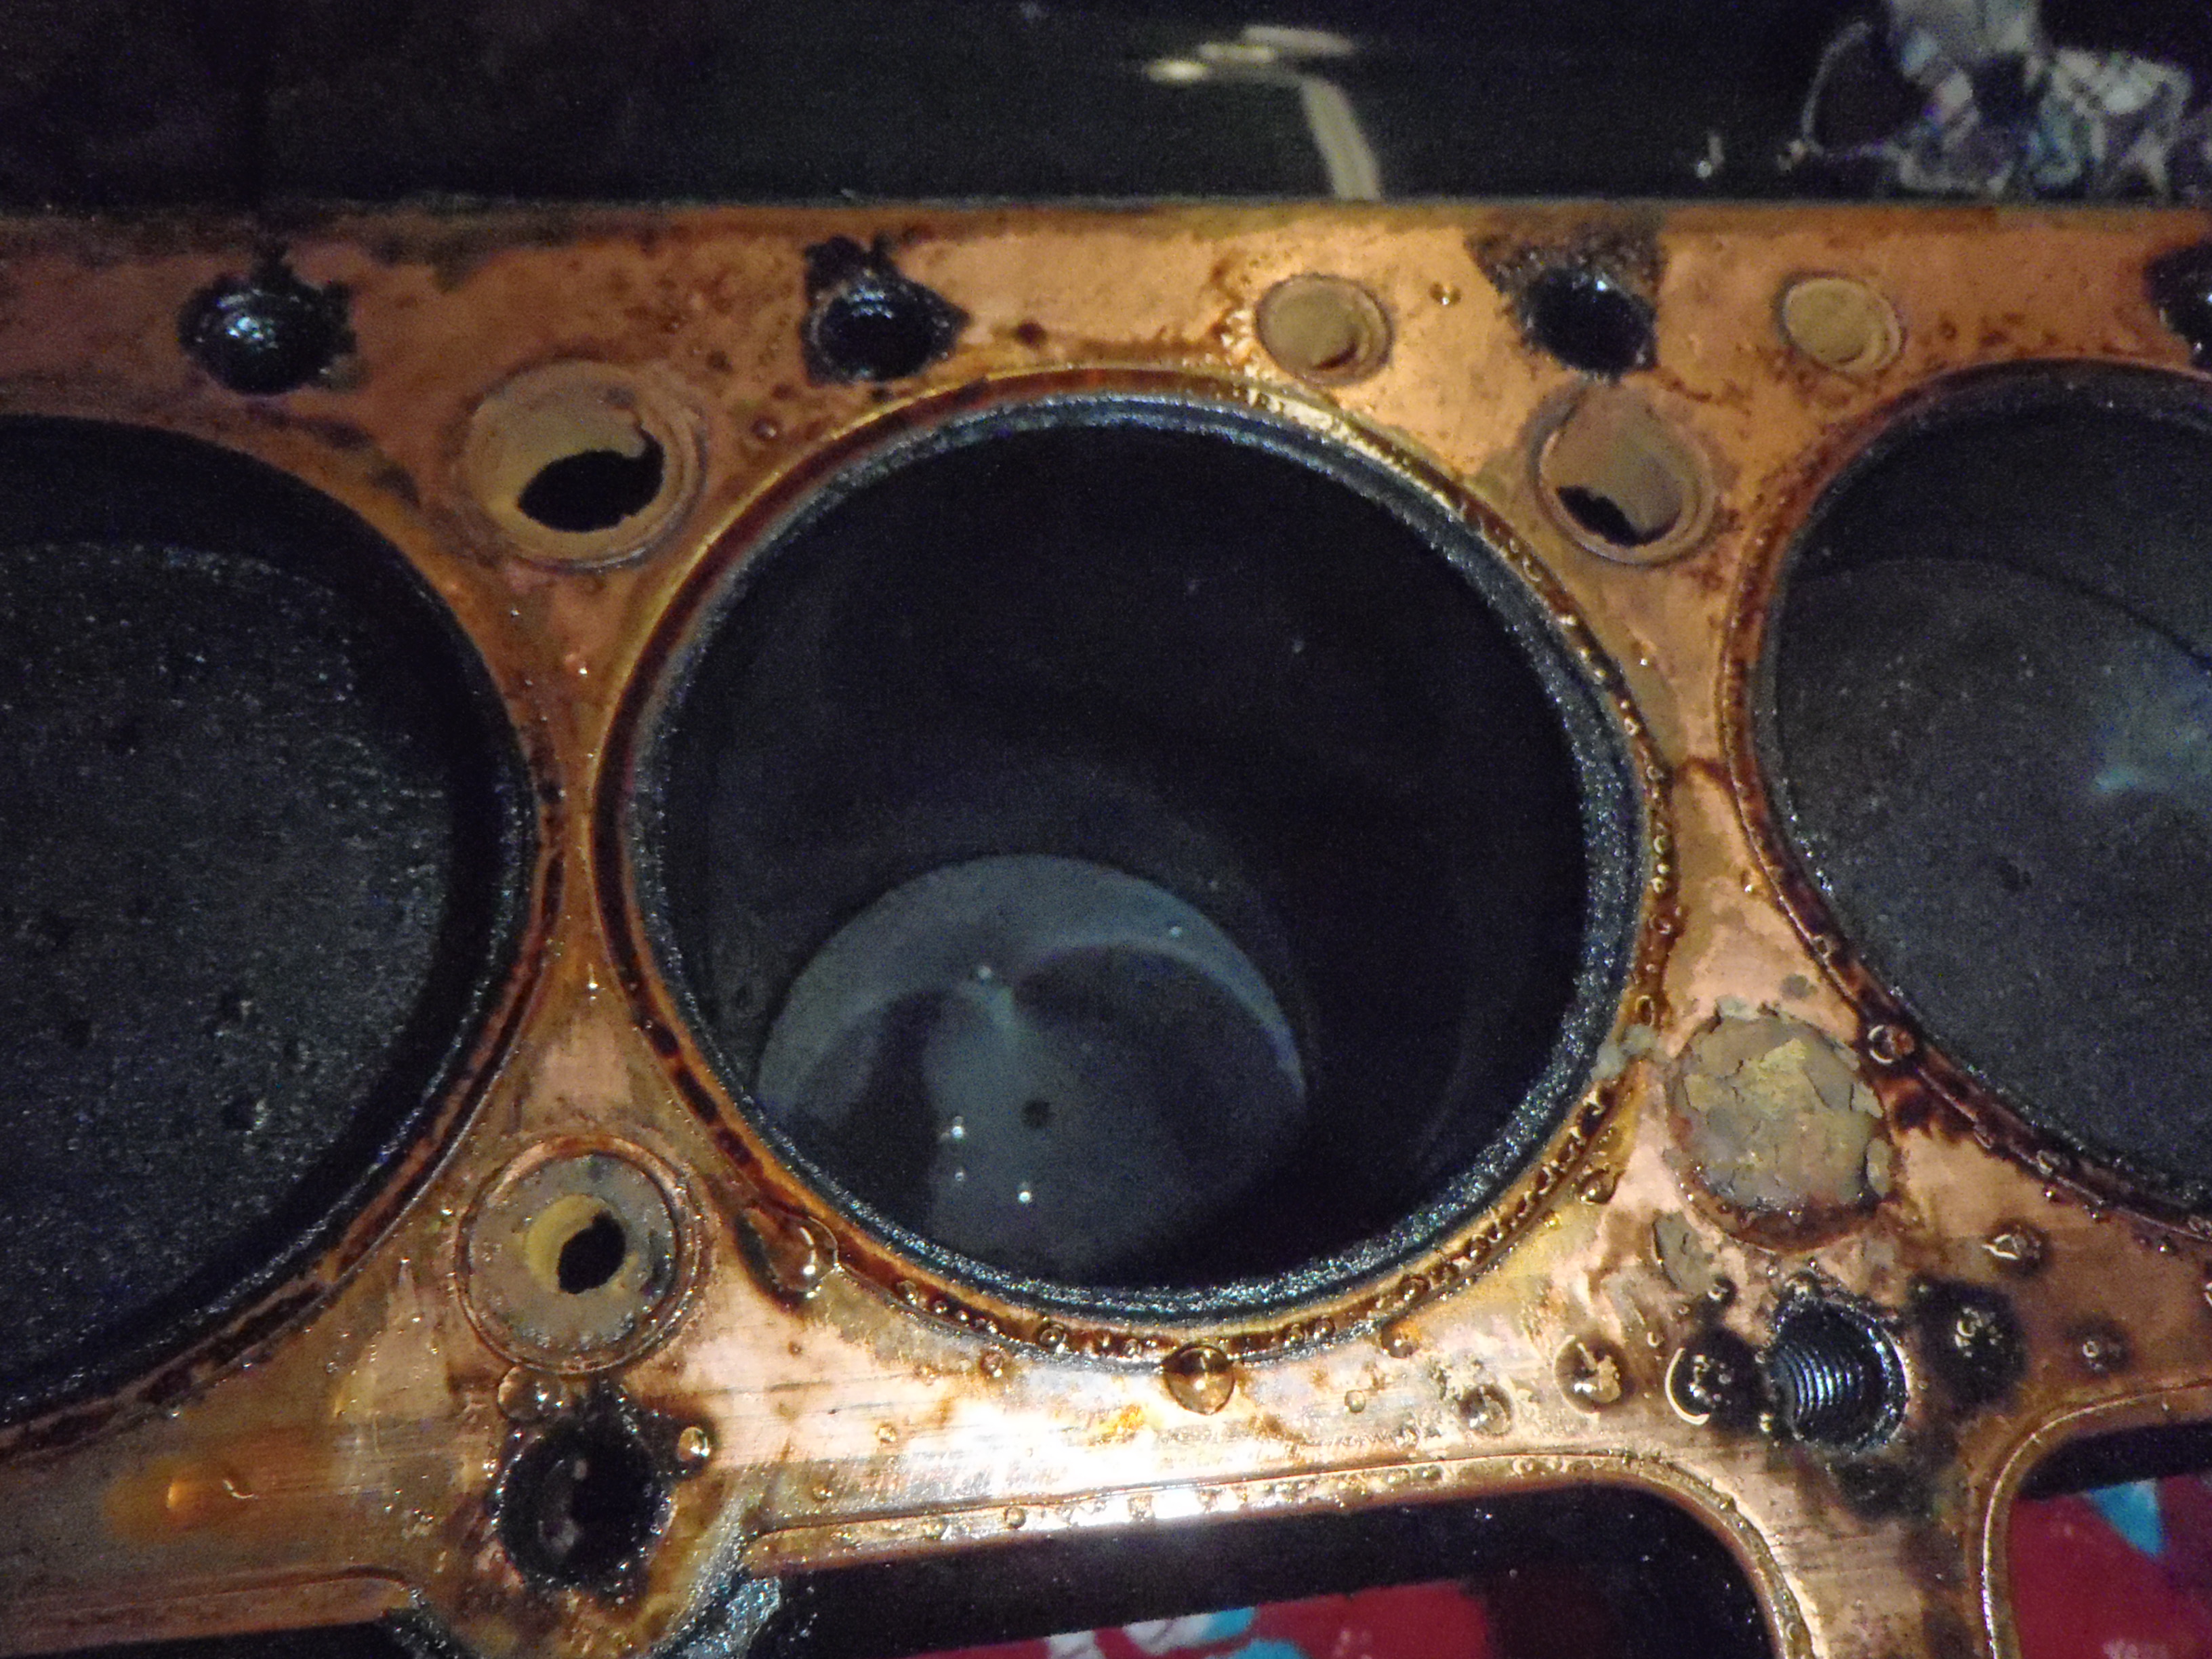
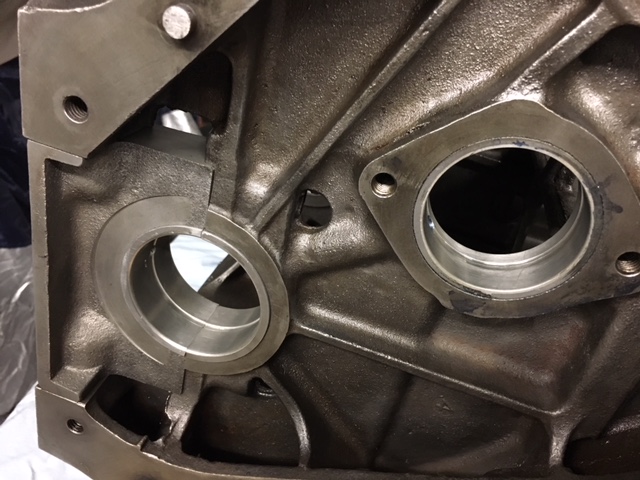
Newly machined and babbitted block. Lots of oil passages to clean out before the thorough block washing.


-
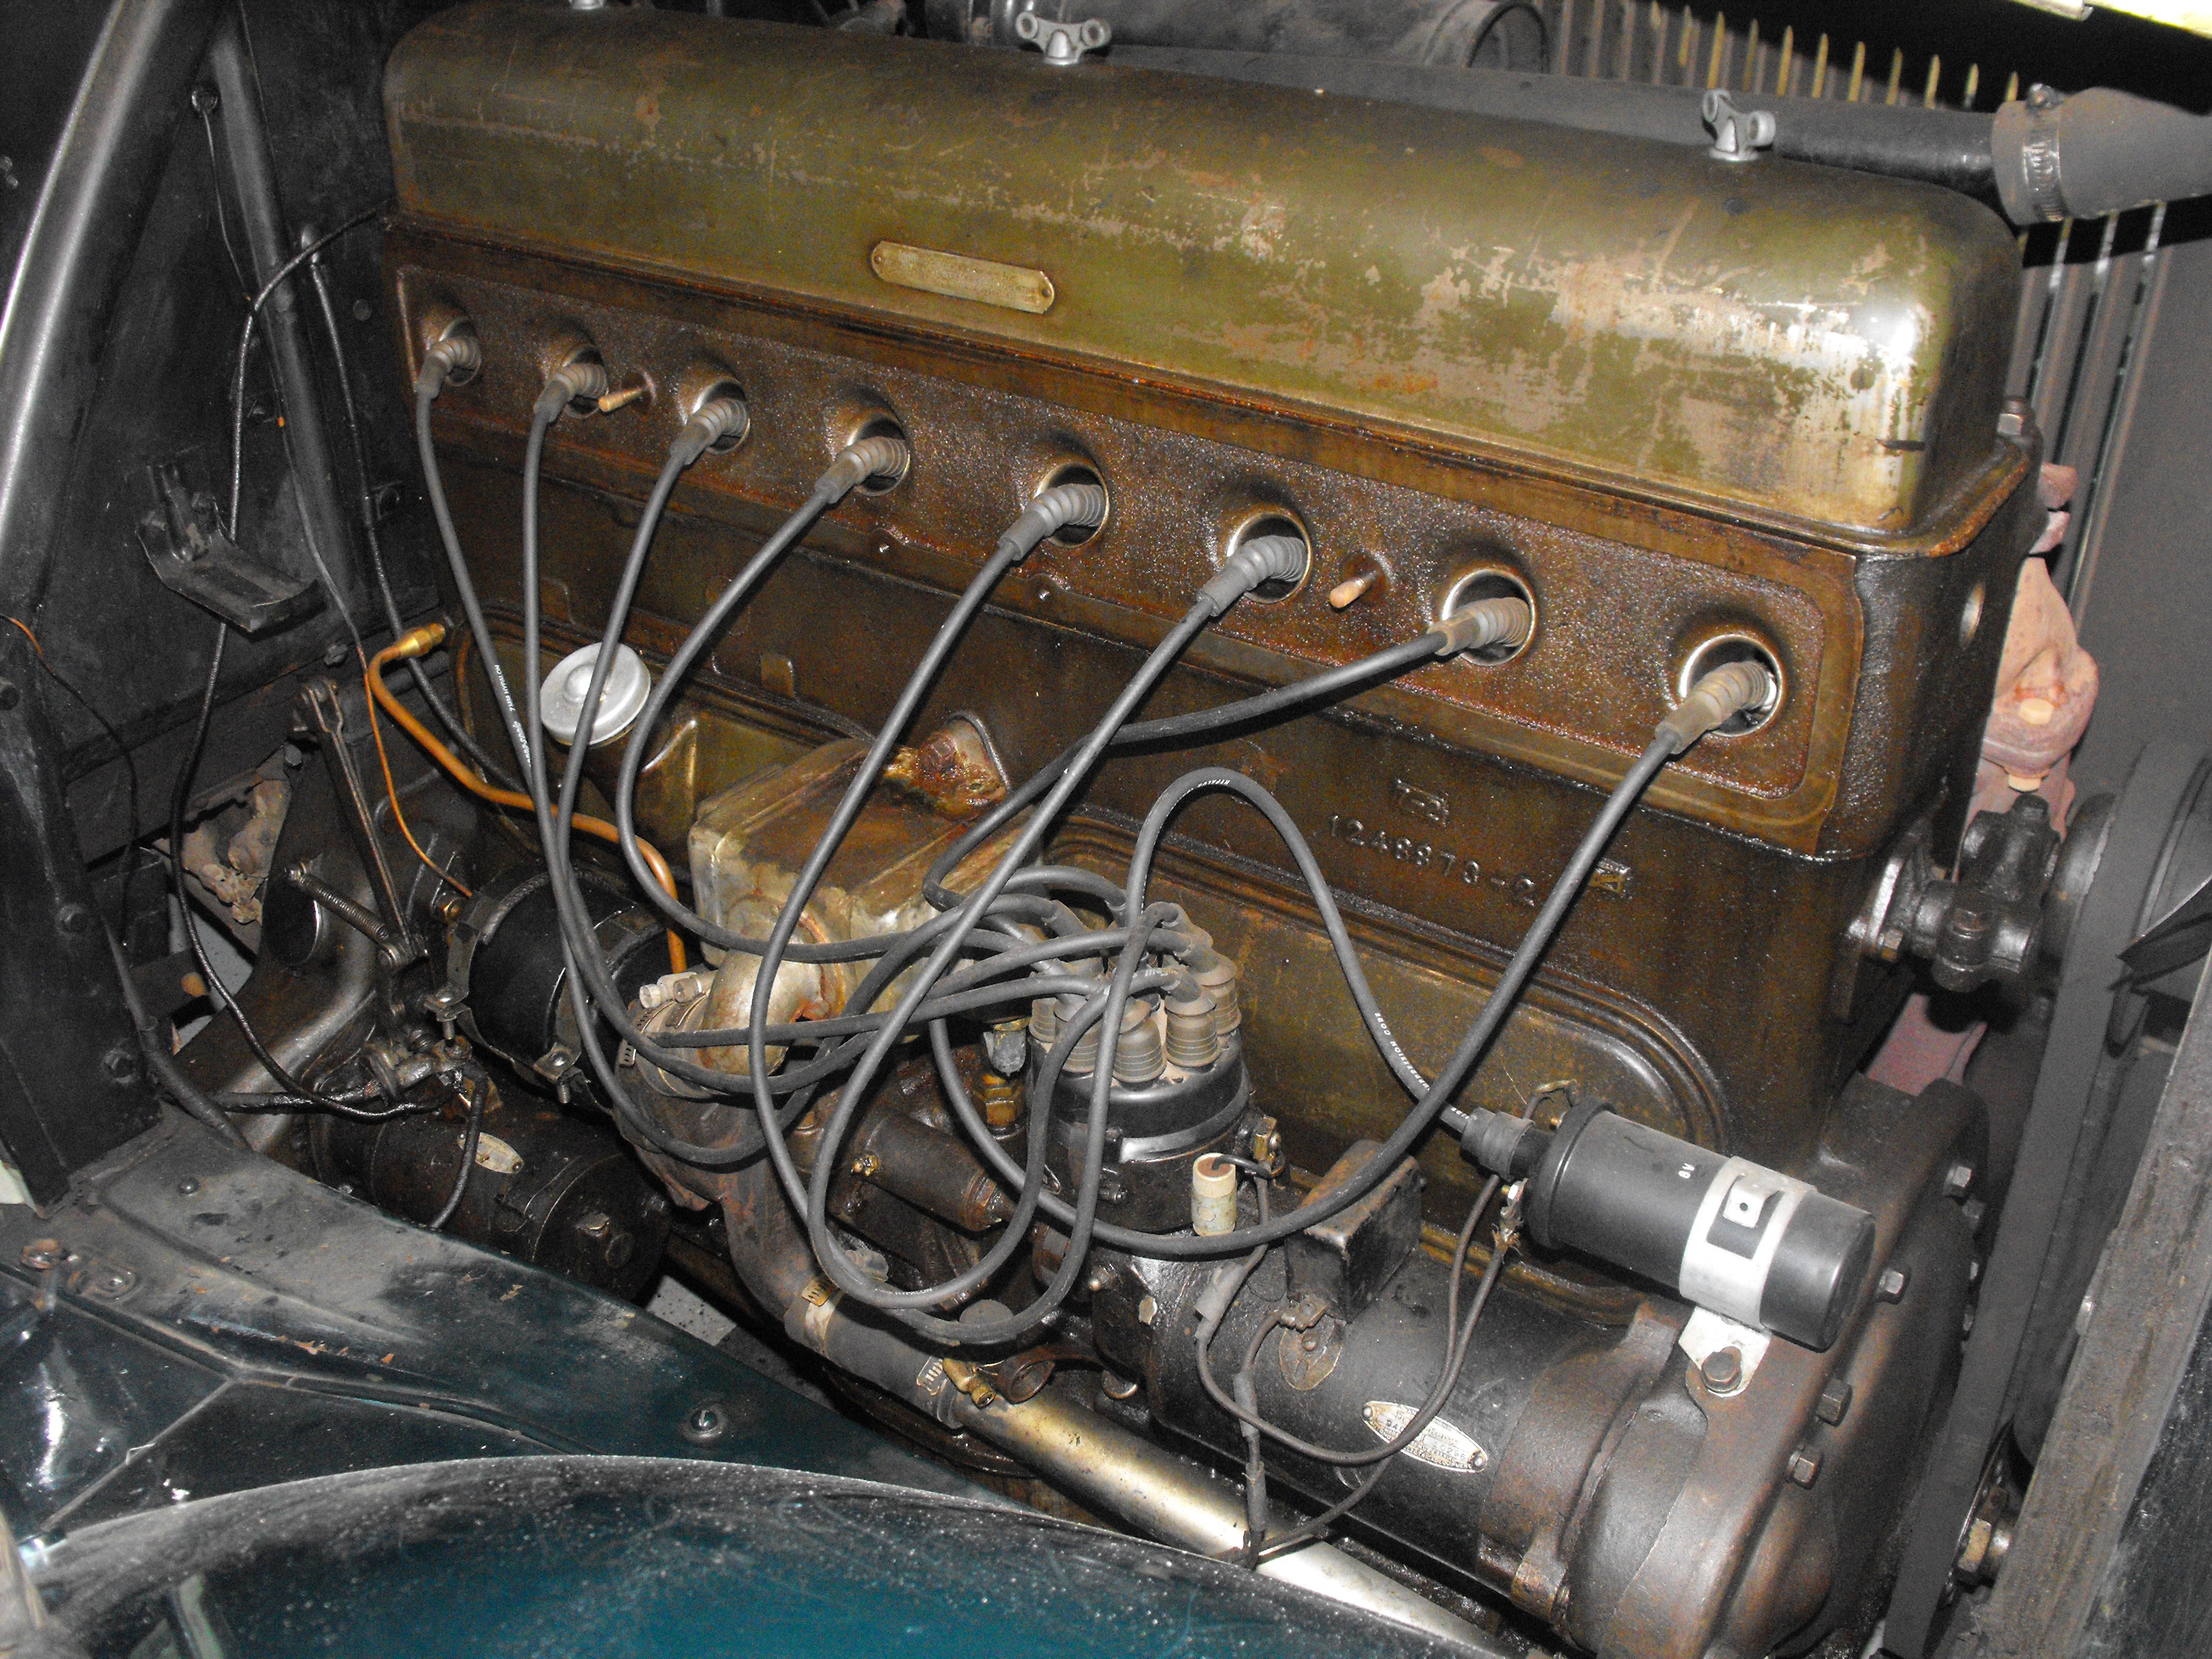
Pulled engine


-
Well ladies and gents I am going to start to reassemble my engine over the next month or so. Going to go slow and clean. It will take a little longer because I want to scrub the newly machined block down and the weather is not cooperating out here in Pennsylvania. I will post pics as I go along with what I'm doing and what I'm running into since I did not find much information when I was struggling with this motor (though I did find lots of help here when I posted questions). Anyway I bought the Buick 4 or 5 years ago, running and rust free but showing its age. It ran OK, but had weak compression and overheated regularly. After a cosmetic restoration I started to drive the car and it had less and less power and overheated no matter what I did, flushed the block, re-cored the radiator, pulled the water jacket cover and cleaned it out etc. Worse it started making noise. I dropped the pan and pulled a main cap and discovered the babbit was starting to spall. I made the decision to get the block checked, machined and re-babitted. Using suggestions from this forum I had Reeves Enterprise do the machine and babbit work (very nice people). I decided to do the assembly. I like to learn new things and this will be my first prewar engine. First I pulled the head and found the cooling passages almost completely blocked with loose scale. Then I pulled the engine and tranny together. Heavy but doable. Hint- I suggest you pull the steering box and shaft if you are going to pull the engine. Then off to Reeves it went. He found two small cracks in the block which were repaired and some old repairs to the head so I hope this thing holds together. I had to have new pistons made, and decided to have the connecting rods machined to accept inserts. I have the newly machined babbitted, and balanced engine back so as soon as I get it cleaned and start assembly I'll post pics and what I did. Wish me luck.


-
That will be a really nice car when you are done. I like the front end on the 33’s. Very cool. Keep a lookout for the parts you are going to need for that car. Buy them when you find them, because you won’t be able to find them when you need them. Chuck
-
Hi NF, I've been asked for the wiring a few times so I'll post it here so others have easy access to it. Sorry but I do not see anything on the windshield parts. There were very few body component drawings in the box. Wiring001.pdf
-
B
-
Marv, Have you tried an industrial bearing distributor? I’ve had luck with them in the past finding replacements for obsolete bearings. You might have to add a thrust washer or something but they can many times find a solution for you. Chuck
-
Dave, I do have wire wheels. Not sure if it would work on a wood wheel hub. My hubs have a small lip that the jaws can just grab, and with the Posilok locked down the puller was able to keep hold of the hub Chuck
-
I used a Posilok puller on mine. It also comes in handy for other pulling jobs.

-
I bought this from Roger Fields a few years ago with the intention of making my 31 Buick a touring car but I've decided to keep it completely stock. So if you want an OD for your Buick this would be the way to go. It comes with literature for maintenance and a box of cabling, etc. From the literature it might have been a Bob Green setup. It looks like it is basically an R10 OD grafted onto the torque tube. I never installed it but Roger had it on his 31 and it was removed when he restored and sold his car. He said it worked fine but I can not guarantee that so it is sold as is. $500 or BO. Shipping on you but I would recommend pick up as it is long and heavy or I can deliver to Carlisle or Hershey. What you see is what you get. Thanks,


-
I am with SpecialEd on this. I think the ads should be left up. One of the things we like to do is research our cars and old ads help the bread crumb trail as they say.