Eric W
-
Posts
1,026 -
Joined
-
Last visited
-
Days Won
4
Content Type
Forums
Gallery
Events
Everything posted by Eric W
-
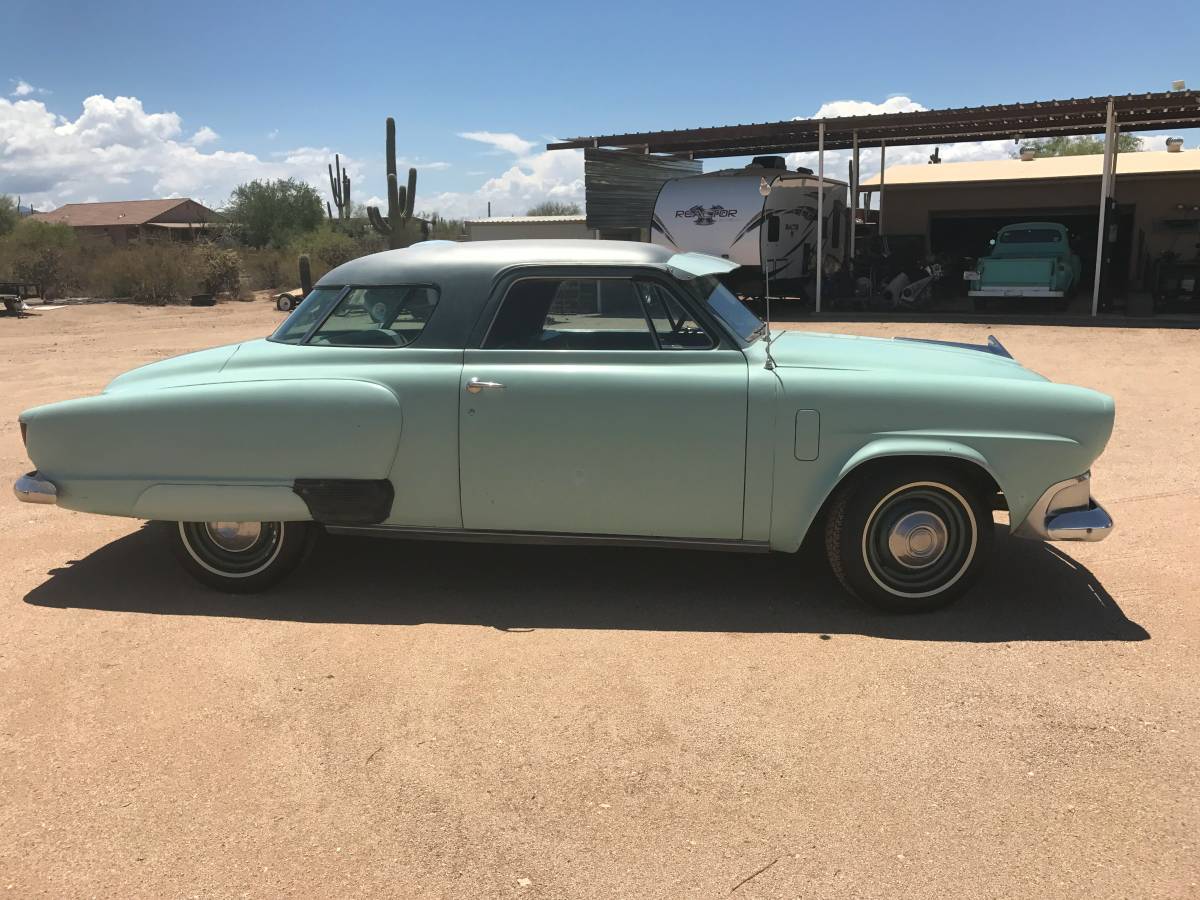
After several months of no vintage car around, I got this Studebaker last week. I had been scanning the c-list ads here and to about 500 miles out for the past couple of months. Don't know anything in particular about Studebakers - if you've seen my other threads (and listed in the signature), I've worked with Buicks for the past 4 years or so. Anyway, this one was very easy for me to get to for a look over, was in the budget, seems to run well enough, and is in better condition than the last 2 Buicks I was working on. As in, I hope it doesn't take as long before I'm driving it. I do most all work myself. The main purpose for these cars has been to take my wife and kids to the Thursday night cruise night for burgers & frozen custard, though I've done a several of the more formalized shows around here. I like the cruise night because you show up when you want and leave when you want - or choose to do something else that week. The main immediate needs for this car are complete brake system overhaul. It has zero brakes whatsoever. So I was able to drive it (slowly) around the seller's yard, and up into my garage, and that's about it. The other main need is seatbelts, especially in back for my kids. I've done both of these projects multiple times before on the Buicks, so I hope that Studebaker isn't too hard to figure out. These pics are from the c-list ad.


-
Looks to be a big collection of parts for the money... I can't get there, but maybe someone can save this... https://duluth.craigslist.org/cto/6170556622.html - listed as $950 for all... Kevin - 218-428-9479 For Sale do to storage loss. All my remaining 65 Buick Skylark parts collection. To many items to list them all but here are a few , Bumpers, Radiator support , 2 sets of doors, windows, tail lights, hood , trunk, seats front and rear w/extra, moldings boxed GS frame with 10 bolt posi. Lots of extra's. Must get rid of. Would like to sell it all as a package.


-
Here's a '48 plastic from the '16 Nationals swap meet area. Hard to capture the shimmer of the metallic red. Did 4 coats of the red, one half at a time to let each side sit flat on the table. The chrome & blue were in good shape, so I didn't do anything with those.


-
Just a little something to hang on the wall... I believe I found this at Nationals last year in the swap meet area. If you've been through some of my other threads, I was repainting with Testor's paints. For this one I tried metallic blue & metallic red to maybe give more of the original shimmer rather than a solid color. Colors are: Red Metal Flake #1529 and Blue Metal Flake #1539. and Metallic Silver #1146. First 3 photos are the "before", then cleaned & polished the frame w/ Simichrome, then painted/assembled indoor photo & outdoor photo. I'm always amazed how much better chrome looks outdoors...


-
After much deliberation, I concluded the remaining items to get this one safely back on the road, though not beyond my abilities to arrange, were beyond my capacity at the moment. The car has been advertised for sale on the local c-list for about a month, and after a visit from a Swede, an inquiry from an Australian, and a near-trade with a local, the car is in the very capable hands of Matt Tisdale, of Tisdale Coachworks in Winslow, Indiana. Matt is very well known in the Dodge Power Wagon community, and his company makes many repro parts for these. Sounds like he'll have this car on the road in a matter of WEEKS. He had an IMMEDIATE opening in his interior shop to get the seats re-done, among other things. For the exterior, he's only going to apply a little oil & leave the patina as-is. His thoughts/plans were very aligned with mine. Sounds like this might be a "shop car" for a while, but you'll probably see it for sale again soon.
-
Same car, same seller, 1 year later. In case anyone would like more details... https://phoenix.craigslist.org/nph/cto/5986395260.html
-
Was in the garage to start/run the car for a few minutes to keep the carb from getting gummed up. Noticed what looked almost like some sort of cardboard "shim" around the steering column, right were it passes under the dash. Remembering other posts on here that spoke of the steering column document holder, I pulled it out - it was a stack of old registrations (in the clear plastic steering column document holder)! Though there isn't any paper from the very first owner, I'd guess it was Helen S. Schlecht of Denver, Co., because this was listed as who it was bought from on a 1963 Arizona registration. Colorado registrations for 1957, 58, 59, and 60 showed those owners bought it 4/15/55. They were Elizah Elmer Sisco and Lorenzo D. Uzzell. So the Az document showing Helen as prior owner, and the Co documents showing bought 4/15/55, put those together, and it was bought from Helen in '55. There's a Colorado inspection from 5/1/61, but one of the Arizona papers shows "prior Arizona title 4/22/60". So somewhere in 1960-61 time frame, Lorenzo moved the car to Tucson. (Only Lorenzo's name appears on the Arizona papers). There are 1963 and 1964 Arizona registrations for Lorenzo Uzzell in Tucson. The '63 Az inspection shows the engine serial number lined through and replaced. Unclear when the actual engine was changed - could have been in Colorado and Az only noticed it at the '63 inspection. The guy I bought it from, Axel, said he bought it in the mid 1980's in Tucson. If it was from Lorenzo (or his heir), and Lorenzo had been consistent with putting documents on the steering column, it may be that the car wasn't driven regularly since 1964. Axel did say he drove it from Tucson to Nogales, and there was a rubber fuel hose from the fuel pump into the front passenger footwell which could have let that happen. The '57-'59 Co documents showed a License Fee + Ownership Fee of $19.49, then in 1960, it increased to $20.99. The Az documents don't have $ amounts. Funny thing is, all these years later Az vintage plates are only $17.50/year...
-
Ken - if not a full thread, at least show us what you had to go so far for... Good luck on the trip...
-
Been a while, but I did have another thread about the park linkage repair in the post war forum. If you missed it, I did repair park with a 1/4" grade-8 bolt. Trying to beat a cold front, with 4-5 days of mid 60's-mid 70's temps before it gets cold, Dec 10-17, I got the following done: Decided to forego taking trans to the vintage trans guy in town since I fixed Park. So this is reassembly with the idea of being able to move it under its own power so I can get one of our daily driver cars into the garage. Made a list of about 20 items to do this, and I found another 5 or 10 as I went along. Got trans back up under the car by myself. It had been sitting on 2 short lengths of 4x4 to keep it up off the floor. I lifted the back end and slid a car wheel dolly under the pan. This let me roll the trans up under the car. I had marked the floor with masking tape for where the stack of MDF boards sat to give the jack the last 1 1/2" or so of lift. So I knew where the jack needed to be. I tipped the trans onto its front end off the dolly, then slid the MDF boards into position just behind it. I tilted the jack's table as far forward-end-down as it would go, then tipped the trans back onto it. The trans wasn't anywhere near settling onto the jack's table, so I used four ratchet straps to pull it into position. Two straps for "tilt", then two more to pull the trans back on the jack so the jack would balance and crank back down to level. I doubt if there was a 2nd person there we would have done much more than over-strained ourselves trying to muscle the trans onto the jack. With ratchet straps, it was slow, but fairly easy. With the trans nicely balanced on the jack, I re-used 2 of the straps to strap it to the jack table. That loose chain that comes with the jack is fairly useless. It falls off continuously, and there's no way to put any tension on it so the trans is held tight to the jack. I lifted the trans with the jack, and it didn't take a whole lot to get the bottom left bolt lined up. Directions say to get the mid-left (tight tolerance) bolt in place, so I did that. I had cleaned the tight tolerance bolts and their holes in the bellhousing so they slid nicely before getting the trans back under the car. I got the lower right bolt in place, and all 3 of these bolts were tight. As such, the turbine housing at the front of the trans won't turn relative to the flywheel. I loosened the bolts a little on each, then the turbine turned easily, so it was easy to line up the bolt holes between the turbine and the flywheel. I next installed the bolts around the flywheel, then the other 3 bellhousing-to-engine bolts. I got the rear mount bolted to the frame cross beam, and got the cross beam loosely bolted to the frame with 4 of the 8 bolts, so I could leave the trans until I could get back to it. Getting the trans to this point (safe back under the car) took about 2 3/4 hours. I got back to it the next day - cycled the flywheel around again to re-tighten the turbine to flywheel bolts. I got all 8 bolts for the trans cross beam in place and tight. Installed the starter (2 bolts). I worked the trans aft mount bolts to the trans, again using the ratchet straps to pull the whole engine/trans forwards and another strap to pull to the left a little to line up the left bolt hole. Got this bolt mostly in, then the right bolt hole needed the trans pulled forwards some more or the mount moved aft. I could reach the edge of the mount with a screwdriver, and hit that a little with a hammer to shift the mount aft enough to get the right bolt in. That was it for the 2nd day, about 1 hour. Third day, I got the rear end hung back under the car. Again, this went easier than I thought it might. I used the trans jack under the front end of the torque tube, and the other jack under the rear end. I replaced the seals between torque tube & trans flange (there are two - a thin inner ring, and a wider outer ring that has the bolt holes in it). I looked at replacing the toothed rubber seal on the drive shaft splines, but the vintage one that was in there was a better molding, and it cleaned up nice, so I put it back. I got the drive shaft sitting on the back of the trans output, again using ratchet straps to pull the rear end forwards (wrapped straps around the diagonals of the rear suspension where they join the torque tube, and around the trans cross beam to pull rear end forwards). To line up the splines, I had clocked the trans output "ball" before I put the trans under the car because the bolt hole spacing on the torque tube is NOT equal. There's an "up" and "down". To get the trans output ball to move a little, I loosened the 6 bolts on its retaining cover. With that, I shifted the ball by prying action with a screwdriver until the drive shaft just popped forwards. I used the ratchet straps to crank it forwards until the bolts would engage, then I used the bolts to pull it in the rest of the way. I put the retainers on the lower ends of the rear springs so the rear end would hang from the car rather than sit on the jack. End of the 3rd day, about 1 more hour. Next day I got the panhard bar re-mounted. No real tricks there, but again used ratchet straps to pull the rear end to the left. Connected trans cooler hoses. Connected dip stick tube. Added the lower bell housing cover plates. Maybe another hour. 5th day - brake line, parking brake, lower car off the platforms, battery cables, battery on charger. 6th day - saw in manual that diff cover bolts are NOT sealed - need sealant on those, so added that. Added fluid to trans. (Wasn't ever able to get the turbine plugs out, so 8 of 10 quarts should still be in it.) Tried to start. Realized ground cable was loose at engine mount (because it started GLOWING). Tightened that bolt. With that, it started, but carb was flooding over. Removed & disassembled carb. Found shred of something on the float valve plug. Removed that. Reassembled carb, reinstalled carb. Started again, no more flooding. Blew a bunch of crap out of the exhaust in front of the muffler. Realized I had loosened that exhaust connection for some reason. Raised car and tightened that. Restarted car. Trans heated up and "burped" about a quart of fluid back out the dip stick. Since I didn't have the dip stick in place, it went all over the engine & under the hood. I suspect the trans vent tube is clogged, so air heats up, expands, and throws the fluid back out. I'm not going to un-do all of the above to get the trans rear housing off to access the vent tube and clear it, but it's something to be aware of. I tried the brakes. Though I had disconnected the line, so there's got to be an air bubble to the rears, they seem firm enough. Tried moving the car. One major purpose here is to reposition the car from diagonal across the 2-bay garage to over against the one side, so we can get one of our daily-driver cars back in there. Drive didn't want to engage, but the linkage may need adjustment. Reverse and low worked, so I got it backed out and moved over in the garage.


-
Plug wire cover for the 320 engine changed part way through '48.
-
Photo below didn't upload correctly in the original post.

-
Finally got back to this. Part of it was I was put off by the shop manual, which went down a path of disconnecting linkages you can't even see in order to remove the rear bearing housing. Today, I decided I would try to fix the park linkage, and if it doesn't work, I'm not really any worse off. So looking inside the rear housing, there's just the shift rod itself that goes forwards. It's held on by a small pin that is held to the clevis by a spring built into the pin itself. So that just pops out. Then I pulled the 7 bolts holding the rear housing to the main body of the trans. I tapped the housing with a rubber hammer, and it started to slide back, and then off. So there's nothing else holding that on. The pin for the park pawl just slips in from the front of the housing (held in by the housing being attached to the rest of the trans). This pin has a 1/4-20 thread in it. So thread a bolt into the pin and use the bolt to pull the pin out (it slides out easily). The pin that the other links pivot on is also only a slip fit into the housing, and I got that out by hammering the links forwards using a screwdriver through the main rear opening in the housing. Get that pin worked about 1/2" out, and can work it the rest of the way out by hand while working the links. Also need to loosen the link to the cross shaft, but that's a simple 3/8" hex. Then all the park linkage parts come out. I did find half of the small pin that broke and fell out. I measured it, and it's right on .250" diameter. My initial fix was to use a .187 bolt, because I had one with about 3/4" of smooth shank. I got all this stuff back together, and was to putting the universal joint back on the output shaft, and the end of that is to hold the shift lever in park to lock the shaft to complete tightening the bolt that holds the u-joint to the shaft. Well, park didn't hold. The slight clearance of the .187 bolt in the .250 hole let the park pawl slide out just enough for it to not hold. So I got a 1.5" 1/4-28 grade 8 bolt, even though it's too long. But this gives about 3/4" of shank, which just more than covers the distance through the 2 sheet metal links and the cast link. So bolt all the way through, then a washer on the other side (so the nut isn't bottomed on the thread), then a metal locking nut. I had to shave down the head of the bolt for clearance to the other link, as well as grind down the other link a little to clear the bolt head. On the nut end, there's actually plenty of room in the housing, but I cut the bolt of close to the nut.


-
The figure looks similar in my many-generations-copied reprint of the '51 parts book - problem is, item "AS" is "lever and pawl" which is an assembly. What's in the transmission I have appears to be missing the rivet or pin that made it an assembly. I did take out the "AW" "rod", the lower end of which appears to line up perfectly with the hole in the lever behind it - to see if maybe that rod end was originally longer - maybe snapped off. It does not look like the rod end thread is sheared off. Maybe I'll take it off again and put a drill bit or something in there to link the pawl to the lever at that point just to see if the mechanism makes the necessary motion. I'm not all that tempted to pull the rear housing (where I could possibly see these parts more easily), because that gets into disconnecting control rods that I can't even see - figure in the book shows pushing one loose with a screwdriver through a slot - how do you get that back together... There's a vintage transmission specialist in town - I think this one will be headed his way. (This trans has another issue to be resolved.)
-
I know park doesn't work on this transmission. The vertical piece with the "GM" part number is the park pawl. At the bottom of it are two sheet metal links. Anyone know what this is supposed to look like, or have a photo? There were no "extra" or loose parts in there, but park may have been broken before I got the car (I got it in non-running state).


-
Nope. No extra pieces floating around. I thought I might have broken Park myself, but finding no extra pieces, it may have been broken when I got it. There is definite evidence that the transmission has been out of the car before - missing bolts, missing lock washers, and the "access holes" cut into the floor (an "improvement" from 1950 to 1951 - factory deleted transmission access panels). I did find out that the 2 "missing" bolts at the top of the bellhousing are intentionally left out of '51's because the access is so bad that the factory decided they just didn't need those. Supposedly the back of the engine doesn't have the mating holes there, but I haven't looked yet.
-
I spoke with the vintage transmission guy here in town. His shop is closed for the summer, but he recommended to drop the pan and look inside. It might just be "gunked up" and cleaning it out would allow for fluid circulation. Unfortunately, I don't think this will be a good answer because the pan was fairly clean, and the intake screen was mostly clear. I cleaned the pan & screen, but I think it will still need a trip to the shop (when it's open again for fall). I pulled off the ball and U-joint to see what Park mechanism looks like (since it's not working). Pic attached, but I'll also ask in the Postwar forum what is it supposed to look like, since I can't find any views of this in the shop manual. Also before pics of the trans support beam and an exhaust hanger bracket.


-
Finally got the trans out! There were 4 more bolts on the support beam, and 5 on the bellhousing that I hadn't gotten to. The cross beam at the back of the engine doesn't seem to have a whole lot of weight on it - I was able to adjust the back of the engine downwards to get a little more access to the bolts at the top of the bellhousing. Fortunately someone had already cut a hole in the floor to access those bolts previously. With the jack all the way down, the top of the bellhousing was still 4" or so higher than the frame. So I tilted the jack forwards until the transmission sat down on its forward face. Pulled the jack out, then rocked the transmission back down onto its bottom (the pan), then slid it out. That's ok for getting it out - not sure what the plan will be to get it back in...


-
With some slightly cooler days, I have made a little progress on this transmission job. I got the trans jack from HF with the seldom-seen 25% off coupon. I made up the engine rear support from 1.25" x .25" steel bar stock. I'll get some photos later.
-
1960's...


-
Here's a few '57 - '59...


-
1940...


-
That first coupe - that's a folding right front seat. It's got a fixed driver's seat, then a narrow 2-person seat sort of halfway back from the front seat (not really behind the driver, but offset to the right), then that small folding seat on the right closer to the dashboard. Here are some 100+ year olds...


-
1920's...


-
Didn't get any '33 photos. Here's '34 - '37... That last one is custom from the cowl back. The forward roof drops down & slides back into the rear roof...


-
Got to edit a few more today. How about 1930 - 1932...