


dibarlaw
-
Posts
4,155 -
Joined
-
Last visited
-
Days Won
3
Content Type
Forums
Gallery
Events
Everything posted by dibarlaw
-

Accidently deleted my topic on 1922 Split Rims
dibarlaw replied to Mark Kikta's topic in Buick - Pre War
Hugh I think the word you are looking for as to the... Turned up (right) is Burbank. Generic term for the light colored topping material of the 1920s. -
Hugh: I was mistaken as I thought that this may have not been a 1925 part but 1926 and up. It does show up in both the 1925 and 1926 Standard book of parts. #182317

-
Mark : The technology is available. But it would be at least as expensive to have it 3-D printed. I had 3-D printed some escutcheons just to use as patterns. I believe I still have some of the INVENTOR files that can be translated into the 3-D program. These Items would not be chromed they are to be nickeled. That is why we had them done in brass.
-
The bracket you show looks to be attached to #183078 which is the battery hold down "battery box clamp". From your photo that should place it on the front battery box stud.

-
On the spare engine I bought for my 1925 Standard weld repaired cracks on the lower water jacket. When I removed the manifolds there is also one running the entire length of the upper water jacket. The welder who did this did a fabulous job. My grandfather Mike DiBarry was a machinist and when the block cracked on his 1928 Master in 1934 he drilled and tapped stopping holes then machined a plate to fasten to the length of the block covering the crack. That lasted for him to trade the car in for a new 1937 Pontiac.


-
Accidently deleted my topic on 1922 Split Rims
dibarlaw replied to Mark Kikta's topic in Buick - Pre War
Hugh: The "iron studs" I made for my car has 7/16"-14 threads. I had made a set with 3/8"-16 and they were quite sloppy. The 7/16"-14 is what fit. I made a set of stainless ones for Dave Blaufarb's 1928-25 that were a bit longer because the place that made his top bows made them wider than original. Your note "BE" from the parts book means (Black Enamel.). Your 1922-45 would have had the clamps not the rests. I was able to find a matching set for my cars. They fit the top on my 1925-45 better that the top on my 1925-25. I did purchase a mismatched set of rests that work on my 1925-25 and even there is an inch difference in the 2 rests it is not noticeable. Mark. Good to start looking for these little bits as you go. But in the scope of what is ahead. You have much bigger things to attend to. Again there is a fairly nicely restored 1922-45 in the MD area that we helped get running for the previous owner that was outside of Baltimore. I was contacted by the owner that bought it from the dealership that purchased it from that previous owner about a drivability issue. I asked if we could get together and see him and the car and find a solution and I never heard from him again. I will check if I still have his contact information. I informed him that the previous owner had A LOT OF SPARE PARTS for his car. None of which apparently went with it when the Boyle dealership bought it Vacuum tank was removed and he had an electric fuel pump. When the car went to Boyle's I do not believe the tank was re-installed and was just left in the pile of spare parts. Boyle's did install 5 new Goodrich Silvertown tires to replace the worn out, cracked, 50 + year old Firestone Non-Skids. The owner at the time said he used to drive this car on the Beltway at over 60 MPH!!!.thumb.jpg.86d9b95011248b31e44fa00cf8296067.jpg)


-
1925 Buick Standard Marvel Carburetor replacement
dibarlaw replied to Hubert_25-25's topic in Buick - Pre War
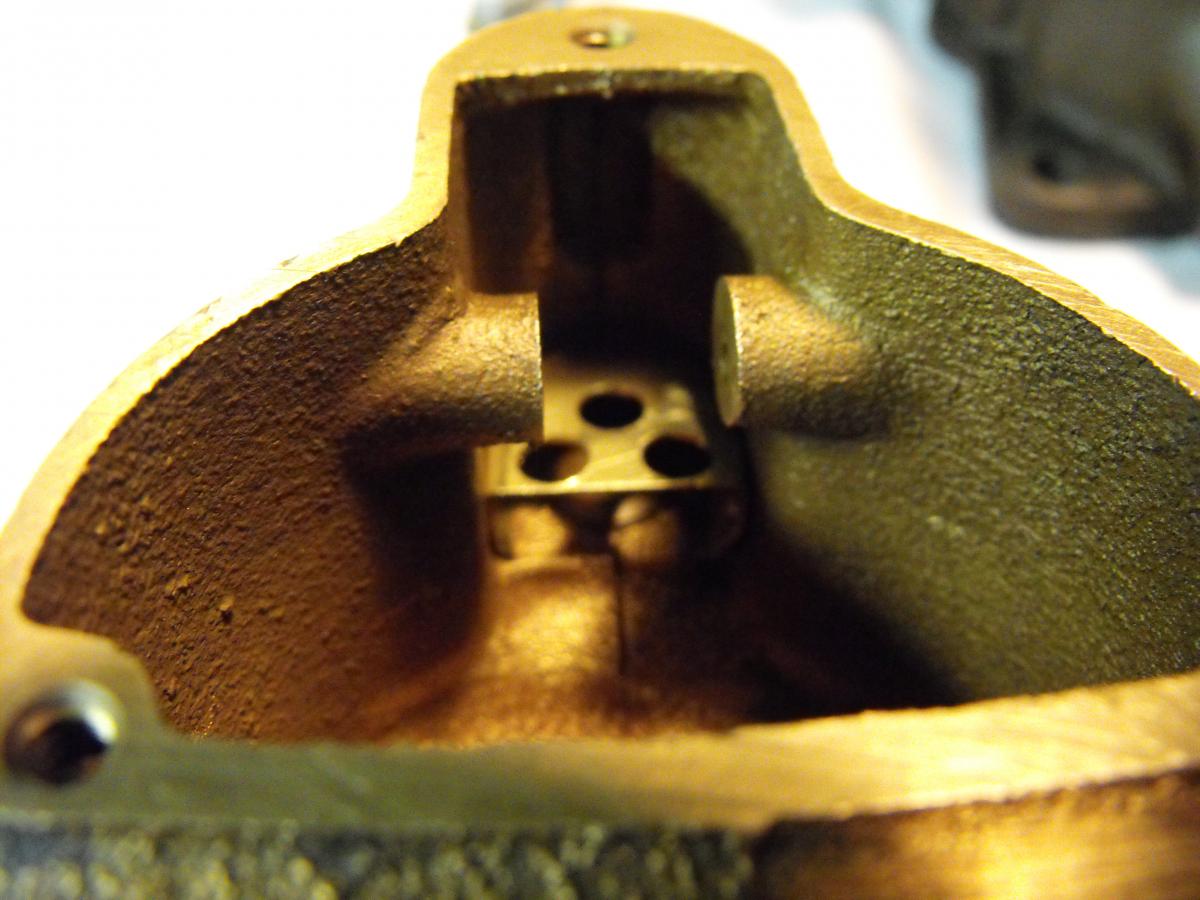
Here is what I did to mark the inside of the bowl. The height of the idle jet was 13/16" from the top of the bowl. The mark I made is now at 7/8". I can see the ghost of where the fuel level was before. 5/8" from the top. There is a depression in the casting that is at the same height as my mark. I tried to sneak up on starting the engine today. It still is doing the same thing. I have set up things as Hugh has outlined but the engine will not idle fast enough to check vacuum. Back to the drawing board!


-
Larry: That was where I purchased my first set of replacement copper core wires for my 1925. That was in 2011. Currently at our store their tractor parts and supplies section has been thinned down considerably.
-
1925 Buick Standard Marvel Carburetor replacement
dibarlaw replied to Hubert_25-25's topic in Buick - Pre War
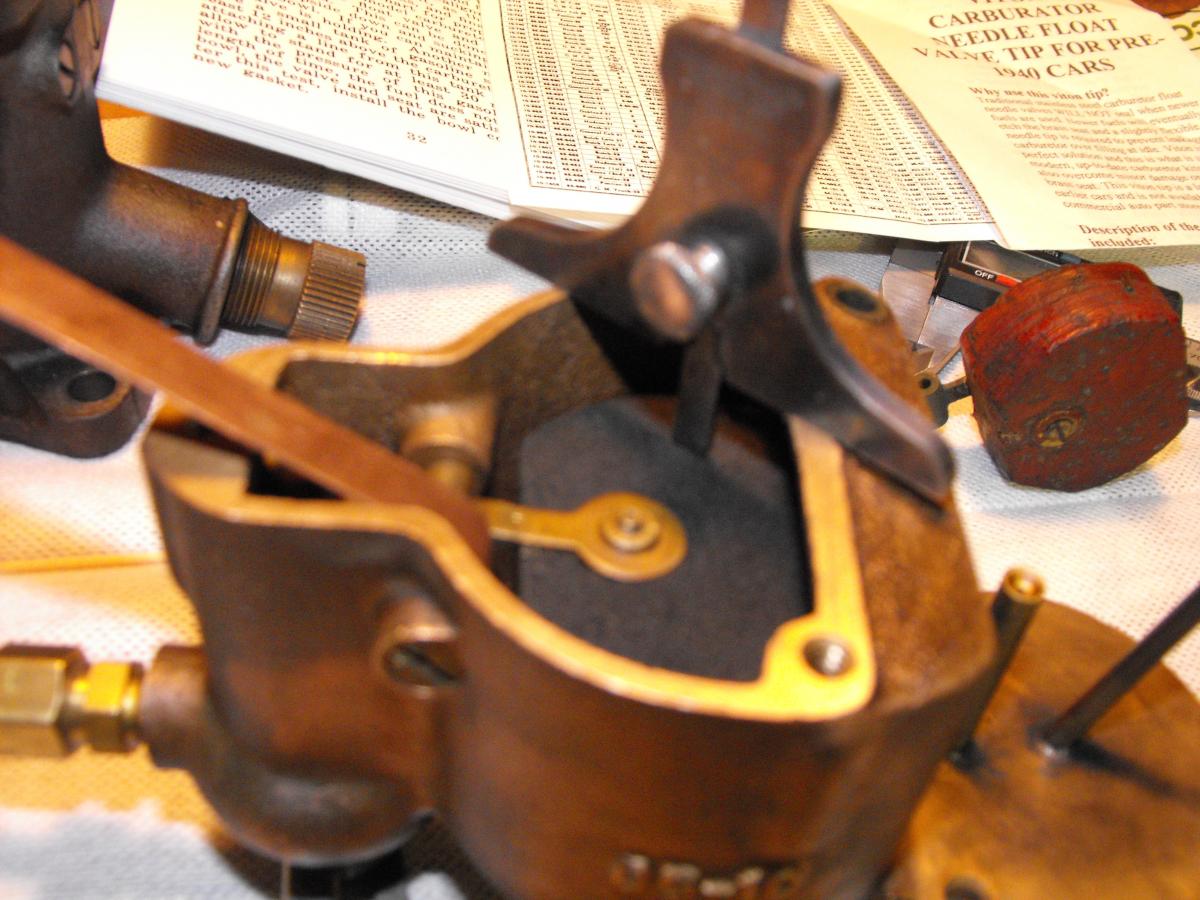
Resetting float after I had previously installed a Viton tip. I had to make a cage so the needle tip could seek center. Yesterday I re-installed the original needle to see if I could get things sealing again.. Same problem as before. And ...this was with another bowl casting jets etc. The fuel level is now holding to the line I scored on the inside of the bowl, so the float is doing its job.


-
Terry: I did the same with the wires on my 1925. I had a roll of Packard Cable plug wire. It still has tinned conductors. One reason was that trying to fit the new 9mm wires in the cover guide and under the cover. To me it was like a 2 lb. baloney in a 1lb. bag. I was also able to adapt new 90 degree rubber boots to fit for the longer 3076 spark plugs to keep them from shorting out to the cover.
-
1925 Buick Standard Marvel Carburetor replacement
dibarlaw replied to Hubert_25-25's topic in Buick - Pre War
Larry: I am running the nitrophyl float from Gregg Lange.
-
1925 Buick Standard Marvel Carburetor replacement
dibarlaw replied to Hubert_25-25's topic in Buick - Pre War
Talked to Mark Shaw about my newly rebuilt engine and it's reluctance to stay running. On the 1925 running issue we spoke of last night. I reset the float and marked the inside of the bowl with my Dremmel tool locating a fuel line mark in the bowl 1/16" below the low speed nozzle. When I opened my valve the fuel came right up to that line. Great! I hit he starter and it started immediately and ran with a slow very smooth steady idle. But there was no throttle response and as it ran for about 30 seconds the engine began to stumble. The idle adjustment or the dashpot valve could not get it back to running any better. Then it could not be started to be kept running. Now the unused fuel in the riser/ manifold falls and the leaking fuel the front of the carb is going on again. The fuel level stayed the same as it was running well. I am thinking I am going to go back to the ignition as something (coil or condenser may be breaking down). Best Regards: -
1924 Master auction in Australia
dibarlaw replied to 1924 6-55 Sport Tourer's topic in Buick - Pre War
Thanks David. I was able to download all the photos for my reference files. Love the original upholstery..thumb.jpg.8e22bcd06a9e9a65528845f4528083a6.jpg)
-
I found this on the General section and thought it would be informative for us Buick guys over here. Not mine... I bought this old tow truck and would like to know if anyone can provide history of Johnnie's Garage. It is a 1932 Buick 97. I believe it was in NEPA (North Eastern Pennsylvania) for the majority of its life but can't say for sure.
-
Good to speak with you this evening. I checked the Master parts book and there are 2 different styles of water outlet tubes for the 1928 Master. Part #207979 1928 120-128 ser. up to engine # 2055041 Part #210491 1928 120-128 ser. after engine # 2055041 So check your engine #. The after engine # 2055041 is probably for the 4 leg tubes.
-
bigvic: Here is a photo of their car I took when picking up my 1925 engine that they rebuilt.

-
Hugh: There is the Bugle article I did. But here are some of the photos I took. If they have enough resolution you can zoom in to see. This is looking Front (left ) to Rear (right). The oil outlet threaded cap(use new copper crush gasket) the outlet/tube assembly (another copper crush casket here also) then the rocker standoff support. From there you can see the rockers on their side with the correct length spring and washers continuing to the rear. Final assembly of the shaft. Otherwise I can take more photos. I will also send to your email. Larry


-
I made it myself from some fine SS screen I had.
-
October issues of the Buick Bugle wanted
dibarlaw replied to Pete Phillips's topic in Buick - Buy/Sell
Pete: There will be 4 copies sent tomorrow. -
While waiting for the primer to dry on the tank I thought I would do the last few steps to get the engine running. I have had the engine out for over a year getting rebuilt. It came back in September and I just got it started at 4:00 this afternoon. It started with the first or second revolution. It was idling well but there will be tweaking of the carb which was already dripping.


-
Who has had a Trans/Shifter Lock Key made?
dibarlaw replied to Crazyfamily's topic in Buick - Pre War
I know of people who had the keys made at old line locksmith shops from the number on the cover. These are nickel plated. Use some lacquer thinner to clean off the green paint.The key tumbler is removable but is tricky to get out in one piece. -
1937 Buick Model 48: RESTORATION HAS BEGUN! (Photo)
dibarlaw replied to Gary W's topic in Buick - Pre War
Gary: Sorry about your BD-1 1937 Marvel carb issues . So far mine still works fine. At over $650 to rebuild it I need to get as many miles as possible out of it. It will be good to see what the change will be in your car with the Carter. Mine sill has a bit of vapor lock coming over the Catoctin mountain near Fredrick MD.2 weeks ago from the Rockville show. But we had put over 120 miles by that time and had to do an ethanol fill up. I had changed the oil last year after the 2500 mile trip to Wisconsin since we had a dead #8 cylinder for over 200 miles. Small piece of the piston top hammered the plug gap shut. I replaced the plug and there has been no further issue. Even though the oil had some dilution it was not black. I changed that oil last week and it still looked good after about 600 miles driven this year.
-
crazyfamily: It was trial and error with how the caskets went in. In the original there were leather gaskets. Thin gasket between cap and glass then heavy gaskets between the gage and the glass. I needed almost 3/16-1/4". I made a cut out version for the rivets. I still had to add another thickness so the pointer did not rub the inside of the glass. In one version I turned and faced a piece of white plastic pipe to fill the space. Like a collar. lt also made things a bit more visible. I had also made an aluminum cap to replace the split steel one on my original tank. Someone in the past had tried to remove the cap with a pipe wrench, broke the cap and the threaded neck was misshapen. A lot of finessing to get it back to round. Also I bought new nitrophil floats. See your friendly early Ford parts supplier as they are only a couple of dollars and were the correct size. All the pieces I used in the Master gage. Meyers Early Dodge has done a run of nickel plated brass caps with the correct 20 threads per inch for Hugh. (Standard only). I bought one at Hershey and they do fit very well. After wire brushing the external threads again it threaded on with the proper fit. The gaskets that are to go with it and the glass are not enough for the Buick type gage. (domed face) So you will still have to make your own.


-
Don: I was afraid to get more aggressive with sanding even though I did go over with # 80 on my DA also. I coated it with a rust reformer to get some of the still visible pits. This is a SEM product to give the rusty areas a prime-able surface. 3 coats are recommended. The problem of extra work comes because the coating only reacts to the rust. Then the rest of the areas have to be scrubbed and sanded clean or the top coats will not stick. The inside coating is a red color material which others have told me that is the coating we want for the best durability. I know about the gas gage problems. That is the reason I bought this tank in the first place since it had a gage. My original tank had a broken gage cap and a piece of plastic with silicone sealer slobbered on it. It took me a week of soaking and gentle tapping to remove it in one piece. I coated my aluminum gage face in Super Glue and it seems to be holding up. The white face unit I did for my Master has already washed off.


-
I decided to exchange my fuel tank for the 1927 one I got from the Handleman several years ago. I had it cleaned, all the holes soldered up and coated inside. (the top side was like Swiss cheese). When I pulled it out of the box I had it stored in the coal cellar it was covered with surface rust. Again, most of this year we had very high humidity. I think the shop just painted the outside with the black wash they use on radiators. So a lot more prep work before I can get it primed and painted. In the meantime, I finally replaced the in-tank filter with the one I made up. Back to work:


.thumb.jpg.7bd76861a91b17352bf9df24439ed718.jpg)
.thumb.jpg.756b5f31d4669e459fc0baafc60738b8.jpg)


.jpg.d00be9692338ae8e6fb608b041b36cef.jpg)


.jpg.d3789c954b03c2b0c0b8844367d77147.jpg)
.jpg.0a3d7e524b3720af8af6abcbdfb76ec4.jpg)