


jari12
-
Posts
171 -
Joined
-
Last visited
Content Type
Forums
Gallery
Events
Everything posted by jari12
-
You can't beat safety with any other argument. You need to be able to see the 'roos on the road at night! Besides, they go well with the alternator.
-

Restoration of Victory Six sports roadster.
jari12 replied to Mattml430's topic in Dodge & Dodge Brothers
Amazing how fast you were able to get it back in shape. Looks great. -
Restoration of Victory Six sports roadster.
jari12 replied to Mattml430's topic in Dodge & Dodge Brothers
Looks great. I'm amazed at how fast you got it repaired. -
Opinion on brushed vs polished aluminum
jari12 replied to Kenendcindyc's topic in Dodge & Dodge Brothers
In my opinion, polished is easier to maintain than brushed. -
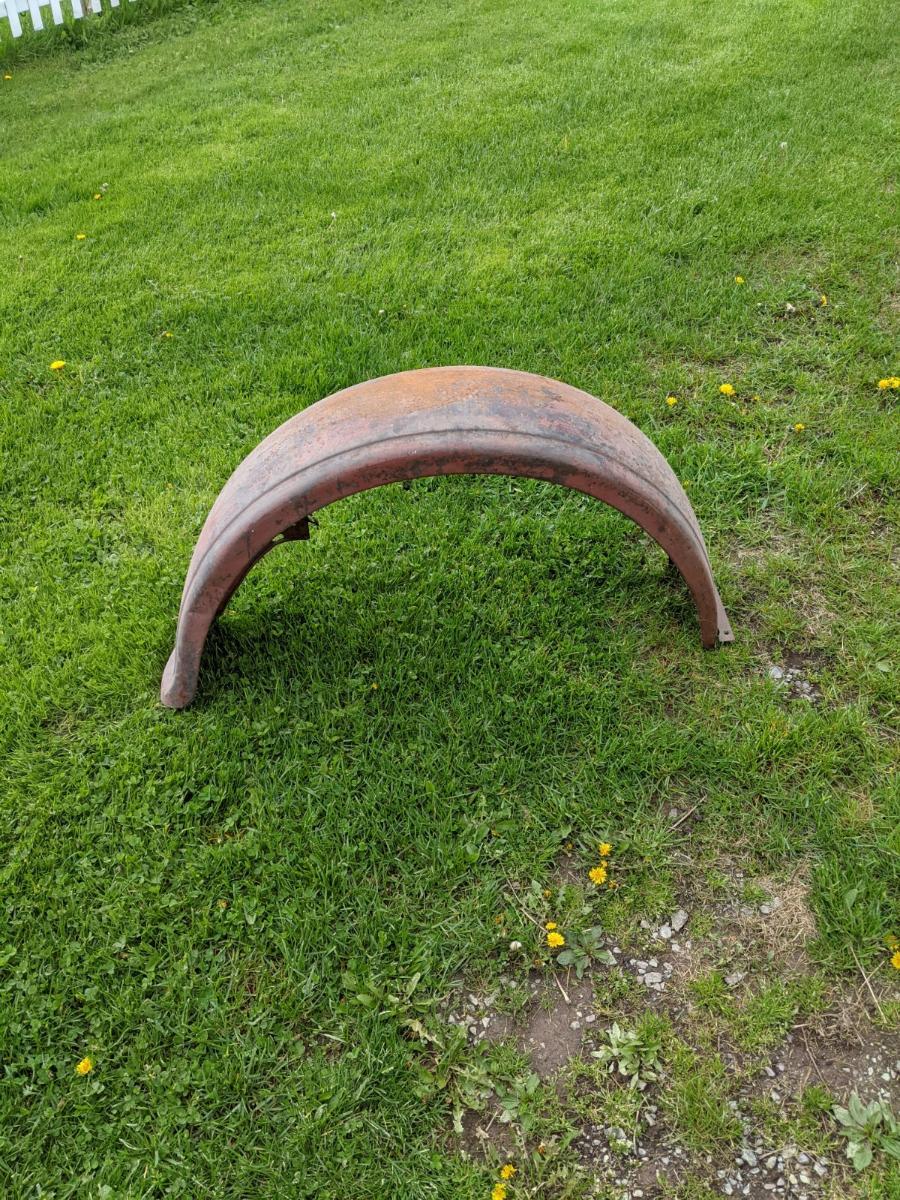
Thank you all for all of the effort. I hope someone who needs it sees it on here. I could always use the space. Thank you.
-
Hi, Anyone interested in this fender or know what it fits? It came with a set of DB roadster fenders I bought. It is in very good shape and I would love to find it a new home where it could be useful. Thank you,


-
I am excited to fire it up but I am probably going to have to wait. Family trip leaves in the morning for 9 days. Still have a few things to do to be ready as well so I don't think I'll get it fired tonight.
-
I got a bunch done over the last few days. Painted the engine side pans, the horn and vacuum tank brackets, the hood sills, and the manifolds. Also finished installing the valve springs and retainers and set the valve gaps at .007 for intake and .008 exhaust. I had to drill the hole in the retainers a little larger for the new valves to fit through. A whole lot of fiddling to get the springs back in and I feel lucky that I still have all my fingers. Got the oil pan on and filled with oil - so far no leaks. It hasn't run yet but I did hand crank for a while and had oil coming out the oil gauge fitting (because I hadn't reconnected the line yet). So at least the pump was working. I put the head back on and torqued the head bolts from the middle out in a clockwise circle to 30, then 40, and finally 50 ft-lbs. I was worried after seeing what happened to RichBad's engine. I put the manifolds back in as well but just snugged them up. What should the manifold bolts be torqued to?


-
Ron and Matt, Hope you both feel better soon.
-
I have some updates. I made two trips last week to pick up parts. First trip I drove to Connecticut to meet a fellow Dodge brother and bought side aprons, the rear frame cross member, a set of running boards to repair or use as patterns, and a pair of fenders that will be patch panel donors. He also through in the brake rod brackets that hang of the center frame cross member. It was great to make a new friend. He was generous with his time and knowledge and showed me his car and let take photos to help me on my project. Thanks Jay. Next I drove over to the Finger Lakes and met George at Romar Dodge Brothers parts and service. I picked up my new valves and gaskets and again made a great new friend. George graciously spent a lot of time showing me around the shop and sharing his knowledge with me. He answered a million questions and tested my starter and horn. Thank you very much George. I thought I might be sharing a video of my engine running by now with new valves but that was overly optimistic. I planned to reuse my valve retaining pins so I didn't buy new ones. I would recommend new if you do this because it took a lot of fiddling to get them to fit. I don't have a micrometer so I used drill bits as gauges. The new valves did have a burr in the pin hole which was easily cleaned up with a 5/32 drill bit using my fingers. The but fit the new pin holes perfectly. It was a little loose in the old valve holes but the next size up (11/64) was too large to fit in the hole on the old valves which were a little wallowed out in the vertical direction but not horizontal. I was pretty sure that my old pins were 5/32 and assumed I would just have to clean them up with emery cloth. The first pin started to slide in so I assumed I was good. Not so. The pins were slightly bent/deformed from use and it took a lot of effort to get them to work. I ended up putting them in my drill to spin them and use a file to take them down and clean them up. Took a few pics. First is the new valves lapped and in place. Still have to re-install the springs and set the gap. Also took a pic of my carb. It is a Winfield Model M 201A. It was on the car when I got it and is pretty cool so I am going to give it a try. It was the first thing I took apart 10 or 11 years ago when I got the car. Everything on it was stuck but with gentle heat and a lot of penetrating oil I got the throttle and choke free about 10 years ago. Never did anything else with it until this weekend. I got all of it apart, cleaned and reassembled and guessed at initial settings. There is info on the web for later model Winfields but not much on this model. Same thing for rebuild kits. I made the gasket for the top of the float bowl and found a gasket from a pile of left over lawn mower gaskets to fit the fuel inlet/bottom bowl gasket. Looking forward to using it. I know it's not original but it I love it. It makes me wonder who cut up my car and what it was used for. The short frame screams doodle bug but everything else could just as easily point to speedster or hillclimber.


-
Restoration of Victory Six sports roadster.
jari12 replied to Mattml430's topic in Dodge & Dodge Brothers
So sorry to hear about the accident but glad you are both OK. Unbelievable, I can't imagine what it feels like to go from such a high after having all your efforts turn out so well to such a low when you saw the damage. Heartbreaking. I enjoy the joking and teasing and good natured encouragement that we get to do on this forum and you play a big part in that but i can't think of a thing to say at a time like this. I'd be deep in the scotch by now if I hadn't been arrested for assault of the other driver. -
Restoration of Victory Six sports roadster.
jari12 replied to Mattml430's topic in Dodge & Dodge Brothers
Not too fancy. It looks great! -
It looks great Rich. I've been camping for the last two weeks without any cell service or internet. Just caught up with your progress.
-
No new pictures, but I did get a few little things done this week. I got some things painted in the engine compartment like the throttle and spark advance linkage, the starter and generator, etc. I found a leak in the joint between the lower radiator tank and the lower water neck. I made my first attempt at soldering a radiator after straightening the tank/water neck connection. I have to fill it and check for leaks tomorrow. It looked like someone had dropped it and bent the lower tank by hitting the water neck. It was kind of fiddly to get the entire thing soldered. You get one side done and start heating the next side and lose solder from the previous one. I attempted to check my starter. I set the housing against the positive terminal of a battery and then used a cable to connect the negative terminal to the starter. I did not have firm connections but thought it would at least get it to spin and i saw nothing. What should I do to do a real test of my starter? It is a 6 volt positive ground car.
-
Restoration of Victory Six sports roadster.
jari12 replied to Mattml430's topic in Dodge & Dodge Brothers
The rack looks fantastic. You're setting the bar pretty high you know. -
Got a few little things done today. I'm still waiting on valves to come in so I decided to paint the engine so it's ready to go back together when the parts come. I also found a cracked race in a front hub so I popped a new one in place.


-
I've been waiting for the next post. Good to see your car again. It looks great. I can't wait to see it in color and can only imagine how much anticipation you feel.
-
Restoration of Victory Six sports roadster.
jari12 replied to Mattml430's topic in Dodge & Dodge Brothers
They look great. Classy and traditional. I'm a jeep guy and always liked the jerry cans that had the word for the contents stamped in the side. -
Restoration of Victory Six sports roadster.
jari12 replied to Mattml430's topic in Dodge & Dodge Brothers
Those cans are very cool. Beautiful job. I like the words better than the symbols if you are taking votes. Also, I thought the build was done? I'm happy to keep watching so keep it up! -
Restoration of Victory Six sports roadster.
jari12 replied to Mattml430's topic in Dodge & Dodge Brothers
Unbelievable job done in such a short time with everything done by you. Quite an accomplishment. Congratulations! It is beautiful. Looks like you have the next project waiting right outside the window. -
Thanks for the tip. I have never used one but I'll look for one.
-
Thanks for the info Ron. I'll keep trying. It is going to be fairly original from the cowl forward at least. My first doodlebug ride was in a 1928 Chevrolet that had two transmissions and a Graham-Paige truck rear axle. The owner was a cool old guy with lots of old stuff like that. He was rebuilding my dad's old Farmall tractor. He had made a concoction to soak the cylinders to get the engine free. I can only remember that it had kerosene and automatic transmission fluid among a few other things. I was probably eight years old. I had a ball and have wanted a doodlebug ever since. I finally got this one but it is too cool to leave as a tractor. It has to be a car again. Funny how we get interested in the things we do. He became a good friend of the familysafter fixing our tractor and it was always fun to see what he would drive into the yard with from jeep firetrucks to old International C-cab lumber trucks etc. Thanks for the spark for a trip down memory lane.
-
Hello All, I have a quick question about how the hood side aprons and latches are attached. I have to remove the hood side aprons next on my car to clean up the frame underneath them. The bolts that hold the hood latches down will not come free. They look like slot head machine screws. The do not have nuts under the frame rail. Am I correct in thinking that both screws for each latch thread into a single rectangular plate beneath the frame rail? Is that plate welded to the frame or will it drop away if I cut the screws? Or is there a trick to get them out when they are really rusty?
-
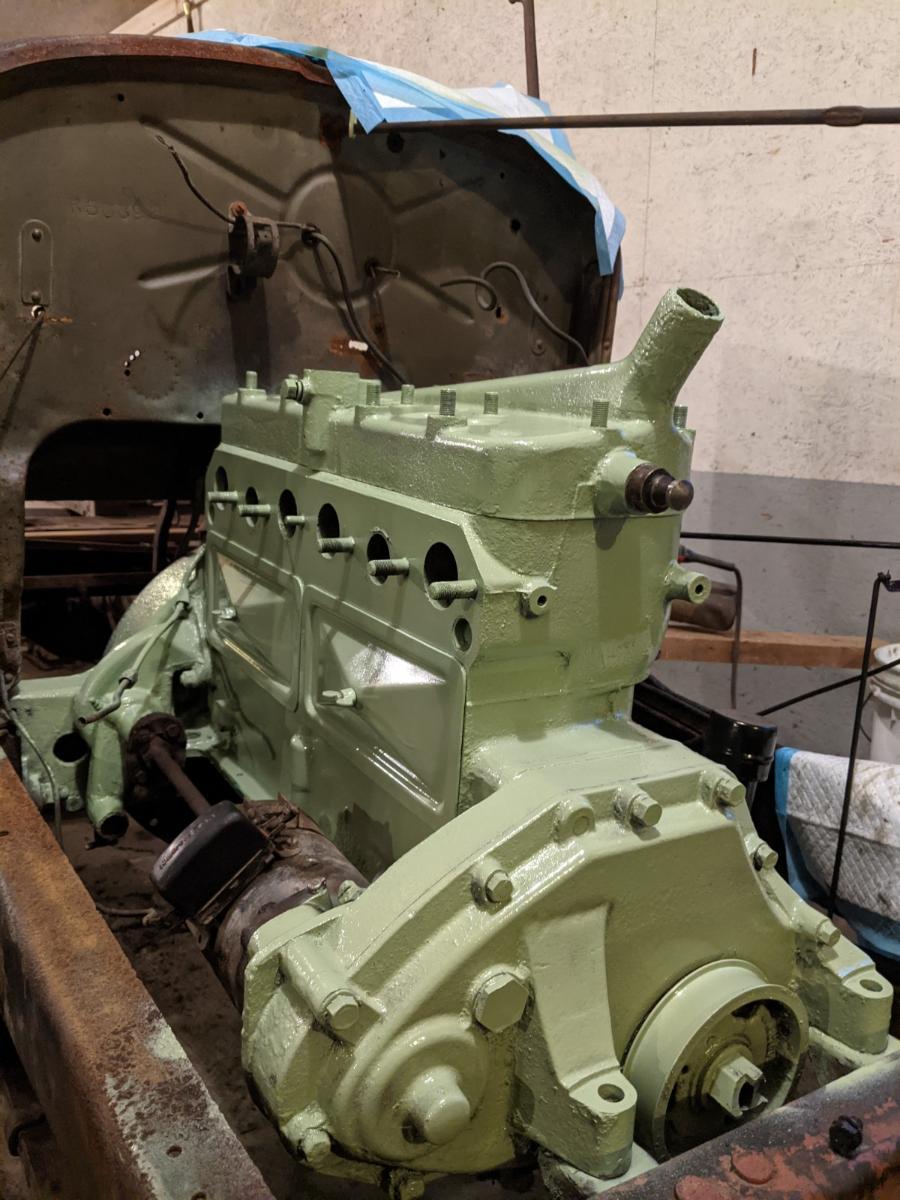
Both engine splash pans patches are done. Kept the engine side and made replacement patches for the bottom and frames sides. Should work well. Just bolted together for now but will weld them together before painting and putting them back in. Also have to cut a hole for the coolant drain off the waterpump near the rear of the right pan. Still waiting for valves and gaskets. Planning to repaint the engine now once it's back together since all of the original paint came off with the grease, dirt and oil.

-
Restoration of Victory Six sports roadster.
jari12 replied to Mattml430's topic in Dodge & Dodge Brothers
The door looks great and sure is more functional with the frame and sliding glass. I always liked Landrovers so maybe I'm biased.


